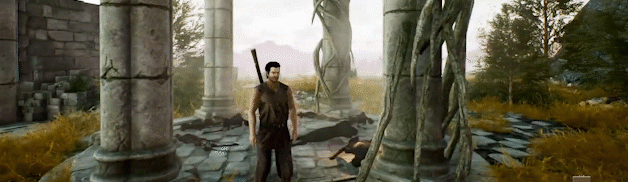
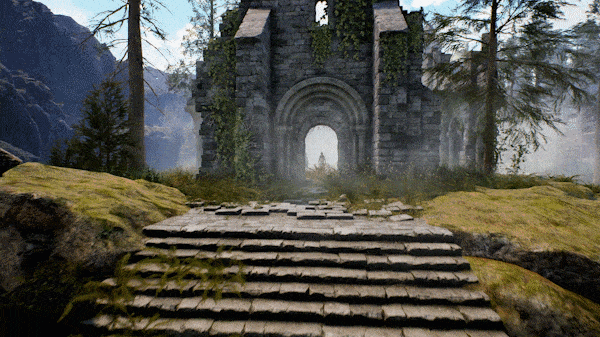
GW: Legacy - SniperWolf
Main Features:
-Over 30+ new gun handling sounds for guns, most guns will now sound unique when pulling charging handle and inserting mags
-Added 5 new guns - F2000 scoped and tactical, FAL, FAL Para, and Dragunov
-Added new dummy soldier NPCs in spawners
-Bug fixes for magazine size for most guns that were incorrect

New:
-added around 30 new gun handling sounds for diffrerent guns (charging handle pull/release, magazine insertion sounds)
-added F2000 with scope (Assault Rifle)
-added F2000 tactical (Assault Rifle)
-added FAL 50.00 (Battle rifle)
-added FAL para (Battle rifle)
-added Dragunov (DMR)
-added 3 more dummy human spawnable figures (toon soldier, fat zombie, skinny zombie)
-added some prepatory work for metaverse integration (Metaverse)

Changes:
-fixed magazines having weird sound when dropped
-fixed issue where zombies would fly back too far when dying
-fixed AK mag rounds from 40 to 30
-fixed AKS-74U mag type and switched rounds to 5.45 39mm
-fixed issue where AK 12 had AK mags in spawner description
-fixed m240 mag box round size to 200
-fixed 1911 mag size to 7
-fixed makarov mag size to 8
-fixed mk23 mag size to 12
-added bolt release mechanism for sa80
-fixed famas to not have bolt catch when firing last bullet
-fixed glock mags size to 19
-increased 500 magnum's backward recoil
-fixed AWM mag size to 5
-fixed AS Val mag size to 20
-fixed VSS Vintores mag size to 10
-fixed Rem870 mag size to 7
-fixed FABARM mag size to 5
-fixed Rem saw off mag size to 5
-fixed beowulf mag size to 7
-fixed mp7 mag size to 40
-fixed vector mag size to 40
-fixed kar98k mag size to 5
-fixed issue of M67 grenade being able to fit into grenade launchers
-fixed BAR mag bullet clip issue
Bloodshore - Wales Interactive
Starting today at 6pm UTC the interactive action movie Bloodshore is 50% off for a limited time only!

https://www.youtube.com/watch?v=pCtjHdd_Evg

If you love FMV then The Complex and Five Dates are also available for 50%, Night Book 60% and The Bunker for 70%!!

https://store.steampowered.com/app/1107790/The_Complex/

https://store.steampowered.com/app/1353270/Five_Dates/

https://store.steampowered.com/app/1477920/Night_Book/

https://store.steampowered.com/app/481110/The_Bunker/

Plus we have a brand new FMV murder mystery game to add to your Wishlist today. Who Pressed Mute on Uncle Marcus? is out on 18th March on PC, mobile and consoles!

https://store.steampowered.com/app/1628130/Who_Pressed_Mute_on_Uncle_Marcus/

Fittest - jammin411
MicroTown - Rudy (Snowy Ash Games)
In this update, I am adding weather to the game, specifically weather effects for rain and snow. This isn't something that affects gameplay (yet), so it's purely a visual update to make the game look nicer and have some visual variety. And weather is great for this type of goal.

Weather effects

I'll start with the end result of the two effects I implemented, because it's simpler to discuss the steps that way. The two effects are rain:


and snow:


This looks relatively simple, but actually has a lot of internal considerations both from technical and design perspective. I am usually prepared that features end up more complex than they seem to be, but this one really surprised me.

Sprites

Keeping with pixel art aesthetic, I would want to draw rain droplets and snowflakes. But for performance reason, I cannot draw separate sprites for every particle (this would be many thousands of particles). So I use bigger sprites with multiple droplets that look more or less random:


I call these "slides". The trick is to spawn and overlap, and quickly move many of these slides, so the viewer cannot easily track individual slides and they look like individual droplets.

This seems simple enough... until you try it out and it looks bad. The reason is that the sprite size and the spacing between the particles on the slide is very important. It has to fulfill 2 opposing criteria - it has to be both regular and random. If I make it too big and regular, it will look like a grid moving across the screen. But if I make it too small and random, it will have many unnatural distracting "gaps" and "clumps" of particles. In short, this required a lot of trial and error and even then the result is a compromise.

Animating

Individual slides animate by moving downwards and a little to the side:


From there I add a little bit of speed variation to each slide and a corresponding color variation (slower - dimmer, darker). This way, it instantly looks like there are depth layers of particles:


This is probably the biggest visual impact of the whole feature. This variation is fairly subtle in the actual game, otherwise it again becomes too obvious that particles are part of bigger slides.

The depth illusion also really comes together with parallax, which I discuss later.

Margins

New slides are spawned above the top of the screen. Then they gradually fall down though their trajectory. Finally, they despawn below the bottom of the screen. Since slides have width and height, then there is an additional margin around the viewport to fit them:


I cannot spawn or despawn slides if they are partially visible; they must have completely left their "visibility area". This means the slides "exist" (simulate, render, animate, etc.) in an area larger than what the camera actually sees. This certainly adds extra complexity and calculations.

Zooming

Camera zooming changes the number of visible slides:


At first, I began implementing this as simply spawning extra or despawning excess slides at the edges. But I quickly ran into 2 problems.

Firstly, I don't know exactly where to spawn new slides. If I do this randomly, it looks wrong. Weather slides normally gradually fall down though their trajectory. This is theoretically a deterministic process, but practically it just isn't worth the time to re-simulate and predict sprites like that. Plus, I have to (de)spawn them at the "edges" only, which is a lot of additional math to determine the area that does or doesn't need slides.

And secondly, if you zoom in and out quickly, it is very obvious that the weather is not in the same location as before. It might not seem like a big deal, but in practice it's annoyingly way too noticeable.

So what I do instead is I always have a fixed number of slides for the entire most zoomed out view and I simulate them all as if the camera could see them. Of course, I don't render them visually. This might seem like a waste of performance to simulate them, but counter-intuitively at medium zoom, the camera can actually see about 2 out of 3 of the total number of total slides:


So this isn't at all that wasteful and the simple simulation math is fast anyway. Plus, my new rendering logic lets me process this very quickly anyway.

Camera panning

It's a little bit difficult to think about how slides move when the camera is moved/panned. Intuitively, it seems like moving the camera would "move" everything. It's a bit easier to visualize if one thinks about the visible portion of the world changing instead:


From this perspective, the slides form a "box" around the visible world area and this box moves together with the camera viewport. In fact, without animation or parallax it becomes obvious that slides don't actually move at all in respect to the camera:


So there isn't actually anything special that needs to be done for this by itself. Of course, without animation or some movement, it looks completely flat.

Parallax

Since camera panning is a constant player interaction, then it is very important that this preserves the weather effect depth illusion. I do this with a subtle parallax:


All slides are moved proportionally to the camera pan. Further (dimmer, slower) particles are panned a little bit less than closer (brighter, faster) particles. Thus variable speed, color and movement together form a rather convincing illusion of depth and volume.

Boundary

So there are 2 ways in which slides can "escape" their box around the world - animation and parallax. Animating slides fall down and right, thus going off the screen. Parallax while panning moves the slides in any of the four directions, also moving them off the screen. Both cases are essentially identical in that theoretically I need to either add or remove slides.

And the solution is actually super simple - I just teleport the slide to the other edge of the camera viewport. For example, if a slide moves too far right, then I teleport it to the left side of the screen across the width of the viewport. Thus, the number of slides remains constant and they preserve the "density" on the screen.


In practice this works like an infinite repeating plane -- no matter how far and fast the slides move, they just wrap around the screen. And this works great.

Resolution

There is one corner case to this and that's changing resolution (resizing window). This completely messes up all calculations. But I decided to not even bother with this. The visual glitch is not overly horrible and the slides fix themselves eventually. And how often does one change resolutions while playing?

World tint

The final feature is to set the mood of the whole scene, which I do by applying a subtle tint to the game world and modifying shadow intensity. It's easiest to visualize by comparing them one after the other in an animation:


Because of color constancy of human vision (and the method I use to blend the colors) it's counterintuitively hard to perceive the change unless you focus on a specific point or the whole image at once. It's more obvious when the game is full screen and the player happens to "unfocus" and notice the difference.

It's more obvious with individual pixels (the eye can pick out warmer and cooler):


What I use for tinting are two "temperature" colors with orange for warm and light blue for cool:


I deliberately only define "cool" and "warm" colors so I can tint the whole scene either one way or the other. While technically I could tint the scene in any mix of colors, multiple colors would end up "fighting" each other and it would be a mess.

Seasons and weather presets define how they affect the world tint and shadows:


Individually, it's basically: summer is warm and winter is cool; sunny sky is warm and rain is cool.

Combining, I get combinations like: sunny summer is hot and snowy winter is cold while cloudy spring is neutral. Moreover, rainy summer or sunny winter is also close to neutral as they "cancel each other out".

Mathematically, this gives me a single "temperature" value between cool and warm, which corresponds to some color between blue and orange. Technically, it's between blue and "nothing" and orange - as the colors reach the neutral midpoint, they "fade" to nothing and there is no tint:


And then I blend this color with everything in the scene. For this, I transform the colors using the soft light overlay blend mode. The exact effect is harder to explain than it is to just show it, but it is basically like shining a weak colored light onto everything, which is essentially what I am going for.

If I were to crank up the tinting to 100% of the tint color, it would look like this:


In contrast to simply multiplying colors, overlay blending methods do not "erase" the underlying color. Meanwhile, color constancy allows the eye to perceive the original colors even when the whole scene is overwhelmed by another color. But even these extreme examples still look relatively reasonable. Which just means that the actual subtle tinting looks very convincing (at least, in my opinion).

A "proper" blending method also keeps color values largely unchanged, which is important in distinguishing elements (for example, tinting doesn't negatively affect people with color blindness):


Final words

At first I was going to do more effects like thunder or blizzard. But the problem is that they just become so prominent as to be annoying. So I settled with fewer "gentler" effects for now.

I want to remark that a feature like this is very easy to do badly. And what is "bad" is also highly subjective. It would be much easier to make an easy (fast and dirty) version of effects and shading. But like many video game elements (such as screen shake or full-screen damage effects), it would be very obvious when done badly, with glitches and/or obtrusively. This can make the whole feature very distracting and eventually annoying.

These effects of course have a performance impact. I am drawing large overlapping sprites all over the screen. In fact, before the last rendering revamp update, I couldn't implement these effects without slowing everything down too much.

Both weather effects and tinting can be disabled in the options as well if this is not your thing.

Future plans

As before, I'm working on housing and civilian needs. I have been working on weather effects in parallel for a while. So I released this update in the meantime just to have an update while I continue with the bulk of the work.

Full changelog

Changes

• Add Weather to the game, which includes Cloudy, Sunny, Rain and Snow
• Weather gradually transitions between clear, cloudy and precipitating (either rain or snow, depending on the Season)
• Rain does not occur at the very start of the world (and older loaded saves)
• Add full-screen particle overlay effects during Rain and Snow weather with varied falling animation, parallax and "depth"-based coloring
• Weather particles shift and scale based on camera movement and zoom
• Add ambient sound during Rain weather
• Add HUD current weather icon and tooltip, add weather icons and descriptions
• Add world tint "temperature" color based on current weather and season, ranging from cool (blueish tint) to warm (orangish tint), as well as shadow intensity multiplier based on the same criteria
• Add audio options toggle for ambient sound (currently, only weather) and volume slider
• Add graphics options toggles for weather and world tinting
• Add "no habitats in range" issue for Game Warden's Lodges
• Custom icons for the Monument techs
• Add internal world weather stat tracking
• Shift-selecting a building or road to build will also "copy" its construction priority
• Animal Habitat selection panel tending label to also show time since last tended

Fixes

• Town Hall no longer requires Bricks for construction
• Bricklaying tech is no longer required for Town Hall tech
• When construction Beehive as auxiliary building, the work range is now shown (with the appropriate label)
• Animals (specifically, Fish) spawning on land
• Occasional internal error due to lag when playing visual effects
• Housing and Firewood goals requiring Market Square and Supply Stall instead of Produce Shop and Supplies Shop respectively
• "Wildlife Conservationist" achievement triggering incorrectly
• "Balanced Diet" achievement triggering incorrectly due to "Cooked Fish" being required for it, but unobtainable
• Deprecated or unimplemented items like "Cooked Fish" appearing in storage selection popup

Optimizations

• Full-screen weather effects can affect performance somewhat

Rudy
Snowy Ash Games
SpellMaster: The Saga - Jesse Kellor

Friends!
SPELLMASTER: THE SAGA will be aired soon!
Price - 24,99$, AND you will receive a pleasant bonus as an exclusive discount within 7 days after the release. The discount will remain a secret for now, but it will be significantly bigger than an average release discount on Steam.
So, stay tuned and don't miss an exciting opportunity! The countdown has already begun!


Best of luck and see y'all soon!
Valkyrie Initiative,
Spellbook Creations
Fall Guys - moms
Is it real love at last? Pair up with your one and only for our Week of Romance – a cute collection of duo levels to couple up for. What’s more, the romantic romp comes with an adorable Swoony costume for you lovebeans to get dolled up in. Guaranteed to get sparks flying in the Blunderdome!


SAY ‘I DO’ TO A HEART-LOAD OF NEW CHALLENGES! FEBRUARY 14 - 20

Beyond the sweet Swoony costume, you can also get stuck in and earn rewards with your special pal. The number one lesson of love is that everything happens for a reason. The reason for this is just that we heart you loads <3


Unlock the following rewards:


Falling For You (Nickname) - 100 points
Cupid (Colour) - 200 points
Moon and Stars (Pattern) - 400 points
Swoony - Lower (Costume) - 500 points
Swoony - Upper (Costume) - 600 points
Marshmallow (Faceplate) - 800 points


Feb 14, 2022
BLACKJACK and WAIFUS Hentai Version - Afftar Mudac

As any other respectful Huge and Rich Gamedev Studio - we're bringing you the DAY 1 PATCH!

  • Stages skipping Achievements Fixed!

The game may get a lot of small updates over time - don't panic - it's only Us, making it better XD

Have fun!
SKALD: Against the Black Priory - fee-ona
Small note from Raw Fury before we continue. Hello! My name is Fiona and I'm a Community Manager here at Raw Fury. I'll be posting on behalf of AL and you'll see me lurking around the steam forums. Thank you!

Happy new year!

Wait, what? Is it February already? All I can say is time flies when you’re having fun. This update is a bit overdue but as always, if I’m a bit tardy in posting on the devlog it’s because I’m making our dream game.

The new year has been a torrent of making cool plans, have Covid wreck it all and instead write awesome code!

Our big carrot of Q1 2022 was that Raw Fury and I were going to GDC in San Francisco to promote Skald. We always knew it was a risky prospect and as Omicron ramped up over Christmas we reconsidered and canceled the trip. And let me tell you: I’m almost glad we did!

It’s given me time to dig deep on a few areas that I always wanted to improve in the game. I’ll try to summarize some of the latest developments:

The GUI System
I’ve rewritten the GUI system. Yes, pretty much all of it. It was pretty much one of the last components of the game where I used Unity’s built in system but it was a bit of a mess. I’m sure someone who’s better at Unity could pull it off, but I really just want Unity to compile my game and leave me alone beyond that.

Thankfully, the Skald engine is really good at drawing pixels on screen with perfect precision and so I was able to use my engine to do stuff like draw fonts, UI-elements and handle transitions and mouse interactions.

One of the first big advantages is that I can now have the game scale perfectly to the screen so it gets pixel perfect resolution.


If you zoomed in on the game in full-screen mode, it used looked like the left image. Now everything scales perfectly and it all looks like the right image. Crisp enough to make your eyes bleed.

For a pixel-purist like me, another advantage of the new system is that we can swap Unity’s vectorized fonts for home-made “real” pixel fonts.


I also added the ability to insert big illuminated first letters at the start of the script. I need to polish the graphic design a little bit but all in all I think it’s going to look amazing.

But there’s more: The new system allows for highlighting of keywords in the text that you can mouse over to get helpful info. Naturally this will also be possible on menus like the character sheets where you can mouse over attributes to get a description or on the map where mousing over objects will allow you to get info in pop-up boxes.


Finally, note how the menu above slides on and off the screen for a bit of a smoother transition.

With all the UI stuff, the technical stuff is now done but there’s still work to be done to really take advantage of its full potential. Stay posted for more updates!

The Animation System
The moment I signed with Raw Fury, one of the first features I knew I wanted to expand upon a bit was the animation system.

Building an animation system that cycles through frames of animation is easy enough. The trouble is scaling it. There are basically three types of models in Skald:

  • Simple Models: These are models like the rats in the demo. They have few animation frames and very few customization options. This works because for the most part, you won’t see them doing anything outside of combat so all you need is a few idle frames and some combat frames.
  • Custom Models: These models have more complex animations so we can have it perform more complex actions. A great example of that is the big monster below. These are very cool and expressive but costly to make since each frame needs to be hand drawn. The upside is that there isn’t a ton of them in the game.
  • Humanoid models: This is the tricky part and where the Skald engine shines. The humanoid models in Skald are “paper-dolls”. That means you can swap costumes, items, skin-color, hair etc and have it show up on the model. They also need dozens of animation frames (and perhaps hundreds by the end). This means hundreds of thousands of different frames to account for all possible permutations of costumes and animations.


Fear not! The Skald engine solves this by doing humanoid animation in a semi-procedural way. Basically each model consists of a dozen components drawn using a kind of animation skeleton. Legs, torsos, arms, heads, hair, items etc are drawn in relation to each other and colored according to specifications. This means that for each new behavior we want to animate, we’ll only ever have to add a very few frames.

As an example, look at the image above again. The character falling to his knees is not a unique animation. Any of the characters on-screen would perform the same animation if given the command.

The awesome part is that adding that particular animation strip to ALL HUMANOID MODELS in the game took only about 20 minutes.

Anyways, you’ll be seeing a lot more of this system as we go. Here is an example of me experimenting with adding some animation frames to the player’s attack animation:


Trust me; the system works – it’s just that I’m not a very good animator 🙂

The Level Editor
This one is the Golden Goose for me. My level editor has been a pretty big bottleneck so far. I just couldn’t get it right and I lacked a clear vision for what a great tool would even look like for Skald. Then I saw the amazing “Tiled” editor and I was saved.

“Tiled” had a simple suit of features that were all I had ever asked for and I knew I needed something like that for Skald. I had two options:

1) adopt “Tiled” (it’s free) and use it for Skald or 2) try to write my own version of it? Well, I just told you I rewrote my whole GUI system to get nicer fonts so I doubt you’ll be surprised to hear I made my own in-house version of Tiled.


This may seem excessive, but a good level editor is critical and this way I get one that is seamlessly integrated with my other tools. I also don’t have to depend on external software. Most importantly though: All the Skald tools will now be collected in a single application so the Skald community can eventually get to mod and create their own application using the exact same tools I used to make this game.

I still have some development to do on the editor before it’s fully functional but as soon as it is, I’ll be doing some streaming of me making levels in style!

Next Steps
So in broad terms, the next big step is doing a major overhaul of the demo to be released in spring / summer. This is primarily to show off and test the new features and it’s also a hugely important tool to get Skald on the radar of press and content creators.

To that end, we’re also going to redo the Steam pages, the website and make a new trailer.

We will be doing more Beta testing before then as well but I’m waiting till things are a bit more stable so I don’t get swamped in reports of issues that are already known. Testers are a limited resource and we need to save it until it really counts.


That’s what I had time for today! I hope it was somewhat informative. To stay posted, follow us on Twitter and join our Discord!

Cheers,

AL
Feb 14, 2022
Lost Island Atlantida Advanture Game - Talgin_dev
small bugs fixed!
Feb 14, 2022
Dome Discover - elizabethgubler
We keep on showing advances of our work.
Today: Testing the new stealth system.

...