In this post we will continue to reveal the lore of Stoneshard. If in the past devlog we told about the different factions of Aldor humans, this will be about other races: elves, dwarves and orcs. Though they won’t be factions you can maintain relationships with in the full game (because of fewness and remoteness of the dwarves and elves, and total hostility of the orcs), they’re still an important part of our setting. It is worth recalling that elves and dwarves will also be playable races alongside with humans.
"If you stumble upon a dwarf who isn’t willing to start a fistfight right off the bat, look at him more closely. My best guess - he's probably dead for a couple of weeks." - Jurg the Innkeeper’s favorite joke
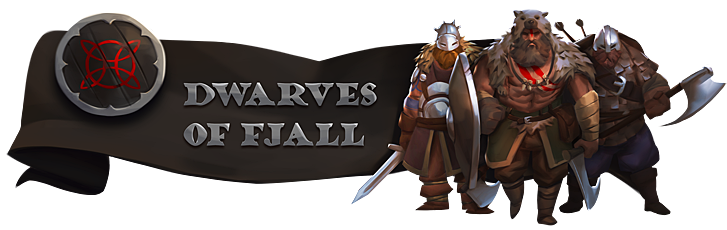
Once the Fjall mountains were a birthplace of a prospering dwarven kingdom, famous for its skillful craftsmen and stonemasons. Dwarves carved many cities in the rocks and connected them by a network of mountain roads – truly a miracle, considering Fjall’s harsh climate and difficult terrain.
However, Fjall crumbled to dust – and the dwarves were forced to leave their mountain vaults in search of a better life on the surface. Little is known about the last days of the once great kingdom, but in the dwarven sagas one often hears the mention of the Exodus, the Extinct Flame and the Great Famine –whatever that means.
Descended from the mountains to the frozen wastelands, those who survived Exodus quickly became savages. Spacious stone passages were replaced by huts and dugouts, skillful jewels – by hides and furs, and the famous smelting halls – with bonfires and primitive furnaces. Ancestors heritage was almost completely forgotten – as well as the spirit of unity once inherent in their folk. Forced to compete in order to survive, the dwarves divided into many fiercely warring tribes. The most numerous ones are Draggar and Ska’ar.
Draggar dwarves have earned notoriety for their passion for pillage and raids – alongside with other dwarven tribes, northern Aldor suffers the most from it. But because of this, they’re also known as dauntless and ferocious warriors. Aldorean nobility gladly hires them to their service – for a decent fee, the Draggarians will fight fiercely even against their own former brethren.
Ska’ar dwarves are more peaceful. They spend most of their lives on the high seas, tracking down all sorts of sea monsters and leviathans. Gathered meat and blubber is enough to survive even the longest winters, and skins and bones are used to make surprisingly durable weapons – some Ska’ar masters wares can compete even with their steel counterparts.
In Aldor dwarves could be met, but very rarely – small communities of dwarven folk can be found only in several northern settlements. These villages are also a common meeting points for Fjall traders and hirelings, who often stop by to exchange pillaged loot for human materials and supplies.
"You better be eating that damn soup, Bertie, or else I'm calling the orcs!" - Unknown peasant mother
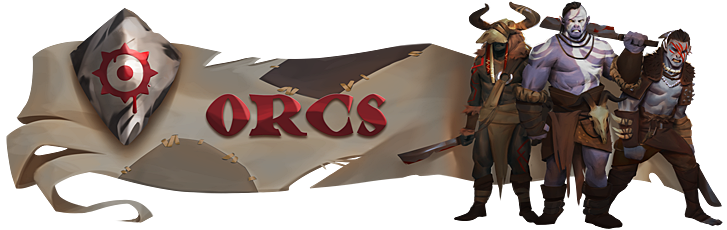
In ancient times the entire territory of Aldor was densely covered with a thicket. For centuries people conquered forest lands inch by inch for their settlements, fields and pastures. However, there were those who resisted the new ways, sparing neither themselves nor the newcomers. These tribes, known as the Forest Folk, were numerous once, but now only three of them remained - and one of them is the orcs.
Orcs are the most powerful, hardy and mysterious inhabitants of the Aldorean woods. If you ask any peasant whom he fears the most, the answer most likely will be “orcs”. Common folk, forest patrols and unruly children - everyone fears the orcs alike due to their unfathomable mysticism, disgusting rituals and inhuman cruelty.
Perhaps they would not have caused such terror, if at least it was known what makes them tick and what gods do they worship. However, it remains a complete mystery, and their actions seem to be absolutely devoid of any logic, moved only by meaningless violence – which makes them even more frightening.
Though orcs remained a serious threat to the people of Aldor for many years, they did not show themselves too actively. Devastating raids and forays happened from time to time, but rather rarely – most of the time orcs seemed to be unwilling to leave their native forests. However, everything changed in the last year, when a certain shaman managed to unite orcish tribes and declare the Sacred Warpath. Aldor, completely devastated by civil war, had troubles organizing resistance during the first months of the incursion, so orcs managed to won back over the centuries of persecution, laying waste to many peaceful settlements.
In six months the orc advance was finally stopped. But as long as the grandees of the Council and the Magistrate vied with each other in bragging about their merits in saving Aldor from orcs, the border guards are preparing for the worst: as the soldiers say, “it’s not us who stopped them; they just stopped attacking.” Who knows – perhaps after this sudden respite, Aldor will have to face an even more ferocious onslaught. There’re rumors of some weird, chaotic piles of branches, animal bones and human bodies found in the forests all across Aldor – so orcs must be really getting ready for something...
"Damn, I’m dying to see those pointy-eared bastards finally invading our good ol’ Aldor. Would be a bloody good reason to hang all those hagglers…" - Some Brynn citizen expressing famous southern hospitality toward local elven merchants
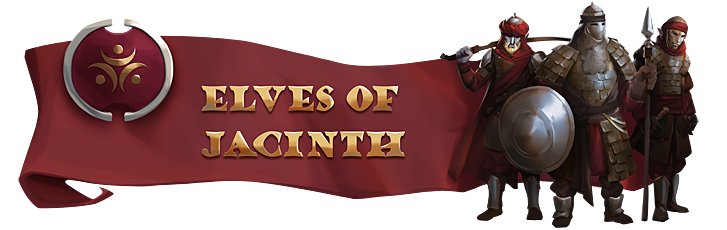
If the traveler thinks of setting off in the direction of the rising sun, crossing the mountains, and then the eastern steppes and deserts, sooner or later he will find himself in the Jacinth Kingdoms – the great elven empire, occupying endless expanses.
Few people have visited Aldor – however, those very few who can boast of such an adventure, tell of many small kingdoms and principalities united under the rule of a single despot. Desert oasis cities, quaint temples-fortresses far to the east, and even steppe elves nomadic caravans – Jacinth is manifold.
Thanks to the undivided power over the most of the known world, Jacinth managed to accumulate untold riches - some of which he lets on for further expansion. Some princes became elven vassals voluntarily; some were bribed by generous gifts. The fate of the most stubborn was unenviable – so far no one has been able to hold back the might of a thousand elven armies.
Recently, as the peace in Aldor is becoming more and more fragile, Jacinth is apparently very willing to do anything to us this moment of weakness to get the local lands in its sphere of influence. Elven mounted scouts are more and more often being spotted on the borders, and elven goods have recently flooded the markets – which is unusual at the very least for a war-torn country. Evil tongues claim there’re reasons behind this – as they say, the Magistrate nobles are ready to do anything to enlist the elven support to win the civil war.
In Aldor itself elves are not uncommon, especially in large cities, where they are often make successful merchants, jewelers or mercenaries. The largest diaspora resides in Brynn, where one can found an entire elvish quarter. Those elves who reside in Aldor are very similar to humans in terms of culture, but they are still treated with suspicion and open hostility – which is greatly facilitated by the spreading rumors of their Jacinth collaboration.
While more large-scale features are still under development, we’ve decided to start a series of posts dedicated to the Stoneshard setting to finally share some bits of lore with our community.
Since the start of development, the game’s lore changed several times, until we come to the variant suiting everyone. If at first we planned to show a rather typical high-fantasy sword-and-sorcery world, we distanced from this initial concept the more and more as the development went on. Maybe some of remember something about the Last King, an undead army and other things – at the moment everything from the list was either scrapped or completely reworked.
As a result, we came to a rather mundane medieval world, where the influence of the magical and otherworldly is rather small, and Aldor is a small once-kingdom, stuck in a civil war between three rivalling factions. In the game you’ll have to constantly balance between them, because gaining allies in one particular faction will always mean making some enemies in the other ones.
"Loyal to the end"
The Council is a group of the most influential Aldor feudals, united around the Regent-Queen and her young son Verne – allegedly the legal heir.
Inora, King Etbert's last wife, married him several months before his untimely death. This marriage was a complete surprise for the whole court - even the nosiest gossipers were surprised by the news. The sudden death of the monarch, soon to follow, became the basis for the rumor that Inora had killed her husband – and her son Verne, born after the Etbert’s death, doesn’t have even a single drop of royal blood in his veins.
Nevertheless, there were plenty of people who believed the Queen. Thanks to her natural cunning and diplomacy, she managed to find many influential allies among nobles – who formed the Council later.
The backbone of the Council consists of two seemingly opposing groups. The first is the Etbert’s old guard – the loyalists who held important posts during his reign. They see Verne as the legitimate successor of the dynasty, which they faithfully served all their lives. The second group consists of those who fell into disgrace during the King Etbert’s rule. For them supporting Inora is a reliable way to regain lost influence and reintegrate into the court life.
However, all of them pursue the common goal: to put down the insurrection and destroy the rebels; restore the crown’s power throughout Aldor; and raise Queen to the throne.
"Free man's wealth is a tyrant's demise"
The Great Magistrate is a union of city councils, rebellious aristocrats, as well as artisan and merchant guilds – all fighting for their independence from the royal court.
The roots of Great Magistrate formation lie in the long-standing conflict of King Etbert and the city of Brynn. Having come to power, Etbert deprived Brynn of its free city status. This autocratic move earned him enemies among Brynn’s influential families. And all these years they only waited for the right moment to restore trampled justice.
After the king died and the Inora laid claims to the throne, the Brynn’s city council unanimously voted to quit Aldor, if it would be ruled by an impostor. Surely, the burghers were somewhat deceitful – they weren’t going to tolerate any more power over themselves, and Verne’s unclear origin was just a good excuse. Many neighboring settlements, tired of feudal oppression, followed their example. This union was called the Great Magistrate – since any decisions are discussed by representatives of all the member settlements.
Thanks to the rich treasury and the wide use of mercenaries, the Magistrate fought with the Council on an equal footing, not yielding even an inch of its land. The obtained status quo was finally consolidated after the outbreak of the Crimson Plague – frightened by the unprecedented illness, the parties declared a truce to curb the epidemic.
Taking advantage of the resulting respite, the Magistrate only grew in power, rebuilding everything destroyed by war and sending ambassadors abroad. By the way, this gives the Council another significant reason to call Magistrate followers traitors – as they say, the Magistrate’s ties with Jacinth elves are much closer than is required for commerce.
"Purge the immoderate"
The Gray Army is a folk uprising that has taken on an enormous scale recently. The composition of the Gray Army is quite dissimilar – the majority are peasants and artisans, but there are other groups as well: former brigands, clerics-in-doubt, broke feudal lords and Magistrate or Council armies deserters.
For several years, the common people meekly endured all the war: they fought under the banners of the Council and the Magistrate, paid wartime taxes, watched lawlessness and violence, suffered from hunger and disease, and died – by thousands. However, the longer the war went on, the louder the grumbling became.
These moods were skillfully used by Nir – a man of unknown origin, and therefore even more mysterious and frightening. A former monk; runaway slave; criminal on the run; feudal lord, who lost his mind after losing his title – there are so many rumors regarding his possible past, the safest bet is not to believe any of them.
The philosophy of the movement is quite confusing and controversial – mainly because only Nir himself grasps it fully. The rest only has to interpret the scattered fragments of his statements – the so-called Words. The Gray Army considers immoderation and incontinence in all its manifestations to be the most important cause of all evil. Nir believes that the ability to find and keep a fine line is paramount, and only in this way people can protect themselves from corruption.
Due to the multiplicity and desperate courage, the Gray Army managed to occupy numerous territories, having won several settlements from the Council and the Magistrate. Now the Army is looking forward to the end of the truce – to finally finish off all those who deny their dogmas.
=====
That's all for today. Stay tuned for the next update about some game mechanics in two weeks!
For the past month and a half we were very silent since we were busy preparing, releasing and supporting closed alpha test. Because of this we didn’t have enough time to develop new features, and thus there was nothing to tell you about. Today we’ve released the last patch for alpha version, which means we’re back into action again! Therefore, today's devdiary is an filler one - we'll talk about alpha test results and plans for the future.
In general, we’re pleased with how the alpha test went. Despite the limited content, every 10th player spent 10+ hours playing the game, and we’ve also collected lots of suggestions and ideas - that we’ll try to consider during further development. Soon we’ll also send another devpoll to our alpha testers in order to get a detailed feedback on all the aspects we're interested in.
As many had noticed, we’ve changed the release date from the Q1 2019 to 2019 in general. As it turned out, we’re bad at making predictions – it’s quite hard to keep up with the deadlines while constantly experimenting and tweaking things – and without such tweaks it’s hard to make such a large-scale game work well enough. Therefore, for now, we prefer not to give any exact dates, but to focus on the development. We still intend to go Early Access before the end of the year, and a specific date will be announced only when we feel the first public build is almost complete.
The next step in our plan is the transition to the closed beta, which we intend to launch in a few months, late spring or summer. It is unclear how much we’ll be able to fit in a few months, but the minimum roadmap looks like this:
Transferring to a new engine’s version and then fixing related bugs and crashes
Adding at least half of the abilities for the most part of planned skill branches
Adding all the non-yet implemented types of weapons and equipment
Complete rework of the dual weapon combat mechanics
Finalization of the ranged combat
Some new dungeons
Additional content
Many minor improvements and fixes that take too long to list (such as barter system for trade, for instance)
We may also have time to add a new settlement and a number of new game systems, but it isn’t set in stone, so the list above is currently the most realistic.
That's all. In the near future, expect regular devlogs on a variety of topics - including, for example, some details about game’s lore. Also, take a look at our new key art, featuring some of the game's key characters:
This devlog is a bit late and therefore kind of off-schedule, as we were busy polishing our today's topic of discussion – bounty system and the associated dungeon, the Crypt.
First, let's clarify the terminology. In our game there’ll be two types of missions: quests and bounties.
First category includes all quests with a scripted storyline and various special content. They are unique and can be completed only once per walkthrough. These tasks include both main plotline missions and various secondary story arcs.
Please keep in mind all English texts are WIP and hadn't been yet professionaly translated and proofread.
And bounties are procedurally generated repeatable quests. Their structure always remains unchanged, but the place and the participants will change. Bounties are offered mainly by village elders, and usually revolve around solving their settlement’s problems. This is one of the best ways to make quick money and improve your relationship with a settlement or a faction.
Some of the bounty-related relics.
As for now, all bounties can be divided into four conditional categories:
Headhunts. To eliminate a threat, sometimes it’s enough to deal with its leader, an elite enemy who may give you a lot of trouble. By the way, elite mobs are also generated procedurally, but we’ll talk about it some another time.
Rescue. Locals often fall into various dangerous situations. Your job is to get them out of the mess.
Search. Lost relics, stolen artifacts, treasure hunts - you will have a chance to take part in all of this. By the way, nothing prevents you from breaking the contract and leaving the found valuables for yourself…
Interaction. In such bounties you’re required to find a certain place and make a number of special actions to achieve… a needed outcome. Sounds pretty abstract, but, well, that’s how it works.
In the future we plan to diversify bounties by adding some new variations and categories. For example, our to-do list contains monster hunts involving some extremely rare and dangerous enemies.
Troll concept. Don't feed him.
It’s worth mentioning that bounties are very dependent on global map situation. For example, if orcs or brigands chose an abandoned fort for their own camp in the settlement’s vicinity, sooner or later they will start to create problems for this settlement – so at some point villagers will offer a bounty on them.
Also, unlike quests, bounties completion time is limited and thus is discussed in advance. Not completing the bounty in time won’t only worsen your reputation, but may also have serious consequences for a bounty-giver.
For instance, if you won’t disrupt the necromantic ritual in the crypt nearby in time, the undead may become significantly stronger in this region, so they’ll make even more trouble in the future. So take your bounties seriously and don’t be greedy – if you aren’t sure you’ll be able to complete them, don’t give people false hope and let them hire some other mercenary.
Nothing like pillaging someone's grandgrandfather's tomb!
In alpha all bounties are focused on Crypts – our new dungeon type. Technically, the Crypt isn’t 100% new – we’ve demonstrated it a long time ago. However, during last month it was completely revamped from scratch to better fit the changed lore and also test our new approach to dungeon procedural generation.
Most crypts in Aldor have hundred-years history and reflect local burial customs. Those who could afford it were buried in impressive stone sarcophagi. Common folks could usually count on an ordinary wooden coffin. Many dead people are also buried with different valuables – as it’s believed that it may help the deceased in their afterlives.
So a trip to the crypt offers not only an oppotrtunity to die from the undead hands, but also a chance to make a fortune… if you’re lucky enough. Anyway, nobody will check the bodies of people who died several ages ago, so that’s probably fine.
Well.... I guess... I'm here?
And as a small bonus – here goes our in-game map item, which shows a small fragment of the global map. Bu the way, this is where the alpha will take place.
In today's devlog we will talk about items: food, consumables, valuables and their impact on the economy.
Let's start with the most delicious part: food. Cooking system isn’t that far away, so we’ve added many new types of food, almost all of which have their own properties, rarity and value. The meat is very nourishing and slows hunger accumulation after being consumed; fruits quench thirst and increase immunity; vegetables also strengthen your immunity and often have special effects. For example, garlic will slightly increase your resistance to unholy damage, and leek will slightly increase the speed of detoxification.
Dishes are separate subcategory of food. They usually greatly satisfy hunger, occupy less inventory space and spoil more slowly (or don’t spoil at all when it comes to pickled and smoked products) or have powerful special effects. For now, you can only buy them from merchants, but in the future we will add the ability to cook them by yourself.
Some types of food are highly valued for their healing properties and rarity. Usually, they have an elven origin: figs, ginger, citruses and dragon fruits will be difficult to find anywhere except from stocks of rarely encountered elven traders.
Alcohol deserves a special mention. Since the war was raging around not so long ago, there is not much quality alcohol left and therefore it’s highly values. You will have a choice: to keep alcohol for yourseld to relieve pain and keep morale high enough, or to sell it for additional income. The more exquisite the alcohol is, the weaker are its side effects: drinking country moonshine is… well, very different from consuming brandy or rare elven icy wines.
By the way: we finally added the ability to merge used consumables with each other. Now, if you have two half full bottles, their contents can be poured into one, freeing up a place in the inventory.
And now, the valuables. We want them to become the main engine of the in-game economy: it will be much more profitable for the player to seek various rarities than to collect rusty junk sold for a penny. First, they take up much less space than massive armor and weapons. Secondly, it’s way more profitable: almost all merchants are interested in valuables and are willing to pay pretty well for them.
Different locations will have different sets of valuables you may encounter. In the crypts you can profit from the plundering of sarcophagi - perhaps, among the decayed bones you may find some old jewelry. In the brigand hideouts you may find a lot of different stuff, including rare goods from the plundered elven caravans: porcelain, silks, ivory and spices. And in the abandoned mines it’s possible to find gems and precious ingots.
And to carry all that loot far enough, do not forget to get a roomy bag in advance. And, perhaps, equip some good armor: with such a load you can easily get into a brigand ambush.
Today we will show another new feature, and this time it’s quite a massive one: trade system. Trade is the vital force of our game economy, so we paid a lot of attention to its development. We faced a difficult task – to make trade system both user-friendly and moderately realistic, and we’re quite happy with the result.
Let's start with the context. The game takes place in a country ravaged by a bloody civil strife. But the war is still not over: due to some unfavorable events, all factions were forced to declare a temporary truce, thereby securing a precarious status quo. But at any time their confrontation may resume again. All this impacts the economy: currency is devalued, because of the chaos and production slump many commodities are in acute shortage, and the prices of essential goods are greatly inflated.
Trading with merchant. Clickable.
In Stoneshard you can trade with almost all neutral and friendly characters: from merchants to simple peasants and city guards. But at the same time, it is worth remembering that the wartime economy is pretty brutal: because of limited resources, everyone is primarily interested in securing personal gain – so NPCs tend to overprice their goods a lot and prefer to buy your goods far below their true value.
NPC role also influences trade prices. Depending on what craftsman you’re dealing with, you may expect some price fluctuations on goods he’s interested in. A blacksmith, for example, works with metal, so he’d buy iron equipment more expensively and also sell it cheaper, while merchants and wandering traders, due to their versatility, tend to trade at less favorable tariffs for you. In addition, your reputation level with a particular settlement and faction, some local and world events, and the quality and condition of the item itself will have their impact on the final price too.
Trading with common folk is mostly about bartering few cheap items like food. Clickable.
Other important aspects of trade are NPC interests, their stock and wealth. These parameters are different for each NPC, depending on its role, settlement and faction.
Ordinary peasant possess very few items: usually, food, drinks and tools. They tend to buy the same kind of stuff from your character and won’t be interested in buying armor or potions. They’re also very limited in their funds, so you should probably seek some another person to sell an expensive gem to – peasant won’t have enough money to make this deal possible.
However, the blacksmith's stock is much more impressive: he sells a huge variety of various equipment, is quite wealthy and is willing to purchase some of your spoils of war, though he won’t be interested in buying scroll and potions too. It’s worth mentioning that there are some items which are demanded by almost everyone due to wartime conditions – such as food, alcohol and different valuables.
Trading stock will be regularly refilled: NPCs will purchase new goods instead of the sold ones, and the speed of this process will also depend on the situation in the settlement and the world around.
Repair in action. Clickable.
And finally, repair function. Now battered items can be repaired by a certain artisan for a fee: metal equipment can be fixed by blacksmith, while carpenter and tanner would work only with wood/leather and cloth items respectively. The repair cost depends on the item’s condition and its base price. By the way, you’ll also have an opportunity to fix the item by yourself using a repair kit or an appropriate skill, but the efficiency of such amateurish repair is much lower, and item’s max durability will degrade a little too. Therefore, it’s a good idea to have your most valuable equipment to be repaired by professional craftsmen only.
Firstly, we would like to wish all of you a Merry Christmas and a Happy New Year (we hope you’ll have great holidays) and take stock of the past year. The 2018th was full of events: the Prologue’s release, a successful Kickstarter campaign, porting to a new engine’s version, huge revamp of many game systems and implementation of many new features. Without your support all of this would hardly have been possible, and it’s an awesome thing our community consists of so many cool people! 2019 should be decisive due to the planned release, so all the most interesting is yet to come!
======
Now let’s turn to the current news. This devlog was preceded by a long period of silence. The reason is simple: we simultaneously worked on many different features, but until recently, they were all too rough around the edges to show them publicly. Now the situation has changed, so in the coming weeks devlogs will be published much more often and stably. And today’s Saturday will be dedicated to the updated UI.
Initially, we did not plan to change with the interface before the Beta. However, when it came to the introduction of trade and the dialogue system, it became clear it's impossible to continue on without the total rework of the entire UI. So in this iteration we tried to take into account the most frequent problems and suggestions of the community.
First let’s inspect the general points. The GUI design has become more dark and monumental in order to better match the game world’s spirit. For example, we’ve added two atmospheric statues to support health and energy scales – they will constantly remind you of how close death is in Stoneshard.
Inventory has undergone notable changes as well. First of all, we’ve added a new equipment slot – the back. There’s a choice what to equip there: a bag for some additional inventory slots or a cape for extra stats and resistances.
Small changes have affected the old weapon slots too. They were increased to a size of 5x2 – so the especially large types of two-handed and polearm weapons could fit. The amulet slot was increased to 2x1 – thanks to this, talismans and necklaces would become much more detailed.
We’ve also added autosort button, which was requested by many players. Upon clicking on it, all items in your inventory will be optimally arranged to leave as much free space as possible. This should ease the management of all your hard-won loot. Weapon loadout switch has moved to the upper panel as well.
Another new feature – gold counter: it allows you to quickly track the number of coins in your inventory, which is very useful when trading.
By the way, as you can see, we’ve changed the font of the game too. The old pixelated font had its own charm, but we were forced to abandon it for the sake of better text readability. Also, this is necessary for future localizations: some European and Oriental characters turned out to be impossible to be adequately pixelated.
That's all for today. Stay tuned for more devlogs in the future!
In this devlog we will continue to discuss Stoneshard’s psyche system . In the Prologue the psyche system was limited only to positive effects such as Optimism, Heroism, Second Wind and Prudence. You can read more about their mechanic in this devlog. However, these are only the tip of the iceberg – a reward for keeping one's mind in good shape. The rest of the mental states arent’t that nice, and this devdiary will be dedicated to them.
I repeat: these are NOT political coordinates.
I think it’s worth to recall how psyche works in our game in general. Your character has two scales: Sanity and Morale. Sanity is responsible for how adequately your character perceives the world around. Morale show the willingness to perceive the world as it is. The psyche of the character in Stoneshard is based on the interconnection of these two scales, which determine the general pool of possible moods and states, and the various triggers that activate these states.
High Morale + Low Sanity
This combination gives states that are generally harmful, but can be useful and even powerful in some situations. They simulate various conditions in which a person loses control, letting outside his inner beast.
Sadism
This state increases the survivability of the character in battle, but severely cripples your recovery speed when not in combat.
Trigger: the activation chance can be increased with damaging and killing enemies.
Critical Chance + 15%
Critical Damage + 30%
Lifesteal + 25%
Energysteal + 25%
Health Restoration -35%
Energy Restoration -35%
Masochism
This state allows the character to draw strength from his own suffering – but it lowers his survivability.
Trigger: the activation chance increases depending on how low your health is, and how high your pain level is.
Damage Received + 33%
Pain Limit +25
Pain Resistance + 30%
The higher the pain, the more energy is recovered at the end of the turn.
Each point of pain slightly lowers Abilities Energy Cost.
Frenzy
Your character throws a tantrum. It causes him to destroy everything in its path, paying very little attention to any resistance he may face.
Trigger: requires active Sadism / Masochism / Megalomania. High pain level, as well as taking and dealing damage, increases the activation chance.
Decreases Sanity, but increases Morale.
You lose control of your character for 10 turns.
Your character have a chance to apply “Consecutive Blows” skill instead of an ordinary melee hit (even if it isn’t learnt)
Damage Received -50%
Pain Resistance + 90%
Weapon Damage + 33%
Critical Damage + 75%
Megalomania
At low Sanity your character tends to pay way too much attention to his own successes. Sometimes it takes morbid forms.
Trigger: the activation chance increases due to successful hits (especially critical ones), killings of multiple enemies and leveling up. Misses and fumbled attacks reduce the chance.
All player attributes are falsely increased when displayed. The narcissistic character considers himself flawless and therefore is inclined to overstate his real abilities.
Physical, mental and magical debuffs (except for injuries and psyche states) become hidden. Such flaws are way too insignificant to be concerned about.
Bonus Experience: -75%
Low Morale + High Sanity
Now we can turn to the next set of states, caused by a combination of low Morale and high Reason. This is reflected by the mood cycle: the longer your character stays depressed, the more disheartened he becomes.
Apathy
The beginning of a long journey right into the abyss. The character loses the motivation to move on.
Trigger: skipping turns, Rest Mode overuse, no challenges (like enemies in sight) increase the activation chance. The fastest way to shake a character a bit is continuous fights. Don’t let your character to be idle!
Willpower -10%
Vision -1
Fumble Chance +7%
Fortitude -10%
Sanity Change -0.05 every turn
Bonus Experience -25%
Anxiety
Anxiety is reinforced where apathy has taken root.
Trigger: requires Apathy. The lower your health and the lower your morality - the more worrying your character is and the higher the activation chance of this state.
Willpower -20%
Vision -2
Fumble Chance + 15%
Fortitude -20%
Sanity Change -0.1 every turn
Psionic Resistance -25%
Despair
A character who has succumbed to despair no longer believes in his own success and just wishes to bring the inevitable end even closer.
Trigger: requires Anxiety. The activation chance depends both on the health and morale levels, as well as hunger, pain, thirst and toxicity levels. The worse your character feels in general, the faster he will fall into despair.
Willpower -30%
Vision -3
Fumble Chance + 25%
Fortitude -30%
Sanity Change -0.2 every turn
Damage Received +20%
Hypochondria
Hypochondria is an obsession with one’s own health. When hypochondriac receives even the slightest reason to worry, he starts to think he got gravely sick with every possible disease ever. With the exception of prenatal fever maybe.
Trigger: every untreated disease and every undiagnosed symptom increase the activation chance.
Willpower -10%
Fortitude -30%
Health Threshold -10%
Pain Resistance -25%
Sanity Change -0.05 for each active undiagnosed symptom
Every turn there is a chance to discover a false symptom. Or maybe a true one? Or maybe a false one though?
The effects of the most terrible combination, low Sanity and low Morale, shall remain a secret so far - because of their complexity, they still require some more work and polish. In the meantime, you can turn on your imagination and try to guess how they will work in our game by their names.
Yup, it's new devlog time. Currently our team is working on some big features that we aren’t yet ready to showcase, so therefore in today's development diary we will discuss several small improvements and fixes we’ve accumulated. Most of the targeted aspects are probably well known to you because of the Prologue, so I guess today's blog will be pretty interesting.
Destructible Environment
You don’t have to fix the impassable objects being generated if you can make them destructible.
Firstly, we’ve added the ability to destroy most of the dungeon environment objects. Yes, all those beds, bedside tables and chairs, which previously were purely decorative, now can be properly broken, burnt or blown up. This small innovation introduces a significant variety to tactics, making you to take a different look at the use of the environment in battle. In addition, each environmental object is made of a certain material that sets the level of its resistances to different damage types. For example, wooden furniture can be easily crushed by slashing and blunt weapons, but, let’s say, iron maidens are way tougher.
Enemies & Door Interaction
Verren gets he's probably screwed, but prefers to remain optimistic.
Mysterious vampires doorphobia has long been a target of our community’s mockery. In the public version of the Prologue, timely escaping behind a closed door was an unbeatable strategy: it gave you unlimited time to heal.
Of course, it was an obvious exploit, not intended by us. So recently we’ve told the mobs that doors don’t present any threat to them and can be actually interacted with. However, the type of door interaction depends on enemy’s type.
Small-sized beasts like bats will need looots of time to break the door, however.
For example, vampires have no problems simply opening unlocked doors, while the undead or beasts will try to break them – which means you won’t have that much time to take a breath anymore. By the way, the same goes for any environment objects that prevent mobs from getting to your character.
All this was made possible by changing the door system as well. Now, like the rest of the environment, they have a durability pool, which can be depleted by attacking or using spells. Which means that now you can get injured only when trying to break the door down with your bare hands.
Attacks of Opportunity
Some pretty angry skeleton.
Another feature added to counter The Most Popular Tactic #2, the scourge of many turn-based roguelikes – endless kiting (referred to as “tactical retreat” by some people). If a player is sure the back areas are secure, he can start to run away – and, because of the turn-based system and the “1 move = 1 action” rule, his enemy will chase him potentially endlessly, unless he has some long-range skills. Usually it was used to reset cooldowns on powerful skills or to lure an opponent to the right spot – for example, closer to the ashfire barrel or spike trap.
Therefore, we’ve added the so-called attacks of opportunity: whenever you try to retreat, the enemies surrounding you may receive a chance to deal a bonus hit. In addition, thanks to the change of the movement system, now enemies will no longer wait for one turn before taking the tile of the retreating player, but will do this instantly. In sum, this makes kiting a disadvantageous strategy, forcing you to rely more on movement/knockback skills if you want to escape some sticky situation. Or, alternatively, level up Agility: high Agility unlocks the perk allowing you to avoid attacks of opportunity.
Durability system change
And finally: some changes were made to the durability system. Previously, durability penalties were calculated dynamically depending on the percentage of lost durability, so your equipment started to get debuffs from the very beginning, which was pretty annoying, honestly.
Now the penalties are divided in tiers: when at > 50% durability, your items won’t receive any penalties; at >25% <50% durability, items will receive a 30% stat penalty; at <25% durability, items will receive a 60% stat penalty. This will make it easier to determine the state of the equipment just by taking a look on its appearance: depending on the durability tier, the sprites of the equipment will become more shabby and battered.
That's all for today. See you soon, until the next devlog!
Stoneshard team is back in action, and in this devlog we will talk about another aspect of the global map – biomes.
The global map (alongside with the tiles it's composed of) is generated procedurally. The map is also divided into several climatic zones, which will affect the biomes and the order in which they may be encountered. When moving to the north, the climate conditions will gradually become more harsh: the southern steppes will be replaced by fields and deciduous forests, then pinewoods will take their place, which will finally turn into the snow-covered expanses of taiga and tundra.
Almost every climate option will have a unique visual and some different gameplay features. For example, in fields with their lack of vegetation, it is easier to spot enemies from a distance - which is not true in forests, where trees and complex landscapes make exploration and movement much more difficult.
It's time to show how these biomes look like. While working on the design of the environment, we temporarily turned off the spawning of animals and emeies, so we could enjoy the beauties of Aldor nature in splendid isolation.
Field environments are rather laconic: green meadows, flowers, butterflies, small bushes, boulders, and very rarely – some saplings.
Most of the Forest sprites were completely redrawn to create a more holistic and dense forest feel. Small glades here alternate with areas of dense vegetation.
Pinewoods consist mainly of fir trees and centuries-old pines. The soil here is also different, more dark and stony. Due to the proximity of the mountains, boulders and rocky areas are more common here.
Well, finally the Taiga biome. The main difference from pinewoods is - yes, you’re right – snow. We also plan to introduce some unique gameplay mechanics to this biome, but they are still under discussion.
As you can see on the GIFs above, the weather and lighting will also dynamically change depending on the time of day and the biome. The day gives way to night, the rain got replaced by the fog, and in the northern regions of Aldor you can experience the snowfall.
Some biomes (like the Swamp or the Seashore) are not ready yet, so we will show them next time. That's all for today, see you soon!