Mar 21, 2017
BREAK ARTS II - イズム | PLAYISM
This week we've been modelling weapon-specific modules.
Modelling will likely take until Sunday, with implementation from Monday.
There are more bits and pieces to create after that, which might leave little time before the live broadcast.

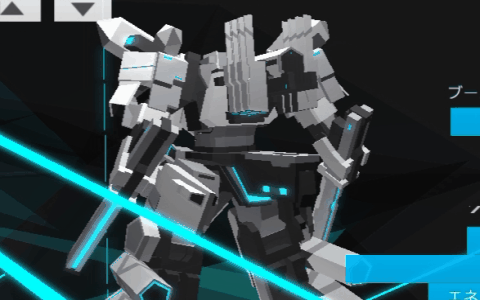
Here's a sneak-peek at one of the weapon modules.
It falls under the category called "Amplifier".
Make sure you add Break Arts II to your wishlist to stay up to date with the DevLogs!
http://store.steampowered.com/app/547360
Modelling will likely take until Sunday, with implementation from Monday.
There are more bits and pieces to create after that, which might leave little time before the live broadcast.
Here's a sneak-peek at one of the weapon modules.
It falls under the category called "Amplifier".
Make sure you add Break Arts II to your wishlist to stay up to date with the DevLogs!
http://store.steampowered.com/app/547360
Share: