Ever had your thoughts wander off to shapez while on the train, at work or at a boring family gathering? What if you could take shapez with you at all times?
We are super excited to announce that, in collaboration with Prismatika & Playdigious, shapez is now available for Android and iOS!
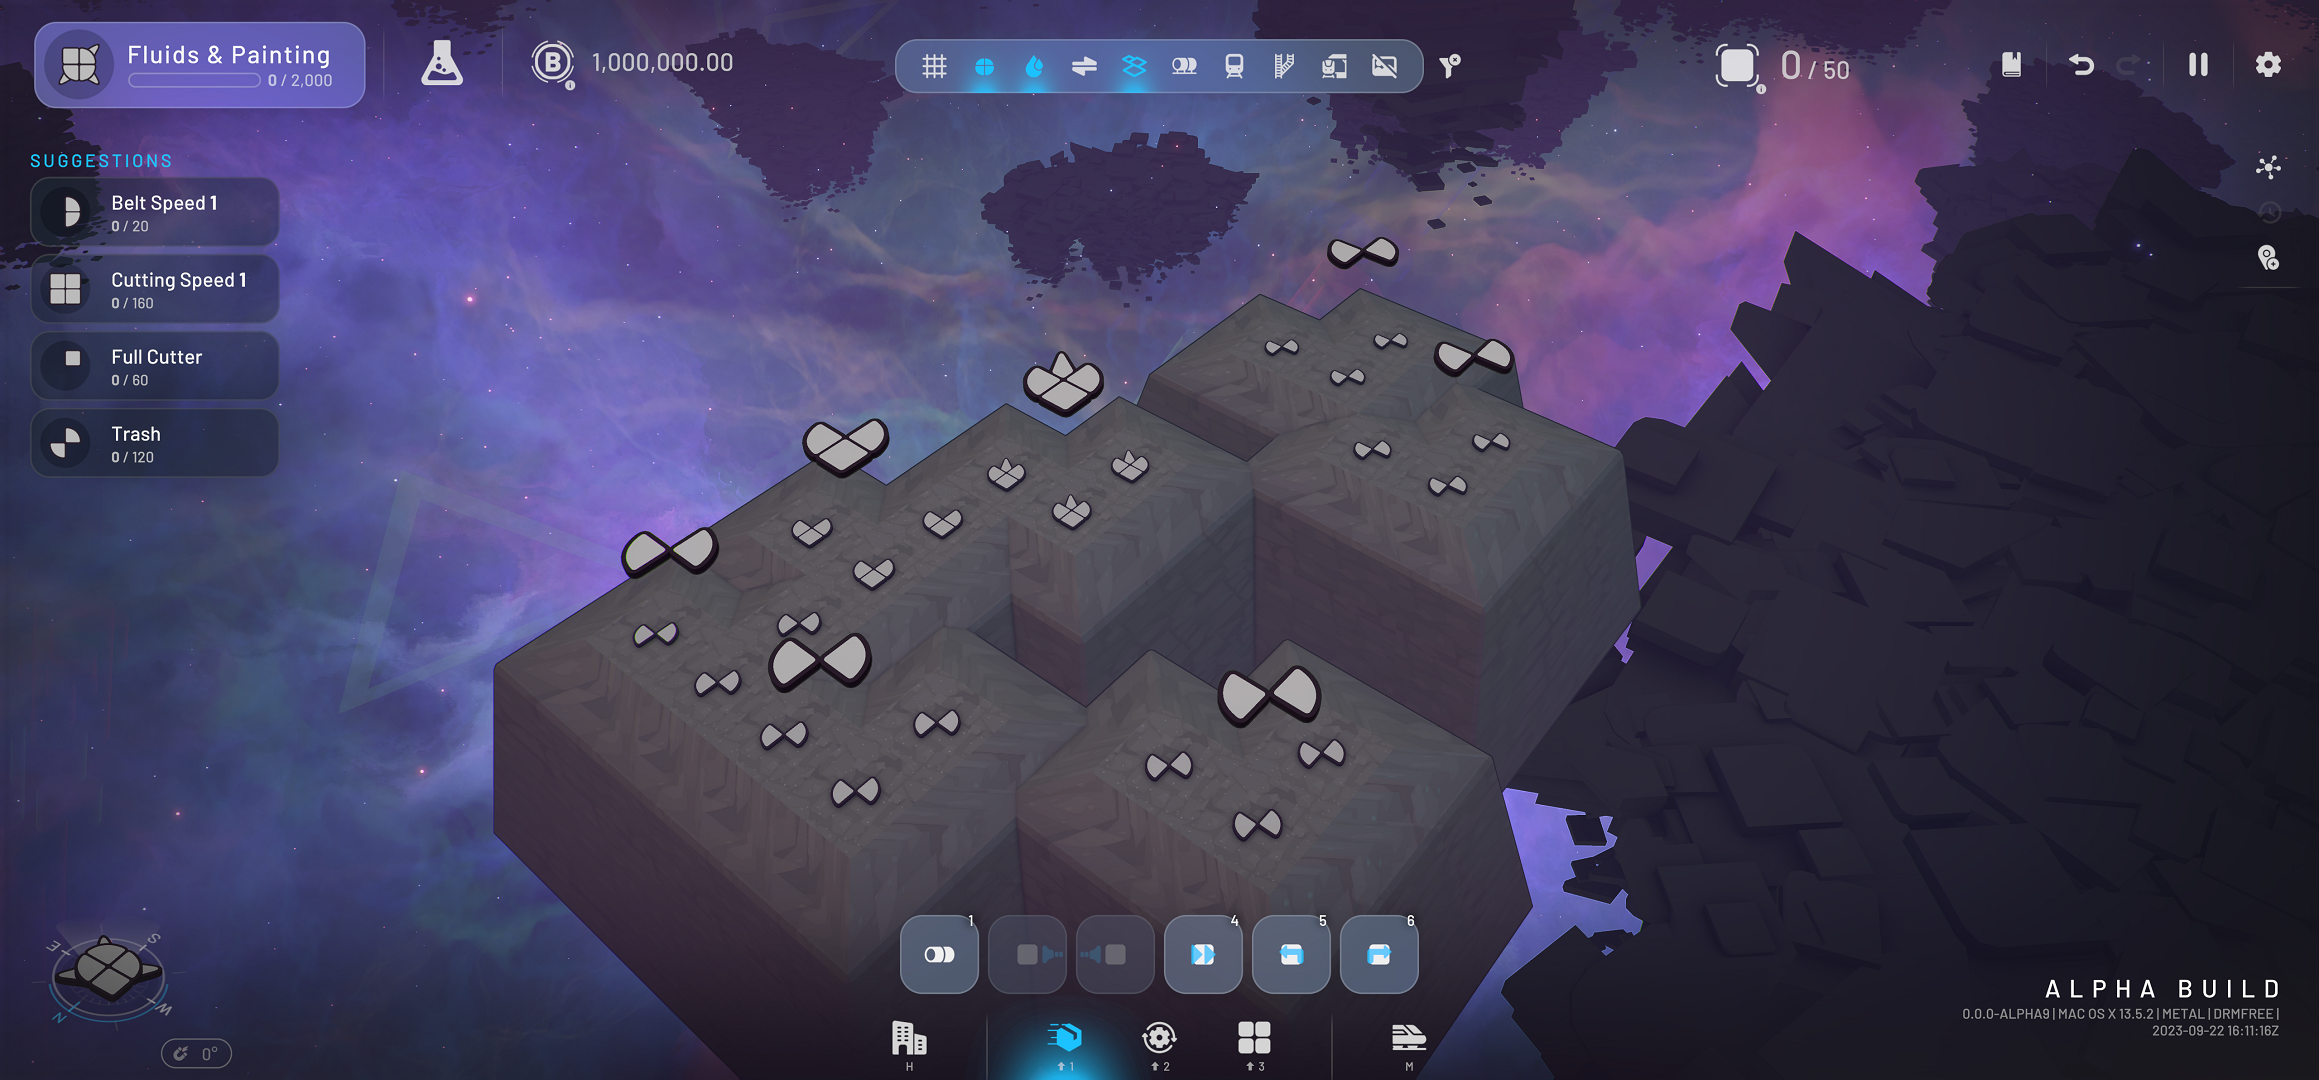
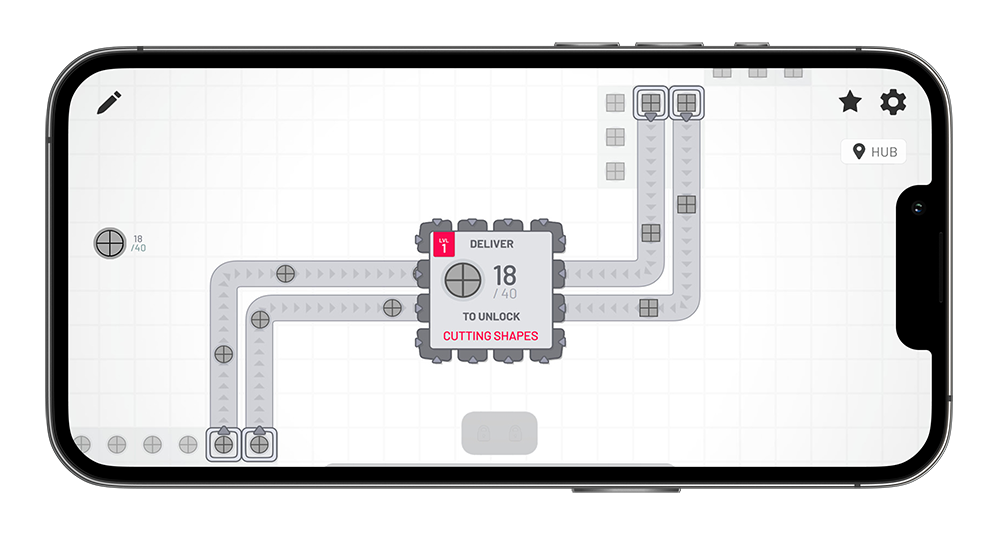
Experience everything shapez has to offer up to level 20 on your phone or tablet! Play in portrait or landscape mode and switch between the two with a flip of your phone.
You can pick it up and try it for free by pressing either button below.
You can play through the first 7 levels for free, no strings attached. The full version of the game is available for $4.99/€4.99. If you're quick, you can benefit from the 10% launch discount!
Shapez Mobile includes all features you unlock in the PC version, except wires. Additionally, cross-platform saves are not yet supported at launch, but do let us know if this is something you'd like to see!
We hope you enjoy shapez Mobile!
~ Tobias, Prismatika & Playdigious
FAQ
If I own shapez on a platform already, do I get the mobile version for free? Unfortunately no, this is not the case. Getting the game on mobile wasn't cheap and we believe the resulting game is worth the cost!
How well does shapez mobile run on older phones? We expect the game to run at playable levels on all devices that support the required OS versions. If you find the game does not run well for you, be sure to let us know!
How well does shapez mobile run on tablets and folding phones? 
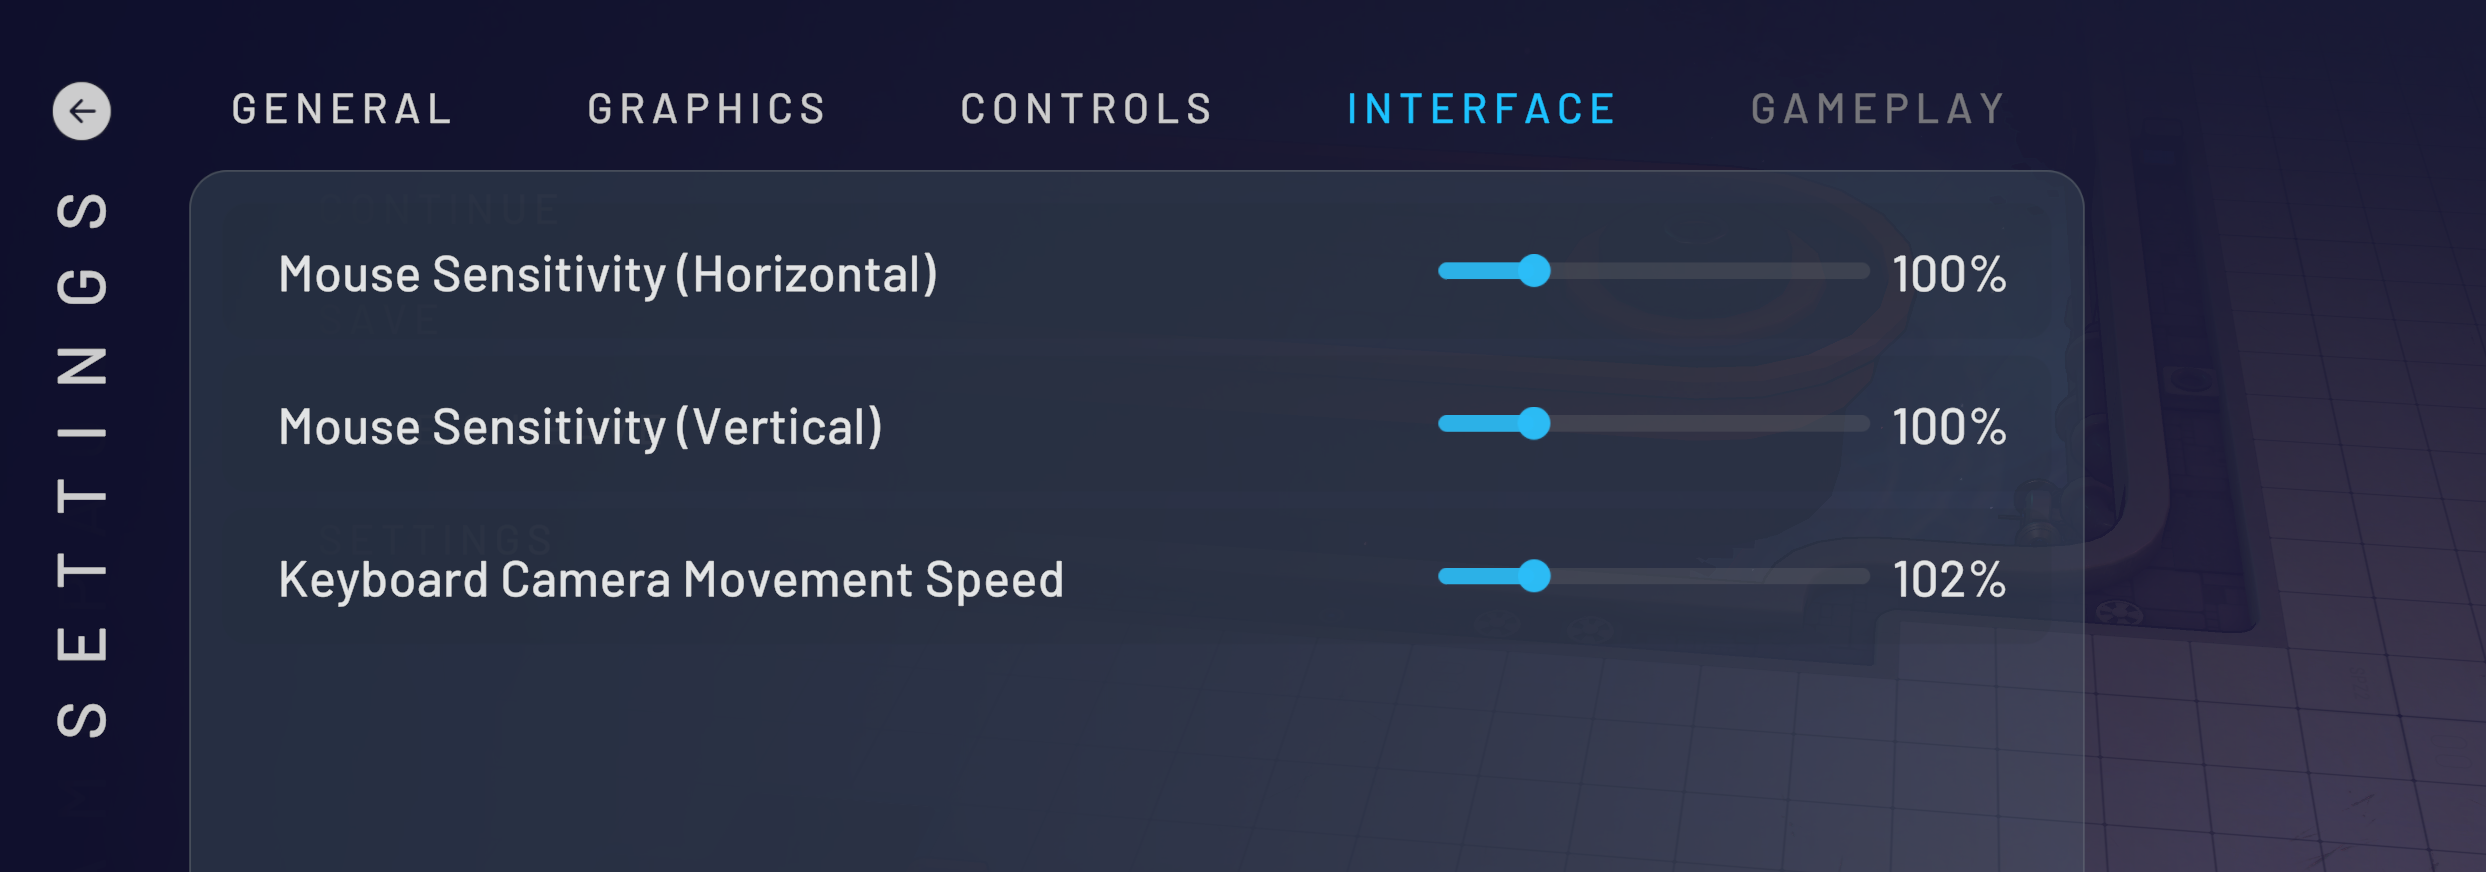
The game runs well on tablets and especially the modern folding phones. You can change the size of the UI to meet your personal needs!
Do you plan to add wires in the future? No plans at the moment. We'll see what the future brings!
Are there plans to release the puzzle DLC for mobile? We also have no plans with this at the moment, but if the game does well, who knows!
It’s time for another progress devlog! Last month we’ve been hard at work nailing down the details of the upcoming Shapez 2 demo. To get into the upcoming Steam Next Fest, we have to submit the demo early January. With the holidays coming up, that means there’s a lot to do!
We would like to humbly request you to add Shapez 2 to your Steam wishlist. It helps you, it helps us, and it’s completely free. Sounds like a fair deal! Just press the blue button below, or click this bit of text.
Alpha 13 went live last week and includes all the changes mentioned in this blog and more. It’s available to our Patreon supporters!
Steam Next Fest Demo
Our current focus is set on the Shapez 2 demo that will be available to play for everyone in the upcoming Steam Next Fest in February. Patreon supporters were given early access to this demo version and will help us find issues and leave feedback on the demo version. This way we can make sure the demo is the best it possibly can be when the time is nigh and it becomes available right here on Steam.
You can expect a dedicated devlog all about the Steam Next Fest demo soon™.
Looking for testers
We're looking for new testers, preferably ones who haven't really played shapez before. If you’re interested in the game but haven't actually had the chance to play, make sure to sign up through the Alpha Playtesting form!
Devlog 014
As we hinted at earlier, this month we are focussing on refining the content we already have instead of working on brand-new content. We already have all the content you will find in the demo after all! So think bug fixing, perfecting key game mechanics and more optimization. However, let’s start with a couple of things that are new-ish to the current build.
New content
We added a brand-new overview mode that will show islands, trains, shapes, rails, tunnels and more when zoomed out very far – farther than the Overview mode you’ve used so far. You can now zoom out four times further than before! Maybe space isn’t big enough to house the factory you’re going to be building after all…
One of the highlights of our past month is the Operation Preview feature. This feature will calculate and preview the resulting shape in real-time while you’re placing buildings. With this new tool in your hands, it should be a lot easier to spot an error and snuff it out before your belts are filled with a shape you didn’t want to make.
The Full Cutter now has a mirrored variant, which can easily be swapped to by pressing F (by default).
The map generation has been reworked entirely. You can now configure the generation when creating a new game, but for now only the seed can be changed. This does mean you can share the map seed with others now! Additionally, more resources will spawn in the starting area to make long-distance transportation less of a necessity in the early game.
We added more knowledge panel entries for most mechanics, as well as an introduction when starting a new game. This introduction will tell you about your goals, how you progress and how you can pull up the knowledge panel when you’re stuck. The panels will only show up when they’re relevant.
Game Design & Balancing
Major changes were made to the progression system in the demo. Tunnels are now unlocked alongside islands, which in turn are unlocked right after platform buildings. Splitters and mergers are now unlocked at the start, so belt placing should feel a lot better in the early game. Additionally, the demo now includes asteroids with colored shapes.
You can expect to spend around 2 hours on progression in the demo. You’re free to continue playing as much as you like after everything is unlocked, but you won’t unlock anything new.
The tutorial has been reworked to be much more expansive and complete. Every step in the tutorial is accompanied by a video that helps visualize the step. We hope the tutorial is now clear enough to teach the ropes to someone who has never played a factory game or anything similar before.
The Rotator building’s rotating speed is now directly linked to the belt speed instead of the cutting speed. This should make it easier to keep your belts running smoothly!
We’ve reworked the way you place buildings and grow your factory. It’s now much easier to replace buildings as pressing the Shift key will now always override whatever building is currently placed. We’ve done a lot of finetuning and made various fixes for blueprint placement.
Visuals
New shape resource node visuals have been introduced that are dynamically generated based on the contained shape. You’ll see the change just below the upper plate: all the shapes you see will be the same as the shape you get when extracting from that node. Shapes with squares will clearly be more square compared to the pointy star shapes. It’s a minor change but it will add some more flair and detail to the game!
We’ve made various improvements to the shaders for buildings, island hover effects, blueprints & blueprint placement, the selection of buildings as well as the island grid visualization.
We added new visuals to belt launchers (‘yeeters’) and catchers and updated the visuals for notches, shape patches and playing fields.
Various improvements have been made to shadows. They now render from farther away, space stations now have shadows on both high and extreme settings and asteroids and miners have shadows on extreme settings. In general, shadow quality should be much better than before. On the topic of quality settings, fluid deposits now have reduced visuals on lower quality settings.
All LODs (level of detail, read this devlog for more information) for all remaining buildings that will be available in the demo are done, which will help with performance a lot for all quality settings. These buildings are the full cutter, halves swapper and rotator. Miners, shape patchers and fluid asteroids now also have their LOD.
Development
Two things in this section. First up, we’ve made further improvements to rendering performance. This, as always, is an ongoing process, so there’s plenty more to come! Second, we introduced the Building Details graphics settings that should vastly improve the performance when set to low. This setting will make the game run a lot better on low-end systems.
UI/UX
We made a lot – and I do mean A LOT – of changes to the UI and UX in the past month in preparation for the demo next year. Let’s start off with a couple highlights.
The entire toolbar has seen a lot of updates with a new look and feel. The button icons are now more distinct from the buttons themselves, and the functionality clearly stands out in bright ‘shapez 2’ orange. The lock indicators of locked buttons have their opacity decreased to look less clickable than before because, well, they’re not. Additionally, the buttons have been reorganized.
We reworked the pre-load splash screen and improved the game’s startup time. There will be a brief loading screen to pre-load shaders and other visuals so the game will run a lot smoother during gameplay.
The last selected variant of a building is now stored and re-selected when you select the same building. For example, if the last variant of the Full Cutter is the mirrored variant, said mirrored variant will be selected by default the next time you select the Full Cutter.
Steep camera angles are now somewhat being restricted the more you zoom out. This is required to guarantee the game will continue running smoothly. We'll keep a close eye on player feedback for this change.
Interface settings & features were added for the following:
Zoom sensitivity
Invert zoom
Mouse panning
Mouse panning speed
Invert vertical angle
Lock cursor to window
Move camera with floors
Now, we have a lot more changes to list, but this devlog would become too long if we were to write them all out. So below, you can find a collapsable list of all the changes we made the past month or so, if you’re interested. Enjoy!
[expand type=showmore] Sprint 19
Entire Toolbar has been reworked & reorganized
Selection is no longer undo/redoable and also less permanent
First polishing pass on english translation
Default keybinding rework: - Knowledge panel is now 'G' - 'Space' now toggles between buildings / islands mode - New: Switch between toolbars ('' and 'Shift + ') - Toggle layers: 'L' -> 'V' - Delete: Can now also use 'X' - Pipette / Clone: 'G' -> 'F' - Center on HUB: 'Space' -> 'H' - Create waypoint: 'M' -> 'L'
Allow replacing catapults with belts
Mirror inverse (SHIFT + F) now works again
Reworked all translations
Tooltips for research nodes now show the actual speed changes
Less suggestions are now shown when you have lots of pins
Contextual keybinding hints have been moved next to the toolbar, also show some "standard" keybindings when nothing is selected
Removed icons for keybindings since they were confusing -> Now text is always shown (i.e. "SHIFT" instead of arrow icon)
Show future milestones in research tree for demo builds
UI adjustments, cleanup & polishing, for example moved buttons into panels
Cleaned up layer manager, consolidated UP/DOWN buttons into keybinding hints
Compass now shows a west half indicator together with the current milestone shape
Fixed hover animations being dependent on simulation speed and not disappearing when game is paused
Added toggles instead of dropdowns for on/off settings
Moved research button to the top right of the screen
Fixed research nodes not being clickable and thus not unlockable
Removed screenshot-without-ui feature since you can press F2 and then F4
Reworked tooltip & cursor info
Improved island grid visuals & add indicator around cursor while placing an island
Removed unused "focus on selection" / "convert path to blueprint" feature
Fixed tutorial videos not loading on Linux / Steam Deck
Allow replacing extractors with an extractor that is differently rotated
Shape packers/unpackers now show shapes per crate in details
Fluid packers/unpackers now show liters per crate in details
Rework camera indicator (lower left), now also show zoom level & zoom stages in camera indicator
(Re-) Aligned HUD elements and reduced padding to the screen borders
Reworked layer display & moved to right lower side of screen
Reworked hotkey display on right side screen panels
Reworked visualizations panel and moved to lower right as well
Updated research tree UI, now showing the names of upcoming milestones
Fixed completed research nodes not having tooltips, also show tooltips in suggestions & pinned research
Hover effects for buildings now fades in / out
Increased speed of main menu animations
Input / output indicators when placing now have different sizes depending on the layer> i.e. Stacker input on layer 2 has a smaller arrow while placing
Streamlined panels -> Clickable panels now have the border, "background" panels are just a flat panel (i.e. blueprint currency)
Updated style of icon buttons to be more holo
Allow saving selection with Ctrl + S already (to avoid having to press Ctrl + C and then Ctrl + S)
Decreased UI blur amount
Research unlock notification now has a short 5 second timer on the continue button to avoid accidentally skipping it
Fixed jump to hub not actually jumping to the hub & also it now resets the zoom level (but not the rotation anymore)
Show CPU & GPU info in settings menu to make it easier to see if the game is running on an integrated GPU
Decreased opacity of toolbar "locked" indicators to avoid looking like they could be clicked
Fixed "pending" selection looking like it would be above buildings
Fluid resources visualization has been removed
Fixed island grid visualization being "below" the islands making it a bit confusing
Fixed train station visualizations being too big
Fixed stacker output preview being shown at wrong location
Sprint 20
Moved layer switch buttons to layer manager again
Moved skill academy above toolbar to be more noticeable
Show cost while placing space belts, and better show when running out of platform blocks
Added continue button to main menu
Show platform limit increase in research tooltips
Allow deselecting building/island selection with right click
Show warning on first game start when playing with integrated / low end GPU
Swapped hotkeys for delete - default is now “X” with “Del” being the secondary key
Improved delete-area icon
Show space belts also on extractor tab now
Improved clarity/sharpness of mouse icons
Reworked preload / splash screen, improved game startup time
Last selected variant (i.e. rotator) is now stored and re-selected
Do not show train visualizations when trains are not yet unlocked
Hide main button panel when none are visible
Show incompatible savegames in menu (i.e. outdated version, or Demo vs Full edition)
Updated credits
Updated game mode selection
Added header for pinned shapes (”Active Sidegoals”)
Added hint on blueprint library when there are no entries on how to save a blueprint to the library
Flipped halves destroyer icon to align with the building functionality
Disallow binding windows key
Improved sharpness & Clarity of icons on lower resolutions
Added hint in research unlock notification that you can find more information in the knowledge panel
Made toggle buttons look less like they have been disabled
Fixed invalid mouse sprites
Added popup when changing language to require restart
[/expand]
Now you’re caught up! Share your thoughts in the comments below, or join the discussions on the Shapez 2 Discord server.
One of the biggest differences between Shapez 1 and Shapez 2 is, of course, the visual upgrade. The transition from 2D to 3D is an enormous task, and we spare no effort to guarantee we will ace this step forward. For this devlog, we asked Nils, our 3D artist at tobspr Games to take you through the process of how we settled on the design philosophy of Shapez 2 and what we have to keep in mind whenever we design something.
Before we get started, please make sure you have Shapez 2 wishlisted! We have some exciting times ahead of us, and it would be a shame if you were to miss out on future updates! :)
Last week saw the release of Alpha 12, a huge update that focuses on improving the onboarding experience of Shapez 2. We are currently working on polishing this experience to a near-final state, barring any feedback we may receive from you. Want to try it out for yourself? Consider joining our Patreon!
Nils here!
Even though Shapez 1 was a pretty complex game, it wasn’t what we would call a looker. The graphics were simple and readable, but not exactly aesthetically pleasing. It’s programmer art, as our lead artist would say! This is fine for those who value function over vanity, but it makes it difficult to attract new players who aren’t experienced factory builders already. If you take a look at a game like Satisfactory, a game that’s both complex and beautiful, it appeals to all kinds of players. It has the visuals to be interesting to players who are new to the genre and the gameplay to teach them the ropes, while also being complex enough to keep veterans engaged.
This is something we feel Shapez 1 lacked. While the low-stakes gameplay was very friendly to new players, the visuals made it more of a game for people interested in IT and programming. So, for Shapez 2, Tobias envisioned a sequel that takes all the gameplay strengths of its predecessor, but takes the jump to 3D and makes it look good while keeping the game accessible.
One other change we deemed important is the complete removal of ‘black box’ buildings. If you look at the buildings in Satisfactory, Factorio or Dyson Sphere Program, the resources you feed into a machine disappear into nothingness. A couple seconds later, a product pops out, and you have no clue which steps happened in between. We think the segmented nature of the shapes allows for a non-black box approach where you can see exactly what a machine does by simply looking at it doing its thing. We are not smelting iron, copper and Arachnian stalagmites to create the inverse Galerian crop circle or whatever. We cut squares into smaller squares, circles into slices, paint and then stack them. We can animate every step in the journey a shape takes, from extraction to delivery.
There are some exceptions to this rule, however. Some processes would be too difficult to animate and take more time than it’s ultimately worth. An example would be the packing of a thousands shapes into a small crate – it makes sense from a gameplay perspective, but would visually not work well.
Getting started
We started off with a very basic aesthetic, inspired in some ways by Mini Motorways. Limited geometry, a desaturated color palette and no fancy effects. No metallic objects, reflections or bevels. We made a few concepts for the general theme of the game and worked together with the community to settle on the space theme Shapez 2 now sports. With the theme set in place, we could now start detailing with shading, reflections and metallic objects.
The visual language for the buildings – repeating patterns, colors and design choices – developed over time. Back when I joined tobspr Games, all I had to work with were some very basic visuals Tobias made. Essentially, it was my job to make them look good! I proposed a few early design ideas, created animations and defined design rules that we still adhere to today. Some of these early ideas are still present in the current version of the game, like the animation for the lifts.
Pinpointing our vision
The direction we wanted to work towards could be described as a marriage between the realism (physicality) of factories and the abstraction of space. Good examples of this are the belts and belt corners. Instead of being a simple 90 degree curve with a stretched texture, or a hard UV seam like many other games do their belts, we made something akin to how a real belt functions. These belts have a texture looping around rollers, ‘cartoonified’ a bit by hiding certain complexer parts of the mechanism. This way, the belts get the vibe of a real factory, with enough abstractness to allow for greater creative freedom. More examples will follow later on!
In general, we’re aiming for a highly polished look with tons of detail, many of which may never be seen by a lot of you. The buildings would hold up in a (non-existent) first person mode, even if we didn’t design them with that goal in mind. With the use of LODs, a consistent design language and a lot of iterating, we ended up with the world we imagined. It captures the spirit of Shapez 1, while looking a lot more appealing (to most), as well as being more readable and easier to understand.
With this design philosophy in mind, let’s dive into some specific examples!
Designing buildings for Shapez 2
The building blocks that make up the core of Shapez 2 stayed largely the same as in Shapez 1. Quite literally actually, as the game is still logically separated in square blocks of one. Since the functionality of a lot of buildings is directly taken from Shapez 1, we ‘only’ had to come up with ways to visualize their inner workings. This turned out to be quite the challenge, however. With the technical and artistic constraints we were working with, it became very difficult to come up with the designs.
A lot of the technical constraints are set to make sure the game keeps running smoothly. We had to limit animations and forgo most of Unity’s basic systems in order to support large factories. We cannot use baked animations, for example. If you’d like to read more about the performance constraints, be sure to check out devlog 011!
Four pillars of design
Readability, building uniqueness, building uniformity and ‘coolness’. These are the four design pillars we try to adhere to. However, within these four pillars, we can already find two conflicts: readability versus coolness and uniqueness versus uniformity. Let’s go over both these conflicts!
Readability versus coolness In a nutshell, readability is the ability for the player to easily differentiate between buildings and understand what a building does from a distance, in our case about 30 meters away. For this reason, buildings shouldn’t have too much visual noise and animations should be simple, e.g. not have too many moving parts. Coolness is all about how fun and interesting the game looks.
Of course, it would be fun if we could give every building big lasers, launchers and complex animations, but this comes at the cost of readability. The more flair a building gets, the more detailed it gets and the less readable it becomes. If we make every building a big light show, you’d have no clue what’s going on after you’ve placed a couple down.
Uniqueness versus uniformity This conflict links directly to readability. You need buildings to look and feel unique to make them stand out and make their function clear. However, the game should look coherent and every building should share one visual design language.
Every building should follow these four pillars of design. They should look cool, yet readable. To be readable, they should look unique, yet similar enough to fall in line with the other buildings.
Design pipeline
Each and every building has to go through a long string of departments and stages before its finalized form makes it into the game. Their journey is as followed:
Game design prototyping
Art concept
3D prototyping
3D refinement
Polishing (Quality Assurance)
Of course, this is a very simplified look at the entire process. It makes sure we don’t miss any crucial oversights, like animation clipping between adjacent buildings or concepts not adhering to the aforementioned design pillars.
Logistic versus processing buildings
We differentiate between logistic and processing buildings. Belts, mergers, splitters and lifts are logistic buildings; they move shapes around. Buildings like cutters, stackers, painters and swappers are processing buildings; they make changes to the actual shapes, producing different shapes.
The function of a building will also determine their design language. Logistic buildings have lightweight, open designs that clearly display what they’re transporting. They have unique designs per build layer to differentiate them, and have one central orange element that does something, like the pusher element in a splitter. Processing buildings should stand out and really look like buildings. They have very boxy designs and have thick, orange borders, yet should retain a unique look to differentiate them. With these differences, players should easily be able to tell the difference between the two types of buildings, even from far away.
Design limitations and rules
With all this in mind, we face a handful of limitations when it comes to designing buildings, the design pillars aside.
Buildings must not exceed their defined chunk (their personal space, as it were), especially not during animation
Inputs and outputs should always be in the center of the chunk and be uniform across all buildings (looking at you, old tunnel entrances and exits)
Animations should be readable from a distance, good looking up close and convey their purpose
Animations are limited to moving, rotating and scaling
The amount of (moving) objects per building should be limited to keep performance smooth
Shader-related restrictions, like glass being expensive to render
Shapes should not be rotated during an animation (except, of course, the rotator)
Shapes should not clip through objects during an animation or when transported
Animations should loop perfectly
Animations should support a belt at full capacity and stop when the output stalls
Shape supports should be handled in some way, they may not just spawn in or magically disappear
One issue we’re still actively working on are the supports for multi-layer buildings. As you can place buildings below these belts, the belt supports can conflict with the building below. Not having any supports looks weird, but they’re technically not relevant for gameplay.
Casus 1: The (full) cutter
Anyone familiar with Shapez 1 will probably recognise the cutter:
This building works well in the Shapez 1 style, but it doesn’t translate well to Shapez 2. Tobias created a basic model for the cutter, which gave me a rough idea on how it should work in 3D as an open design. However, the visuals needed a complete rework.
This presented quite the challenge, since in Shapez 2 the building operations are not dependent on camera rotation, but tied to the world as it were. This is necessary, as blueprints wouldn’t work if the buildings would change the axis they work on. If the cutting angle would be baked into the building itself, said angle would change if the rotation of the blueprint would change. This also means you’d get a different output every time you rotate a blueprint.
You can see the solution below. The blue half circle indicates which part of the shape is manipulated. The same principles extend to the Swapper as well.
Casus 2: Lifts
To introduce a completely new problem to developing this game, we decided to add layers. You have to be able to move a shape from one layer to the layer above or below. Let’s go through all the boxes it has the mark off, shall we?
Lifts should…
not clip
not use baked animations
support a fully upgraded belt
be able to stop if the output stalls
not use more than 2 moving parts
support corner and backward delivery options
make sense when viewed from above
fit the general style of the game
not take up too much space (open design)
look solid and sturdy
have visible support for moving parts
have a looping animation
That’s quite a lot of requirements to work with, but we’re very happy with how it turned out. The current design is almost a year old by now, yet it’s still one of my personal favorites.
Not to mention you can make stuff like this:
It’s in the details
As we mentioned before, we went for a very polished, yet stylized look. Almost every building currently has one or two little details that you can discover if you zoom in close enough. Let’s have a little peek:
The belts were made to emulate the look of real conveyor belts, including a bit of suspension that holds everything in place. We made sure the UVs and textures aren’t stretched and decided on handling the change of direction of belts in a way where they feed into each other instead of warping.
Or take a look at the painter, which is admittedly still very much a work in progress as far as shaders are concerned and will get another overhaul later. We wanted the painter to adapt to the height of the shapes coming in. So, we added a hinge and allowed the roller to move up and down as shapes of different heights are fed into the machine.
We hope this devlog showed you a complete picture of our design process for Shapez 2. Of course, we also hope you enjoyed it :)
Happy progress blog day! We’ve been working a lot on the visual presentation of Shapez 2. This includes everything from making the game easier to navigate, as well as making the whole factory-building aspect (which is quite important in Shapez 2, I’d say) smoother and a bit faster.
As always, these blogs are bi-weekly! One week, it's all about the progress we made developing the game. Two weeks later, we do a deep dive into one specific mechanic or feature that warrants some explaining. We plan to keep this cadence going until the full release of the game, and probably even after!
While you’re here, make sure you have Shapez 2 wishlisted! Not only does it allow you to stay up to date with the latest know-how on the game, it also gives Shapez 2 a better shot at getting featured by Steam. It would help us out a ton, thanks!
Alpha 11 is available to our Patreon supporters and features all the improvements we mention in this blog, alongside a handful of smaller changes (like bug fixes). These alphas are – as per usual – available for Windows, Mac and Linux systems.
Devlog 012
We’ll first tackle some changes that directly impact how you build your factories. We will then move on to the visual changes that will improve the overall gameplay experience.
Game Design
It's finally here: Introducing the Blueprint Library! While still a work-in-progress, it allows you to save and load blueprints to your heart's content. You can also copy the blueprint to share with others through a simple text message, or dive into your game files to find the Blueprints folder. From here, you can share the blueprint files with others or back them up for later use.
This is just the start of our plans for the Blueprint Library. We'll be adding a bunch of features to organize your library, like folders and customizable icons.
You can now also research discounts for your blueprints that allow you to place the specified amount of buildings free of charge.
We made some changes to the way you connect two space stations to each other using belts. When placing belts, the game will automatically place receivers on station notches for you when you place the catapult. There is now also an indicator for this mechanic to make it more clear.
Deleting one of the outputs of a belt splitter or merger will now automatically remove the left-over connection of the deleted output. So, when deleting an output, a three-way splitter will turn into a two-way splitter and a two-way splitter will turn into a regular belt.
We added some new station platform designs. Have a look!
The shape & fluid patches have been updated with a new potential layout. These changes are accompanied by updated visuals for the fluid patches, as well as the outer walls of fluid and shape miners.
Additionally, a starting map will now spawn resource patches closer to the HUB, lowering the amount of transportation necessary in the early stages of the game.
Visual Updates
A new design for the Full Cutter has been added, and the name for the Full Cutter will just be ‘Cutter’ going forward.
New Halves Swapper design & animations have been added.
The HUB was rotated 90 degrees so the initial camera position now faces north. This should make it easier to get your bearings when starting a new game!
The tunnel entrances and exits are now finally centered! No more throwing shapes through solid walls.
New indicators for mismatched belt directions have been added. We’ve all messed this up before, so now it should be easier to notice when something is off! The current visuals are placeholders and will be changed in the near future.
UI/UX
We’ve been putting a lot of work into updating the UI and UX in the latest Alpha versions. Let’s take you through the highlights!
The icons for the toolbar, all the buildings and some UI elements have been updated in a new style. Thank you to the people in the Discord for your initial feedback on these new visuals!
Additionally, the icon for certain key bindings have been updated to be more readable. For example, the 'SHIFT' key binding is now reflected with a single-family home, the arrow you see on most keyboards.
The Skill Academy we covered in Devlog 010 is now implemented, and will give you quick tips on newly unlocked features. Be sure to read them if you ever run into a skill, uh... issue.
Unlock notifications now display videos of the newly unlocked buildings, which show how they’re used.
Updated placement grid and Layer UX visuals now indicate which layer is selected. This should make it easier to build across multiple layers and keep track of the layers on which you’re building.
The lock indicators are now always shown, so you’ll always know which slots are locked and which ones aren't.
Building descriptions are now shown when selected and are unique per variant. The descriptions for every building and its variants have been updated along with this change.
Several improvements have been made to the main menu and settings page. These improvements include drop-down lists for most settings and clearer key bind settings, as well as a confirmation prompt when leaving the graphic settings page with unsaved changes.
We’re experimenting with hover indicators when hovering buildings or islands. Hovering is the state the building is in when the building is selected but not yet placed. Please let us know your thoughts on these indicators!
Balancing
We’re working on rebalancing various goals to make the progression of the game feel more rewarding. The Tunnels, Chunk Limit 1 and Blueprints have been moved to unlock slightly earlier, while the splitter & merger goal will take more shapes to unlock. Platform and chunk limits have been increased.
Half Swapper and Full Cutter speeds have been changed. For both, you’ll now only need 4 to keep up with a full belt.
And that wraps up everything for this devlog! Be sure to leave your thoughts in the comments, or join the discussions on the Discord server.
We get a lot of questions about performance, so we thought it would be a good idea to take you through our progress of optimizing Shapez 2 to run as smoothly as possible. We asked Lorenzo, one of our developers, to take you through everything. This is a very technical blog, so if you're not experienced with this stuff, feel free to skip this one.
Before you dive in, be sure to wishlist Shapez 2 if you haven't already! It helps us out massively. Thanks!
In our journey to evolve the shape of Shapez from a 2D game to a stunning 3D experience, we've encountered numerous exciting challenges and opportunities. This transformation not only adds depth to the game but also infuses it with more personality, gameplay possibilities, and aesthetic appeal.
However, this transition has not been without its fair share of obstacles. The move to 3D has introduced a multitude of development challenges, spanning game design, artistic direction, and technical implementation. Perhaps one of the most significant technical challenges lies in rendering 3D objects.
In Shapez 1, rendering was relatively straightforward, with one sprite per building. In the 3D realm, each building has thousands of triangles to render, different materials and animations. For large factories, this requires a considerable amount of optimization, both in the simulation of these entities and in the rendering process.
In this devlog we go in-depth in a lot of the rendering optimizations tailored specifically for Shapez 2, as well as what is missing and what are the next steps in keeping a stable frame rate with massive factories.
Introduction
Performance has always been at the forefront of our development philosophy. Right from the beginning, we made deliberate choices to ensure the game's efficiency. In the game context, we can split the performance into three categories: Simulation, Rendering & Interfacing. The simulation changes from Shapez 1, as well, as some insights of how we are pushing the performance for large factories can be found in Devlog 001. The interface, meaning, every interaction that the user communicates with the game and reflects both in the simulation and rendering, is very circumstantial. It can be optimized on a case-by-case basis. The rendering issue, however, is one of the biggest challenges to overcome. We already did a lot, but given the massive scope that we aim for, it might not be quite enough yet.
To kick this devlog off, let's first discuss a bit about how the rendering works (in a very high-level way).
Overview of the rendering workflow (CPU-GPU)
It is important to understand that CPUs and GPUs serve very different purposes. I like to think of the CPU as the solver of all problems: no matter what you throw at it, it can handle it to some degree. Sure, if you jump around instructions and memory, the performance will degrade, but it is not compared to how a GPU would handle it. CPUs pipelines help process many instructions per cycle while branch predictors try to minimize the amount of incorrect jumps and L1, L2 & L3 caches reduce RAM fetching latency. On top of that, processors today come with many cores, but leave the responsibility of using such cores to the developer. More on this later.
The GPU on the other hand is a hardware specialized in processing a single instruction for a very large amount of data. That's why it shines in computer graphics and game development: just think about the number of pixels in your screen, the number of polygons a model has or the amount of rays that need to be traced to render one frame of a path-traced scene. As mentioned in the previous paragraph, it is not so good at switching state (branching). In other words, drawing two different objects once is slower than drawing one object twice.
With that in mind, the processor is the part that will handle all the input, interfacing, and simulation for game development. And after all that, it will dispatch to the GPU what it wants to draw. In order to draw something into the screen, the CPU needs to pass some data to the GPU: a mesh, transformation matrix and a shader (yes, this is very, very oversimplified). Imagine if we want to draw our very hard-working belt. The CPU, after processing the simulation, asks the GPU: “Hey, would you be so nice to draw this belt mesh at this position using this shader right here?” “While you’re at it, draw this shape in this position slightly above the belt” and so on.
Culling
The CPU tells the GPU (nicely or not) what it should draw, and the GPU complies without hesitation. What data is communicated is crucial for performance. Imagine telling the GPU to draw every object in your scene? Even the ones behind the camera? The GPU does not have a lot of context to work with and will process most parts of its rendering pipeline until realizing that the object is not in view. Defining which objects are visible in the current view is called Frustum Culling. Ideally, this should be performed by the CPU.
The way that the data is communicated is also very important, that's why the Khronos Group at some point realized that their OpenGL was too high-level and created Vulkan, a very low-level API for interoperating between CPU/GPU. Unfortunately, Steam character limit won’t allow us to go in depth, but you can read more about it here.
What we have been doing
Alright, now that we are in sync regarding how CPU and GPU need to communicate, let's talk about what already has been implemented in Shapez 2 to maximize the performance.
Game Object avoidance
We steered clear of Unity's Mono Behaviors for core components that demand high performance. Except for the UI, almost all of our systems are written without Unity components. This allows us to employ a better architecture following C# principles and have fine control over all aspects of the game, including the performance.
GPU instancing
In Unity, to draw geometry on the screen, draw calls are issued to the graphics API. A draw call tells the graphics API what to draw and how to draw it. Each draw call contains all the information the graphics API needs to draw on the screen, such as information about textures, shaders, and buffers. Less draw calls are better, as the GPU has less work to do and less switching to perform. One of the most important optimizations in the rendering of Shapez 2 is using the full potential of GPU instancing: grouping objects with the same mesh and shader in a single draw call.
In my assignment to enter tobspr, I was tasked to create a shader that would logically render many materials based on some mesh data. So I did, but In order to fully explore the potential of such a shader, I decided to run some tests comparing the performance of drawing Game Objects vs. batching all rendering in a single instanced draw call. For the test, I used 64×64×3 = 12k low-poly belts and the results were astonishing:
Material combination
Our buildings and space stations are composed by different materials:
Since each building might be composed using multiple materials, this would require multiple draw calls per building. To improve it, we combined all of them in a single shader. This allows us to have only one mesh for each building main part which is drawn with a single material, thus a single draw call. The material split is made inside the shader using the information of the UV0 channel, which encodes the material index per vertex data. Additional moving parts and effects need to be drawn separately.
Mesh combining
Having a shared material for all buildings reduces tremendously the number of draw calls, but it also provides the foundation for a very interesting optimization: mesh combination (also sometimes called mesh baking). At runtime, buildings on the same island are combined into a single batch dynamically. Since the material is unified and the mesh contains all buildings, we can render tons of buildings with the most varied materials in a single draw call.
The example below uses only two combined meshes to draw all of these buildings’ main components:
Level of Detail (LOD)
We take vertex count very seriously, even one extra vertex can become 300,000 extra ones when rendering very large factories. To support very detailed, yet scalable meshes, we created different meshes for each building in different levels of details. The model that is actually presented on the screen is calculated at runtime based on the camera distance.
What's the problem, then?
With all those optimizations, the rendering performance should be excellent, right? Well, it is, but we always want more. Better performance means bigger factories, more compatibility with older hardware and less hardware pressure. The question naturally becomes: what can be optimized next? So far, you might have recognized a pattern in the optimizations above: they are all targeted at optimizing the GPU rendering process. Less draw calls, less vertices, less context switching. Indeed, the hardest part of rendering is always focused on the GPU, and we’re getting very close to the scale we are aiming for. However, all of these techniques put further pressure on the CPU, which already needs to deal with the simulation part. As Tobias always says, each 0.1ms saved from the rendering will be well spent in the simulation, allowing for further complicated factories to run.
During development, we avoided using Unity components as they are generally not very performant. Core components have been written with performance in mind, employing several algorithmic optimizations to ensure everything runs smoothly. However, the code executed by the CPU is still written in C#. This comes with limitations on how performant it can be, as the language offers a trade-off between productivity and runtime performance.
The table below provides some insights about the performance of each language for single thread tests. The algorithm executed is the same, yet the time difference to execute it can be abysmal.
Unity is a beginner-friendly engine with a lot of features both to help you get started and for veterans to write very complicated systems. However, although there are many highly optimized systems and a high influx of new optimizations, the underlying structure was not created with performance in mind. During the past decade, the engine race was quite fierce between Unreal and Unity. Numerous debates over which one is the best one, forced Unity hand to take their lack of performance into consideration, thus yielding a completely new paradigm with a powerful tool belt to back it up: the Data Oriented Technology Stack (DOTS).
It was created with the slogan: “Performance by default” and since its impressive debut in Megacity (2019), has received dozens of improvements. DOTS is a combination of technologies and packages that delivers a data-oriented design approach to building games in Unity. Applying data-oriented design to a game’s architecture empowers game creators to scale processing in a highly performant manner. It is composed mainly by three technologies: ECS for Unity, Burst Compiler & C# Job System.
ECS is a data-oriented framework focused on structuring the code in a very different manner than traditional Object-Oriented (OO). Instead of mixing and matching data and implementation. As the name suggests, ECS has three main parts. Here’s an excerpt from Unity’s own documentation:
Entities — the entities, or things, that populate your game or program
Components — the data associated with your entities
Systems — the logic that transforms the component data from its current state to its next state
Inside the DOTS Infrastructure, ECS is powered by the mighty Burst Compiler: that translates IL/.NET byte code to highly optimized native code and the C# job system: which allows Unity developers to take advantage of multicore computing platforms with parallelized code that can run safely and at speed.
DOTS looks amazing on paper: a completely new approach to design your game with a clear division between data and logic that is also very efficient due to the contiguous nature of ECS and the underlying tools that back it up. In practice, however, using ECS on production was not advised until recently, since the package was still in development. It also comes with a heavy price to pay if your code is already written and although it is easier to maintain, the initial code creation can be much more challenging. For the last few years, the API changed dozens of times, many of these rendered previous implementations obsolete. A lot of core systems, such as physics, audio and multiplayer have also stayed in pre-release for the last couple of years. Using ECS for production was risky and not advised.
The good news is that the Burst Compiler and the Job System work independently of ECS, and we get to enjoy their performance benefits without the hassle of rewriting all of our codebase from scratch.
Burst Compiler
Burst operates within constraints and patterns that empower the compiler to perform much of the heavy-lifting. These are:
Limited C# Subset: Burst Compiler operates on a constrained subset of C# and does not support, by design, inefficient patterns.
No Garbage Collection: Manual memory management eliminates the need for garbage collection, reducing time spikes.
No References, Just Plain Data: Data is stored without references, facilitating faster memory access.
Adjacent Memory: Most jobs are written reading/writing to contiguous memory, making it possible to use vectorization (SIMD) and efficient use of CPU caches.
Parallelism with Job System: Enhanced parallel processing capabilities.
When all these factors combine, they can result in remarkable speed improvements of 30x to 300x in CPU processing. This means that for code that is highly independent, math-dependent, and data-focused, we can significantly enhance its performance.
In the game development realm, many games process everything in a single thread, not using the full potential of the processor. Here’s why:
It can be challenging to split the workload between multiple threads;
Most games are not coded with that in mind and have data dependencies everywhere;
Race conditions, deadlocks and complicated issues might arise
Most games do not have a lot of processing to do (generally the rendering is the performance culprit)
The Job system is Unity’s answer to all of these problems, providing a solution to take advantage of multicore computing platforms with parallelized code that can run safely and at speed.
Restrictions
The Burst Compiler and the Job System almost seem magical given the increase in performance they can provide. They come, however, with a hefty price to pay: it is way harder for your code to comply with them. A lot of constraints restrict how you should structure your code. In short, they do not support managed references. You need to stick with bare bones data-only structures and some pointers to help structure collections. And that's all you got. The benefit is that you can write very efficient code. If you are curious about what is allowed and what is not, here is an overview of what is supported by Burst:
❌ Arrays (T[])
✅ Unity Mathematics
❌ Managed types (classes)
✅ Unity Native Collections
❌ Anonymous functions*
✅ Structs
❌ Delegates
✅ Primitives (int, float, bool)
❌ Strings
✅ Pointers (IntPtr, T*)
❌ Char
✅ Pure static methods (no side effects, no
❌ Static data access
mutable data access)*
*ECS actually supports when defining systems that will execute on archetypes, but it is just syntax sugar, the lambda is converted down to a simple function
As shown, the Burst Compiler only accepts a very small subset of C# that feature-wise looks a lot like C. Furthermore, both Job System and the Burst Compiler do not accept references to managed code. To understand managed vs. unmanaged, it is crucial to first understand how the memory allocation works.
C# memory management
In the C# context, whenever you create a new instance of a class (and in many other circumstances), it allocates the class data in the heap to avoid loss. Once again, C# makes it easy for programmers because it implements a garbage collector.
On the other hand, if you use C# structs, the data is passed around on the stack by default. That means that using a struct, per se, does not allocate memory on the heap. When the function reaches its end, the data is automatically gone. The inconvenient part is that the programmer must guarantee that the data is properly copied between functions since it does not survive scope ending.
Managed vs. Unmanaged
With this in mind, we further refer to data allocated and disposed by C# simply as managed. This includes all instances where data is allocated in the heap. But what is unmanaged data, then? Well, it is not that this memory is not managed, it is just that it is not managed by the compiler. Instead of having the compiler solve it for us, the programmer becomes responsible for allocating and disposing it. Forgetting to dispose unmanaged memory will cause memory leakage. Premature disposal of it might invalid memory accesses and crashes. In Unity, this is done using a handful of DOTS extensions that are very similar to C's malloc and free functions.
It is important to note that unmanaged memory should not reference a managed one, as this can create a lot of issues with the garbage collection – and in general – with the C# memory management. In the Burst context, accessing managed references is not even allowed, forcing the programmer to rely on blittable structs and unmanaged memory.
Garbage collection
The garbage collector is a system component responsible for managing memory by reclaiming and deallocating memory that is no longer in use. It identifies and frees up memory occupied by objects or data structures that are no longer referenced by the program. This process helps prevent memory leaks and simplifies memory management for developers, as they don't need to manually release memory.
Garbage collection can introduce performance overhead compared to scenarios with manual memory management. It adds periodic pauses to a program's execution to identify and reclaim memory, which can result in unpredictable delays. These pauses can be especially problematic for real-time or performance-critical applications, causing jitter and latency issues.
How to render with DOTS?
The limitations on the Burst Compiler and Job System also requires no access to managed API, including most of the Unity systems. Game Objects? Nah. Physics? Think again. Graphics API? Big no. This created a big problem for us. We wanted to use DOTS to speed up the culling process, but without access to the graphics API, there was no way to actually submit the render commands to the GPU. One option was halting the main thread and waiting for the jobs to complete at the end of the frame. That did not yield any performance gains, though, as the overhead was too big for dispatching the jobs, waiting for their completion and submitting the computed data from managed code.
To properly solve it, we had to research how Megacity solved it back in the day. Luckily for us, not only is the API available, but also received a recent update in Unity 2022.2 that improved the usability. The Batch Renderer Group API was designed to be accessed by unmanaged/native code (DOTS compliant). The way it works is that at the end of each frame, the BRG generates draw commands that contain everything Unity needs to efficiently create optimized, instanced draw calls. As the developer, we can fill in that draw call information and specify exactly what we want to draw from within an unmanaged context. Meshes and materials are managed types that need to be worked around. In BRG, we register them during a managed context and assign a unique ID to them. This ID is just a type-safe structure holding an integer, allowing us to reference meshes and materials from within the unmanaged code.
Space Background Decorations
Now, as mentioned, writing code supported by the Job System and the Burst Compiler is harder than writing regular C# code. Both technologies can be considered recent and, although quite mature, we still approached the problem with caution. Instead of refactoring dozens of rendering classes and completely switching to Burst-compiled jobs, we opted for focusing our attention on a very isolated system: the background rendering. The background has no relation with the simulation and, except for the camera data, has no dependency with any other class. That provided us the perfect experimenting backyard where we could test the power of DOTS without the massive amount of work required to implement it everywhere. Bonus: the background rendering was using quite a lot of the CPU, and optimizing it yielded good results in many setups being bottlenecked by the processor.
More specifically, we focused on the background rendering of the chunked decorations, because they are dynamically generated based on where the player is looking. There is a lot of optimization that could be made algorithmically to improve the decorations, but we kept them the same to analyze how impactful using DOTS could be. The decorations are generated based on noise the first time they are discovered and cached for future queries.
The Batch Renderer Group has several interesting features that might fit a lot of games well:
Persistent GPU
Scriptable layout
DOTS instancing shader variant
Compatible with DOTS
Evidently, for us, the compatibility with Jobs & the Burst Compiler was the captivating factor, but the BRG offers something for many projects. For example, the persistent GPU offers a pipeline similar to Unreal Engine, where data is uploaded to the GPU once and updated sparsely. This avoids having tons of data to wire between the CPU and the Graphics card. In Shapez 2, we don’t have static geometry (like most games have), except for the main HUB. We actually upload instance data every frame to the GPU. The new scriptable metadata layout allows customizing exactly which data is passed to each instance. For the decorations, we keep the data to a minimum to reduce the amount of data uploaded to the graphics card.
To understand how the improvement works, here’s a breakdown for a simple scene without many buildings using the previous solution. By inspecting the Profiler data closely, it is possible to check that the main CPU loop (the left side) takes most of its time culling the decorations (Draw Managed Background Particles / Asteroids / Stars). Only after they all finish, the data submitted to the GPU can start being processed.
The main change we implemented is running the decorations culling using burst compiled jobs. These jobs are scheduled as soon as we have the camera data information (the only data the decorations need to be culled). While the main thread is busy processing the inputs, simulation and other rendering, the jobs execute concurrently as can be seen in the image below:
The jobs are much faster than their original managed counterpart, but even if they weren’t, we would see improvements due to the parallelism. When the main thread is done with the other tasks, the decorations are already culled and everything is ready to be dispatched to the GPU. In these example frames, the CPU time reduced from 9.21ms to 2.35ms, halving the total frame time. There are many optimizations missing for the jobs that would make them run even faster:
Due to the nature of a culling algorithm, vectorizing the code is very challenging, but we believe a part of it could still benefit from the AVX set;
You can see that each decoration is culled sequentially in a single thread. Each decoration could dispatch one job per thread, or the jobs could be scheduled to run at the same time. For higher numbers of cores, both could be combined to achieve even more parallelism.
Mesh combiner
Besides the background, one of our highest bottlenecks comes from combining meshes. As mentioned earlier, combining meshes at runtime reduces a lot of pressure on the GPU, which can draw many buildings with many materials in a single draw call. The mesh combination process, however, needs to be processed by the CPU. In order to reduce the pressure on the processor, a new mesh combination system was written using the Job System and Burst Compiler. The goal was creating a system that could handle combination requests from both managed and unmanaged code, while the combination itself would be performed in a job to reduce the amount of work the main thread has to do.
In-game results
The FPS improvements we have seen in most systems are very exciting, but the individual performance improvements are even more. Before we dive into the numbers, let me quickly explain the difference between the cached and uncached tests: since the decorations are created dynamically based on the seen chunks and the map is infinite, there is no way to bake all the decorations beforehand. Whenever a chunk is seen for the first time, the decoration for that chunk is generated from noise and cached for further lookups. One issue in the previous version was that turning the camera fast and discovering many new chunks at the same time would cause a huge spike in the frame time. It would also generate a lot of memory garbage to be collected. This is not a problem anymore with the new solution, as it can handle the generation much faster.
Disclaimer: these tests are not averaged. They are a representative average frame manually sampled from the profiling pool. Tests are using an i3-9100F & RTX 3060 Ti.
For the average case, the performance is increased by 6x. However, since it is running in parallel, the effective benefit we see is 28x faster culling. This only holds true if the jobs finish before the main thread, which requires the main thread to be busy and the other threads not so much. Further improvements will need to consider balancing what is processed where. The more tasks we move to other threads, the less impactful these changes are.
Now, looking at the uncached case, which is the one that requires more from the CPU, we can see that for generating new chunks both scenarios struggle more than with cached data. While the original one drops the FPS substantially, the Burst version still delivers runtime acceptable performance. Most of the jobs’ time was used in the lazy mesh combination. The combination still requires some improvements on the managed side (some balancing), but some delay is expected (something close to 0.5ms per frame that fetches mesh data). If we schedule one per frame, it’s not an issue, but the meshes might take too long to bake. That's why we need some smart balancing.
These results should give you a rough idea: 30x – 120x improvements in the main thread. 6x – 114x overall. Now, let’s also check the memory improvements and the actual FPS improvements in-game.
From the benchmark, you can see that the average FPS improved. The 1% however, was the most affected metric, highlighting that the new version should handle processing spikes much better.
Now what?
Eventually we will reach the limit of what we can do to optimize the factories, but we are still not there yet. The next steps are more challenging, but we have some optimizations prepared. The first step is moving all the mesh combinations from managed to unmanaged code. This is easier said than done. To fully support it, there is an incoming headache of standardizing the vertex layout formatting or solve it generically, balancing problems to figure out and more optimizations to research regarding using the main thread for computing.
Besides it, we have many checks and benchmarks aligned to make sure everything is compliant with the performance standards we established. After this is done, ideally, we would like to move the whole rendering to burst compiled jobs, but that is a complicated task that involves lots of refactorings, structural changes and many Unity crashes to go.
You can see it for yourself! Starting from Alpha 8, we also created a new benchmarks' menu, which can be used to evaluate the performance running the exact same scenario with multiple configurations.
Please let us know if you also benefited from the changes. Hurry up, they will probably get removed in Alpha 11
So, that's about everything! We hope you enjoyed this deep dive, and we'll see you again in two weeks.
It’s time for another progression blog. These past two weeks were all about visual improvements to the shapes, building and various menus & UI!
As per usual, make sure you wishlist shapez 2 here on Steam to support the development of the game! Following the game will also make sure you stay up to date with the latest news. Thanks!
Since Devlog 008, we have released two new Alphas! Patreon Supporters gained access to Alpha 9 last week, with all-new progression, research UI, new visuals, massive performance improvements and much more! If you’d like to get your hands on the latest Alpha version, consider supporting us on Patreon.
Devlog 010
So, what have we been working on the past month? Let’s talk you through the highlights.
Visual update to shape designs
We made a couple of changes to the general look of all shapes in the game. The sides of shapes are now solid black and the height of every layer has been lowered. This will make shapes with many layers a lot less tall and clunky than before.
Be sure to let us know what you think about these changes!
Progression Rework
We have completely reworked the progression of the entire game. We swapped around the Halves Swapper and the Stacker, as we found that the Halves Swapper was too complicated to be unlocked that early into the game. While we were working on this change, we figured it was a good time to look at the rest of the progression. We got a ton of feedback from the community on the progression system, so we made a lot of changes to the later stages of the game especially. We hope that the newly reworked progression system will feel more natural than the previous one. Patreons can experience the new progression in Alpha 9.
Building design updates
Stackers have been updated to be more of a challenge to use. The old design, with the input on one side and the output on the opposite end, had one very clear, obvious and quite boring optimal setup that everyone would use.
The new design has the output at a 90 degree angle compared to the input, either on the left or the right. This will make Stackers a bit more tricky to use, and allows for multiple different solutions to the problem.
We also made stackers faster to keep optimal designs similarly compact even with the added space for creative problem solving: now instead of needing 5 Stackers per full belt, you will only need 4!
All variants of the Rotator building have updated design concepts to more clearly display their use.
Half Cutters have been renamed to Half Destroyers to more accurately reflect their functionality. Their design has had a big update, featuring a fancy laser beam of destruction.
Additionally, the Full Painter building has been updated with a new design concept.
Skill Academy
We added what we call the ‘Skill Academy’. Essentially, these are tips that appear in the top left corner to guide new players through the early stages of the game. This is not the tutorial, but should help prevent confusion when players are new to shapez or factory building games as a whole. These can be toggled off, if desired.
Speaking of the tutorial, you'll also spot the "First Steps" section. This is, in fact, the tutorial. It will guide you through the early sections of the game while you're playing, by giving you pointers to what things are what exactly is expected from you while playing Shapes 2.
UI updates
A lot of screens got various degrees of updates. The research screen got a reworked concept, and should now more clearly show what you can unlock, when you unlock them, and how you unlock them. The progression system has also received an update, with side goals that are unlocked once reaching a specific main goal.
The research unlock screen got updated to display the new tools you unlocked and how they work. The current visual of the unlocked tool is a placeholder.
The in-game shape viewer has had an update to make the shape code editable, allowing you to view any shape you want. Hours of entertainment guaranteed!
Finally, we gave the building and island toolbars a fresh lick of paint for better readability.
We would love your feedback on all these UI updates, so let us know what you think!
Blueprinting
Blueprints have received a big update in two parts. Now, when selecting one or more space stations, you’ll get an overview of all buildings and connections, as well as the total cost of everything that’s placed on or connected to them. You’ll also get a more in-depth overview that breaks down the amounts for each type of building.
The second big update lets you copy, cut, rotate and paste your selection of space stations. This means you’ll be able to grow the factory faster than ever and increase your throughput with just a few clicks, as long as you have the resources!
You can accumulate more blueprint resources by delivering shapes of completed research.
Performance Improvements
We made big strides when it comes to performance! Below, you can watch a showcase of what it's like playing on a Macbook M1 Pro at 4K. This save features 540.000 buildings.
Of course, the FPS isn't the greatest, but these machines aren't really made for games. You would already hit 60 FPS on modern machines. Shapez 1 would already run at 1 FPS under these circumstances.
We still have a lot more performance improvements planned, so the game will run even better when we enter Early Access. Rest assured that we work very hard to make this game playable on as many machines as possible!
Various other changes
The procedural map generation has been improved. You should now come across more interesting shapes to work with. The nodes remain placeholders for now.
The Overview Mode view for these resource nodes has also had a visual update!
Tunnels can now be set to automatically place tunnels connection your space station.
We added a new concept design for the 1x1 Shape Miner platform. Just look at this little guy go!
We continue our work on trains and will soon be ready to do a deep dive into how exactly they will work and what you can do with them.
Additional mouse and keyboard settings have been added to the settings menu, allowing you to set your horizontal and vertical mouse sensitivity, as well as the keyboard camera movement speed. It goes up quite a lot, in case time is of the essence.
That’s everything for this blog. Let us know if you like what you’re seeing! The next blog will go more in-depth again, so on the lookout for that one dropping in two weeks.
Again, please consider wishlisting the game if you haven’t yet!
While we are currently super busy working on Shapez 2, we have partnered with Prismatika & Playdigious to bring shapez 1 to mobile devices!
Shapez Mobile will release on December 5th on iOS and Android.
Be sure to pre-register so you get a notification when it releases (You can also just search for "shapez" on the app store):
You will be able to play the first 7 levels for free, and then you can unlock the full game until level 20 for a price of $4.99, with a 10% launch discount!
The game will be feature par with the desktop version until level 20, so basically everything except wires. Cross platform saves will not be supported on launch unfortunately - but let us know if this is a feature you'd like to see!
We’re working on a new shape type that’s coming to shapez 2: Crystals. These crystals will massively shake up the endgame and come with a couple of handling instructions.
Before we get into it, be sure to wishlist shapez 2 if you haven’t already! It really helps us out with the release of the game.
While we’re still in the early development stages of crystals, we would like to walk you through how they work and our vision for the mechanic. Be sure to let us know what you think!
Please keep in mind that the current visuals for the crystals are placeholders and will be changed before early access.
What are crystals?
Crystals are a brand new shape type you will encounter in the final stages of the game. They’re pieces of solidified colored paint that are quite brittle in nature and should be handled with care. This fragility means crystals come with their own set of rules and mechanics, which will shake up the production order you’re used to and provide greater depth and diversity when it comes to producing shapes.
You'll come across the basics of crystals in the final milestones of the game. The more complex crystal milestones will be an optional challenge for those who dare.
Creating crystals
Crystals are created using the Crystal Generator, a machine that will turn any paint you pipe into it into a hardened shape. The shape the crystal takes on depends on what you use as a mold: the Crystal Generator will fill up any empty spaces – including supports – of the shape you send through the machine up to the uppermost layer of the shape.
Doesn’t matter if you’re a bit square or a star – as long as the space is occupied by any shape, even other crystals, the Crystal Generator will not pour paint into it. Additionally, crystal isn’t any specific shape, like a circle or a square, and cannot be painted after hardening. It’s 100% solid ‘crystal’ with the color of the paint you used to create it.
Handle with care
The tricky thing with crystals is their aforementioned fragility; if you’re not careful with them, they’ll shatter into millions of incredibly tiny shapes, unfit for production. That’s to say, they break and disappear.
So, when it comes to keeping these crystals intact, there are two rules to keep in mind:
1. Separating (cutting, swapping) two or more connected crystal parts will cause all adjacent crystals to shatter. Crystals can be safely separated from normal shapes (molds), however.
To help you determine when two crystals are connected, here is the code:
2. Dropping crystals on top of another shape using a Stacker will cause the dropped crystals to shatter. Shapes can be safely dropped on top of crystals, however.
A brand new challenge
The inclusion of crystals will seriously change up the way you need to think about creating shapes. It essentially inverts your production; instead of directly producing the shape you need, you need to produce the exact opposite and leave the spaces you want the paint to harden in unoccupied. The molds themselves could be considered an intermediate-level shape goal, with parts that can either be discarded or reused continuously.
Considering the fragility of crystals, it’s wise to delay the inclusion of crystals in your production chain as long as possible. Prepare everything you can, produce the ideal mold for the crystal shape goal you need, and only pour the paint after everything else is done.
If your shape goal only requires one color of crystals, you will only need one mold. However, if multiple colors of crystals are required, you’ll need one mold for every color and pour the paint in stages. Once all the different crystal components have been poured, combine the crystals using a half swapper, for example. Just remember: do not separate or drop crystals!
That’s all we have to share on crystals for now. This mechanic is still in early development, so be sure to let us know your thoughts on this addition! You can join the discussion on the shapez 2 Discord server.
If you like what you see, be sure to wishlist shapez 2 to support the game and stay up to date with development!
It’s been a little while since the last devlog. We’ve been very busy with the Gameplay Reveal trailer from two weeks ago, which was then followed up by Gamescom.
However, we’re back now! So let’s discuss what we’ve been working on since devlog 007.
News
As previously mentioned, we finally released the Gameplay Reveal Trailer for shapez 2! Thank you to everyone who joined us for the premiere and supported the trailer.
In case you missed it, you can find the trailer here:
If that got you as excited as we are, be sure to wishlist the game and follow shapez 2 to stay up to date with the news!
The astute among you may have noticed a second logo at the end of the trailer. We are working with Gamera Games – who you may know from Dyson Sphere Program – to publish the game in Greater China & Japan. They will also handle the Simplified Chinese translations for our announcements and devlogs!
Additionally, we have enlisted the help of Game Drive, a games marketing agency. As we’re moving ever closer to the Early Access release next year, marketing becomes more and more important for the growth of the game, so we need some extra manpower!
Alpha 7 Build
Alpha 7.4 of shapez 2 is currently available on our Patreon and has been for a bit. A lot of the changes you’ll read about below have already been implemented in this build. If you’re interested in giving this new build a go, be sure to subscribe to our Patreon to get access, alongside a host of other great benefits!
Devlog 008
So with all that out of the way, let’s dive into the new devlog.
Rendering & graphical performance
After watching the trailer, a lot of you had questions about the performance of the game. Once you really got going in shapez 1 and made a huge factory, or made a make-everything-machine or two, the simulation could start to lag quite badly. So understandably, when people saw the graphical uplift of shapez 2, people assumed this would make things worse. Well, fret not!
Unlike Shapez 1, Shapez 2 is made in Unity with C#. This gives us a lot more tools to optimise the simulation and prevent unnecessary use of your system’s resources. One of the changes is that the game now supports multi-threaded processing, so the simulation and the game won’t run on just one of your CPU’s cores. The biggest change however, is how we handle off-screen simulation. Instead of just fully simulating everything in your factory at all times, we’re limiting the simulation of the portion of your factory that isn’t currently on your screen to just 2 times a second – down from the full 60 times a second – while still running at full precision. You won’t notice a mechanical or visual difference at all. However, it’ll make sure the simulation runs smoothly regardless of the size of your factory.
We stress tested this system on a mega factory of 360.000+ buildings and it works great. In fact, you saw this very factory in the trailer! Our goal here is to allow for about 1 million buildings on a modern PC build for the release of the game.
Do keep in mind that the massively improved graphics will mean you most likely won’t be able to sneakily play Shapez 2 on the school computer as you could (and we know you did) with shapez.io. You will require a bit more computing power to run this at a smooth frame rate; without any tweaking of the settings, that is!
To counteract the increased resource demand of the game somewhat, there will be a host of graphical options to tinker with, alongside a ‘minimal mode’. This mode will reduce the visuals to an absolute minimum and allows Shapez 2 to be played on laptops. This mode has been tested on a Microsoft Surface Pro and runs fine!
Exact minimum and recommended system requirements are to be determined and published closer to the release of the game. If you want to give it a try right now though, be sure to download the free alpha version through our Discord server! As the game still has a lot of optimisation to go in its current state, it’s safe to say that if your PC runs Alpha well, it will be able to run it in the future.
Trains progress
We know you’re excited for space trains, and we’re working hard to make them a reality. You’ve seen them in action in the trailer, so you’ll have a good idea of the vision we have for them. Do keep in mind that the trains are still subject to change.
However, a lot of work still needs to be done to make trains fully operational, but we’re on track to have the trains depart for Early Access next year. We hope to do a devlog dedicated to trains in the future, once they’re finalised.
Barreling
In devlog 006, we introduced you to the world of fluids. One of the topics we addressed here was fluid packing and cross-island transport. As there’s no way of moving fluids directly between islands, you’d need to produce barrels to keep the fluid in, fill the barrels, then move it by your preferred mode of transportation. Once at your destination, you’d empty the barrels and pump the fluid back into your pipe system.
We feel like the process of producing barrels didn’t quite fit. Having to deliver shapes somewhere to produce the barrels made fluids a hassle to use. It didn’t add anything interesting to the mechanics, just more tedium.
Instead, the Fluid Packer building will take the fluid and ‘freezes’ it into blocks that can be transported however you wish.
Auto pinning side goals
As the side goals are very important for your progression through the game, we want to make them a bit more prominent. Now, side goals are automatically pinned if you produce the shape they require.
We will continue working on the early game and research experience and are planning to add a full tutorial.
Visualisation layers in overview mode
We added brand new visualisation layers to the overview mode. You watch a neat little demonstration here:
The layers now include:
Islands grid
Shape Patches
Fluid Resources
Shapes
Explored Areas & islands
Tunnels
Train Items
Train Lines
Train Stations
You can enable multiple layers at once, or even all at once if you hate being able to see what you’re doing.
Island selection toolbar
We added a new Island Selection toolbar, allowing for quick and easy access to the different types of islands you can place. You’ll also be able to select multiple islands and delete them all at once. It’s easy to accidentally delete a lot this way, but don’t worry, you can undo everything if you mess up.
Packer Building
We’ve been working with the Packer and Unpacker buildings. The Packer building allows you to stack many shapes of the same type and color and pack them into one item. The Unpacker, as you may expect, does the opposite.
The main purpose for these packs is to transport the shapes via train. Pack the shapes, insert the packs into a train, remove the packs from the train, then unpack everything again. It’s also great for massively increasing the throughput on a belt, as long as you have enough Packers. Details on how this building will work together with trains, will come in the devlog dedicated to trains.
Graphical Improvements
A lot of time has been spent on improving the graphics of the game across the board. Improvements have been made to the materials of the Space Station, all buildings, the playing field as well as global lighting effects. We hope you liked what you saw in the trailer!
One of the main improvements we’ve been working on is LOD (Level of Detail). For those who don’t know, a common technique to increase performance is to lower the LOD of models that are far away from the camera. This technique is especially important to make the game run smoothly when zoomed out, like in Overview mode.
We don’t want the decrease in LOD to look jarring when you zoom out though, so we’re trying our best to make this look smooth and as unnoticeable as possible. This is done by having multiple stages of LOD, so the transition from one LOD to the next isn’t as big. We’re also fading out the shadows now, instead of simply removing them.
Now, we’re finally caught up! Again, apologies for the lack of devlogs lately. Now that the trailer is out and we have some reinforcements, we hope to bring you new devlogs every other week.
If you’d like to support the game, please wishlist the game here on Steam and follow the Shapez 2 page if you’re not already. It really does help us out a lot.
Shapez 2 is all about building the biggest shape-producing mega-factory you could imagine. With the infinite canvas of space to exploit, it’s up to you to create a machine that can extract, cut, paint and assemble the shapes you need to progress and grow your factory. Start off with the humble gray circle and work your way up towards increasingly more complex shapes while unlocking new machines, upgrades and modes of transport along the way.
You can play shapez 2 however you like! Make a spaghetti belt factory even you no longer understand, or optimize every little detail in the production process. Make one big mega-factory, or split the production chain across multiple smaller factories that you connect by space trains. There’s no threat of alien invasion or worse: running out of resources. Take your time, experiment and build a factory you can truly be proud of!
Thank you for your support
Whether you’ve been with us from the early days of shapez.io or are only passing by just now, we thank you for the time and support we’ve received over the past couple of months and years. We owe much to the community, and without you, shapez 2 simply wouldn’t be possible.
Help us test the game
Eager to give the game a go? You can join our Discord server to access the public build of shapez 2 and give us feedback on the gameplay and the stability of the game. If you’d like to support us early, head over to our Patreon! Patreon supporters get access to the latest alpha build whenever a new one releases. Together, we hope to bring the Early Access of shapez 2 to you in 2024 in the best possible shape it could be.
Be sure to wishlist shapez 2 on Steam! Indie games like shapez 2 heavily rely on wishlisting to reach a broader player base. We’d really appreciate your support, and you’ll be kept up to date with news about the game!