
Hello, this is the Troubleshooter development team.
We hope you are doing well.
Meanwhile, we spent the last four months solving various problems that we encountered while developing new functions for our sequel.
We faced many unexpected challenges, each one demanding and exhausting to resolve.
Nevertheless, we are trying our best, step by step, to present you with another amazing adventure.
In this post, we’d like to share what we’ve been working on over the past four months.
In our last post, we revealed 5 of our main casts - Ari, Hannah, Azul, Faye, and Claudia.
And now, we have finished the other 6 characters, including their own background and story.
With this,『Troubleshooter: Banished Children』will present the story of 11 main characters.

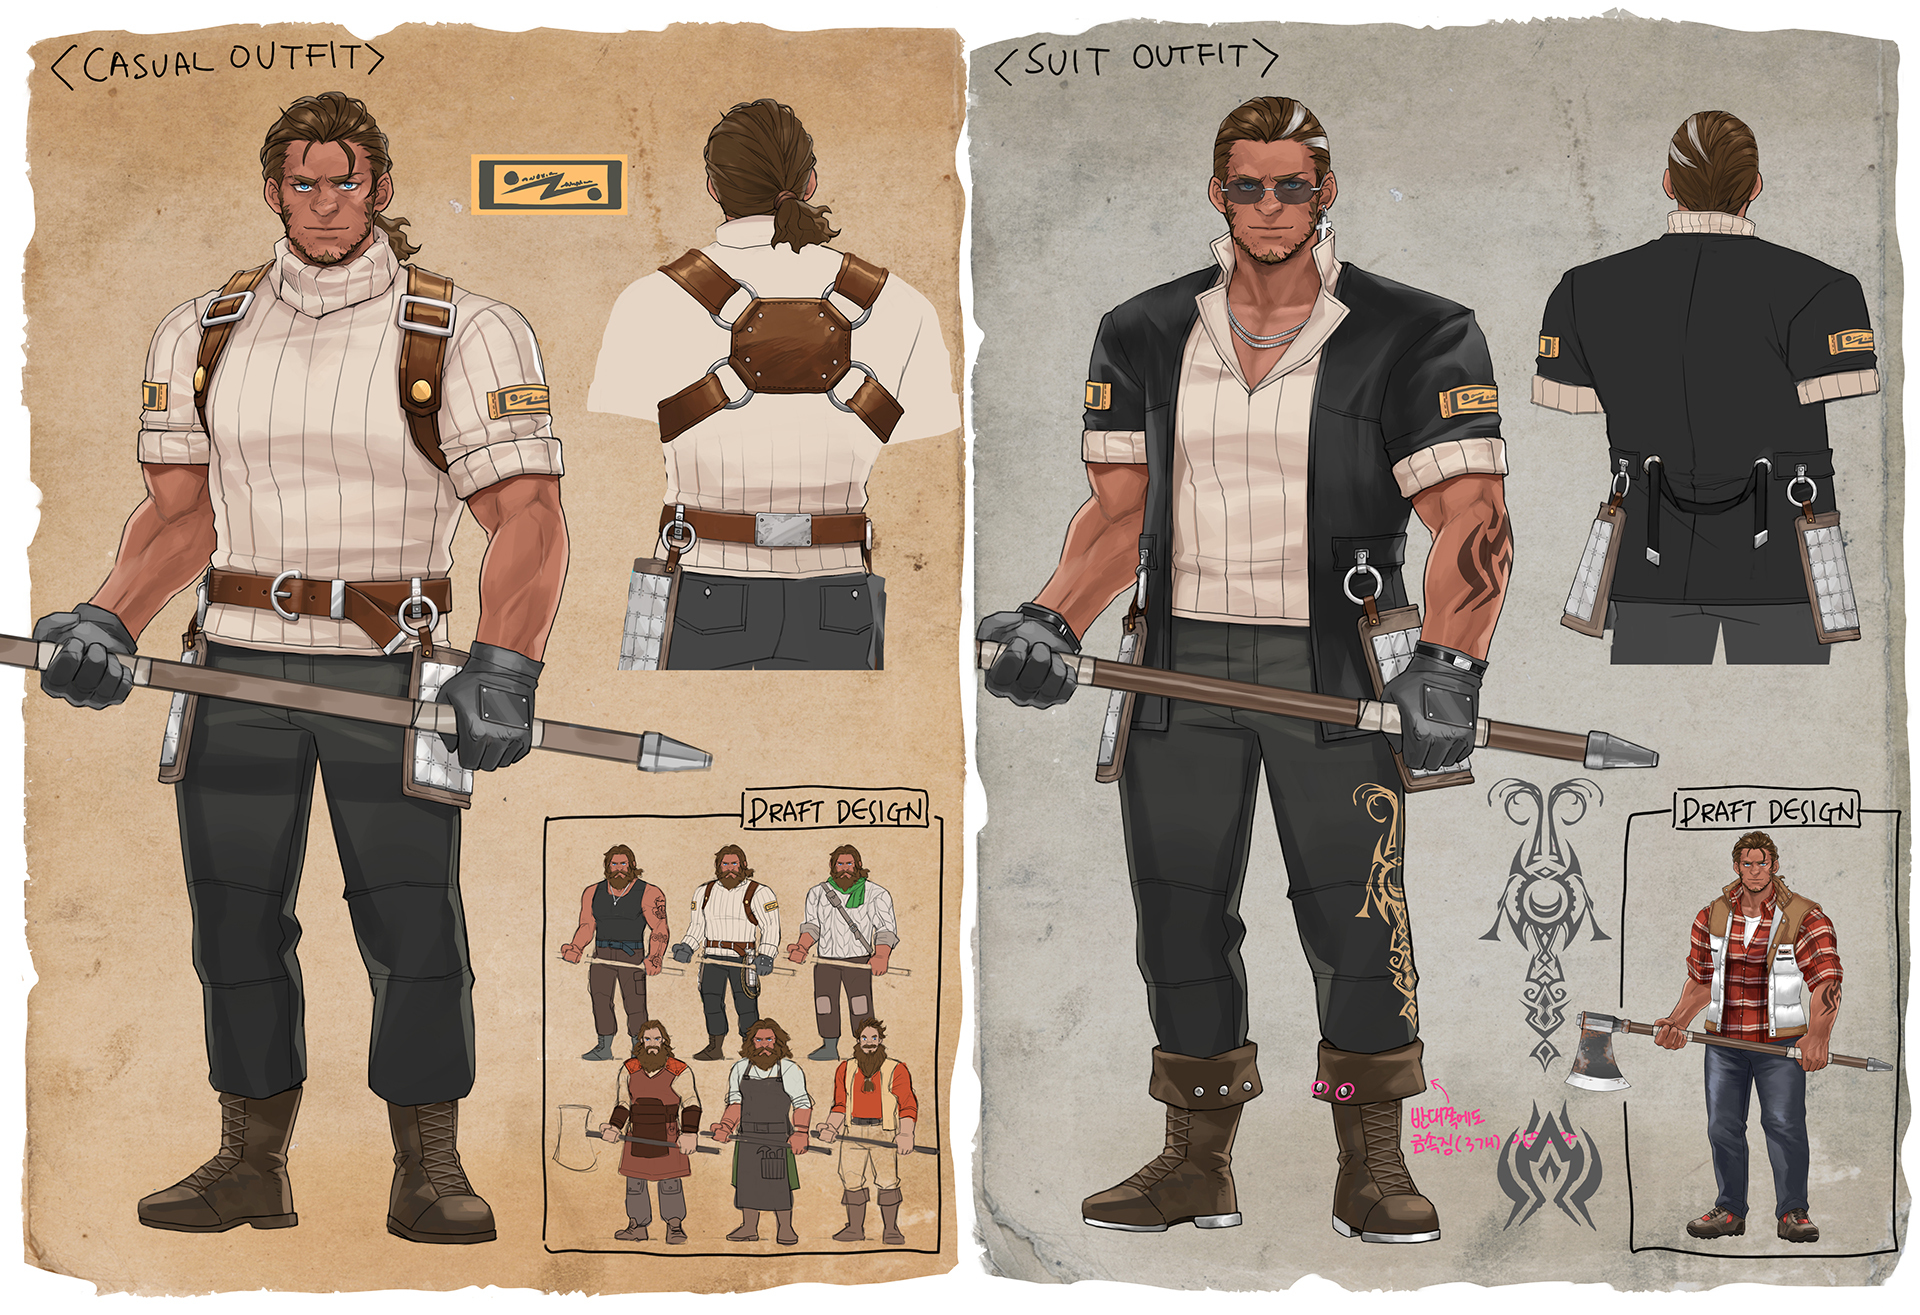
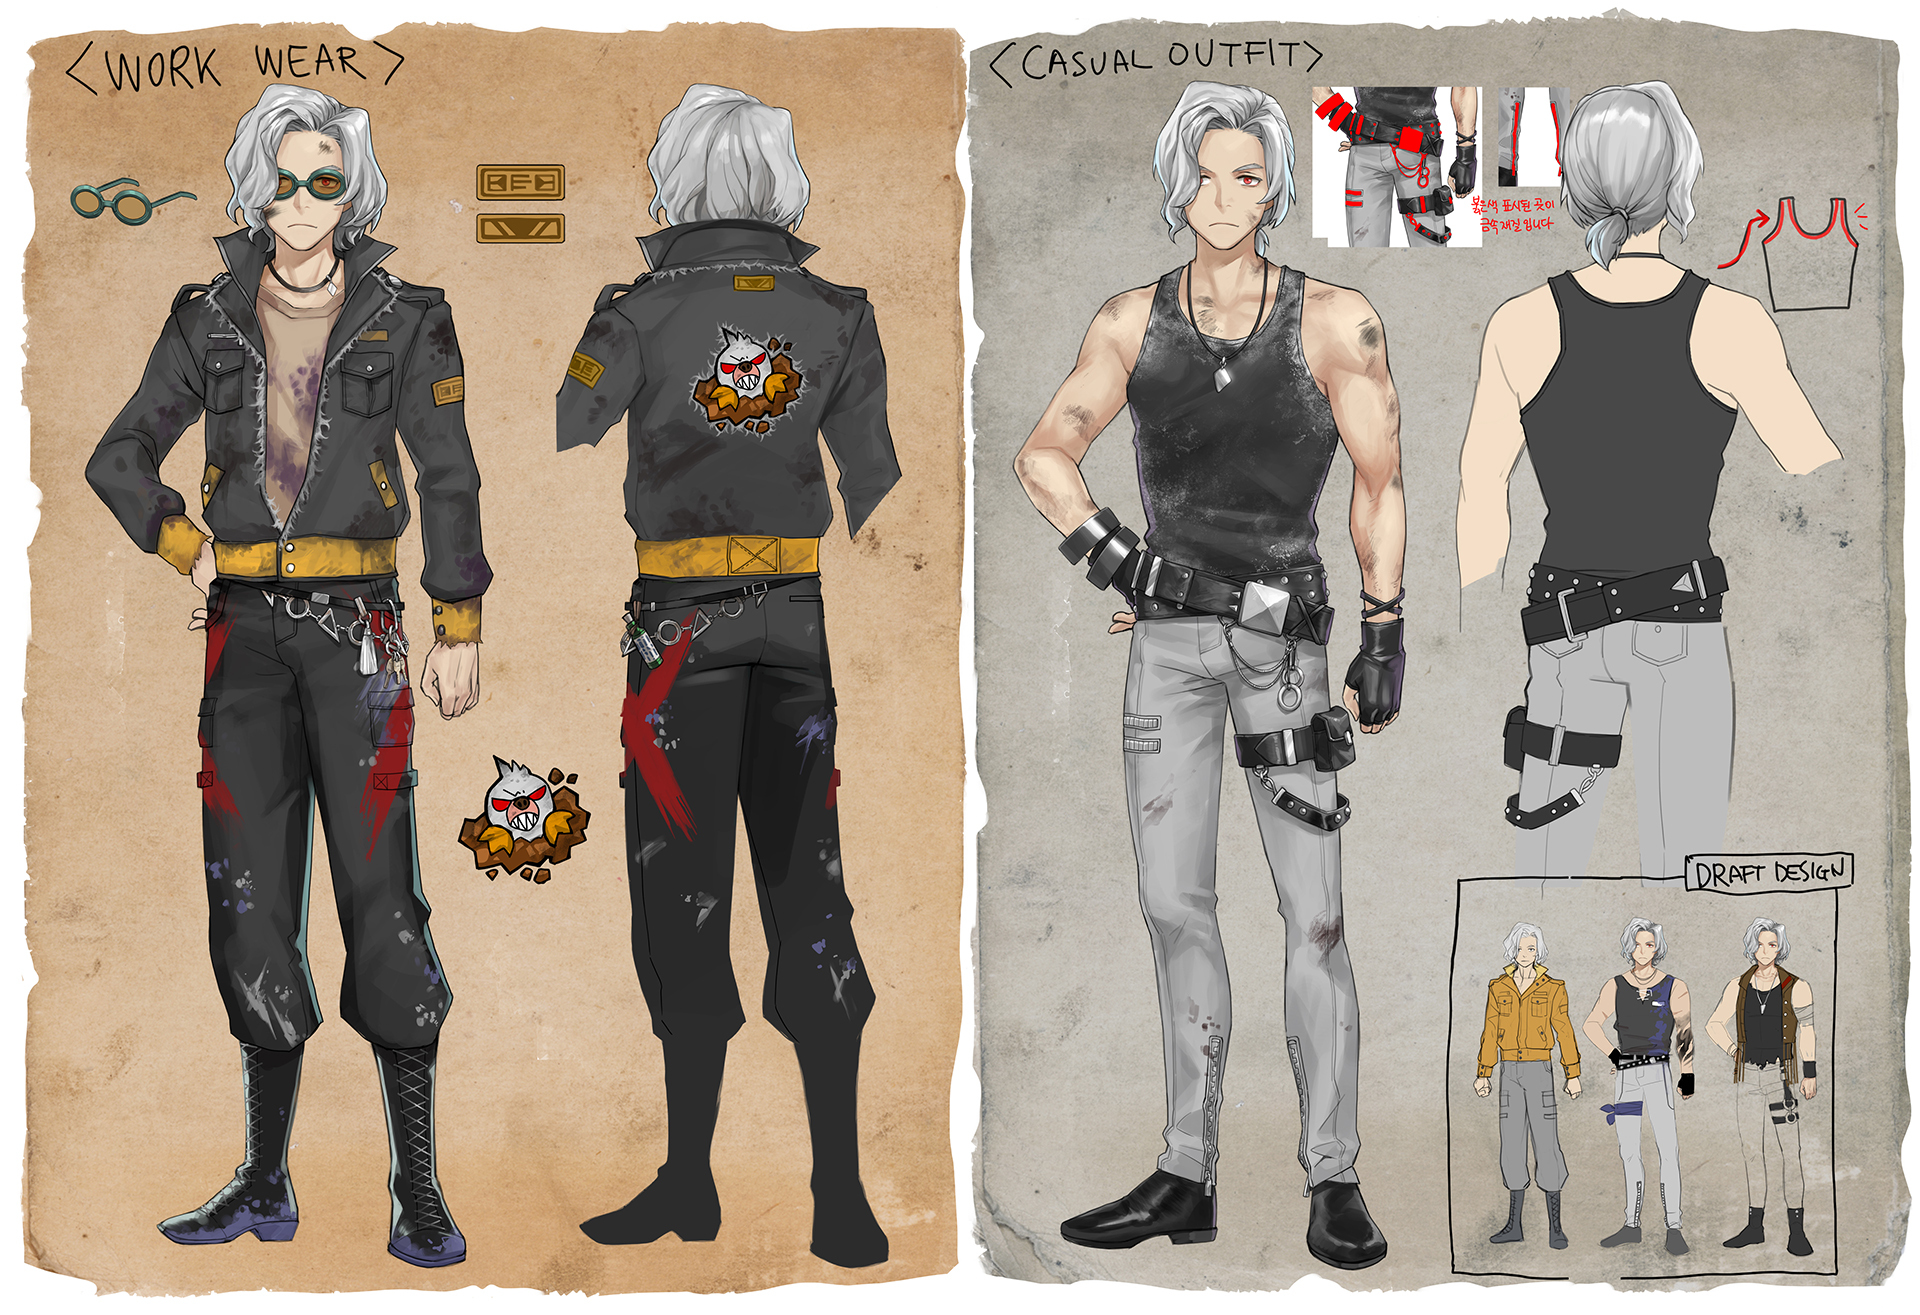
Gravis spends his day wearing only a knit turtleneck shirt, even in harsh weather…
...just because ‘he’s too tired to layer up’.
However, when he goes to get some goods, he slicks back his hair, highlights it, and wears fancy trousers with a dark-colored jacket.
Because he believes that people won’t look down on him if he looks like this.
Ari, while looking at him, always thinks.
“It won’t make any difference.”
Since he already looks so intimidating with his physique.

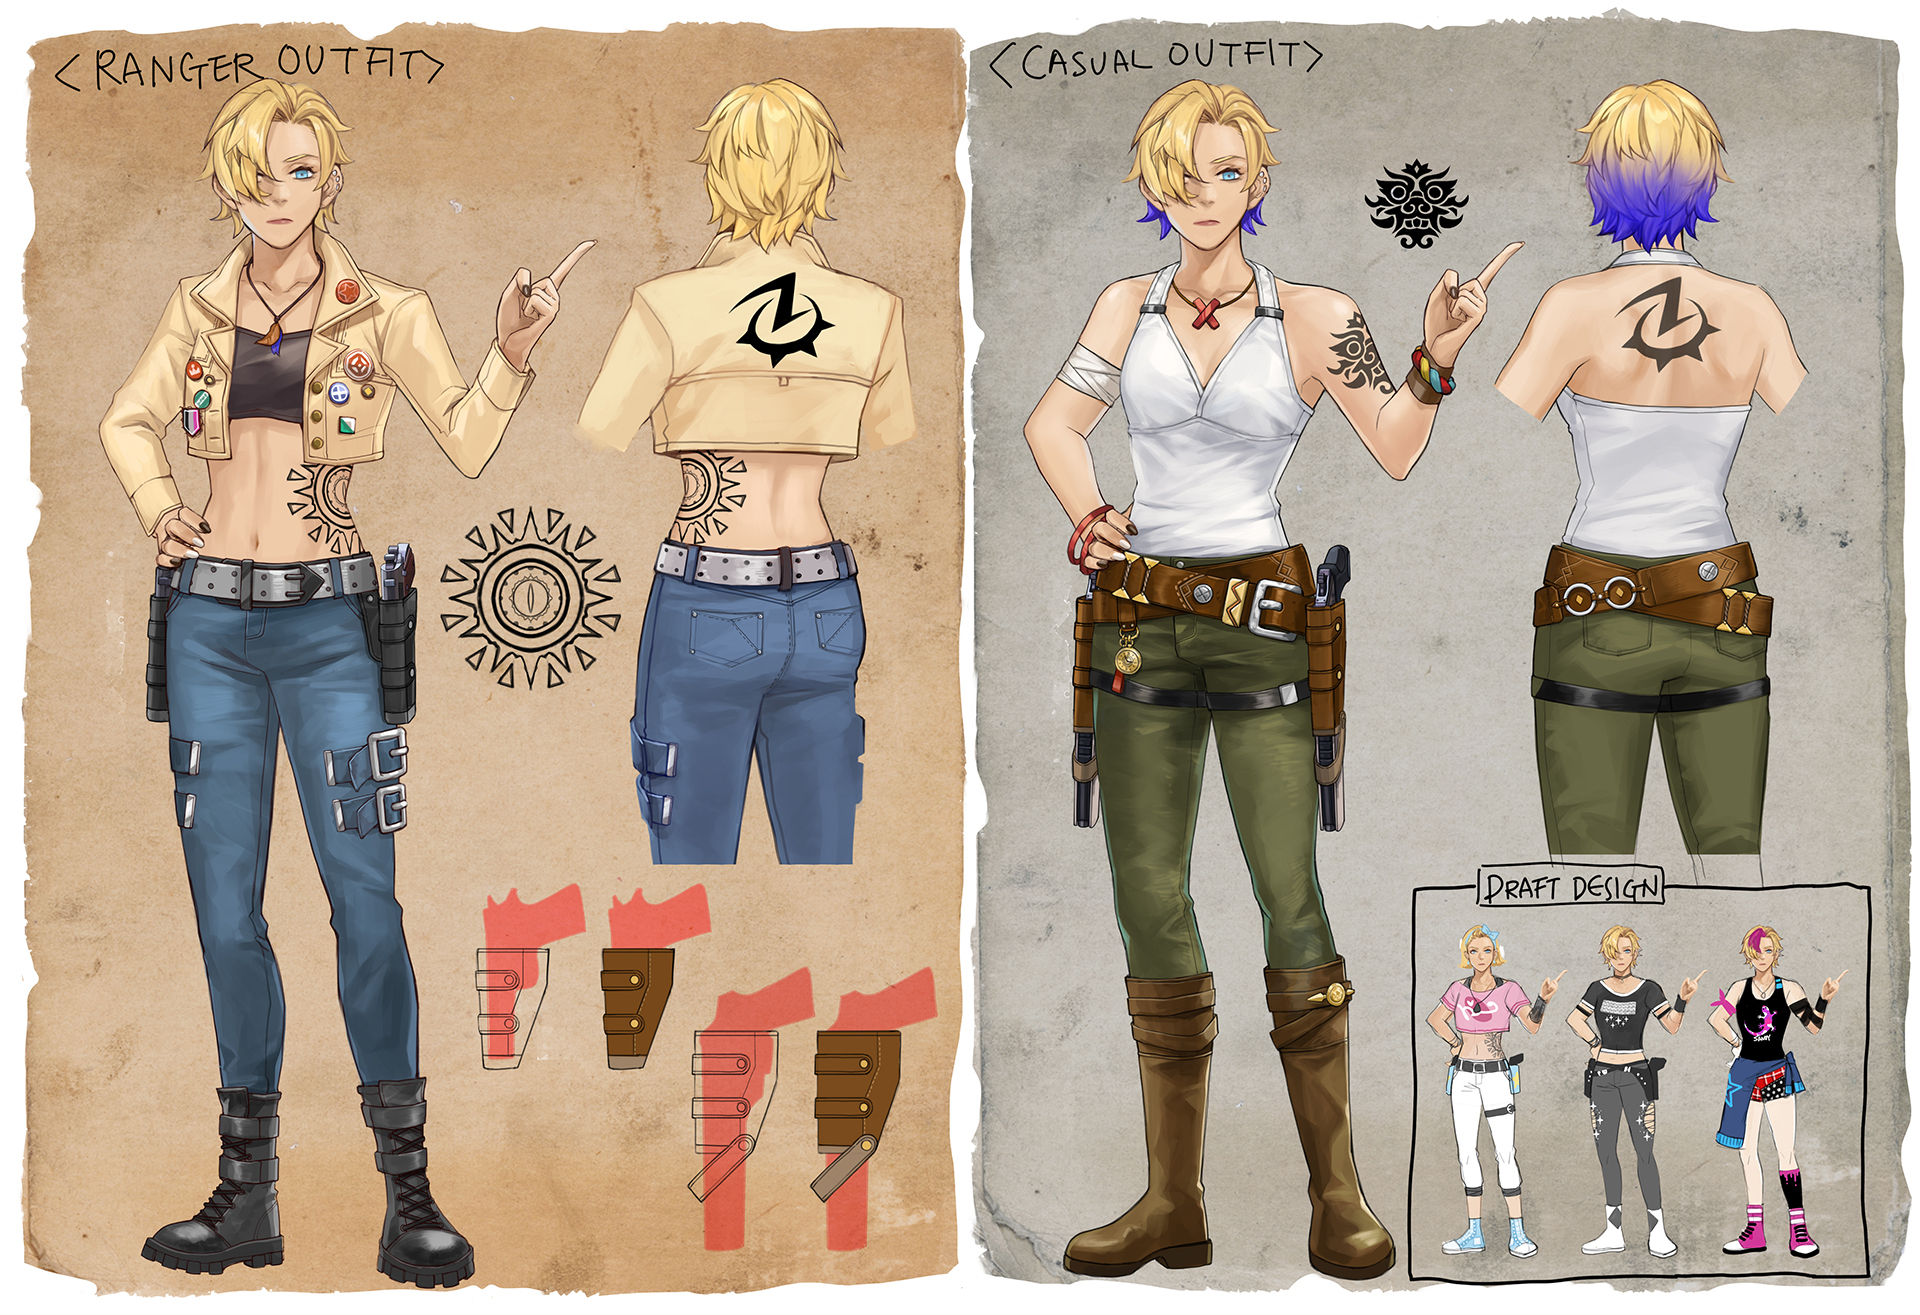
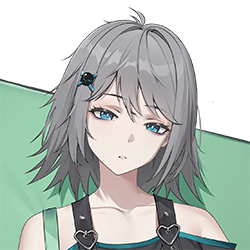
As a former lawyer, Tyra felt deep disappointment in the law and authority while witnessing the corrupted ‘justice’ of Valhalla.
The day her client was imprisoned by false accusation, she clipped her hair that she had grown since she was a child, and threw away all the expensive suits and shoes she had. That was the day she abandoned her career as a lawyer and became a Troubleshooter.
As a Troubleshooter, she now wears cropped jackets with innerwear that she never tried when she was a lawyer, and wears sturdy leather boots instead of luxury shoes. As a lawyer, she had to hide her true self behind formal suits, but now she puts on badges that represent various organizations she believes in.
It’s the same for her casual look. For Tyra, fashion is more than just clothes to wear, but an expression of her rebel spirit to society.

Reed spent a lot of time finding valuable things in scrap. There are paint stains on his work suit that can’t be removed with ordinary washing, and the frayed hems show signs of wear and tear.
His colleagues recommend that he buy a new one, but he thinks that it is not necessary, since it will get dirty soon. As long as it doesn't smell too bad, he's content.
Indeed, he knows that one day he has to change his suit again. Usually, he wears more casual clothes.

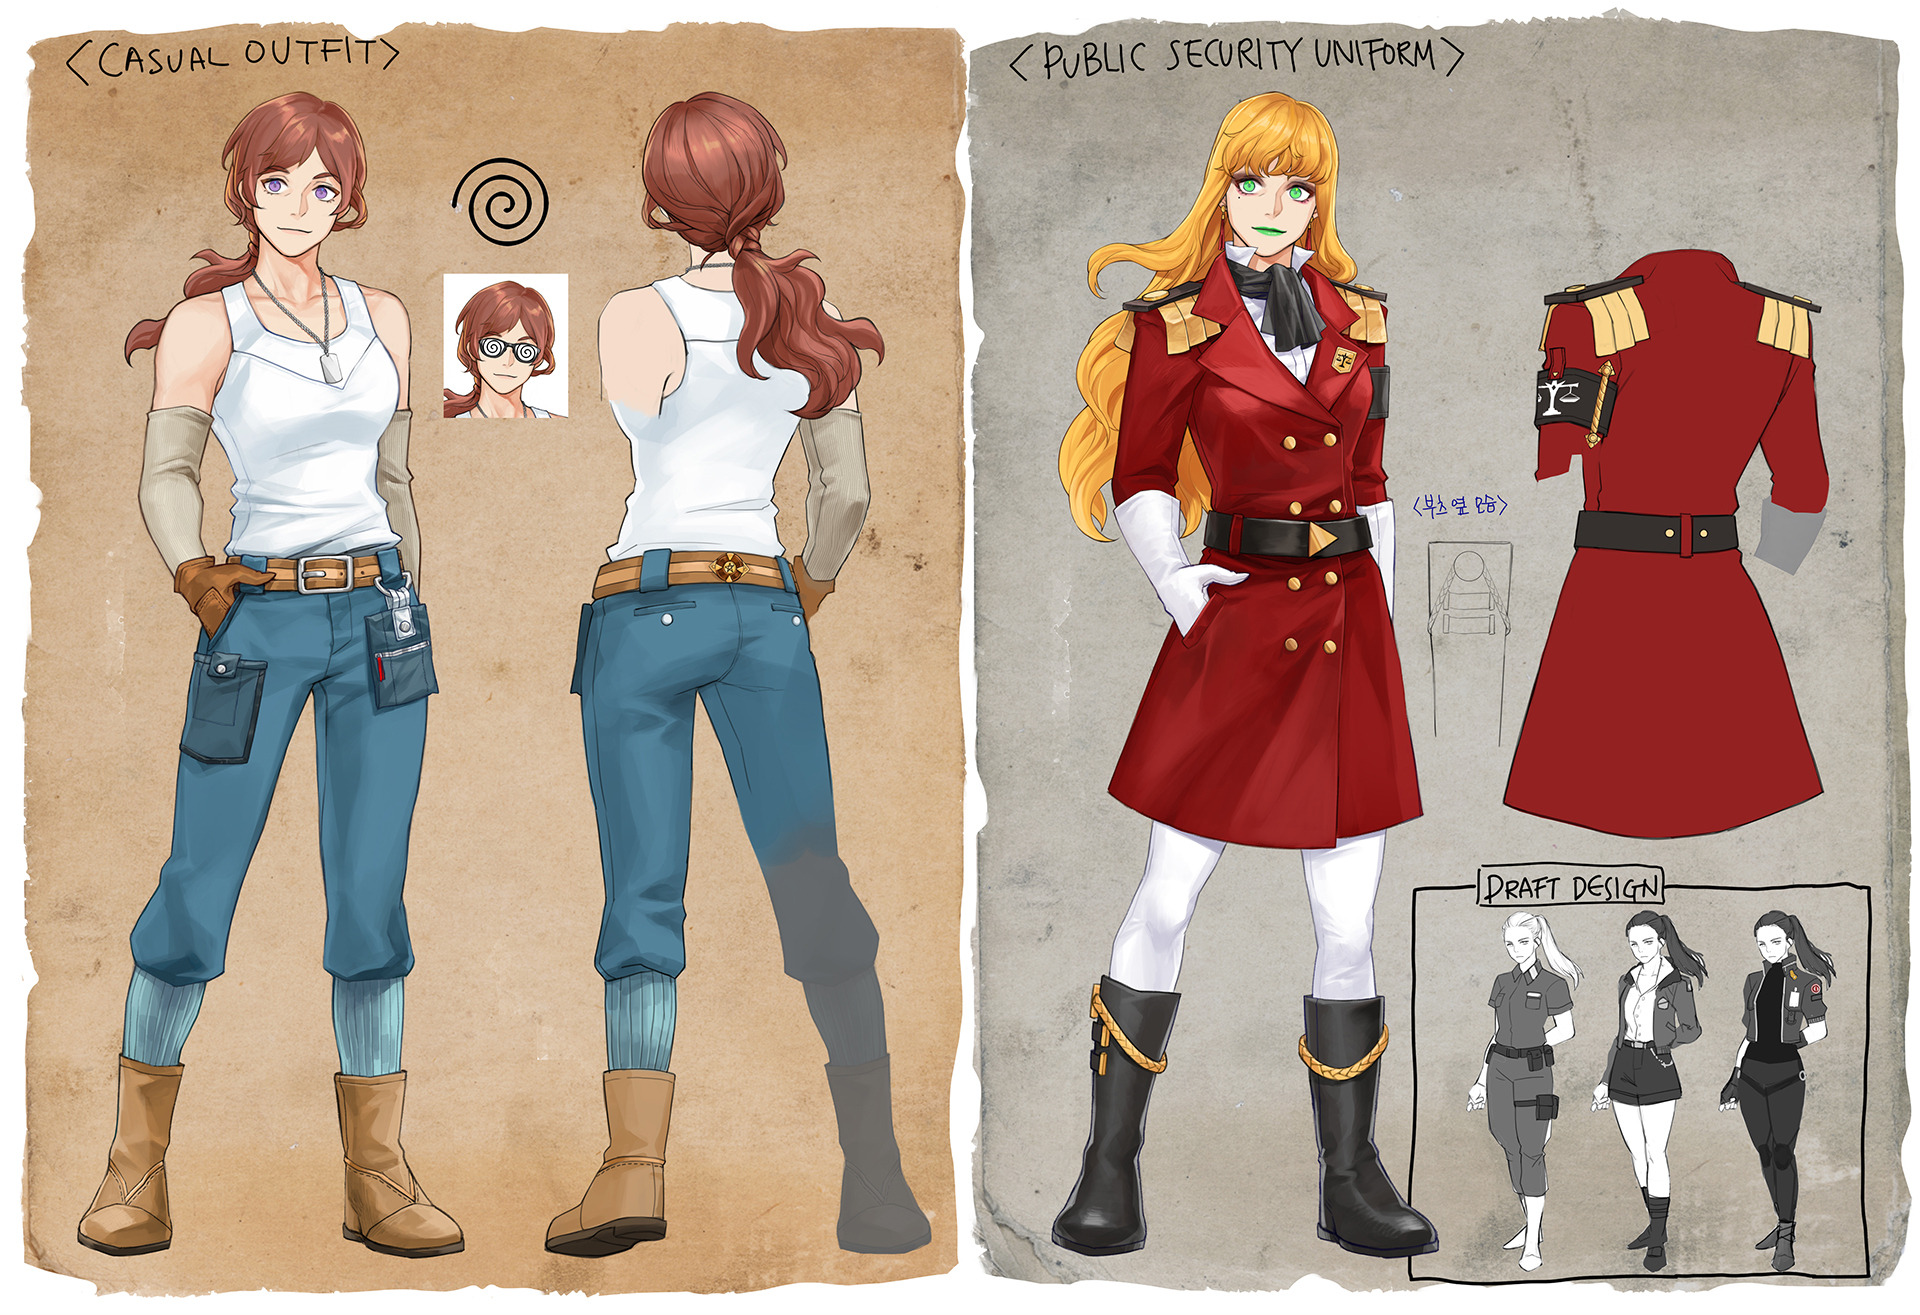
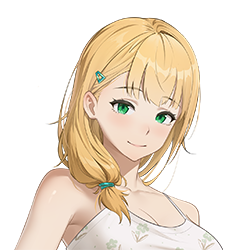
As the youngest Public Security officer in history and the youngest Public Security chief officer in history, Lumi set a new example with her excellent skills.
Despite all her efforts, people called her only ‘daughter of the Director’. Jealous, her colleagues mocked her success as a trophy made by her father.
On the first day of her work as chief of Section 1, she ‘armed’ herself with a red uniform exclusive for chief officers, blonde wig, dark eyeshadow, and red lipstick. It was like her armor protecting her from many suspicions and mockery.
Since then, she has led her team with righteous jurisdiction and a calm judgment, silencing anyone who questioned her skills before. Her red uniform and makeup became more than just show-offs. They became icons of her presence.
But when she comes back home, she throws away that armor of hers.
Wigs away, makeup off, she turns to “Lumi” again when she puts on her sleeveless shirt and jeans.

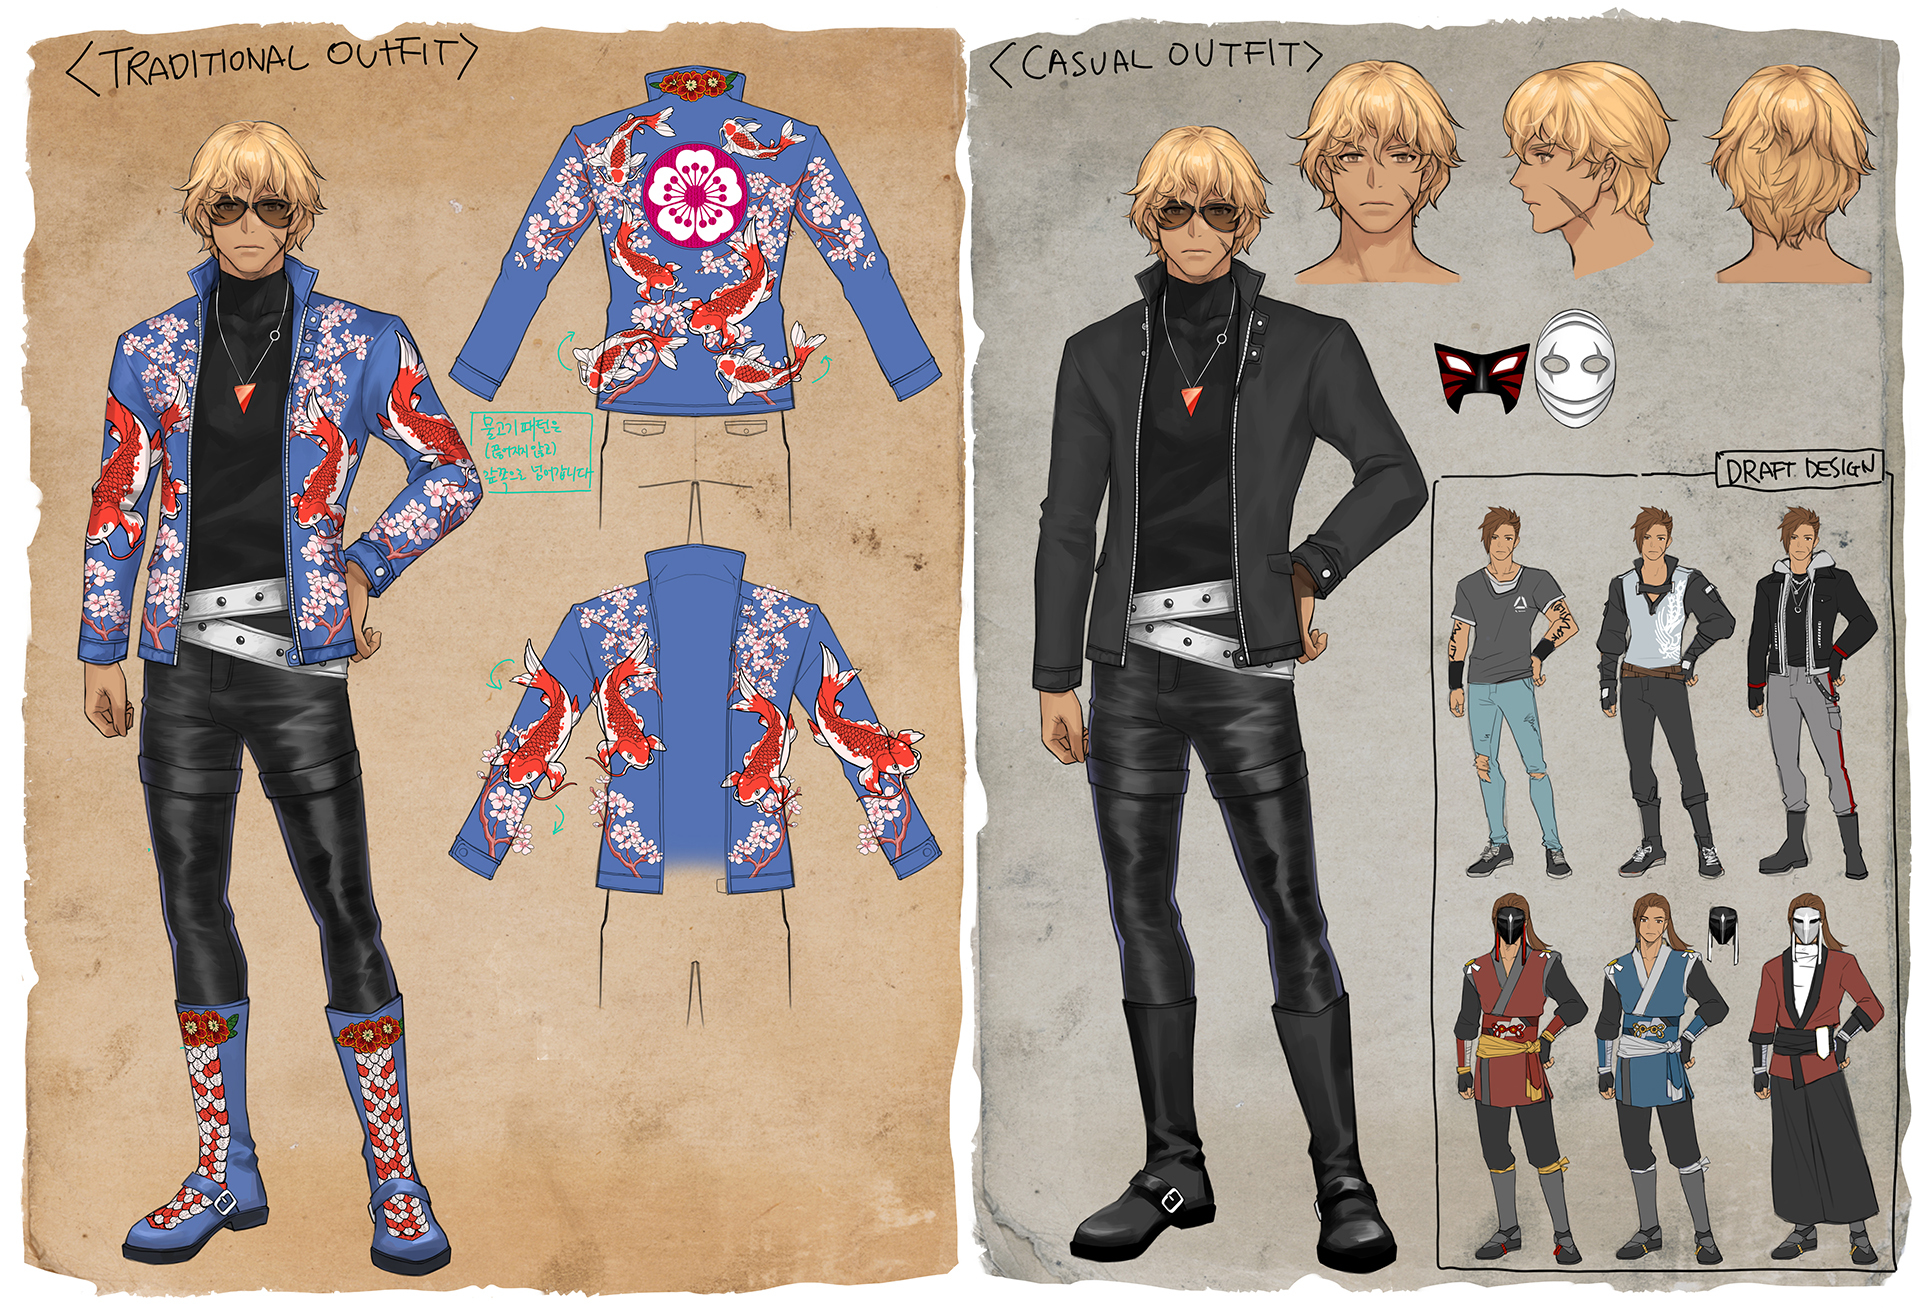
The Nine Dragons. The strongest crime organization in the East Alliance.
To choose its new leader-The Dragon Head, they held a competition called ‘The Game of Dragons last’
Each clan sends its champion, and there is one more person to check the last leader’s clan. So there are 10 candidates. These candidates are called Carps, and only one of them can become the Dragon Head- the supreme leader who rules the Nine Dragon gang.
Ryo Ryuzaki, the 10th Carp.
He turned his face away and ran away from his fate, but it won’t let him go that easily. By a twist of fate, he took many people’s lives, just like when he was an assassin for his clan before.
The weight of his karma became heavier, and his way to redemption has been blocked. Until he met his former master, Kylie.
If he can’t run from his fate, he’s going to fight it. For his new goal, he now heads to Kalter while disguised.

Son of Edward Leblanc, the most powerful man in Valhalla.
The former successor of the Leblanc family.
Vahalla’s ‘Orichalcum’ rank wanted criminal.
A prophetic artist known as Ramjist.
He has many names, each one being grand and heavy enough.
But if one meets Yuri in person, they can never imagine that these names fit him.
Because, he is just an everyman in appearance.
Today, Yuri is travelling across the Kalter to fulfill his purpose, wearing comfortable clothes.
For practical reasons, it’s not easy for us to afford dynamic and cinematic video cutscenes.
Instead, we choose to rely on the illustration-focused method, just as we did in our first game. To improve your immersive gaming experience, we adopted a new technology: The image conversion.


We are also listening to your feedback on our story, such as too many retrospection scenes and scripts being too long.
We are looking into it, trying to solve the problems by planning our scenes a step ahead, with more care.
3 new tracks were added during the last 3 months. We’ll do our best to present you with better music, and more joy!
The development may be slow, but we’re doing our best to deliver a better product.
We’re going to launch the game in Early Access again. Hence, we’ll listen to your feedback and make the game better together.
Wait for actual gameplay footage that we’ll bring you with the next update, early in 2026!
Thank you.
Hello Crew Members!
Thank you very much for wishlisting and following Night Crew! We're super excited to announce our launch date of...
17th November 10AM UTC / 6AM EST / 3AM PST
We've been hard at work creating a fun, terrifying mall for you and your friends to explore, and can't wait to see you all exploring the mall and meeting the various beings that come out to roam in the dead of night.
We have decided to take a bit more time from our original planned launch date to polish things up and get even more content into the game, so we can't wait to see you on the 17th November!
Oh, I've just received word... Mall management would love to leave a short message for you upcoming hires.
Dear prospective hire,
Please arrive punctually for your shift. You will be provided with your company mandated attire, and any relevant tools to complete the tasks assigned to you.
We remind you that although we like to keep a positive working environment, sometimes that is not possible. Note that your (signed) contract allows for the following non-positive interactions which are a possibility on your first shift:
Bad language
General feeling of impending doom
Damage to or removal of (but not limited to): extremities, limbs, eyes, organs, bones, and skin.
Mental trauma
Cleaning of foul waste
Exposure to high voltages
Crushing due to lifting heavy objects
Please see your training booklet for more information. Have a good first shift.
-
Management
Still It Runs is a stealth adventure where you play as a cat, alone in a strangely silent house.
Collect scattered memories, uncover what once happened here—and try to stay unseen.
In a rundown house tucked away in rural Japan, a lone cat awakens.
You are that cat, exploring empty rooms and dark halls.
Why are you here?
What happened to the family that once lived in this place?
Who is the eerie figure stalking you from the shadows?
Collect fragments of memories to uncover the truth.
Run. Search. Escape.

Play as a Cat in a Haunting Stealth Adventure
Sneak through a family’s old home, gather items, and piece together their memories. A tense stealth exploration game where every creak can betray your presence.

Silent Footsteps, Sudden Threats
Make a noise or panic-run, and something horrifying will stalk you. When the creature locks on, it's time to escape—don’t get caught.

A True Japanese Horror
From acclaimed horror writer Sesuji comes an original tale of loss, memory, and fear. Explore, remember, and survive whatever still lingers in the dark.

Now 10% off during the launch sale!

Choo Choo Engineers!
Today our epic and dangerous journey begins! It is up to you to rescue survivors and make it through the apocalypse. I know you will survive and destroy the boss, because you're awesome!
Thank you to all the fans and translators who volunteered their time and skill to help make Choo Choo Survivor 2 an incredible experience!
Thanks,
GTGD


In today's quick patch, I'll try addressing the confusion with how Microcards and Microcells work. As well as sorting out a few bugs:
When picking up a Microcell item, the description text will say "... need more for Microcards", as a hint that you should find more of them. Once you've obtained enough to equip 1 Microcard, it will then say "Can now equip Microcard!".
When opening the Microcard Equip screen, any full red bars will flash for a moment, to help indicate a card can now be equipped.
FIXED: one case of the music staying quiet/off. But there's still a few others I haven't been able to pin down, so you may still experience this sometimes. Sorry, hopefully next patch I'll squash this bug for good!
FIXED: Missiles stuck in grey doors. Due to the nature of this, it actually could have triggered some other issues/bugs as well, so hopefully resolving this gives a better experience in general.
FIXED: A bug where switching in/out of Ball-Mode in Boss Rooms would push the player a little sideways.
Laser Moth now stops firing the laser when doing MidFightSequence.
Laser Moth should now keep itself inside the boss room.
Added a prestige feature to make replays more convenient.
- Added new decorative buildings category
- Added Wall, Wall Corner, and Wall Tower as decorative buildings
- Added new Architecture I & II research to unlock them
- Added objective about building walls
- Walls can be drag-built & be in-place replaced by Wall Corners and Wall Towers
- Decorative buildings can be recolored with the new Crimson Dye potion, unlocked by the new Chromatic Alchemy research (more colors to come!)

- Implemented visual research tree for each category, to replace old research panel
- Added right-click context menu on research items to track research requirements on main screen until research is finished

- Added multiple Mana Tree visual variants that progress with contributed Mana
- Completed Mana Trees now stay in the world, in all their glory:-)
- Added ability to place any available resource icon onto the map to remember factory locations, using Shift + Left Click (removed with Shift + Right Click)
- Apples now sway in the wind
- Improved color variation of vegetation
- Fixed subtle color shift that sometimes happened when deleting vegetation for the first time
- Capped Mana Crystal level to a maximum of 15
- Essence Boost spell duration now affected by Advanced Spellcasting skill (increases from 30 seconds to 45 seconds)
- Added fuel value display in tooltips for resources that can be used to generate power
- Changed default UI toggle hotkey from F12 to J to avoid conflicting with Steam screenshot function
- Production values exceeding 1,000 per minute are now formatted in the style of "1.2k" for readability
- Fixed save menu overflowing when too many active saves exist
- Resources gained via merchants & resource crates are now preferentially added to Warehouses that already store that resource, rather than always the closest Warehouse
- When you play the Water World challenge mode, the traveling merchants might have a new recipe in store that will help you traverse the wide ocean
- Resource nodes now translate into and out of ground when a Miner is placed or deleted, to reduce clipping
- Added new Throughput Mastery challenge objective
- Fixed spell visibility not restoring when closing resource tree via close button
- Fixed Gold Component Technology research description
- Fixed Ward Generator not displaying effective Mana consumption based on skills
- Fixed recipe auto-upgrade being too aggressive and switching to unintended recipes
- Fixed power generator child classes (hydro generator etc.) not correctly registering power output from the start, which caused initial flickering in power display
- Fixed issue where spells not enhanced by Advanced Spellcasting skill were still labeled as such in the UI


Welcome to the seaside town, experience this heart-fluttering encounter called "one day"!
In this serene seaside town, life should be as gentle and soothing as the waves: opening the wooden door of the corner flower shop in the morning, holding a cup of steaming coffee; leaping into the sparkling pool in the afternoon, fully enjoying the water play; strolling along the cobblestone paths at dusk, with seagull calls lingering in your ears.
However, everything changes with the intrusion of four distinct "contract girlfriends"…… Four seemingly casual "one-day contracts" quietly descend, pulling you into a sweet yet dangerous adult game. 😈🔥


Hi all
Since the last quick update I've turned things around. Rather than working with full models for the mountains, I decided to take another approach.
While the mountain itself only comes after the second part of the Silent Forest, I've had to make part of it already for that part, since I want a bit of continuity in the game, and not just a 'woop, here I am!' kind of vibe. It is taking 'a lot' of my time, and patience, but at least it's not wasted work since I can easily reuse what I'm making now in the actual Mountain part.
To recap last week's update, and to give a better view of the change, here's last week's photos:


As you can see the whole thing looks a bit bland and too much of the same. I know, last week I said it looked good, but the more I stared at it while making it, the more I felt I could do better, and that brings us to the following screenshots:

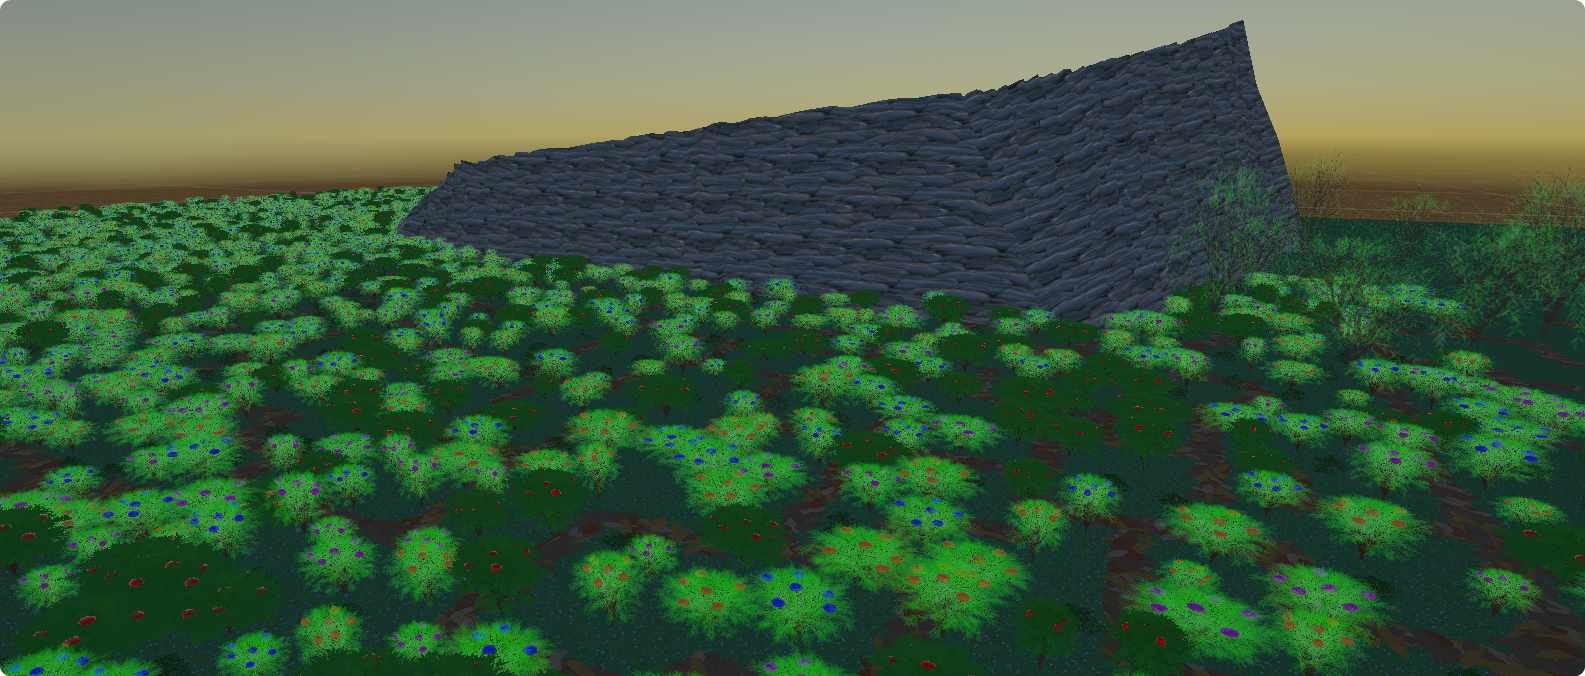
What you're seeing here is just a part of the mountain, it will still become much higher.
The new result looks a lot more natural, less repetitive, and takes about as long to make as a single model does. Once I got used to the tool I built for it, it even became faster.
So, let’s talk about the tool that made this all possible.
If you're into the technical stuff this little chapter is for you, if not, you can skip it all to the next chapter.
The tool I'm using I've named CustomSpawnZone, and works together with two other scripts CustomSpawnZoneEditor and ConnectedDirtSpawner. Now, the spawnzone script itself is what makes the zone, the polygons, etc. The editor script makes it all work in the Unity editor, makes buttons appear that I'd need to add and remove the points, and makes my clicks register the points. The spawner script makes the actual spawns, but more on that later.
The whole reason why I decided to go this way, as mentioned above, is because I didn't like what the model looked like. I had to find a way to make it all more flexible, as well, since working on a hard, big, dumb model would almost require me to redo it over and over.
The CustomSpawnZone script does exactly that: it allows me to define freeform areas directly in the editor, rather than having to work around a static model. Each zone stores its polygon vertices in local space, builds a triangulated surface for height sampling, and provides both fast bounding checks and precise 3D containment tests. It even supports snapping generated points to Unity's active terrain, which makes it feel surprisingly natural when placing the points.
There are three methods that are important for this to work. These methods form the foundation of the zone logic - handling everything from triangulation to terrain snapping an containment checks.
Firstly, the TriangulatePolygon() method, which builds the triangulated surface. The method creates a list of indices for the polygon vertices, after which it applies simple ear clipping triangulation for convex polygons. Here's a look at the method:
[c]private void TriangulatePolygon()[/c]
[c]{[/c]
[c] if (points.Count < 3)[/c]
[c] return;[/c]
[c] triangles.Clear();[/c]
[c] var indices = Enumerable.Range(0, points.Count).ToList();[/c]
[c] for (int i = 1; i < points.Count - 1; i++)[/c]
[c] {[/c]
[c] triangles.Add(0);[/c]
[c] triangles.Add(i);[/c]
[c] triangles.Add(i + 1);[/c]
[c] }[/c]
[c]}[/c]
Secondly, the IsPointInside() method does the containment tests, first by checking whether a point is inside the polygon in 2D, and then checking if the point is within the vertical bounds of the polygon surface. The method looks as follows:
[c]public bool IsPointInside(Vector3 worldPosition)[/c]
[c] {[/c]
[c] Vector3 localPos = transform.InverseTransformPoint(worldPosition); [/c]
[c] Vector2 testPoint = new Vector2(localPos.x, localPos.z);[/c]
[c] bool inside2D = IsPointInPolygon(testPoint, points);[/c]
[c] if (!inside2D)[/c]
[c] return false;[/c]
[c] float surfaceHeight = GetHeightAtLocalPosition(localPos);[/c]
[c] bool withinHeight = Mathf.Abs(localPos.y - surfaceHeight) <= heightRange * 0.5f;[/c]
[c] return withinHeight;[/c]
[c] }[/c]
TryGetTerrainY() lastly snaps a point to the terrain.
On top of that, random point generation (to spawn the dirt/rocks) uses rejection sampling inside the polygon's AABB - a simple but reliable approach for most shapes. To calculate surface height at any position, the system triangles the polygon (ear clipping) and uses barycentric interpolation between vertex heights, falling back to an inverse-distance weighted height when necessary. It is a nice mix of math and practicality that keeps results smooth.
The core logic for this happens in two methods, the GetRandomPoint(), which handles random rejection sampling inside the polygon bounds, and the GetHeightAtLocalPosition() method, which determines accurate height from the triangulated data. Together they decide where objects should spawn and at what height, using either the barycentric interpolation or distance-weighted height sampling.
While there isn't really much to say about the GetRandomPoint() method - it's all about using Random.Range() etc - the GetHeightAtLocalPosition() is a bit more interesting to talk about. It first gets all the triangles from the polygon triangulation, to then find which triangle a certain point contains. It then uses the barycentric coordinates to interpolate the height of the point, with the method BarycentricHeight(), which uses 4 points. If it is unable to, it falls back to the distance-weighted average of all points with the method GetDistanceWeightedHeight().
Here's a look at the full GetHeightAtLocalPosition method:
[c]public float GetHeightAtLocalPosition(Vector3 localPos)[/c]
[c] {[/c]
[c] if (points.Count < 3) return localPos.y;[/c]
[c] Vector2 testPoint = new Vector2(localPos.x, localPos.z);[/c]
[c] List<int> triangles = TriangulatePolygon();[/c]
[c] for (int i = 0; i < triangles.Count; i += 3)[/c]
[c] {[/c]
[c] Vector3 a = points\[triangles\[i]];[/c]
[c] Vector3 b = points\[triangles\[i + 1]];[/c]
[c] Vector3 c = points\[triangles\[i + 2]];[/c]
[c] [/c]
[c] Vector2 a2 = new Vector2(a.x, a.z);[/c]
[c] Vector2 b2 = new Vector2(b.x, b.z);[/c]
[c] Vector2 c2 = new Vector2(c.x, c.z);[/c]
[c] [/c]
[c] if (IsPointInTriangle(testPoint, a2, b2, c2))[/c]
[c] {[/c]
[c] return BarycentricHeight(testPoint, a, b, c);[/c]
[c] }[/c]
[c] }[/c]
[c] return GetDistanceWeightedHeight(localPos);[/c]
[c] }[/c]
For editor usability, I added visual gizmos that draw the zone's edges and world bounds. Seeing the triangulated surface right inside the scene view makes fine-tuning the zone layout far more intuitive, speeding up a lot of the work.
OnDrawGizmos() renders both polygon edges and its triangulated surface for a visual on where the spawn logic would succeed or fail. Failing usually results in 2 planes, of a sort, to show up. Rather than one smooth plane as it should be. Here's the OnDrawGizmos() method:
[c]private void OnDrawGizmos()[/c]
[c] {[/c]
[c] Gizmos.color = Color.magenta;[/c]
[c] for (int i = 0; i < points.Count; i++)[/c]
[c] {[/c]
[c] Vector3 current = transform.TransformPoint(new Vector3(points\.x, points\.y, points\.z));[/c][/p]
[c] Vector3 next = transform.TransformPoint(new Vector3(points\[(i + 1) % points.Count].x, points\[(i + 1) % points.Count].y, points\[(i + 1) % points.Count].z));[/c]
[c] Gizmos.DrawLine(current, next);[/c]
[c] }[/c]
[c] Bounds b = GetBounds();[/c]
[c] Gizmos.color = new Color(1, 1, 0, 0.1f);[/c]
[c] Gizmos.matrix = transform.localToWorldMatrix;[/c]
[c] Gizmos.DrawWireCube(b.center, b.size);[/c]
[c] DrawTriangulatedSurfaceGizmo();[/c]
[c] }[/c]
All of this, and more, make it so that, in the editor, it looks like this:

As you can see, even from this side view it’s perfectly manageable — and more importantly, flexible.
This setup means I can shape and rework the environment freely without touching a single model again. Every small improvement to the logic makes the mountain come alive a bit more — one spawn zone at a time.
Of course, just having the zone logic wasn't enough. I needed a way to actually work with it comfortably inside the Unity editor. So, I wrote a custom editor script (one of over a dozen already....) to make that possible. It handles point placement, snapping, live distance display, and visual feedback right in the scene view, letting me draw and shape spawn zones directly on terrain with ease.
The script adds a gid system, real-time distance measurements from the last point placed, and even smaller helper visuals to make sure I'm following my roadmap correctly when transferring the layouts into Unity. Toggling Add Mode lets me click directly in the scene to define new vertices, while grid snapping ensures everything stays consistent and evenly spaced. It's a big help for building large, natural-looking areas quickly.
Under the hood it's just using Handles, Undo recording, and a bit of math for snapping - nothing fancy - but it makes the entire workflow feel ten times smoother. What used to take several back-and-forth tweaks between Blender and Unity now happens in a single scene view, interactively.
I could go into a lot more detail with this, but since it's more on the developer side than the player side, I’ll keep it short and just show a few screenshots. It’s one of those tools that quietly makes things possible behind the scenes.
If you’re curious about how it actually works or want me to go deeper into it in a future devlog, let me know in the comments!


Last but certainly not least - this is the thing that actually makes thing visual, after all - the ConnectedDirtSpawner script. It is the last piece of the system and probably one of the easiest to explain. While the CustomSpawnZone defines where things can spawn, the ConnectedDirtSpawner decides what actually goes where.
The script loops through each part of the zone, figures out where the dirt pieces (or rocks, or anything, really) could fit, checks if the point is inside the polygon, and then spawns one of the assigned prefabs at that position. It adds a bit of randomness to the placement and rotation to avoid patterns, and even applies a slight color variation using a MaterialPropertyBlock, so no two dirts look exactly the same.
Each spawned object is also scaled up a little, and optionally snapped to the terrain if the zone supports it. That keeps the visuals consistent across slopes or uneven terrain. And, since we're talking about a mountain, there's going to be lots of that...
The placement logic itself is pretty straightforward:
It takes the prefab size to determine spacing.
Iterates over the zone's bounding box.
Randomly offsets each position slightly.
Uses the IsPointInside() check to make sure the point lies within the polygon.
Uses GetPointOnPolygonSurface() to find the correct Y height.
Spawns the object with random rotation and color tint.
Here's a look at the helper method that calculates the surface height, making sure each piece aligns perfectly with the zone surface:
[c]private Vector3 GetPointOnPolygonSurface(CustomSpawnZoneDirt zone, Vector3 localPosition)[/c]
[c]{[/c]
[c] float height = zone.GetHeightAtLocalPosition(localPosition);[/c]
[c] Vector3 worldPos = zone.transform.TransformPoint(new Vector3(localPosition.x, height, localPosition.z));[/c]
[c] return worldPos;[/c]
[c]}[/c]
The script also includes an editor-only context menu that lets me preview the whole spawn setup right inside Unity.
That’s been incredibly useful — I can clear and respawn the dirt layer instantly without entering play mode.
Lastly, for debugging and visualization, there’s an [c]OnDrawGizmosSelected()[/c] method that outlines each zone and shows where the spawn points might appear as little green spheres. It’s an easy way to see how dense the spawn grid is and where the logic succeeds or fails.
Now that I've got everything in place to make the mountains - something that was kind of a bigger hurdle than you might imagine - I'm starting to think beyond it again, what the rest of the game will look like, not just in terms of levels, but how players experience the world as a whole.
I've already mentioned I prefer continuity in the game, being able to move from place to place seamlessly (not talking about the loading screen, but the journey of Boll itself). So... What really is next?
The original way I saw it was that Boll ends up on a glider or a small plane of some kind, at the top of the mountain, and then glides off to the next part of the journey. The issue I have with that, however, is where does that glider come from? Isn't it all too convenient for there to be a glider? But then I'm also thinking: anything I'd do would end up being too convenient.
What's new between the original plan and how things have turned out so far, is the whole dimension thing. And I think that's exactly what I'm going to be using. Maybe I'll skip whole parts of the original plan altogether.... Who wants to see more Forests, anyways? Or head back into suburbs? Or walk along a river?
Maybe I better start focusing on heading into a city, an industrial area, or an airport, rather than more of the same. There's still time to think about it, I still need to get up the mountain, after all. One thing's for sure, however: What goes up, must come down. The question is just: how?
Future-me will likely have all the answers. For now, I'll just focus on the present.
Happy playing!