
METAL GEAR SOLID 3: Snake Eater - Master Collection Version - Doktor_J3
We are aware that users are reporting issues with the Steam® version of METAL GEAR SOLID: MASTER COLLECTION Vol.1 resulting in the game running at abnormal speeds.
We ask for your patience while we conduct a thorough investigation.
We recommend that you try the following workaround as a temporary solution.
This workaround is not necessary if you are not experiencing these issues.
The screen configuration, etc. may be different depending on the which version you have installed.
We ask for your patience while we conduct a thorough investigation.
We recommend that you try the following workaround as a temporary solution.
This workaround is not necessary if you are not experiencing these issues.
Instructions
For those using a graphics card made by NVIDIA®
We recommend that you follow these steps below.The screen configuration, etc. may be different depending on the which version you have installed.
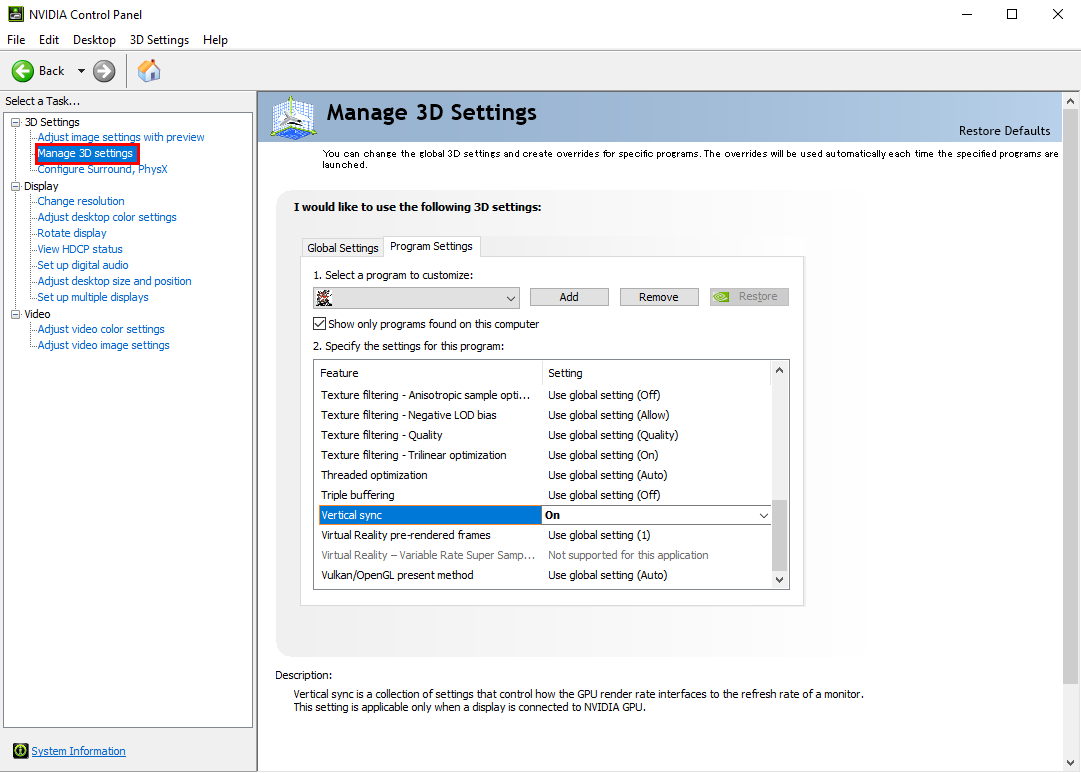
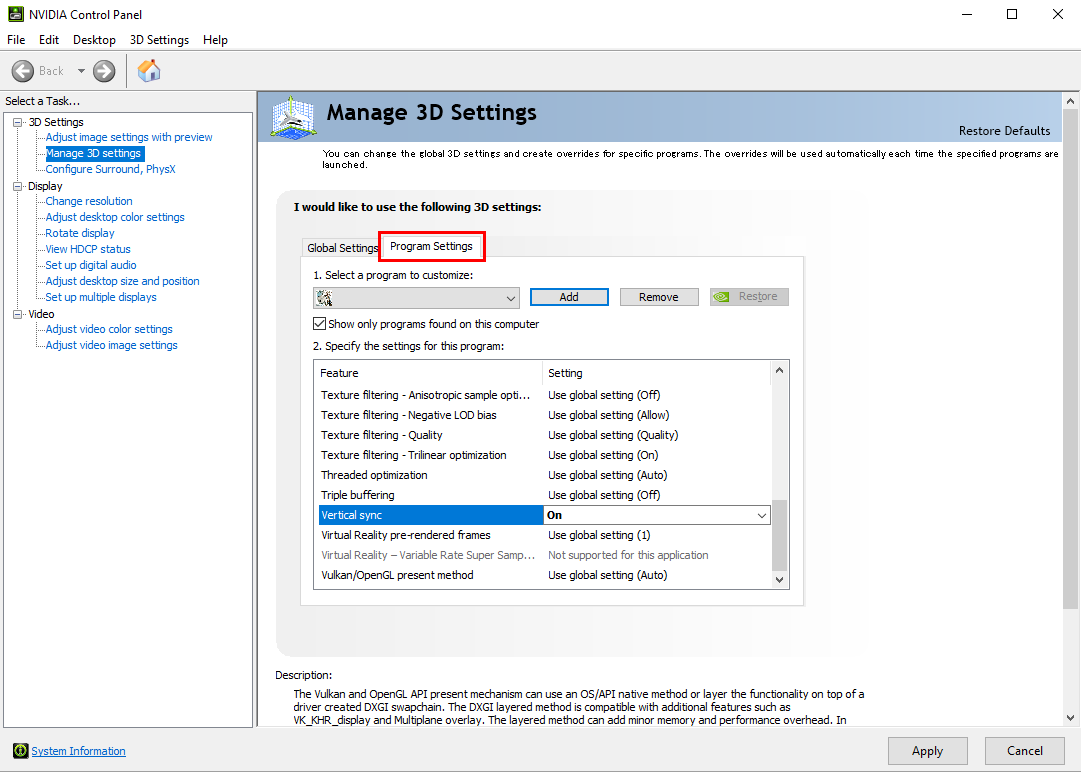
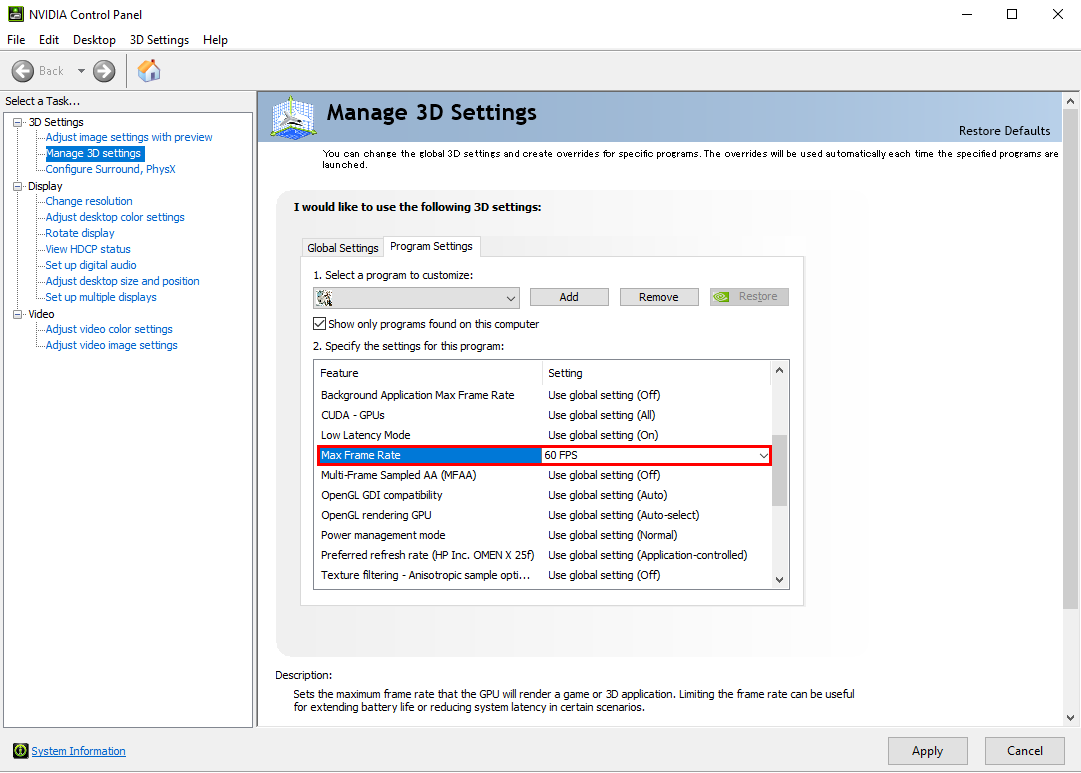
- Open the “NVIDIA Control Panel”, then select the “Manage 3D settings” located on the left-side of the window.
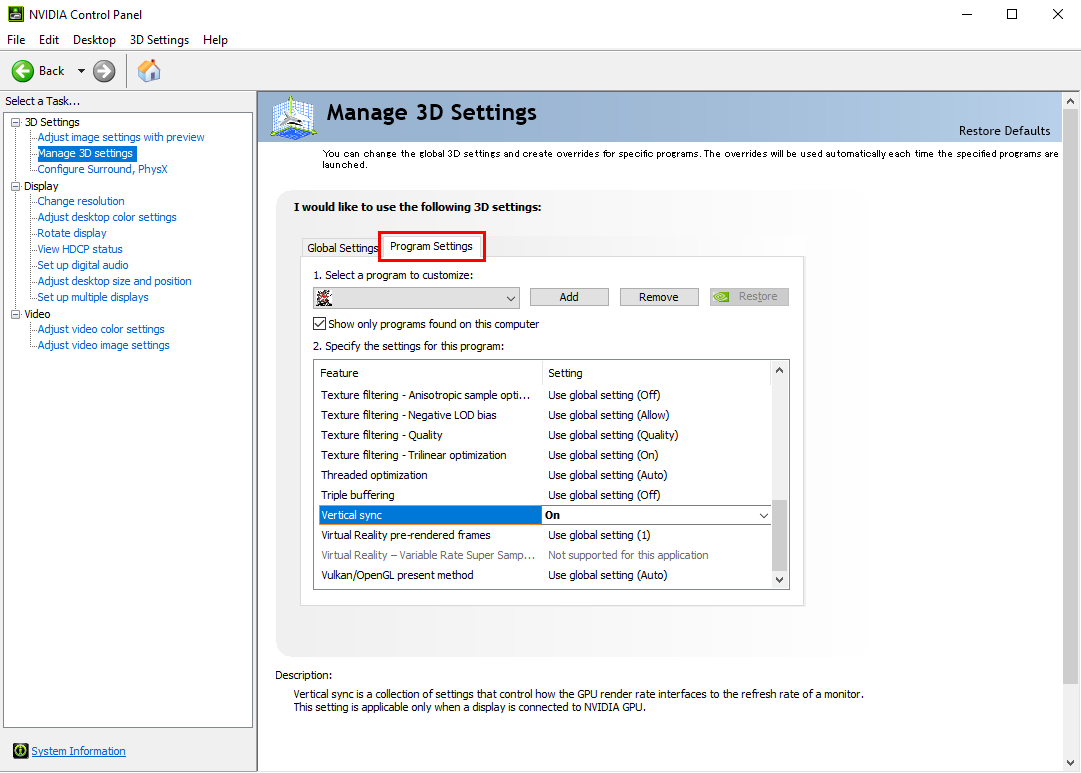
- Select the “Program Settings” tab.
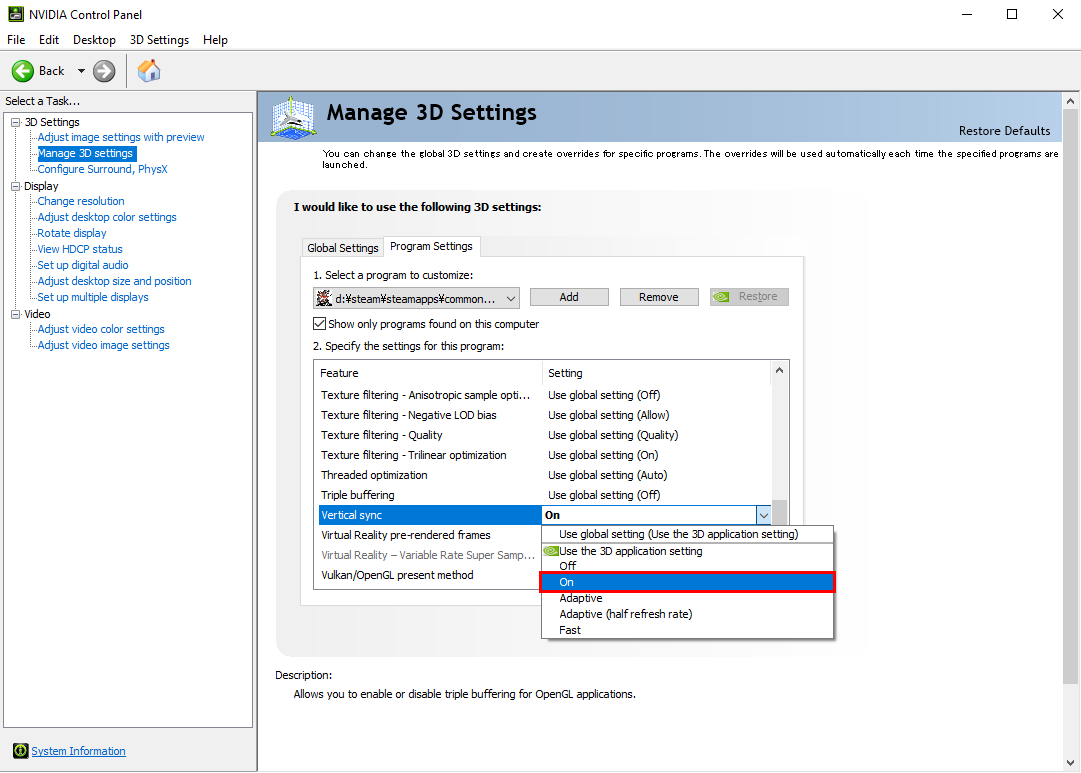
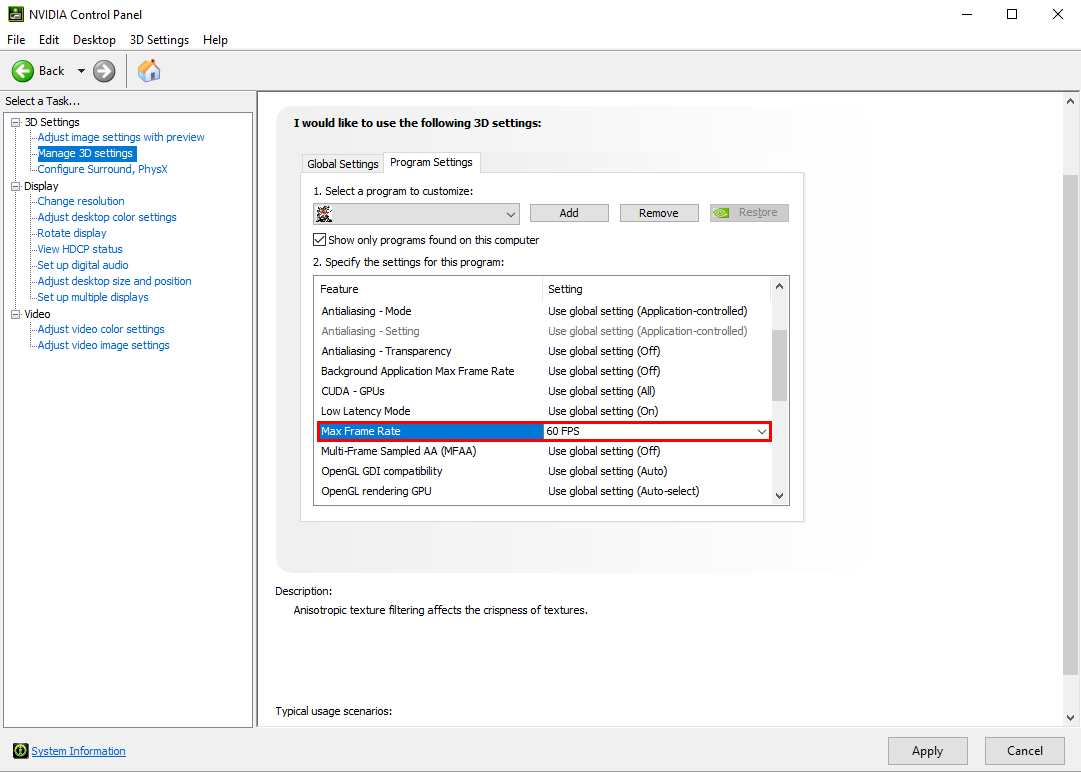
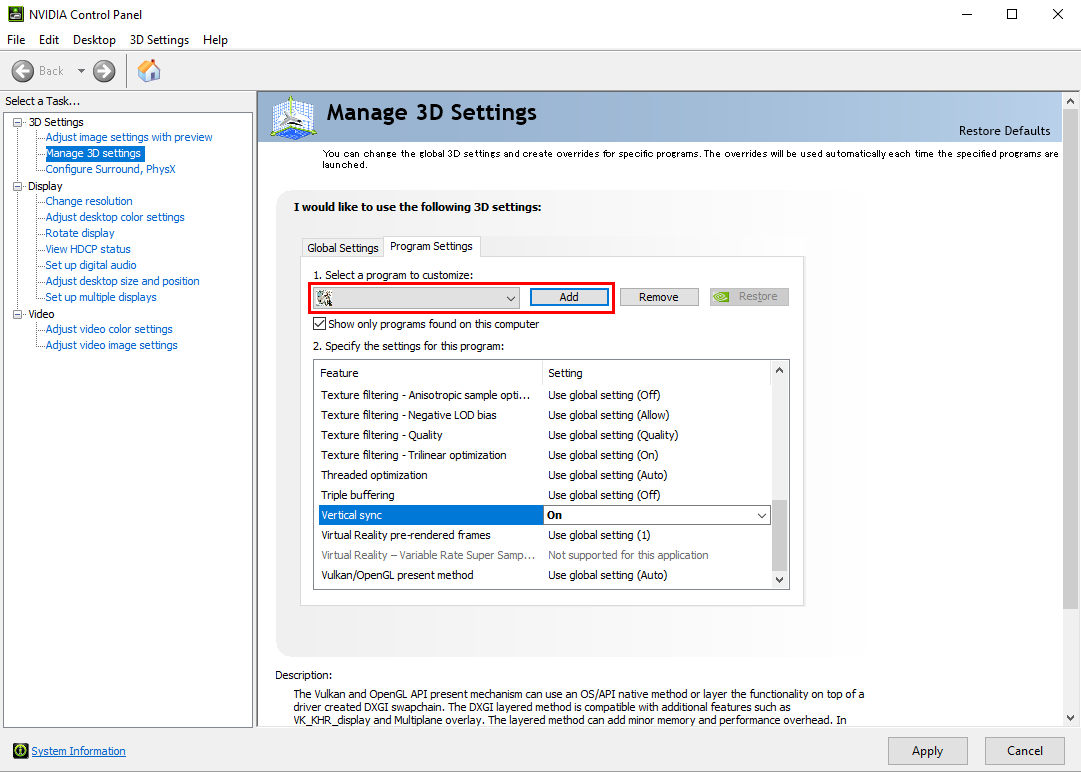
- In the “1. Select a program to customize:” section click on the “Add” button, then go to the folder where you have “METAL GEAR SOLID 3: Snake Eater - Master Collection Version” installed and select “METAL GEAR SOLID3.exe”.
Once selected, make sure that the file location is displayed on the right-side of the “Add” button.
*The screenshots in this instuctions were all captured using the METAL GEAR SOLID - Master Collection Version.
The game title and icon that should display as you follow these instructions is "METAL GEAR SOLID 3: Snake Eater - Master Collection Version".
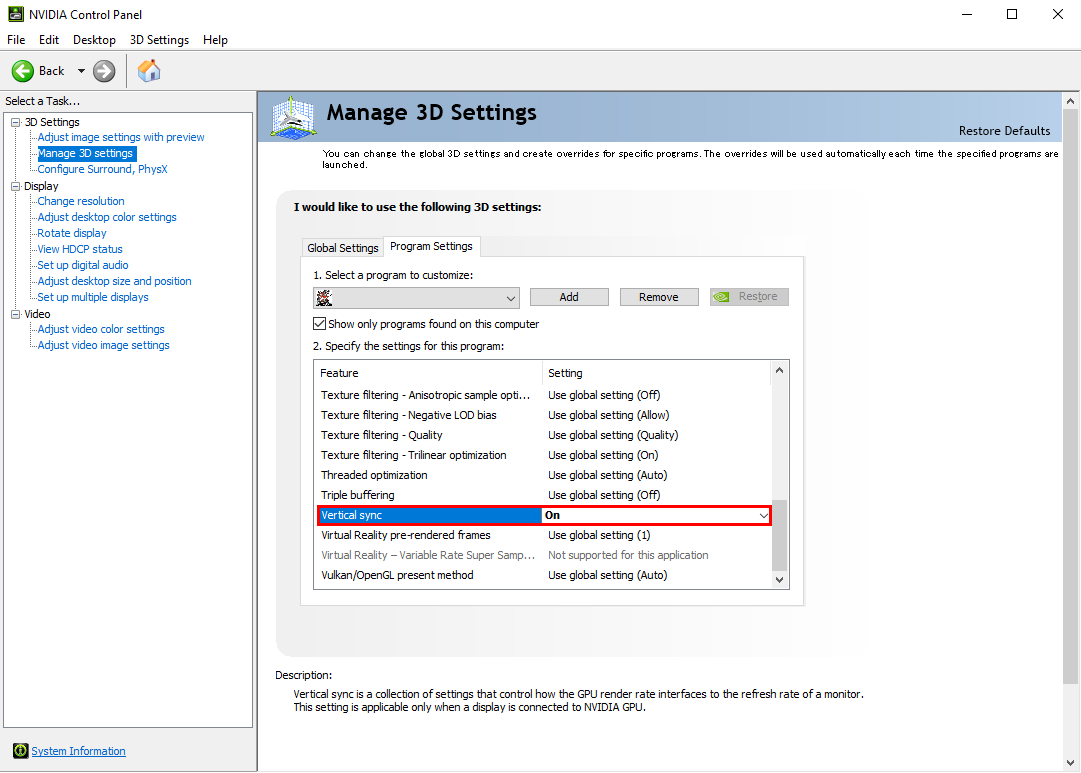
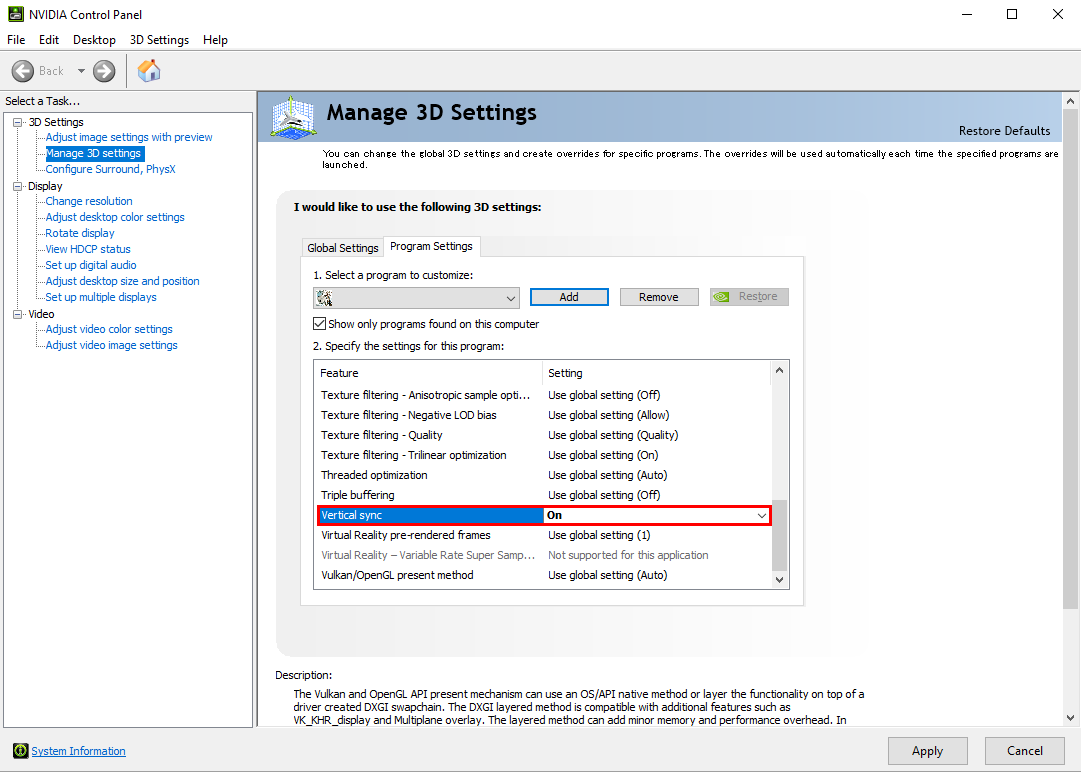
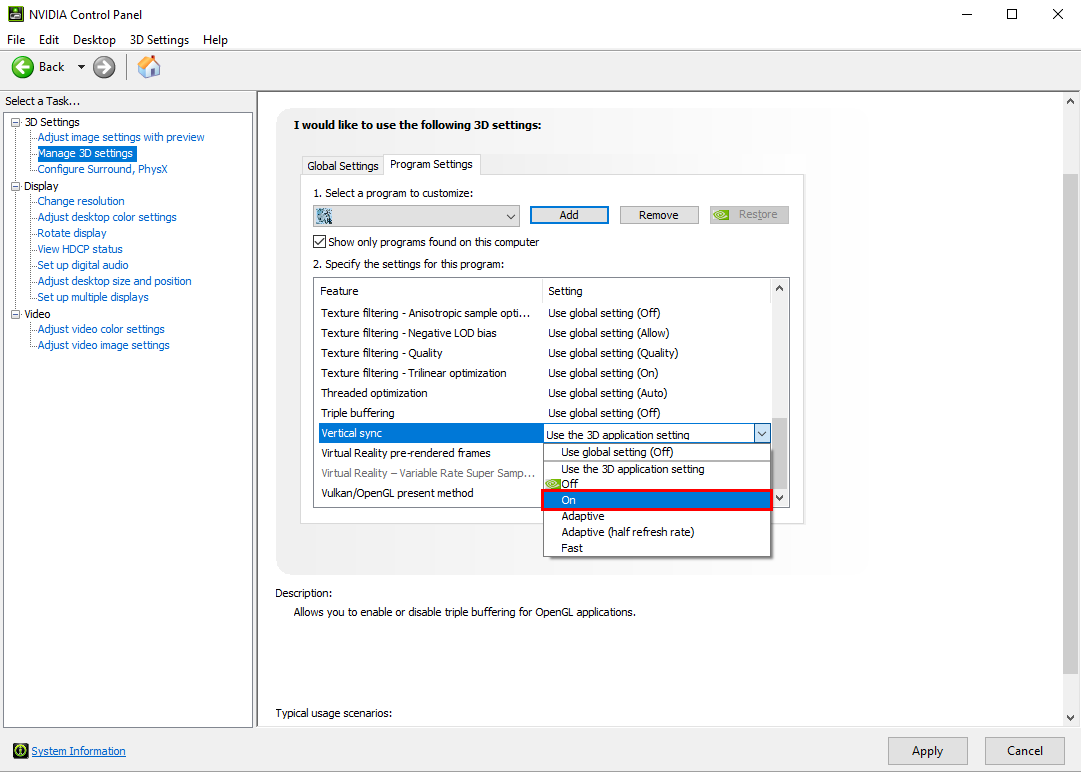
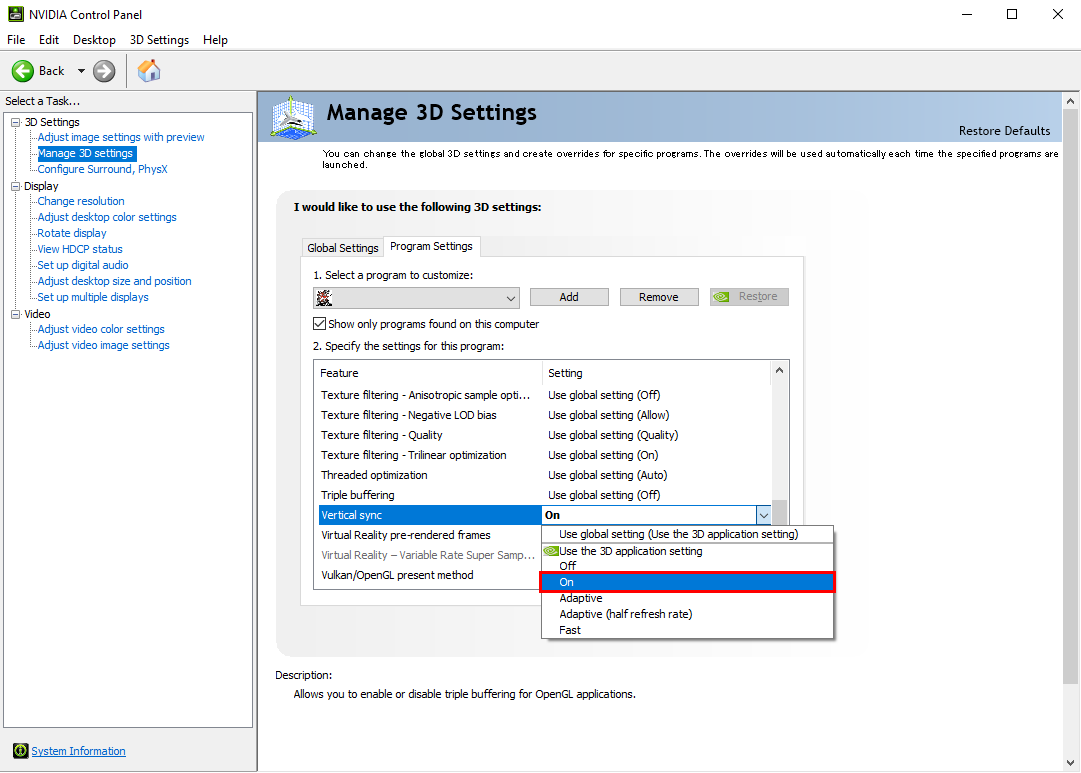
We will replace them with the correct screenshots at a later date. - In the “2. Specify the settings for this program:” section, make sure that the “Vertical sync” is turned on.
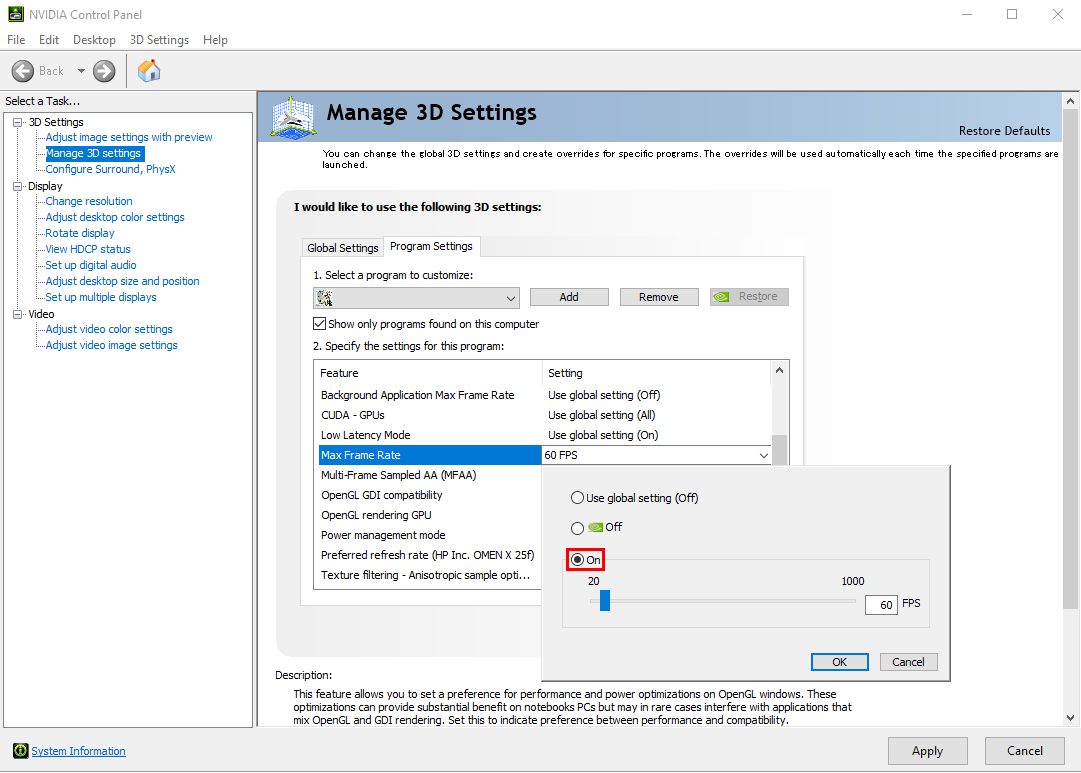
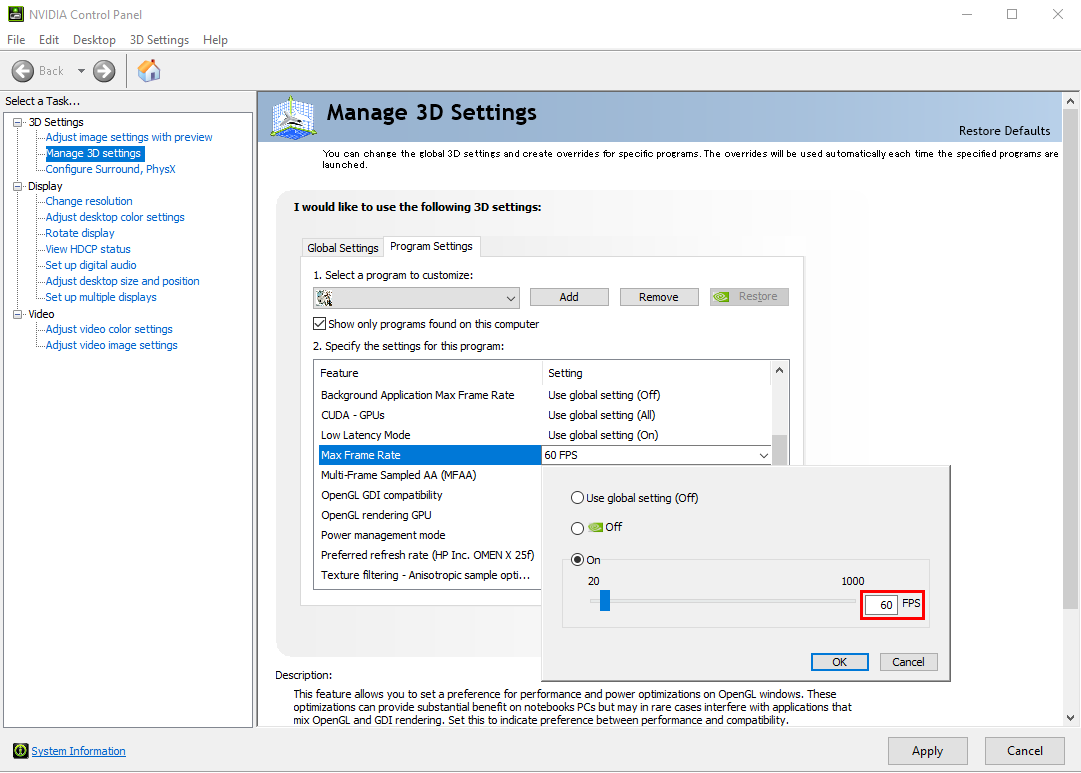
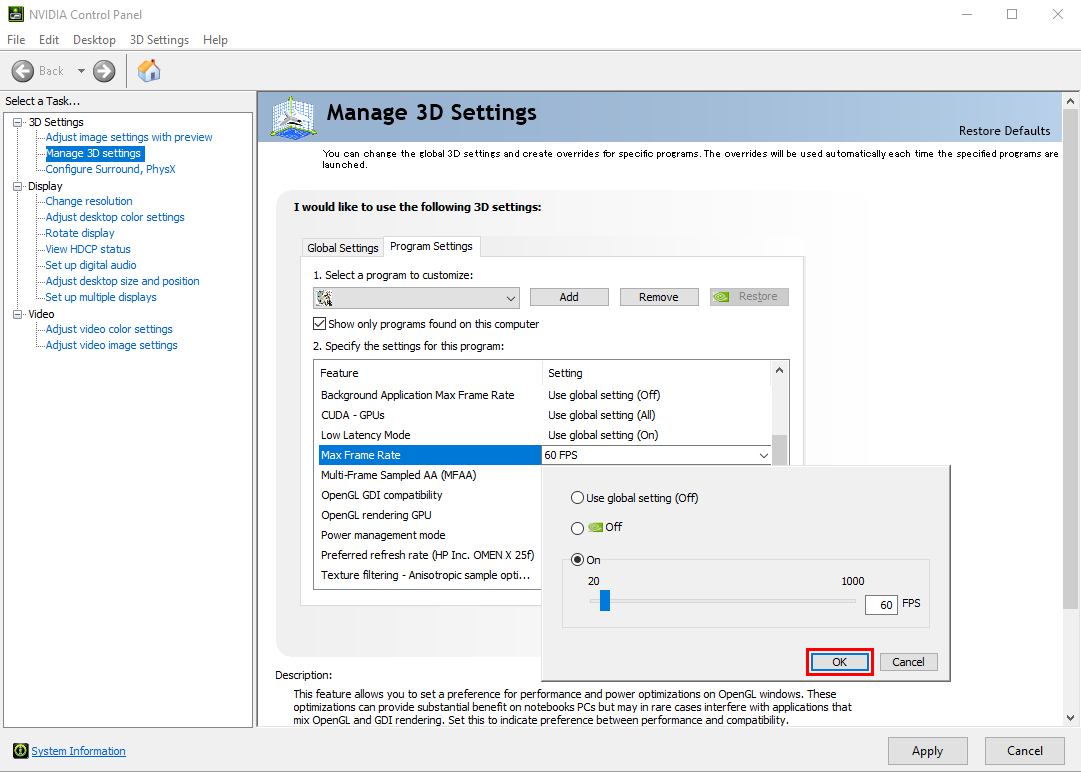
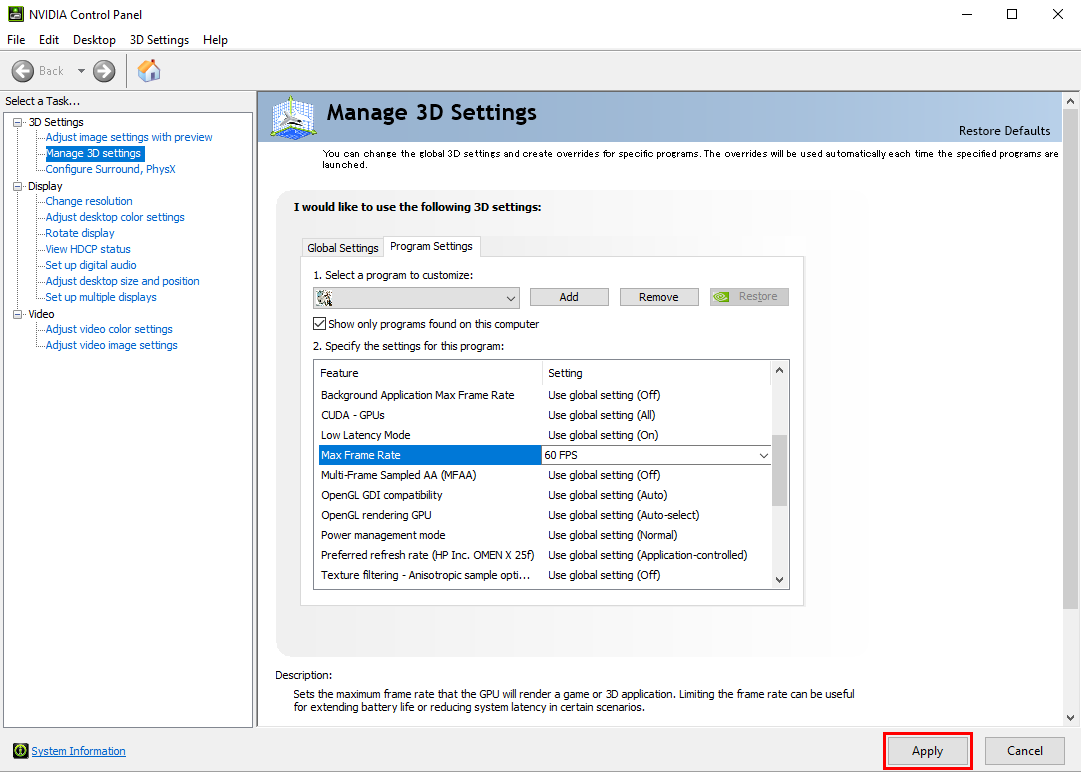
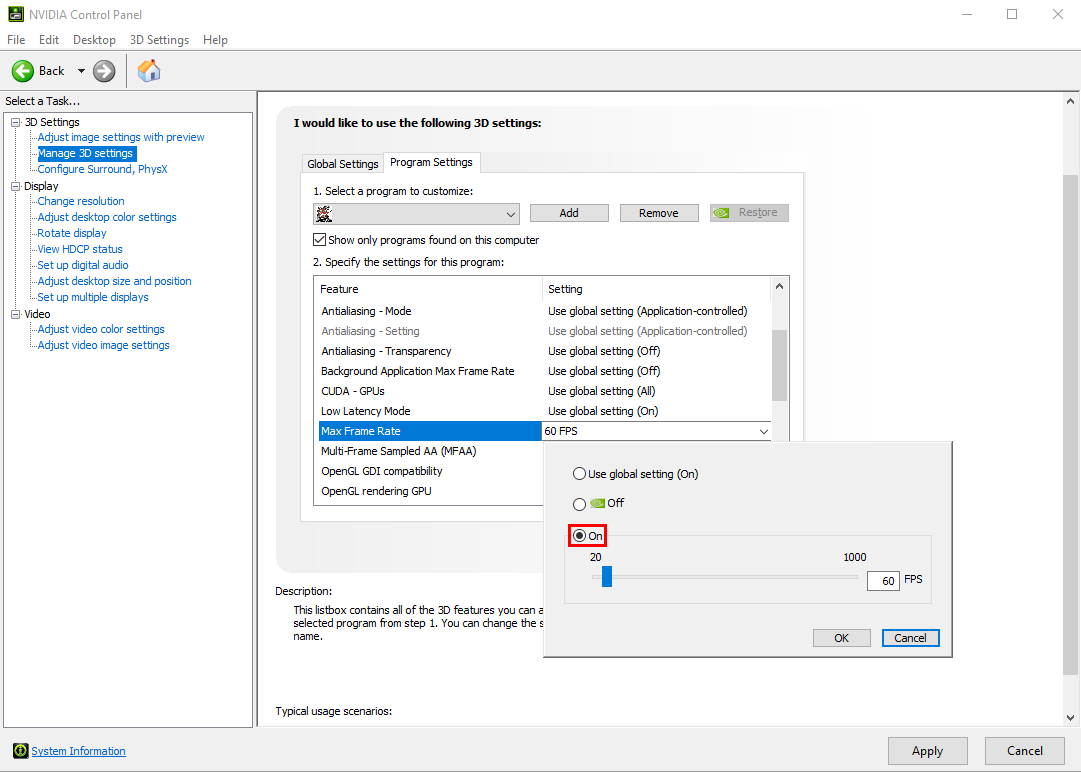
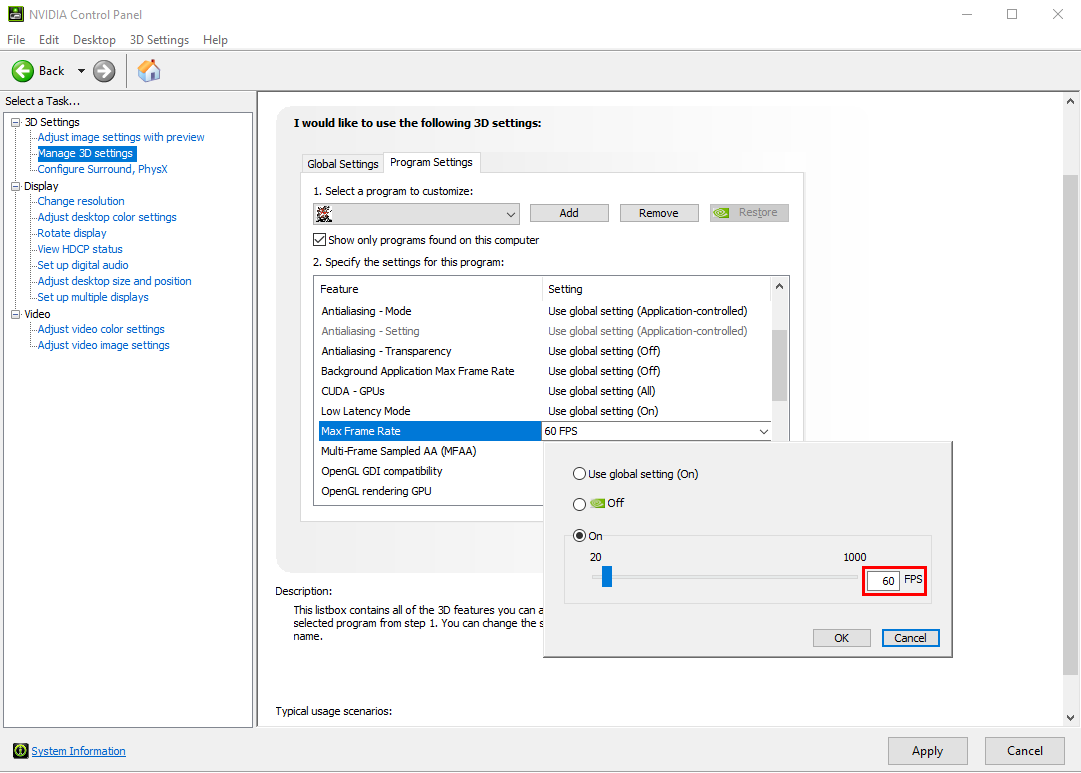
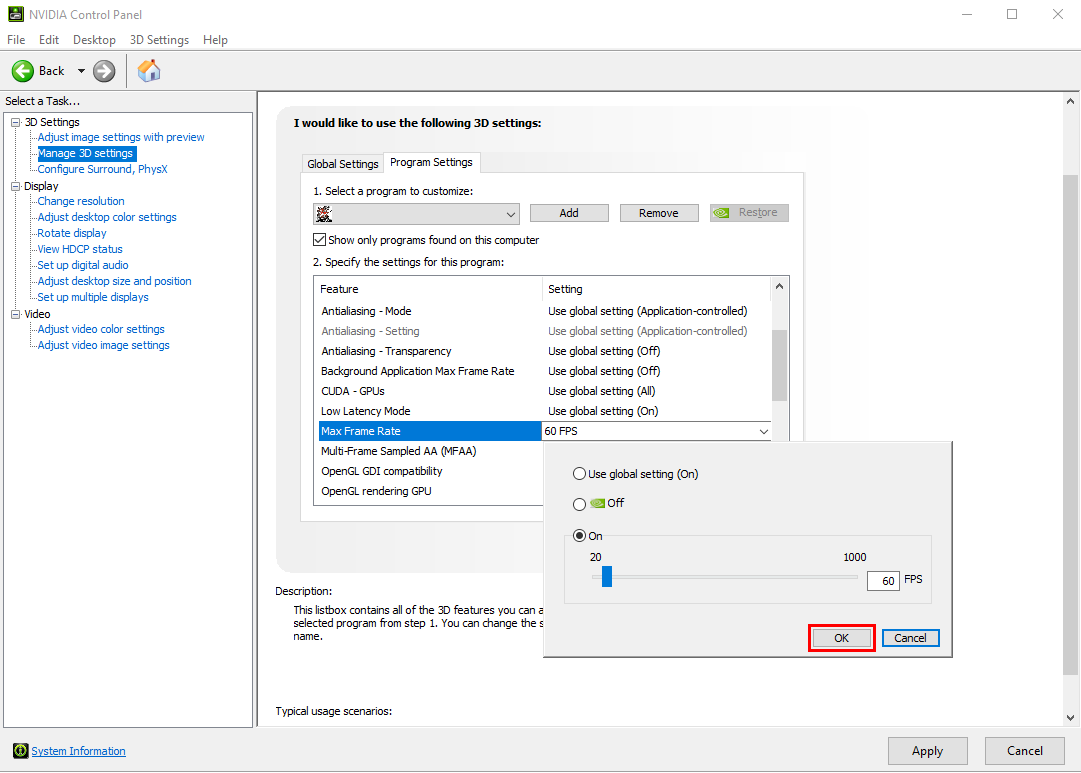
- In the “2. Specify the settings for this program:” section, make sure that the “Max Frame Rate” is at 60FPS.


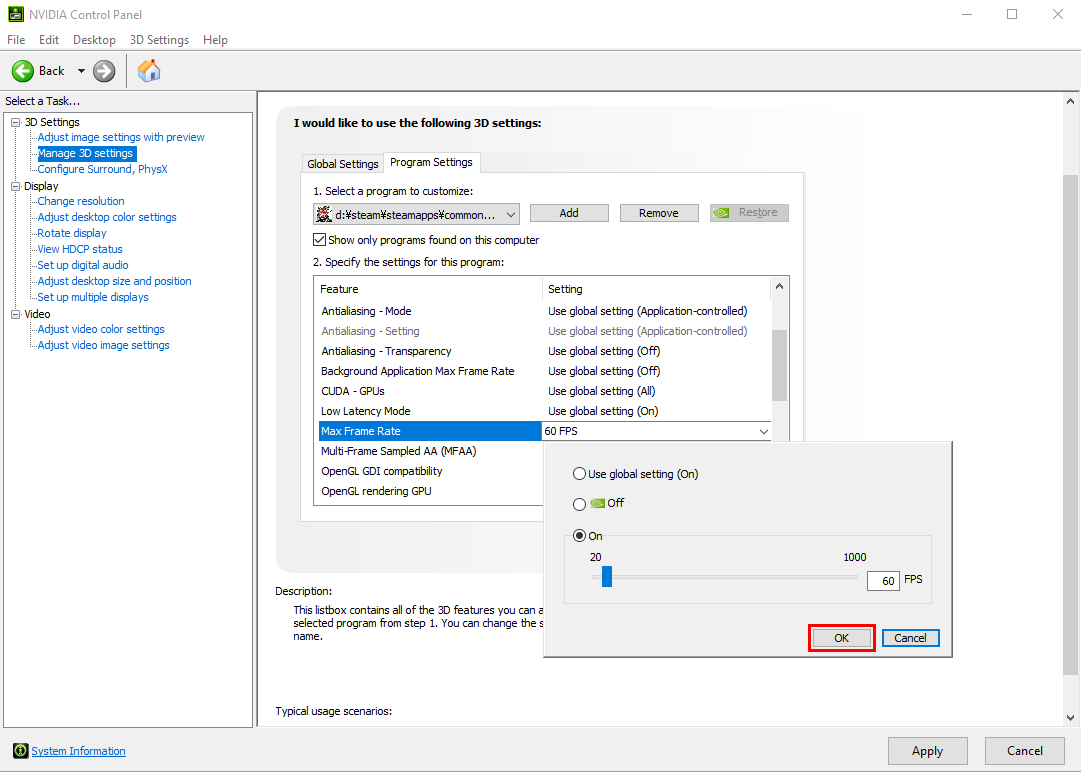
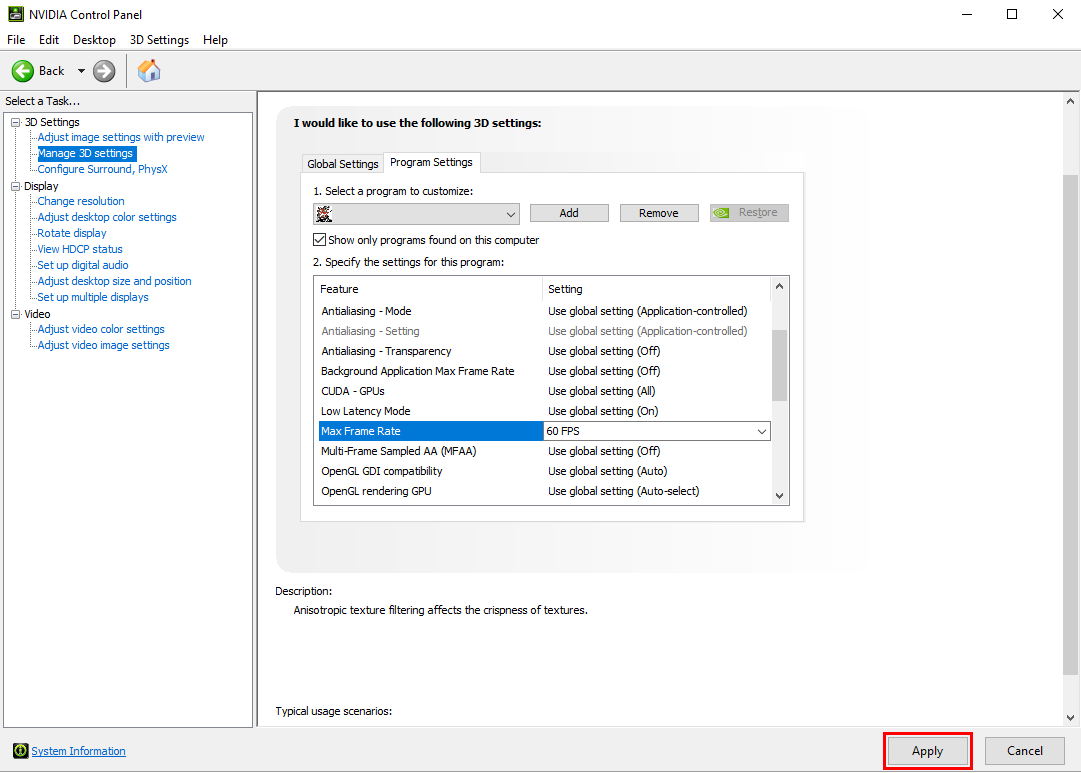
- Click the “Apply” button.
- In the “1. Select a program to customize:” section click on the “Add” button, then go to the folder where you have “METAL GEAR SOLID 3: Snake Eater - Master Collection Version” installed and select “launcher.exe.exe”.
- Follow the same instructions from Step 4.
For those using a graphics card made by AMD
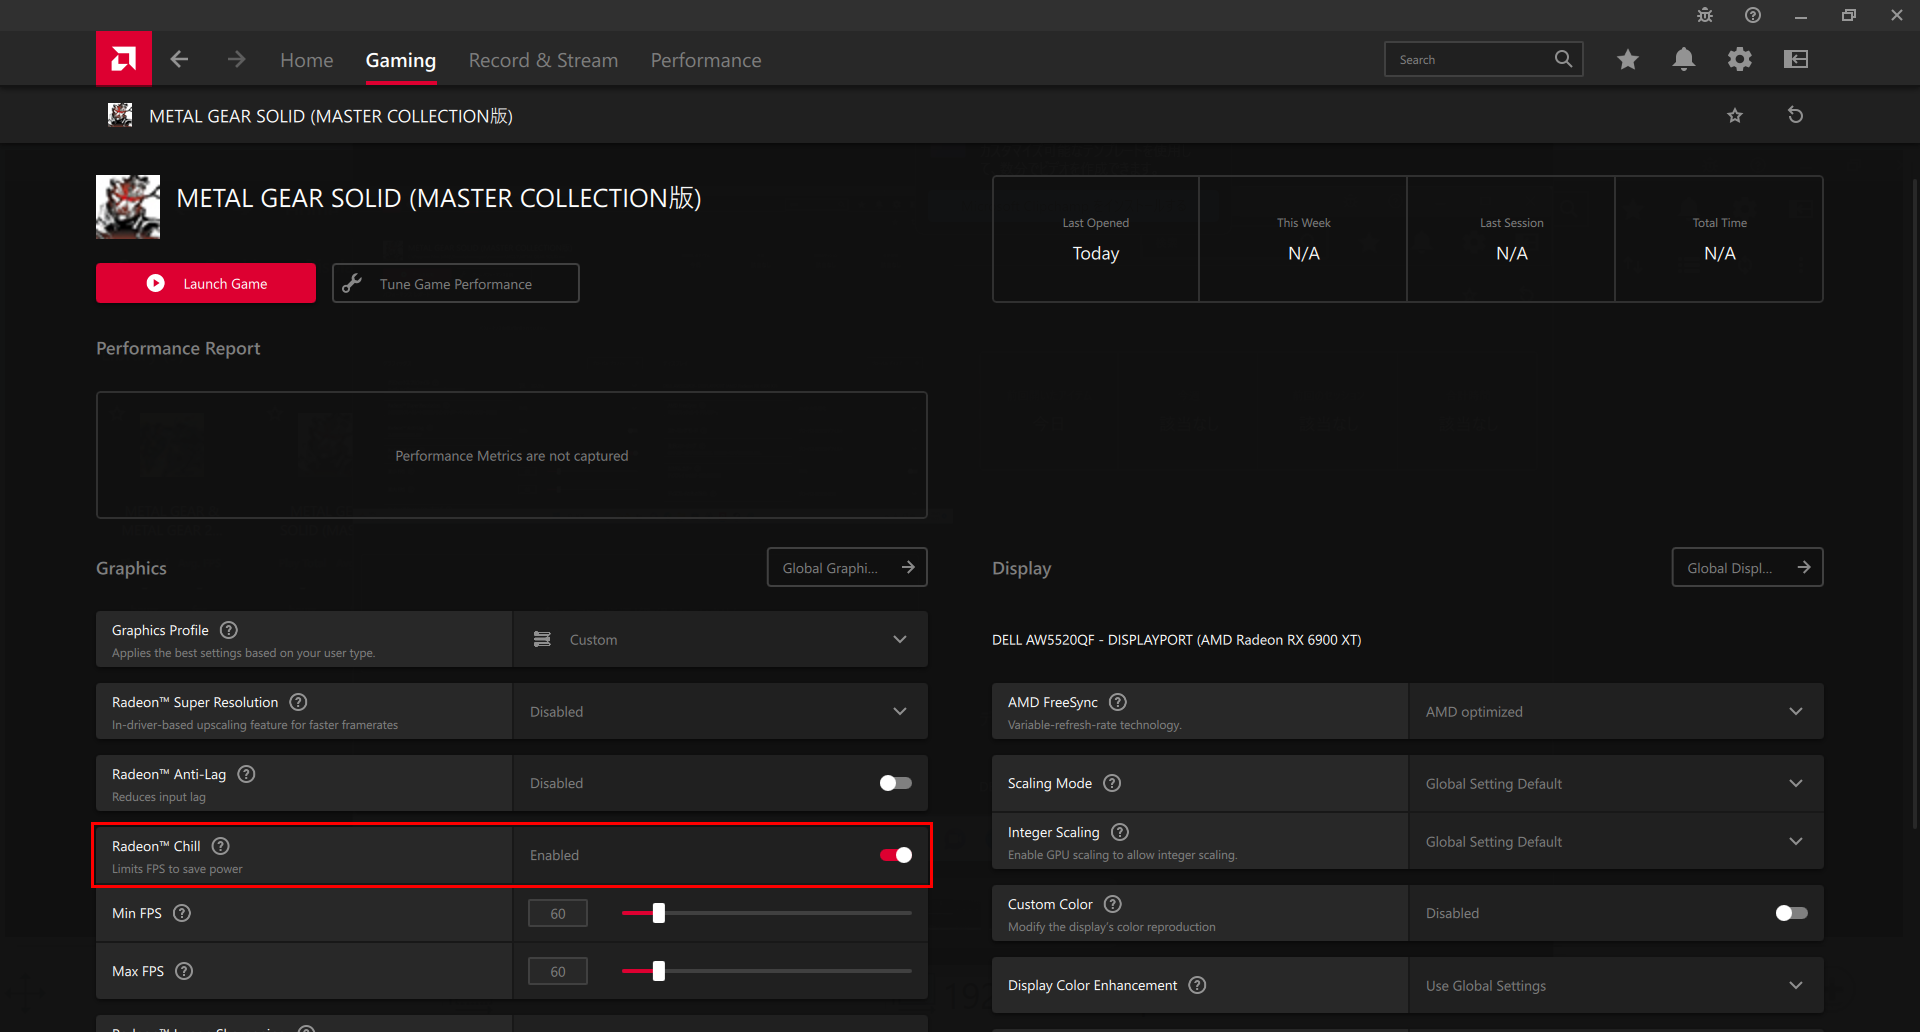
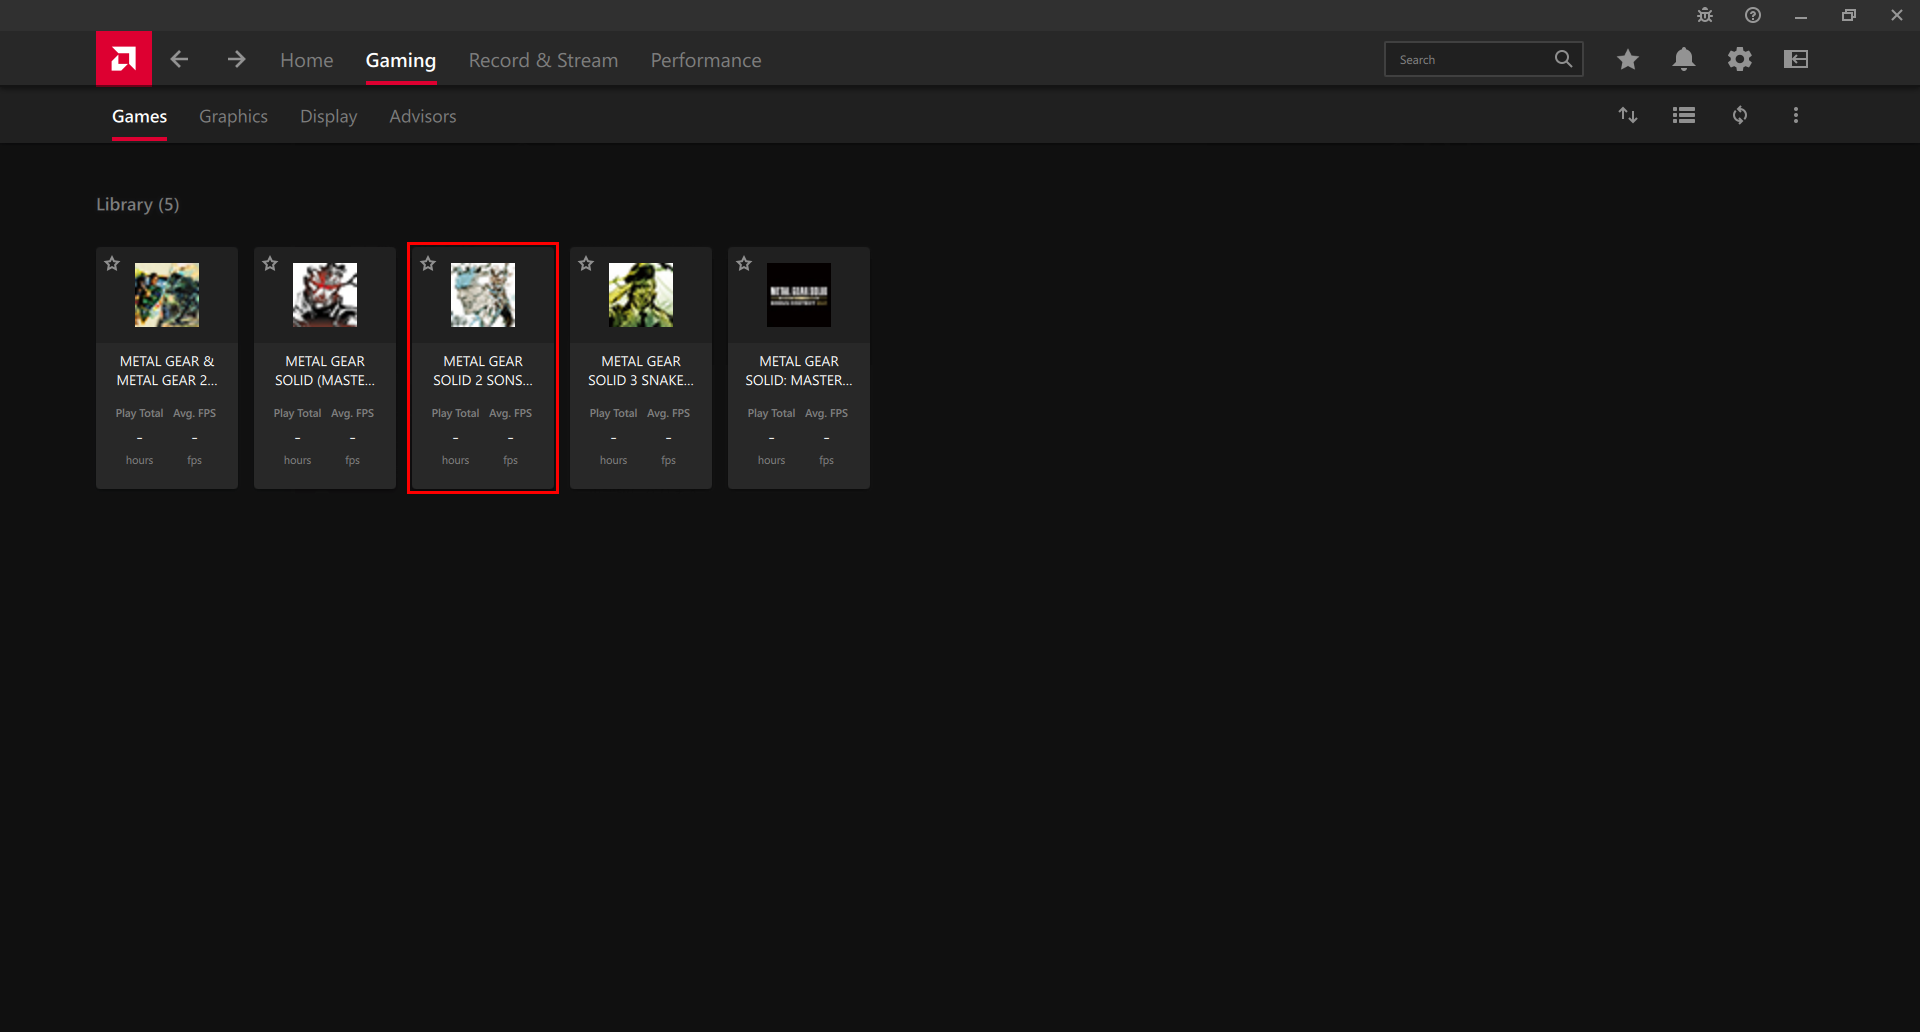
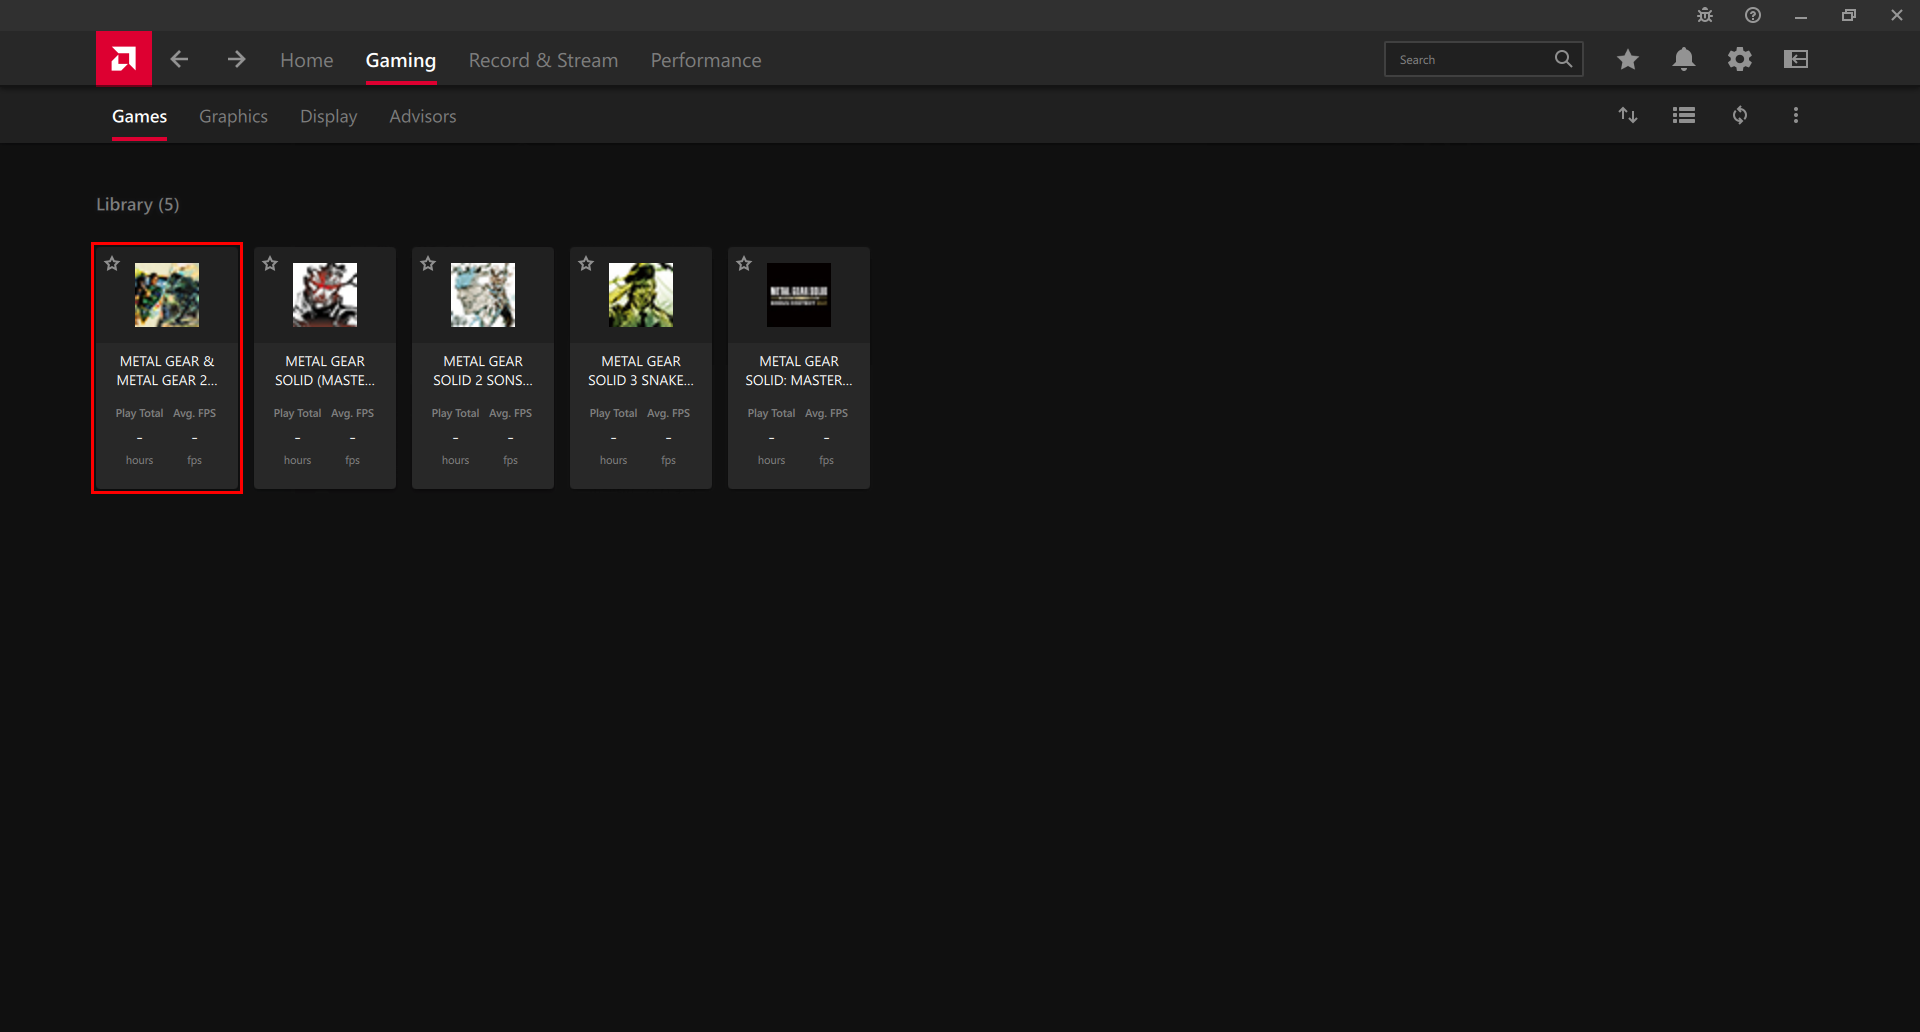
- Launch the “AMD Software” that you have installed.
- In the “Gaming” tab, select “METAL GEAR SOLID 3: Snake Eater - Master Collection Version”.
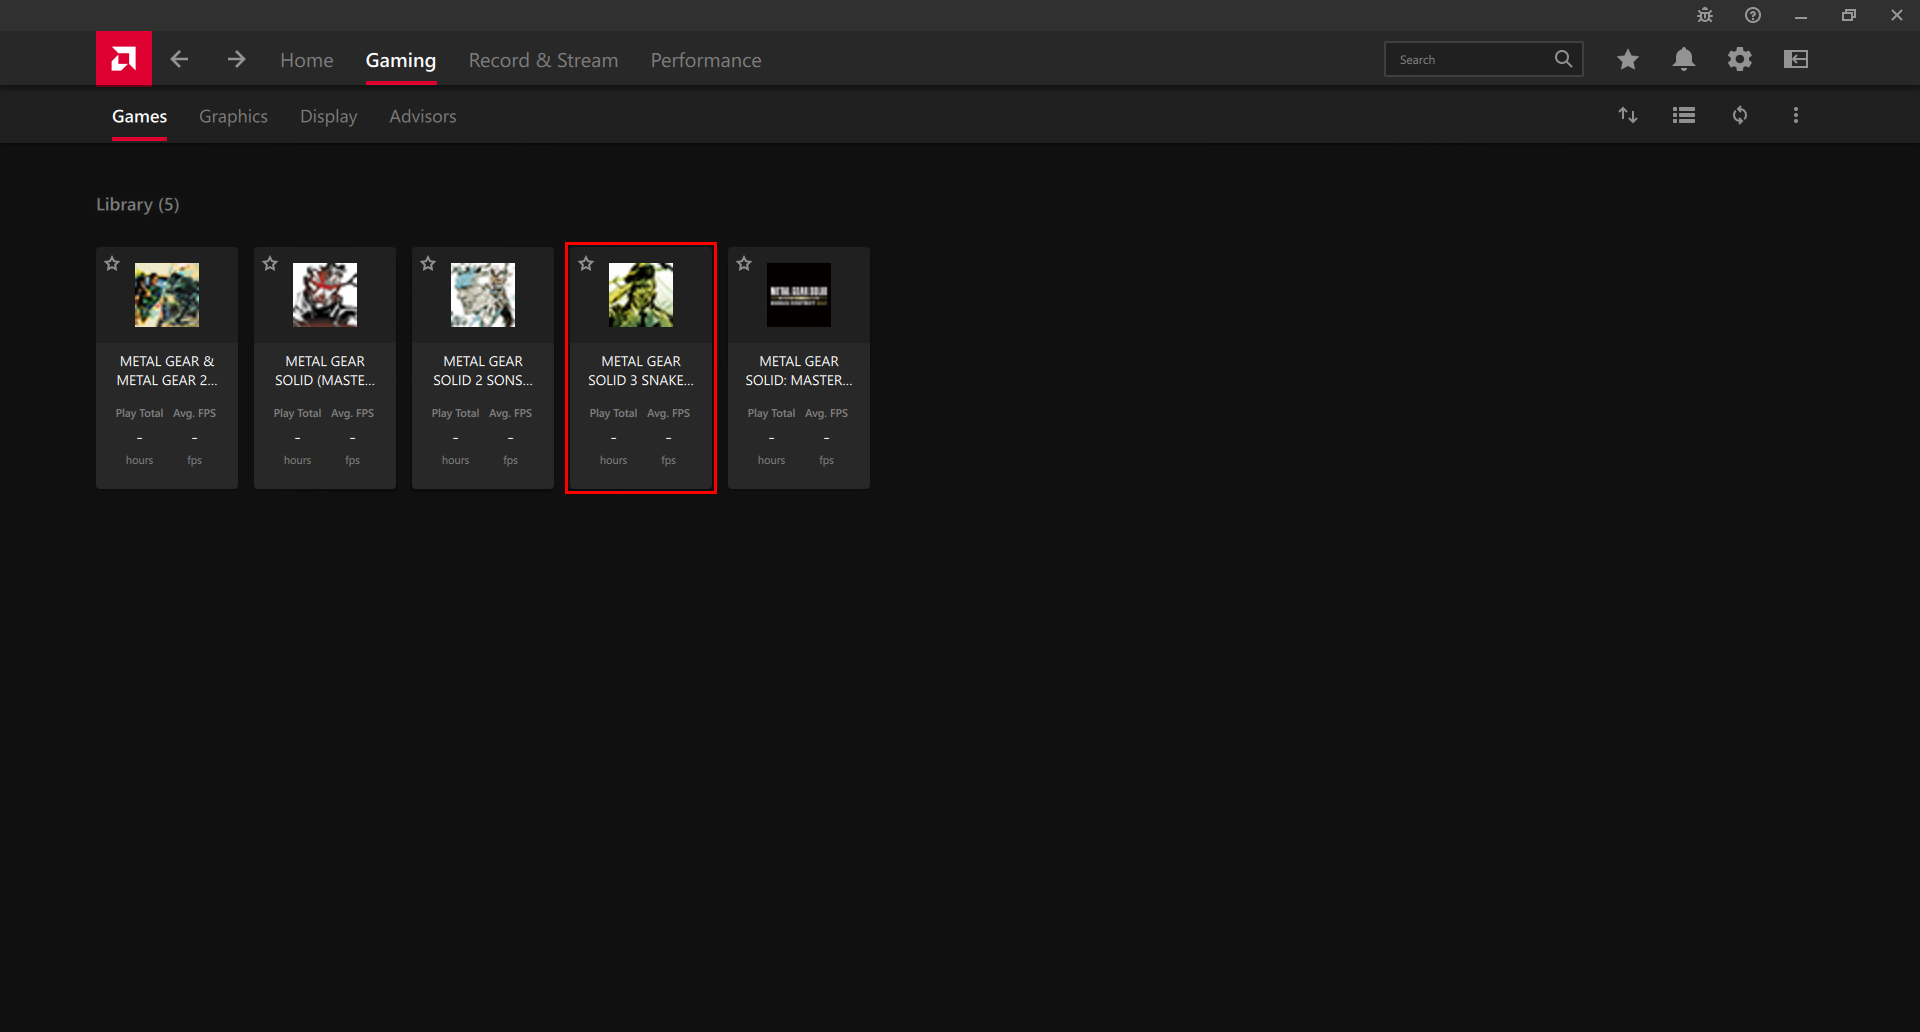
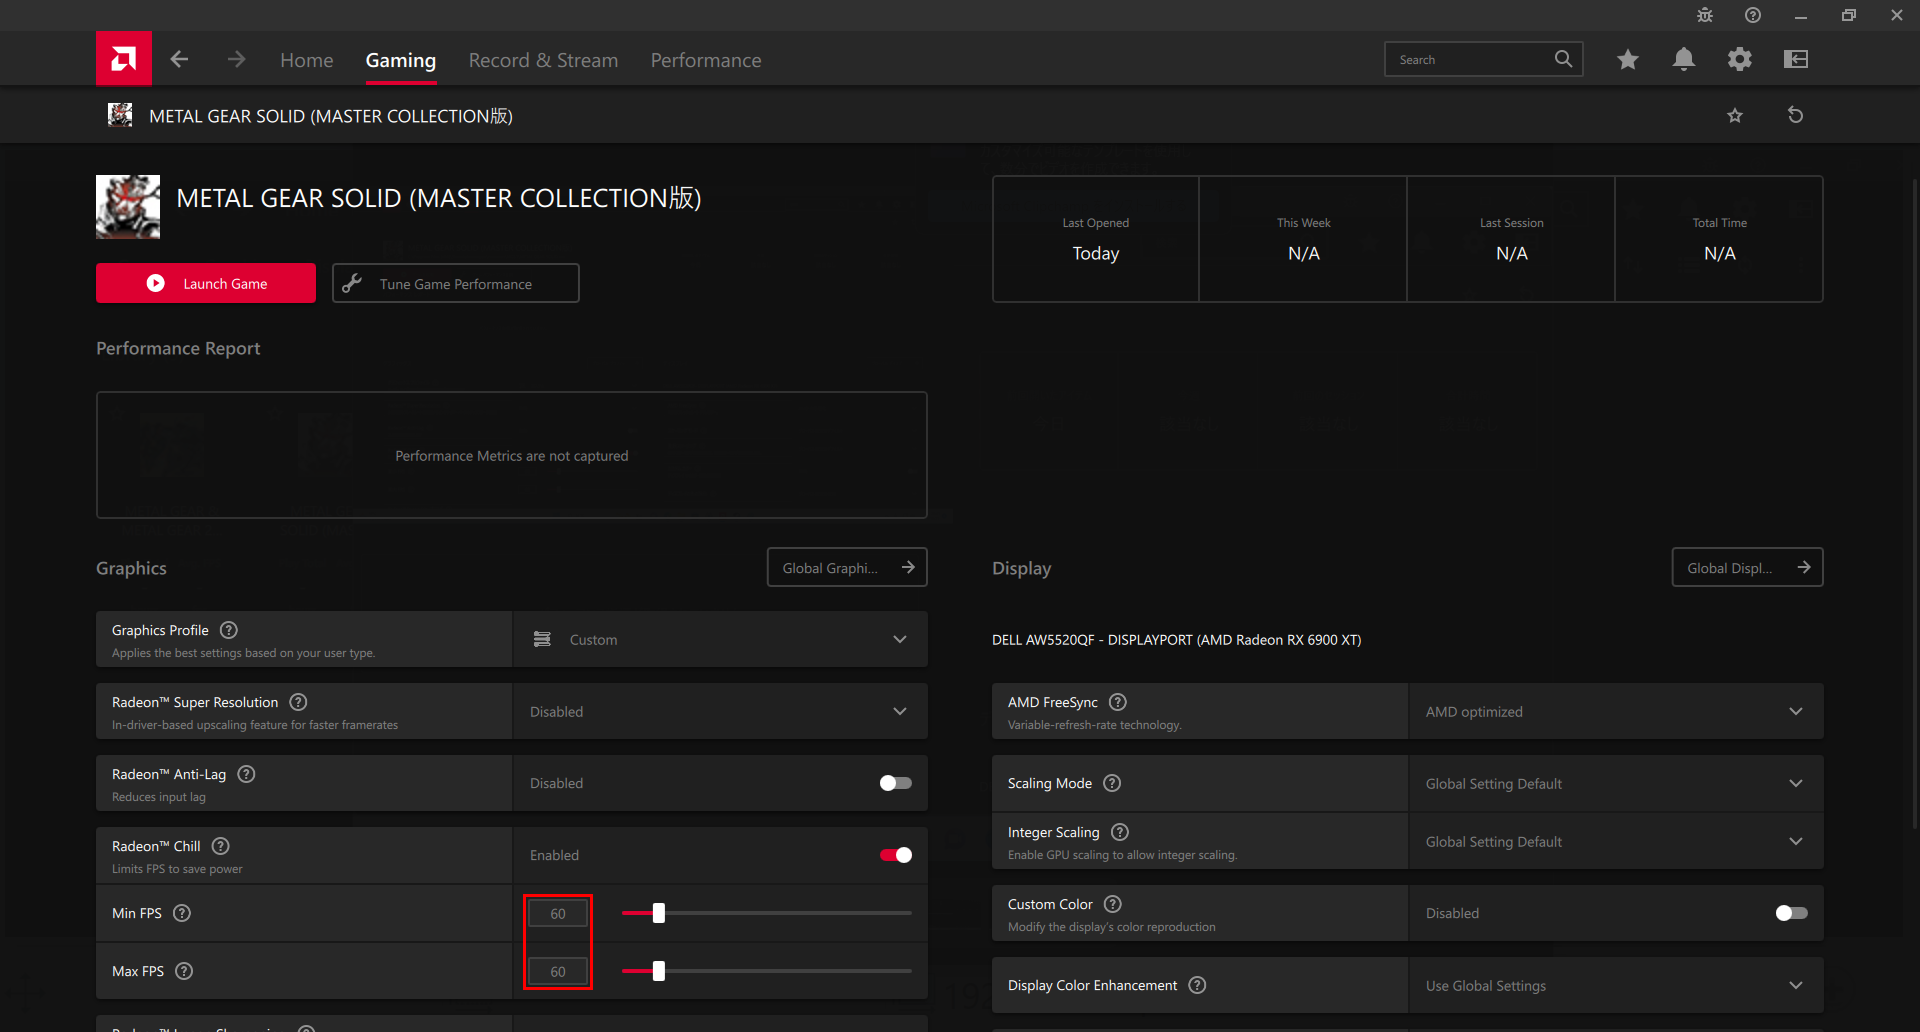
- Make sure that the “Radeon™ Chill” is turned on, with the Min FPS and Max FPS set to 60.
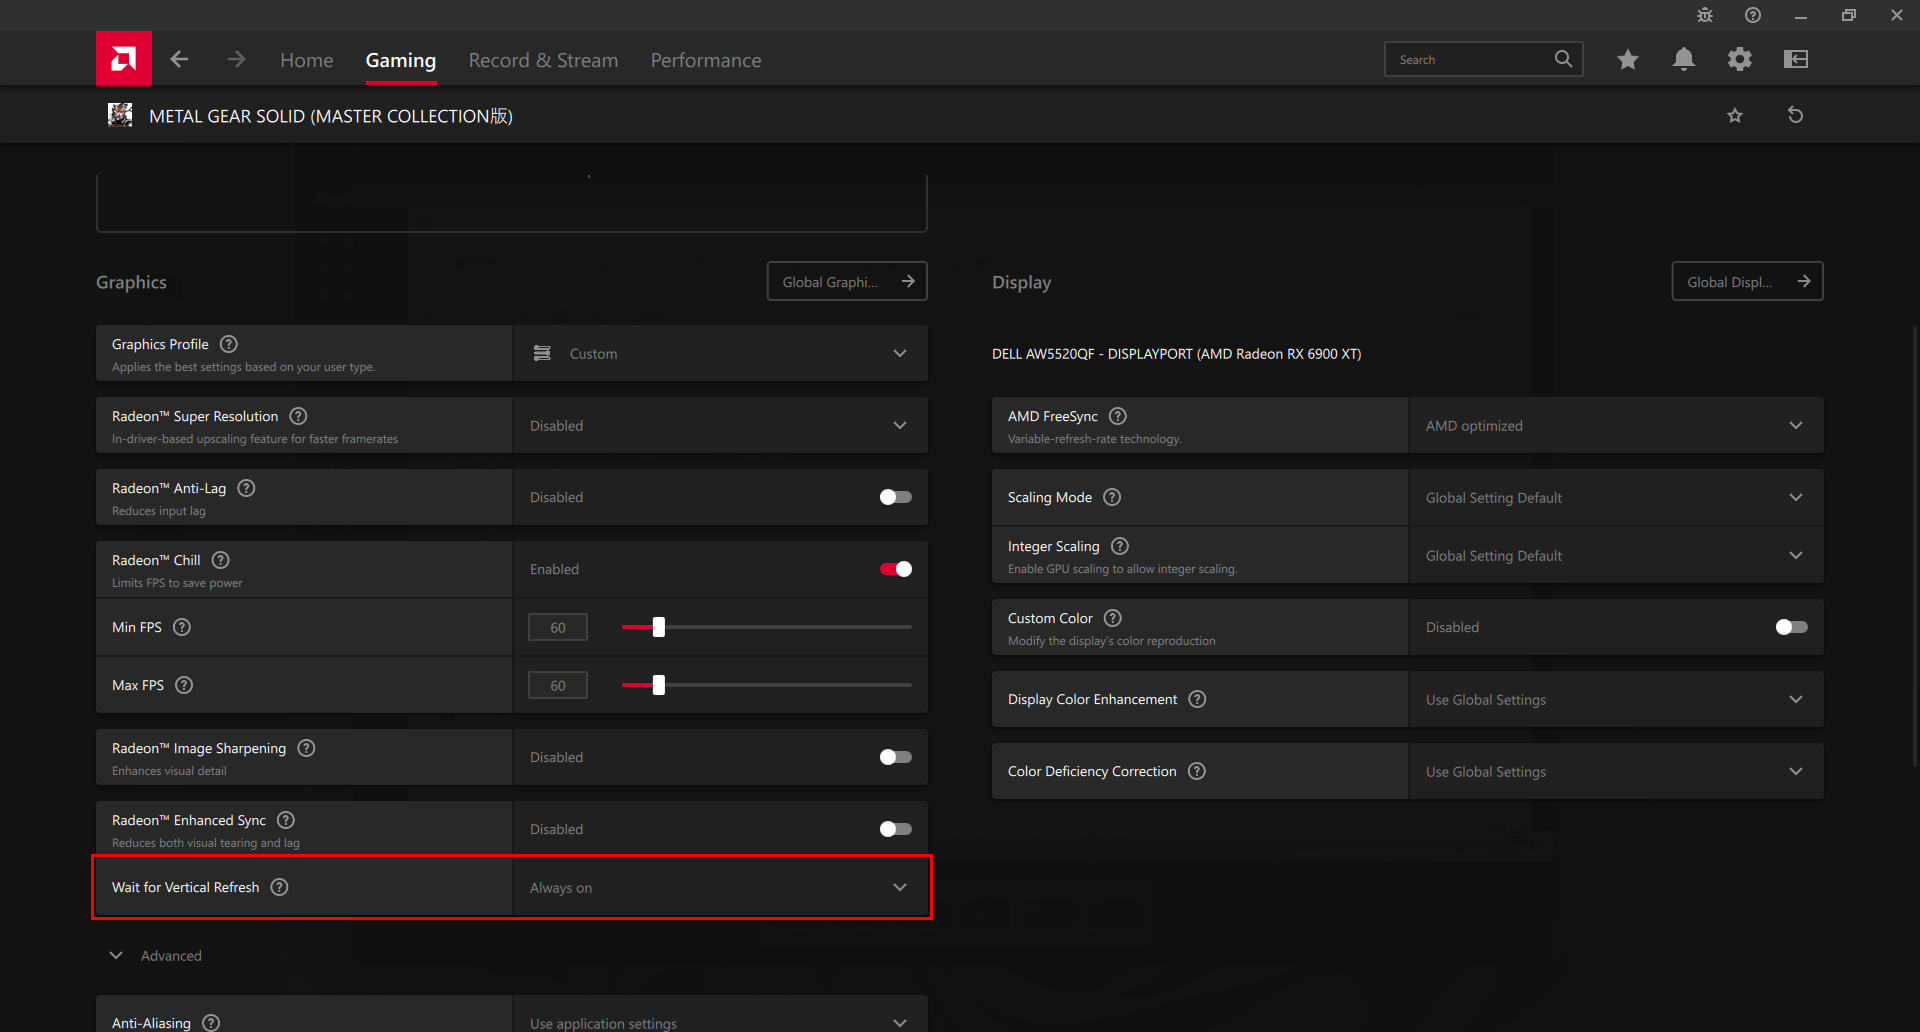
*The screenshots in this instuctions were all captured using the METAL GEAR SOLID - Master Collection Version.
The game title and icon that should display as you follow these instructions is "METAL GEAR SOLID 3: Snake Eater - Master Collection Version".
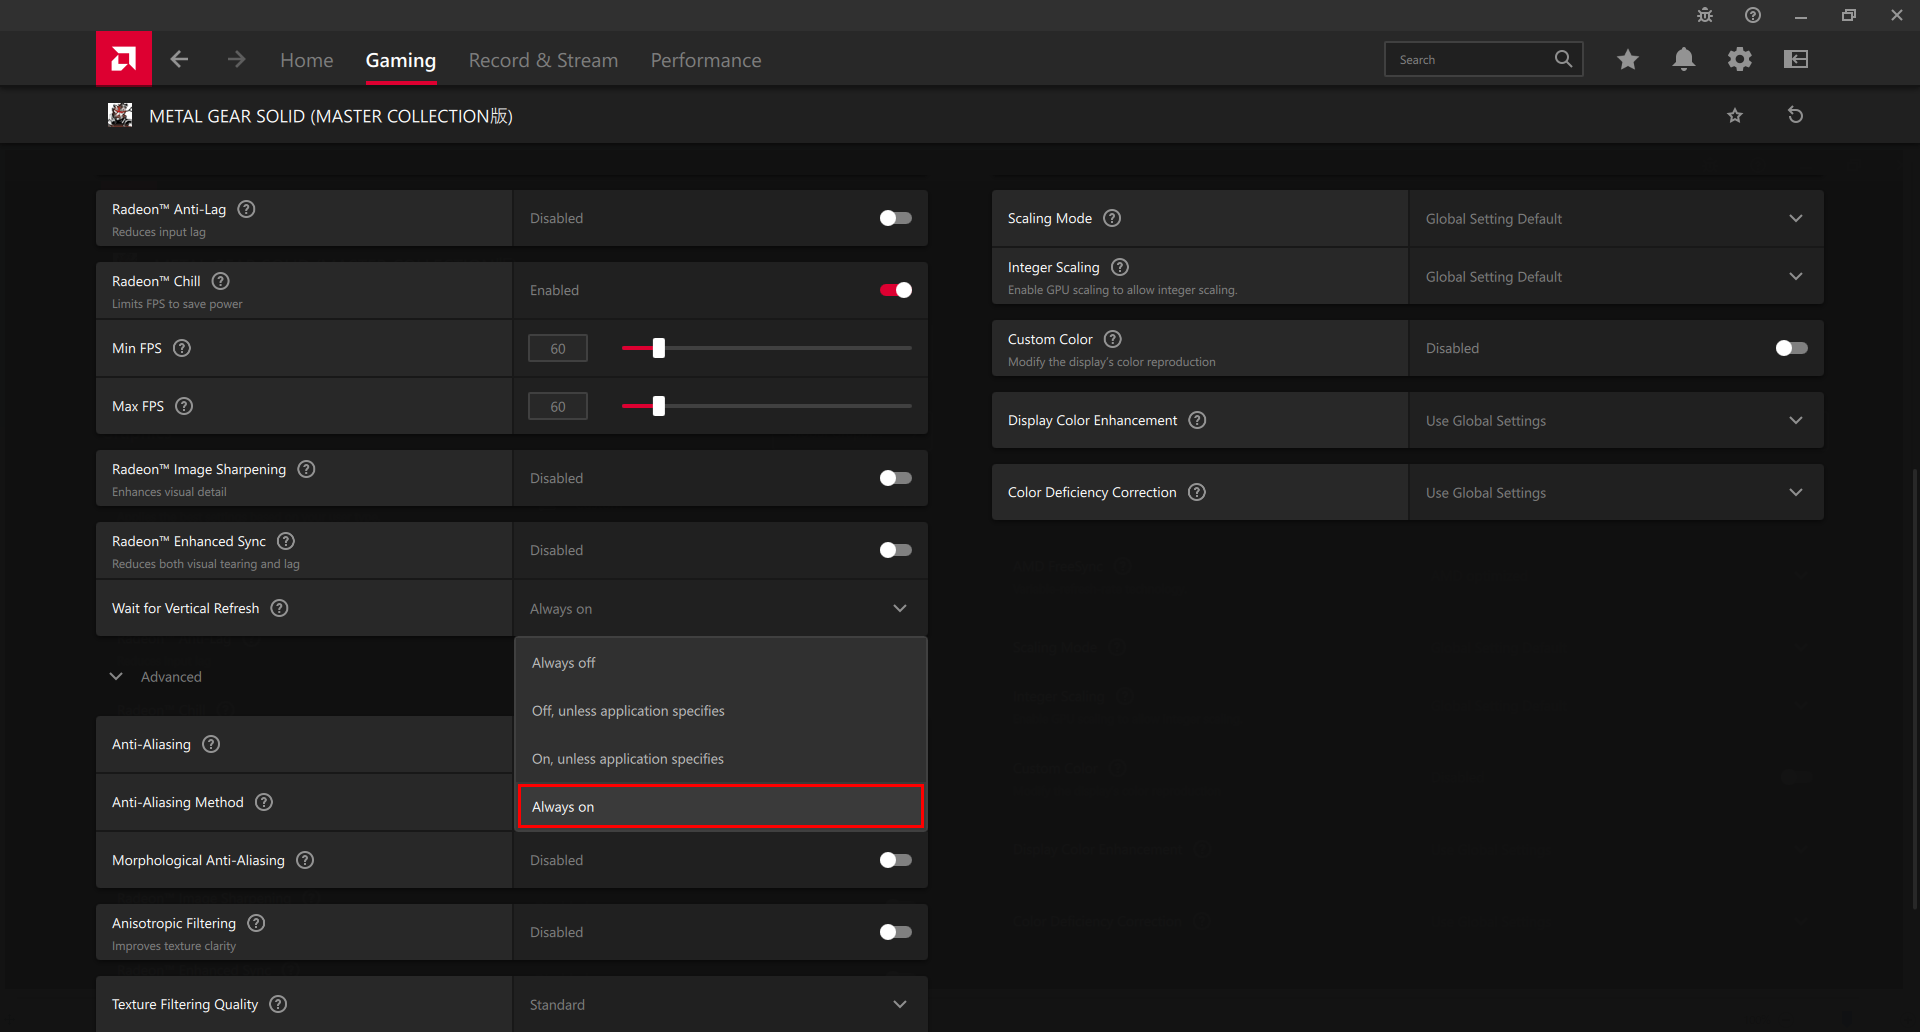
We will replace them with the correct screenshots at a later date. - Make sure that the “Wait for Vertical Refresh” is set to Always on.
Share: 


 Let’s go through the resources first!
 Speaking of buildings...