Deflector - SuperGoldenSire
  • Fixed some localization issues
  • Fixed an error where the challenge “Kill 300 enemies in Magnetic Fields” was promping in Living Entrails
  • Battery now can be given to fisherman
  • Fixed error where challenges related to traps were not unlocking correctly.
  • Fixed issue getting stuck in dialog when speaking with Collector the robot.
  • Initial mutations no longer appear again after finishing every world.
  • Fixed issue jetpack boss mutation removing the ability of dashing
  • Fixed issue spinning swords mutation not working properly sometimes
May 2, 2022
Instruments of Destruction - Radiangames
Lots of small tweaks and bug fixes in this update:

Increased max island blocks + decals to 6000
Increased maximum detail debris settings (Medium is the old High setting)
Added option to change how much large debris is present (Medium is closest to old behavior on most islands)
Added checkbox for Low FPS smoothing (enabled by default aka no change)
Fixed magnets/pistons having reverse controls when placed on opposite sides
Fixed beam placement with PLACE ON HOLD disabled
Lowered volume of attachers (when more than 1)
Lowered volume of laser fire start (when more than 1)
Reduce camera shake from multiple parts creating shakes at the same time
Fixed Mirror mode lasers don't get range set (and delay on bombs/release connectors)
Added advanced option to adjust bomb aerial timer
Added FOV save/load
Locked mouse cursor to the game window
Make power explosions not affect launcher/cannon blast
Make launcher/cannon blast weaker
Fixed disabling shadows removing dust/etc particles
Kinda fixed undo showing controls for beams/ropes
Fixed parts showing as $0 after Undo (and mass/cost totals not being right)
Fixed setting start angle on pivot 90 rotates connector incorrectly
Improved vehicle flipping so it's less crazy (have to push the button more, but it's better overall)
Started changing how island ground data is saved/generated
Engineer Alpha - aaronworcester
As I was coming up with all the things I wanted to say in this week’s log about the rotation 2.0 update it didn’t feel quite right. It had no context or background on how we got here. So I decided to do more and create what I am calling a ‘Megalog’. A much larger form of the engineer’s log that will happen periodically that goes a bit more into the why and history, as well as some of the behind the scenes code. I understand that not everyone will care about what is in here and that is fine but for those who do (myself and others) I want to give them more because I want to be the developer that I always wished my favorite game had, and now I can be. With that in mind please remember that this content is not complete and will likely change some before release.

The origins of rotational power in Engineer Alpha date back about a decade to a Minecraft mod called RotaryCraft by Reika. I greatly enjoyed playing with that mod and while it had good bones, I felt its implementation left something to be desired. A large part of that I am sure was due to being limited by the very strict rules imposed by being in Minecraft.

After playing with RotaryCraft in many of my mod packs over the next few years I knew rotational power was something that had potential and that if I ever made a game I would want rotation in it.

I decided that Engineer Alpha would start with rotation as the primary power transfer method for several reasons; first among them is that you can actually see it work. Also it was different from similar games that tend to start you off with electricity. Now if you have ever studied energy transfer you will quickly learn that electricity is basically cheating, you can do whatever you want and you get crazy good efficiency. I didn’t want to start you off with the super easy and efficient method as there be nothing to improve on. This isn't real life and advancement is fun.

This all lead to the creation of Rotation 1.0 in Engineer Alpha. Rotation 1.0 was very crude and essentially just a proof of concept. The initial idea was just to connect two points in the world with a straight line, as this is the most efficient way to connect two points, and as I have mentioned before the game did not start out nearly as cubic as it is now. So in a completely free form world this seemed like it would fit just fine and I would put some kind of U-joint on the end to justify weird angles shafts would be at. This straight-line idea however, never sat well with me.


It felt like I was trying to make the game too “modern” and not what was best for gameplay. Eventually after working on other parts of the game and solidifying some other ideas it hit me to use the 3 dimensions of the world for the 3 parts of any shaft. When I first got this working, I knew right away it was what I wanted and I went with it. The “connection box” as I like to call it came about around this time as well and as we were not completely embracing the cubic world yet I needed a way for the shaft you built to “snap” to the building it was to connect with.

Rotation 1.0 was borderline unusable. When you built a shaft on a building you had one chance to get it right as Connection boxes didn’t come back when the shaft was removed and animations tended to break.


There were also some additional mechanics I had initially planned on including with the system like shafts seizing back along the line if the end didn’t get enough torque or a shaft breaking and needing to be repaired if overloaded. Ultimately these were deemed to be unnecessary and too punishing for players who didn’t know the system so they were never added and never will be.

Rotation 1.0 never really saw much external use beyond maybe a few testers and needed to be fixed up before anyone could be expected to actually play with it.

Which brings us to Rotation 1.1 which is what you are playing with on Version 0.2. The bad code was rewritten to make it serviceable by the player. Connection boxes were made to respawn when their shaft was removed. Keyframing was added as animations tended to break after a few minutes. There were even some limits because of other parts of the game that weren’t done yet like buildings needing to be an odd number of blocks in all dimensions, which is why the current connectors like gearboxes are big and unwieldy.


Rotation 1.1 worked and felt good enough that people could use it but I was not very happy with it and when the time came I would do it right. So it was shelved for a while and other things were developed and iterated on.

Which brings us to today, and Engineer Alpha version 0.3 which will include Rotation 2.0. 2.0 was nearly completely rewritten from the ground up with very little reused code.
The goals for 2.0 were:
  • Use the Cubic Voxel world to its fullest (no more connection boxes).
  • Improved visuals.
  • Direct connection (shafts not required).
  • Less errors and less restrictive backend code.
  • Splitters.
  • Proper shaft placing collision.

I started working on this even before version 0.2 came out and I could not be happier with it. All the pieces feel like they fit together and create a system that will work for the game.

One of the first problems was that without connection boxes I needed a way to show the player what is an input or output without being so “video gamey”. So I came up with a new connector.
This will be the new connector for all inputs and outputs. The direction of the arrows will always follow the flow of energy. So as a player all you have to do is line up the arrows between your machines and they will work.

The new system also works a little differently behind the scenes. In 1.1 shafts were the thing that allowed one building to give its rotation to another. In 2.0 there is a new input and output system that allows building to talk to each other directly. No more shafts if you don’t want/need them in your build.


Gearboxes have changed to now be a 3x2x1 building.
They are going to remain as a "black box" for the time being for reasons that will become clear later. And as I am sure you are wondering the answer is yes you can place blocks next to the input and output. The UI for the gearbox has also received a minor update. 
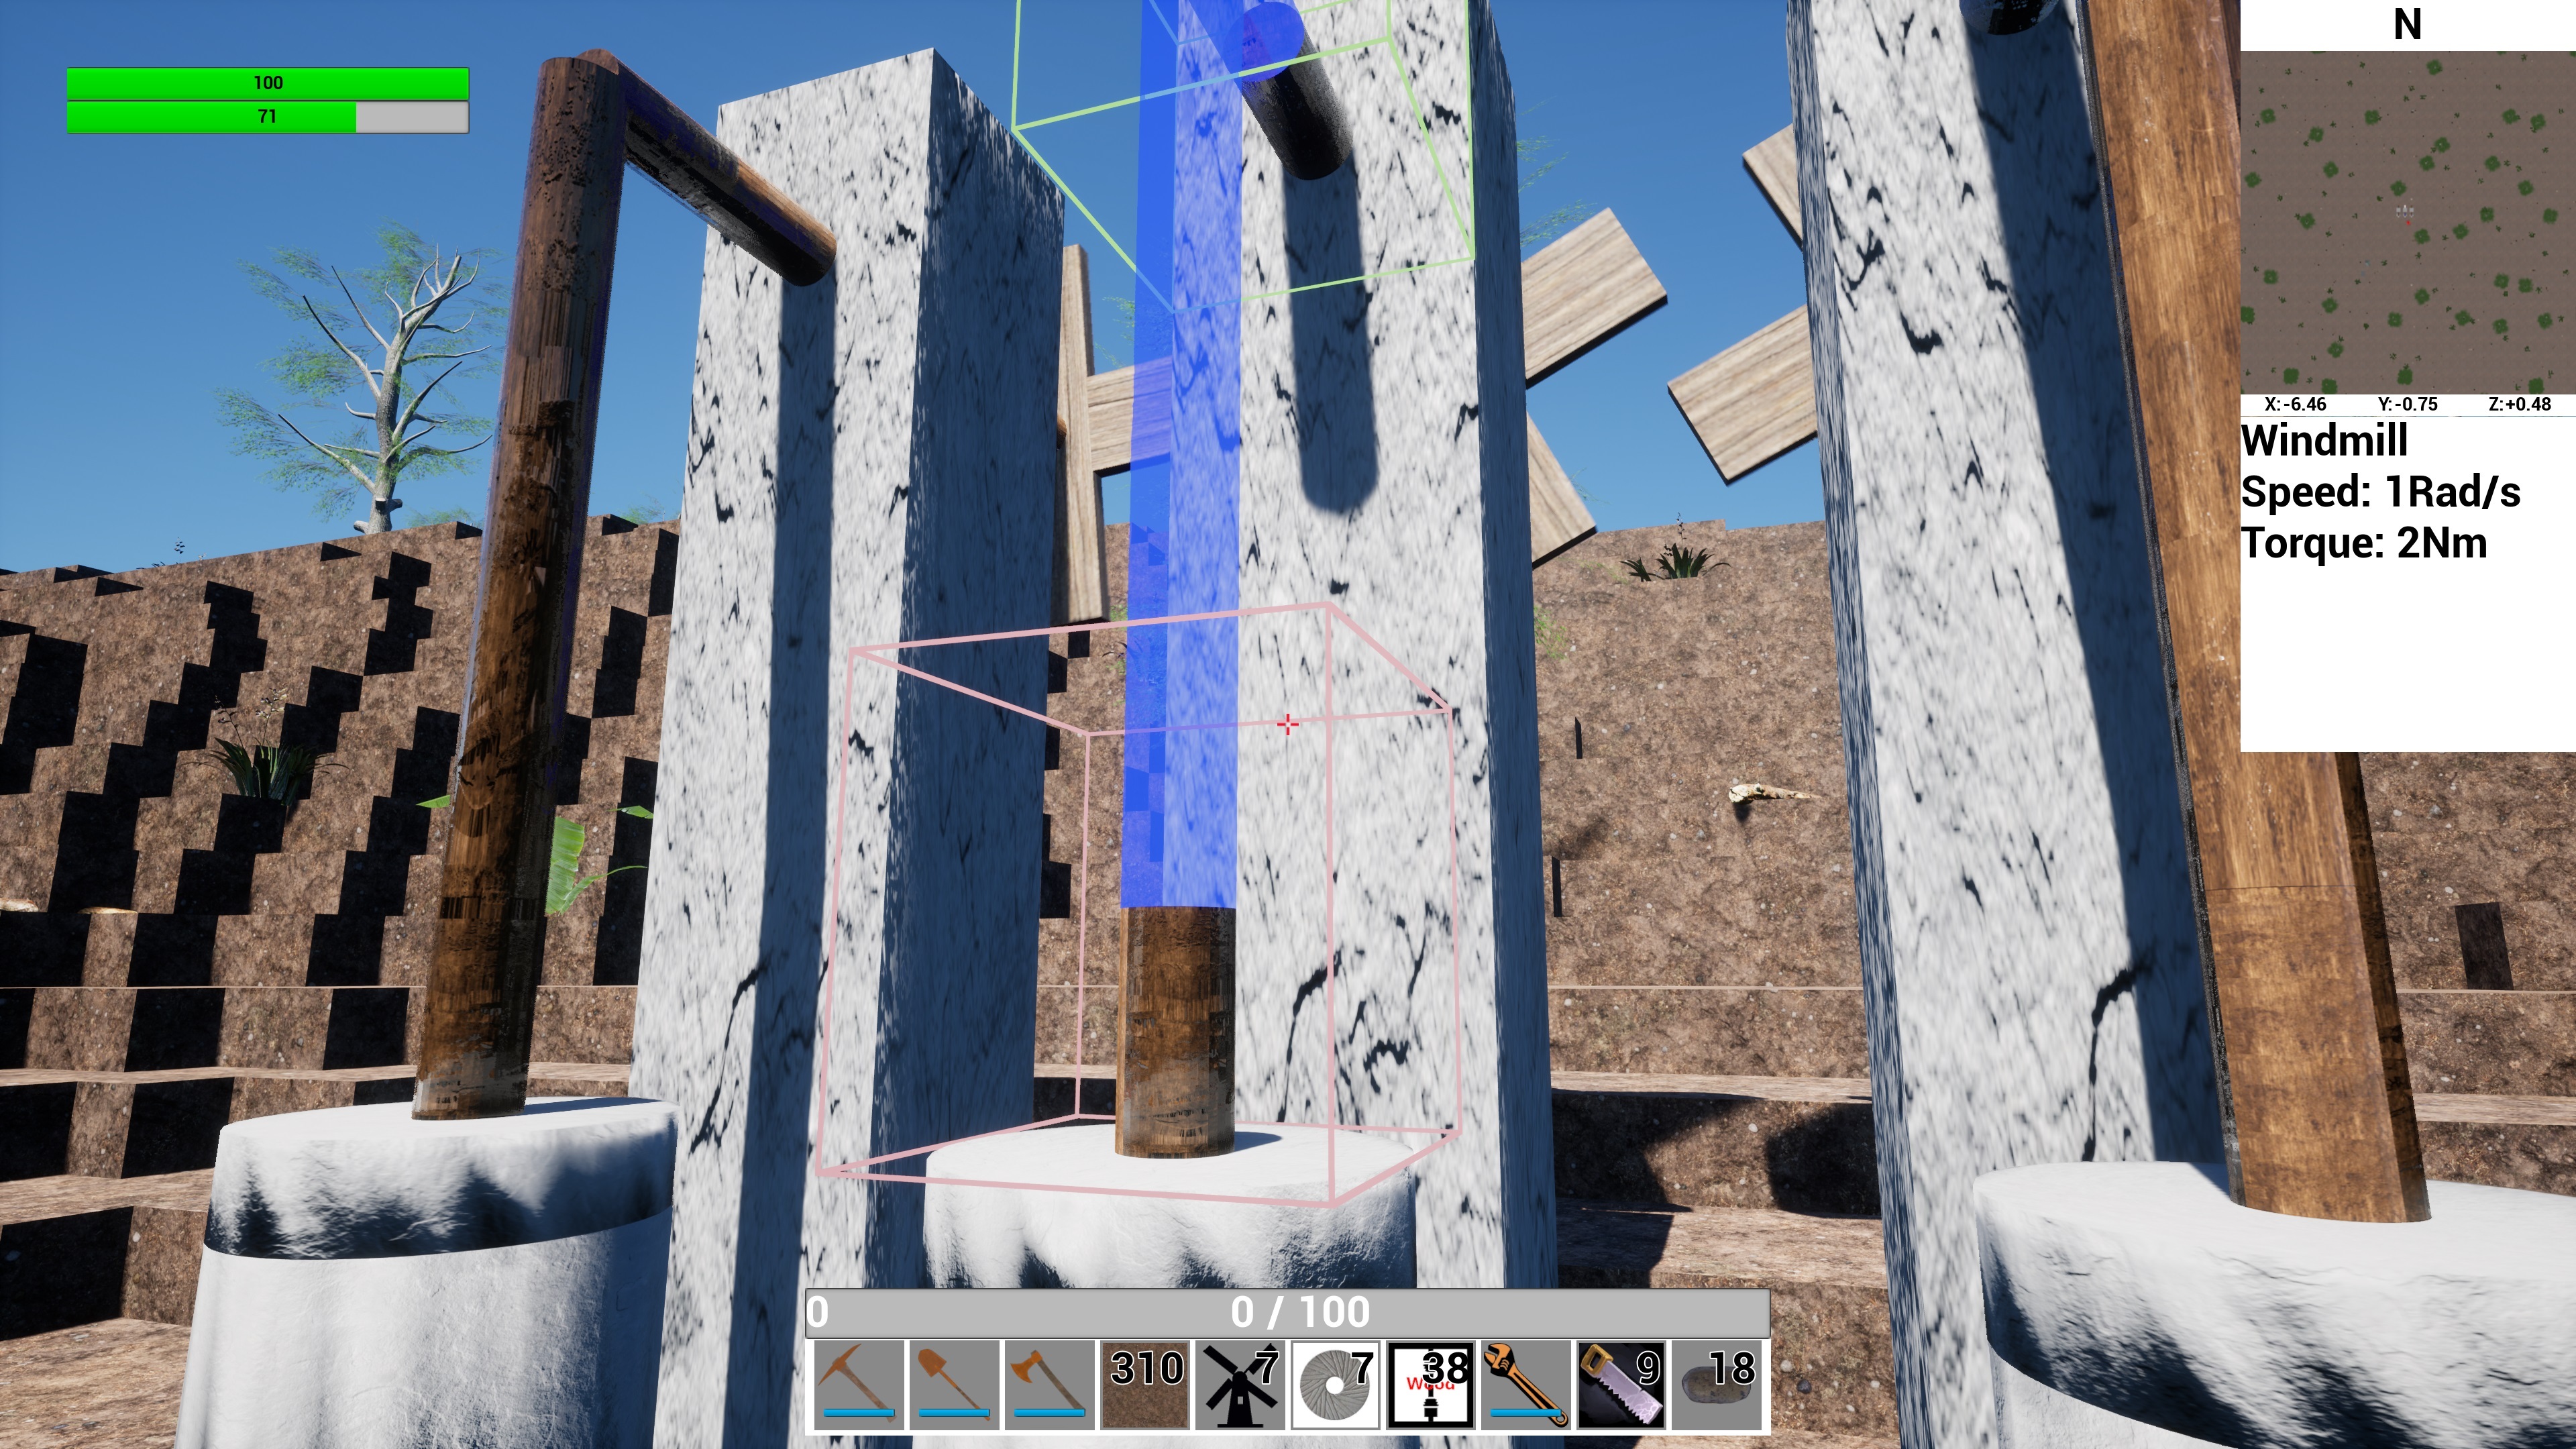
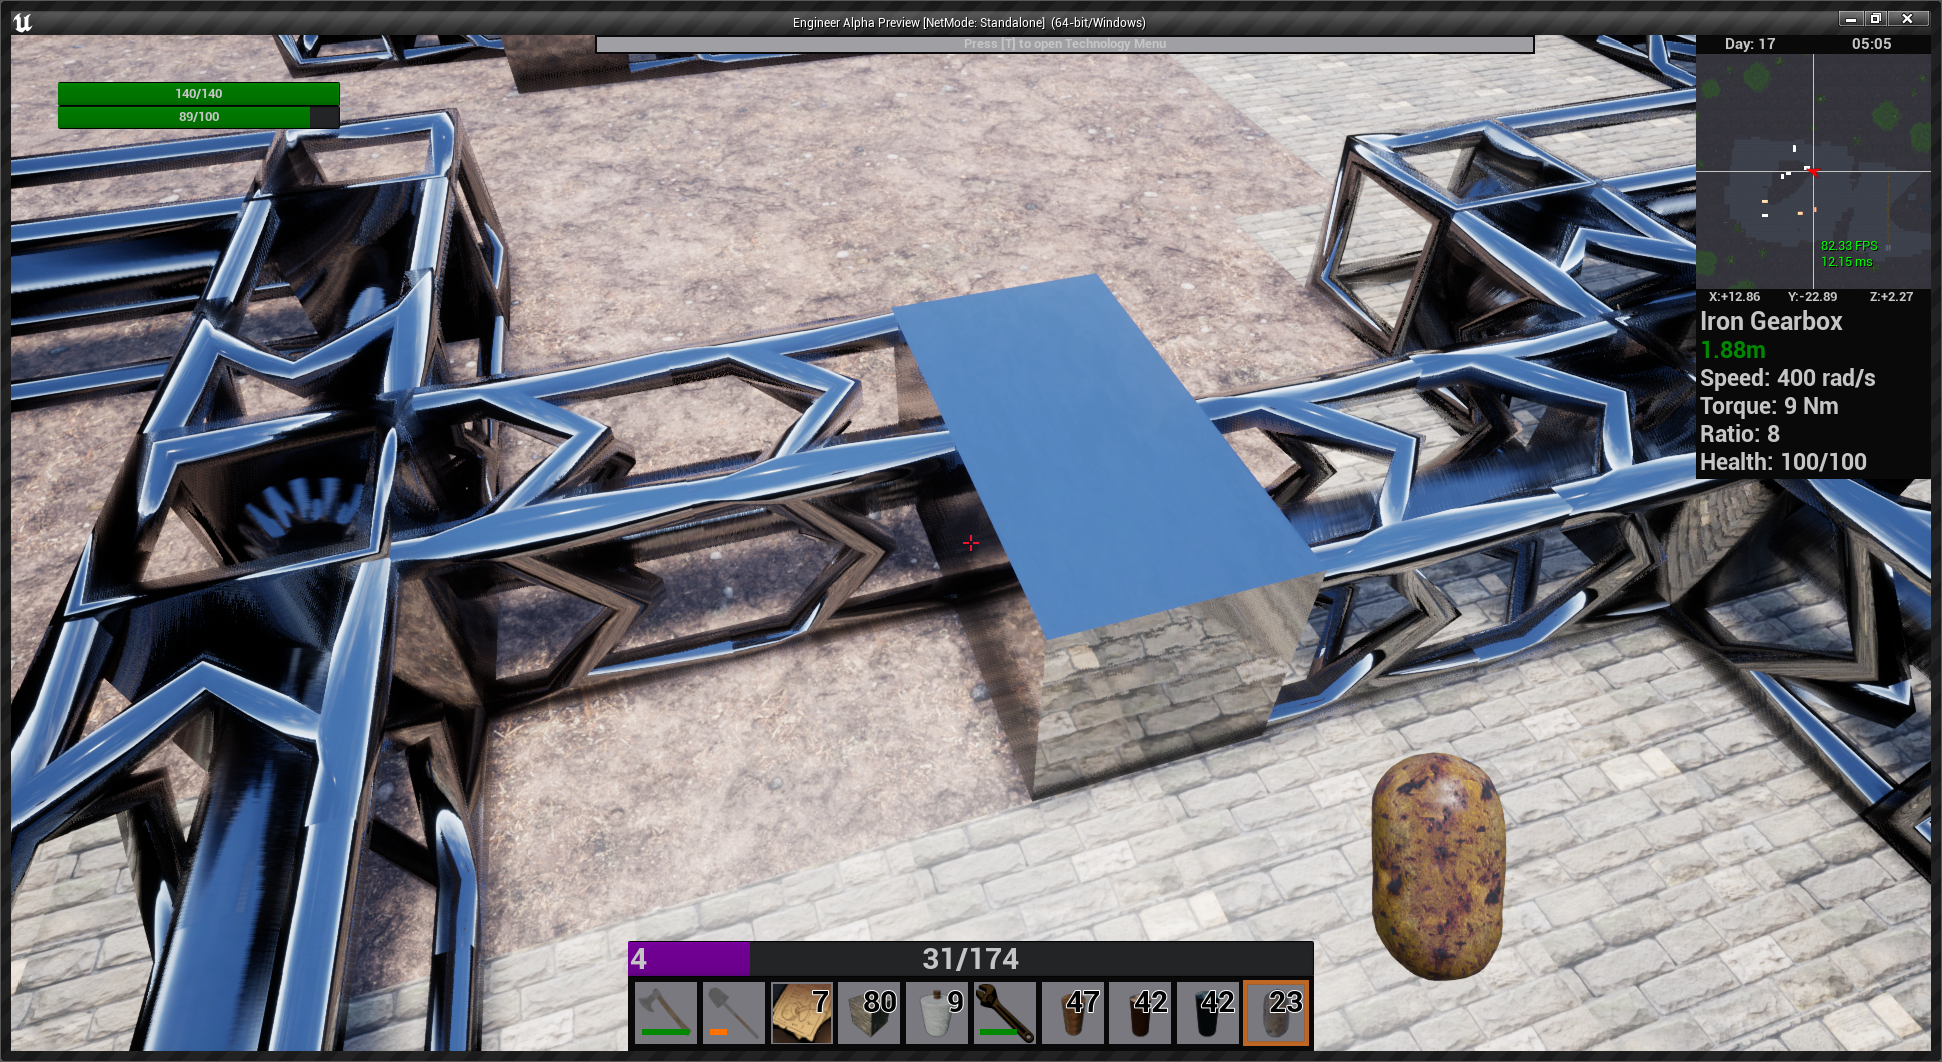
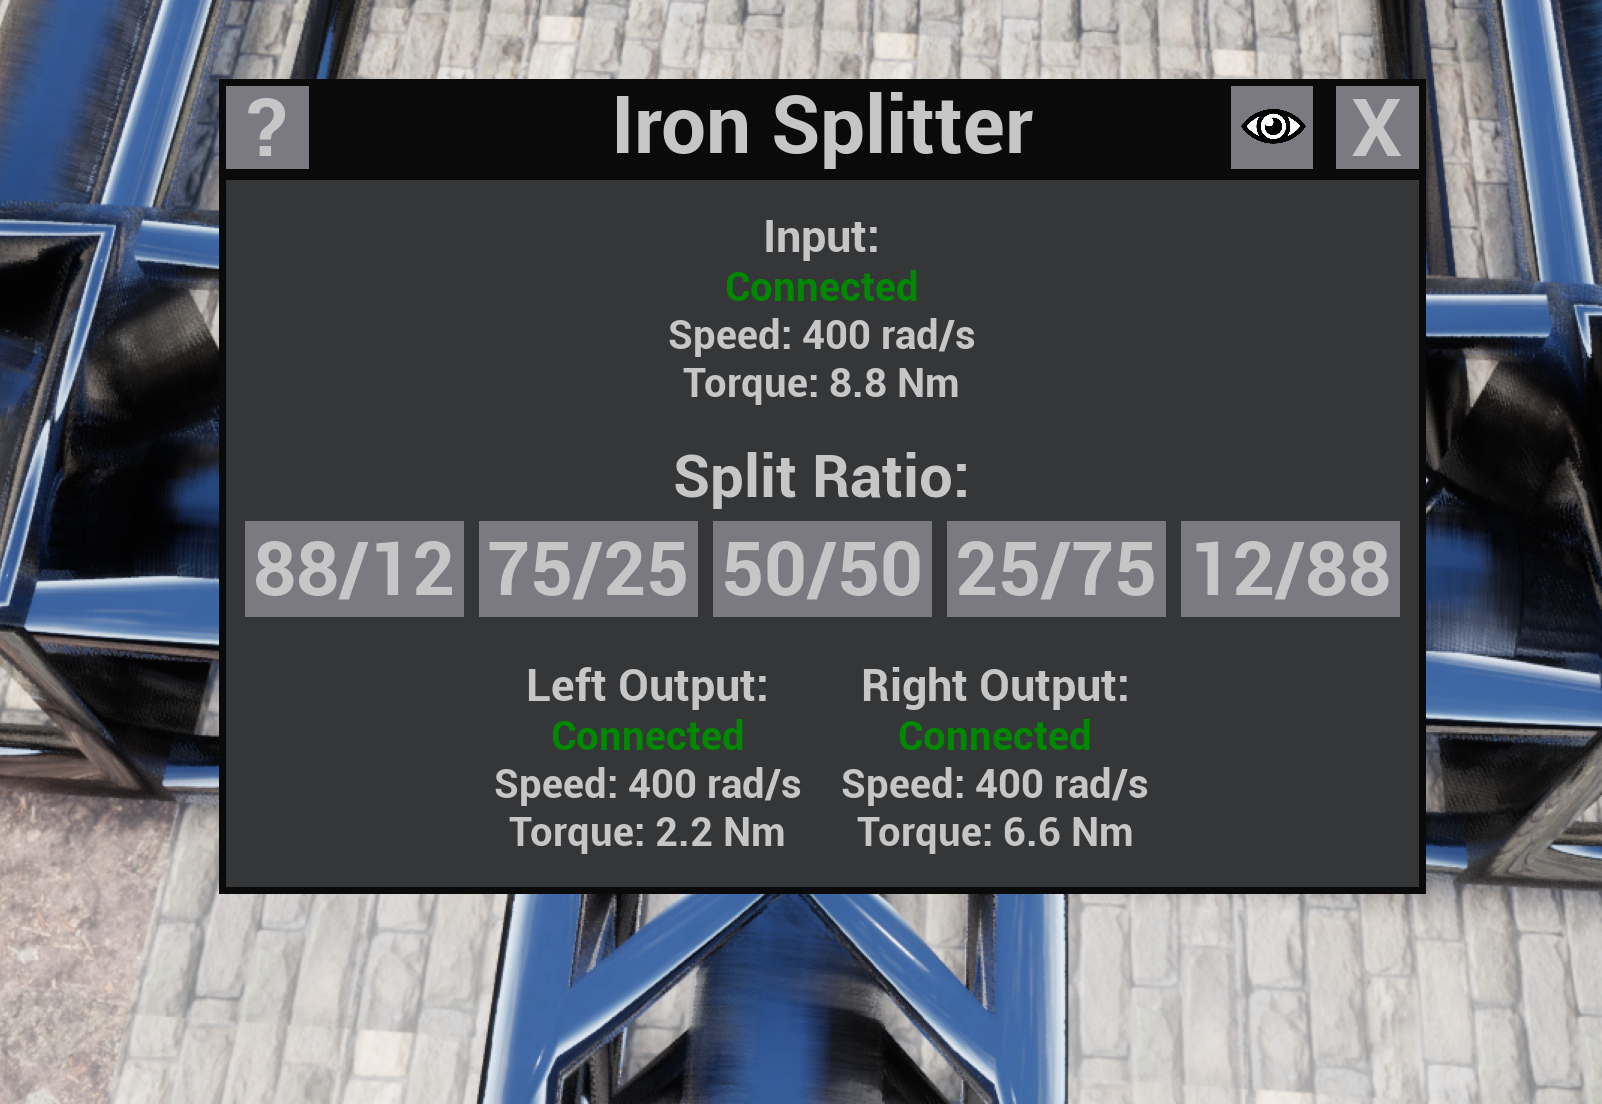
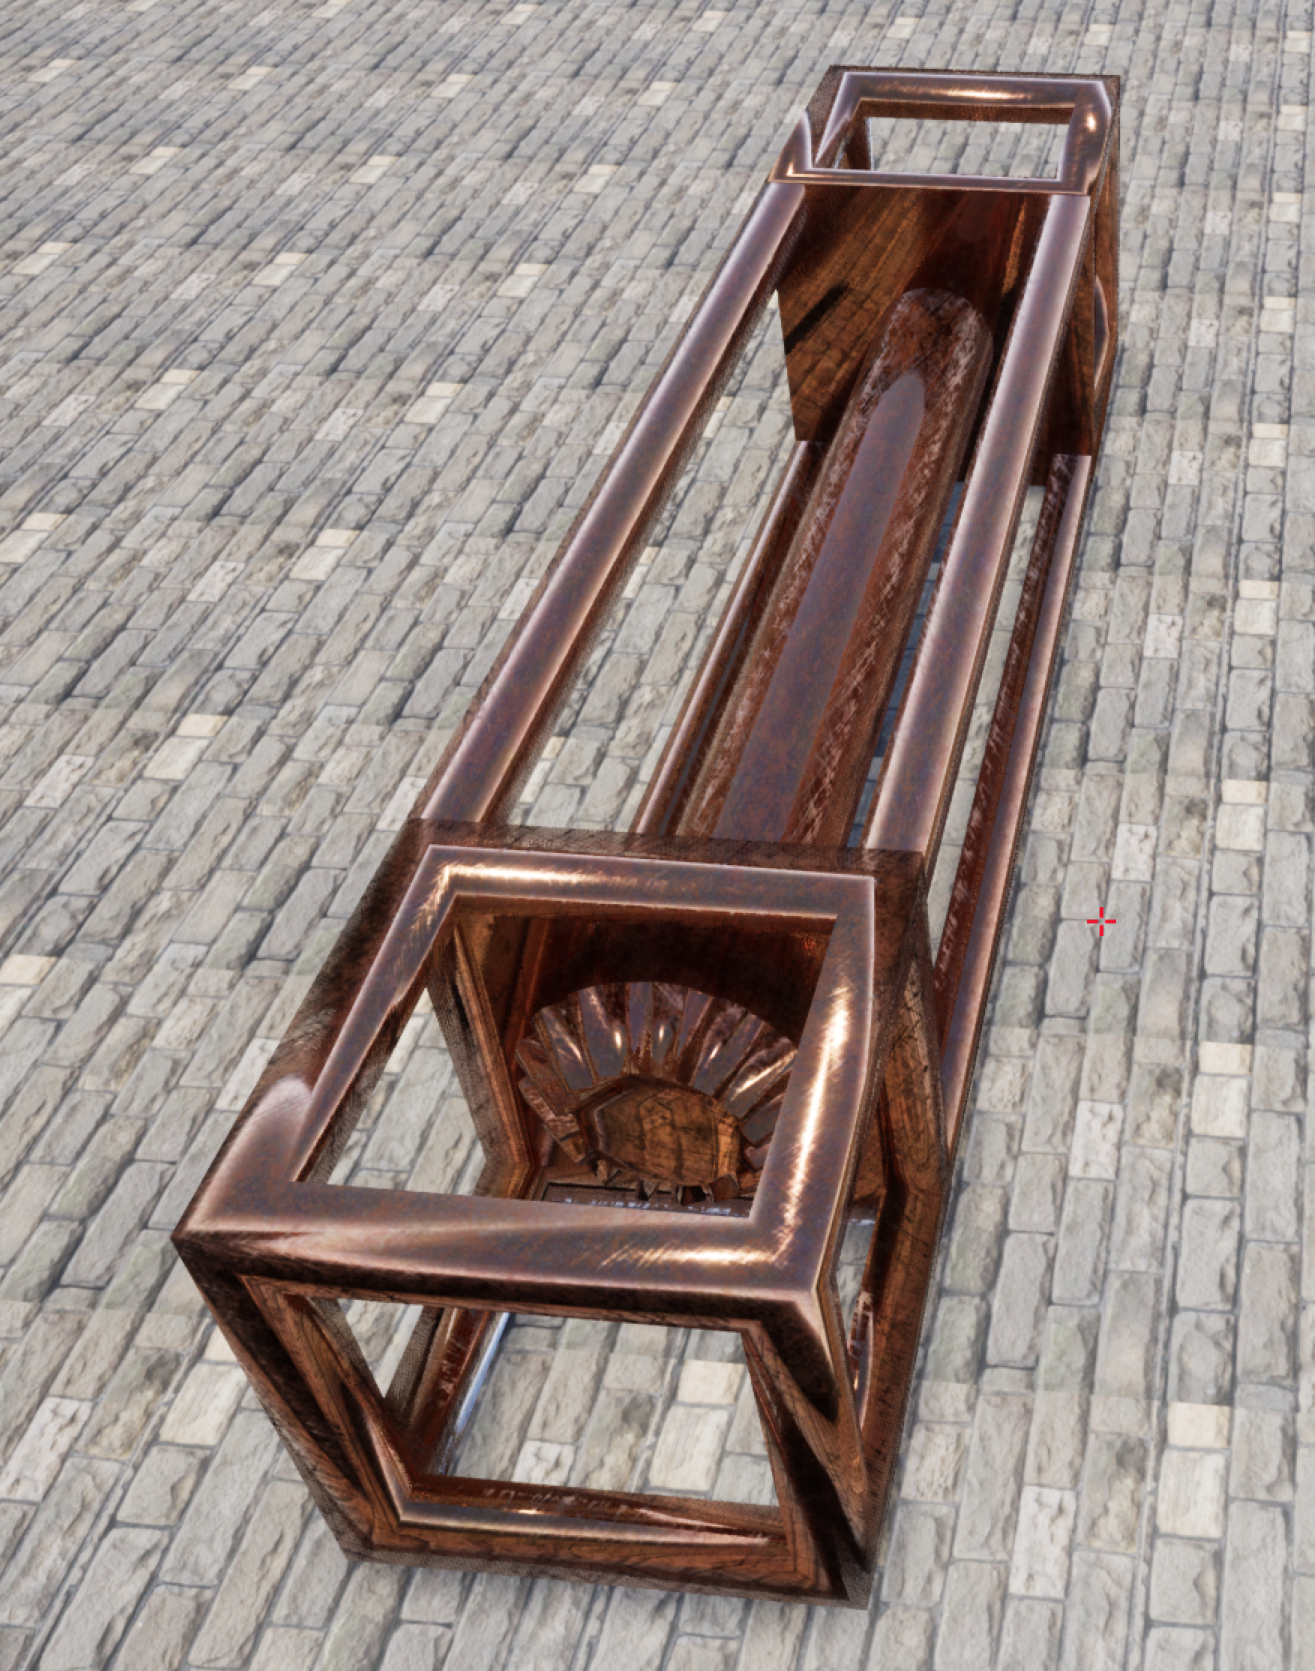
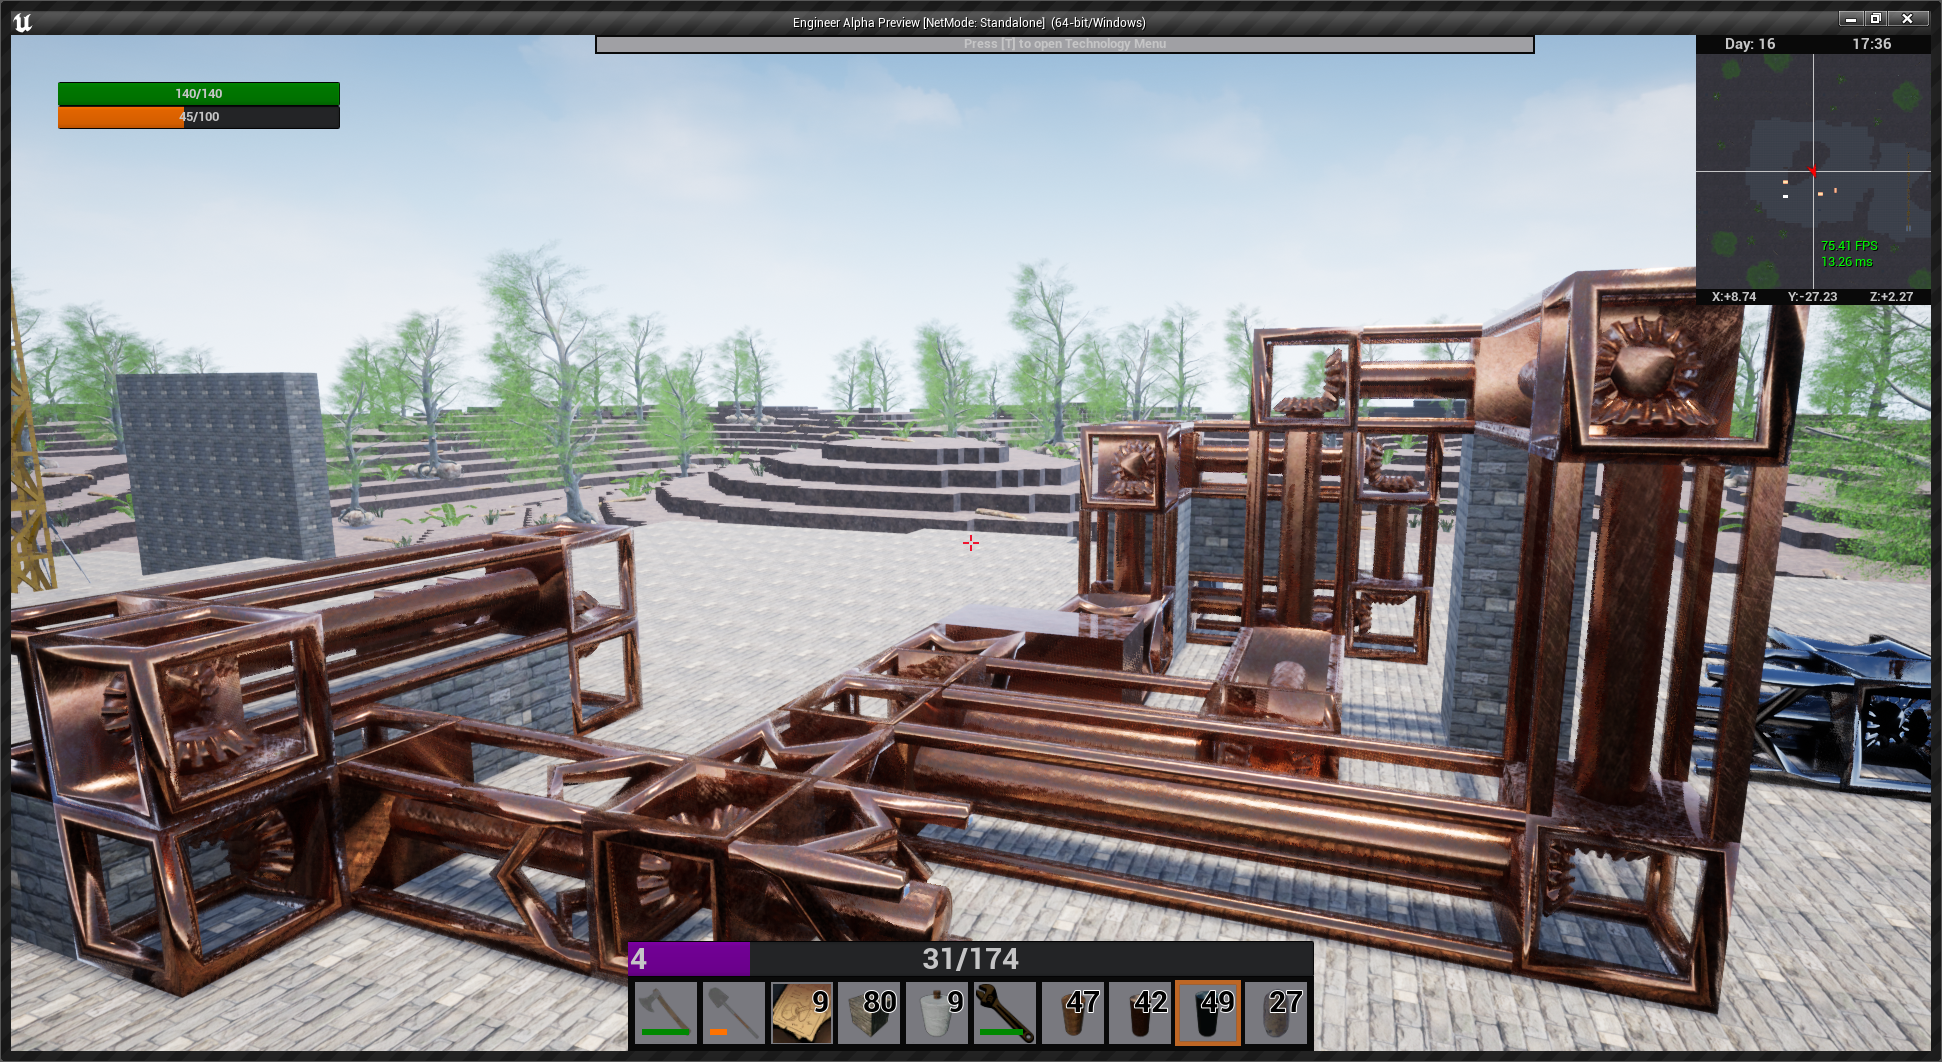
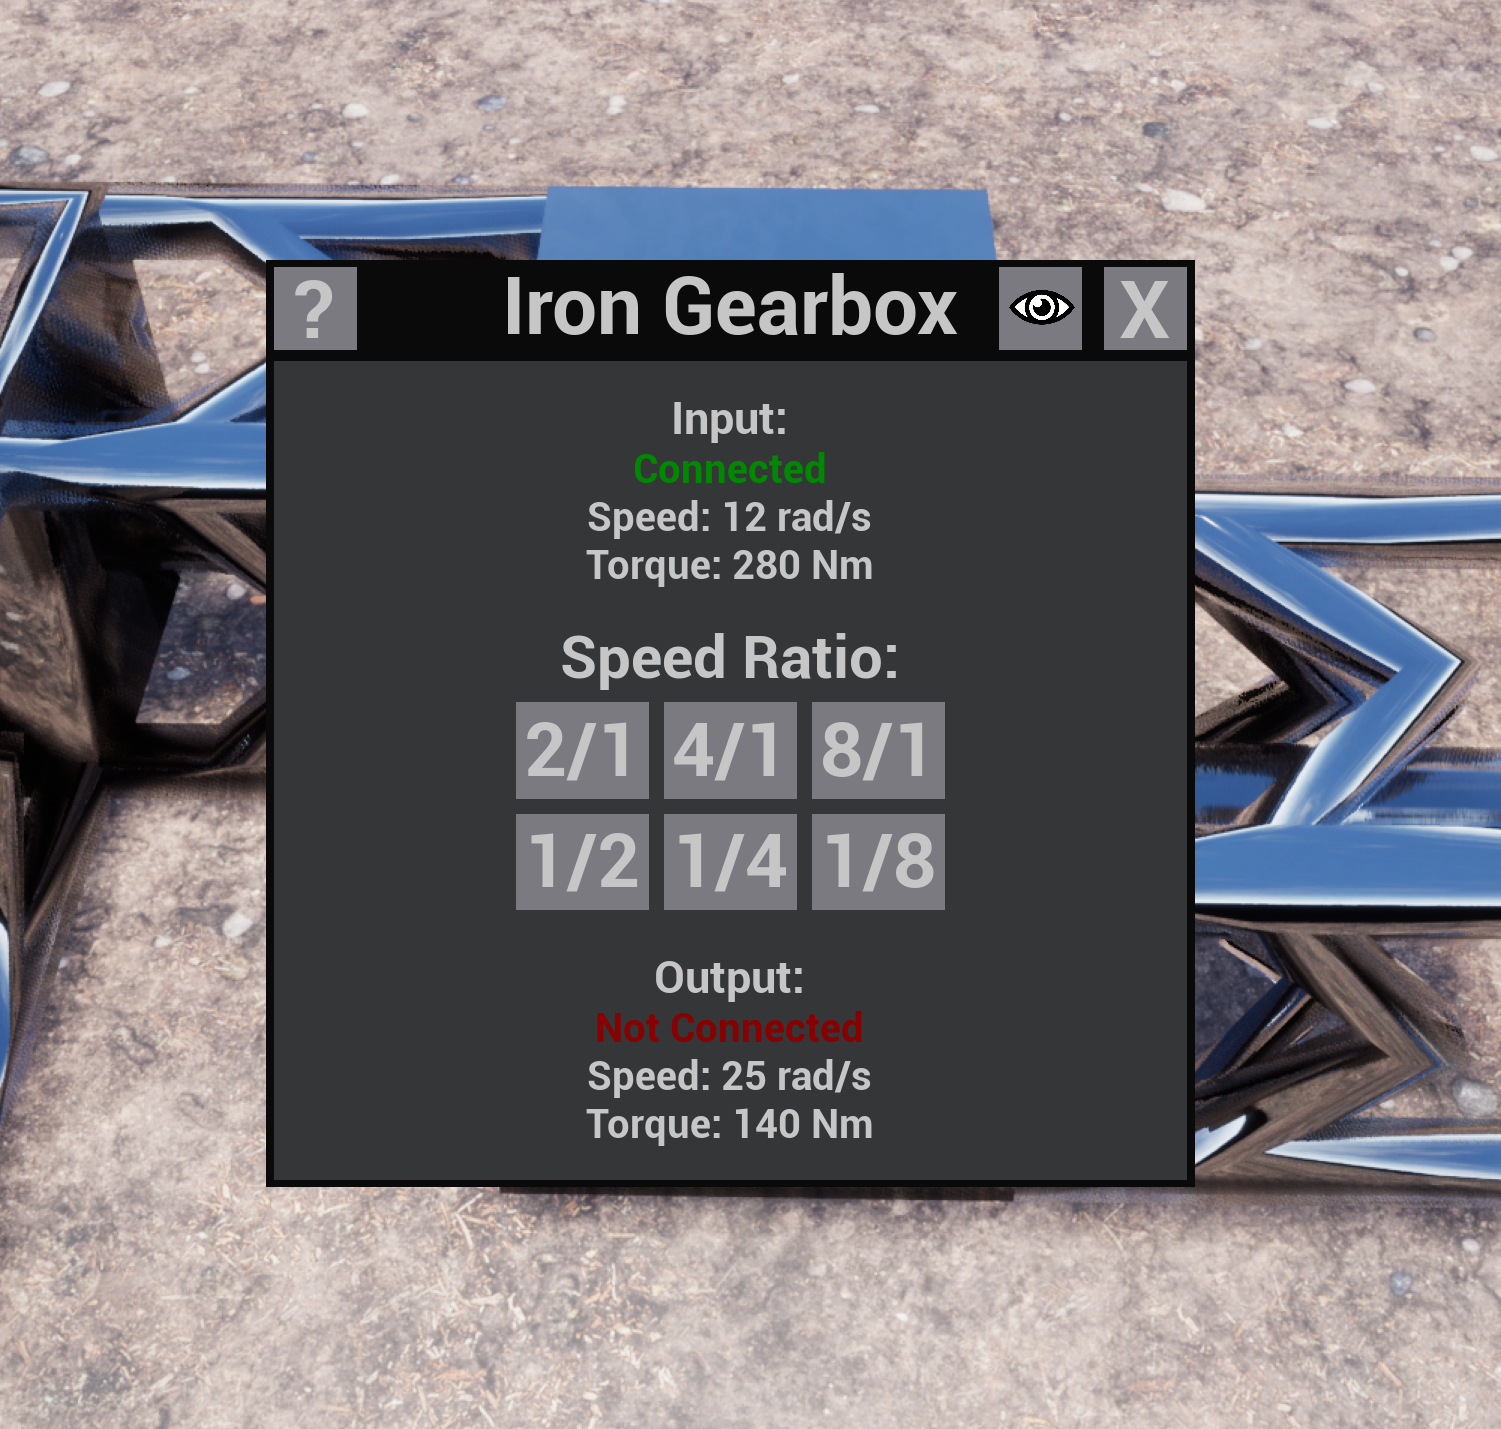
You may now select from more options based on the material of the gearbox, e.g. wood can only use a ratio of 2 while iron can use 2, 4, or 8.

Mergers are the least changed part from the old version and they are effectively the same, just smaller.
They do however have a nice new UI element that will tell you if their input speeds do not match.

The shaft support was a bad solution that I was never happy with. So it is with great pleasure that I can say they have been completely removed from the game!

If you look at the parts available for the rotation system in 0.2 you will notice one obvious piece that is missing, the Splitter. Splitters were not in 0.2 because I was unsure of exactly how the implementation of them was going to work. Such as how much control you would have over how much power goes which direction. As well as the potential for iterative computations. Splitters have been added and are nearly the opposite of mergers.
When it came to how much power was going to go in each direction the simple answer is "however much each side needs". The problem is that if you leave it open ended the calculation becomes iterative and your computer is doing significantly more work all the time. So it needs to be a static value for each side. I had initially decided to give the player full control over how much was going to go each side but I decided that was a little too much control and opted for a simpler version. (the full control version will likely return in a late game more expensive building)

I have also added in a “Power Provider” that will serve as an infinite source of power for all your scientific needs! It will be creative mode only because if you choose to cheat I want you to cheat as much as you want.

Animation was also a problem in the old version that tended to break after things had been going for a while. In v1.1 there is key framing of all rotating machinery every 60 seconds. In 2.0 all animations have been updated and no longer break or snap. Another problem with animations was how fast they actually looked to the player. You will likely want to see things turn (I know I do) and the 1 to 1 ratio in v1.1 did not work well for showing things to the player. So for version 2.0 I have created aa adjustable curve that allows all rotation visuals to be easily changed so they always look good to look at no matter how fast they are actually going.
The current rotation speed curve. rad/s of the shaft is on the X-axis and the animation speed is on the Y. With this for example a shaft that is rotation twice as fast does not necessarily look as if it going twice as fast.

Which leads us to the elephant in the room, shafts. Shafts are the big deal that either make or break the entire system in my mind. So I took the time and did them right, and they took a long time to get right, like as long as everything else in the rotation 2.0 update combined, but they were worth it.

Shafts are now placed directly within the voxel grid and do not require any connection to be placed.

As you aim to place the shaft every block is checked along its path for collision and if there is anything in the way the entire shaft will turn red and give an error message if you try to build it like any other building.
The block boxes show which voxels have been tested for overlap and will not show up on release.

Shafts can still be placed with any of the 6 options for dimensional ordering (XYZ,ZYX…) as well as the exclusion of any dimension(s).
If you place a shaft without any connection on either end you will get a single gear on the end of it to show that it is unconnected. Any corners in the shaft will have a set of right angle gears oriented for that corner. A shaft that goes in all 3 dimensions will have 2 middle corners and 2 ends.

The ends of the shaft have what I like to call “dynamic corners” when you place a shaft it will look around itself in the 5 (or 6 for single piece shafts) options that something can connect to it by. The shaft will adapt its first and last corner to be what it needs to be to connect. There are 3 options for dynamic corners a 90 degree gear corner, a straight line, and the single gear. Shafts will connect to building inputs or outputs as well as other shafts automatically. If a shaft is not connected on either end it will check for a new connection anytime a new building is built nearby.
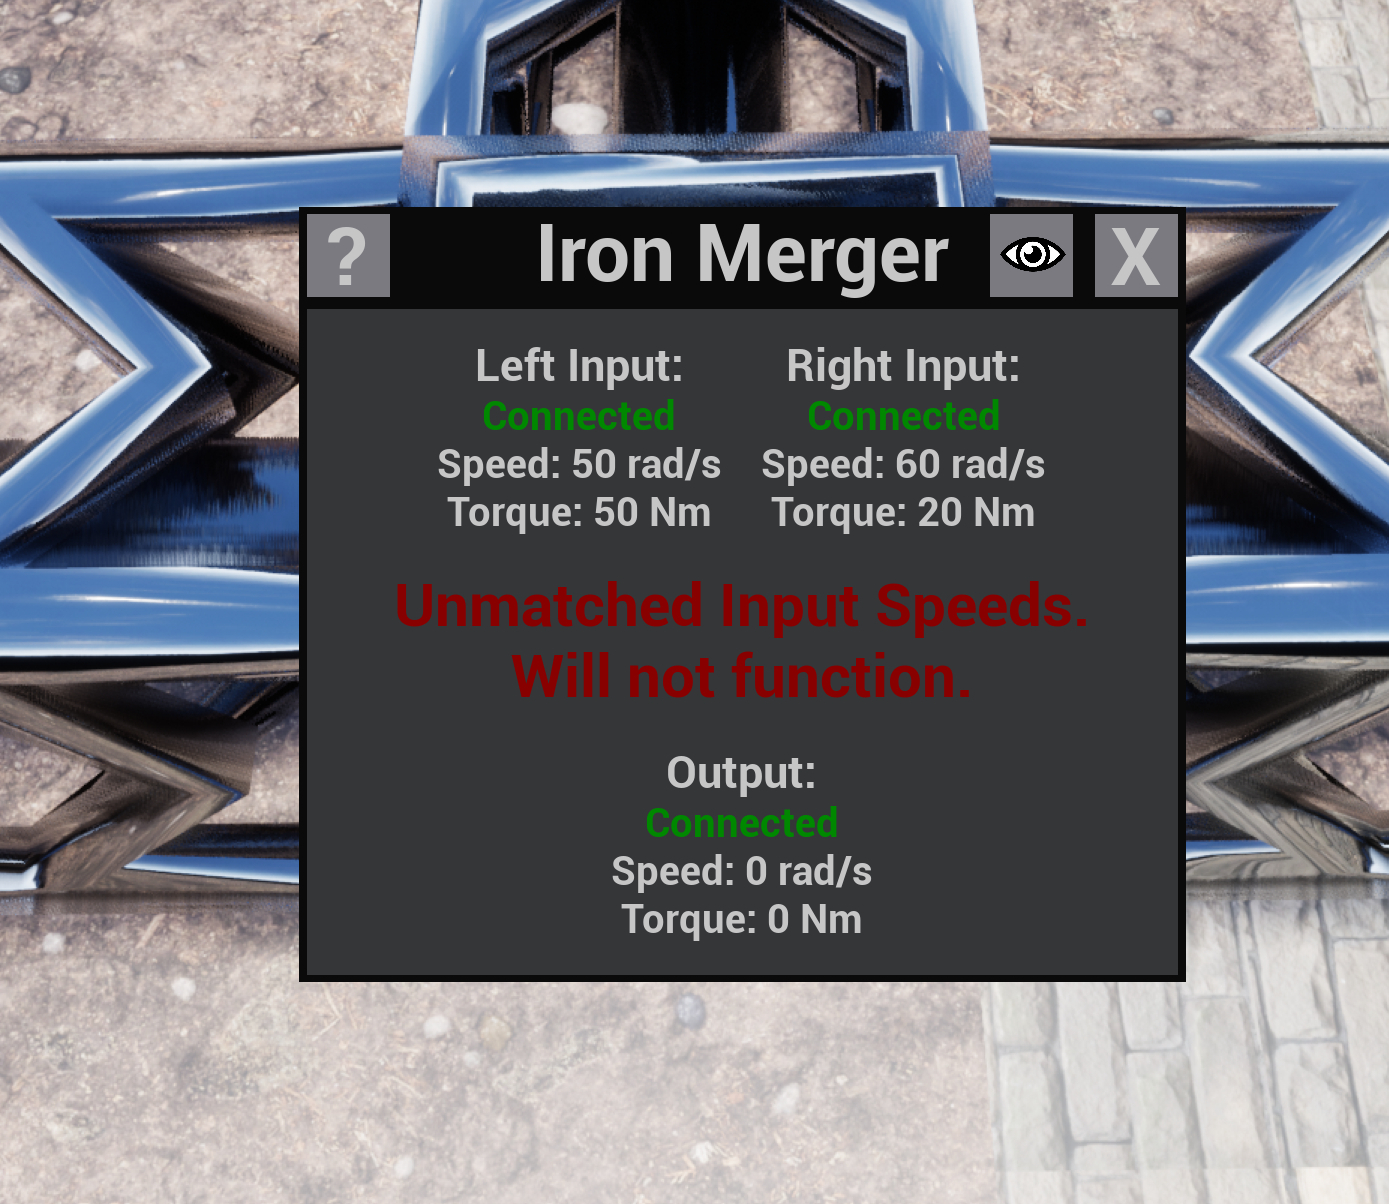
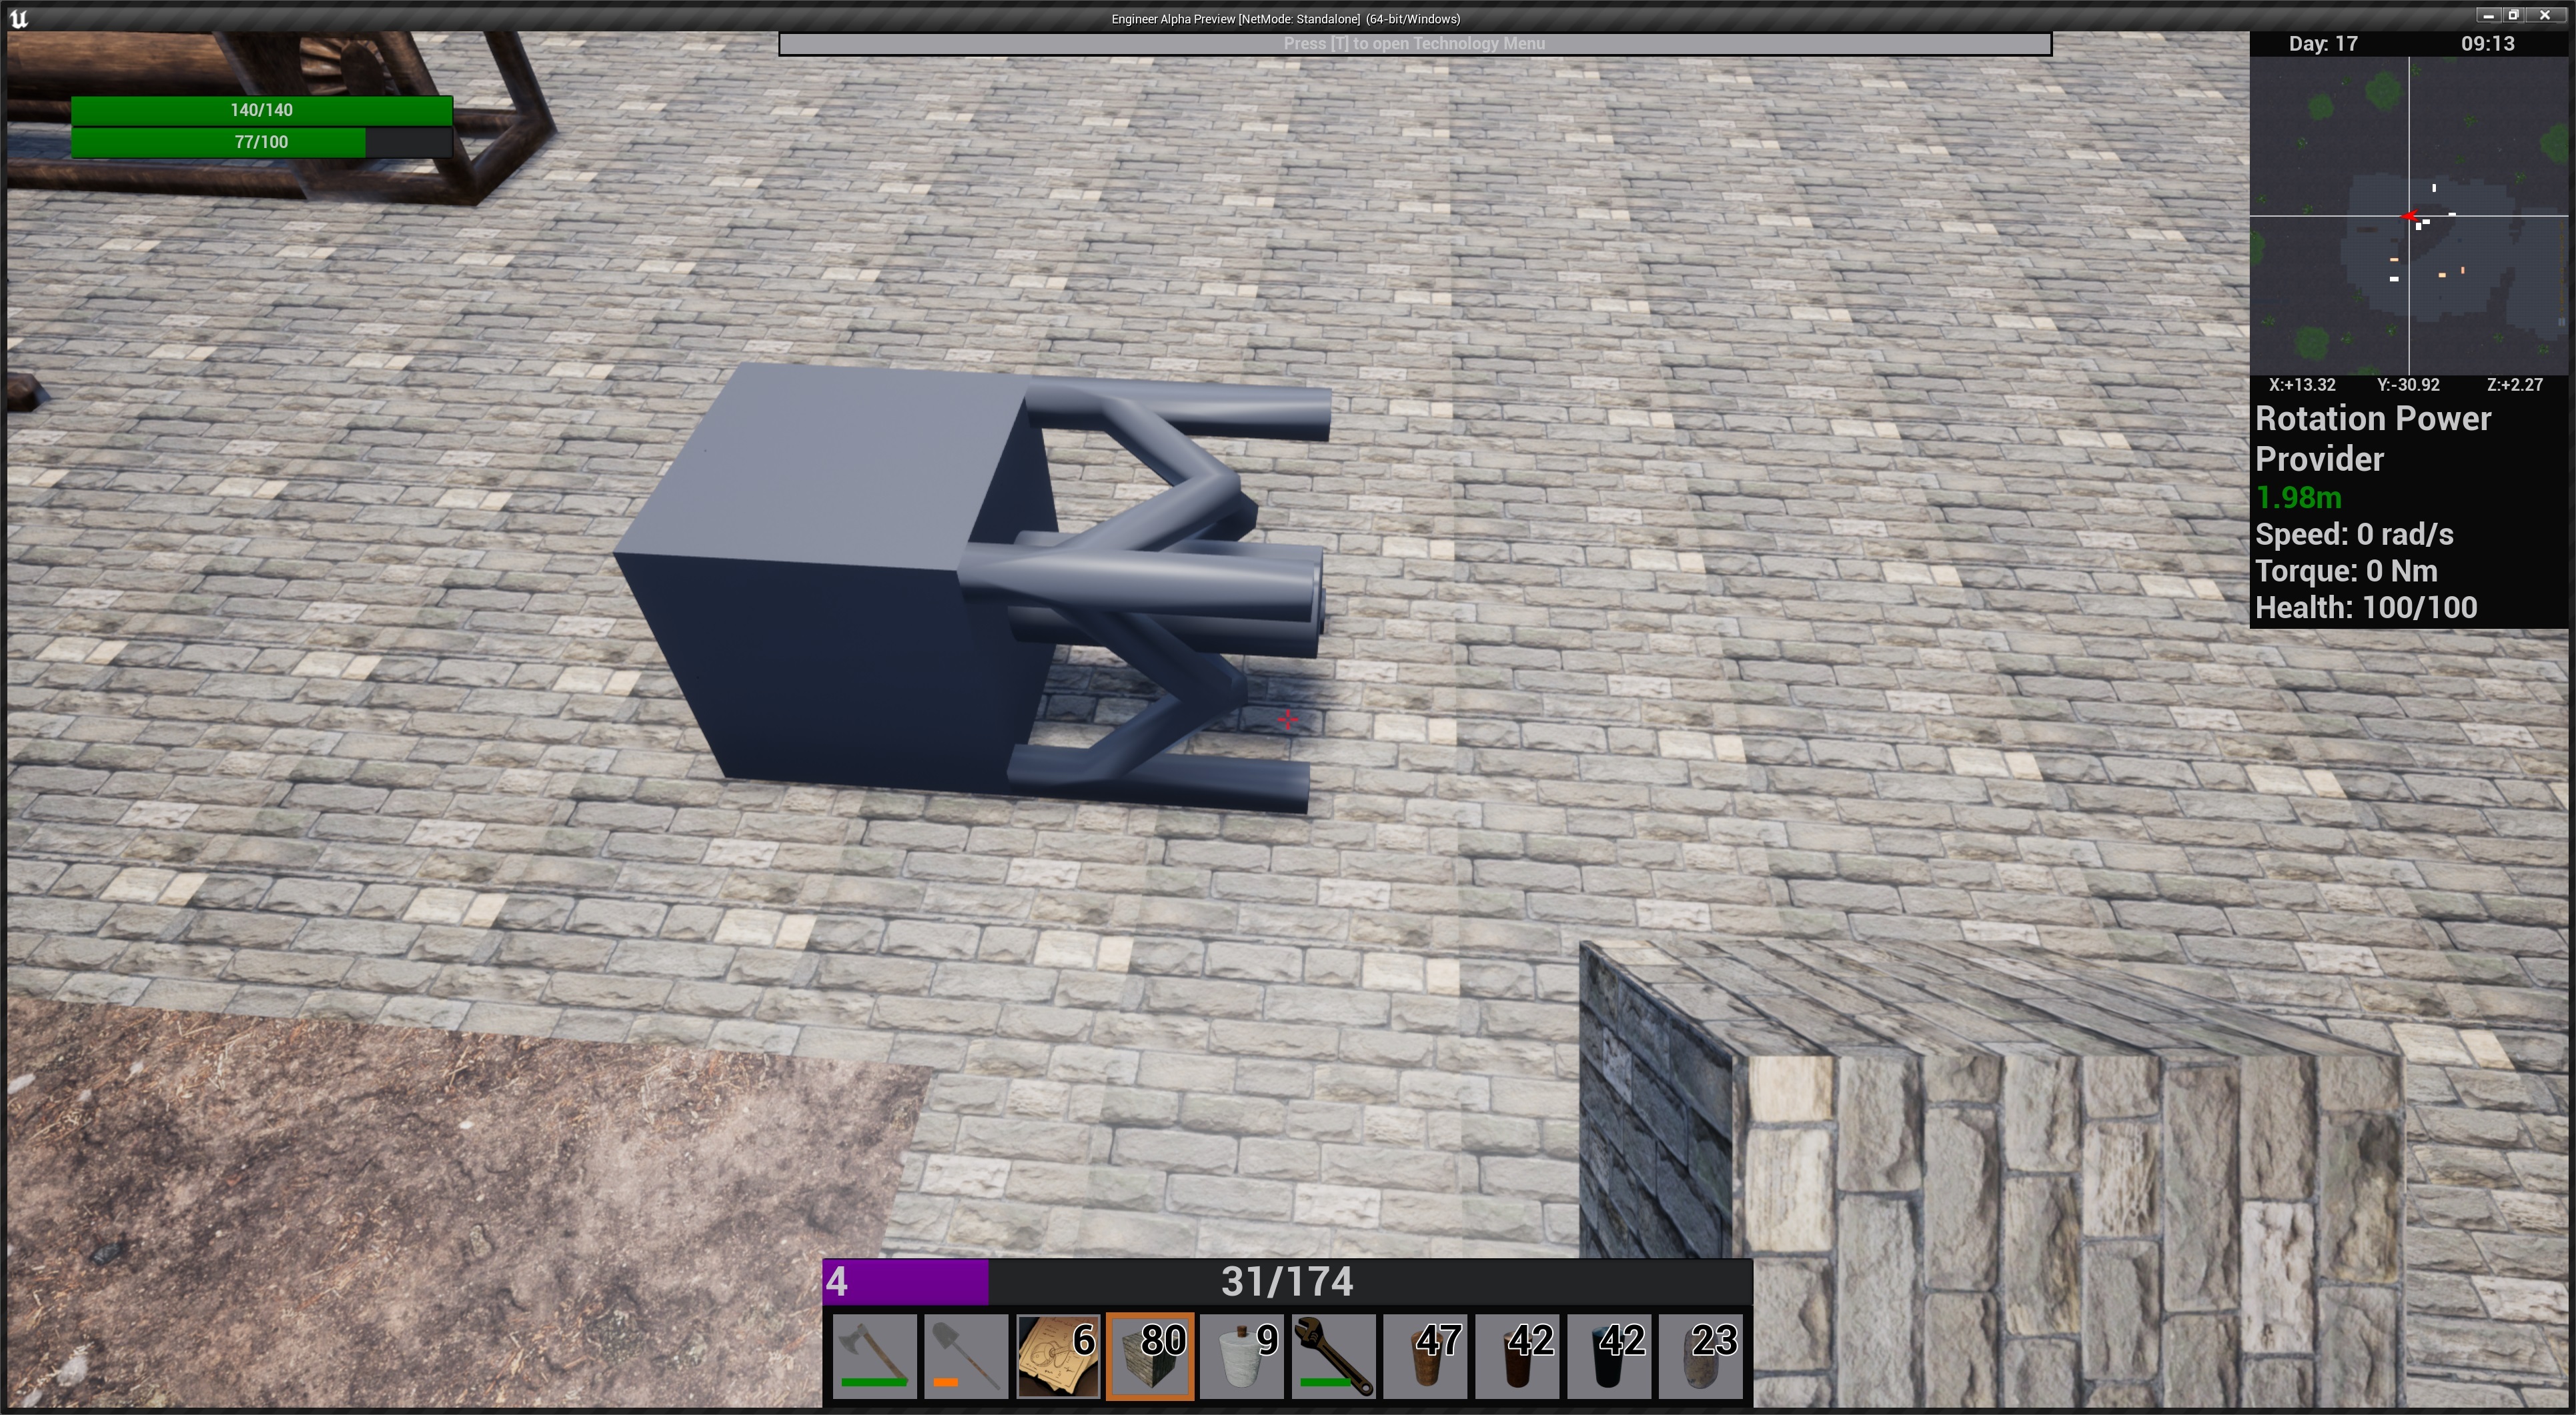
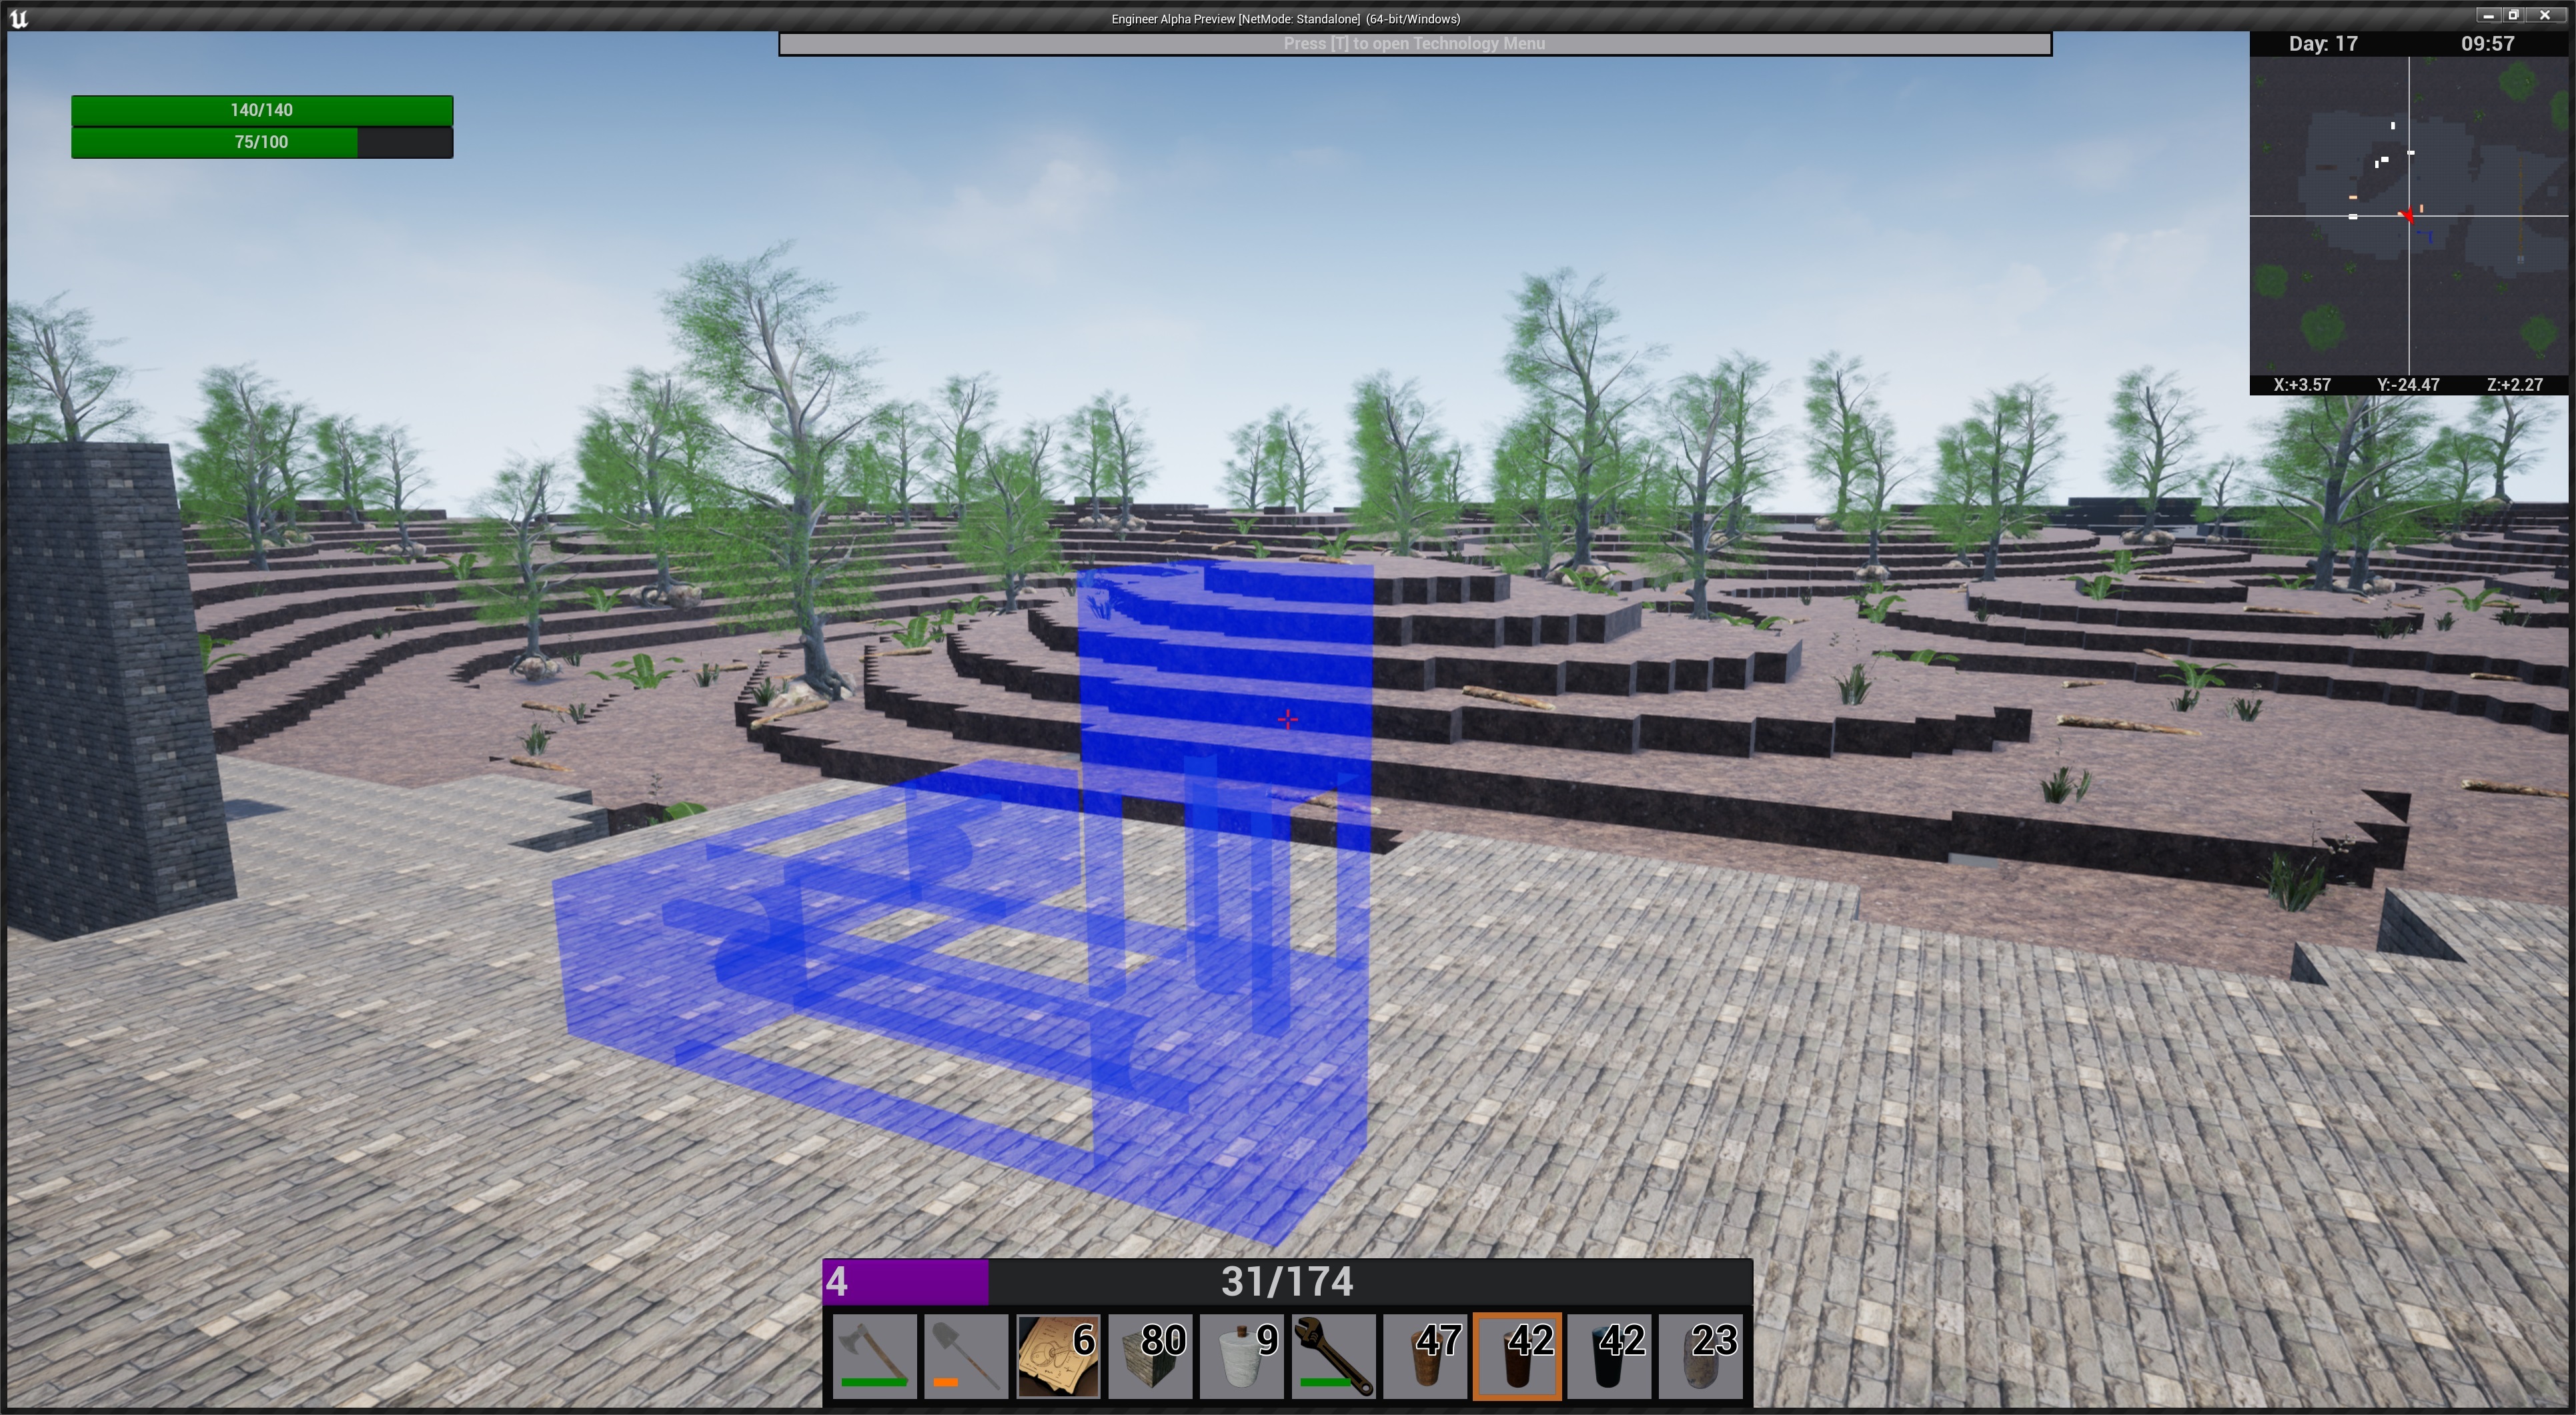
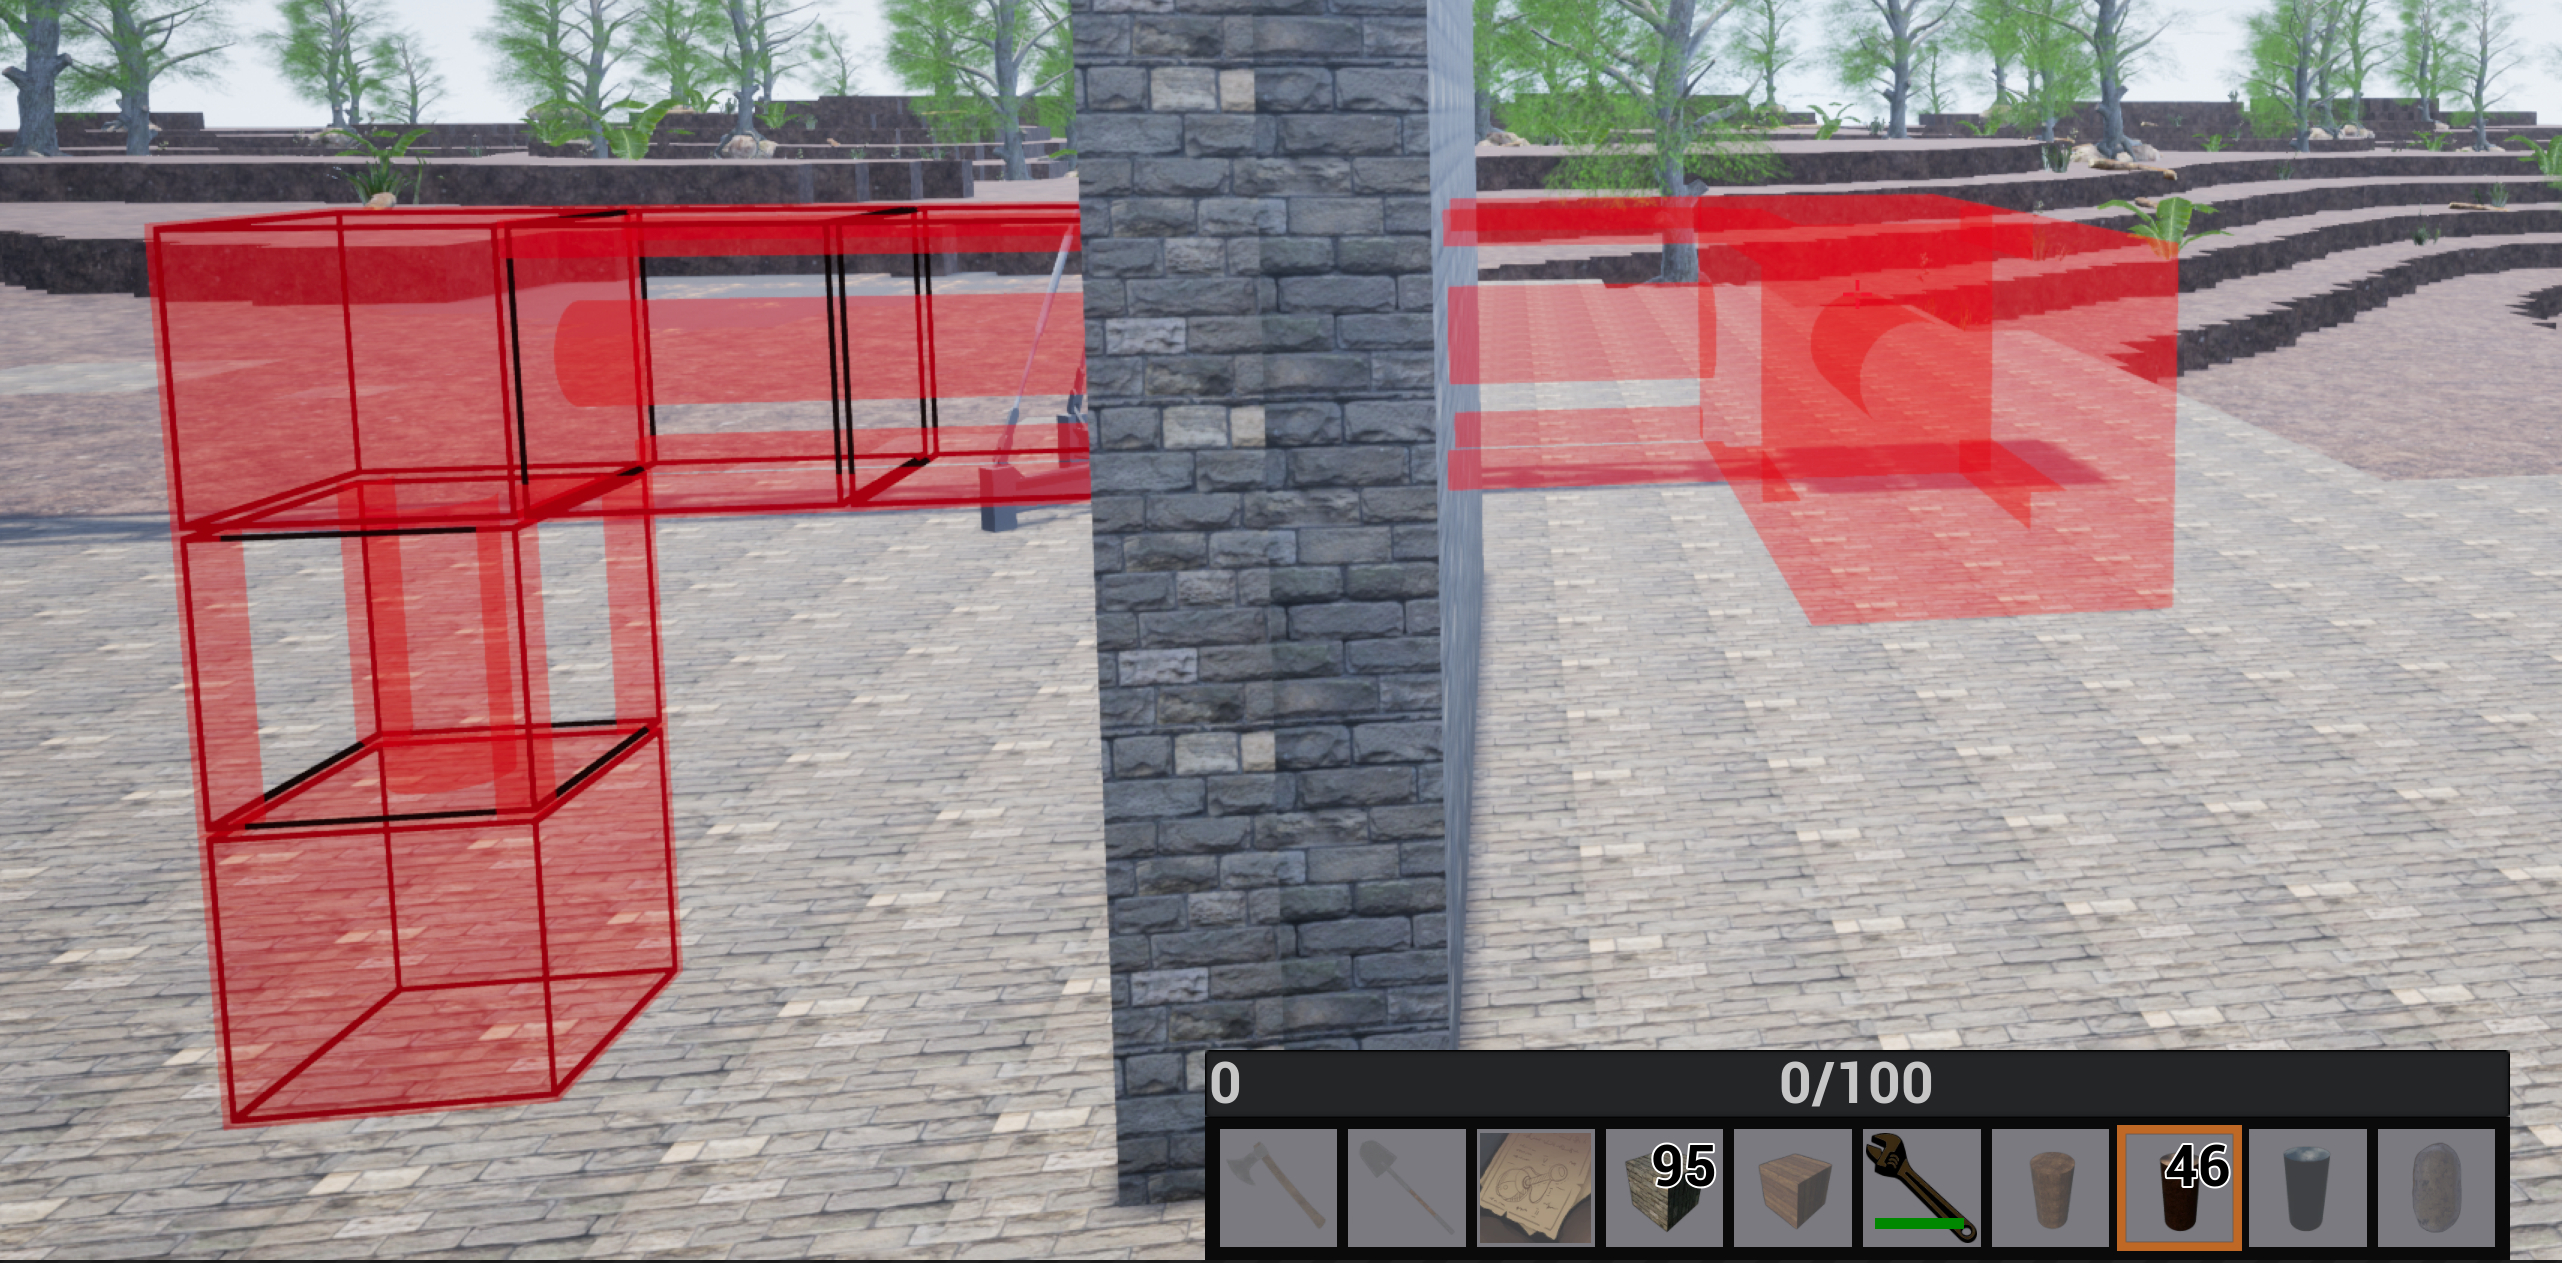
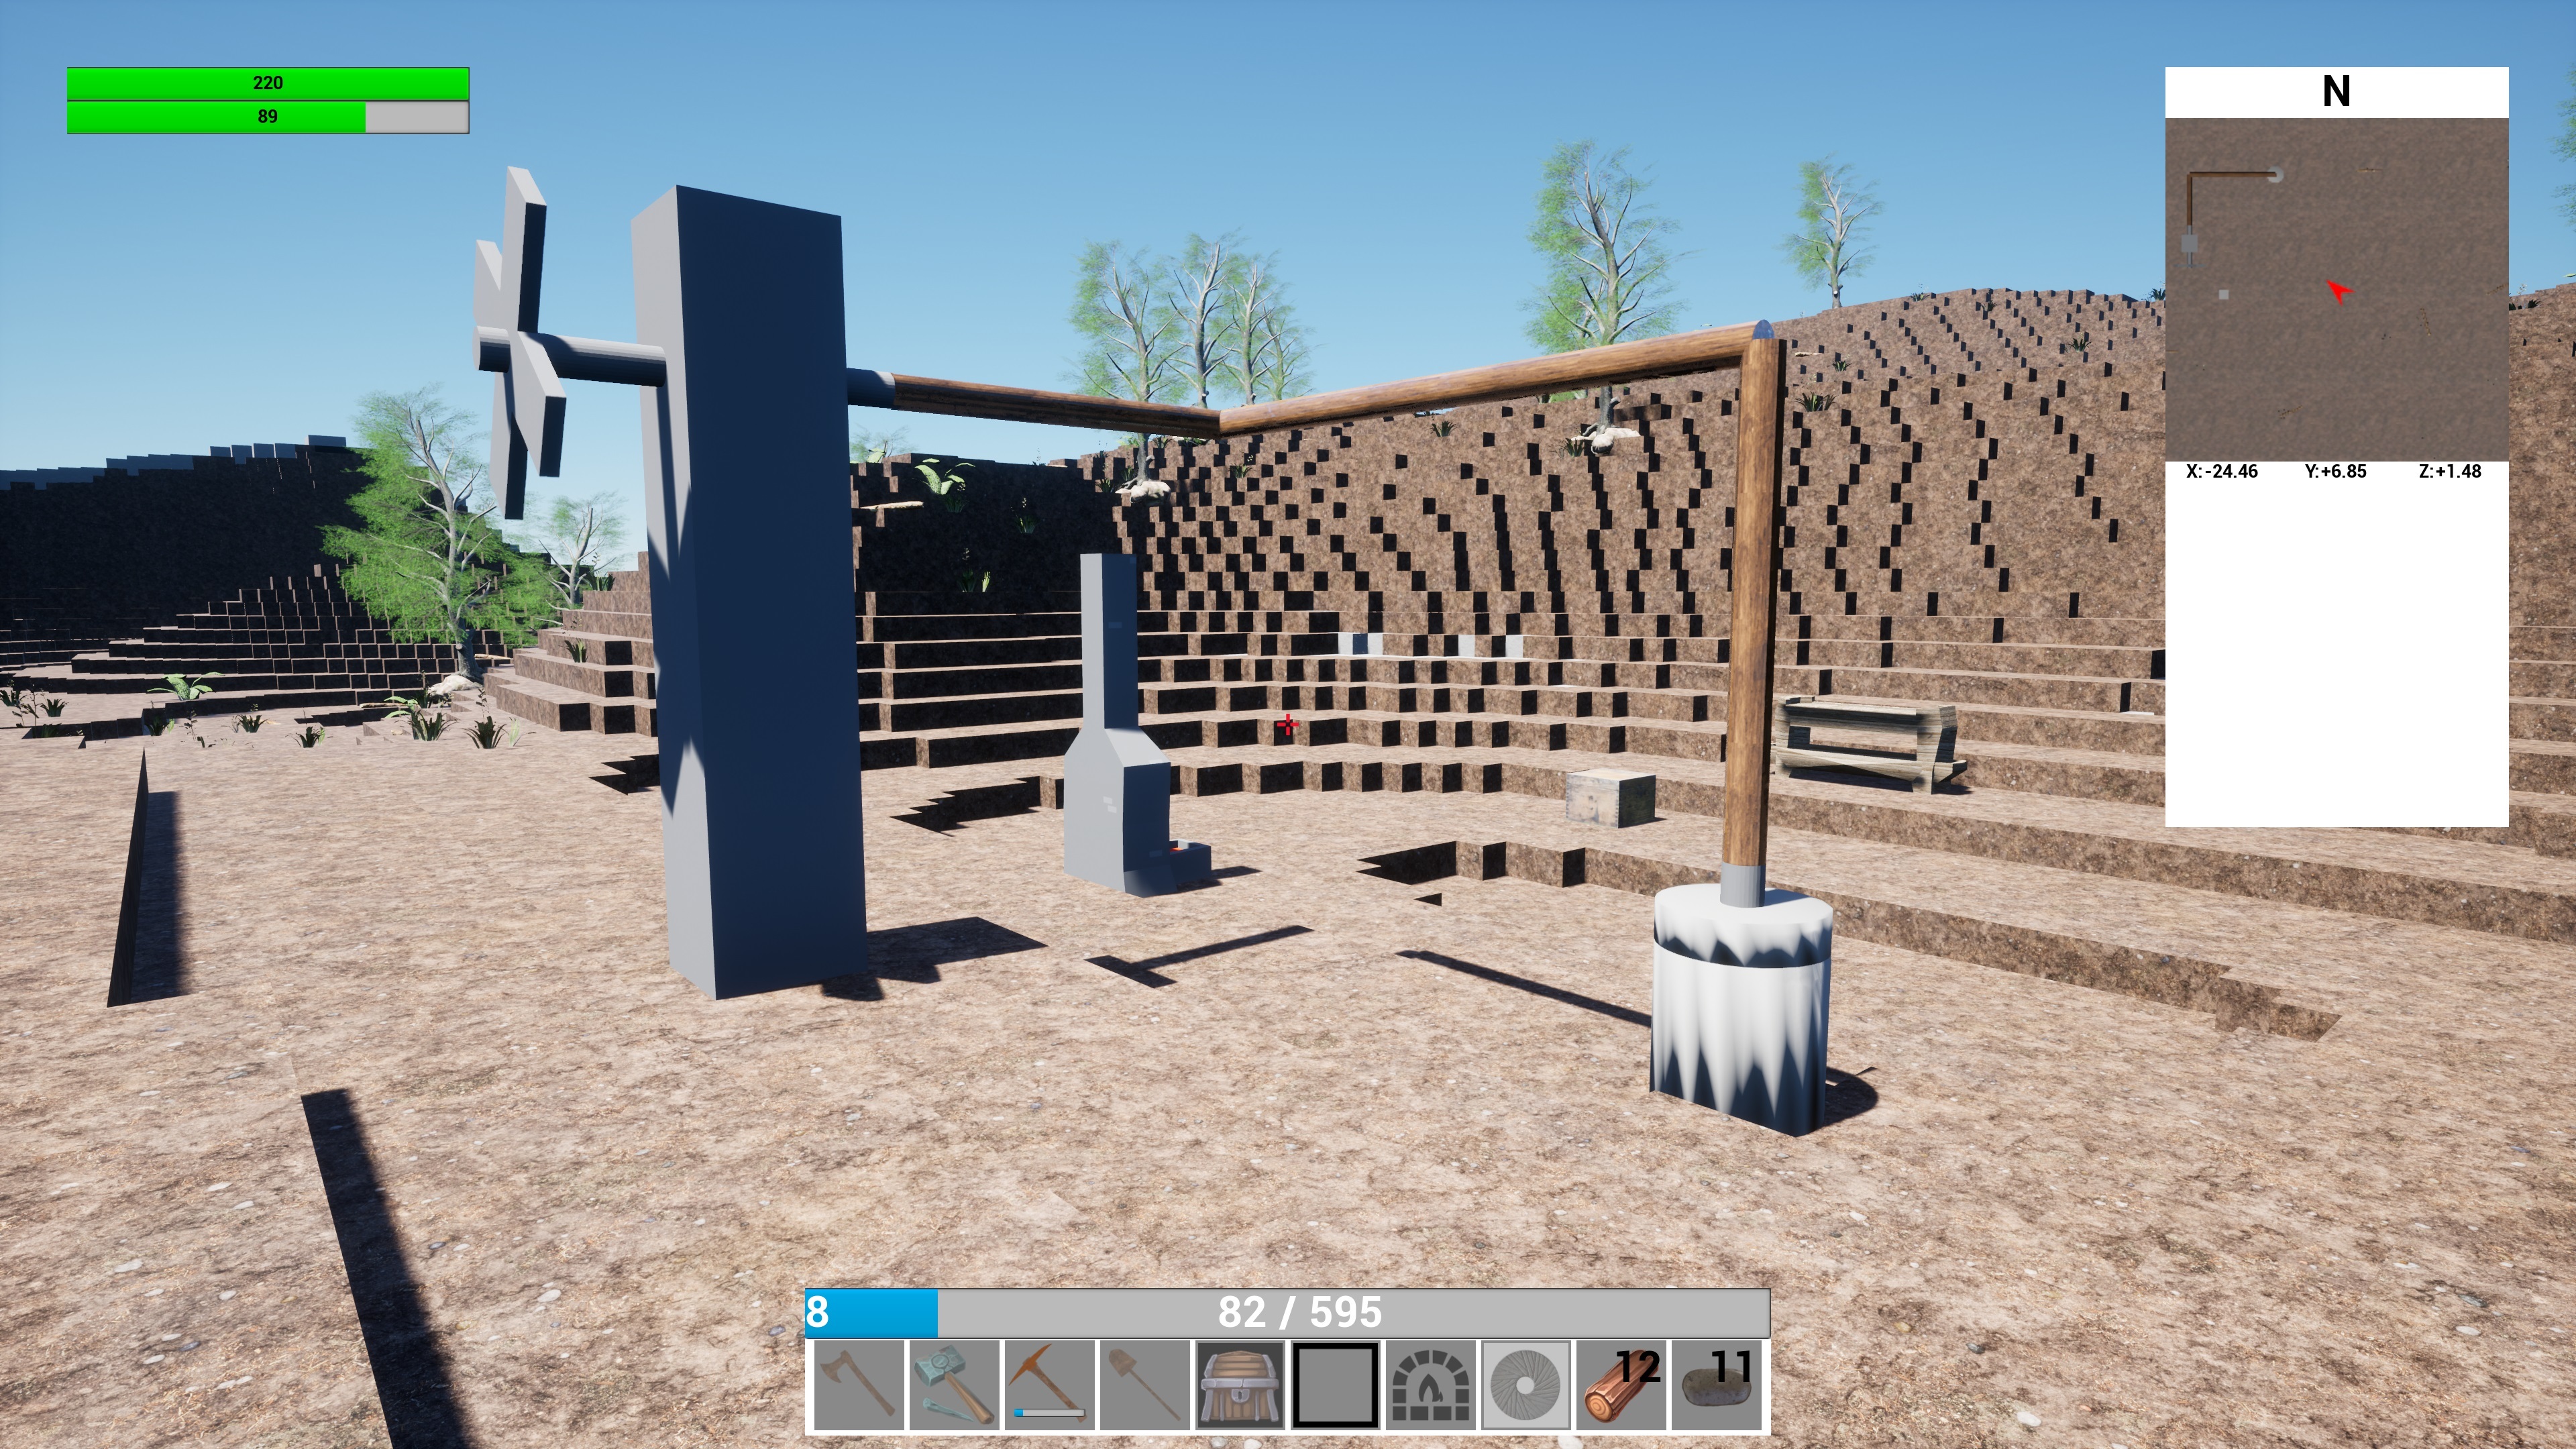
The only thing that I have not added mechanics-wise is a way to manually change the input and output direction of a shaft if they are next to multiple possible connections. There are no plans to add any buildings with connectors that this would prove to be a problem with but if it is something that is needed I will add it.

The code for these shafts was created to be very flexible as there are hopefully going to be other connectors that are built in a similar way in the future. This is the code that defines how all the parts of the shaft are to be placed in the world using only the start location, end location and XYZ order.

As it would be mean to leave you without any gameplay footage after all of this here you go.
Castle of Delights - donemidionavarro
Nazralath: The Fallen World - Ugo
Hello everyone!

We are pleased to announce that Nazralath: The Fallen World is now on Steam. Wishlist us to get notified when the game becomes available.

You can watch our announcement trailer here:

https://youtu.be/yaMzZJrVWY4

To celebrate this occasion, we've released the trailer music on our YouTube channel, so you can now enjoy the forbidden rituals from the comfort of your own home:

https://www.youtube.com/watch?v=jYpmTgG3WTI

Join us on Discord to get updates on the game, chat with us, and ask any questions you may have!


Passpartout 2: The Lost Artist - fatcat622
Bonjour fellow artists🍾🍷

We recently reached a milestone of 20 000 wishlists for Passpartout 2!


We’re grateful and impressed by your wishlisting abilities. It’s amazing to see so many people excited to pick up the paintbrush again. Speaking of brushes we recently did some improvements to the watercolor brush I’d love to share with you.


Now I consider myself a mediocre artist at best, so for me it’s important that the brushes in Passpartout 2 help me make beautiful art. So far my favorite is the watercolor brush. It leaves behind this lovely texture that chaotically builds shapes that I can add to, helping me create some pretty sweet art. I especially like using it for drawing water or fire, but I’m sure the creative minds out there can find many more uses for it! I mean, the masterpieces you made with the barebones tools of Passpartout 1 is mind blowing so I can only imagine what you’ll cook up with this!


Here’s a little time lapse of me using the watercolor and some other tools to draw a tiny boat on the ocean, minutes before getting hugged by a big-boy octopus.


Now it’s time to go back to the development dungeon. Thank you for tuning in and stay awesome!


/Mattias
Mictlan: An Ancient Mythical Tale - Anna_Somniar
Hi, Mictlan followers!

Our talented concept artist, Mauricio Pampin, created this WIP for the armor of heavy infantry soldiers.
This set of protective equipment includes a full cuirass and breastplate (protecting the user’s torso), greaves (covering the knees all the way down to the feet) and helm (guarding the head and face).
Finally, it comes with a halberd for offensive purposes.

The art looks very metallic, as these materials offered a lot of advantages to the wearer against practically every weapon the enemy had.

Infantry troops were known for going on foot and fighting enemies in melee combat.


TextureWorks - GameDev_ToolMaker


New Ways to make texture. Bulk Processing of Texture Maps etc.
With New Additions in Tetxure Library.
Coming Soon in few weeks...
Passpartout: The Starving Artist - fatcat622
Bonjour my fellow artists!🥖🍷


We recently reached a milestone of 20 000 wishlists for Passpartout 2!


We’re grateful and impressed by your wishlisting abilities. It’s amazing to see so many people excited to pick up the paintbrush again. Speaking of brushes we recently did some improvements to the watercolor brush I’d love to share with you.


Now I consider myself a mediocre artist at best, so for me it’s important that the brushes in Passpartout 2 help me make beautiful art. So far my favorite is the watercolor brush. It leaves behind this lovely texture that chaotically builds shapes that I can add to, helping me create some pretty sweet art. I especially like using it for drawing water or fire, but I’m sure the creative minds out there can find many more uses for it! I mean, the masterpieces you made with the barebones tools of Passpartout 1 is mind blowing so I can only imagine what you’ll cook up with this!


Here’s a little time lapse of me using the watercolor and some other tools to draw a tiny boat on the ocean, minutes before getting hugged by a big-boy octopus.


Now it’s time to go back to the development dungeon. Thank you for tuning in and stay awesome!


//Mattias
Drawngeon: Dungeons of Ink and Paper - DarkDes
The drawn dungeons are waiting for you ... with discount -60%!

https://store.steampowered.com/app/1000470/Drawngeon_Dungeons_of_Ink_and_Paper/
...