It's release week! Only 3 more days until the Rift to Galatea 37 will break open and your wait will be over. We hope you are just excited as we are!
Today we are publishing the last pre-release update to The Riftbreaker: Prologue and The Riftbreaker Beta. The Prologue version will continue receiving updates after the full game is released. The Beta version, however, will be deactivated in 3 days. We would like to thank you all for helping us improve The Riftbreaker. Your ideas and feedback changed many things for better. We hope the final product will meet your expectations and that you will stick around to see what the future brings.
See you on the other side! EXOR Studios
The Riftbreaker Beta Update Changelog October 11th 2021
AZERTY keyboard layout is now automatically detected and appropriate control scheme is applied to avoid conflicts in bindings.
Game save catalog has changed from 'Documents/Riftbreaker' to 'Documents/ The Riftbreaker' or 'Documents/The Riftbreaker Prologue', according to the game version.
Gui: BuildModeScreen: the last selected building is not highlighted only when using a gamepad.
Improved game loading speed.
Grenade and teleport aiming improved on gamepads.
The ending of survival mode has changed - your HQ must survive the final attack.
Multiple missing localization strings have been added.
Added Qucik Save and Quick Load feature. Their keyboard shortcuts are F5 and F8, respectively.
Added Ironium Synthesizer building - it's the direct opposite of the Carbonium Synthesizer.
Geothermal Power Plant can now optionally output mud - this will allow you to access water much easier on some maps.
Stun duration reduced to 3 seconds to weaken Power Fists.
Added localizations, descriptions and icons for elemental versions of Dash and Power Jump.
Fixed effects, glow and projectile spacing in nuclear missile launcher.
Changed flora cultivator and flora collector buildings names, since they can collect more than just flora now.
Disabled statistics on all platforms. The screen needs more work and we will reenable it at a later point.
Improved effects and ribbons for artillery.
Fixed many potentially gamebreaking bugs and crashes.
Thank you so much for the feedback that you gave us about Abtos during the Steam Next Fest!
The team managed to fix all the critical bugs and issues of the demo, but we still didn't have time to fix some minor issues. On this update release, we focused fixing some annoying minor bugs and visual artefacts.
Demo Patch Version 1.1.5
Bug Fixes
-Soldier does not chill out anymore and continue his journey -We fixed some tapes that couldn't play -We applied a WD40 to the lever and now it works properly -Now all the paintings are clickable -We fixed a weird bug with the our player movement -Fixed Door UI -Fixed Quality settings
Adjustments
-First night is now more difficult -Volume slider can now mute the sound -The Front Spotlight lever is now in a better position
Issues
- Ultrawide monitors are still not fully supported. A future patch will add support for 21:9
If you've been struggling to matchmake when playing on Steam, we've set up a test branch for you to try out.
The 'public_test' branch should give you an improved online experience. We'll be running the test with this branch until October 18th, collecting player feedback along the way.
Please note: At present, this will not allow crossplay with Epic Games.
This is a really valuable test for us, as it allows us to get as many players as possible online to play and matchmake so that we can them implement a patch to the game to fix this issue for everyone!
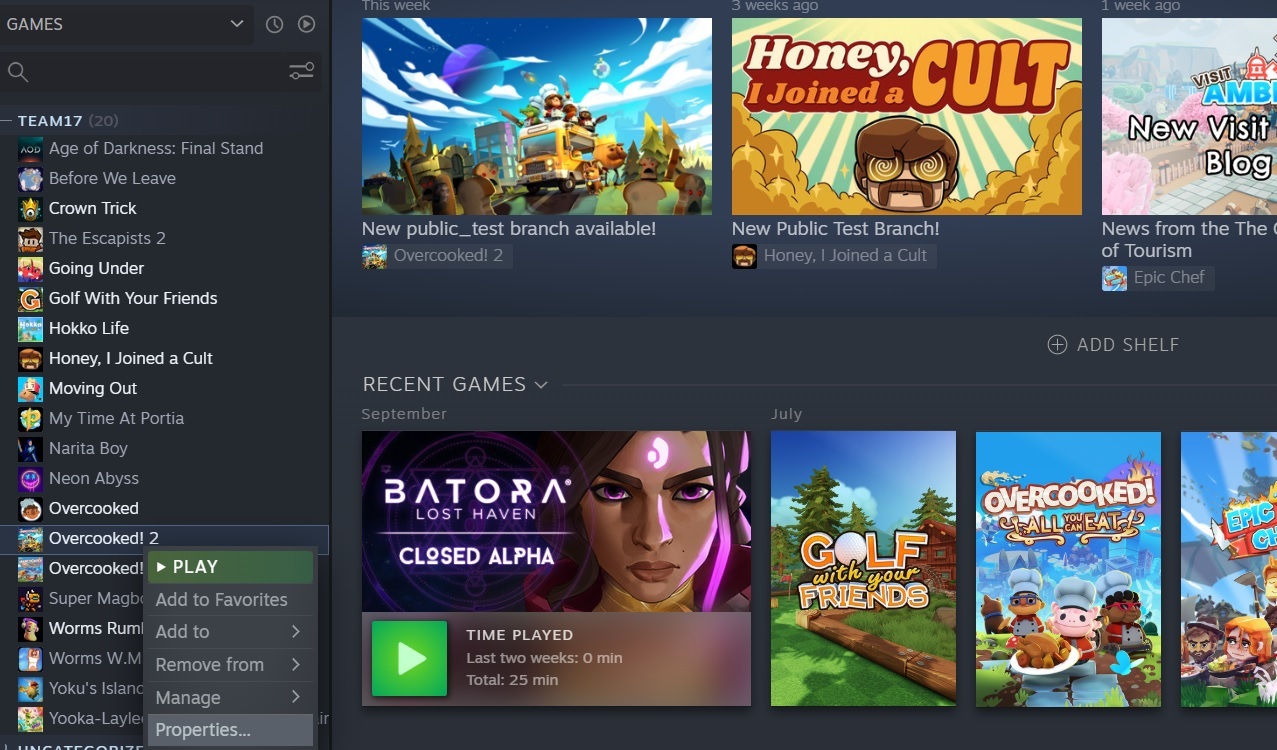
How do I access this Public Test branch?
You'll need to 'opt in' to play on the test branch.
To do this, right-click the game in your Steam library...
On this menu, click 'Properties'
On this window, go to the 'BETAS' tab and choose 'public_test' from the 'Select beta you would like to opt into' dropdown menu and close the window.
Your game will then update in your Steam library and you should see 'public_test' next to the game name.
Collecting your feedback from this test branch is vital for us so we can look into fixing the matchmaking issue.
If you opt in to play this version and would like to help us by giving feedback and reporting issues etc, please email our team at help@team17support.com
** The public_test branch is now closed **
Thank you to everyone who took part and helped us by providing feedback!
Space Crew: Legendary Edition - Missile Trajectory
Curve Digital and Runner Duck are excited to announce that the intergalactic crew management strategy game, Space Crew, is launching a free Legendary Edition expansion on 21st October 2021.
Armed with a carefully chosen crew and a fully customisable spaceship, plucky captains should prepare for this vast new expansion. The Space Crew: Legendary Edition expansion will include:
A brand-new campaign – Players will take on a droid army led by rogue androids previously allied with the United Defence Force. Battle against a whole host of new Enemy Champions and ships across new missions, with new gear, liveries and upgrades available for victorious Captains to unlock.
Away Team missions – Leave your ship and venture on foot for the first time with three of your crew onto outposts and large vessels in the all-NEW Away Team missions. Selecting the right team will be critical for survival as Away Team missions consist of exploration, puzzles, or combat… sometimes even against the clock!
Legendary Crew members - Build and personalise your ultimate crew by discovering and rescuing legendary crew members with amazing abilities and superior stats, to bolster your efforts against the enemy threat.
To support the impending launch of the expansion, Curve Digital are running a Space Crew 60% off sale from 11th October to 20th October on Steam.
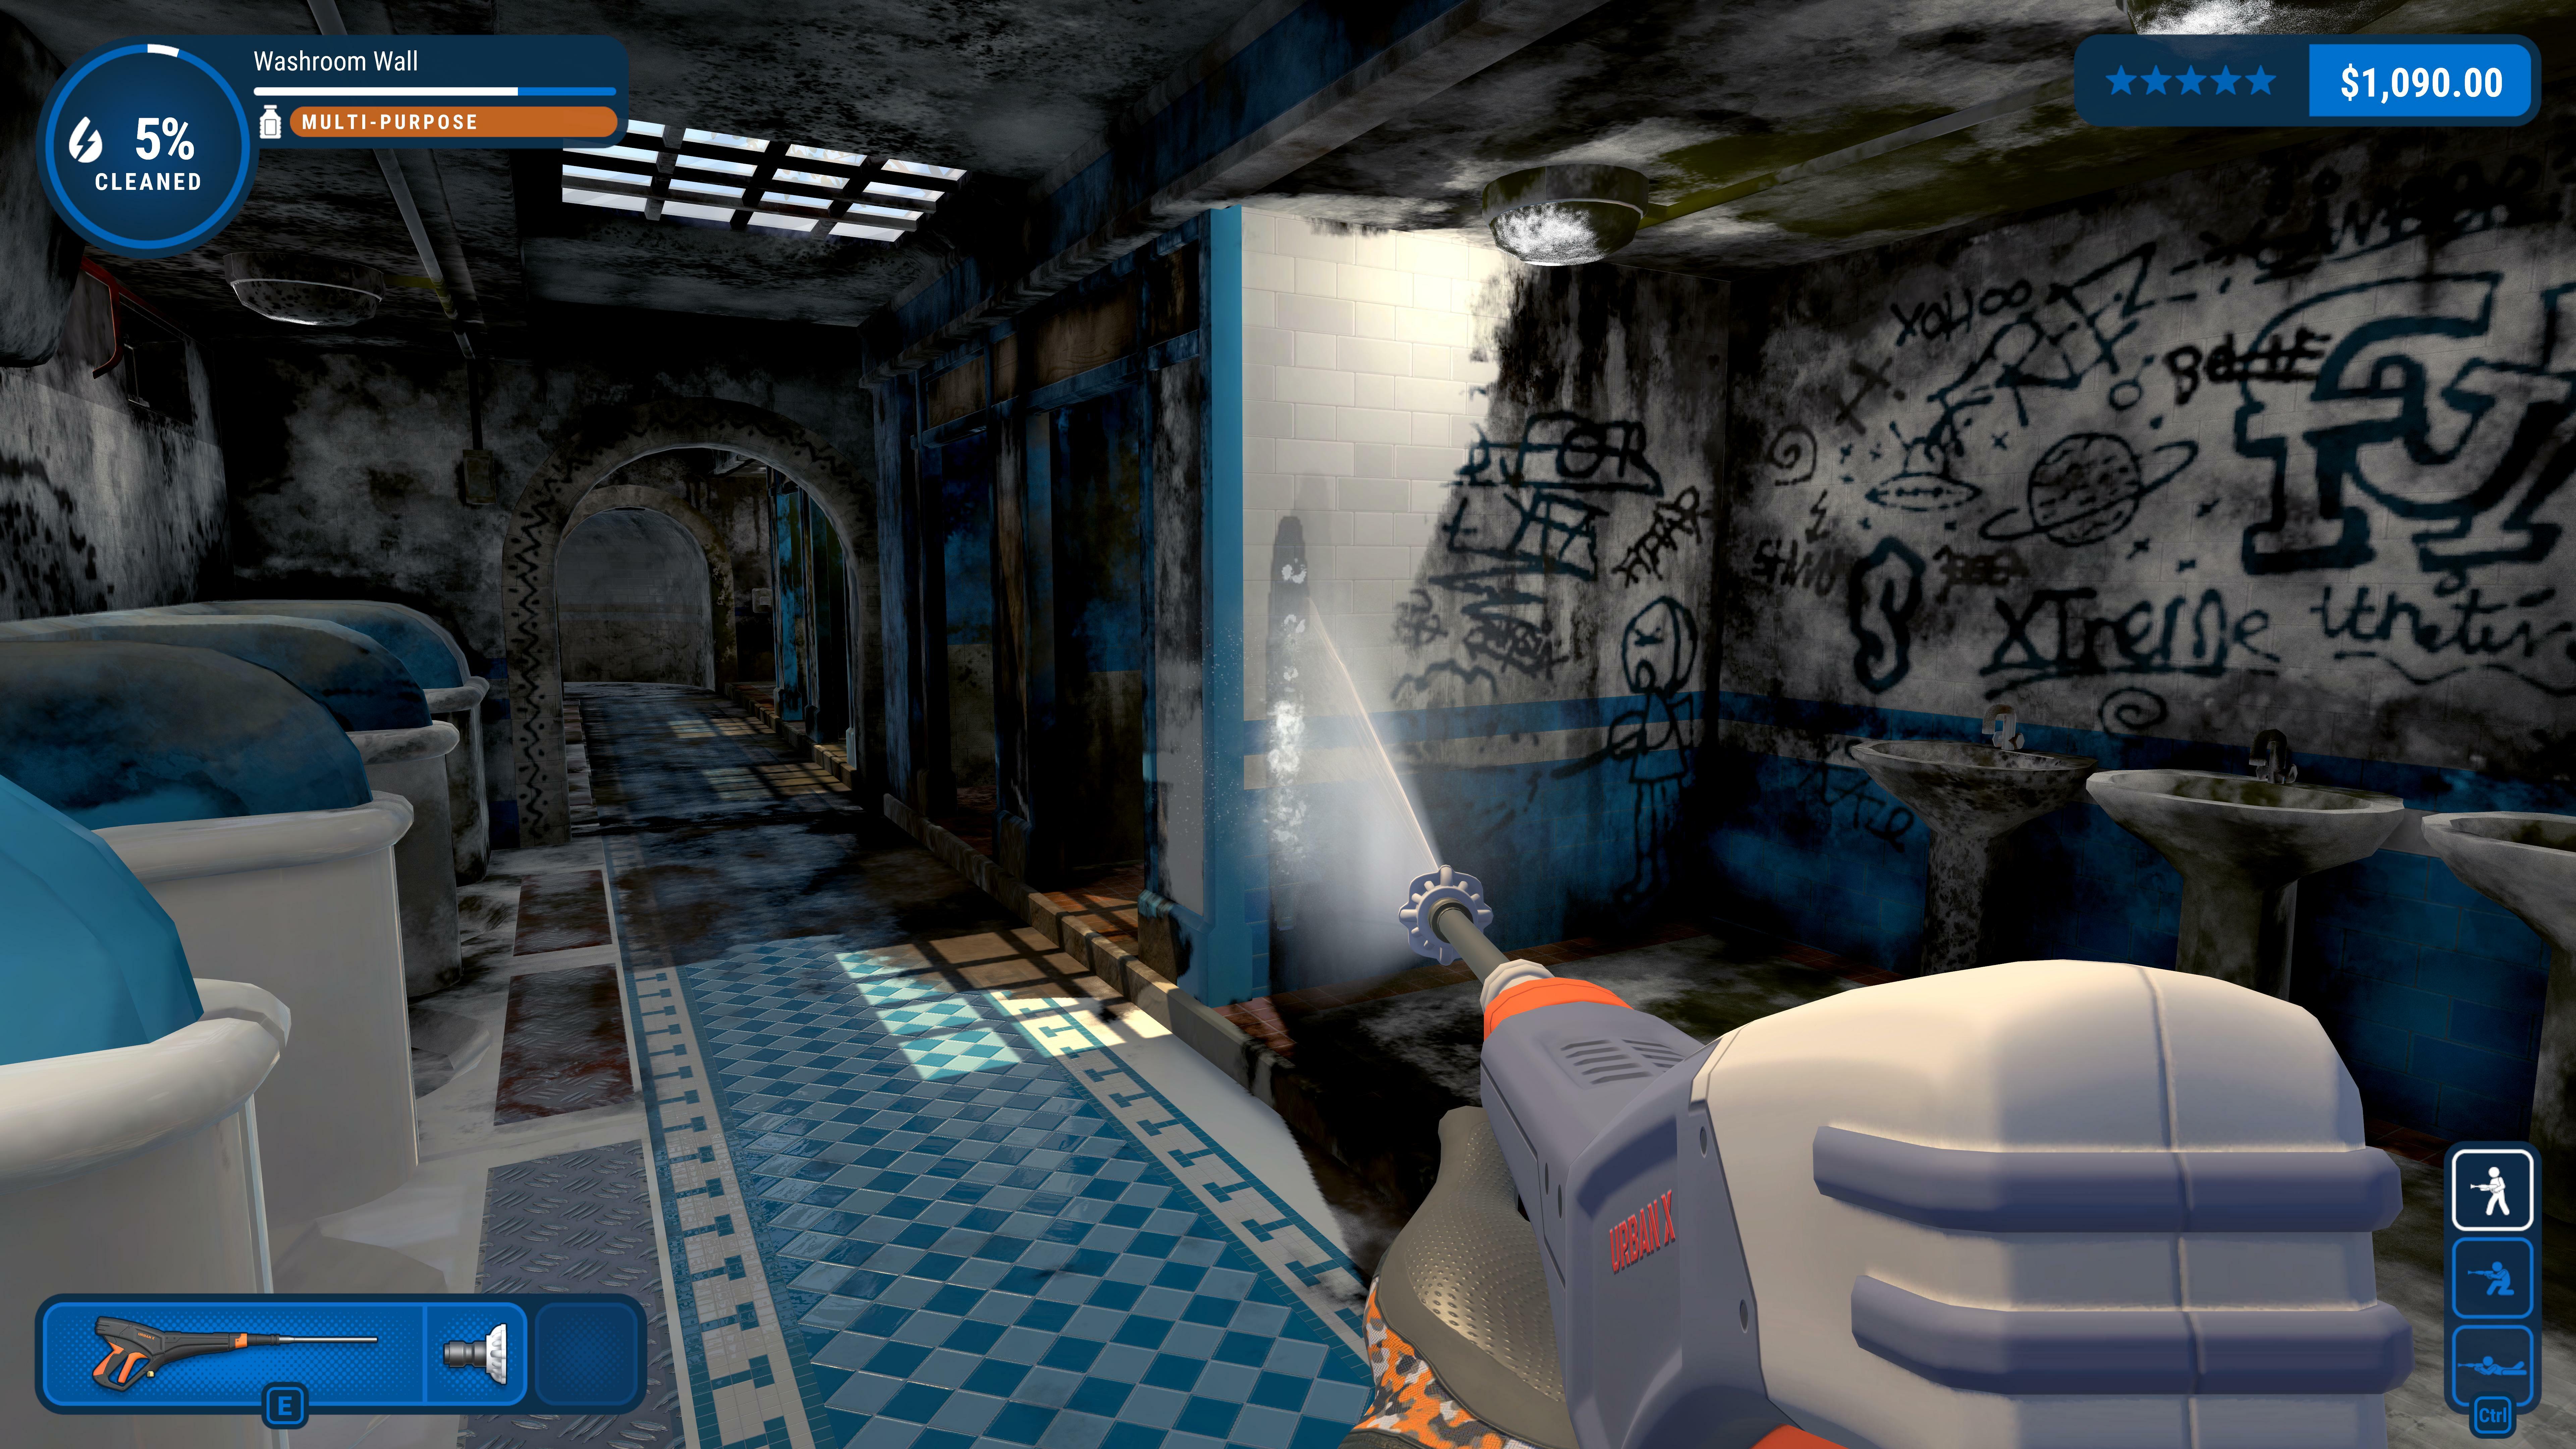
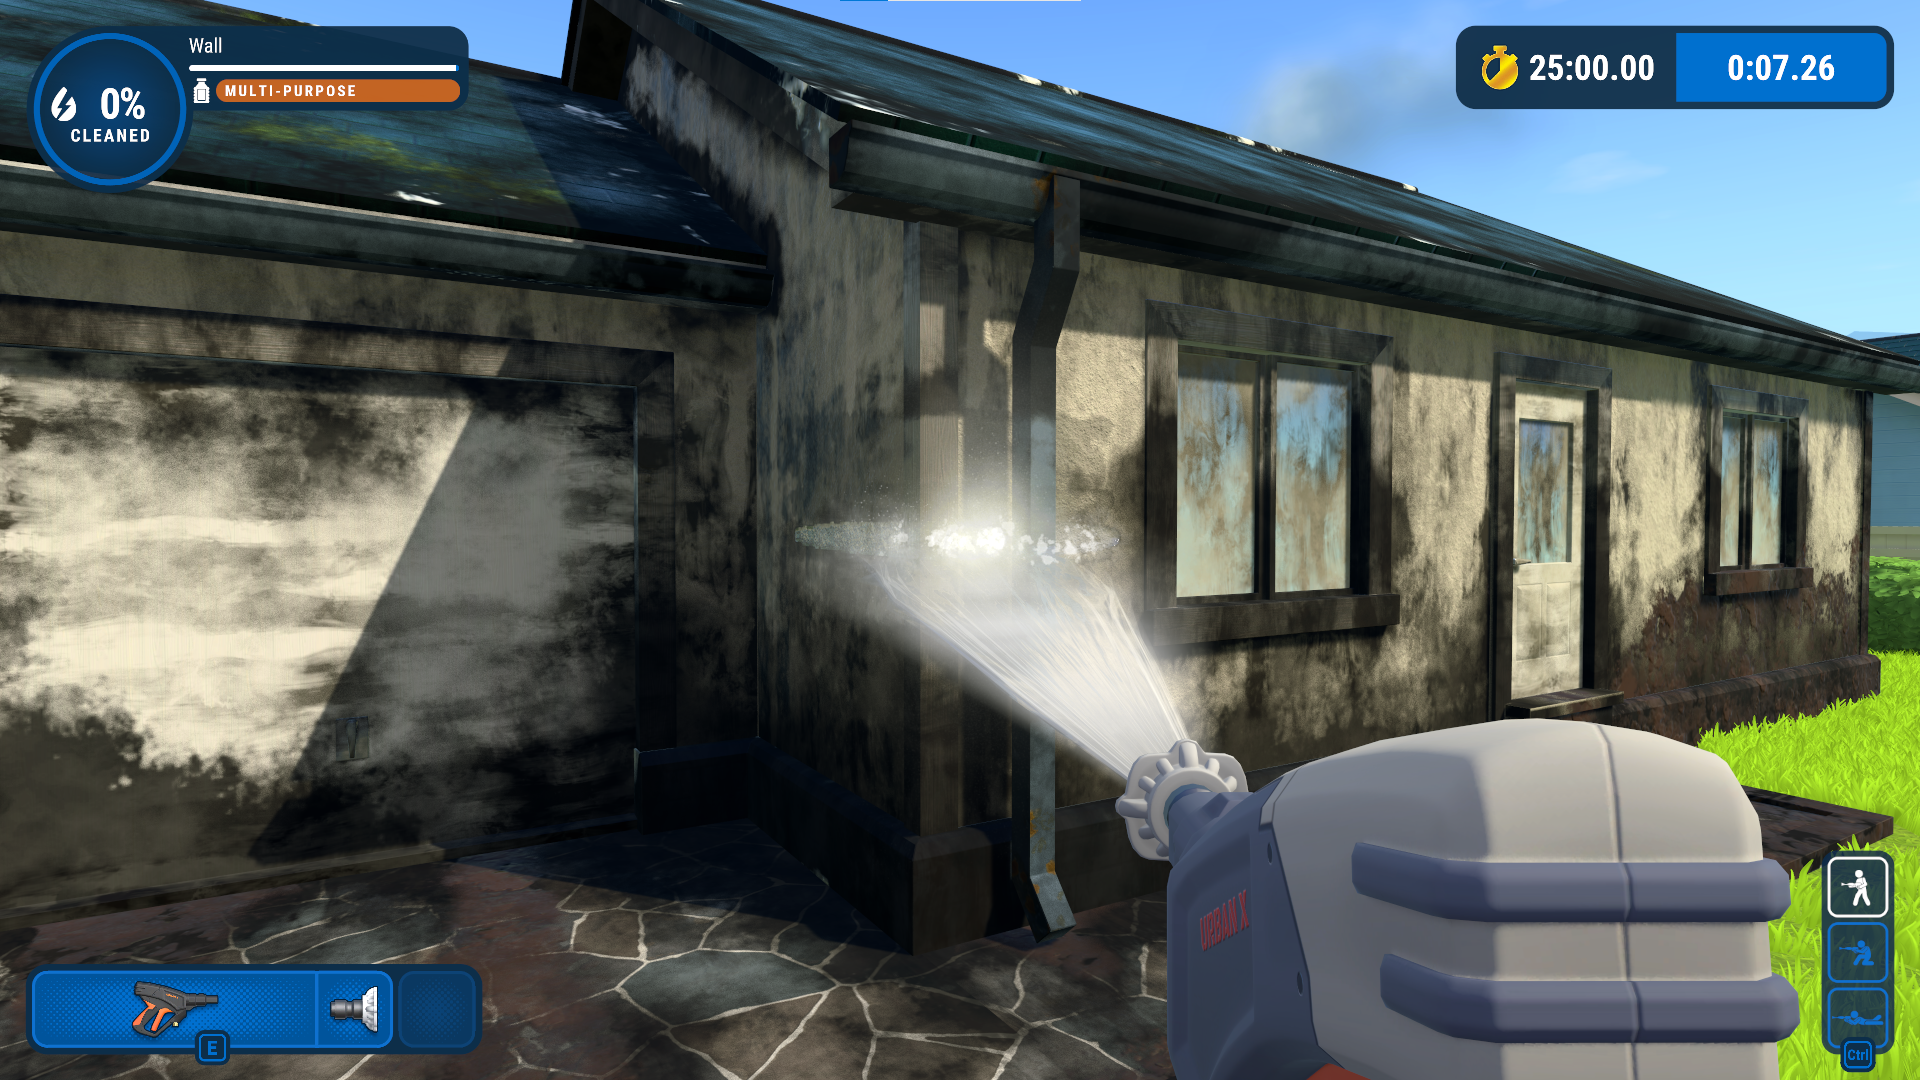
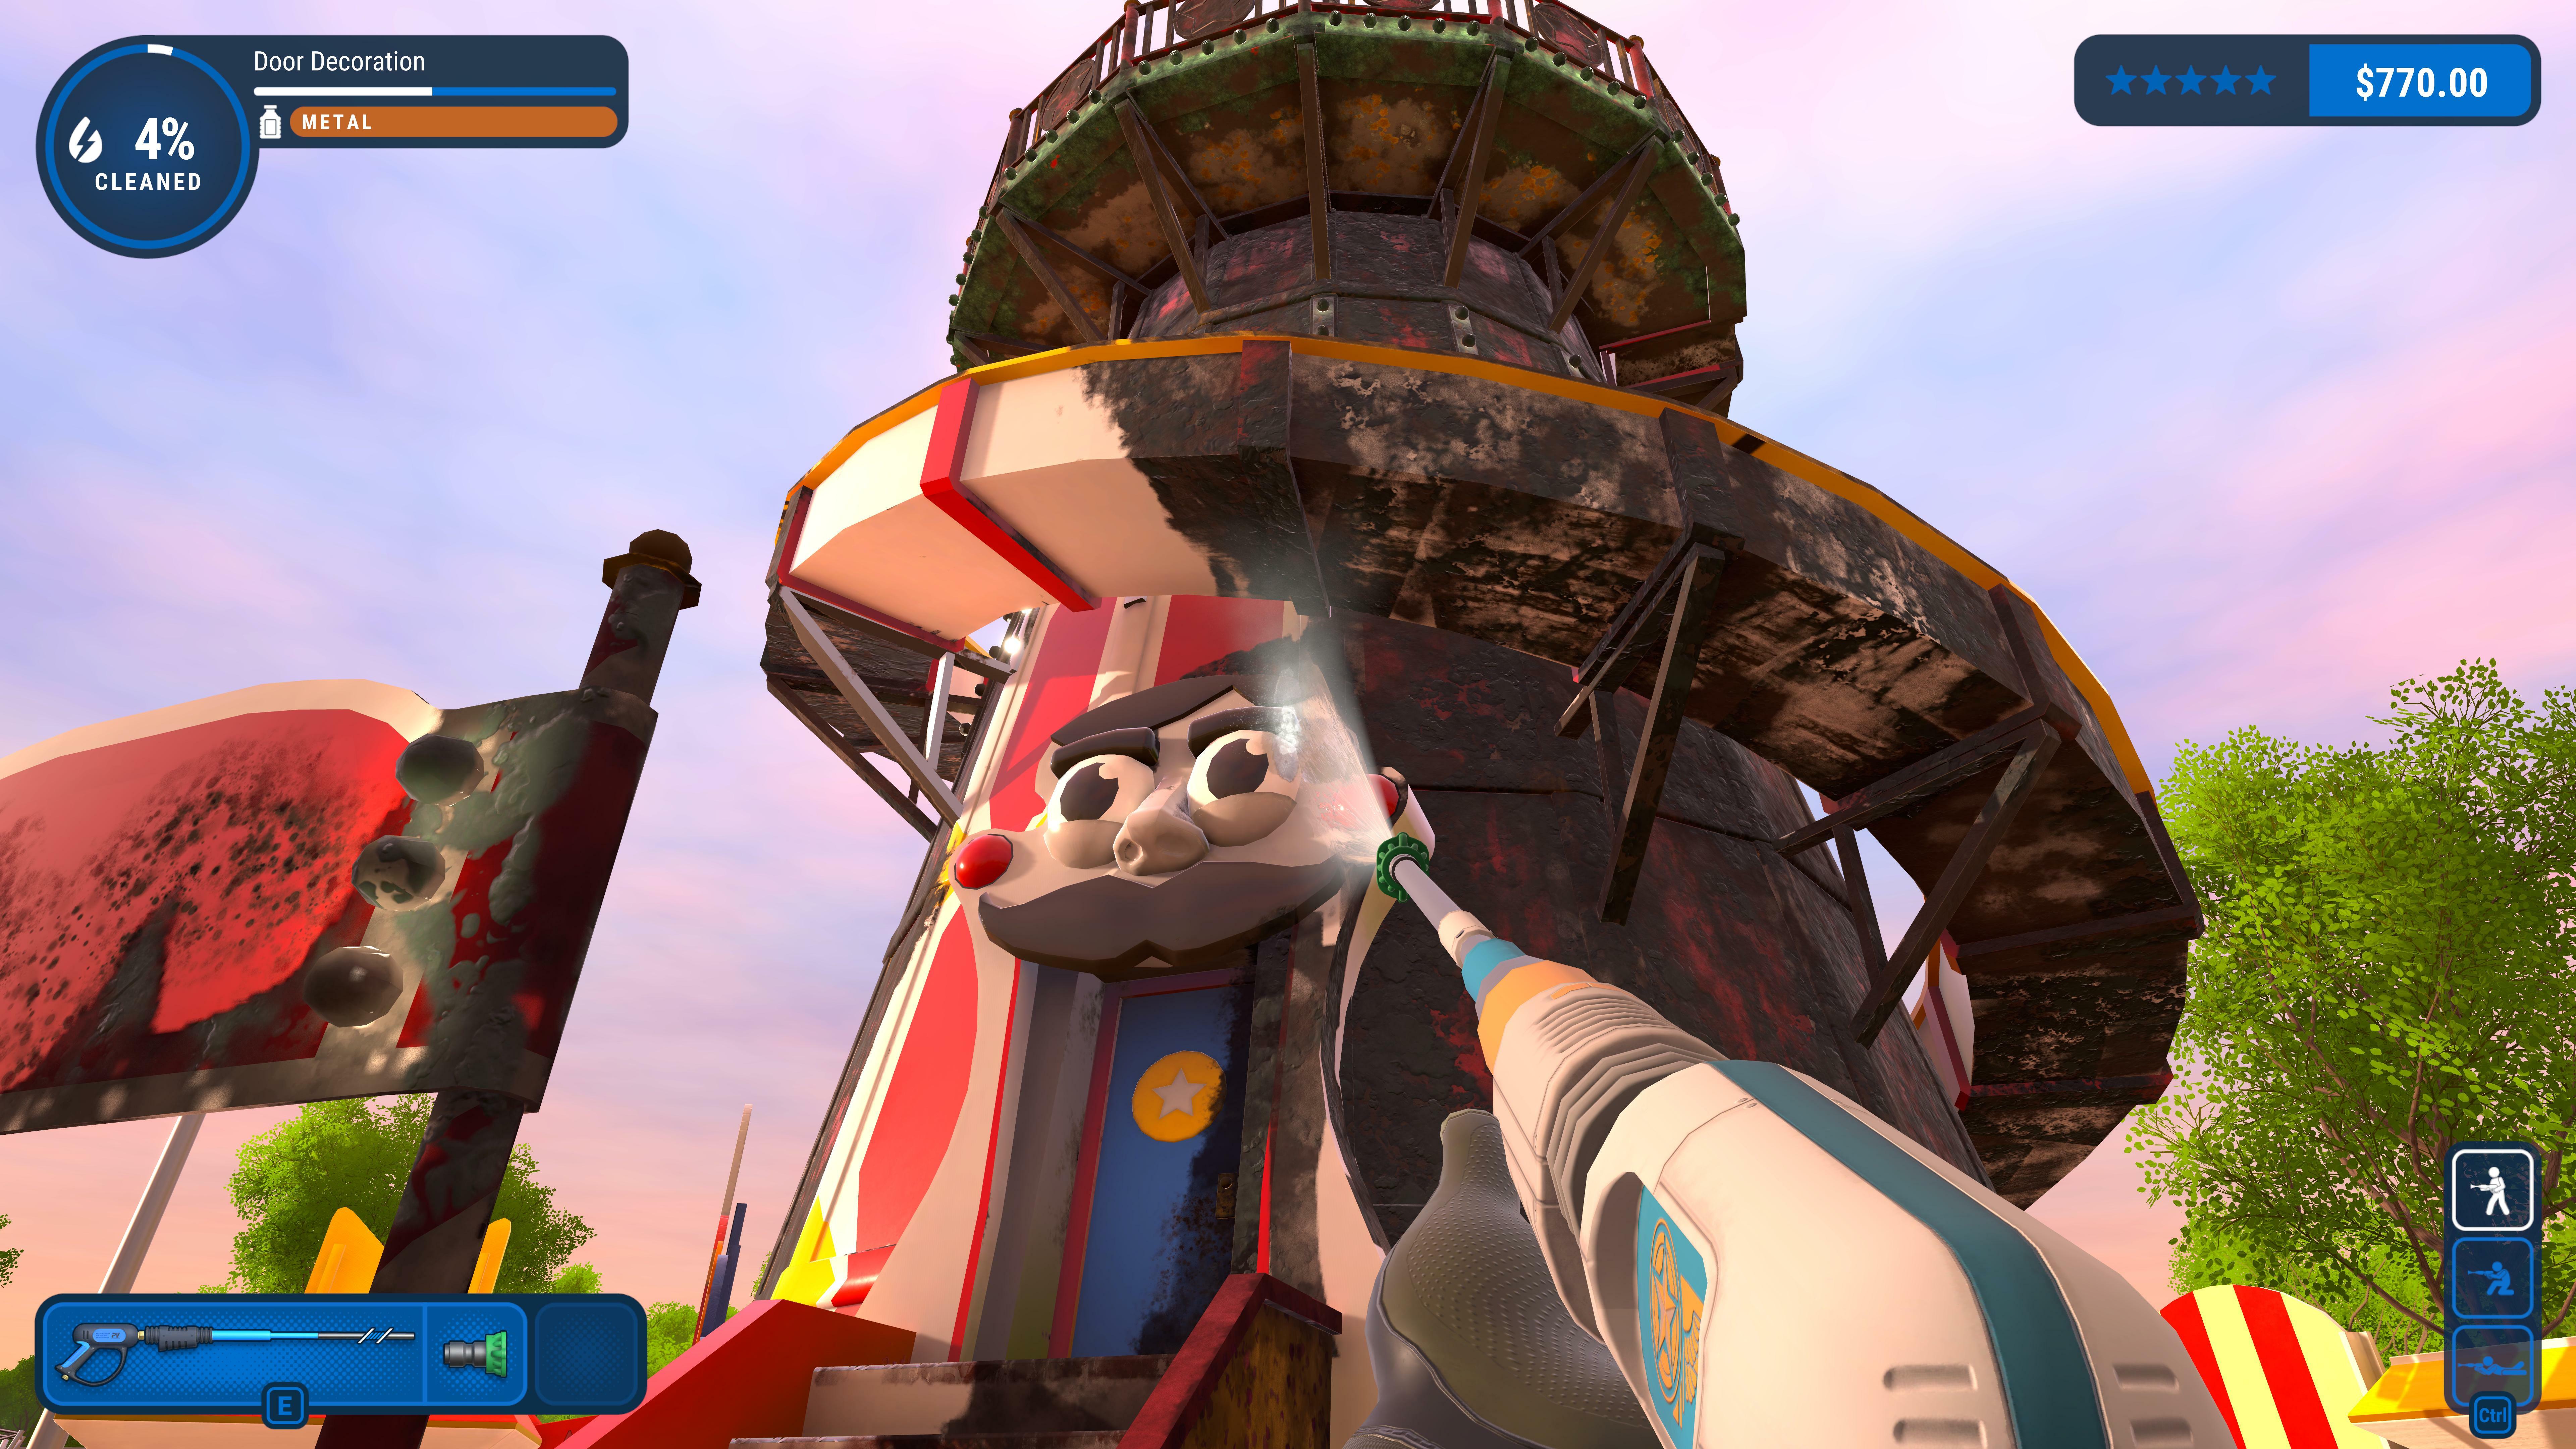
Welcome to content patch 0.6 which adds more things to wash, including the first indoor non-vehicle wash. Plus, new challenges, skins, and more!
New features:
Four new Career Mode jobs - Frolic Boat, Wash Room, Helter Skelter, and Private Jet.
Water and Time challenges for Golf Cart & Bungalow levels
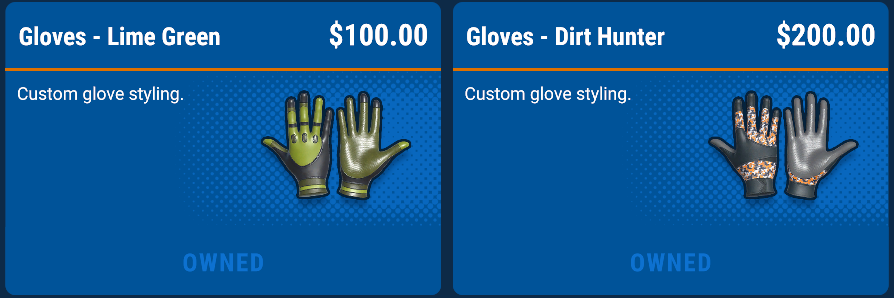
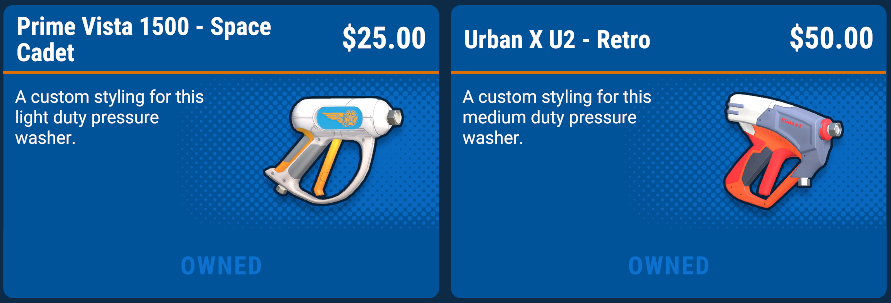
Two new glove skins
New Skins for the Prime Vista 1500 & Urban X U2 powerwashers
Fixes
Collision improvements
Legacy mode performance improvements
Thank you all for playing and for your feedback so far. We hope you’ll all enjoy the new content and we can’t wait to start teasing what’s in store for the next update!
Until Next Time...
That's all for this update, please let us know all of your thoughts on the new content, here, on our Discord, or on our socials! Also, this counts as our weekly dev log, we'll be back with another instalment next week!
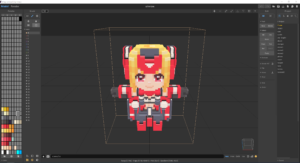
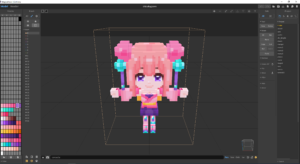
In the world of Teravit, you can fight monsters and roam freely in the world using characters created with MagicaVoxel.
Today we’ll be introducing how to create such an original character. For those who are interested, let’s take advantage of “MagicaVoxel” to create your own unique character and prepare for the upcoming Teravit release!
If you read this article to the end, you will also be able to create this kind of character.
Objective: ・Introduction ・Let’s prepare a character → Download the boy.vox file and load the contents ・Let’s create an original character →Before creating a character → Create your own original characters by painting them different colors → How to make colors → How to paint ・Conclusion
・Let’s prepare a character
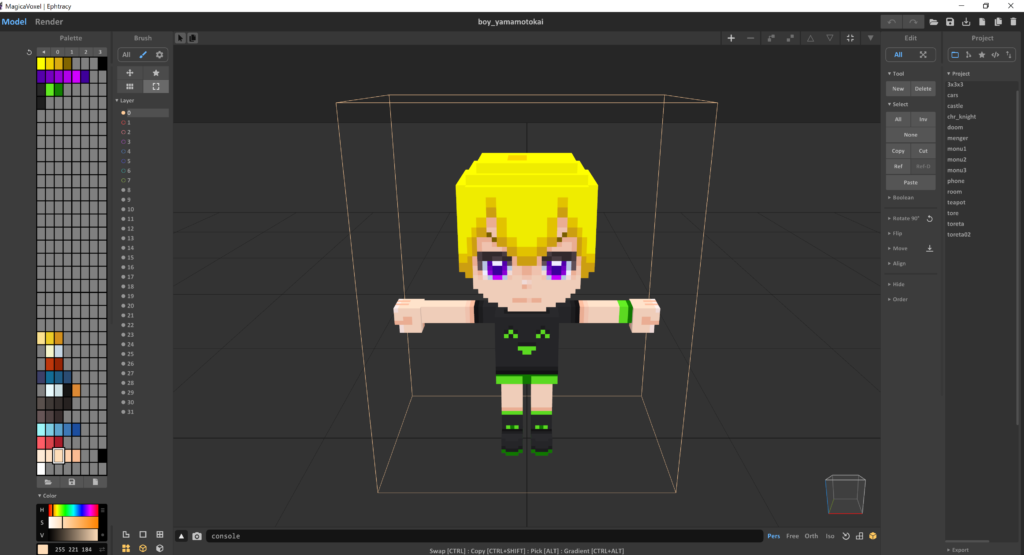
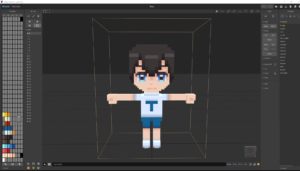
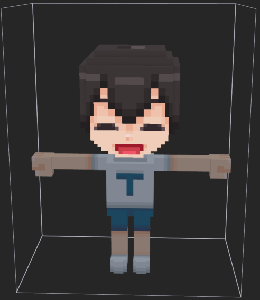
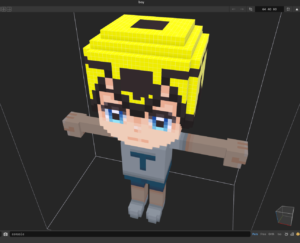
Get the boy.vox file and load the contents In the world of Teravit, you can freely explore using the avatars you create with MagicaVoxel.
This time, we will be sharing the voxel data for “Boy” (boy.vox), Crimrose (crimrose.vox) from CosmicBreak and Lady Shizuka (shizukagozen.vox) from Onigiri. First, download the data you are interested in, and load the data in MagicaVoxel. * This article will show you how to create your own original character using “boy.vox”.
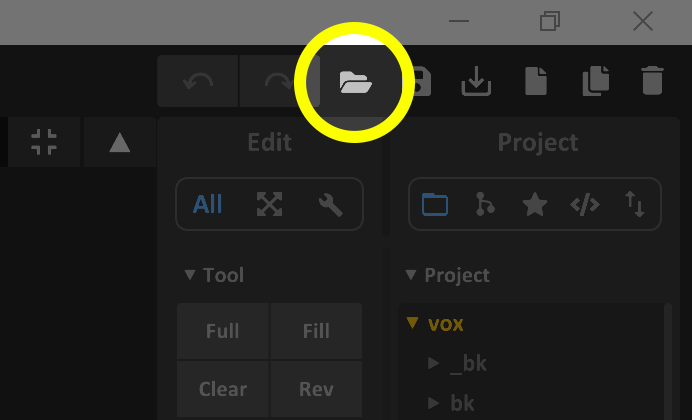
Once the download is complete, you can load it into MagicaVoxel by selecting “Download” from the folder icon in the upper right corner of the screen.
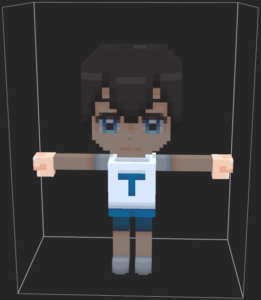
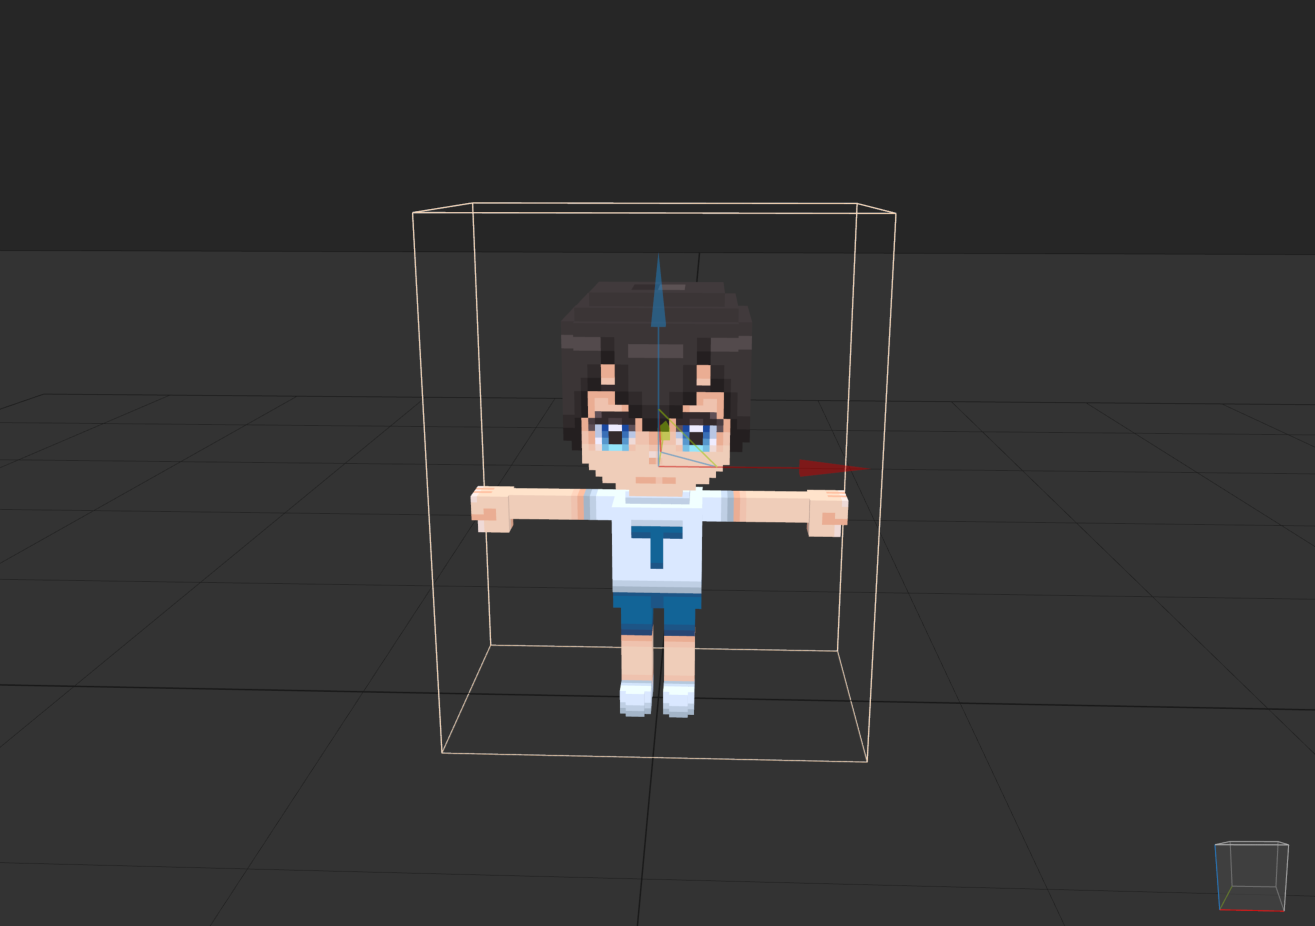
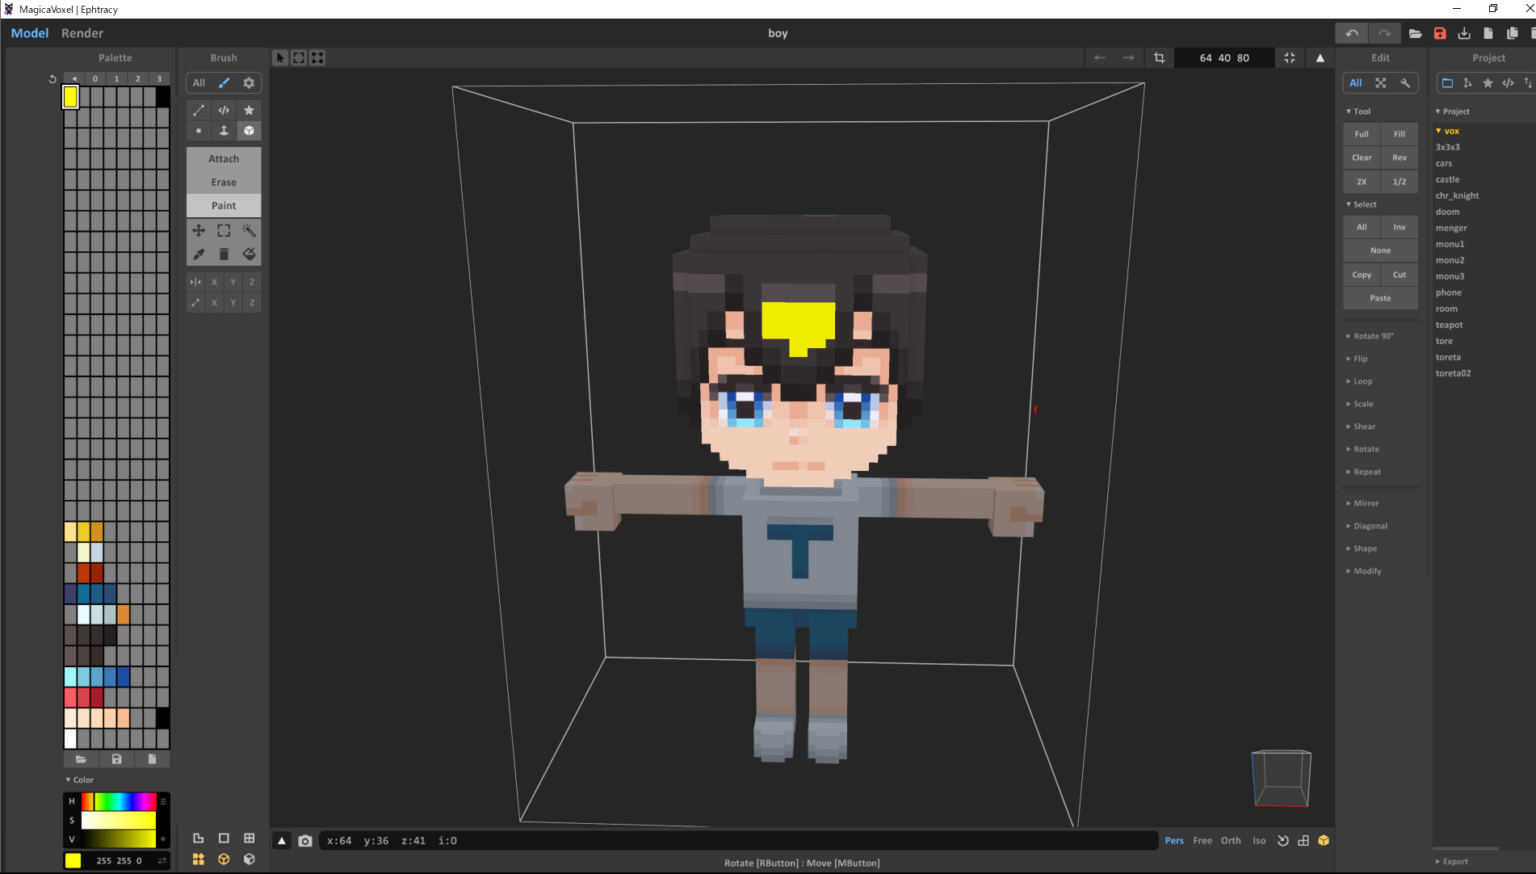
When the “Boy” avatar appears on the screen as shown in the image below, loading is complete.
Let’s create an original character
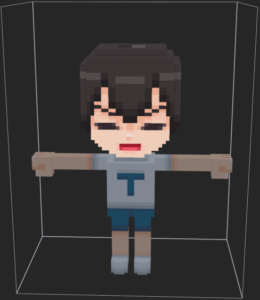
There are a few things to keep in mind when using MagicaVoxel to create a character for the Teravit. For example, the “Boy” consists of the following components.
・body0 : Body + Two Hands
・body1 : Two arms + Two legs
・face0 : Face (Normal)
・face1 : Face (Eyes closed, Sleeping)
・face2 : Face (Happy)
・face3 : Face (Damage, Death)
All of these components are body parts that move independently of each other. If you create an original character from scratch in MagicaVoxel and want it to appear in Teravit, be careful to create it in separate layers as described above.
* We are currently making adjustments to “face2 : Face (Happy)” with the goal of displaying various emotions on avatars for the official release. Please note that the changes made will not be applied to the avatar in-game.
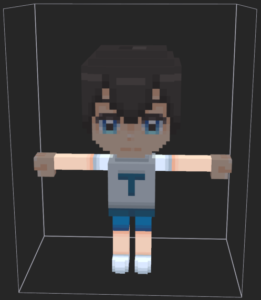
Create your own character by painting it different colors
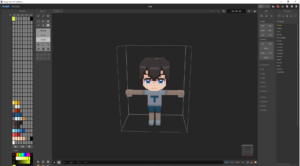
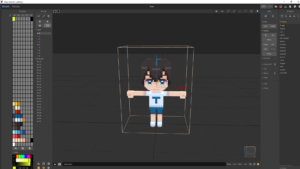
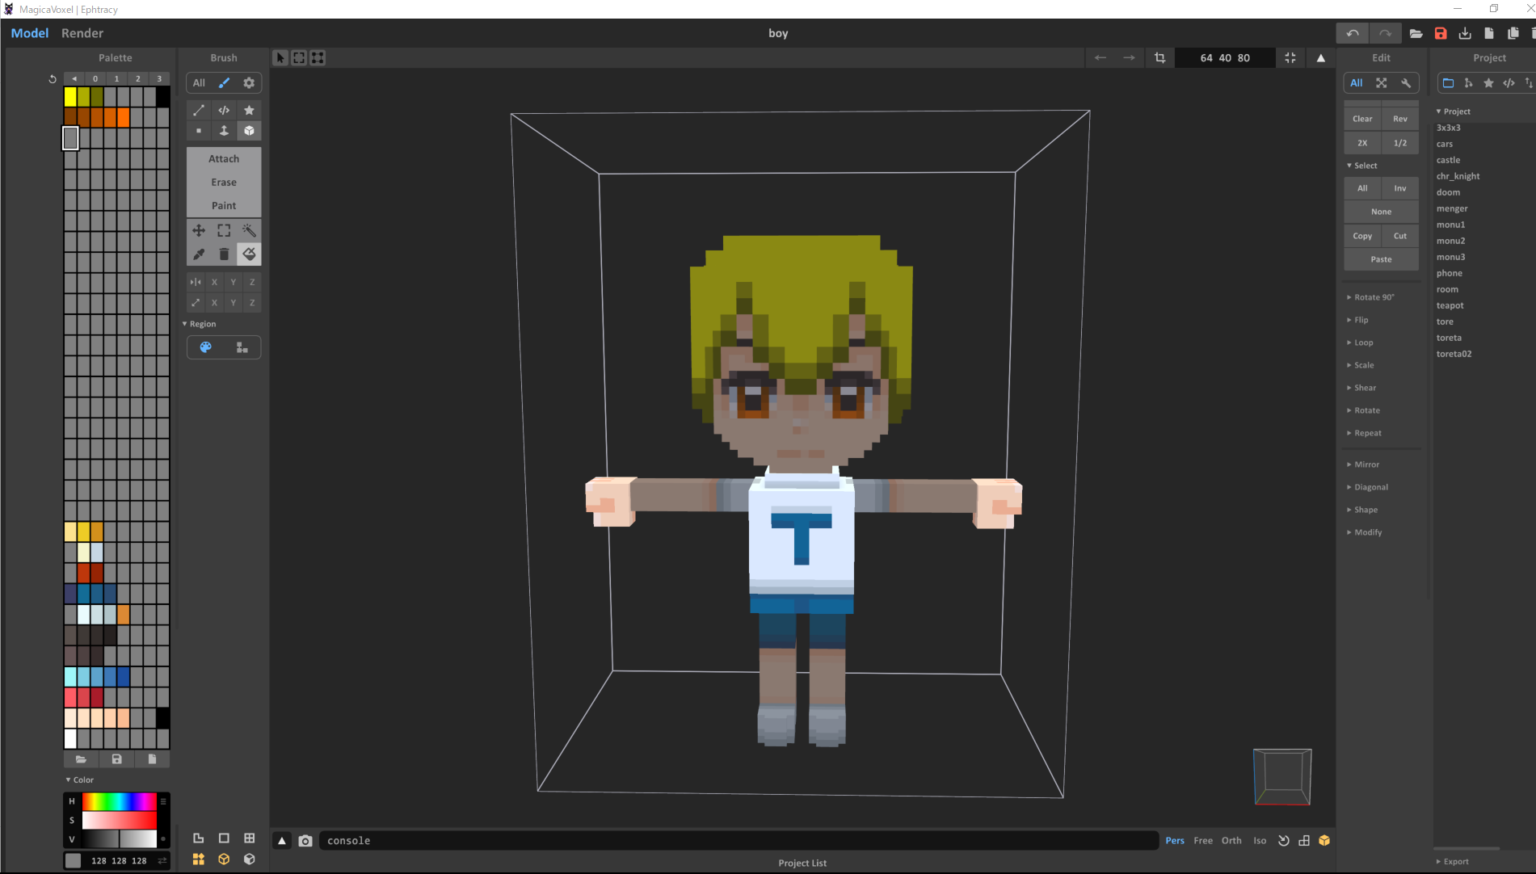
MagicaVoxel has two types of screens; the Modeling Screen, where you can create three-dimensional objects using voxels, and the World Screen, where you can freely move and place voxel objects in 3D space.
Modeling Screen
World Screen
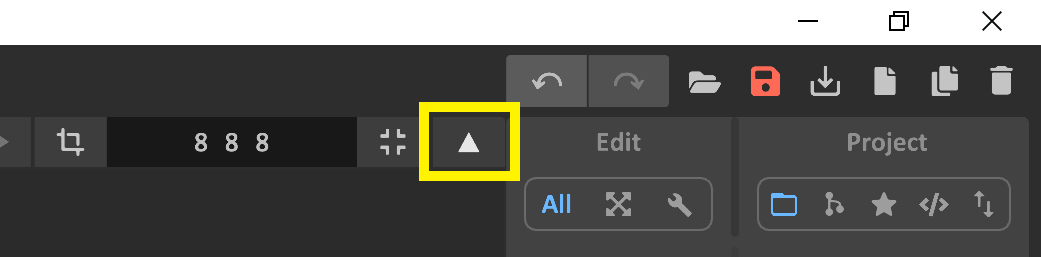
Click the “▲ ” (Triangle) button in the upper right corner to switch between the “Modeling Screen” and the “World Screen”. You can also switch between them by pressing the “Tab” key.
Firstly, select your character’s face [face0 : Face (Normal)] in the “World Screen” by left-clicking on it, and then click on the “▲” (Triangle) in the upper right corner or press the “Tab” key to switch to the “Modeling Screen”.
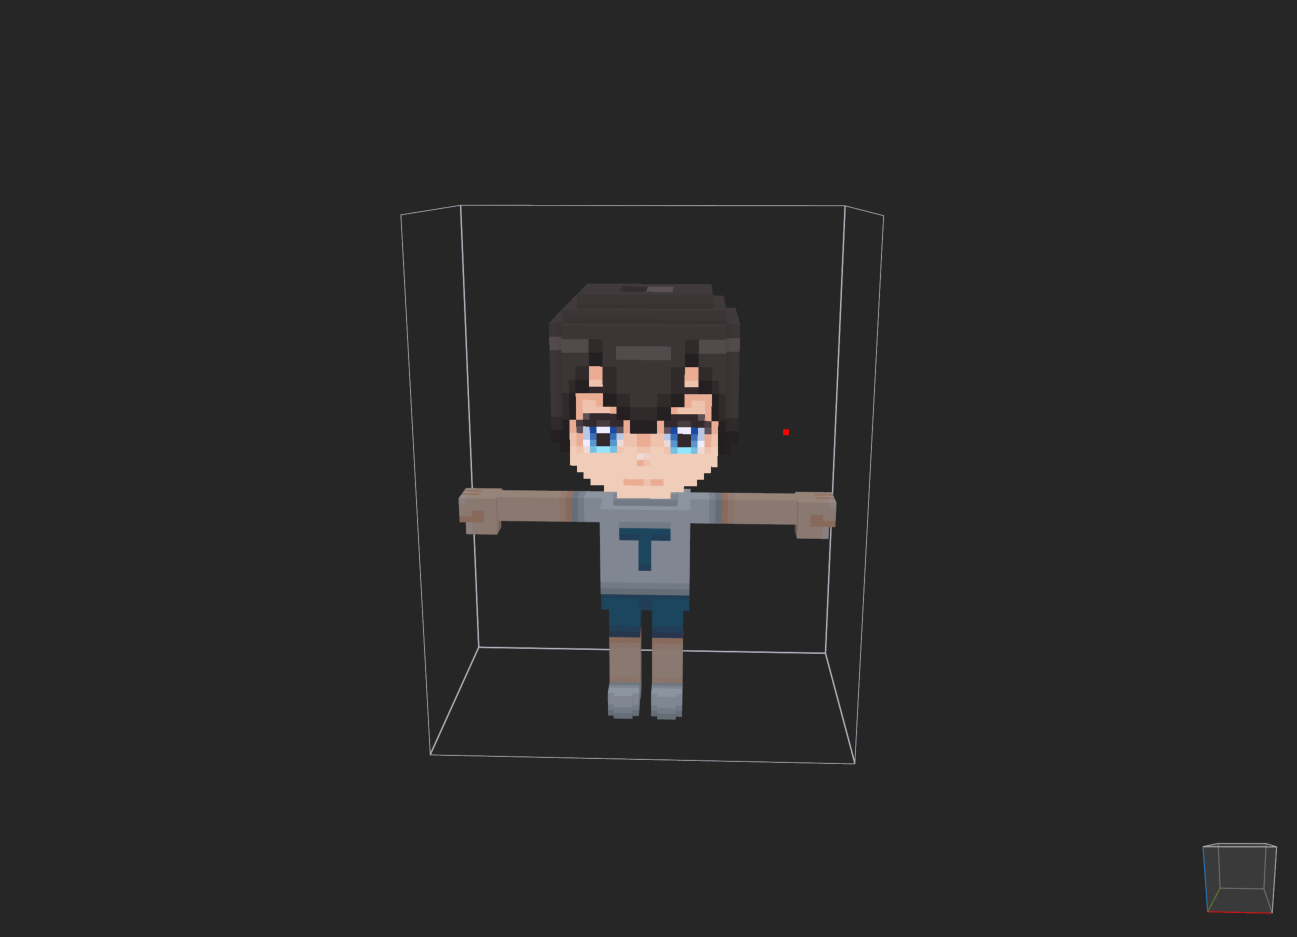
When you switch to the Modeling Screen, only the selected area (layer) will be highlighted, so you will be able to repaint the voxels or add voxels, as shown in the image below.
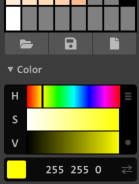
Let’s make colors
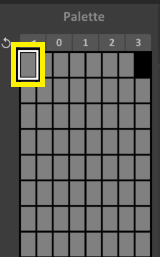
In MagicaVoxel, you can use the color palette on the left to select colors, but currently only shows the colors used by boy.vox. If you want to use a new color, you can do that by creating your own color.
1. To create a color, select one of the palettes in the color palette.
2. With the palette selected, select “▼Color” under the color palette to see the colors labeled “H: S: V:”.
3. You can add colors to the palette by adjusting each of the “H: S: V:” to match the color you want to create.
[POINT] The number under HSV is the RGB value (A way to represent colors consisting of the three primary colors of light). You can also create a new color by changing the value here. Here we have created a yellow color by entering the RGB value of “255 255 0”.
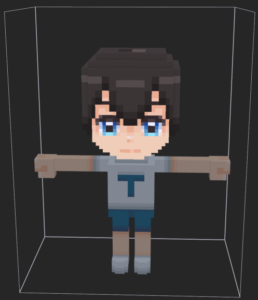
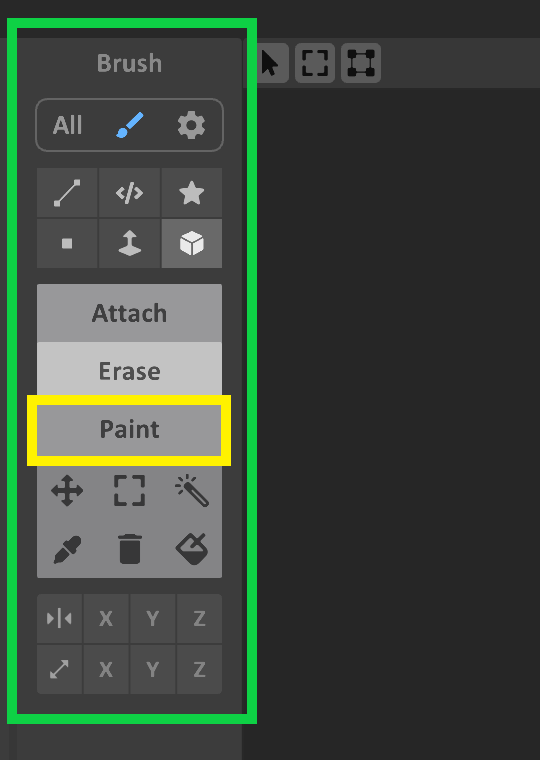
How to paint Once you’ve added the colors you want to use to the color palette, it’s time to create your own original character by actually repainting the boy.
1. With the color you want to use selected from the color palette, select “Paint” from the “Brush Tools” on the right side, which you will use to apply the color.
2. By clicking on “Boy“ (Object) while it is selected, you can paint it with the selected color, and draw any pattern or picture you want.
[POINT #1] Using the functions in the Brush Tool, you can select the same area as the color of the selected voxel, or fill the selected voxel with the color selected in the color palette.
Useful Tools (Some)
You can select the same area as the color of the selected voxel.
The selected voxel can be filled with the color selected in the color palette.
[POINT #2] If you click on a voxel while holding down the “Alt” key, you can extract the palette of the selected color. This is a useful feature to reconfirm which colors were used.
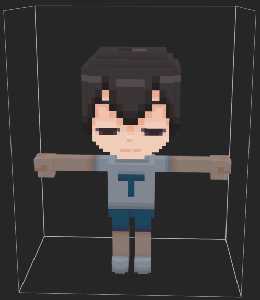
3. When you have finished coloring, go back to the “World Screen” and select another layer by left-clicking on it. Switch to the “Modeling Screen” and create your original character by repainting the colors and patterns just as you did for “face0: Face (Normal)”.
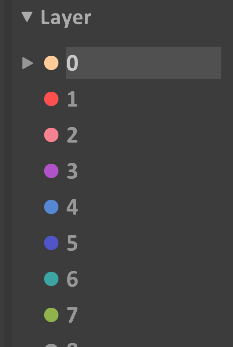
[POINT] By using the “Layer function” on the left side of the “World Screen”, you can change the character’s facial expression (face).
The ● to the left of the number indicates the currently displayed layer, which can be toggled visible or invisible by clicking on it.
Layer1 : face1 - Face (Eyes closed, Sleeping)
Layer2 : face2 - Face (Happy)
Layer3 : face3 - Face (Damage, Death)
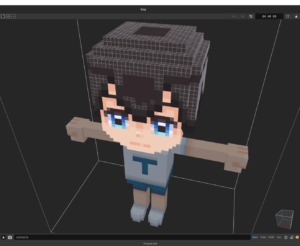
4. When you have finished painting everything, your original character is complete.
After completing your original character, don’t forget to save it.
[POINT] To save your work, press “Ctrl” + “S” (or “Cmd” + “S” on a Mac). When you save the file, a file save dialog will appear, so don’t forget to save it in the vox folder in the same folder as the MagicaVoxel application with a file name of your choice.
Conclusion
This concludes how you can create an original character using MagicaVoxel. The characters you create can be used to freely explore the world of Teravit.
To make them appear in Teravit, select "Settings" from the title screen, go to "Skin" and use "Upload vox data" to load the .vox file you saved. Finally press "Save settings" to apply.