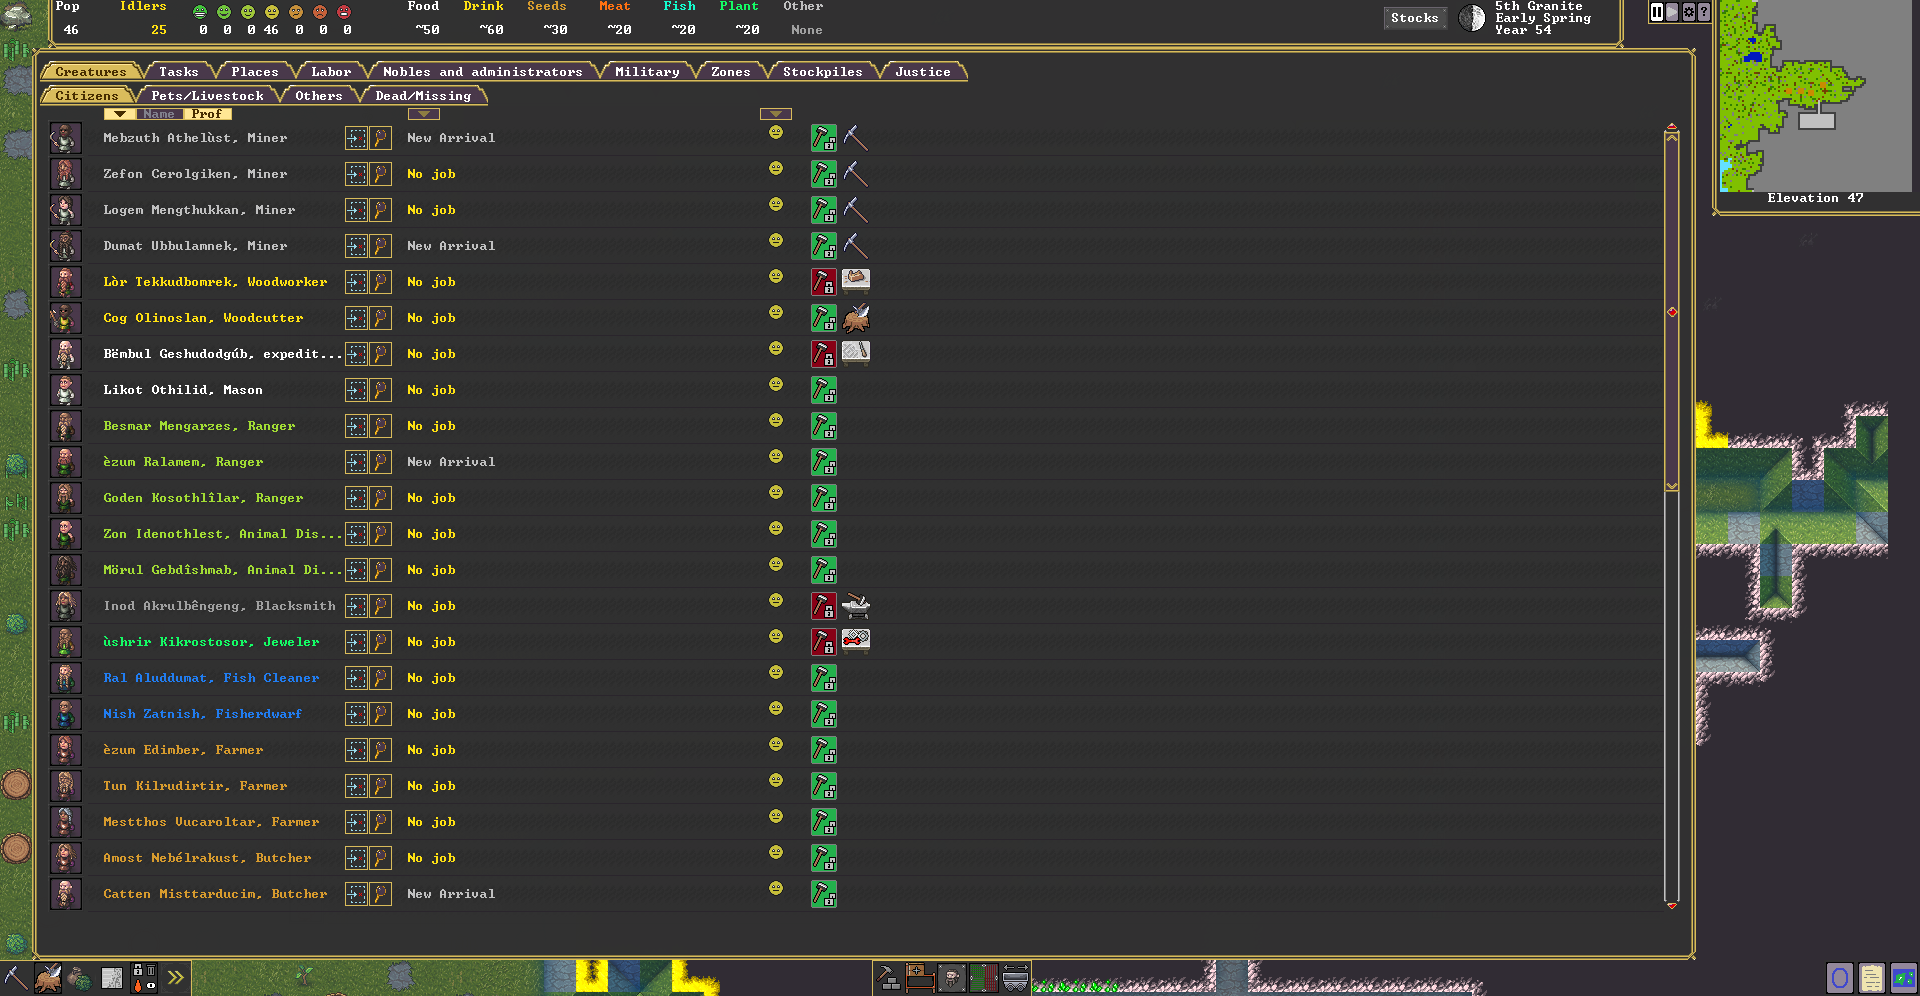
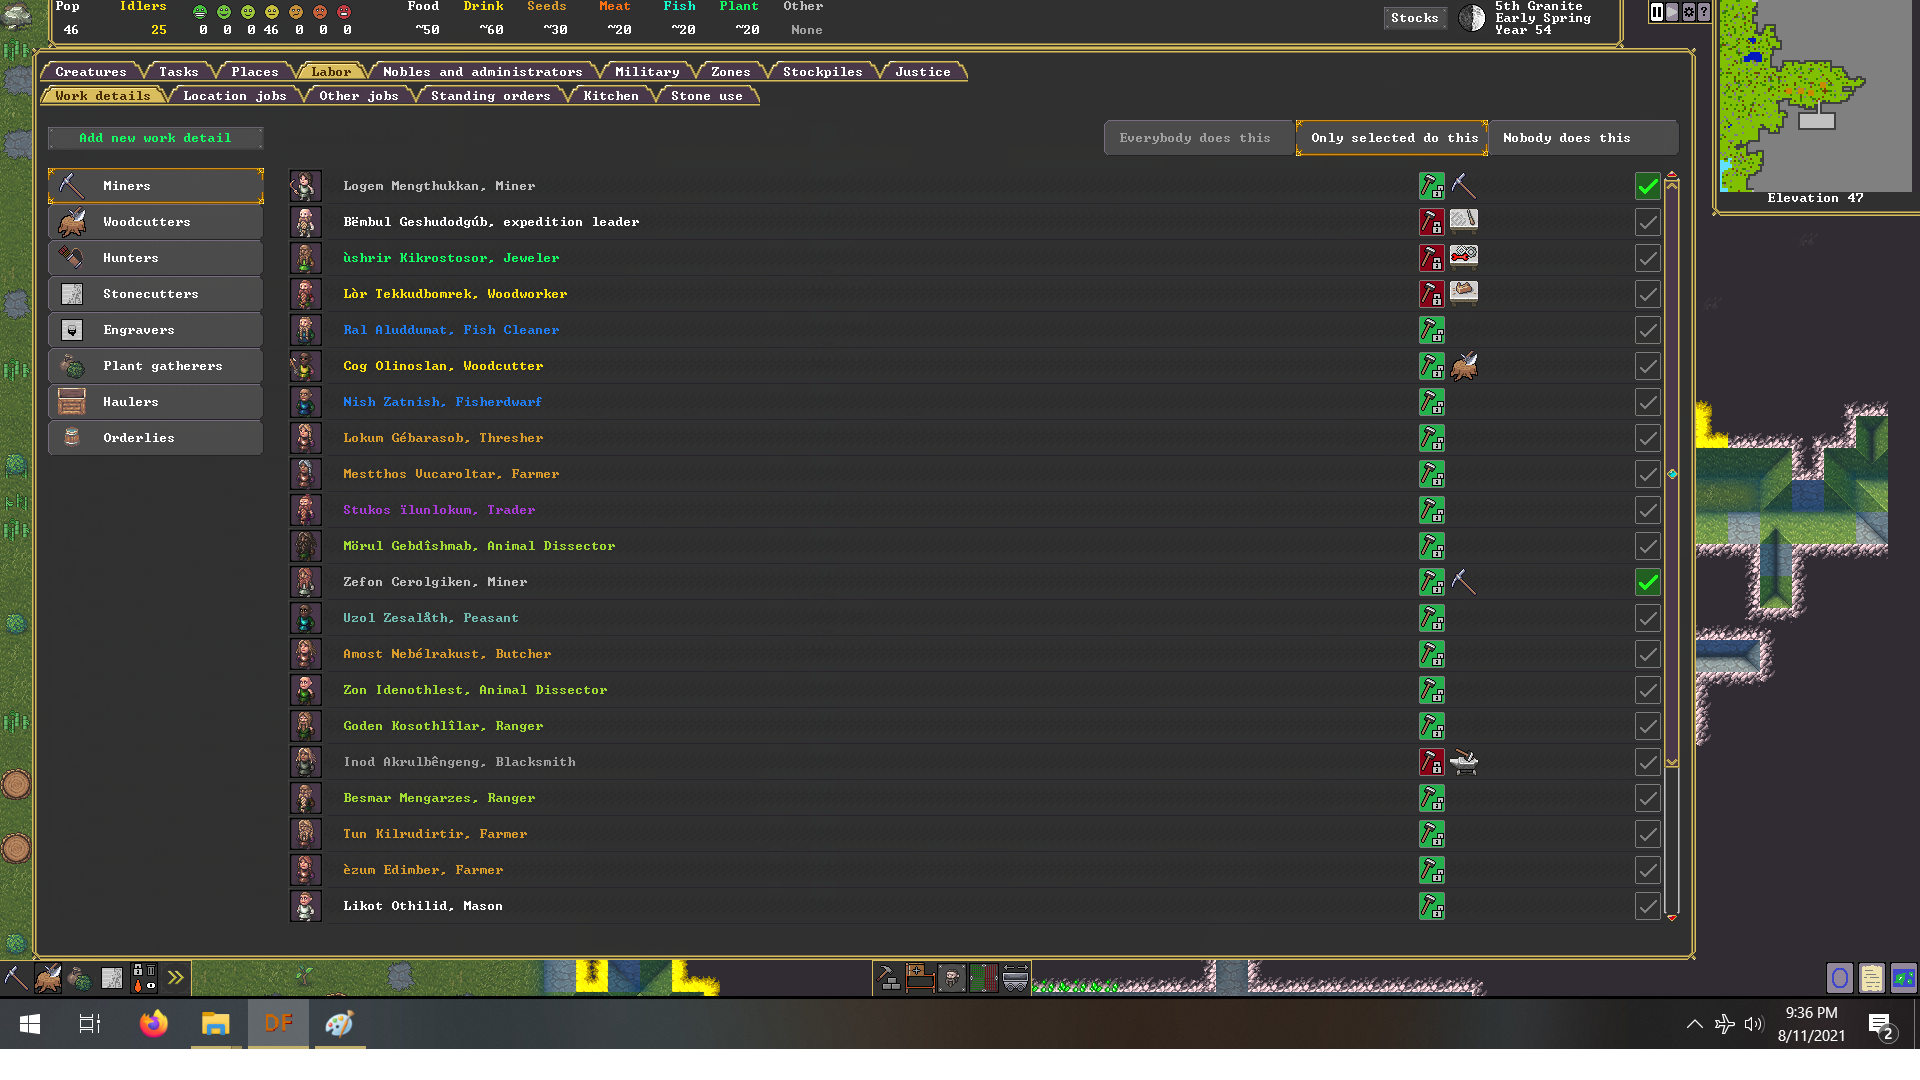
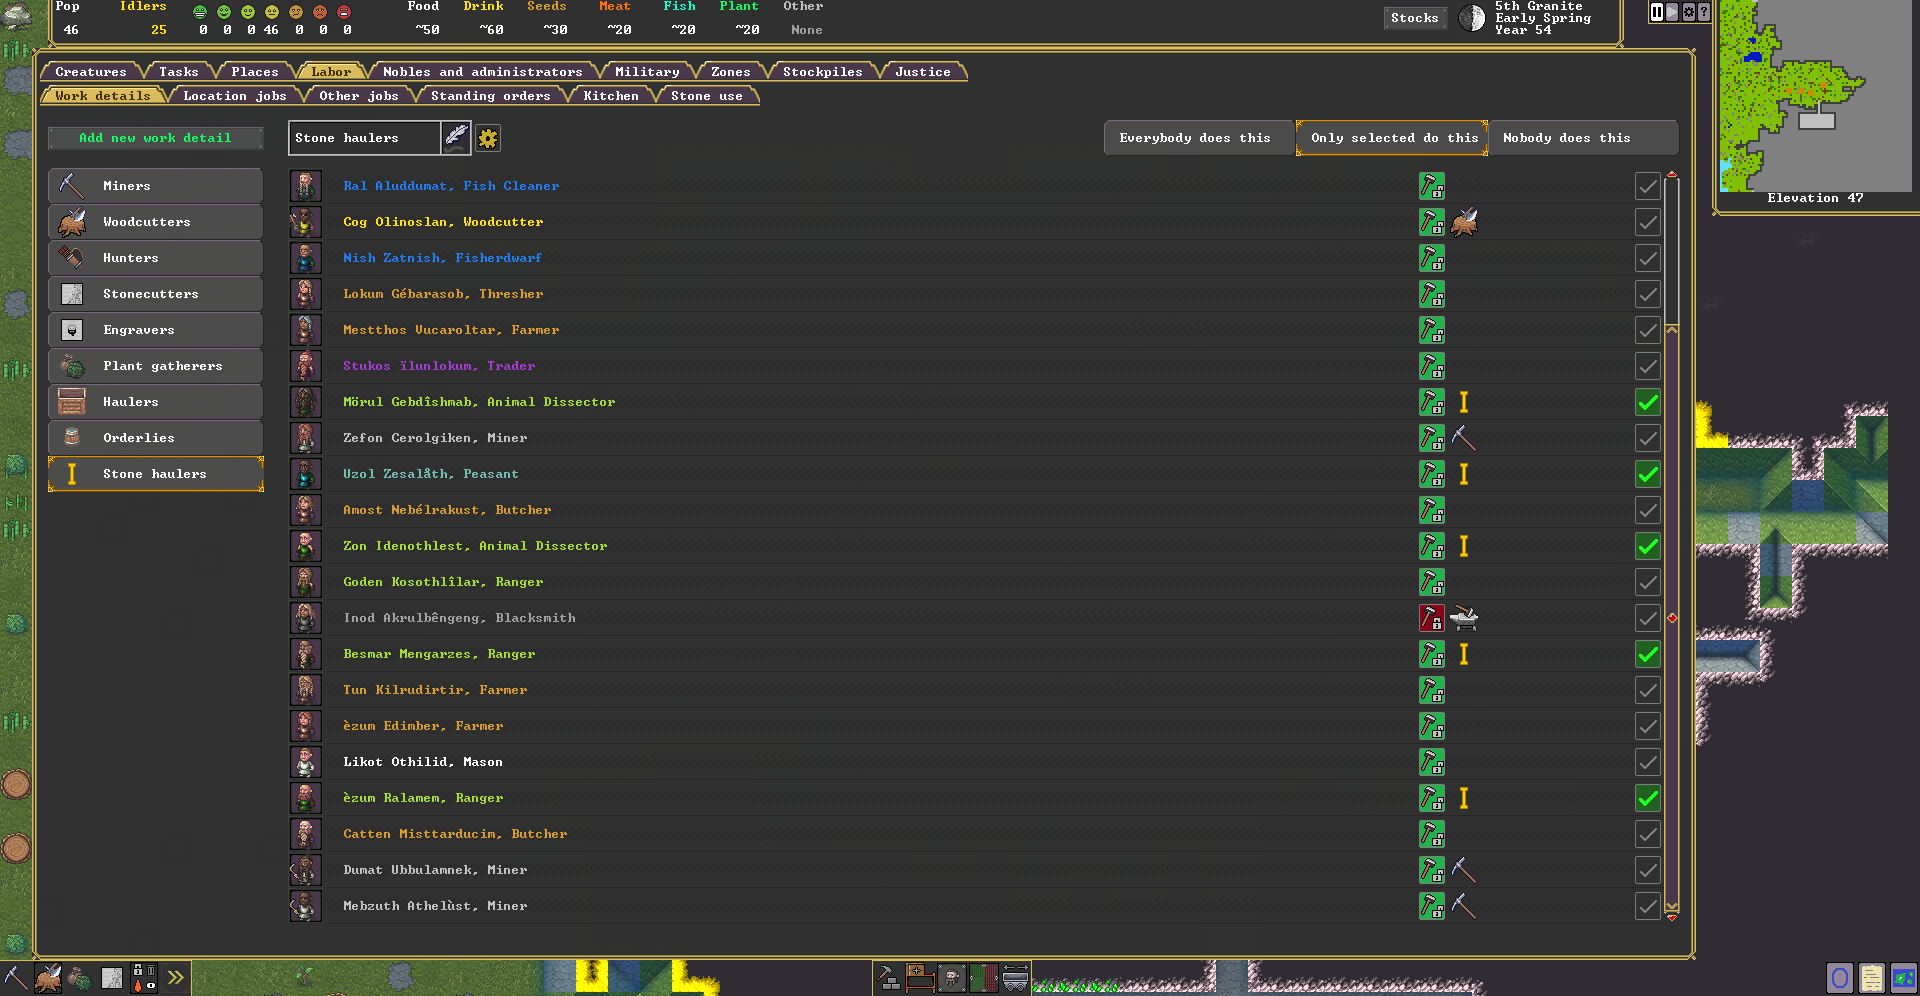
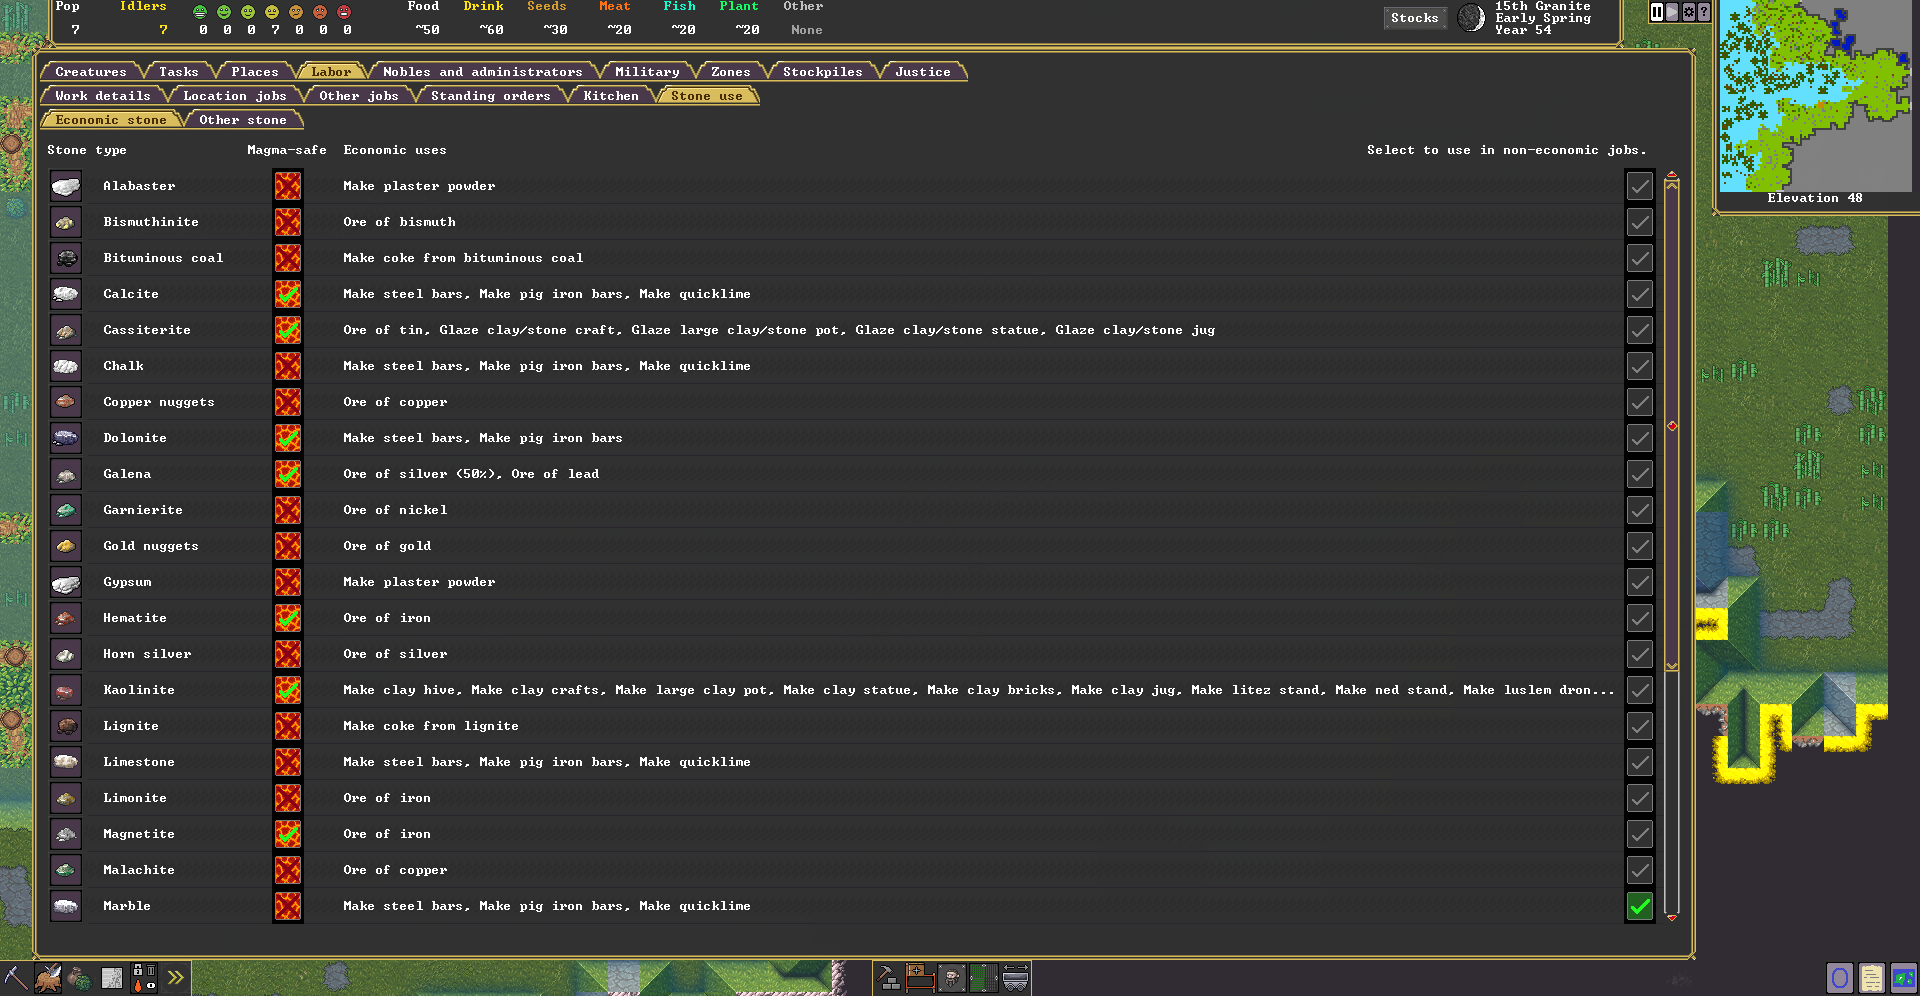
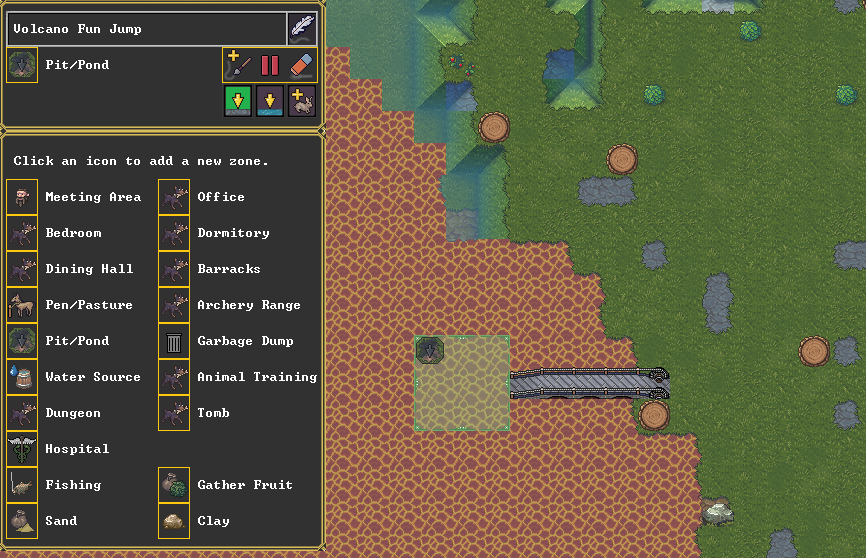
The game has several special locations that can be given names and which can spread out over several meeting/bedroom/etc. zones, even across different z levels. Dwarves that work in places like this have always had special labor assignments, even before we added the work detail system from the previous news update, and we need to support this in the new interface. Locations also have various other functions we've also supported now.
Traditionally, Dwarf Fortress has had four types of locations you can set up: taverns, temples, libraries, and, more recently, guildhalls. Taverns and libraries allow you to opt-in to more visitors from the outside world, as people come to relax and study. Since, multiple zones like meeting areas and bedrooms can be assigned to a single named location, you can make, for instance, a library which has both a scriptorium and a place for scholars to meet, or you can allow the priests in your temple to have their own private quarters which are still accounted as part of the temple.
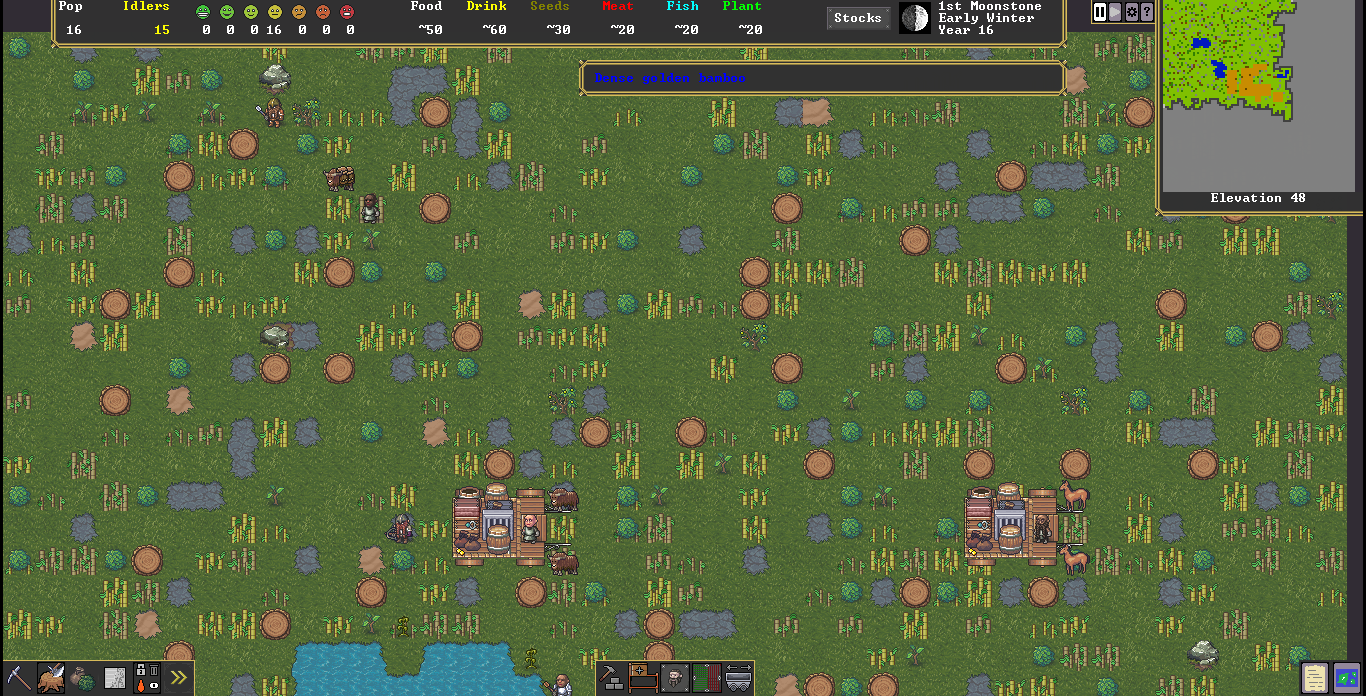
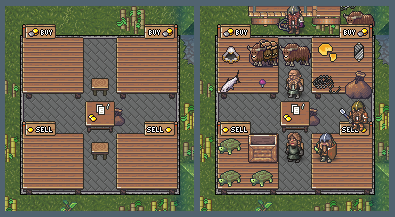
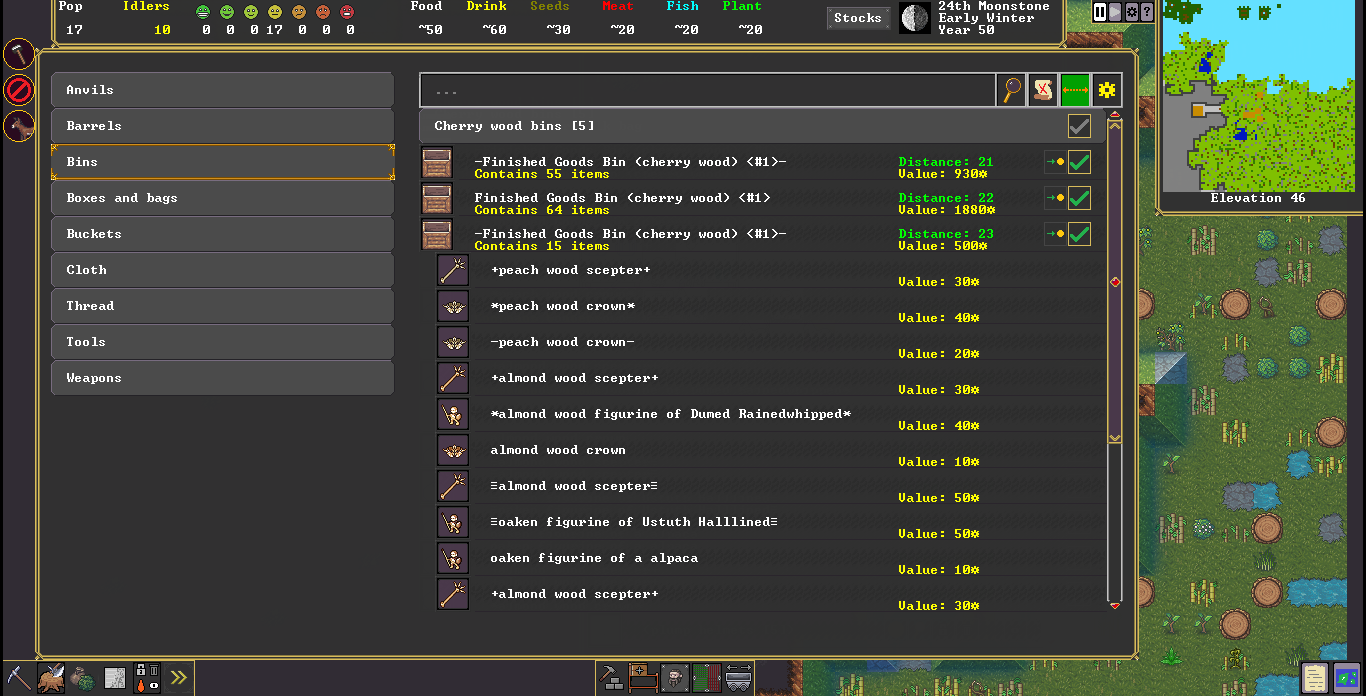
In the tavern above, both of these tavern keepers are part-time. The first isn't specialized (the green hammer), so they'll do odd jobs all over the fort. The second is specialized, but they are also assigned to a carpenter's shop. Of course, they have little to do without any goblets! You can set the level of items stocked using the controls there. Most locations need items of different sorts.
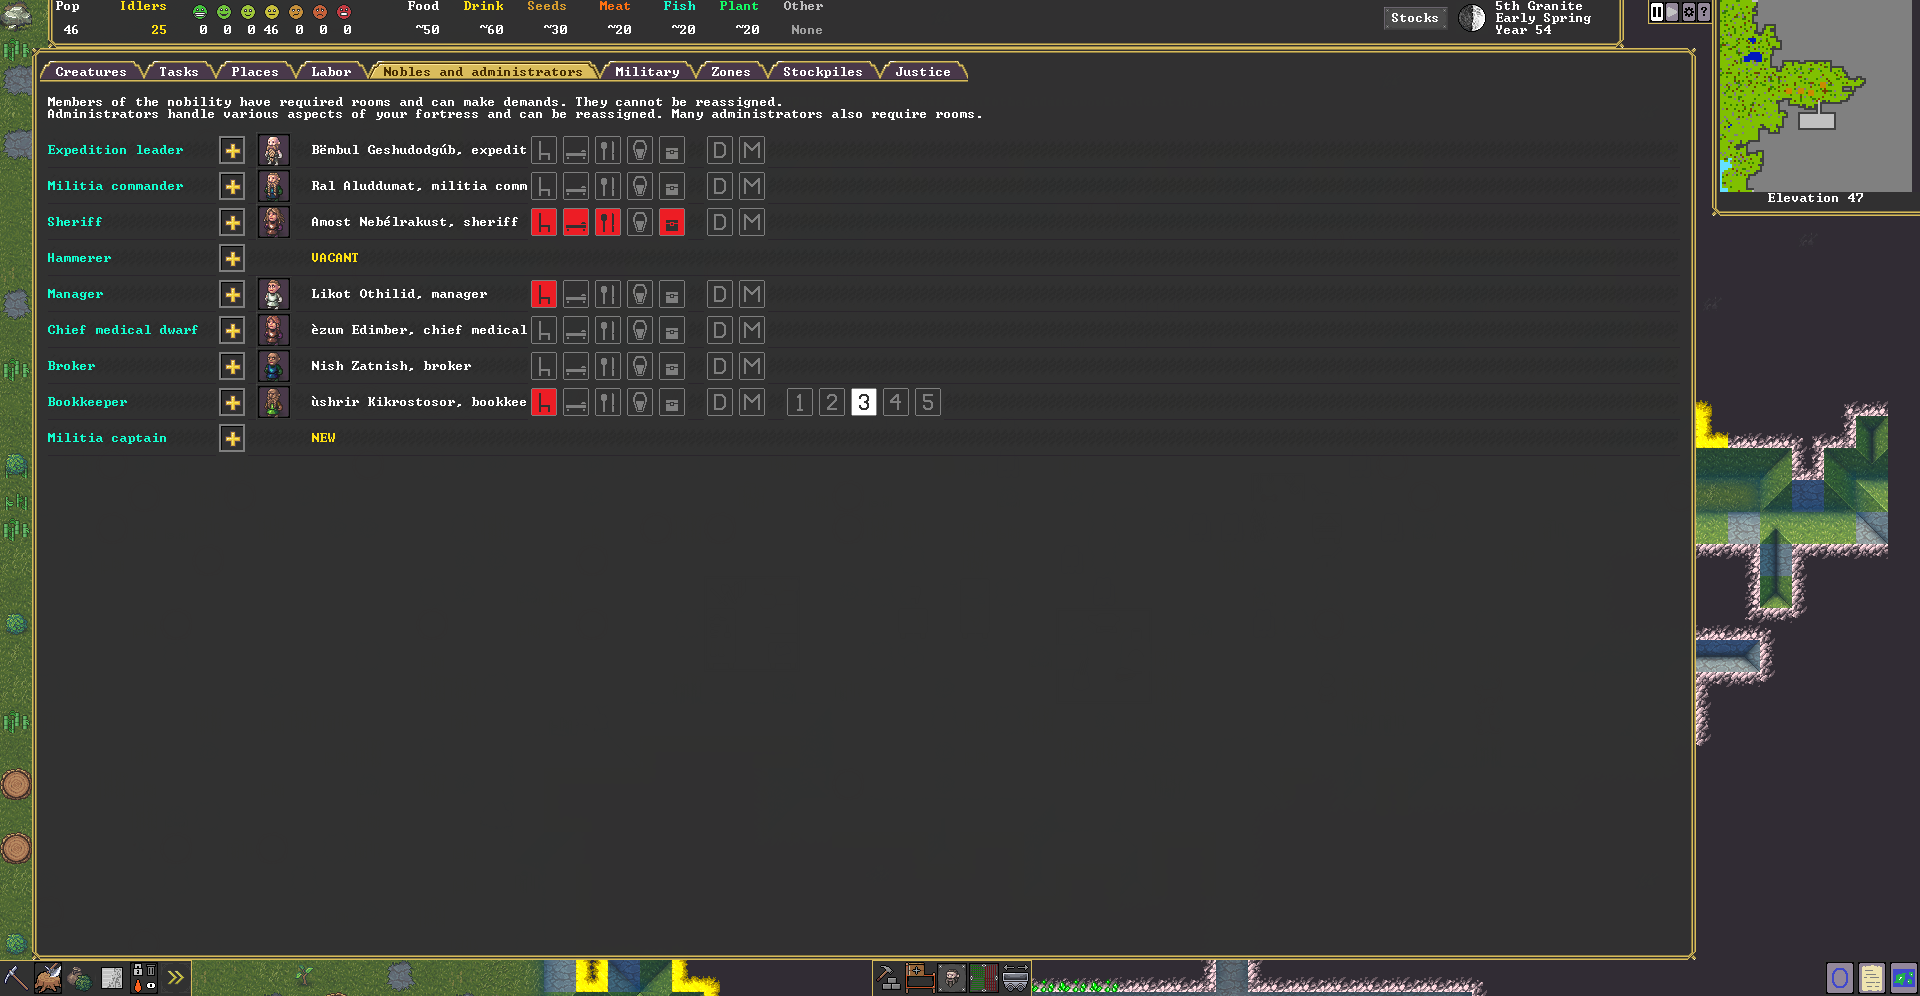
Some locations, the temple and guildhall, can be affiliated with organizations in the fortress (and in the case of religions, the entire world.) As their value increases, for instance, you can recognize the priesthood which allows you to assign the fort's priest and then high priest of that religion. The temple in the image has risen from "shrine" to "temple" status, but more migrants that belong to the Creed of Walls need to arrive before a priest can be assigned. Religions are generated during the world historical process, and priests can comfort stressed-out dwarves. Functioning guilds allow dwarves to share their skills in demonstrations.
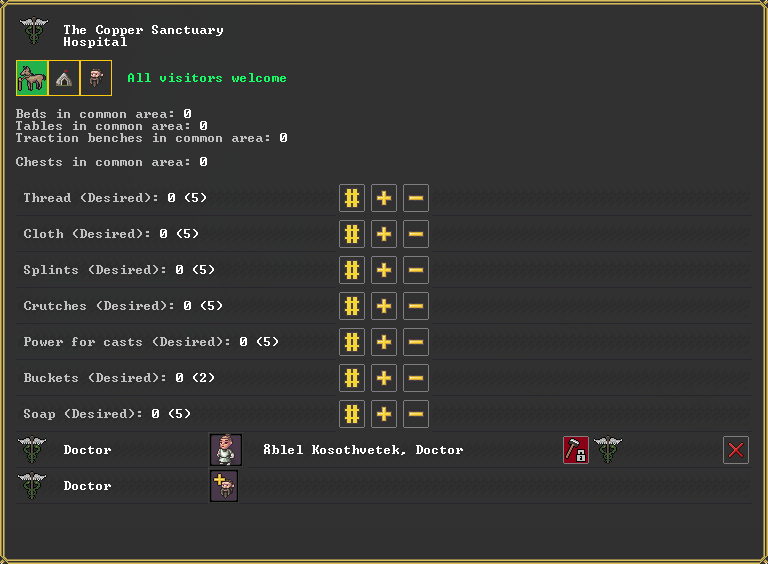
For the Steam release, hospitals have joined the list of multi-zone locations! They were always one of the more involved single-purpose zones, and doctors one of the more complicated professions, so it sped up the interface-making process to just pull them over rather than trying to support their in-between oddness, ha ha. Now you can make big named multi-level hospitals now with specialized operating rooms and traction benches in the osteo ward or whatever you like, and bedrooms for the doctors to sleep in - or just throw everything together in one zone as before.
More work on menus! There are so many menus. First, a small menu - the worker assignment for workshops.
Here you can assign a master to a workshop, and you have the option to dedicate the master to just their workshop jobs (and any other assignments.) This part is a little less flexible than the old DF system, where you could assign multiple dwarves and set skill ranges, but this new way works about as well with the new labor system and it'll additionally hook up to our ideas for guilds and apprentices as we expand it later, so, one master per shop now!
As details like this come in, we're placing the information on the creature list. You can see the workshop assignment and related icons here now, with room to expand, and some brighter text colors! The artists haven't had a chance to take a pass on them yet, so the hues and saturation levels might get shifted, but legibility on the gray background is the main goal.
The current labor system is now a large departure from the old DF. In the old one, narrow labor assignments, like 'miner' or 'gem setter', had to be set manually on every dwarf, and often new players would have no idea why a workshop task was not being completed, or why a building wasn't being constructed. Now you still need to have the correct resources, but the jobs will be done by anybody available, starting with the most talented.
By itself, this change takes a lot of control away, which you may find yourself wanting back as you become more skilled with the game. For instance, the workshop master is one way to have control, since the dedicated dwarf will become more skilled than random job takers, and ultimately produce better trade goods, weapons, and so on, with the same resources. The automatic labor assignment system does account for skill and tends to build up some skilled dwarves by itself, but the different is noticeable.
However, this isn't nearly enough! For instance, many tasks in Dwarf Fortress don't even occur at workshops. Mining, woodcutting, wall engraving, hauling, and several others take place elsewhere in the play area. The automatic labor system will muddle through here as well, but we've also added a new system: work details.
Here are the default work details, including the jobs I listed above. If dwarves are assigned to these work details, then by default, they'll be the only dwarves that do them. This allows you to set up dedicated wall smoothers and haulers for instance, so that other dwarves aren't constantly doing these things, whether they are dedicated workshop masters or not. If nobody is assigned to the haulers, then everybody will do it. You can also deactivate the work detail so that nobody at all does it, which can come up if you have other priorities or if there's some trouble in the fort to iron out before they return to work.
(Note: we still need to display relevant skills and order the dwarves properly! The order on the screen there is random. The automatic system also doesn't yet cover miners, woodcutters, and hunters, who use special equipment for their jobs, which complicates everything.)
Default work details alone don't capture the versatility of the old DF labor assignment system. It was very, very clunky, to the point that many people preferred working with a gigantic spreadsheet, but the ability to set custom labors is powerful as well, so it's important to recapture while trying to avoid making the system too laborious. To this end, we've added custom work details. Here you can see a new "Stone haulers" work detail I've created, with only the stone hauling labor enabled. In a dwarf fortress, stone gets everywhere, and you can set up some dedicated dwarves to grab the wheelbarrows and move stone slowly into piles where the carvers can more easily use it. I've set up some placeholder icons (just a bunch of roman numerals), so our first custom work detail got the 'I' symbol.
Rangers and animal dissectors assigned to stone hauling duty! You can dedicate anybody to their assignments, not just workshop masters, so we could also press the dedication buttons to the left of the 'I' symbols there to make sure these dwarves aren't distracted if there's a lot of hauling to be done. You can also turn off a custom work detail, and that job will be disabled for everybody, or re-enabled for everybody, depending on the option you select.
We're still in the midst of the labor interface! We still have to set up menus for doctors, farmers, fisherdwarves, and dwarves that work specific locations like tavern keepers, scholars, and performers. We'll also continue keeping our eye on feedback as we know the labor system is a concern for a lot of veteran players.
We've also been going through other menus and getting them sorted out. Here for instance is the standing orders menu. For the moment, it remains mostly unchanged from old DF, but could undergo some revisions as we continue. For now, we just need to get them all done! The chores tab there is new; young dwarves will do some hauling, cleaning, and other bits and bobs to be helpful around the fort.
Here's the stone usage menu. Again, this is a pretty unaltered transfer from the old DF, but there are lots of pretty stones now, courtesy of Patrick, and it's easier to see their various uses. This menu doesn't come up a lot, but it allows you to save or expend specific stone types according to your needs.
Finally, a first pass on the nobles and administrators menu as well! The central text column is a little cramped, ha ha. This is also reasonably similar to the old screen, but shinier, and allows you to set certain important jobs and to see how well you are doing in meeting those dwarves' room and furniture needs. A bookkeeper for instance needs an office to work in, and you can also set how precisely you'd like them to set the numbers. There's plenty of hover information to clarify the symbols, but it's also good to be able to take them in at a glance quickly.
We'll keep on working!
And congratulations to Kitfox on the Boyfriend Dungeon release! Lots of dwarfy weapons, and a cat, and an axe is coming!
After the record-breaking heatwave in late June, it cooled off to more normal Summer temperatures, and this has allowed us to continue on smoothly! There's a healthy grab bag of menus left to complete, relating to the military, justice, labor and so forth, and we're just going through them one by one in whatever order seems to make the work go fastest. Most lately, we've been working on the ability to produce work orders. Much of the art here on these fresh new menus is still placeholders.
Work orders are used to automate tasks in your fortress. The most simple order is something like "make ten beds". The manager (one of the administrator dwarves you appoint) validates the order, and then the jobs are automatically assigned to any carpenter workshop you have available, which saves you the trouble of setting them all manually. Work orders can also be assigned to specific shops.
But there's a lot more you can do with work orders. They can be conditioned on the stocks of the fortress. For instance, you can set a work order to produce drinks at the still 25 times if your supply drops below 100 drinks, and the order will renew itself at the proper time. You can also set key furniture orders, like the beds above, to renew based on the number of beds you have, or seasonally, etc. Orders can also be conditioned on the completion of other orders, if you want to make sure you have the supplies available. For instance, you could create 10 cloth, then have a 10 cloak order ready to go immediately afterward. You can also leave all of this alone and get along just fine, but the system is pretty powerful and now it's less difficult to use!
The screen above is a basic work order being selected. In the old Dwarf Fortress, this was an opaque mess. Now it should be a little easier to find jobs, and also to see which jobs are available by shop. We're still finishing up the menu by which you select conditions to place on orders (like the aforementioned "when drink supply is less than 100.")
Another bit we finished up is the ability to link workshops to stockpiles from the workshop. We had already finished the ability to do this from stockpiles, but oftentimes it's more convenient to add links while you are in the shop thinking about production. In this screen, we've set up the metalsmith to take metal bars from a particular pile and to give finished goods to a different pile. Both of these piles are close to the shop, and so as long as the goldsmith is working and the piles are supplied by other dwarves, gold craft production will be happening as quickly as possible. If you use the ability to nickname piles, it's also easy to remember what your setup is (I've neglected to do this in the screenshot!)
As with work orders, it's also possible to ignore stockpile links completely if you like. But as you start to notice your dwarves wandering farther and farther to get job items, it becomes more natural to start optimizing storage and routes a bit, and you can begin to use these tools to fit your playstyle.
We've started up work on the main information display, where you'll be able to check on and manage all sorts of things about your fortress. The old version of the game had this information scattered all over the place. This time we're trying to collect it all together:
Please note that most of this is placeholder graphics as I'm still tweaking bits and pieces. I drew a little red outline for 'remove work from job', but it'll probably end up being something different, ha ha ha. Some of the categories are also likely to change a bit.
We're more or less going to implement/update these going left to right, though there are lots of relationships between all the types of data so it isn't as simple as that. For instance, even on smaller screens (like the 1366px wide laptop image displayed here), there's still room on the right side for, say, some labor, health and military information for each citizen in the fortress. I'll be adding that as I go. And 1920px screens won't need the ellipses on dwarf names for the most part. In any case, when each of the tabs are done, we'll be through a hefty chunk of the remaining menus and screens from the old game.
Also new here on the Creatures tab (the old units screen), we have sorting! Lots of sorting. There's also a stress display, which players of the old version will recognize as something we just didn't have before. Now you're one click away from finding all of the dwarves in your fortress that are closest to throwing tantrums or otherwise having a miserable time. And it's cool to see them all there in a column with their little outfits! You'll note that we don't have a dwarf baby image in yet, he he he.
Here's a little setup I've carved out at the underground level where the water flows in a brook. Near the bottom of the image, a stone floodgate holds the water back. The channel to the north of it has a ramp for access from above, coming down from the grassy field by the brook. We also have vertical bars forming a few large cells in the upper right. The shape shown in the individual bar tiles adjusts according to what is nearby. Patrick drew the new bar and floodgate pictures.
The lever in the top left has been connected to the floodgate. I've used a hasty and risky method! As you can see in the animation below, a dwarf can run down and pull the lever, escaping upward just in time before the water comes rushing in.
You can see in the image how water blockages works. Water can rush through vertical bars, but it is blocked by floodgates and doors. Floodgates are safer since dwarves can open doors by default and it's a bit dangerous to rely on them. Players make drowning chambers in a variety of designs for various reasons.
I've also more or less completed the trade screen, where you actually exchange items with the merchants that arrive periodically throughout the year. This is reasonably similar to the old trade screen, aside from all the mouse support, as well as the search filters. You can also collapse both headings and container lists by clicking on them, though I should probably add a specific button for that. The dwarf merchant there up at the top is placed so low since we need to support much larger creatures, though I should get a chance to even that out for different sizes. So, a few things left to do, but it's going pretty well.
Mostly I've been spending these last two weeks moving apartments after 13 years in one place. So much junk... and my vacuum caught on fire, ha ha ha. But there was still a bit of time for work, and now we can show you the very important DF industry, beekeeping!
This industry came about after the community voted on which of some hundreds of animals should be added to the game over a decade ago. Being a practically minded community, the animal that led to naturally to several new industries was the overwhelming favorite! Above you can see some artificial hives, ready to accept wild colonies.
Hives can be populated either using a wild colony, or by splitting an existing colony in an artificial hive. You'll want to balance your splitting and gathering of products, since gathering products destroys the hive in question.
Natural hives can take some time to appear and aren't on every map. Above, I've used debug commands to place all of the possible wild hives together. From the top going counterclockwise, there's a bumblebee colony, an ant hill, termite mounds, and then the one we are looking for, the honey bee hive!
Once installed, the bees will begin working (the second hive down on the right side has little bees buzzing around it.) You can also see an individual wild bee above the right column. These pop up around artificial and wild colonies, and are mostly okay, but will occasionally sting!
After a time, the bees' work is done and products are ready to collect! I've also split the first colony to another colony on the left side. In this way you can keep expanding your industry.
Here you can see the products in the hive building, wax honeycombs and some royal jelly. Royal jelly can be collected in a jug and used in cooking (though as old hands know, there are some jug storage issues there we're still working on!). Honeycombs themselves must be brought to a screw press. The pressing produces a wax cake and also some honey which can be stored in a jug. Honey can be used in food or made into mead, and wax can be used for crafts.
This time we'll revisit bridges, which Patrick has done another pass on.
Here I've set up a double wooden drawbridge. You can see now where the mechanisms are, and thus can tell from the image itself which way the bridge will raise. (The fisherdwarf has been busy catching salmon, steelhead trout, and mussels, but I didn't make a food stockpile, so they are littering at the riverside.)
This is the bridge in action:
This might keep some invaders out of your fort, but you'll often want to build further defenses deep underground in case things go terribly wrong.
Here's a stone bridge over an internal moat:
The water isn't necessary if you dig a deep enough pit, but it's fun to play around with nonetheless. For this moat, I connected a surface stream to my fort using a channel and then a staircase. The water flows into the moat from a submerged hallway at the northern side. Of course, due to water pressure, this is incredibly dangerous, so a submerged hallway on the southern side connects to a staircase which drains the water further down into the natural underground caverns. Lots of giant mushrooms currently being rained upon down there. You can avoid this by using floodgates and only admitting as much water as you need.
When the bridge goes up, dwarves in the hallway are safe from arrows, though the way I've set this up, the initial lever puller would be exposed.
Here's a steel bridge, or diving board, above a volcano, along with a pit zone. The game doesn't care what's below the pit zone particularly - once a prisoner or beast is designated, a dwarf will bring them over and throw them in. You can use this to create lion pits and stuff like that, or you can use it over volcanoes and other such places, as you like, for captured thieves or invaders.
- Tarn
PS: Alexandra from Kitfox here, the one who posts on Tarn's behalf. Hi! I did an interview with content creator BlindIRL that's worth checking out. Stay tuned for future community events!
Over the last few weeks, part of what we've been doing involves trade in the fortress, both making it look better and adding some new practical pieces as well.
Here we have some full wagons on the bottom of the screen bringing much-needed supplies to the player, through a bamboo forest. There's also a yak with some bags packed on it that is part of the caravan as well, and a few bodyguards. On the wagons and animals, there's not a lot of graphical real estate to work with, so the images reflect the amount of stuff being carried (there are four levels), rather than specific items.
Once we get to the newly redesigned depot, though, the situation changes, and we can show specific trade goods on the tables. The tables at the top are for the visiting merchants, and they also get the northern stool. The bottom tables show the goods the fortress is willing to trade (which are selected by the player), and the fortress broker sits on the southern stool.
In the image above, the left side is before the wagons arrived, and on the right side, the wagons have unloaded (you can see the wagons resting at the very top.) I've also brought the, um, goods I had on hand in my little test fortress, ha ha. It is a bin of wooden crafts and some turtles we caught. I'm sure the thriving capital of the dwarves will love my little turtles.
Just for fun, here's an image of the depot in the old version. I've circled it in green in case you have trouble picking it out! The separate tables and the ability to tell who is trading which item are new to the graphical version.
We're still working through the trade screens. Here you can see what we have for bringing items to the depot so far. It's a little easier to select groups of items now, as well as bins containing various objects, but we're also going to allow direct selection at stockpiles and from the items themselves, so you won't have to handle everything from the depot, which could be very cumbersome to say the least.
A little of this applies to adventure mode as well! Here I've packed some items on my trusty donkey, and that is visible now as I lead the critter through the village.
Levers in Dwarf Fortress can be hooked up to all sorts of buildings and machines, such as doors, floodgates, gear assemblies, cages, spikes, and bridges. In the old game, this was a reasonably painful process, where mechanisms had to be manually selected, lists scrolled through, and afterward it was very difficult to figure out which lever was linked to which building without just pulling it and seeing what horrible things happened.
This has been changed now! In the video, you can see what we currently have:
When you click "link lever", two appropriate mechanisms are chosen by default. You decide what to link the lever to by clicking on it, and once you've hooked it up, both the lever and the linked building have a list of links with a recenter option. So hopefully there will be fewer unnecessary tragedies.
Patrick has also drawn up some new barrels, with their contents, so that you can get some information about your food stocks at a glance.
Here we have some dwarven wine and rum, as well as meat, fish, plump helmets and seed bags.