Mar 23, 2019
Armored Battle Crew [World War 1] - Tank Warfare and Crew Management Simulator - skullwolf
Hey Tankers!
Today, we will introduce you to a rather fascinating variant of Mark V.


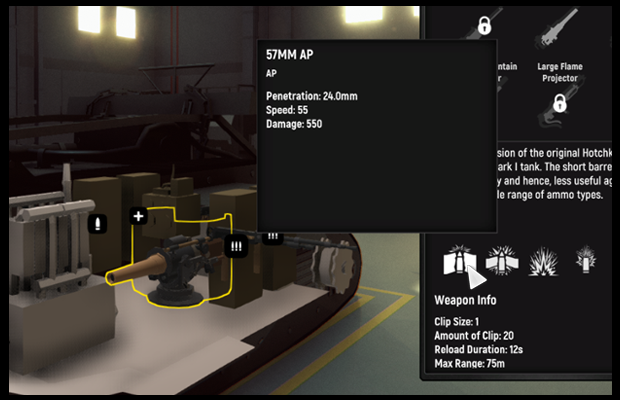
A wide range of weapons such as grenade launcher, small to large mortar are available. Do note that the rear gun port is removed and with the mortar being exposed, be sure that no enemy is sneaking behind your tank!

Resupplying can be a tricky affair as the tank is slow so do plan way ahead. Additionally, do watch out when navigating tight spaces in urban area due to the extra length of the tank. You would not want to get stuck in heat of action!

That’s enough for the day. Stay tuned for more insight and be sure to WISHLIST the game so that you can be the first to try out the mighty mortar when the war starts!
Do join us on Discord to chat about the game and tanks!
Leave a comment or like if you love what you are seeing!
Armored Battle Crew Team
Today, we will introduce you to a rather fascinating variant of Mark V.
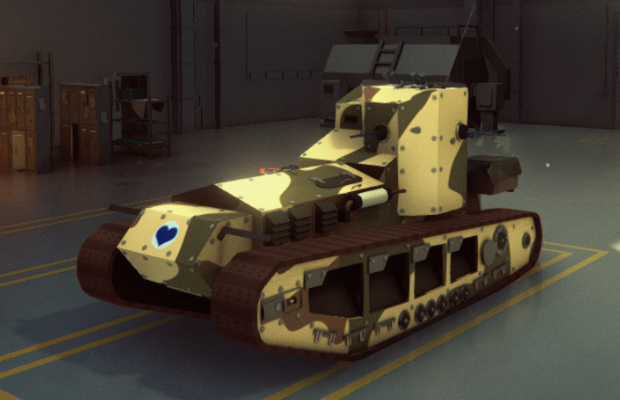
Tadpole, not Walpole?
The German, facing the onslaught of British tanks in 1917, started to increase the width of their trenches in bid to impede the movement of tanks. To aid in the crossing of such widened trenches, the rear tracks are lengthened. The extra sections were dubbed the Tadpole Tail extension due to the shape and hence the name, Mark V Tadpole.Mobility
The extra length allows Mark V Tadpole to cross widened trenches. But due to the increased weight, the tank has reduced speed. The additional track length also make the tank harder to steer, resulting in much slower rotation speed. Mortar
Additional fire support was provided to the accompanying infantry by installation of a mortar on top of a platform at the rear of the extended tracks. In the game, the mortar can be accessed by the tank crew via the rear hatch. A wide range of weapons such as grenade launcher, small to large mortar are available. Do note that the rear gun port is removed and with the mortar being exposed, be sure that no enemy is sneaking behind your tank!
Tactics
Due to the reduced mobility, you will have to make full use of the mortar to gain the upper hand in the battlefield. But be mindful as the medium to large sized mortars have long reload and eat ammo for breakfast. Resupplying can be a tricky affair as the tank is slow so do plan way ahead. Additionally, do watch out when navigating tight spaces in urban area due to the extra length of the tank. You would not want to get stuck in heat of action!
That’s enough for the day. Stay tuned for more insight and be sure to WISHLIST the game so that you can be the first to try out the mighty mortar when the war starts!
Do join us on Discord to chat about the game and tanks!
Leave a comment or like if you love what you are seeing!
Armored Battle Crew Team
Share: