Hell Let Loose - Jonno
Welcome to Role Guide #6!

This week we’re taking a look at a role that is commonly seen as the aggressor of a unit, fearlessly charging the enemy frontline and shining in close-quarter combat – the Assault.

If you missed the previous Role Guide where we looked at the Medic, you can catch up here.


The Assault

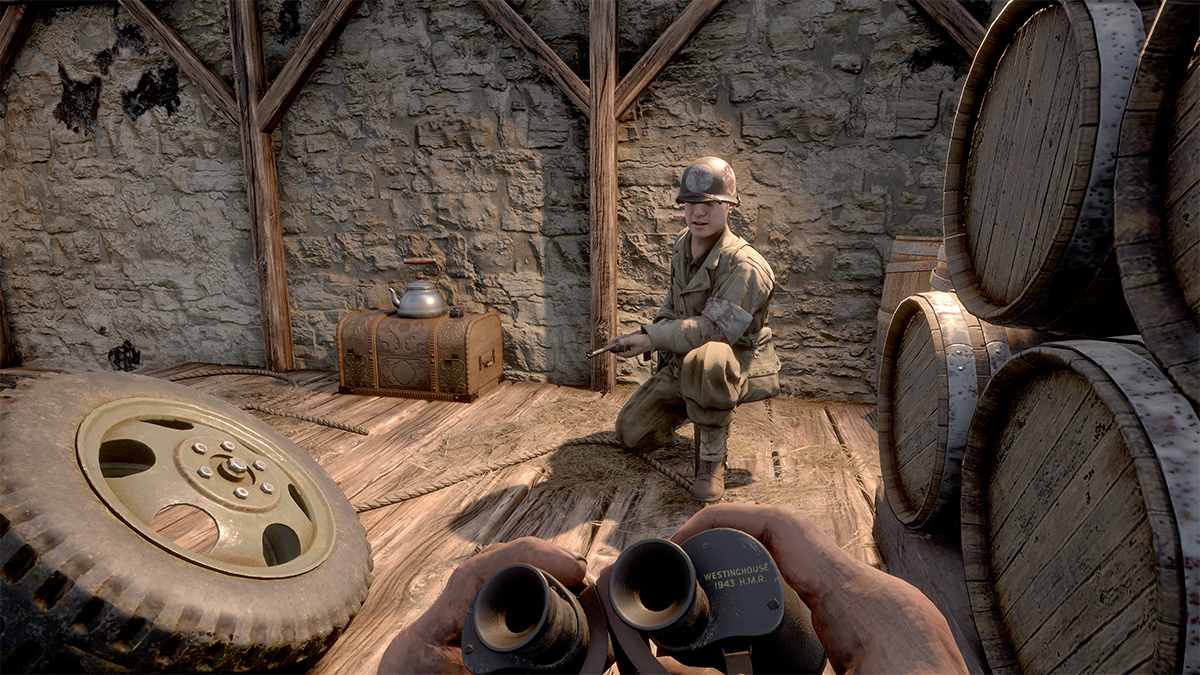
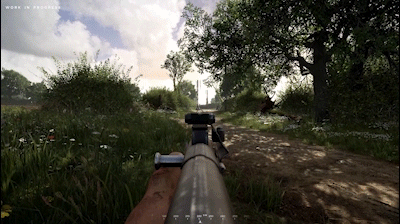
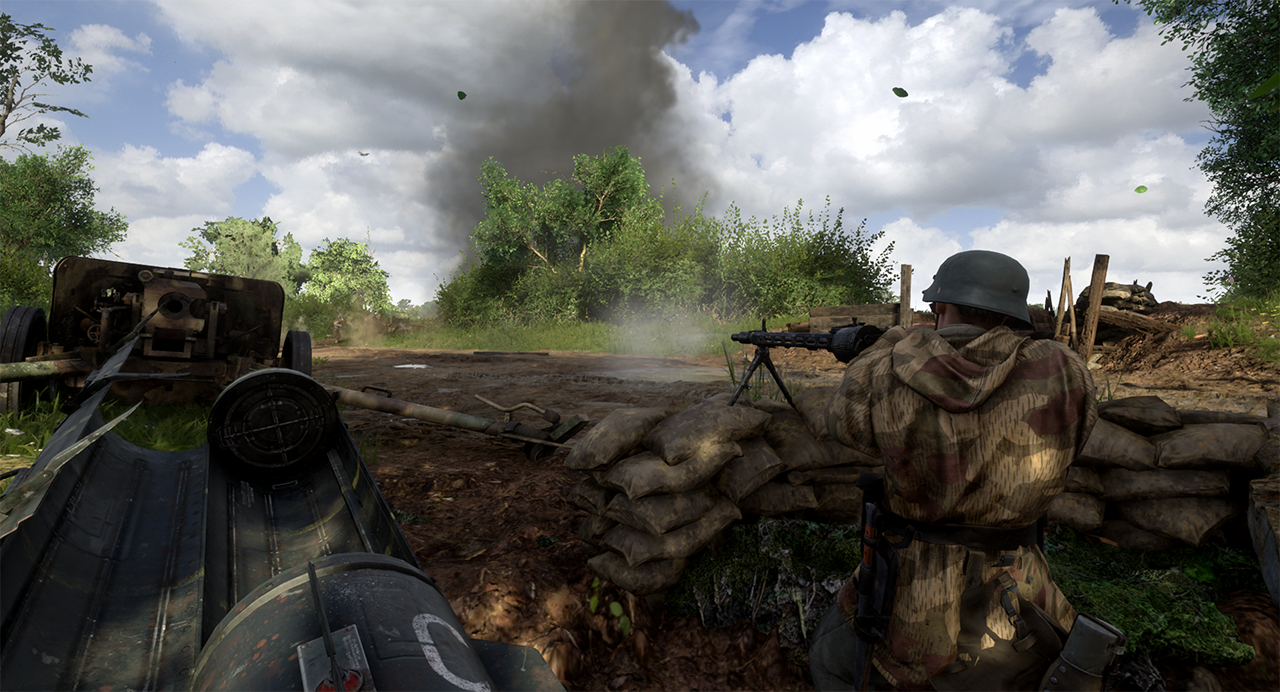
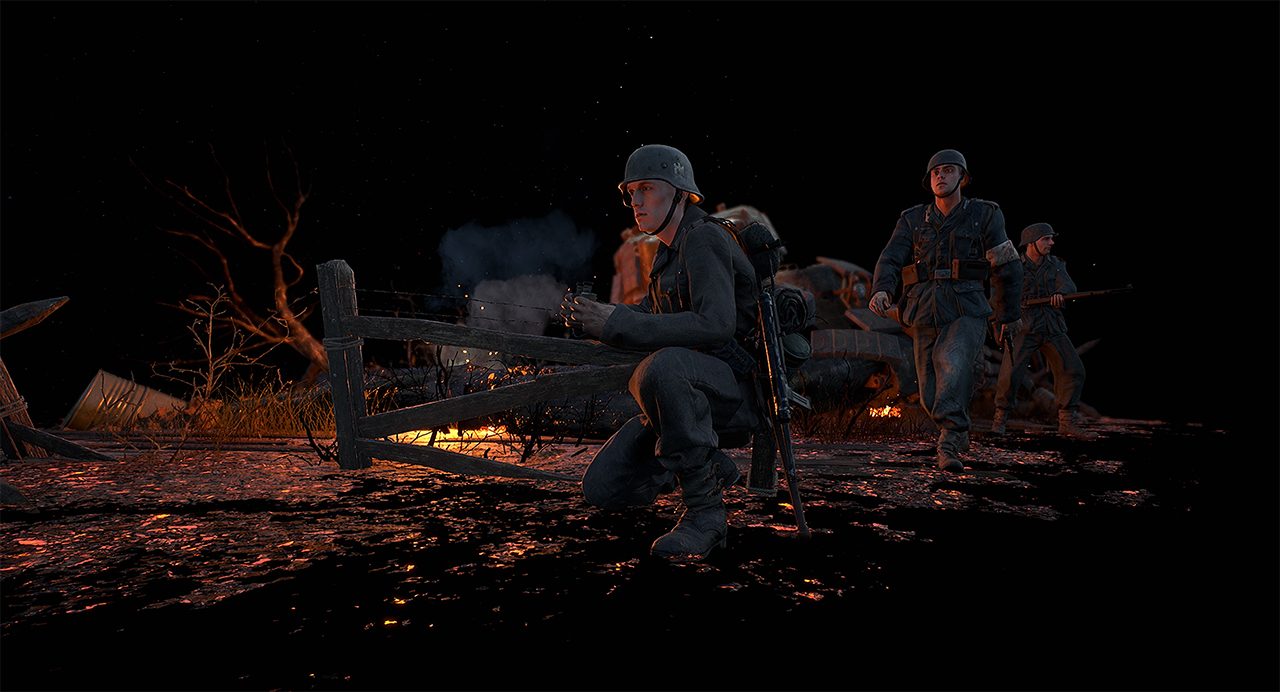
As an Assault you’ll be leading the charge on the frontline. Strongpoints, trenches, buildings and hedgerows, all are fair game for you.

Using your primary weapon and grenades, you are a highly mobile combatant, able to relentlessly push enemy positions and lay down fire with fully automatic weaponry that have a quick reload. Where other classes would struggle when outnumbered in close combat, an Assault sees it as a fair fight.


Key Duties

Tip of the spear

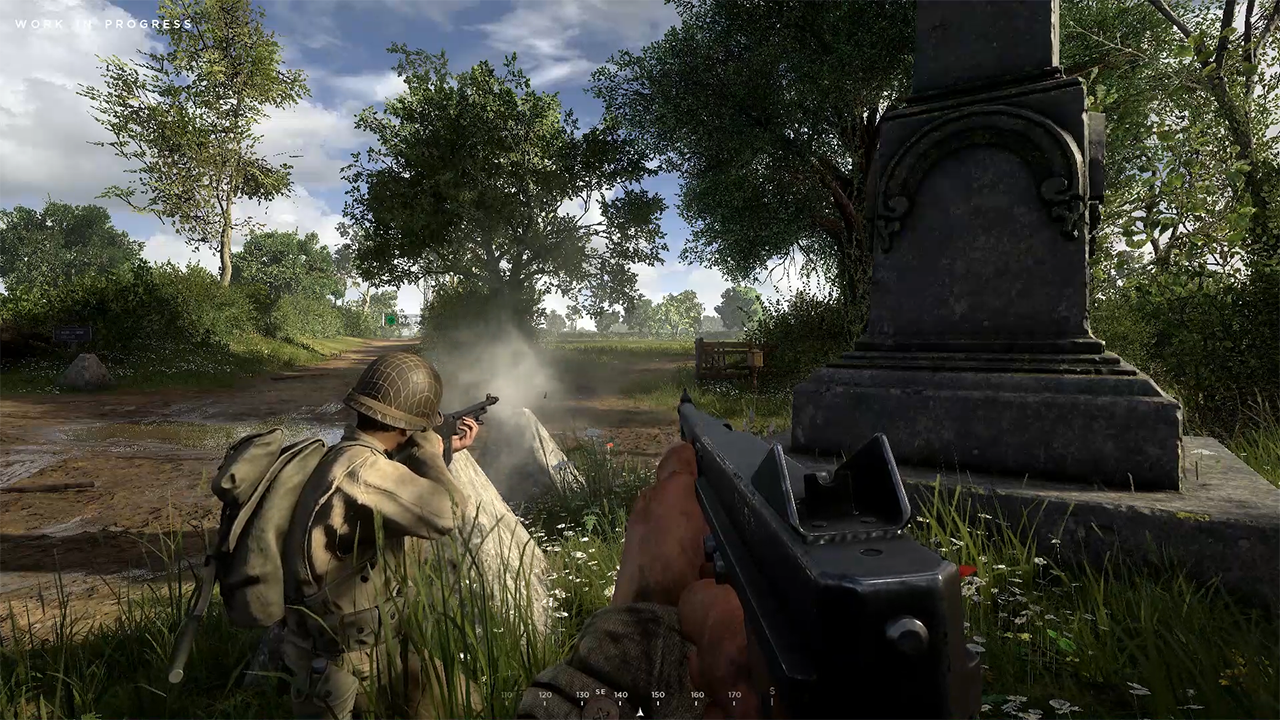
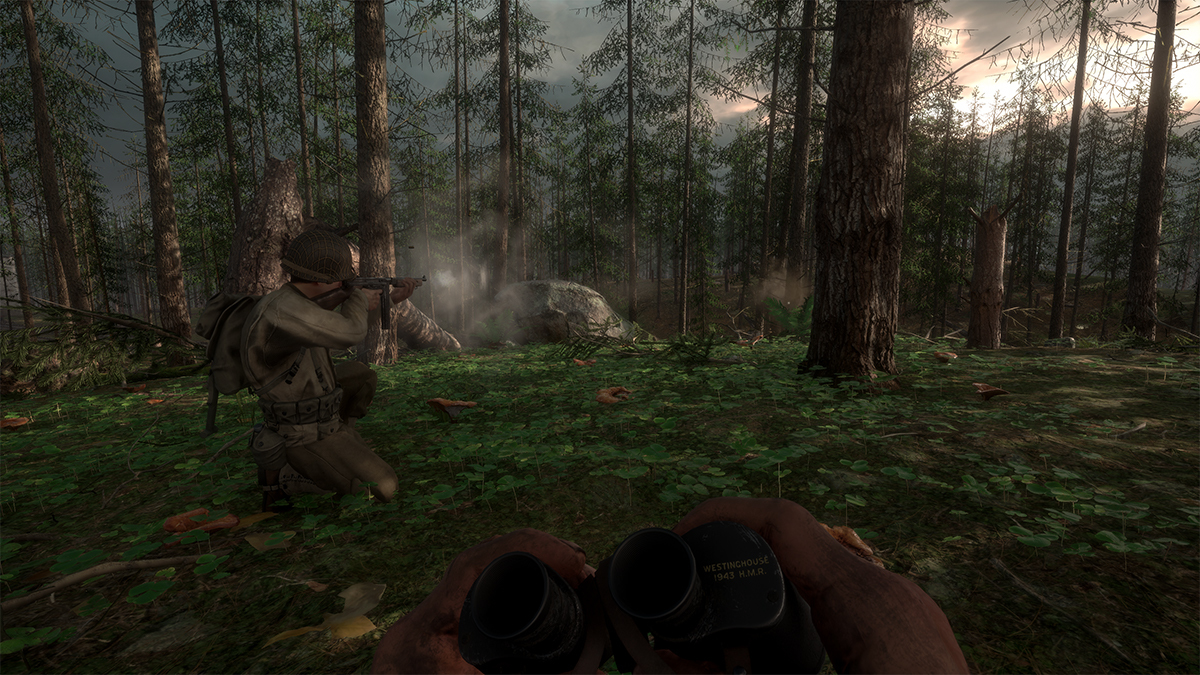
At the front of the unit is where you belong, head first into battle, disrupting enemy lines as you sprint from location to location, bursts of weapon fire in tow.

With suppressive fire from your allies, you can quickly gain ground and put your loadout to good use. A soldier that manages to breach enemy lines can cause havoc as the enemy struggles to focus their fire in one direction.

This role is wrought with danger, but with great risk comes great reward.
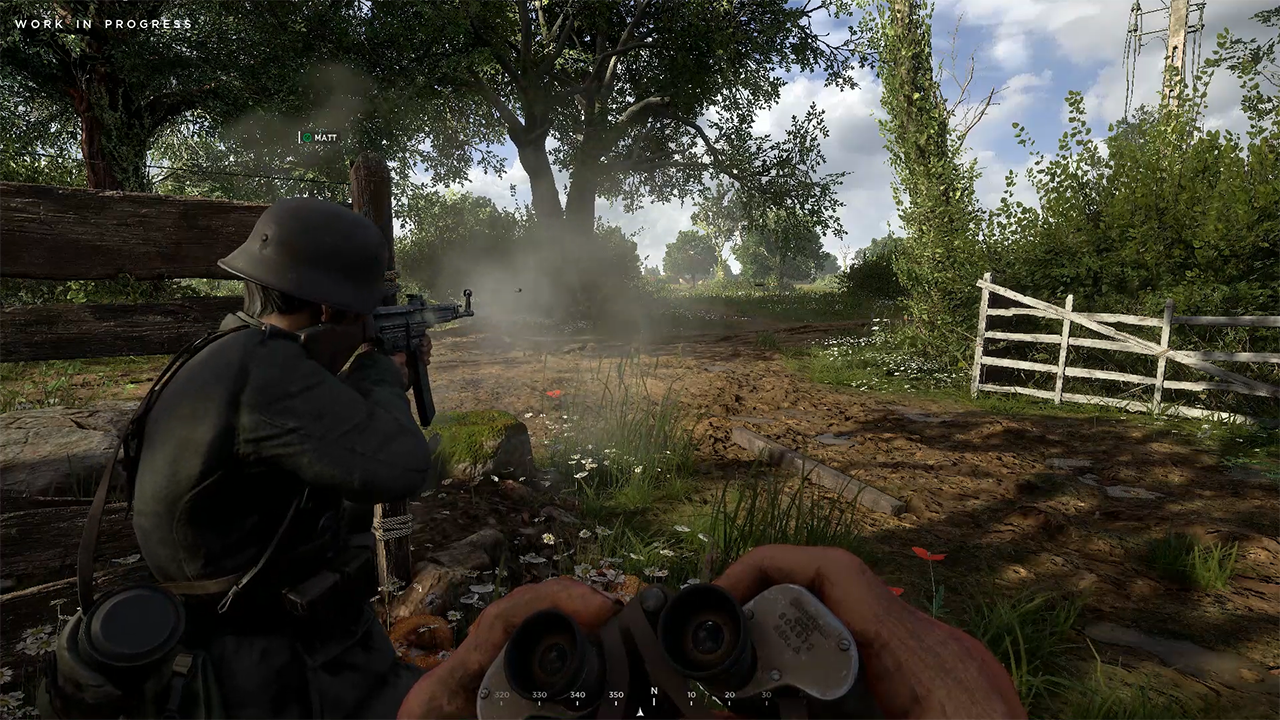


Stalwart Defender

Assault players are known for their aggressive playstyle and storming capability, after all, it’s in their name! But, did you know they also excel at defending build up urban locations and trenches?

Other Semi-automatic and heavier full auto weapons lack the handling and mobility to be a match for the Assault’s guns in the confined spaces of urban combat, whether that’s room to room or street to street.

Having an Assault on guard duty in these build up areas can pay dividends, even holding back multiple enemies in a chokepoint on their own.


American Assault Loadout
  • M1A1 Thompson
  • Mk2 Grenade
  • Bandages
German Assault Loadout
  • Gewehr 43
  • M43 Stielhandgranate
  • Bandages

Combat Tips

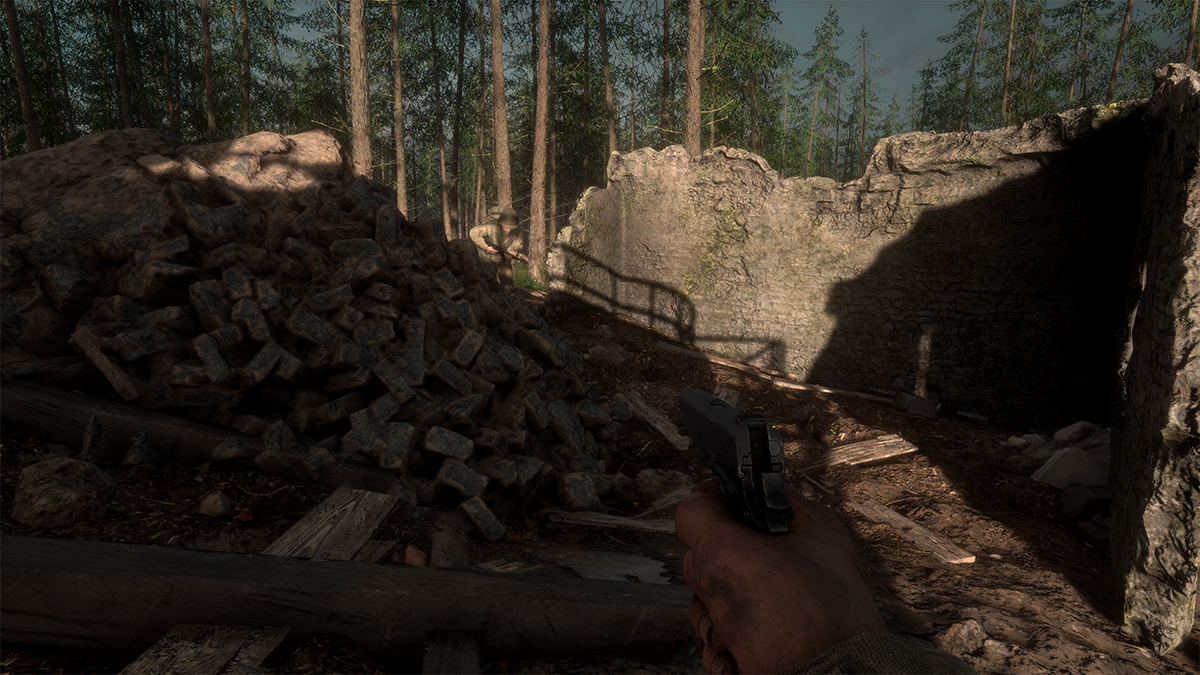
Room service – When storming a building/trench, make use of your grenades! Whether you’re looking to clear a room or force a group of enemies into your firing line, using a grenade will be much safer than charging into said area outnumbered.

Lock ‘n reload – Both the American and German weapons have a respectable rate of fire and will quickly dispense the available ammo in their magazine. Make sure to reload after engagements to keep your battle readiness. Charging into your next fight to discover that you need to reload is a sure-fire way to be sent to the respawn screen.

Look back – As the vanguard of your unit, the chances are you’ll be in front of your allies. When combat begins, you’ll be even further ahead, diving into enemy lines. Just remember not to stray too far from your unit. Being isolated is not only a detriment to yourself, but your unit.

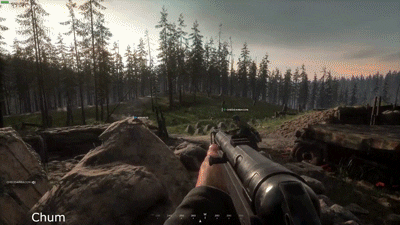
It’s all in the hip – At close range both the Thompson and Gewehr 43 are competent hip fire weapons. If you encounter enemies in an uneven environment, or are caught off-guard, don’t be afraid to just shoot! The previous seconds you save from not aiming down sight can be the difference between winning and losing.


Hell Let Loose is available to Wishlist now:

https://store.steampowered.com/app/686810/Hell_Let_Loose/

Follow Hell Let Loose on Twitter
Like Hell Let Loose on Facebook
Hell Let Loose - Jonno
Hey everyone,

Welcome to Developer Briefing #13. This week we’re sharing with you an update we’ve made to the Hell Let Loose metagame following community feedback in January’s closed beta.

If you missed the previous Developer Briefing, where we revealed our new in-game tips feature, you can find out more about it here.


Metagame Update

After January’s closed beta, the team have been busy going through all the feedback that our participants have shared with us. This was a crucial test to allow us to make various tweaks, updates and bug fixes to the game.

We also took the opportunity to listen to what our players were saying around the core metagame and whether it was providing a consistently satisfying and dynamic experience. It was pleasing to hear that the overall feel of the game was going down well with our beta players, however we spent a lot of time both playing and listening to community feedback and noticed some critical things that we felt should be addressed, more on that below.


The New Metagame


Map markers can only be placed by the Officer/Commander roles.

The updated metagame for Hell Let Loose is as follows:
  • Only one sector in a column is now in active play at any one time, down from three.

  • Every time the map is played, the sectors that are in play are randomised, creating different scenarios in different matches.

  • When a sector is captured, the next available sector to attack/defend will be selected depending on if it is adjacent, or diagonal to the current one. This eliminates the need to walk to the opposite end of the frontline.

  • A victory occurs when you capture the enemy HQ sector. A loss occurs when you lose yours.

  • When a HQ sector is in play, the defending team cannot spawn in that sector. Instead, they must spawn in the adjacent HQ sectors, or make use of an OP/Garrison.

  • The team that captures an active sector will gain ownership of that entire column (three sectors).

  • The map coloration has been updated to clearly show the progression of the battle along the entire length of the map.


Issues & Solutions

The feedback that led to this change, as well as the logic behind the solutions can be found below:

Issue One: Player density was too low for the majority of the match. This lead to a boring experience and rarely feeling like you were experiencing the full intensity of the battle.

Solution One: The vast majority of players will focus on one sector, creating higher density gameplay. While one sector sounds like it would create an unacceptable bottleneck, we’ve found that the 400m wide sector nicely consolidates Infantry, Armor and Recon units, as well as rewards units that manage to widely flank the opposing sector in order to cut off the enemy.

Issue Two: Players who defended empty sectors seldom saw action and combat - therefore being punished for doing the “right thing”. In addition, games were often won in a similar way to Alpha - with small groups of players walking around the sides and cutting off the main battle.

Solution Two: Players can now choose to proactively flank and penetrate the enemy lines in new, dynamic ways - instead of being forced to defend an empty location. Similarly, your team will no longer lose enormous groups of sectors due to small groups walking past.

Issue Three: Seeding servers was unappealing as confrontation was rare in low population servers.

Solution Three: Even low population servers will have a focal point of where the action is, assisting in seeding new servers. We will be watching this and looking at further refining the way in which low population servers are seeded.

Issue Four: Battles never felt large or competitive, as you were never sure if you were fighting the full breadth of the enemy force or just one unit.

Solution Four: Players will always be engaging in the biggest conflict in the server, whilst keeping the options to flank or retreat from combat. Defeating an enemy in a sector is much more rewarding now, as it means the entire enemy team has been forced back.

Issue Five: Artillery, tanks and other large-scale abilities aren’t as effective as they could be due to the breadth of the battlefield.

Solution Five: Artillery and other assets now have a determined location to attack/defend.

Issue Six: Newer players unsure of where they should be heading or respawning.

Solution Six: Simplification of the way we communicate attack or defend locations will direct inexperienced players to where they should be.


To the next battle!

When making the metagame changes that we’ve described above, we were keen to implement quality changes based on community feedback without sacrificing anything in the process.

We feel we’ve achieved that, increasing the intensity, frequency and scale of battles, without sacrificing map size, objective play or the wide range of strategic options available to our players. In our team testing, we’ve actually found that the majority of player tactics are now more effective and viable with a consolidated objective. Additionally, due to the randomising nature of the objective order, you’ll be fighting a very different battle every time you play each map.

We have several more metagame functions to polish, refine and add to and this testing time will be critical for us in making sure the game is satisfying every time you play.

That wraps up this week’s Developer Briefing. We hope you’re pleased by this player feedback led update and would love to hear what you think about it, so pop your initial thoughts in the comments below!

Be ready for the frontline by wishlisting Hell Let Loose:

https://store.steampowered.com/app/686810/Hell_Let_Loose/

Follow Hell Let Loose on Twitter
Like Hell Let Loose on Facebook
Feb 26, 2019
Hell Let Loose - Jonno
Welcome to Role Guide #5!

This week we’re taking a look at a class that can turn the tide of a losing battle and make wounded soldiers fighting fit – the Medic.

If you missed the previous guide where we looked at the Automatic Rifleman, you can catch up here.


The Medic

As a Medic, you’ll find yourself in the unique position of being able to revive wounded allies, an incredibly powerful tool when made the most of. Whether it’s a member of your unit, or that of an allied one, you can get them back on their feet and facing down the enemy without the need to respawn.

This allows you to be a driving force for your team’s momentum, keeping up constant pressure as you push deeper into enemy lines, not needing to wait for your unit to regroup following any respawns.


They may be a non-combat role, but Medics come armed!


key Duties

Reviving wounded allies

Successfully fulfilling this role will make you a popular individual on your team and a bane to the enemy! Armed with your morphine, you can approach wounded teammates and perform a short action holding LMB to revive them.

Once you’ve revived them your job is not done quite yet, you’ll then need to apply a bandage to them to stop the bleeding.

After both these actions are complete, that soldier is ready to return to battle once again!


Bandaging the injured

In Hell Let Loose, injury can come in many shapes and forms, from bullet wounds to explosions and fall damage, a Medic’s life will be a busy one.

Whilst all soldiers enter battle with a small number of bandages to address any damage that comes from these sources, you as a medic will come equipped with many more!

As such, if you notice a teammate getting injured, or receive a request for healing over voice/text chat, go forth and apply a bandage to a soldier in need.


American Medic Loadout
  • M1 Carbine
  • Colt M1911
  • M18 Smoke Grenade
  • Morphine Syrette
  • Bandage

German Medic Loadout
  • Karabiner 98k
  • Walther P38
  • NB39 Nebelhandgranate
  • Morphine Ampoule
  • Bandage

Combat Tips

Watch for signs - To assist Medics in their reviving pursuits, they’ll be able to identify downed allies in need of help by a black skull on a red background in their field of view. This is accompanied by a distance marker to help you gauge your distance from the wounded. Use this to spot allies who need reviving when you’re not in direct contact with them.

Look left, look right, look left again – If you see a wounded ally bleeding out on the floor, be careful when approaching them. Unless your unit has secured the area there’s a chance that whoever took them out is still watching. Before running over to revive the downed soldier, check the surrounding area and ask your unit if they’ve spotted anyone.

You’re a doctor, not a miracle worker – Whilst Medics are gifted with the ability to heal wounds that would otherwise be fatal, they can only do so much. If an ally is shot in the head, or dies from an explosion, they will be unable to be revived and must respawn.

Medics in the mist – There will come a time during a heated, intense battle that you’ll see an injured teammate, bleeding out and calling for help as bullets whizz past them. Feeling the heroism swell inside, you feel the need to act. That’s where your smoke grenade comes in, throwing a smoke and letting it build cover for you before pushing out to revive can allow you to pull off combat revives in the most chaotic of situations.

Staying alive - As a Medic, you’ll be a priority target for enemy Snipers and Riflemen. Because of this, it’s generally advised that you stay near the back of your unit, unless required to perform your healing duty. The loss of a Medic at the start of an engagement can be a severe detriment to a unit’s survivability.

Non-Medics, listen up - If you’re wounded you can wait for a medic instead of immediately going for a respawn. If there is a friendly medic in close proximity, they will show as an icon on your screen. We recommend to always try and wait for a medic as letting go will take deplete your Manpower resource.


Hell Let Loose is available to Wishlist now:

https://store.steampowered.com/app/686810/Hell_Let_Loose/

Follow Hell Let Loose on Twitter
Like Hell Let Loose on Facebook
Hell Let Loose - Jonno
Hey everyone,

Welcome to Developer Briefing #12! In this week’s briefing we’re sharing with you a preview of our new hints and tips system.

If you missed last week’s Developer Briefing, where we revealed some of the building interiors you’ll be fighting through in Sainte-Marie-du-Mont, you can view them here.


New Feature – Hints & Tips!

In Hell Let Loose, one of our primary goals is to give our players a fantastic gameplay experience that combines objectives, shifting strategy and authentic, team-based combat.

If you’re a veteran of this genre of game, the chances are you’ll take to Hell Let Loose like a landing craft to water, picking up on the metagame as well as the game’s nuances swiftly.

However, this of course isn’t the case for everyone. To help fresh players get up to speed with the game’s various mechanics and style, we’ve begun to implement different types of tips that will crop up the first time a player finds themselves in a particular situation or attempting to perform an action.


Tip Type #1 – Objectives

Strongpoints and Sectors make up the two key aspects of Hell Let Loose’s metagame. Capturing and holding them will all contribute to your team’s victory, as well as bringing in resources for your Commander to make use of.

To inform players how they are captured, among other things, the following type of tips will be displayed in-game:


Tip: You are capturing a sector. You must outnumber the enemy to continue capture progress. Look out for Strongpoints to capture more easily.

Outnumber the enemy within a sector to capture.


Tip: This sector is locked! Locked sectors display a padlock on their icon. Move back towards a neutral or unlocked sector.

[M] to open the map and view locked sectors.


Tip Type #2 – Equipment & Vehicles

Equipment and vehicles are powerful tools that are at the disposal of our players on the frontline. To assist in players getting quickly accustomed to and using them, we’ve added tips that explain both what they do and how to control them.


Tip: Provide fire support with the Artillery. Change the elevation for distances and the traverse for rotation. Load either an explosive or a smoke round in the chamber from the second seat.

[W] & [S] for elevation, [A] & [D] for traverse, [LMD] to fire, [R] to reload.


Tip Type #3 – Situations & Actions

When attempting to perform certain actions or encountering specific situations for the first time, players will receive a message that suggests to them what their next steps should be. Examples of this include attempting to enter a tank when you’re not an armoured unit, and what you should do to stop yourself bleeding out after taking a non-lethal bullet wound.


Tip: You cannot enter this vehicle. You must be in an Armour Unit and on the correct team to enter. You can change units by redeploying.


Knowing is half the battle!

The in-game tips we’ve shared above are just a few examples of the tip system we’re using that will help on-board our players in Hell Let Loose. These tips aim not only to improve the individual player’s experience by helping them learn the game as they play, but to also improve the overall gameplay quality of the matches themselves as all players are introduced to the game’s mechanics in a natural, progressive way.

We’re not stopping there though, the team are working on other ways for players to learn more about the various roles, loadouts and playstyles that exist within Hell Let Loose. These will be easily accessible in-game and give players the opportunity to read up on various elements of the game before heading to the frontline.

What tips do you think would benefit new players to Hell Let Loose? Share yours in the comment section below!


Be ready for the frontline by wishlisting Hell Let Loose:

https://store.steampowered.com/app/686810/Hell_Let_Loose/

Follow Hell Let Loose on Twitter
Like Hell Let Loose on Facebook

Hell Let Loose - Jonno
Welcome to Role Guide #4!

This week we’re looking at a flexible, hard hitting role – the Automatic Rifleman.

If you missed the previous guide where we looked at the Machine Gunner, you can get up to speed here.


The Automatic Rifleman

As an Automatic Rifleman, you’ll have the advantage of being both mobile and hard hitting. Fighting alongside Riflemen, Assault and Anti-Tank roles, you’ll be in a position to attain fire superiority in a skirmish to allow your unit to advance on the enemy and secure the objective.

Please note: The characters models for both the German and American Automatic Rifleman are currently placeholder and in the process of being updated.

Key Duties

Close-mid range fire support


Armed with either a M1918A2 BAR or StG 44, this role finds itself in the unique position of having both high mobility and suppressive firepower. Excelling at close-mid range combat, Automatic Riflemen are equipped to engage multiple targets simultaneously in a variety of environments ranging from woodland, to trenches and house to house combat.

When fighting the enemy with your unit, you need not worry about being precise with your shots. Whilst you can accurately shoot enemy soldiers, you have the ability to suppress the enemy for your allies. Focused fire in the opposition’s general direction will suppress them and/or pin them behind cover. This is an especially important tactic to use when your unit isn’t receiving support from an active Machine Gunner.


Shoot, move, repeat!


During a firefight, Automatic Riflemen have the ability to kill multiple enemies and relocate in quick succession. If you’ve taken down an enemy or supressed them, take this opportunity to relocate a short distance, reload and open fire once again. This can disorientate all but the most iron willed of units and quickly throw them into disarray!


American Automatic Rifleman Loadout
  • M1918A2 BAR
  • MK2 Grenade
  • Bandage

Suppressing fire - Character model is a work in progress.

German Automatic Rifleman Loadout
  • StG 44
  • M43 Stielhandgranate
  • Bandage

Choke point control - Character model is a work in progress

Combat tips

It’s the thought that counts – When attacking an enemy position where your unit has begun engaging the enemy, if you know where the enemy is but can’t see them, for example a window, fire towards it anyway! The consistent shots will more than likely lead to the enemy not risking themselves getting shot by peeking, allowing your team to overrun the enemy with less resistance and casualties.

Short, controlled bursts – When engaging the enemy at range and going for a kill shot, maintain short, controlled bursts. This will greatly assist you in keeping your sights on the enemy, especially when there are multiple targets in proximity of each other.

Between an explosive rock and a hard place – Having both a mobile automatic weapon and hand grenades allows you to instil panic in the enemy whilst also boxing them in. Throwing a grenade or two into an enemy position, followed up with fully automatic fire can suppress them, leaving them less likely to escape the blast radius. Those that do make a break for it will then find themselves directly in your automatic fire…

Move, but not too far – Whilst Automatic Riflemen are encouraged to shoot and move, it’s worth keeping an active note on your positioning. It can be easy to get over zealous in the heat of battle, leading to a player overextending, leaving them isolated from their unit and vulnerable to enemy reinforcements.

Staying still is ok too – Staying prone and waiting for an ambush opportunity, or merely laying down consistent, suppressive fire from a fixed location on the enemy is a great way to play the Automatic Rifleman too! When paired with the Rifleman’s ammo box, you can successfully keep watch on a given area for an extended period of time.


Hell Let Loose is available to Wishlist now:

https://store.steampowered.com/app/686810/Hell_Let_Loose/

Follow Hell Let Loose on Twitter
Like Hell Let Loose on Facebook
Hell Let Loose - Jonno
Welcome to Role Guide #3!

This week we’re laying down suppressive fire with one of the hardest hitting roles in Hell Let Loose – the Machine Gunner.


The Machine Gunner

As a Machine Gunner, your main responsibility will be to provide heavy suppression on enemy units and positions. With a high rate of fire and a large ammo count, this role excels at holding down a field of fire from a fixed position whilst their unit pushes forward.


Key Duties

Suppressing Fire

Machine gunners are unparalleled amongst the 14 infantry roles when it comes to zone control and suppressive fire. However, in order to achieve this, you must first set yourself up by deploying your bipod. Deploying your bipod will leave you immobile, but will allow you to aim down sight, increasing accuracy and lowering recoil. To deploy your bipod, simply approach any hard object (including the ground) and press F when prompted.

When engaging the enemy with your unit, you should aim to be set up on your bipod before the main encounter begins. A unit that manages to stop the opposition from setting up their own Machine Gunner in a prime location will have a significant advantage. In the likely scenario that you’re not afforded this opportunity, you should quickly seek out a suitable bipod position that gives you the most beneficial firing options and return fire.


Officer’s Wrath

When playing as the Machine Gunner, you’ll be packing a large portion of your unit’s firepower. Because of this, it’s important to work closely with your Officer to ensure that their strategy is seen through.

For example, when looking to defend a strongpoint your Officer will likely base their defensive strategy around you. It’s vital that you listen to your Officer’s plan, failure to do so could leave an exploitable gap in your unit’s defences and your allies being overrun. That being said, if you have an alternative strategy, make sure to discuss it with your Officer as it may be the better option!


American Machine Gunner Loadout
  • Browning M1919 (Machine gun)
  • Colt M1911 (Pistol)
  • Bandage


German Machine Gunner Loadout
  • MG42 (Machine gun)
  • Walther P38 (Pistol)
  • Bandage


Combat Tips

Brace yourself – Whilst Machine Gunners are most effective when holding down a field of fire, in a desperate situation they can hold the RMB to brace fire. This fires their weapon from the hip, limiting accuracy and making you an easy target, so use it sparingly… Or if you’re clearing a building.

Know your surroundings – Machine Gunners will find themselves relatively stationary for a large portion of their combat time, therefore it’s important to know what’s around you. Unlike other infantry roles, your mobility is severely hampered when you’re aiming, so make a mental note of where you can be flanked, shot from or penned in from. Whilst you’re at it, have an escape route planned too!

Patience is a virtue – If you’ve set-up your bipod and found yourself watching a chokepoint or contested path, patience can have big rewards. If you see an enemy soldier emerge from cover, unaware of your presence, it can pay off to wait a few seconds before opening fire. Why? Because where there’s one soldier, there’s normally their unit too! This can make the difference between one elimination and a unit wipe.

Light them up – When firing your machine gun, you’ll notice that some of your rounds are tracer rounds! These are an effective way to highlight enemy positions, not only for your unit, but surrounding allies. Whilst you’re suppressing an enemy position, your allies will be able to focus in on where you’re shooting to aid in taking out the opposition.


Hell Let Loose is available to Wishlist now:

https://store.steampowered.com/app/686810/Hell_Let_Loose/

Follow Hell Let Loose on Twitter.
Like Hell Let Loose on Facebook.
Hell Let Loose - Jonno
Hey everyone,

Welcome to Developer Briefing #11! This week we’re bringing you a second dose of Sainte-Marie-du-Mont as we share with you a first look at the updated interiors that you’ll be fighting in.

If you missed the initial Sainte-Marie-du-Mont Developer Briefing, where we showcased updates we’ve been making to the map’s outdoor, rural environment, you can catch up here.


Building interiors update!

In Sainte-Marie-du-Mont you’ll fight across fields, hedgerows, farms and eventually the town itself.

The town is made up of roads, paths, residential buildings and the church, which serves as a landmark for approaching armies!

Knowing that our players will be engaging in fierce house to house combat in this area we felt it important to create authentic, interesting environments within these locations that give both the players defending or storming the buildings a fantastic gameplay experience.


Imagine taking cover behind a fallen table, isolated from your unit, as you hear the dull thuds of boots on wood as enemy troops slowly climb the stairs…


Through the keyhole

When creating the environments found within the homes of the residents of Sainte-Marie-du-Mont we were very keen to create ‘lived-in’ spaces for our players, where upon entering one these buildings they can read the room and feel as though a story is being told.


Whoever left this building did so in a hurry, even leaving behind their breakfast!


Once a family home, now abandoned and ravaged by war.


Taking the high ground

Those that venture to the upper floors of buildings may find themselves in a position to overwatch key locations, perfect for Machine Gunners and Snipers! Just make sure to check your corners for any unwanted guests first…


A strong vantage point, if you don’t mind the mess…


Floor to floor

When storming, or holding a building, players will need to keep a note of the building’s lighting. Shadows and dark rooms can hide soldiers, whilst lighting can give away your position!

The image below shows off one example of this. Soldiers looking to storm the upper floors will face a fierce battle here as they push into the gloom.


Interior decorating

Fighting in buildings will be a stark contrast to battling amongst trees and farmland, encouraging new tactics and brutal gameplay.

When designing these interiors, we wanted to give you areas that felt natural, whilst being fun to fight in. We hope the images we’ve shared with you here go some way in showing what we’ve got in store for you!


Be ready for the frontline by wishlisting Hell Let Loose:

https://store.steampowered.com/app/686810/Hell_Let_Loose/

Follow Hell Let Loose on Twitter
Like Hell Let Loose on Facebook
Hell Let Loose - Jonno
Hey everyone,

This week’s Developer Briefing is all about the closed crowdfunder beta that ran from January 11th – January 14th. The beta saw crowdfunders take to battle in Hurtgen Forest as infantry, tanks and artillery clashed in brutal warfare!

The following backer tiers were eligible to play in the closed beta:
  • Scout
  • Veteran
  • Platoon
  • Lieutenant
  • Captain
  • Major
  • Colonel
  • Major General
  • General
Recruit tier backers were not included in January’s beta, however their presence on the frontline will be requested for the next one…


In this post we’ll be sharing with you some of what we learned from the beta, including the most common pieces of feedback we received from our players, as well as how we’re addressing them.

Before we get stuck into the list, we’d just like to say a huge thank you to our backers that played in the beta. From taking the time to give us your feedback, thoughts and bug reports to battling alongside you on the frontline, the closed beta weekend was both fun and incredibly valuable to us.

Please note that the list below is from direct beta feedback ONLY and not indicative of features, fixes and content coming in the future, which includes the Commander role, flamethrowers, vehicles, maps and more…


Audio
  • Positional audio - particularly for firearms – will be addressed across the board.
  • Smoke artillery rounds have no real audio sound when they land. This will be investigated.
  • If you rapid fire the Garand, the sound glitches out – FIXED.
  • Death sounds and screams are triggering twice, they should only be played when wounded/killed - FIXED
HUD
  • Player names of teammates can obstruct a player’s view – These will be made more transparent.
Weapons
  • Check hit registration and consistency on headshots for pistols, etc.
  • Grenades feel too floaty and slow – this will be looked into.
Input/Controls:
  • Mouse sensitivity changes needed to cater to a wider range of DPI - FIXED
Thompson
  • ADS iron-sights are very difficult to use – Proposed optic redesign in progress.
Bolt-action and Semi-Auto Rifles:
  • Tweak damage model so that rounds hitting extremities will only injure beyond 100m. Sniper rifles to retain long-range OHK.
Suppression
  • Suppression aim flinch and darkening is currently not applying as intended.
Miscellaneous
  • We’re looking into barbed wire having movement reduction and health reduction on touch – this is not confirmed for implementation yet.
  • Round end team switching not working after first round – To be addressed.
  • Implement headshot sound like a ding against a helmet sound.
  • Blood splatter for headshot to be larger than body shot, reduce current body shot spray.
Post-Processing:
  • Work on improving AA on some of the graphical settings.
Vehicles
  • Tank audio sound cutting out after a tank respawns – working on a fix.
  • Tanks stutter while moving – under investigation.
  • Tanks need map markers and HUD indicators.
  • Tanks barrel rotates too slowly.
  • Scale tank barrel movement sensitivity per zoom level.
  • Change medium tank respawn rate from 10 minutes to 5 minutes.
  • Tanks to auto-destroy if driven out of bounds or stuck for more than 20 minutes -FIXED.
Spawn Points
  • On occasion spawning on an OP that is destroyed results in spawning in the enemy main – to be investigated.
  • Garrisons currently require to be dismantled in order to be placed again - change so that if you fulfil Garrison requirements you can place a new one. Spawn point cap to be decided.
UI/UX
  • Escape key should act as back button in menus.
  • Clicking a unit name should expand the unit and clicking it a second time should collapse it.
  • Expanded unit names can push the bottom most unit behind the "Change Role", "Create Unit", "Switch Team", and "Exit" buttons.
  • Brightness slider in Video settings needs quality of life adjustments.
  • When pressing the “Apply” button in the options menus, make the color 50% grey/alpha when you clicked “Apply”. This because there is no visual feedback that you applied the changes.
VOIP
  • Reports of beta in game VOIP working for two rounds, then stops working.
Gameplay
  • Issue: Jumping isn’t working as intended, with waist height objects proving a problem. The team are looking into the potential for a vaulting mechanic.
  • Issue: The speed while running and crouching are the same, these should be different.
  • Issue: When you are building something, and another player walks through the ghost, the build is cancelled and you have to start all over again.
  • Issue: Death is abrupt, and players are not confident how they died or where they died from.
    Possible fixes:
    • Add in a “falling camera” that will topple with their body
    • Add in a directional indicator
    • Work on positional weapon sound
    • Lower the damage done by bolt actions and OHK weapons to only wound beyond 100m.
Sniper
  • Sniper are overperforming right now. Investigating potential balance options.
  • Hold breath is too short - increase to 15 seconds.
Artillery
  • Artillery range chart needs to be fixed (currently inaccurate).
Medic
  • Give Medic a primary weapon but limit total magazine count.
Features:
  • Vaulting to be implemented.
  • Add to environmental background sfx/fx.
  • Add coloured smoke to certain roles


On to the next battle!

That wraps up this week’s Developer Briefing!

As the above hopefully shows, the team are working hard on what we learned from the closed beta. These fixes and adjustments are down to you, our players – so thank you!

We're excited to begin working through implementing these fixes and changes. Of course, some will be relatively quick to fix while others will take longer. We ask for your patience over the coming testing periods as we work through these.

To stay in the loop for all things Hell let Loose, including news on future betas, be sure to drop us a wishlist:

https://store.steampowered.com/app/686810/Hell_Let_Loose/


Like Hell Let Loose on Twitter
Follow Hell Let Loose on Facebook
Hell Let Loose - Jonno
Welcome to Role Guide #2!

This week we’re looking at one of the more demanding yet rewarding roles in Hell Let Loose – the Officer.

If you missed the previous guide where we looked at the Rifleman, you can catch up here.


The Officer

As an Officer, you will serve as a source of leadership and strategy for your unit. Working alongside your Commander and fellow Officers, you’ll organise your unit and provide instructions on your objectives as the frontline shifts.


Key Duties

Placing Spawn Points

Arguably your most important duty, it falls to the Officer to place both Garrisons (teamwide spawn point) and Observation Posts (unit-only spawn point). Failure to do so will lead to your team not being able to reinforce a sector under attack or bolstering a push on the enemy. Your unit will really appreciate not having to walk a long way to the front!

You can place spawn points by equipping the watch from your inventory. Observation Posts can be placed with no requirements by an Officer, but have a cool-down before another can be placed, whereas a Garrison needs supplies (provided by Support/Commander roles) to be built.


Communicate and lead

It is your duty as an Officer to not only lead your unit of soldiers, but to communicate with other Officers to help co-ordinate the wider battle effort. This can be done by making use of the Officer-only voice channel. Make sure to check in with them to synergise your battle plan and check if they need reinforcements.

Regarding your unit, you’ll decide when to attack, when to defend or when to make a tactical withdrawal. Maintaining voice communication with your unit will help ensure nothing is missed.

You can also provide descriptive location markers using your binoculars:

1. Observe
2. Attack
3. Move
4. Defend
5. Request Supplies
6. Fire Support


American Officer Loadout
  • Thompson (SMG)
  • Colt M1911 (Pistol)
  • Mk2 Grenade
  • M18 Smoke Grenade
  • Bandages
  • Watch (Observation Post & Garrison placement)
  • Binoculars


German Officer Loadout
  • MP40 (SMG)
  • Luger P08 (Pistol)
  • M43 Stielhandgranate
  • NB39 Nebelhandgranate
  • Bandages
  • Watch (Observation Post & Garrison placement)
  • Binoculars


Combat tips

Place that spawn point – As an Officer you should be ensuring that you always place an Observation Post down for your unit. This should be at the forefront of your mind when deciding on your battle plans. If the frontline shifts, or your original Observation Post is destroyed, be sure to place another one down in a viable location.

For the greater good – When placing a Garrison down, co-ordinate with your fellow Officers to ensure that it’s in a suitable place for your whole team. Clustering Garrisons together in close proximity will reduce their potential impact on the battle.

Keep your head down – Officers are a juicy target for a plucky Rifleman or Sniper. Unless absolutely necessary, try to avoid leading from the front of your unit. Losing an Officer at the start of an engagement denies a unit of smoke cover, binocular markers and even a rapidly placed Observation Post.

Hearts and minds – A unit wipe not only hits your team’s manpower, but it can also impact your unit’s morale. You may have lost that battle, but the war is far from over! Rally your soldiers with some positive words, keep their chins up and form a counter-attack!

Duty calls – When storming an urban area or trench system, the Officer’s loadout excels. Equipped with an SMG, a pistol and two types of grenades, you are a close quarter combat force to be reckoned with.


Hell Let Loose is available to Wishlist now:

https://store.steampowered.com/app/686810/Hell_Let_Loose/

Follow Hell Let Loose on Twitter.
Like Hell Let Loose on Facebook.
Hell Let Loose - Jonno

Hey everyone,

On the run up to Early Access launch, we’ve been keen to communicate that pretty much everything you see in the game is a work in progress, including what you hear!

The closed beta gave us a fantastic opportunity to get feedback on what our crowdfunder players thought of weapon audio in Hell Let Loose, and we heard you loud and clear!

So, in this week’s Developer Briefing we’re going to be making some noise…


Updated Weapon Audio

Below we’re going to share with you some first-person perspective (FPP) audio update teases for two iconic weapons in Hell Let Loose, the MG42 and the M1 Garand. Audio is still a work in progress, so please keep that in mind!

This is part of a wider update the team are working on in relation to audio across the board in the game. What we’re showing below is just the first step on our journey to making the audio in Hell Let Loose as immersive and powerful it can be.

With Early Access, we have three core objectives around audio -
  • 1. An immersive first person and third person audio experience (firing, reloading etc).

  • 2. Sound behaves in a consistent and accurate way allowing for players to gauge distance and direction of shots (With a focus on positioning).

  • 3. Each individual weapon is identifiable at distance based upon their audio characteristics (Calibre, rate of fire etc).
Now, let’s give these weapons a listen…


MG42

When updating the MG42’s audio following the closed beta, the team’s primary focus was striking a careful balance between audio captured from a firing range and the cinematic feel that gamers have come to expect from their weapons.

Below you can view a short clip that shows the updated MG42 in action:

https://www.youtube.com/watch?v=UYgvRc9A5VI


M1 Garand

Much like the MG42, the team adopted an update approach with the M1 Garand that balanced firing range audio with a cinematic feel.

You can hear the M1 Garand in its updated glory with the clip below:

https://www.youtube.com/watch?v=9HgZNdL8cb0

The sound of progress

As we continue to update and polish various aspects of Hell Let Loose, including audio, we’ll be sharing them with you, our community.

These changes are made possible due to the feedback we receive from you, so thank you!


Sign-in and wishlist Hell Let Loose on Steam:

https://store.steampowered.com/app/686810/Hell_Let_Loose/


Follow Hell Let Loose on Twitter
Like Hell Let Loose on Facebook
...