Hell Let Loose - Jonno


Hey everyone,

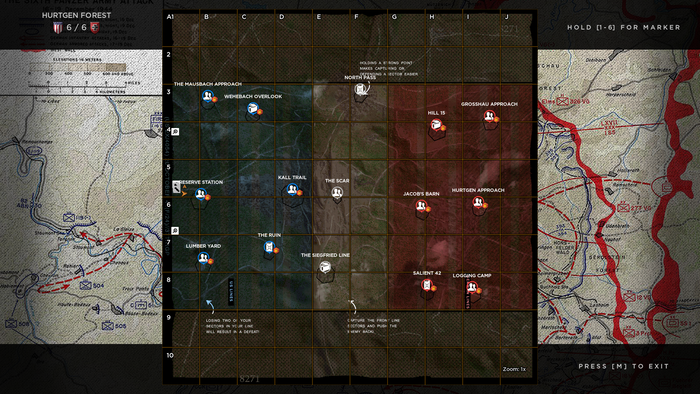
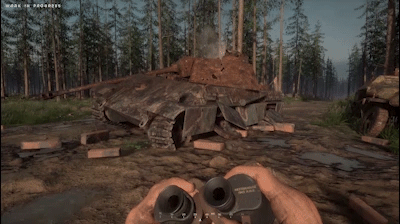
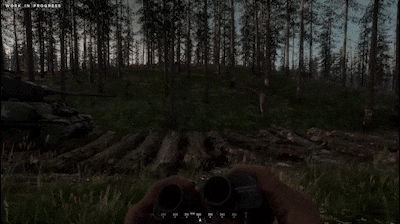
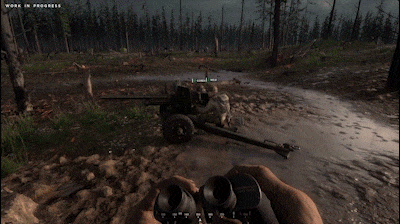
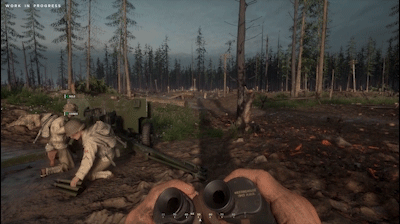
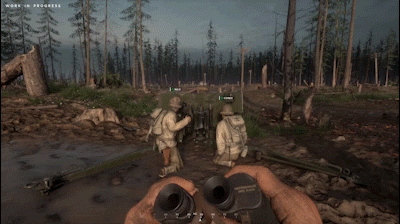
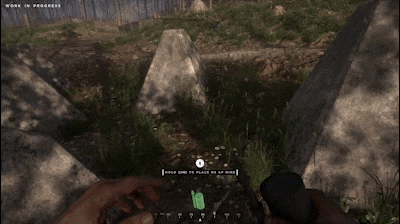
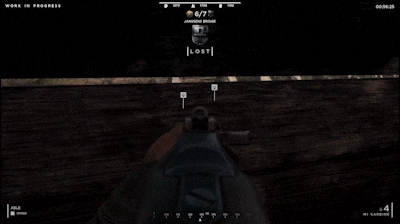
As you may already know, this weekend we’ve been running a closed beta for Hell Let Loose.

The beta, available exclusively to crowdfunding backers on this occasion, is running from until Monday 14th January, 11am GMT.

Due to the limited access of this beta, we’re hosting a livestream today that will give non-backers an opportunity to see Hell Let Loose in action, with the added option of asking us any questions you have about the game live on stream!

Stream time

Sunday 13th at 7pm GMT / 11am PT / 2pm ET on the Hell Let Loose Steam Store page!

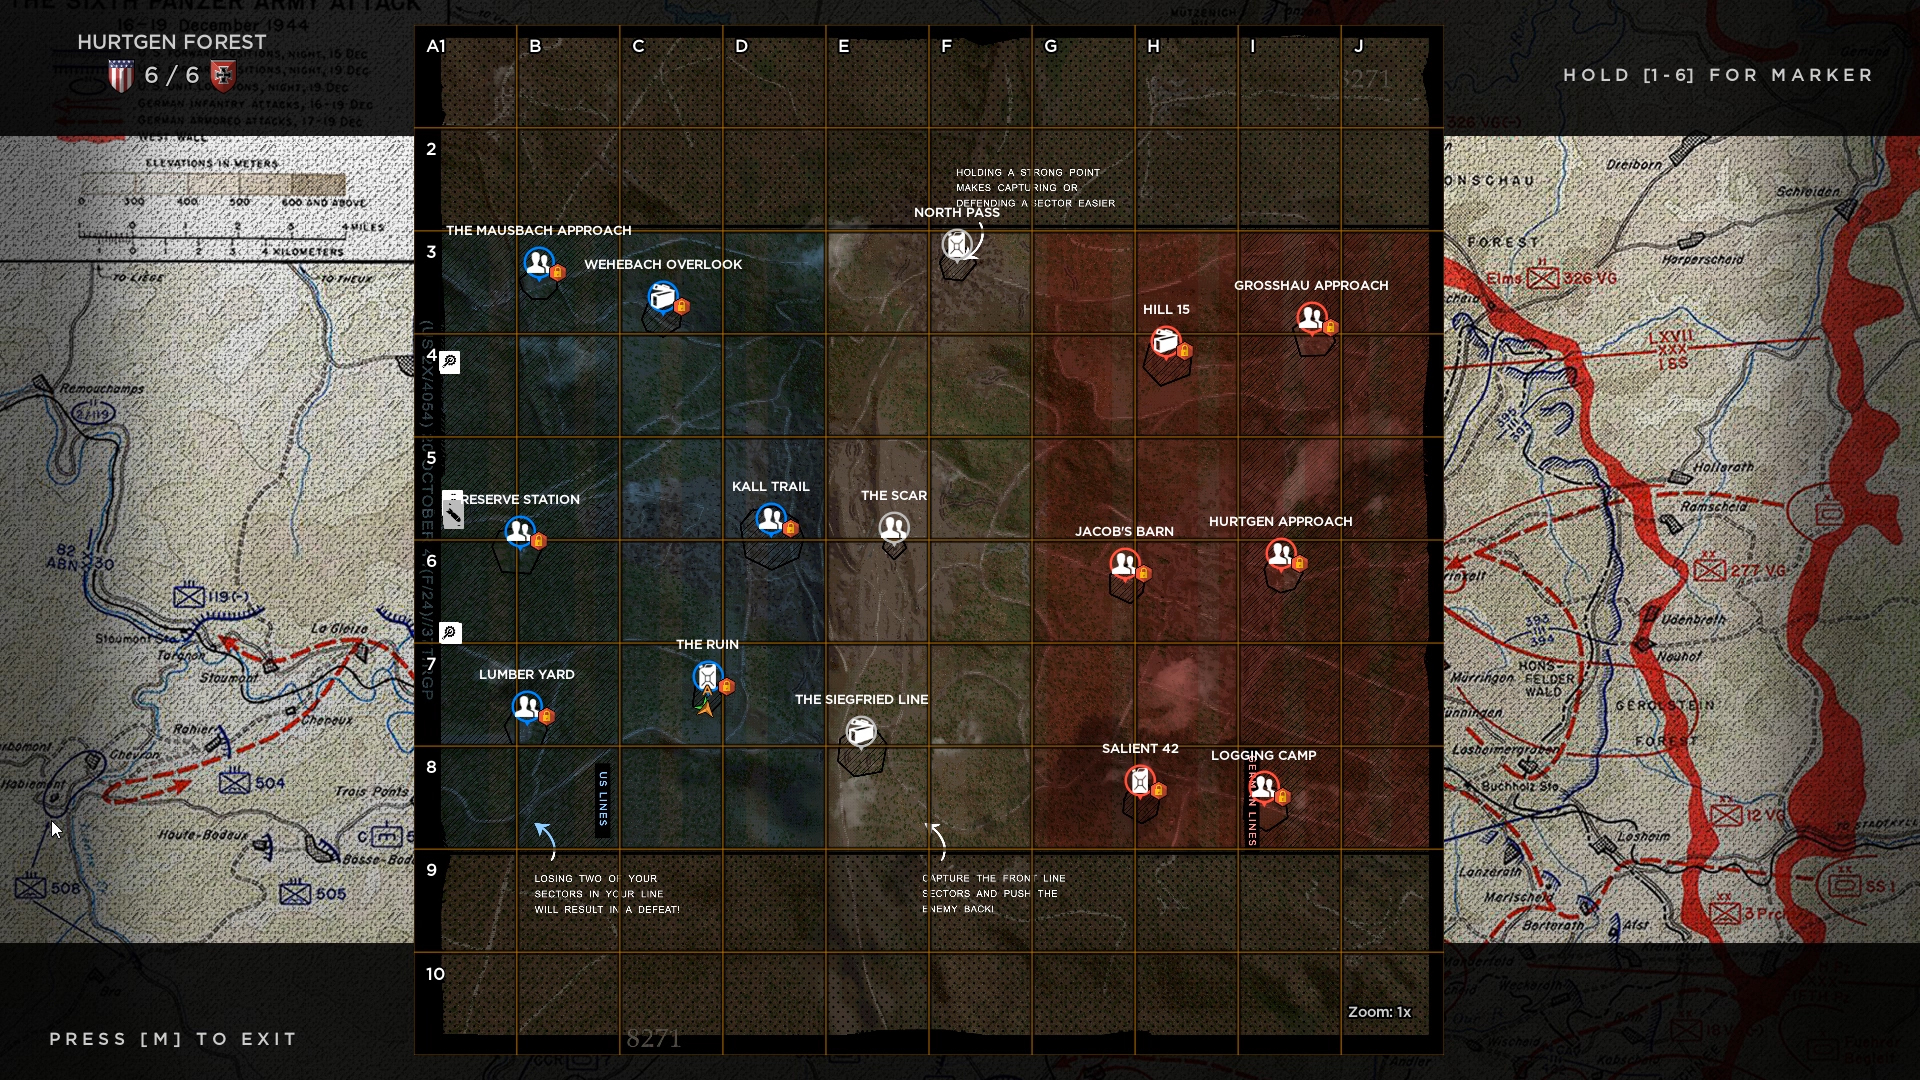
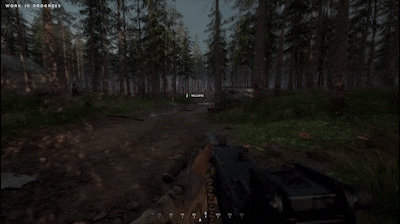
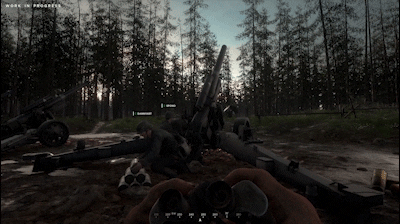
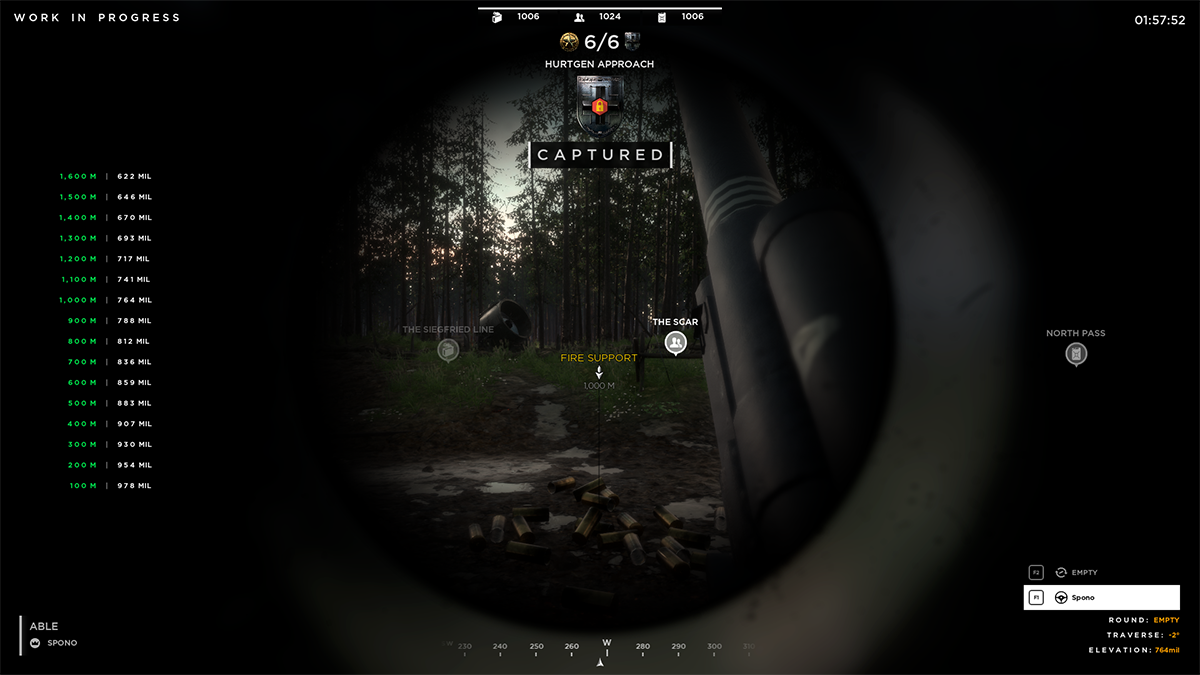
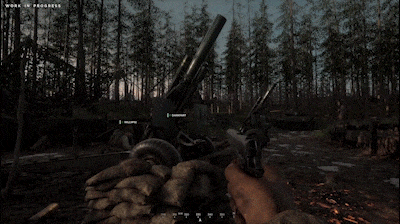
We’ll see you on the frontline of Hurtgen Forest!


Hell Let Loose is available to wishlist now:

https://store.steampowered.com/app/686810/Hell_Let_Loose/
Hell Let Loose - Jonno
Hey Everyone,

The sixth instalment of the Hell Let Loose Developer Briefing is here, bringing with it reinforcements to the frontline!

This week we’re taking a look at spawn points and how smart respawns can work in a player’s favour.

Spawn points – The basics

In Hell Let Loose, there are three different types of spawn point that you can choose to use. Each spawn point will deploy players in waves to give you the best advantage in keeping your unit together.

Headquarters – Fixed point, teamwide usage, shortest respawn timer.
Observation Posts – Variable locations, unit only usage, medium respawn timer.
Garrisons – Variable locations, teamwide usage, longest respawn timer.

Both Observation Posts and Garrisons come with their own strengths and weaknesses that should be considered when you’re deciding how to use them, both as an officer and a respawning soldier.

Deployable spawn points are not limited to just being placed in territory your team holds. They can also be deployed in neutral and enemy held sectors when the situation demands it.


Only recon units can deploy OPs in enemy territory


Observation Posts – Keeping your unit united!

Deployed by officers, Observation Posts (OP) are a quick and efficient way to place a spawn point for your unit almost anywhere on the map.


For an officer to deploy an OP they must have at least one other member of their unit in close proximity. Once this condition is met, simply equip your watch and place that spawn! The OP is ready for use immediately following its deployment and lasts until it is destroyed.


The OP is a versatile item but lacks endurance and must maintain a secure perimeter. If an enemy soldier enters anywhere within a 10ft radius of it, the OP will be destroyed.


Garrisons – Taking your team to the frontline!

Garrisons are the second deployable spawn point available for officers. Garrisons provide broader utility than the Observation Post as they allow any Infantry or Recon player on your team to spawn on them, not just those within your unit.


Garrisons are also more durable than their counterpart, requiring an enemy soldier to physically touch it and complete a short action to put it out of commission.

Due to the increased utility that the Garrison brings to a team compared to the Observation Post, it requires supplies in order to be deployed.


Once a Support role has placed down supplies, a Garrison can be built next to them. This will consume the supplies. Because of this, it’s important for an officer to be in close communication with their support player to ensure supplies are placed where they’re needed.


Top Spawn point tips!

It’s a long walk back to the front – As an Officer, you should make an early decision as to where you’ll place your first Observation Point and act on it. The initial engagements in the battle are important and your unit being able to respawn directly to the frontline will greatly support your team’s ambitions.

Officer’s Quarters – Officers can only have one active Garrison each! In order to support your team’s push across multiple fronts it’s important for officers to co-ordinate with each other on where they plan on placing theirs.

Behind friendly lines – When looking to place a spawn point in a location that you expect to be contested, like a strongpoint, it’s normally a wiser decision to place the spawn slightly behind the key location. This will allow for a counterattack should that point fall to the enemy.

Aggressive spawn points - When territory falls to the enemy, your Observation Post and Garrisons within the sector will be destroyed - so take care in making sure you don't over-extend. Only the recon units have the ability to place an Observation Post in enemy territory - if they can first infiltrate the enemy line.

Not a retreat, just a tactical withdrawal – If an Observation Post or Garrison has been compromised by the enemy, don’t be afraid to fall back to a different spawn. Throwing away your life (and with it manpower) for a lost spawn point isn’t a wise investment.


Your spawn points, your strategy!

Spawn points play a vital role in both holding territory and keeping up the pressure during an offensive.

In Hell Let Loose, we’re giving players the flexibility to place Observation Posts and Garrisons almost anywhere they see fit (terrain allowing).

Whether you just want to place a standard spawn, or establish a base with fortifications and deployables around it, the choice is yours.


Livestreams this weekend!

Join us this Saturday at 2pm GMT and Sunday at 7pm GMT as we stream live from the Hell Let Loose closed crowdfunder backer beta!

We’ll be streaming to the Hell Let Loose Steam Store page, so simply head over there at the above time to watch the broadcast.

We’ll be answering viewer questions on stream as we take part in the battle for Hurtgen Forest, showcasing 50 vs 50 combat, tanks, artillery and more.

See you on frontline.


Add Hell Let Loose to your Steam wishlist:

https://store.steampowered.com/app/686810/Hell_Let_Loose/
Hell Let Loose - Jonno
Hey everyone,

Welcome to the fifth Hell Let Loose Developer Briefing!

This week we’re taking a look at sectors and strongpoints, as we share the key role they play in the metagame.

Sectors & Strongpoints – The basics

In Hell Let Loose, territory is power! Each map is split into sectors, being three sectors high and five sectors wide. Each side starts with six sectors under their control, with the rear three being your HQ spawn points.


There are two ways to claim victory over the opposing side in Hell Let Loose:

1. Capturing and holding two of the enemy team’s HQ sectors.
2. Owning more territory than the enemy when the match time runs out.

Sectors are captured by having a greater soldier count within the area than the enemy. Sectors take time to capture, so a fierce tug of war battle can occur over hotspots on the battlefield.

To add a further level of strategy, each sector also contains a strongpoint. Strongpoints are a small section in a sector that doubles a soldier’s capture value when taking or holding a sector – so are critical for teams trying to hold a sector against superior numbers. We’ll be going into greater detail about strongpoints further on in the briefing.


Sectors – The territory that keeps on giving!

In order to keep your team’s war machine rolling, you’ll need to acquire three different resources:

Manpower – Allows the Commander to use infantry related orders, such as force respawning dead infantry, or increasing the capturing power of infantry in a chosen sector.


Munitions – Required for additional fire support, such as the HQ artillery battery. Munitions also allows for supply drops, strafing runs and bombing runs to be called in by the Commander.


Fuel – Instrumental in fielding tanks and other armoured vehicles. Allows the spawning of additional vehicles on top of starting units and enables use of the force respawn order on destroyed vehicles.


Manpower, munitions and fuel can only be earned by capturing the sector that offers the corresponding resource. You can find out which sectors will best suit your team’s strategy by checking your map.

Once under your team’s control, a sector will provide a steady stream of supplies, assuming you can protect it!


Strongpoints – Tactical localities worth your attention!

As previously mentioned, strongpoints are small areas in each sector that double a soldier’s capture, or hold value, for that given sector.

Strongpoints can be identified on your map by looking for a small, shaded area in a sector. Each strongpoint will have a different size, shape and location within a sector, so each must be attacked, or defended, with a different strategy.

On the battlefield itself, strongpoints are usually found at points of interest. For example, some of Hurtgen Forest’s strongpoints include:


These locations will see fierce combat. Because of this it is important to make sure they can be reinforced by Garrison or OP spawn points positioned to the rear of these critical areas.


Top sector tips!

Have a plan – As an officer, communicate with your commander and fellow officers to formulate a battleplan. Which resources will you prioritise? Will you focus on vehicles or artillery and support orders? Where will you attack and who’s defending? A cohesive plan will increase your chance of victory.

Counterplay – If you notice an enemy team being overly reliant on vehicles or artillery support, it’s worth considering a targeted play to deny them of the sectors that fuel their strategy.

Turtle power – Sectors, and specifically strongpoints on the frontline will be consistently contested. Setting up fortifications, deployables and MG teams in or around them will greatly aid in holding the line.

Go hard or go to respawn – You can expect strongpoints to be heavily defended. Having the support of recon units, artillery/armour and smoke grenades will increase your chances of a successful push.

Behind enemy supply lines – If the enemy has captured deep into your side of the map, a brave unit can sneak deep behind enemy lines and capture a bridging sector, isolating the enemy team’s captured sectors and stopping them from sending supplies to their HQ.


Go forth and conquer!

Now you know the role that sectors, and strongpoints play, as well as their importance in a battle’s metagame!

Each member of the team will play a role in earning a victory. There will be dynamic cases of well executed strategy, victory against the odds, plucky plays and heroic last stands!

How every battle plays out will be in your hands.


Add Hell Let Loose to your Steam Wishlist:

https://store.steampowered.com/app/686810/Hell_Let_Loose/

Follow Hell Let Loose on Twitter
Like Hell Let Loose on Facebook
Join the Hell Let Loose Discord


Hell Let Loose - Jonno
Hey everyone,

For the fourth instalment of the Hell Let Loose Developer Briefing, we’re bringing out the big guns!

Artillery – The basics

It can be your saving grace or your worst nightmare. If you hear the unmistakable sound of an artillery shell hurtling towards your location, you’d better hope it isn’t aimed at you!


Artillery is located at the centre HQ sector for both teams. There are three artillery pieces per team and each can be manned by two players:

Gunner – Aim, fire and relay co-ordinates with unit officer.
Loader – Reload, load HE or Smoke rounds, aiming support and further communication.

Artillery can be operated by a one-man crew, but at a reduced rate of fire.


In order to be an effective artillery crew, you’ll need to be aware of these two key pieces of information:

Traverse – This is the direction that the gun is facing. The Gunner can use A or D on their keyboard to turn the barrel, whilst the Loader can rotate the entire gun using A and D.

Elevation – This is the angle of the barrel. Aiming the barrel higher will fire the shell closer to your location. On the flip side, the lower the barrel, the further the round will travel. On the left of the gunner’s screen, they’ll see a chart of elevation mils and the corresponding range in meters. To set the weapon to the needed elevation, the gunner muse use W or T to raise and lower the barrel. The elevation can be seen in the bottom right hand corner of the screen.


The big guns

Say hello to the artillery that you’ll be firing in Hell Let Loose!

The US will take to battle with the M114 155mm Howitzer, which can fire either the HE M107 (High explosive) or the HC BE M116 (Smoke).


On the other side of the front line, the Germans will be using the sFH 18 ‘Evergreen’ 15cm, that can be loaded with 149 MM x 260 R (High explosive) or 149 MM x 260 R (Smoke variant) shells.


Whether an artillery crew are using HE shells to take out enemy positions, or smoke rounds to provide invaluable infantry cover during an advance, precision use of artillery can change the flow of battle in front of your very eyes!

Top artillery tips!

Buddy up – Whilst possible to man an artillery piece alone, having the support of a designated loader will allow you to focus on adjusting your elevation and traverse to perform different strike patterns and styles – including a creeping barrage onto an enemy position. You’ll also have a significantly faster rate of fire!

Danger close - Artillery is realistically powerful. It will kill and main anyone within a 50m area. Be very careful when firing near friendly units.

Request orders – A marker placed on a target by your Officer will allow you to immediately check the precise range.

Finite firepower – Artillery ordnance is fed by your team’s munitions resource. This is a limited resource that can only be replenished by friendly forces capturing and holding munitions sectors on the map. Running out of munitions means you’ll lose the ability to rain hell down on your enemy, so use manage this resource wisely!

Take note – Creating a range book or map to record the elevation and traverse needed to hit significant roads or strong-points will allow you to quickly sight the artillery piece without the need to manually find the range each time. Clear communication of degrees and traverse will empower your battery to quickly change targets or adjust its fire pattern.


Incoming fire support!

If you’re meticulous in your execution and enjoy impacting the battle from afar, then using artillery could be the playstyle for you!

Through working together with your unit’s Officer and making use of your own frontline coordinates, you’ll have the power to support infantry advances or slow down enemy tank advances with smoke rounds, as well as raining down hell on enemy positions with a high explosive barrage.

Your shots will ring out across the frontline as infantry and armour alike dash for cover as they hope, with baited breath, that the incoming barrage doesn’t have their name on it.


Festive break

Due to the Christmas period, there won’t be a Developer Briefing next week. But fear not, we’ll be back in the first week of January with the next instalment of the Developer Briefing and more!


Have a fantastic Christmas and we’ll see you in 2019.

Add Hell Let Loose to your Steam Wishlist:

https://store.steampowered.com/app/686810/Hell_Let_Loose/

Follow Hell Let Loose on Twitter
Like Hell Let Loose on Facebook
Join the Hell Let Loose Discord

Hell Let Loose - Jonno
Hey everyone,

We're pleased to announce that the Kickstarter Backers closed-beta for Hell Let Loose will take place in January 2019!

Running from Friday, January 11th to Monday January 14th, the beta is exclusively for Hell Let Loose Crowdfunding backers, who have closed-beta access.


Whilst access to this beta is restricted, we thought we’d let you know it’s happening as the chances are you’ll be seeing new gameplay related posts here on Steam, as well as footage from the beta on YouTube and various streaming platforms.

Will non-backers get a chance to play before Early Access launch?

We’ve been seeing community questions and requests related to if/when there will be a chance for a hands-on with the game before Early Access launch next year. To answer this question, we’d like to share with you that we’ll be exploring options for those outside of the Kickstarter backer community to join the battle in potential future betas.

If you’d like to see the closed beta in action, keep an eye out for coverage from the Hell Let Loose content creators!

We’ll also be hosting Developer Streams during the beta on the Hell Let Loose Steam Store page. Dates and times for this will be announced closer to the beta.

What’s new in the beta?

Backers who played in the Hell Let Loose closed alpha earlier this year will notice some new additions to the game, including:
  • Improved player movement.
  • Strong Points – Significant locations in each sector that double the capturing or defending power of each player within them.
  • New weapon animations.
  • Dismemberment.
  • Player controlled artillery.
  • Engineer role.
  • Anti-tank role.
  • Fortifications - Barbed wire, sandbags, dragon’s teeth, Czech Hedgehog, Belgian gate and vehicle repair station.
  • Deployables – AT mine and AP mine.
  • Tanks – Panther and Sherman, both with realistic physics, gear shifting, shell penetration and ricochets.
  • Machine gunner upgrade – Can brace fire and deploy with their bipod on hard objects.
  • New look spawn points.
  • Smoke update – Now deployable using artillery or medic and spotter roles.
  • Sounds – Updated weapon sounds. (Work in progress)
  • Graphics and Net-code Optimisation. (Work in progress)


Join the Hell Let Loose Steam Group
Follow Hell let Loose on Twitter
Like Hell Let Loose on Facebook

Learn more about Hell Let Loose in our weekly Developer Briefing series:

#1 Fortifications
#2 Deployables
#3 Tanks

Hell Let Loose is available to Wishlist now on Steam:

https://store.steampowered.com/app/686810/Hell_Let_Loose/
Hell Let Loose - Jonno
Hey everyone,

Welcome to the third Hell Let Loose Developer Briefing!

This week we’re rolling out the medium armour as we take an introductory look at tanks in Hell Let Loose.


Tanks – The basics

Tanks are a force to be reckoned with. With the ability to be a stalwart defender of key locations on the frontline, or a driving force to breakthrough the enemy, they are a valuable asset when used correctly.

A tank is most effective when crewed by a 3-man team:
  • Driver – Driving and access to Hull Machine Gun.
  • Gunner – Fires main gun and has access to coaxial machine gun.
  • Tank Commander – Best visibility of any tank crew, has access to periscope.
Tanks have a realistic damage model in-game, so don’t expect hit points! When attempting to both use, or take down a tank, players will need to consider a tank’s physics, including: gear shifting, speed, shell penetration, ricochets, firing angles and armour thickness. For example, penetrating a tank in its front will prove much more difficult than shooting it in the rear.

Damaging a tank in a specific area will also create negative effects for the vehicle, for example, a penetrating shot to the tracks will lock the vehicle into first gear until it’s repaired. If you find your tank damaged, or low on ammunition, you’ll need to return to base to re-arm and repair.

Oh and one more thing, if you’ve found the perfect ambush location, turn off your engine!


Tanks – The Panther

The Panther tank, Germany’s response to the venerable Soviet T-34. Officially designated as a medium tank, the Panther weighed in at 44.9 tons and came equipped with sloping armour and a highly accurate 75mm main gun.


Tis but a scratch!

In Hell let Loose the Panther will provide devastating flexibility to the German army, whether it’s picking off enemy armour from afar or hosing infantry with devastating machine gun fire.

Keep in mind that this power comes at a price, as the Panther will be expensive to both deploy and replace.


The Germans will have access to two Panther tanks in a game.


Tanks – The Sherman

Pressed into service in 1942, the Sherman tank was an evolutionary design, tracing much of its heritage to the M3 Lee it replaced. Despite having thinner armour, and a smaller 76mm main gun than its German Counterparts, the Sherman quickly gained a reputation for being equally mobile and reliable.


In Hell Let Loose, the Sherman will provide the swift firepower needed to make swift advances into enemy territory, as well as quickly reinforcing the American line where necessary.

What the Sherman lacks in armour and firepower, it will make up for in numbers and general presence in battle. Although cheaper than the Panther, tank crews manning the Sherman will need to rely on tactical positioning and teamwork to better the armour and firepower of their opponents.


The US Army will have access to four Sherman tanks in a game.

The cavalry’s here!

If you fear nothing and relish the opportunity to strike fear into your opponents, then being a member of a tank crew may be just the role for you!

Whilst tanks command a strong battlefield presence, they really shine when working together with other tank crews, infantry and artillery teams – a lone wolf will find their time on the frontline short lived!

There are many more vehicles that will be available to the player in Hell Let Loose. We’ll be exploring those in future developer briefings!

That wraps up things for this week, tanks for stopping by!

Add Hell Let Loose to your Steam wishlist:

https://store.steampowered.com/app/686810/Hell_Let_Loose/
Hell Let Loose - Jonno
Hey everyone,

Welcome to the second instalment of the Hell Let Loose Developer Briefing series!

If you missed Developer Briefing #1, where we introduced fortifications such as barbed wire, sandbags and tank traps, you can get up to speed here.

At the end of last week’s briefing, we promised you that the next one would would be a blast, so today we’ll be giving you an introduction to anti-tank guns and anti-personnel mines!


Deployables – an introduction

Whether you’re looking to create an impenetrable front line, or bolster a weaker flank, deployables play a key part in achieving these objectives.

Using Hell Let Looses’ dynamic deployable placement mechanic, you’ll be able to tactically deploy a wide range of tools and weaponry almost anywhere on the map as you, or your commanding officer, sees fit.

This week, we’re going to give you a look at two deployables, the anti-tank gun and anti-personnel mines.


Anti-tank guns

In the footage below, we’re showing off the 57mm M1, which was one of the main anti-tank guns used by the allies in World War II.


In Hell Let Loose, the M1 will serve as the primary American anti-tank gun. Man-portable and capable of readily destroying anything short of the heaviest armour, the M1 is an asset to any defensive line.


If you’re looking to field your very own 57mm M1 anti-tank gun, you’ll want to take to the frontline with the Anti-tank role as this is the only class that can place this deployable in battle.

Anti-tank guns are ideally operated by a two-man crew, with one person focusing on shooting and the other on reloading. A one-person crew can operate the gun, but fire rate will be sub-optimal in comparison.


Anti-personnel mines

Hidden and very dangerous, anti-personnel mines are an effective way to control chokepoints, slow down enemy advances and create ambushes.

The M2 AP Mine (see below) is available to the American forces in Hell Let Loose and can be fielded by both the Engineer class and Recon unit. Players on the German side will get access to their own variant, the S-mine.


Easily concealed and extremely lethal, these devices will spell the end for soldiers who don’t pay close attention to their surroundings.


Hold the line!

If your preferred doctrine is “The best defence is offence”, then playing roles such as the Anti-tank gunner and Engineer who have access to these deployables will leave you satisfied!

When paired with a Support role, you’ll have the required supplies to adapt to almost any situation and put your unit’s plan into action.

There are even more deployables that will be available to further your strategic choices, such as the anti-tank mine, which we’ll explore in a future briefing!

That wraps things up for this week. How will you utilise these assets in battle? Let us know in the comments below!

Add Hell Let Loose to your Steam wishlist:

https://store.steampowered.com/app/686810/Hell_Let_Loose/

Hell Let Loose - Jonno
Hey everyone,

Welcome to the first Hell Let Loose Developer Briefing!

Developer Briefing will be a weekly news post from the team that we’ll use to share gameplay features, discuss what’s going on at HQ and more!

To get things rolling, we’re going to be showing off some of the fortifications you’ll be utilising on the frontline.


Fortifications – an introduction

In Hell Let Loose, we’re keen to create an environment where dynamic battles flourish and players are empowered to forge their own strategies on the fly.

One way we’re supporting this is through fortifications, allowing players to fortify areas and create defendable positions.

In a nutshell, fortifications can be categorised into three broad groups:
  • Offence
  • Defence
  • Support
This week, we’re going to give you a glimpse at defensive fortifications.


In the above gif, you can see the US Engineer role scrolling through some of the fortifications at their disposal:
  • Barbed wire (Small)
  • Barbed wire (large)
  • Hedgehog (Germans get the Belgian gate)
  • Sandbag nest
The keen eyed among you will also notice a fifth option on the Engineer’s list, the repair station, but we’ll go into more detail on that in the future!

These items can help a team secure a captured strongpoint, or help lock down a specific area of the frontline – the choice is yours!


Teamwork makes the dream work

The Engineer is a flexible class that has the ability to shape the frontline. But, without supplies they can’t build a thing!

This is where the Support role comes in. Support players both carry and deploy supplies that can be utilised by a range of classes, including the Engineer. Our advice for playing the Engineer? Make sure you’ve made friends with someone playing the Support role for maximum efficiency!

That pretty much wraps up the first Developer Briefing. Stop by next week as we look at some of the more destructive fortifications that’ll be at your disposal, we promise it’ll be a blast…

Add Hell Let Loose to your Steam wishlist:

https://store.steampowered.com/app/686810/Hell_Let_Loose/


Hell Let Loose

We haven't heard from the WWII multiplayer FPS Hell Let Loose since October 2017, when it launched a $100,000 Kickstarter to help get it across the finish line. It ended up drawing in more than double that amount, and today the developers announced that it will launch on Steam Early Access in 2019.

Hell Let Loose is a "realistic platoon-based" shooter built around 50v50 battles, "in which players must coordinate to capture sectors and resources to beat the opposition into submission," publisher Team17 said. "Authenticity is key, and players will be able to experience history using a realistic period arsenal, with accurate weapon behavior." 

The trailer released today appears to reflect that approach. In contrast with the high-speed, over-the-top gameplay of Battlefield 5, the action in Hell Let Loose is slow, clunky, and ugly: You can't see a hell of a lot, and the kills in the trailer aren't the result of epic duels but of shooting guys in the back while their attention is focused elsewhere. "Realism" is a squishy concept in the context of videogames, but that seems pretty close to the mark as these things go. 

Hell Let Loose is listed on Steam, and there's a website up at hellletloose.com, although there's not a whole lot to see there right now. Developer Black Matter said that "a roadmap of key content drops" will be posted when the Early Access release is live. 

Update: The post originally stated that Hell Let Loose will be out in January 2019, but a release month hasn't actually been specified.

Hell Let Loose - contact@rockpapershotgun.com (Dominic Tarason)

As the cycle begins anew, World War 2 shooters are in vogue once more and Hell Let Loose is ready for the front lines. Developed by new studio Black Matter, it’s a gritty, semi-realistic World War 2 team shooter for teams of up to fifty players a side. There are unit classes, vehicles to drive, ride in or escort and apparently a resource-gathering strategic layer in-between matches. It’s due for an early access release in 2019 after a successful 2017 Kickstarter campaign, and seems quite far along in development as you can see in the grimy, muddy combat footage below.

(more…)

...