If you're reading this Slay the Spire guide, you no doubt know that Mega Crit Games' roguelike card battler is absorbing, addictive and annoying in equal measure. Although easy to learn, it's deceptively deep and difficult to win. The random elements can make it seem like a crapshoot. Most runs are beatable, though, if you make the right choices. Here's a primer on the wisest picks.
Think on your feet
One of the best yet most frustrating things about Slay the Spire is that there's no guaranteed strategy for success. Each run offers different cards, potions and encounters, so you must work with what you're given. Early on, watch for cards or relics that you can start to build a strategy around, and adapt accordingly. Until your build begins to take shape, avoid cards that only deliver value as part of a combo: Body Slam, for example. However, the game also discourages too much specialisation. Almost every build has a monster tailored to find its weak spot.
Read the map
The first three levels of the game have the weakest monsters. It's a good idea to fight these opening encounters to build up your gold and card options. After that, things change. Higher up, look for paths that avoid standard monsters as the rewards aren't worth the risk. Pick question marks and campfires instead. Miniboss fights can be hard, but they net you a relic which is often a worthwhile payoff. On acts two and three, scroll up and check the icon at the top of the map, as it indicates which boss lies in wait. These fights are hard and demand specific strategies, so start tailoring your card and shop choices to prepare for them.
Don't get greedy
Every time you get offered something, there's a "skip" option. It's there for a reason: you want to maintain a small deck. Adding in every half-decent card you see will make your deck bloated, so it's less likely you'll draw key combos. Ditching the weak Strike and Defend cards you start with is therefore very useful. Unless you're running a lot of card draw effects, aim for the smallest deck you can, ideally under 15 cards, full of mutually supporting effects. Once it's working, skip even rare or powerful cards if they don't benefit your build.
It's less common that you won't want a relic, but if the effect will hurt your play style, leave it behind. Some boss relics, such as the Snecko Eye and the Runic Dome, have downsides that make them rarely worthwhile. If your potion slots are full, and you're offered a better option, you can discard one to grab the new elixir.
Nothing is free
Most choices have a downside. Zero energy cards might seem an automatic boon, but they still clog up your deck, making it harder to draw more critical cards. The only exception is if the effect also draws a new card, or your deck already has a lot of card draw. At bonfires, it's usually best to upgrade a card unless you're under half health or about to face the boss. However, some card upgrades barely improve on the original. If you run out of worthwhile upgrades, it's okay to rest unless your health is very high.
Watch the whale
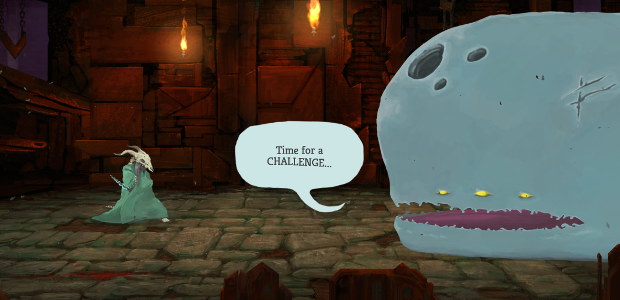
If you reach the act one boss, which you will on most runs, the next attempt starts with a choice of bonuses offered by a talking whale. All except the first have an associated degree of increasing risk and reward associated. Never take that first choice: the benefits are too meagre. Same for the last choice as it's always too risky: starting relics are very powerful. Judge the positives and negatives of the middle two options and select accordingly. The best bonuses are those that net you a relic, or remove cards from your deck.
Shop wisely
Gold is in short supply, so you spend it with care. You should only buy cards if they're critical to the deck you're trying to create. Instead, save up for relics. Those that give a boost to strength or dexterity are particularly good value for money. Most of the time the relics on offer won't be worthwhile, in which case use the card removal service. Ditch curses first, then your starting Strike and Defend cards. Potions are never worth it: you'll find plenty for free.
Learn the encounters
All the creatures in the game have particular attack patterns. You'll get a lot further in your runs once you can learn to anticipate their actions and plan ahead. This is very important for monsters like Slimes and Byrds whose actions you can interrupt, earning you a respite from a planned attack. It's also critical for those like the Gremlin Wizard that cycle up to powerful attacks, so you can try to kill them before they get off a big blow. It's especially useful to learn the patterns of miniboss fights. Once you can navigate them in relative safety, they earn you a powerful relic as a reward. You can also learn the question mark encounters, whose choices will play out the same each time. Some selections are much better than others.
Plan your turn
It's tempting to get stuck in and kill stuff, but it's better to consider your options first. Maximise the effects you're planning to use: apply Vulnerable before any other attack cards, for example. As a rule, your priority is to avoid damage, since that will end your run, especially if you're confident you can deal with the encounter. But there are often better ways to do this than accumulating Block. If you can kill or stun an attacking monster, for instance, you won't take its damage. Applying the Weak status likewise reduces incoming pain. If you've got card draw, remember to check what's in your draw pile in case you pull an important card but don't have the energy to play it. Consider all the variables in the situation and how they might work together, and do your best to balance offence and defence.


