Dec 8, 2017
Factorio - Klonan
Christmas is coming early for Factorio fans. We have a lot of exciting things to show you and announce this week, so hold on tight.
In automatic mode, when the train isn't moving, the artillery wagon will automatically scan for enemy buildings (biter nests and worms) and shoot at them. Manually designating targets is very simple, you click on the ground (or on the map or zoomed map) using a special targeting item. For each click, an artillery wagon in range will fire once at the target.
Firing at the biters from far away isn't all consequence free, as they will come running to your train, so you will have to make sure there are some defences nearby, or are prepared for a quick getaway.
Currently it has a range of 7 chunks (224 tiles) when firing automatically, and a range of 17.5 chunks (560 tiles) when firing manually. The main reason for this range difference is to incentivize players to use manual mode, since it is quite a fun way to use the artillery wagons, and it gives the satisfaction of blowing up biter nests remotely.
Albert is working hard to finish the graphics, but here's a untextured work in progress preview.
https://eu1.factorio.com/assets/img/blog/fff-220-WIP-artillery-wagon.mp4
Projectiles are slow and are shown on the map. They explore every chunk they travel across.
https://eu1.factorio.com/assets/img/blog/fff-220-auto-shooting.mp4
Since they explore the area before exploding, you can zoom in and watch the impact.
https://eu1.factorio.com/assets/img/blog/fff-220-manual-shooting.mp4
We also wanted to allow transitions from any terrain type and water. With some adjustments to our new alpha-masking capabilities we were able to create few sets of transition sprites, most of which are shared by multiple tile types. The new problem now is that the transitions are screaming for animated water now. Oh, well...


It has been tough to find a printer who can meet our requirements. After many different companies, tests and iterations (such as the batch for the party), we have an order booked for 2,000 T-shirts scheduled to arrive on Monday.
Once we check them and make sure everything is alright, we will open up to orders through our new Eshop on our website. The T-shirts are grey unisex, available in sizes XS to XXL, with the Factorio logo printed on the front. It was especially important to us that the silkscreen was of a high quality, and we are happy to say these are better than your typical print shop. The price is $20 USD per shirt plus shipping. There are some limitations on the countries we will be shipping to.
If everything goes according to the plan, we will send the first shipment on the 13th of December, and subsequent packages every Wednesday after. Packing the orders is all going to be handled by us, and since we are expecting a large initial demand, we hope that you will be understanding if we don't mange to get them to you before Christmas.
For now we will be limiting orders to a maximum of 3 per person, so we can make sure they end up in the hands of fans, and won't all be scooped up by some scalper/reseller. We also reserve the right to cancel any suspicious/large orders to further this goal, and will be looking through the recipients to make sure nobody is taking more than their fair share.
We have the full terms of service on the store, so please check it out before you make any order. We won't really appreciate if we see anybody reselling the shirts, as we aren't really making any profit from this venture, we are just trying to do a good service to our fans. In any case, once we have a good gauge on the demand, we will be able to produce some more batches early next year, so we can keep the supply flowing.
We decided that Factorio fans would really like to play during the holidays, so we plan to release 0.16.0 next week.
This date is quite tight, but this week's internal playtesting went well, with only a few bugs and desyncs. It does not include everything we wanted but a smaller and quicker release is probably better.
Please bear in mind that this is an opt-in experimental release of an early access game, there will be bugs, especially since the release is a bit premature. We will have just 1-2 weeks of bugfixing before most of us will go on holiday, so it might not be perfect, but we will make it as playable as possible. Plus some of us (like Rseding91) will be fixing bugs during the holidays.
The next few weeks will be a bit crazy for us, working overtime to fix bugs and pack t-shirts, so let us know how excited you are about the news at the forums.
The artillery train
Some of you might remember we said there is an artillery train planned, well we now have a playable version of it, so we can show it to you today. The artillery train (or more correctly, the artillery wagon) is an end-game wagon you can add to a train. It fires artillery shells over large distances, either automatically at nearby bases, or at manually designated targets.In automatic mode, when the train isn't moving, the artillery wagon will automatically scan for enemy buildings (biter nests and worms) and shoot at them. Manually designating targets is very simple, you click on the ground (or on the map or zoomed map) using a special targeting item. For each click, an artillery wagon in range will fire once at the target.
Firing at the biters from far away isn't all consequence free, as they will come running to your train, so you will have to make sure there are some defences nearby, or are prepared for a quick getaway.
Currently it has a range of 7 chunks (224 tiles) when firing automatically, and a range of 17.5 chunks (560 tiles) when firing manually. The main reason for this range difference is to incentivize players to use manual mode, since it is quite a fun way to use the artillery wagons, and it gives the satisfaction of blowing up biter nests remotely.
Albert is working hard to finish the graphics, but here's a untextured work in progress preview.
https://eu1.factorio.com/assets/img/blog/fff-220-WIP-artillery-wagon.mp4
Projectiles are slow and are shown on the map. They explore every chunk they travel across.
https://eu1.factorio.com/assets/img/blog/fff-220-auto-shooting.mp4
Since they explore the area before exploding, you can zoom in and watch the impact.
https://eu1.factorio.com/assets/img/blog/fff-220-manual-shooting.mp4
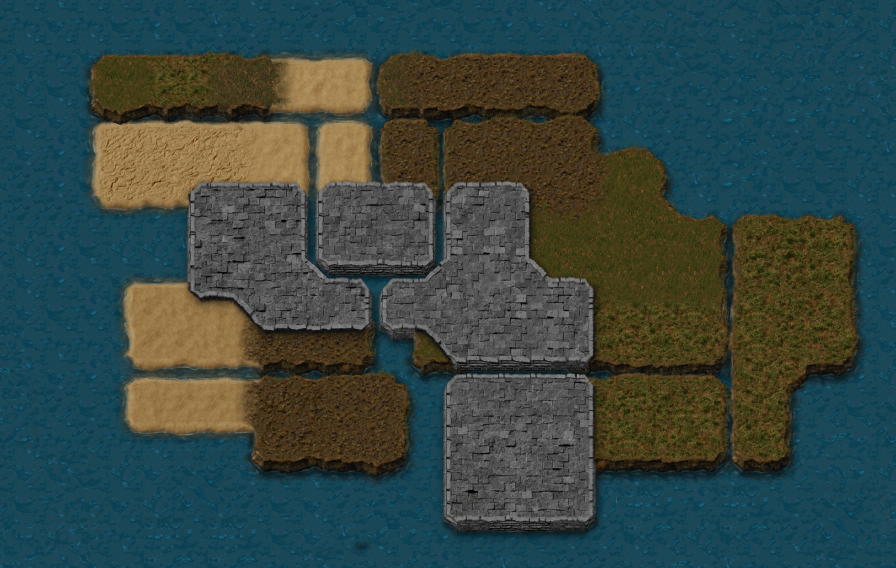
New terrain/Transitions
As we proclaimed in FFF #199 we wanted to move grass-to-water transitions, from the grass tile to the water tile to make it impossible to build on tiles that visually have water on them. Moving the transition created some new problems. First we had to change rules for building offshore pumps, as they would be placed too far into land. Walking or driving around water felt very wrong suddenly, as player character would get stuck on corners that looked like they should be walkable. So we had to adjust player and vehicle collisions to account for that. We also wanted to allow transitions from any terrain type and water. With some adjustments to our new alpha-masking capabilities we were able to create few sets of transition sprites, most of which are shared by multiple tile types. The new problem now is that the transitions are screaming for animated water now. Oh, well...
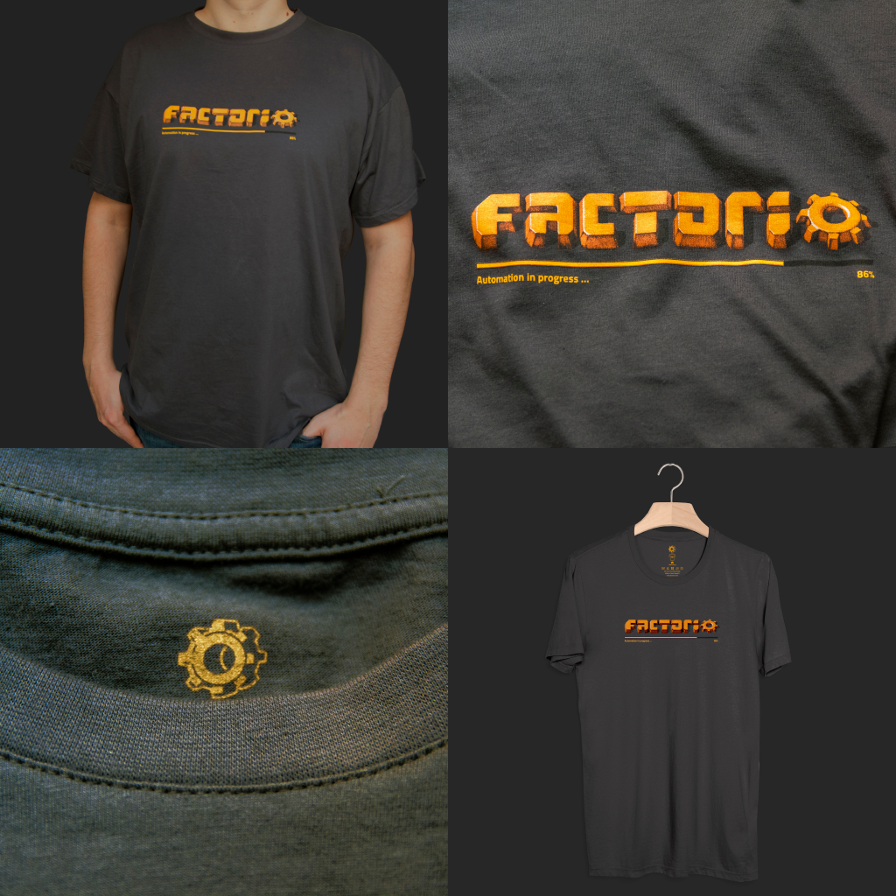
Official Factorio t-shirts
Its been a long time in the works, and we've been asked about it countless time, but the Factorio T-shirts are finally happening, and will be available next week.It has been tough to find a printer who can meet our requirements. After many different companies, tests and iterations (such as the batch for the party), we have an order booked for 2,000 T-shirts scheduled to arrive on Monday.
Once we check them and make sure everything is alright, we will open up to orders through our new Eshop on our website. The T-shirts are grey unisex, available in sizes XS to XXL, with the Factorio logo printed on the front. It was especially important to us that the silkscreen was of a high quality, and we are happy to say these are better than your typical print shop. The price is $20 USD per shirt plus shipping. There are some limitations on the countries we will be shipping to.
If everything goes according to the plan, we will send the first shipment on the 13th of December, and subsequent packages every Wednesday after. Packing the orders is all going to be handled by us, and since we are expecting a large initial demand, we hope that you will be understanding if we don't mange to get them to you before Christmas.
For now we will be limiting orders to a maximum of 3 per person, so we can make sure they end up in the hands of fans, and won't all be scooped up by some scalper/reseller. We also reserve the right to cancel any suspicious/large orders to further this goal, and will be looking through the recipients to make sure nobody is taking more than their fair share.
We have the full terms of service on the store, so please check it out before you make any order. We won't really appreciate if we see anybody reselling the shirts, as we aren't really making any profit from this venture, we are just trying to do a good service to our fans. In any case, once we have a good gauge on the demand, we will be able to produce some more batches early next year, so we can keep the supply flowing.
Factorio 0.16 experimental
We had some discussions some weeks ago about when we should release 0.16. Because of the approaching winter holidays, we realized we have two choices, either to release before the winter holidays or some time in January.We decided that Factorio fans would really like to play during the holidays, so we plan to release 0.16.0 next week.
This date is quite tight, but this week's internal playtesting went well, with only a few bugs and desyncs. It does not include everything we wanted but a smaller and quicker release is probably better.
Please bear in mind that this is an opt-in experimental release of an early access game, there will be bugs, especially since the release is a bit premature. We will have just 1-2 weeks of bugfixing before most of us will go on holiday, so it might not be perfect, but we will make it as playable as possible. Plus some of us (like Rseding91) will be fixing bugs during the holidays.
The next few weeks will be a bit crazy for us, working overtime to fix bugs and pack t-shirts, so let us know how excited you are about the news at the forums.
Level designer needed
As an unrelated footnote to this weeks FFF, we are looking for an experienced level designer to help us develop the mini-tutorial and campaign levels. For more information, see the job description on our website.
Share: