Nov 11, 2024
Hearts of Iron IV - PDX Chakerathe
Hello everyone, it's again the time to give you a glimpse into the fun stuff we've been doing from the tech side. You know, in addition to implementing the new features. This time around, I (PDXen) got the honour to write the Dev Diary.
I'm gonna start off with some outdated news from the past: Did you know that we did a performance pass on Trial of Allegiance? I honestly hope that you didn't. Being a country pack, we never intended to improve the performance but we did make improvements to counter the influx of data that happens when we add more content.
But I know you don't want to listen to ramblings about the past. So let's get started on what we've done this time. While we've taken time to look at the performance and improve parts of it, we've also added some new generic features that we hope our modders will like.
So whenever our performance tracking indicated a slowdown for the first time I took a look at what we could optimize and became a bit disheartened. The French Paradox did a very good job at parallelising much of our code for AAT. There were not many easy options for parallelisation left but we managed to identify a few places. Even on our machines with quite a lot of cores, this wasn’t enough so we took a step back and looked at optimizing the sequential parts of the code. I hope this is quite good news for all of us that run on hardware with fewer cores.
The hunt for optimization opportunities led to looking at old systems that now had more data and the uncharted lands of legacy code. I’m just gonna give you a few tidbits of old systems that we found interesting assumptions about the data in or simply interesting ways of solving it.
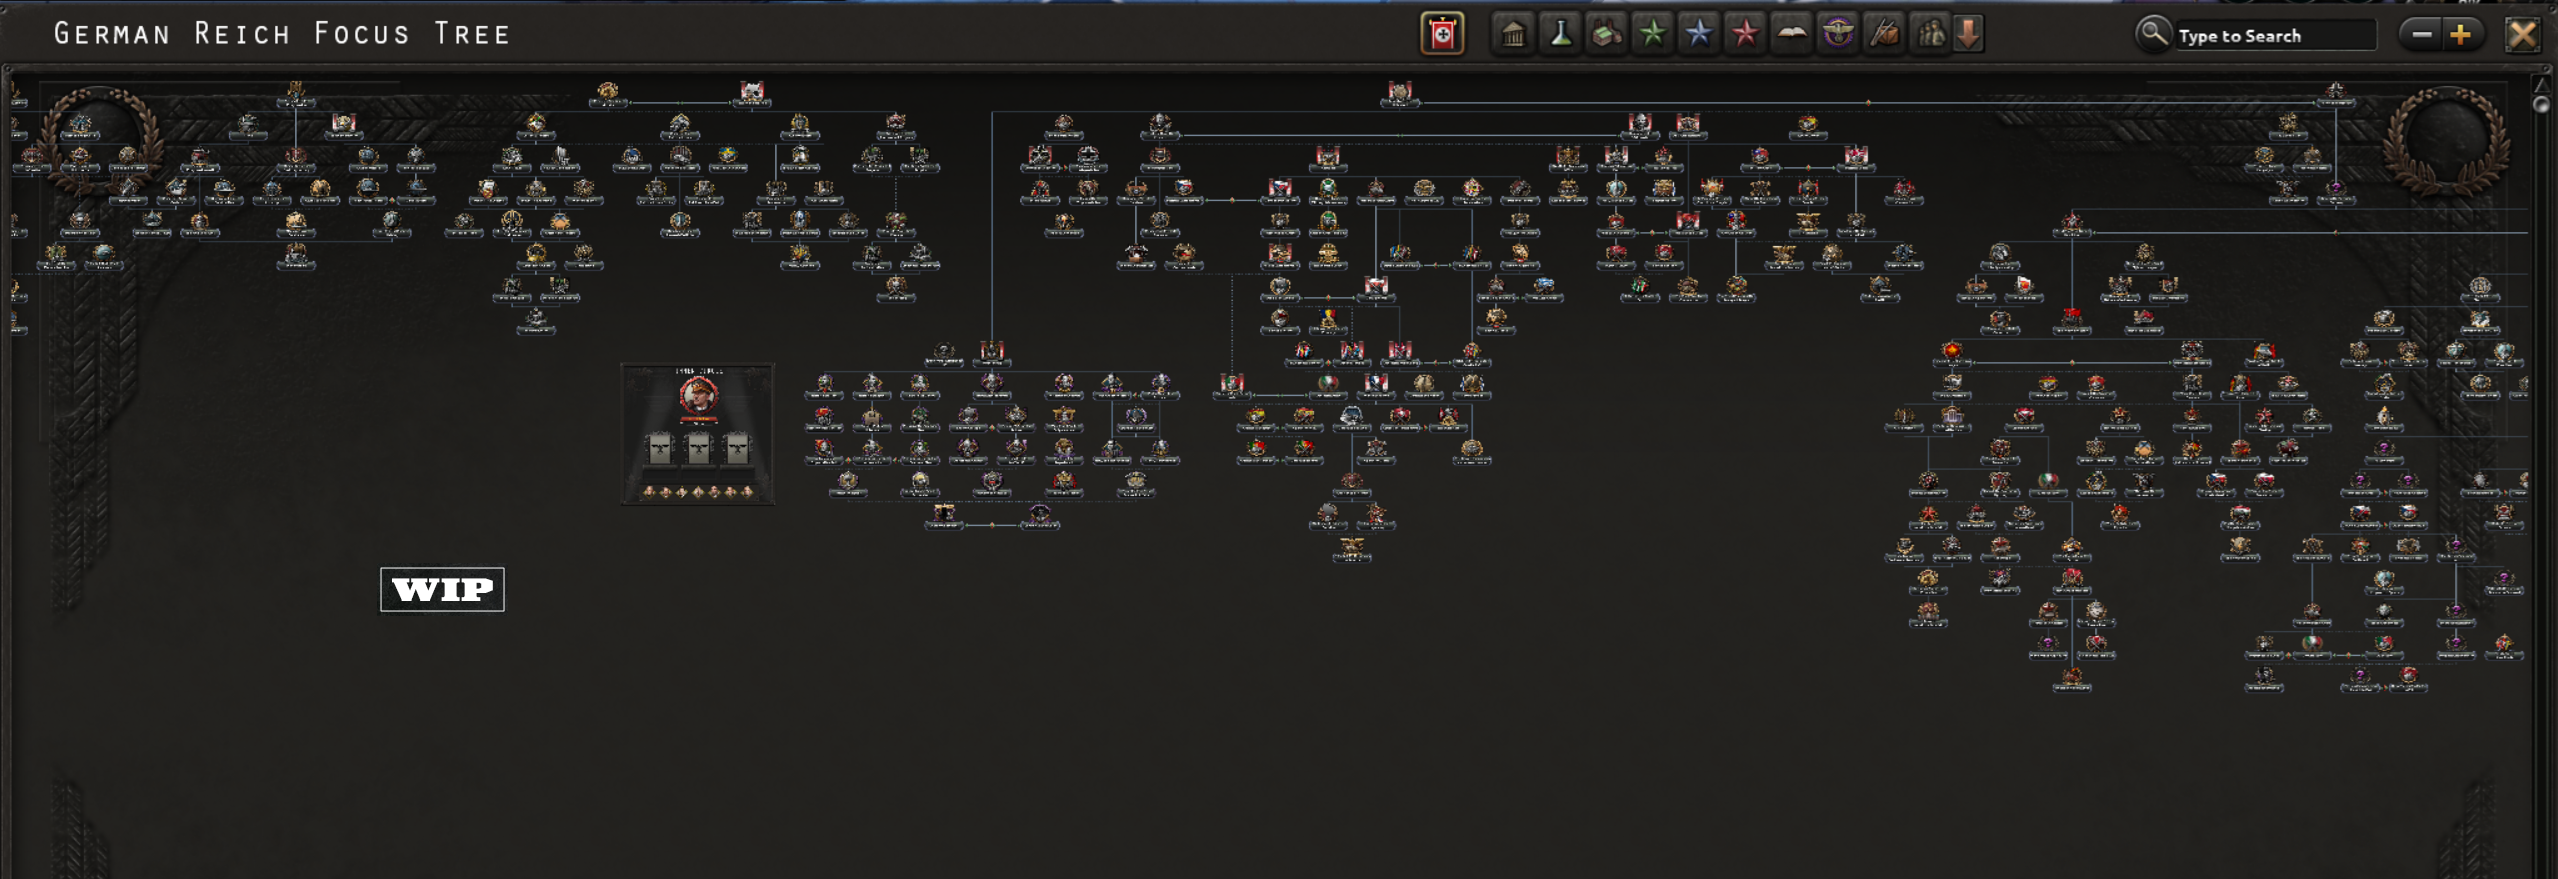
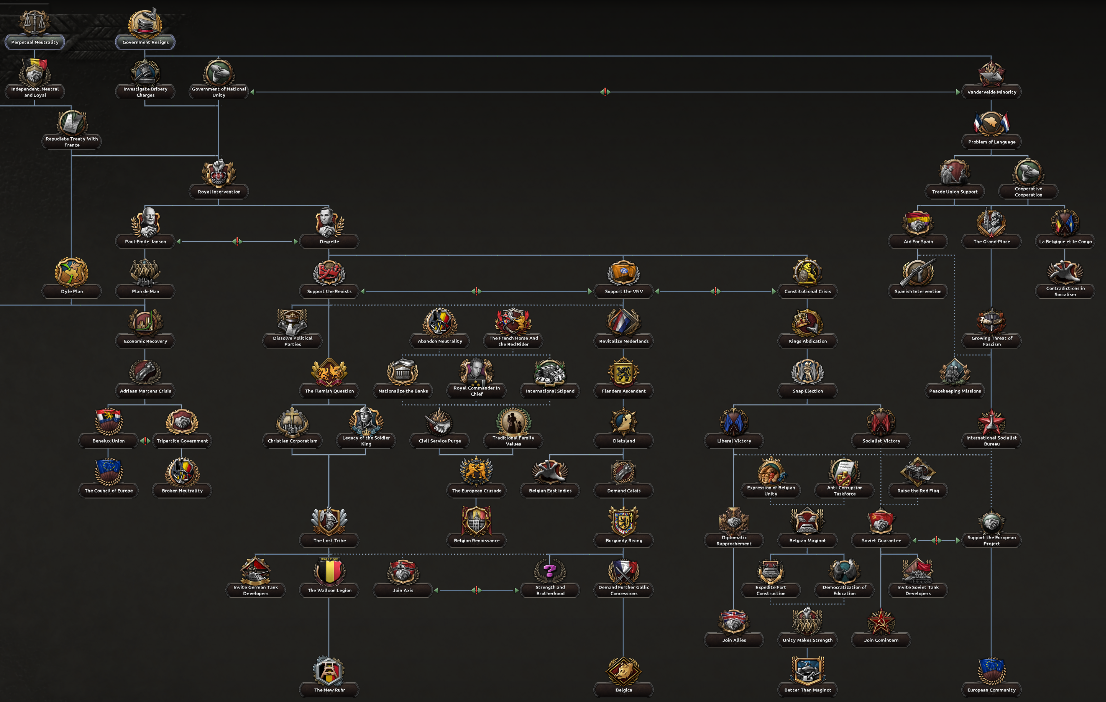
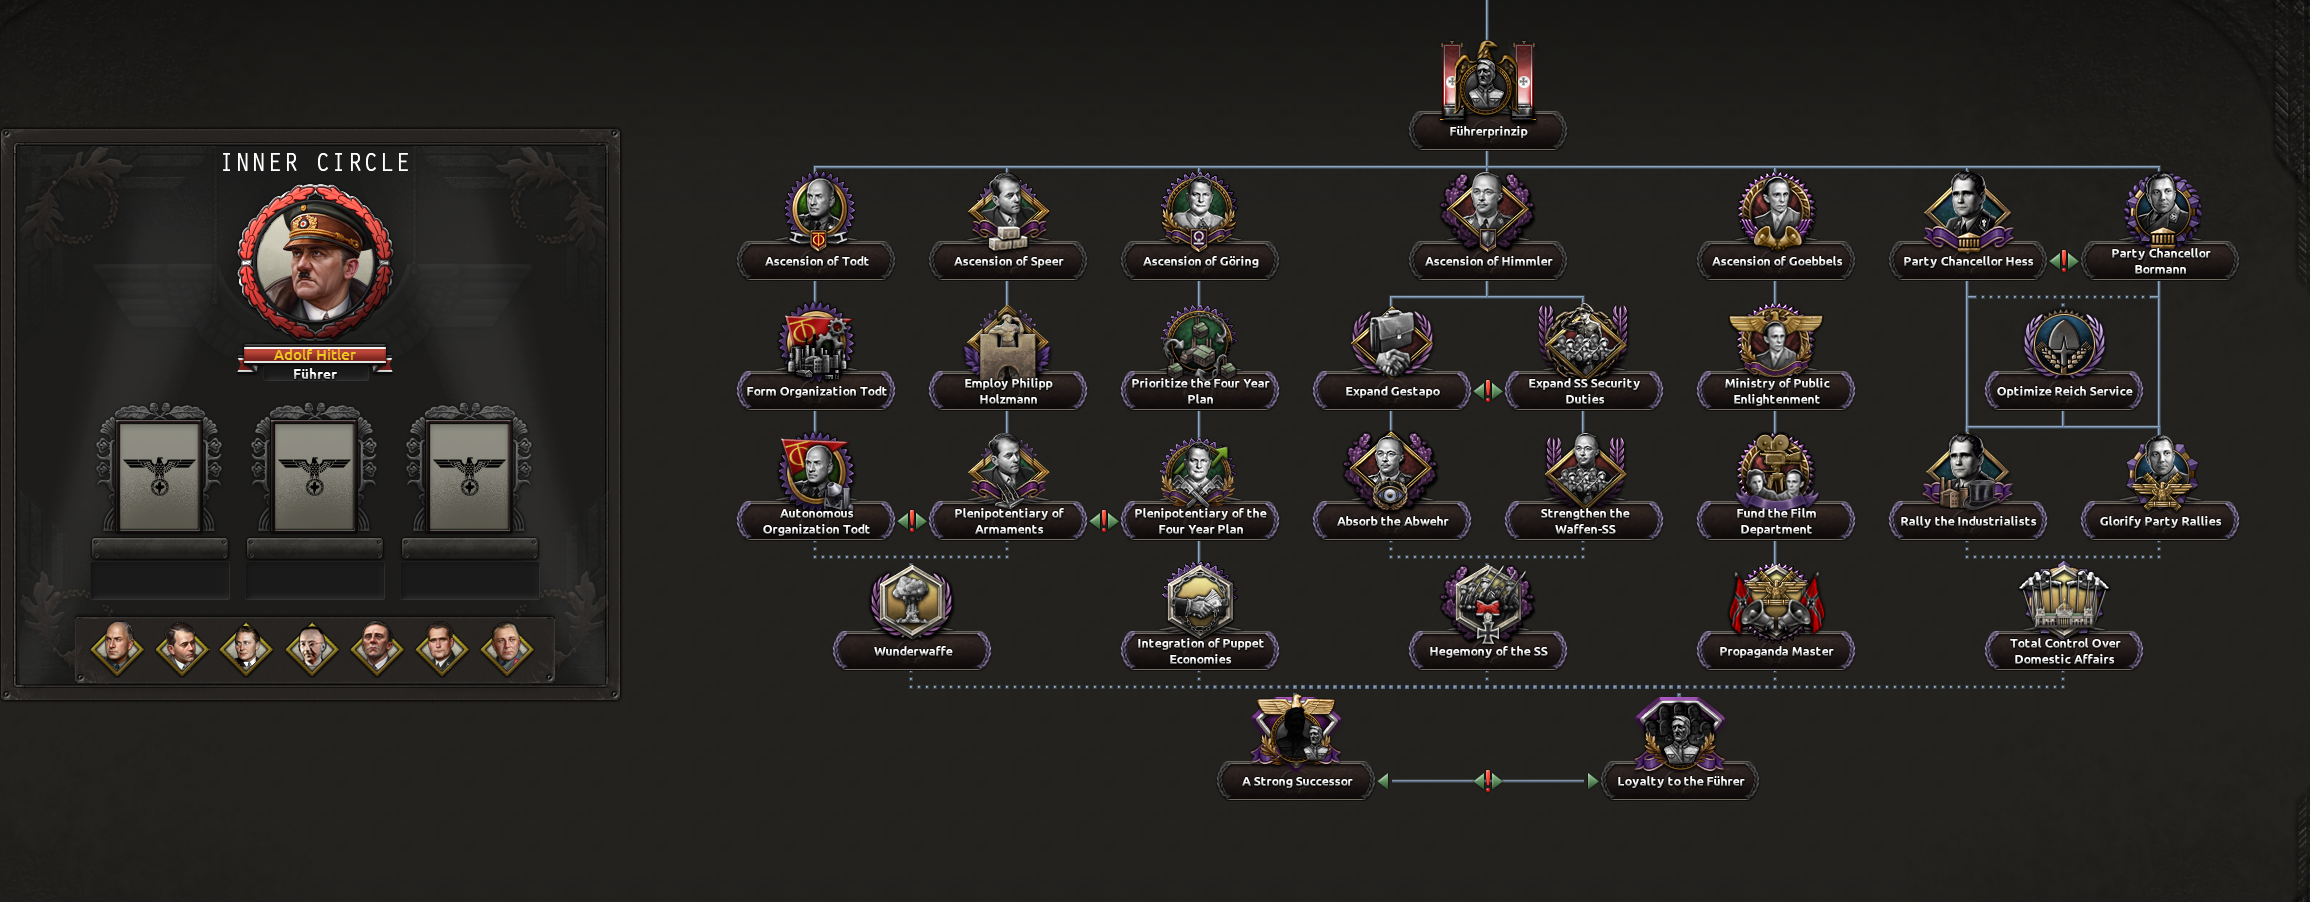
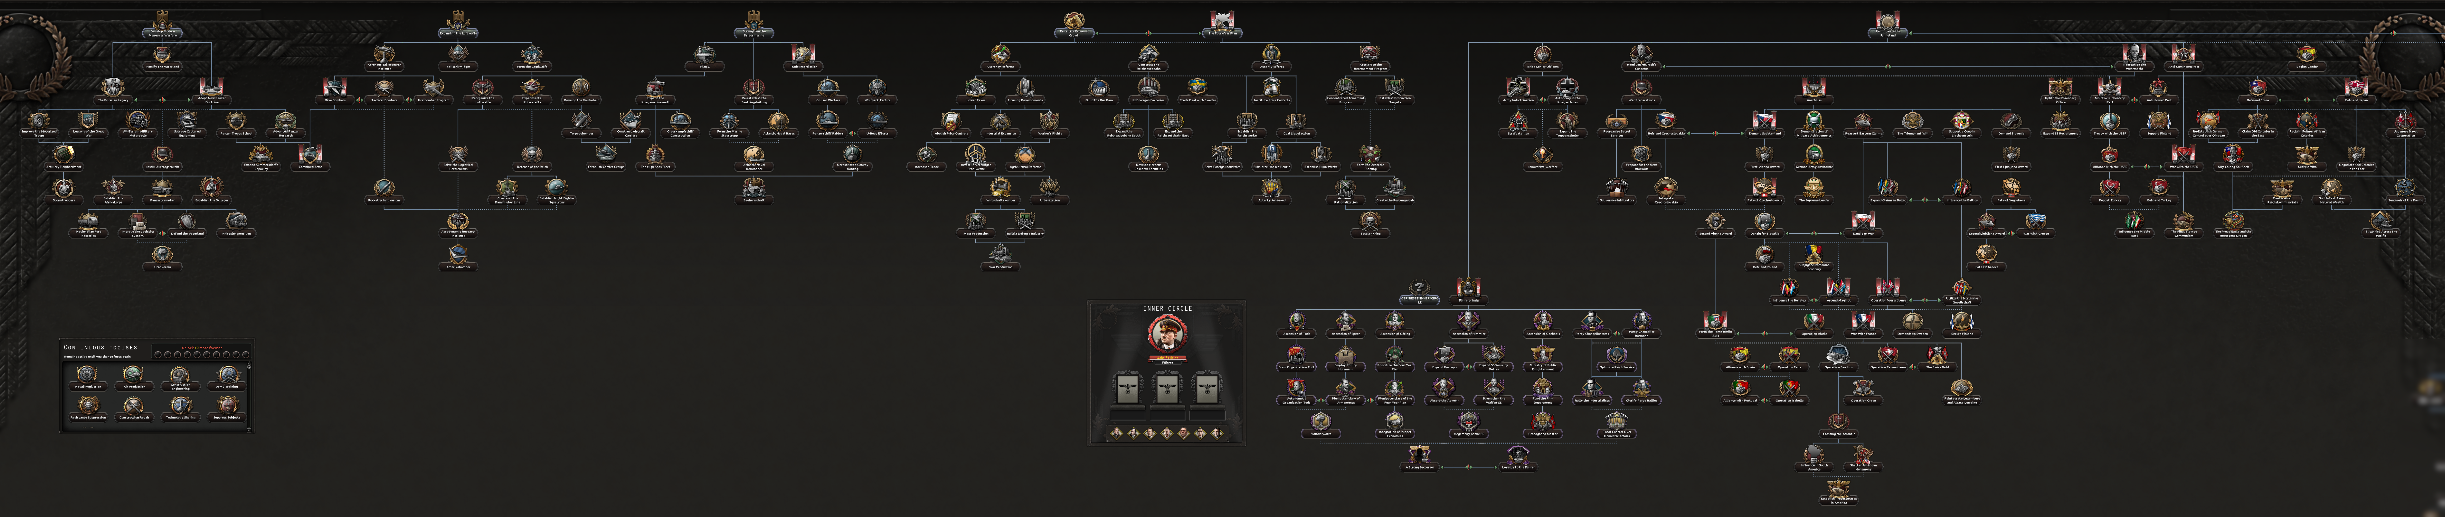
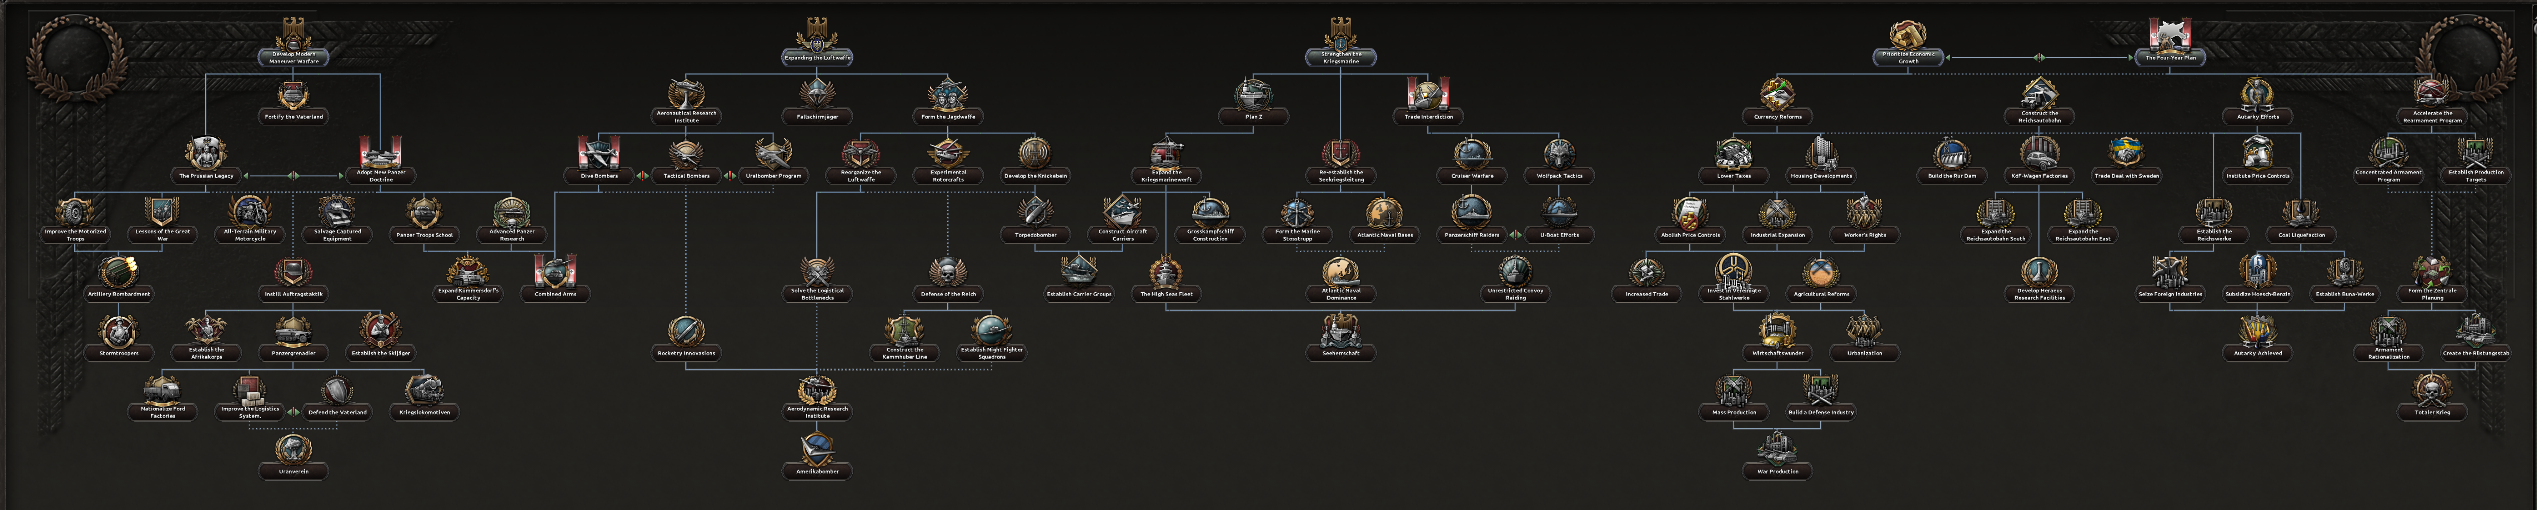
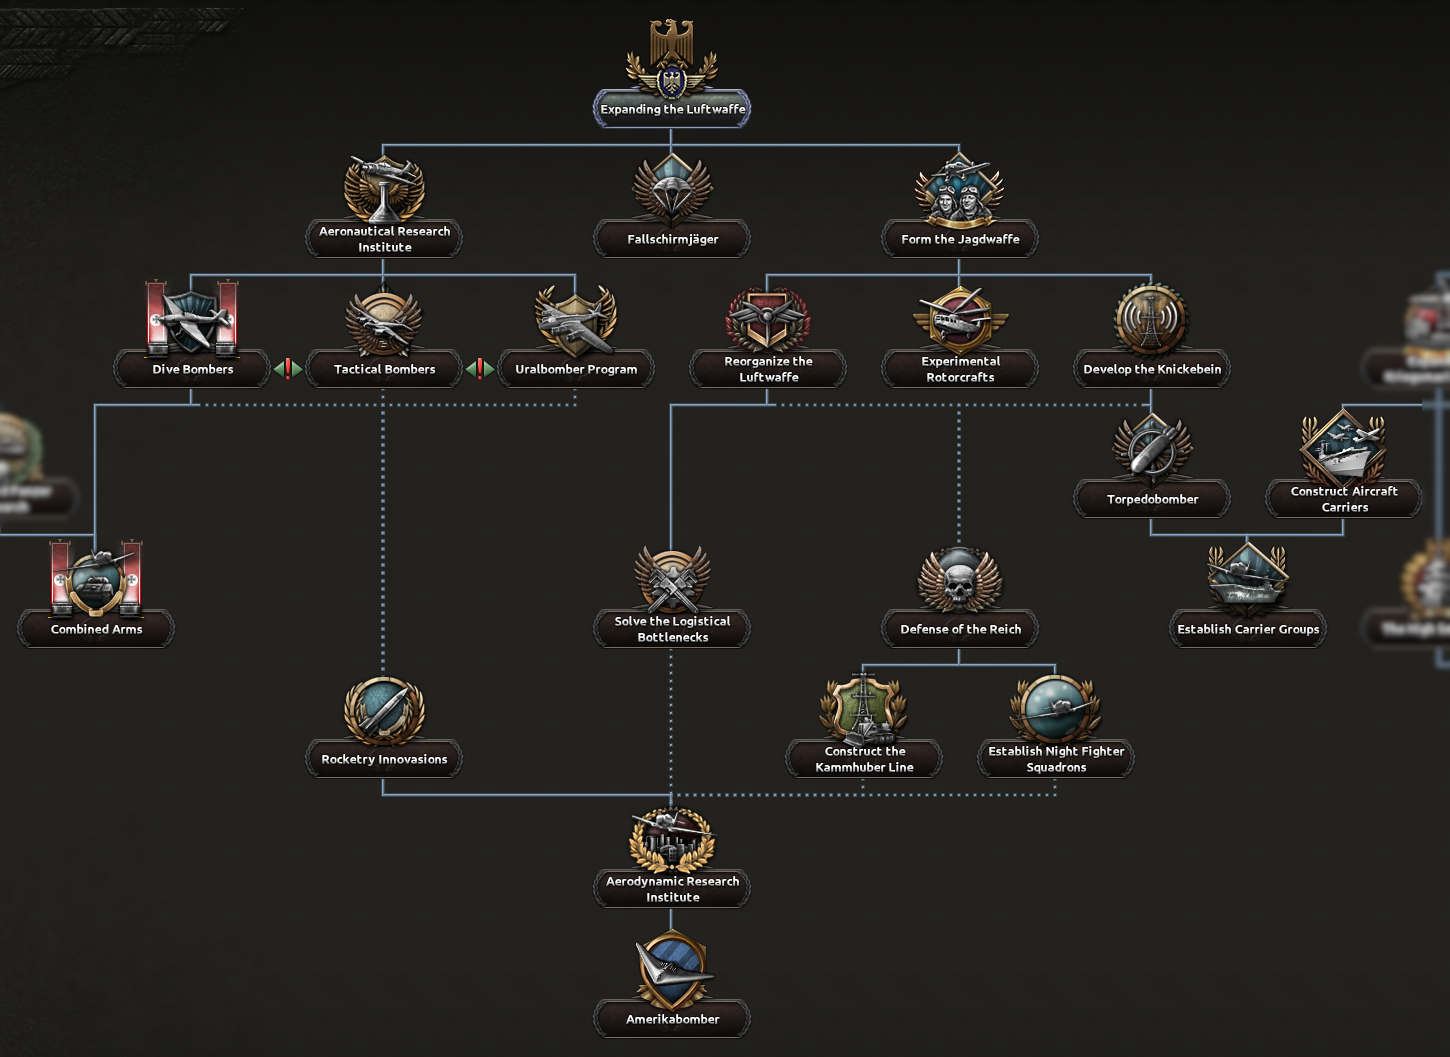
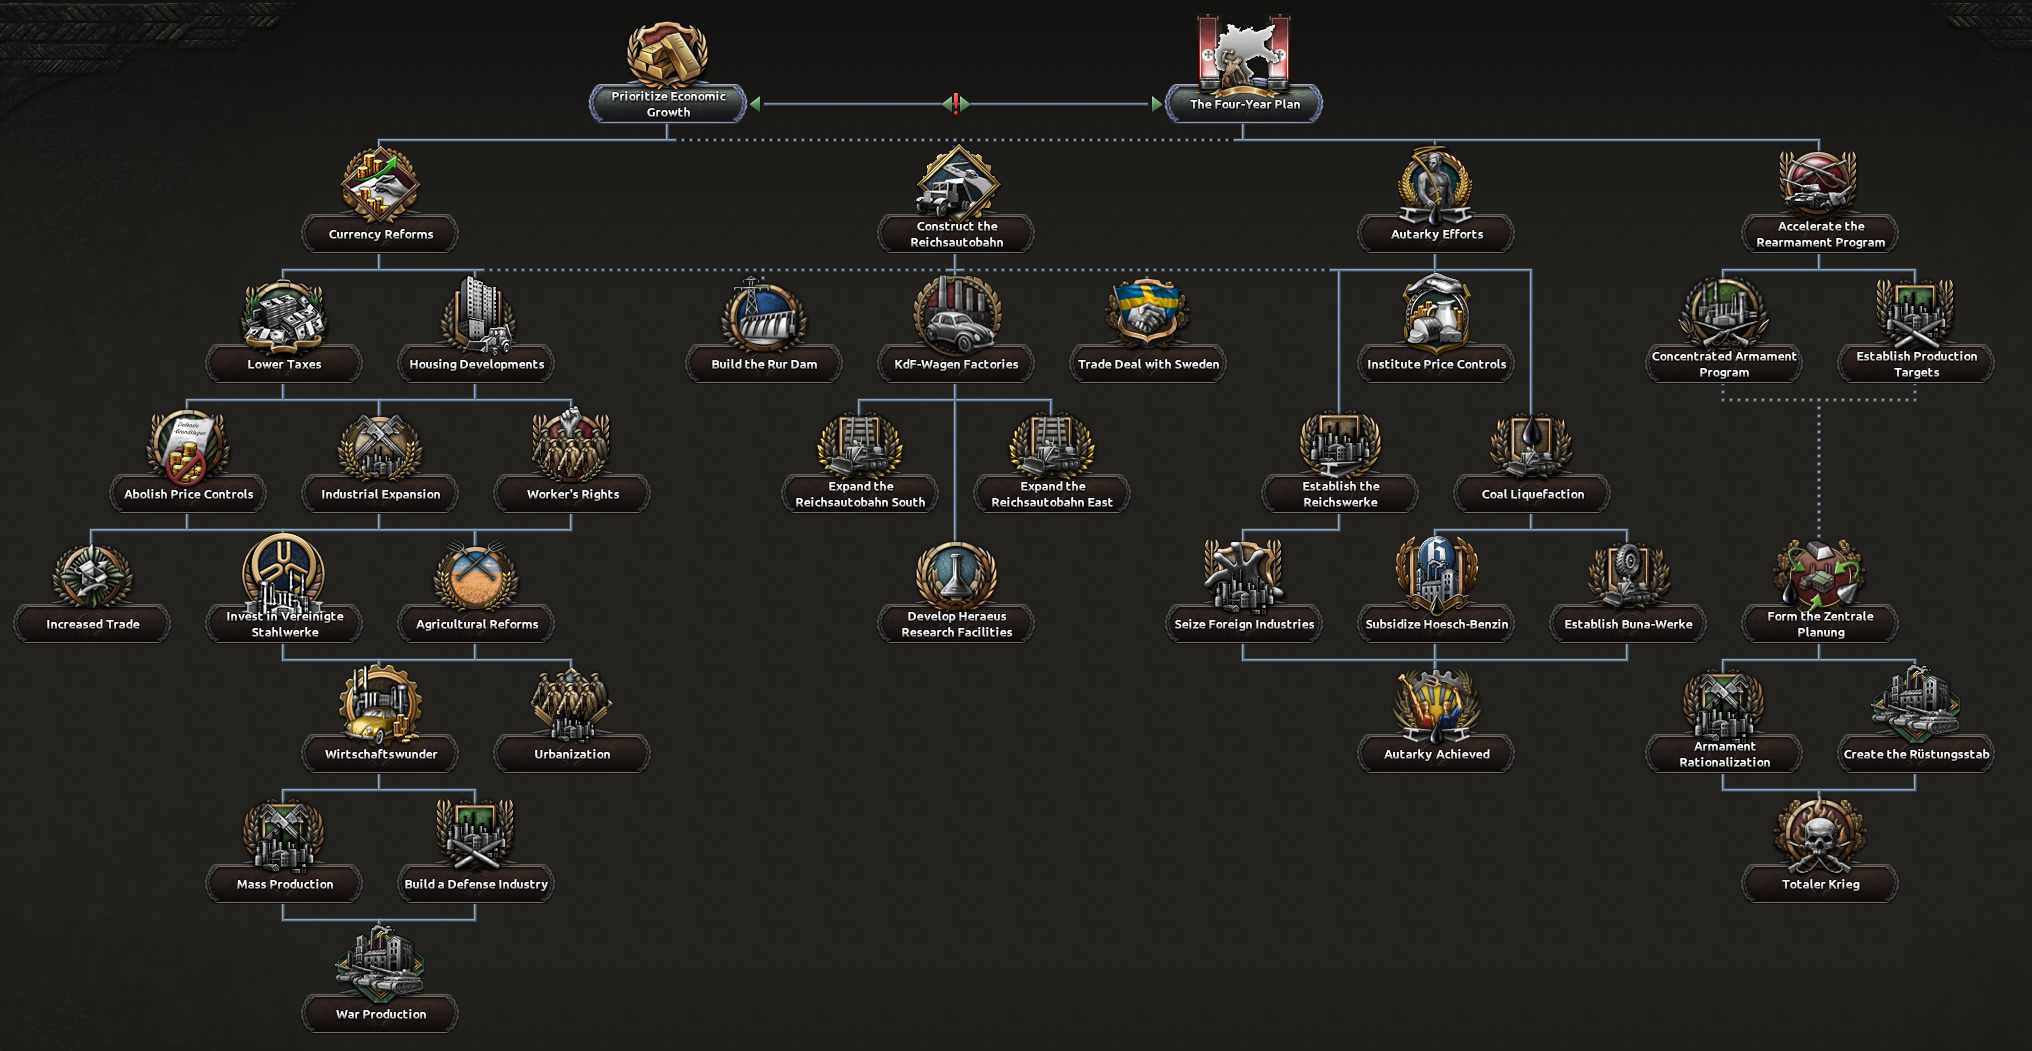
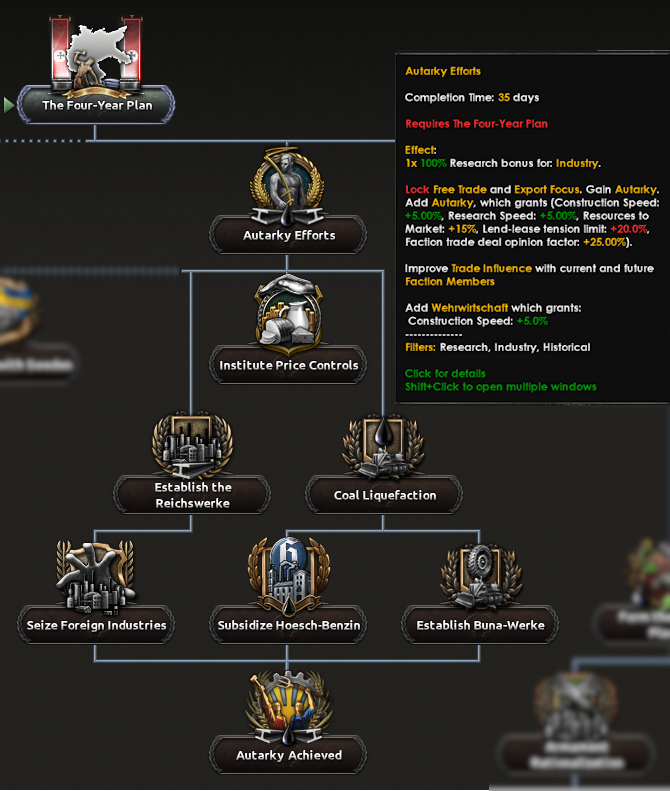
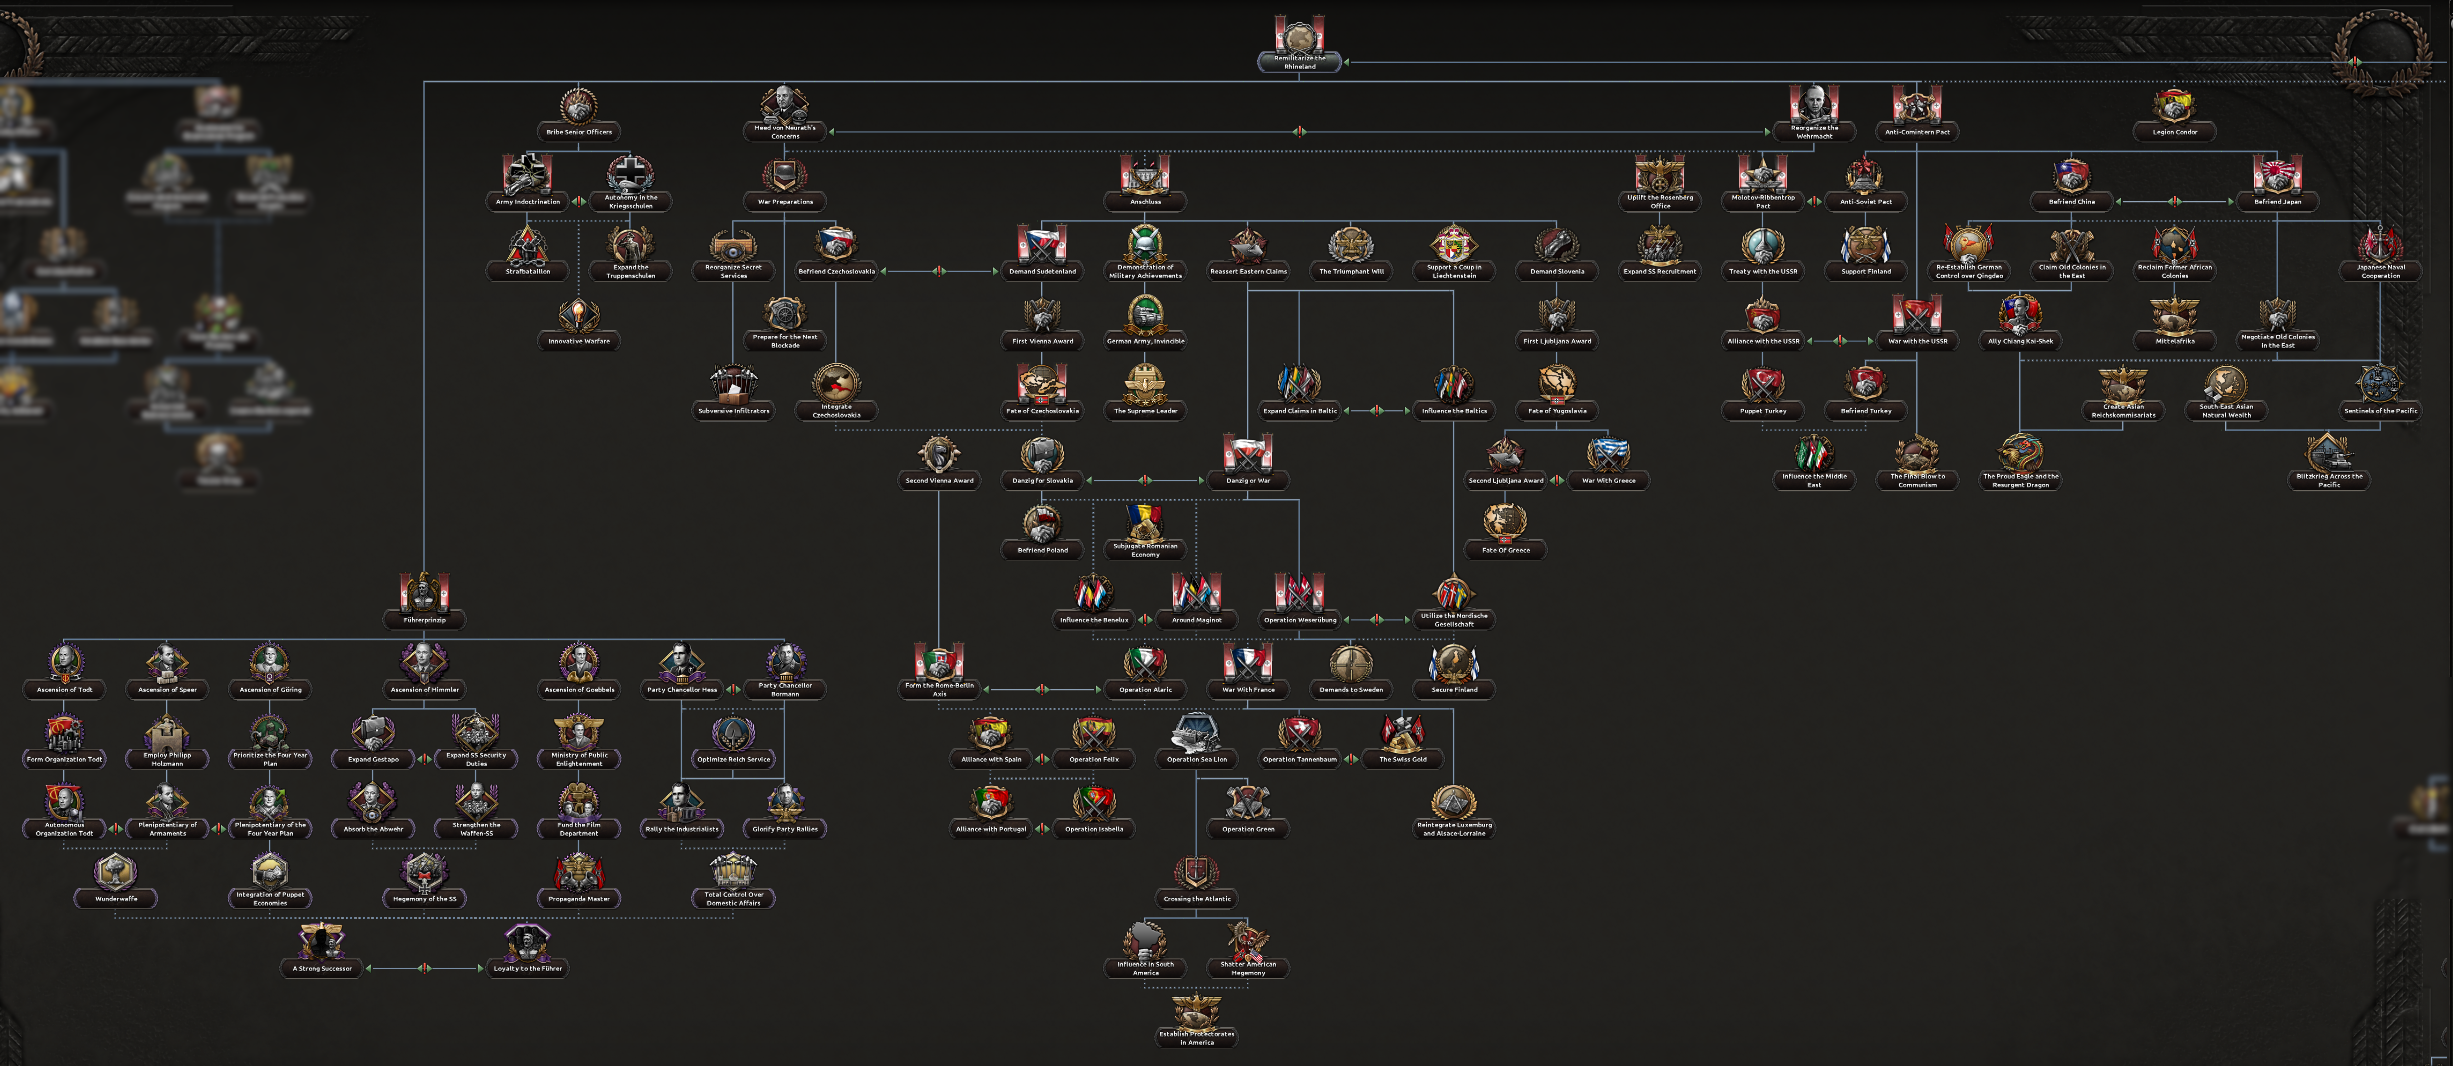
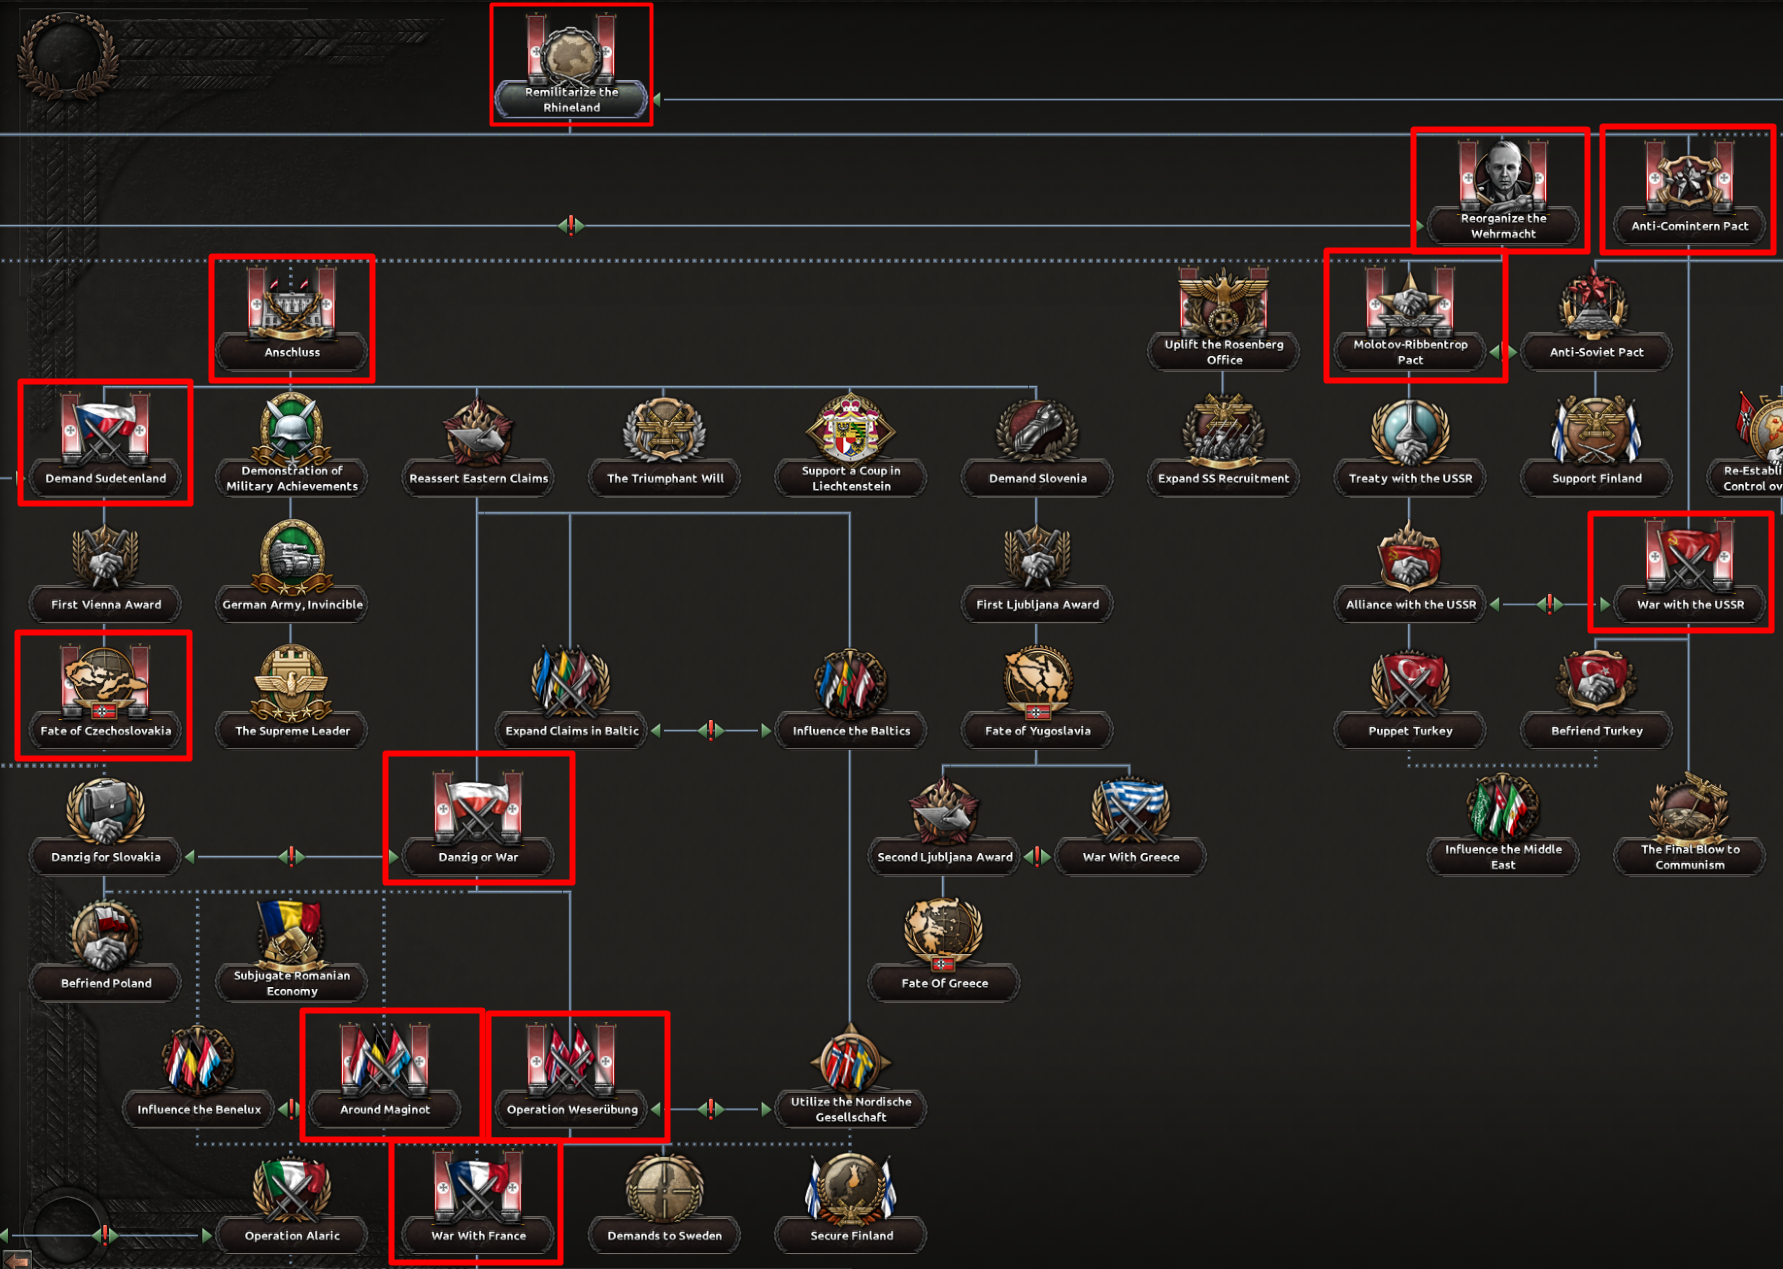
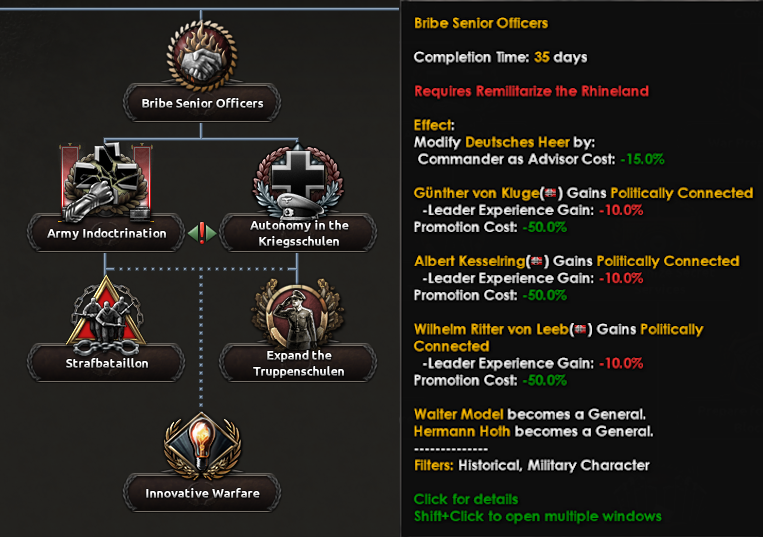
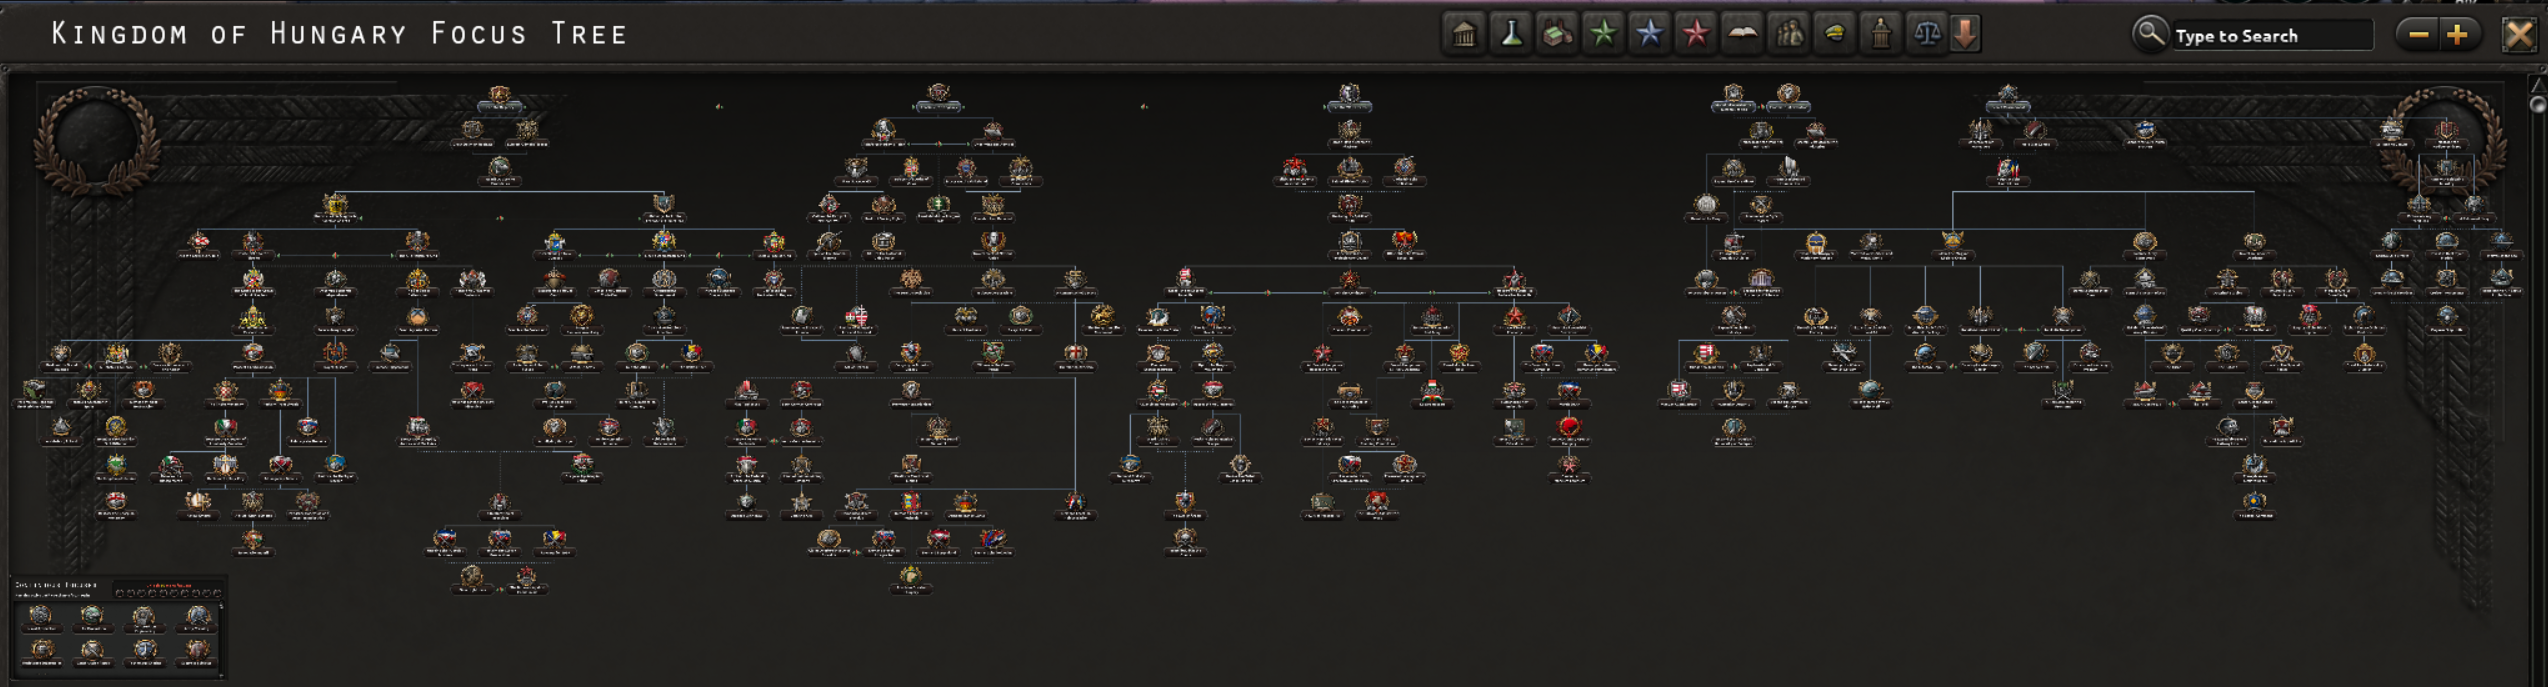
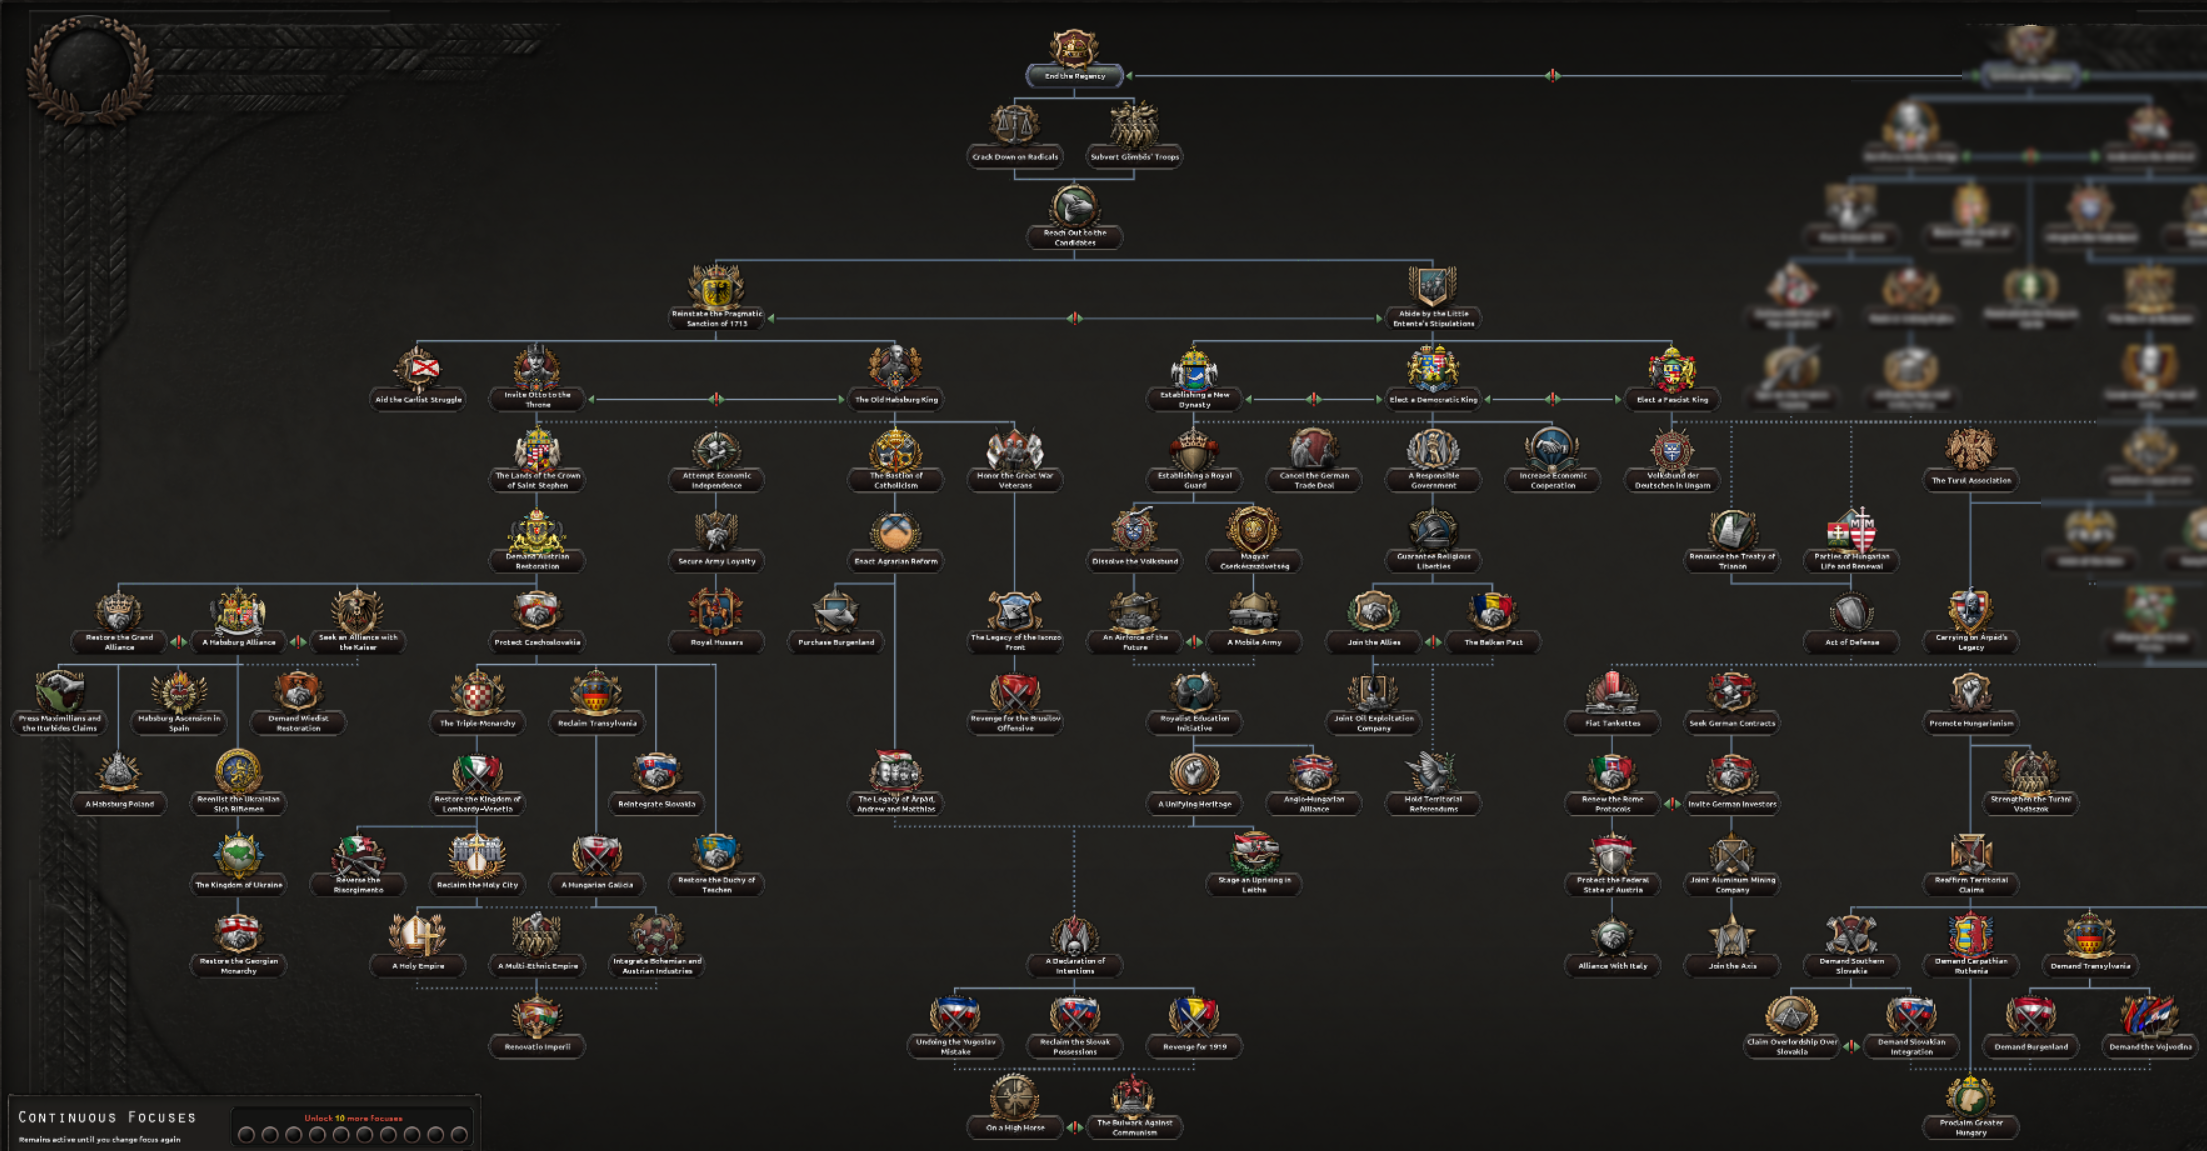
The new German focus tree with 350-400 focuses, which I couldn’t even fit into a 2k screen.
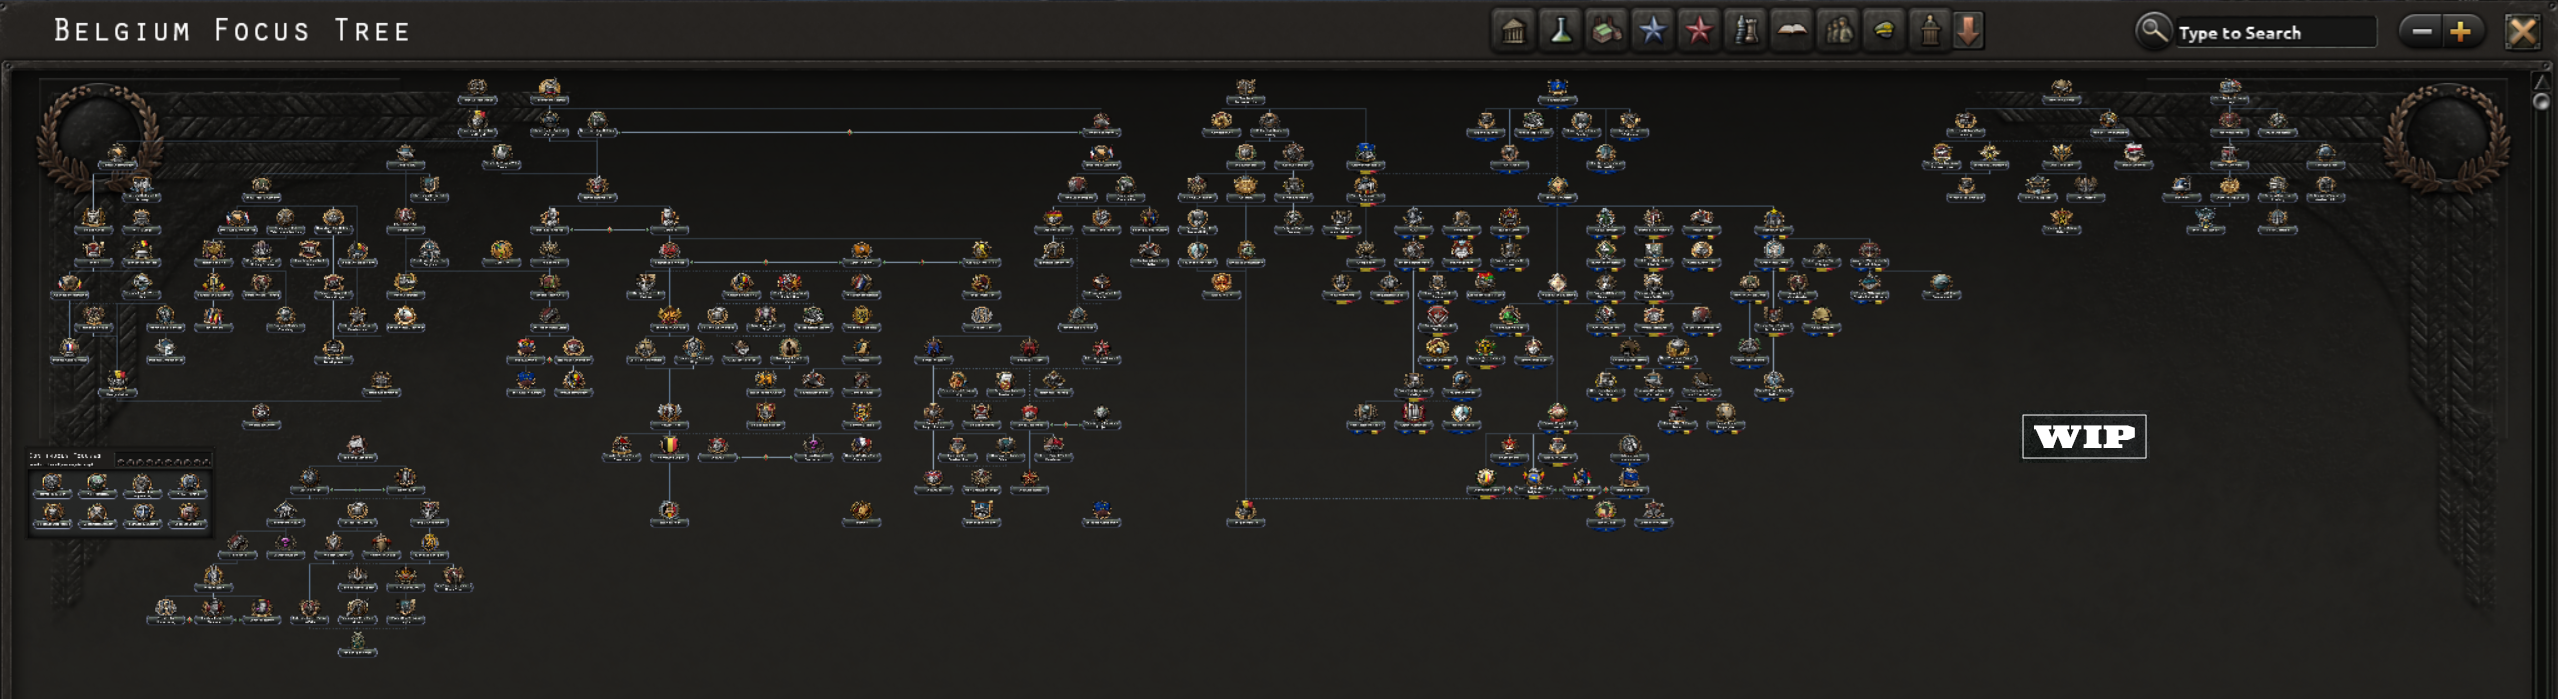
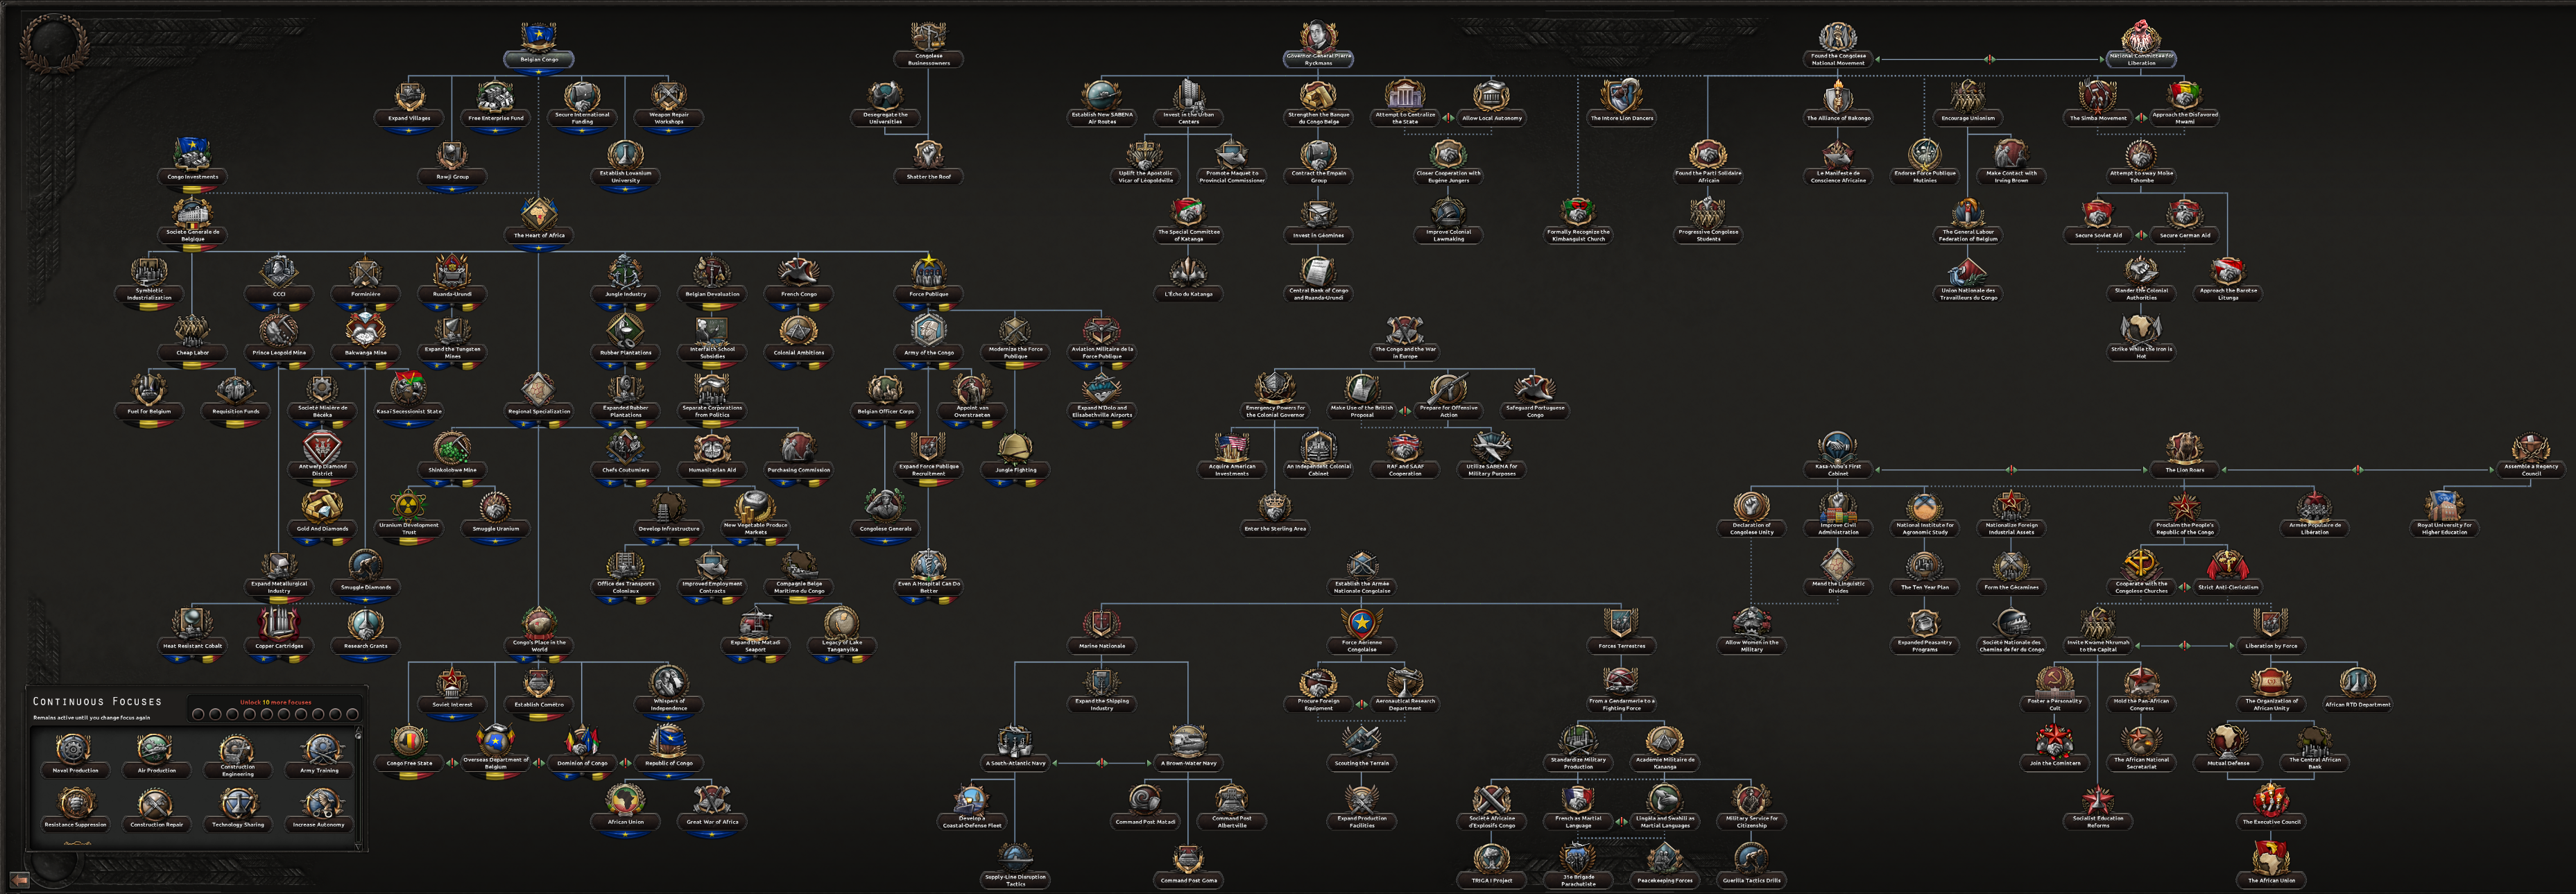
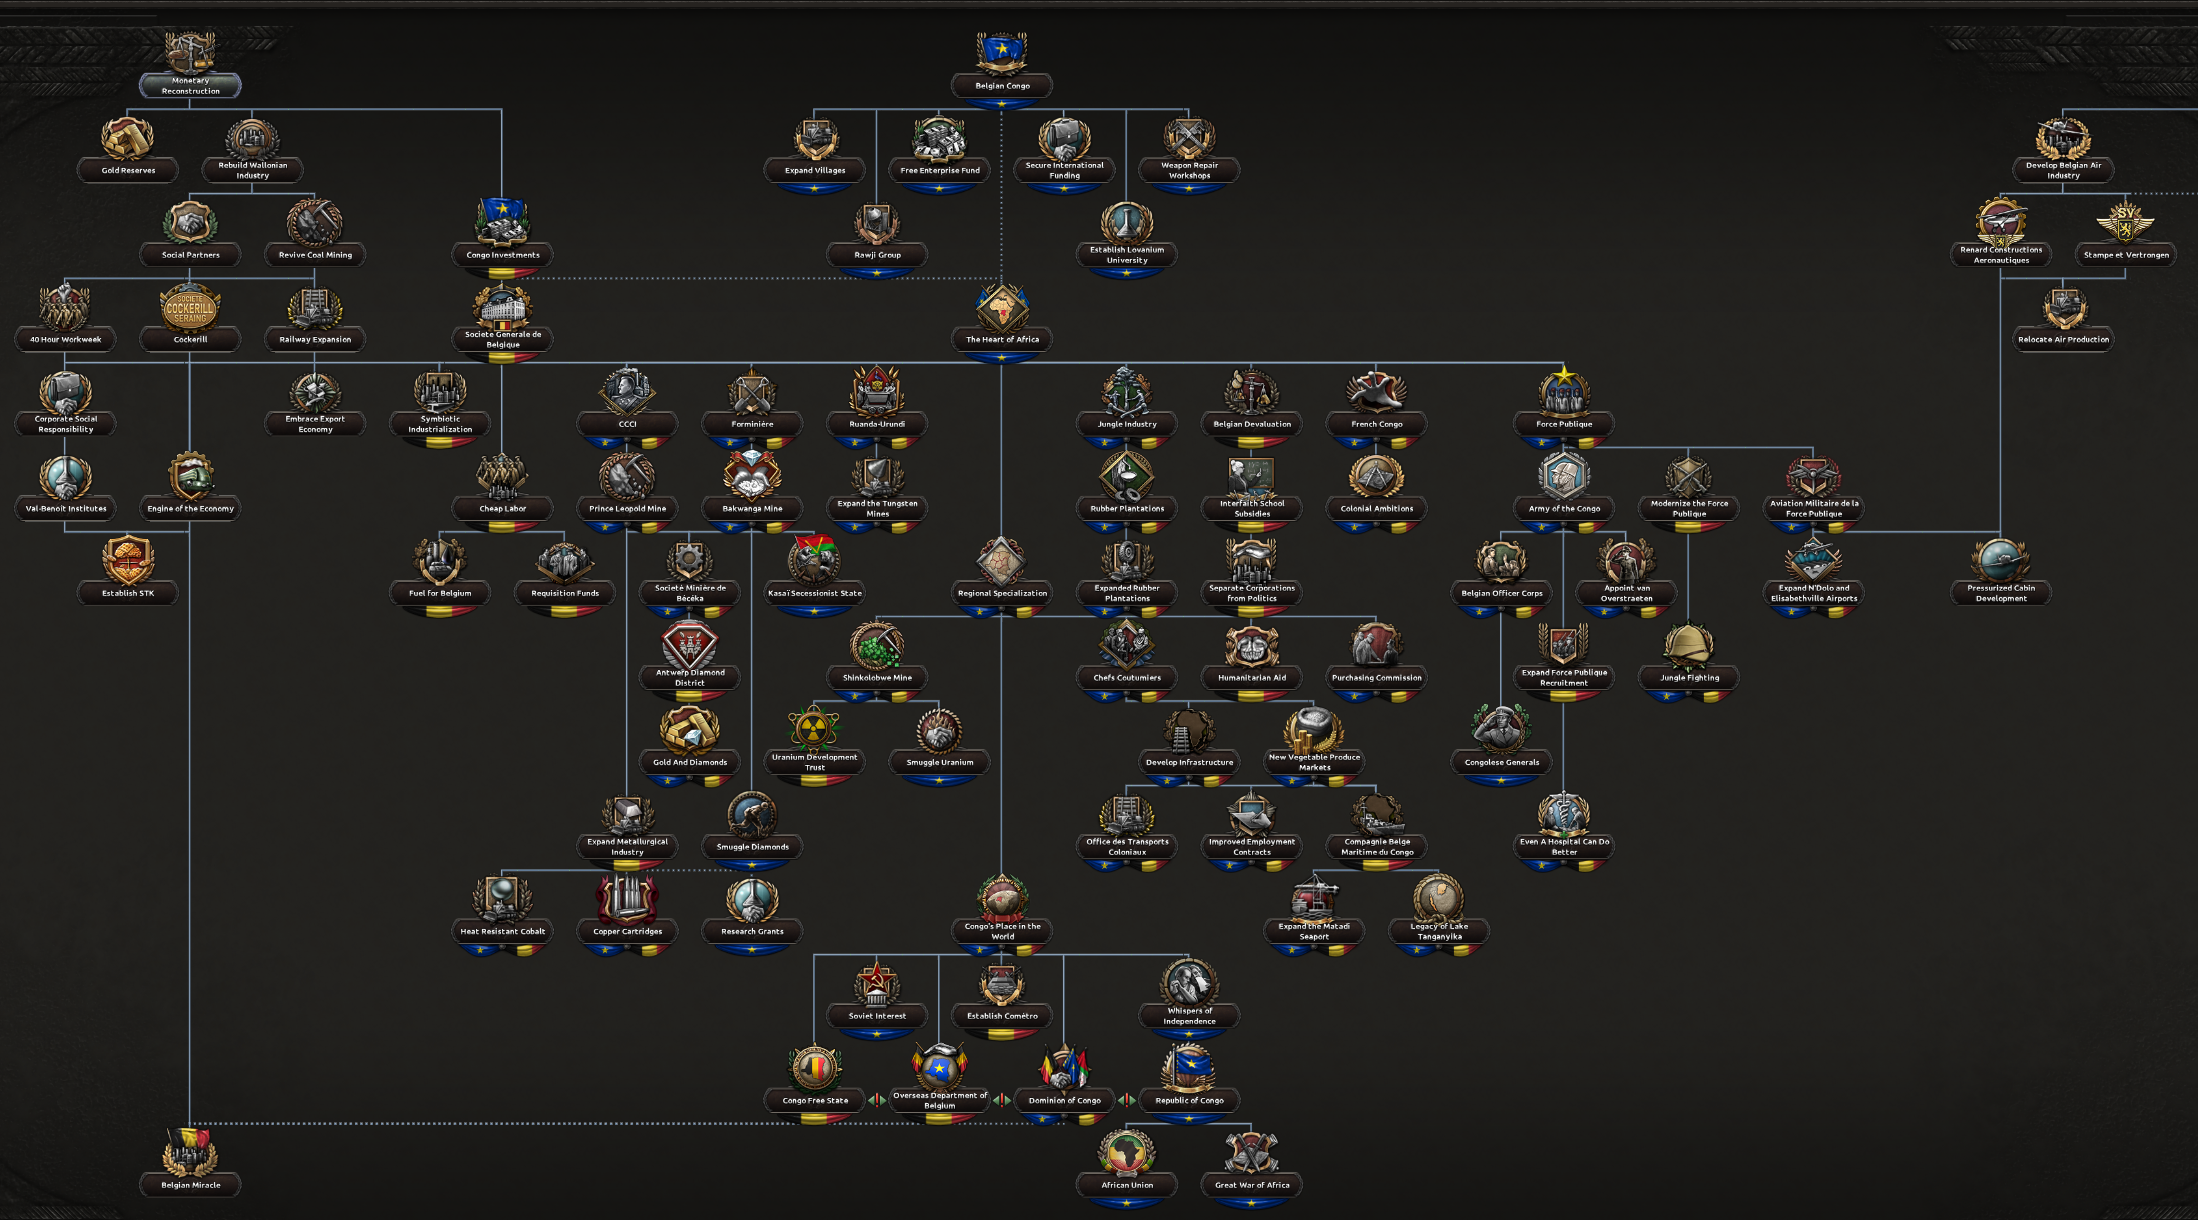
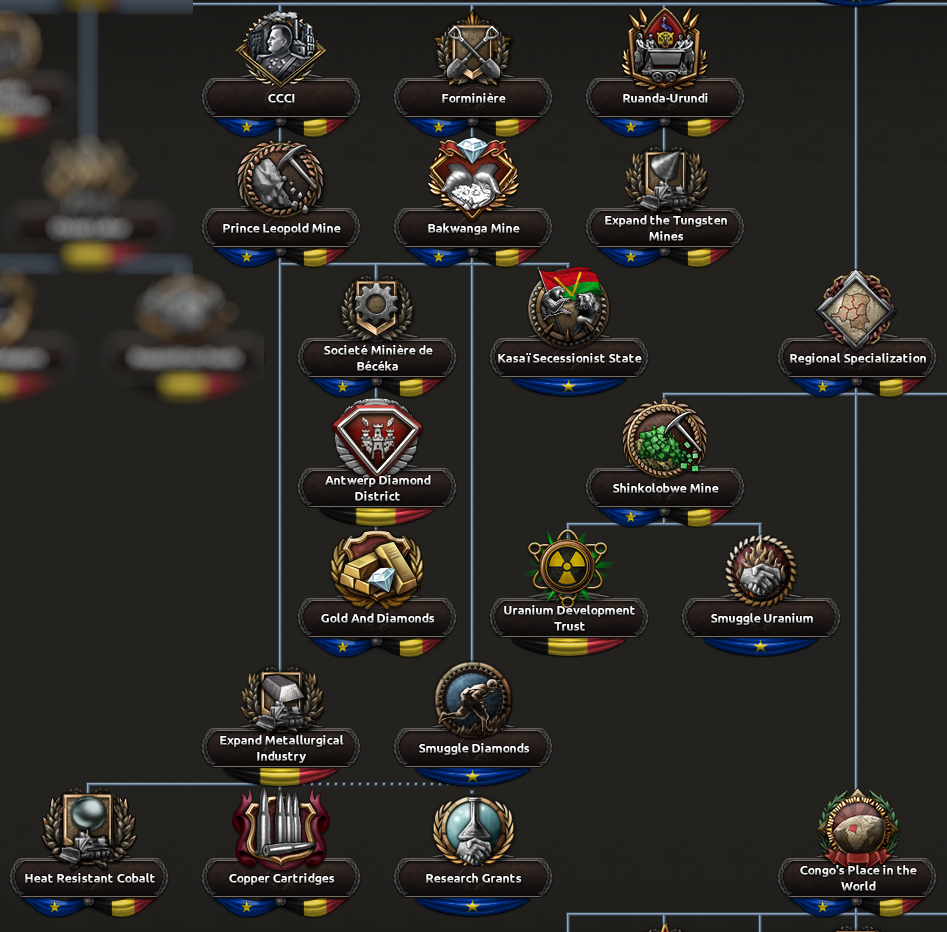
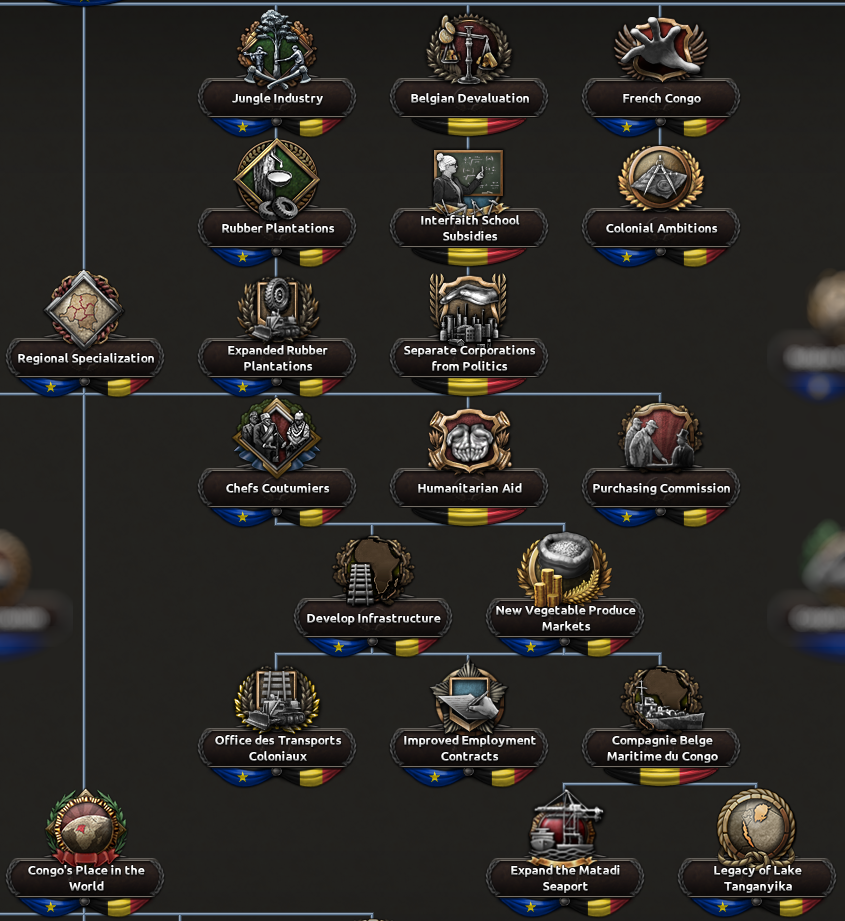
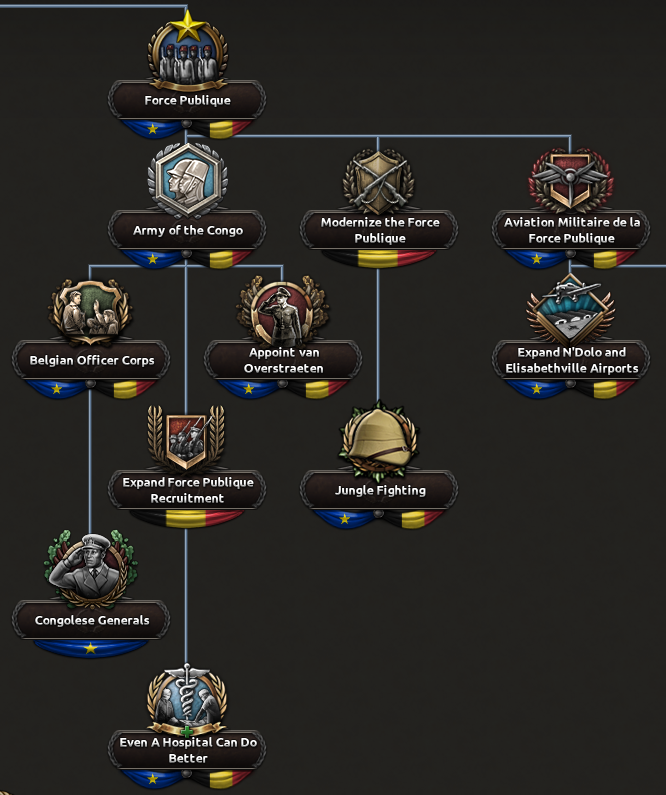
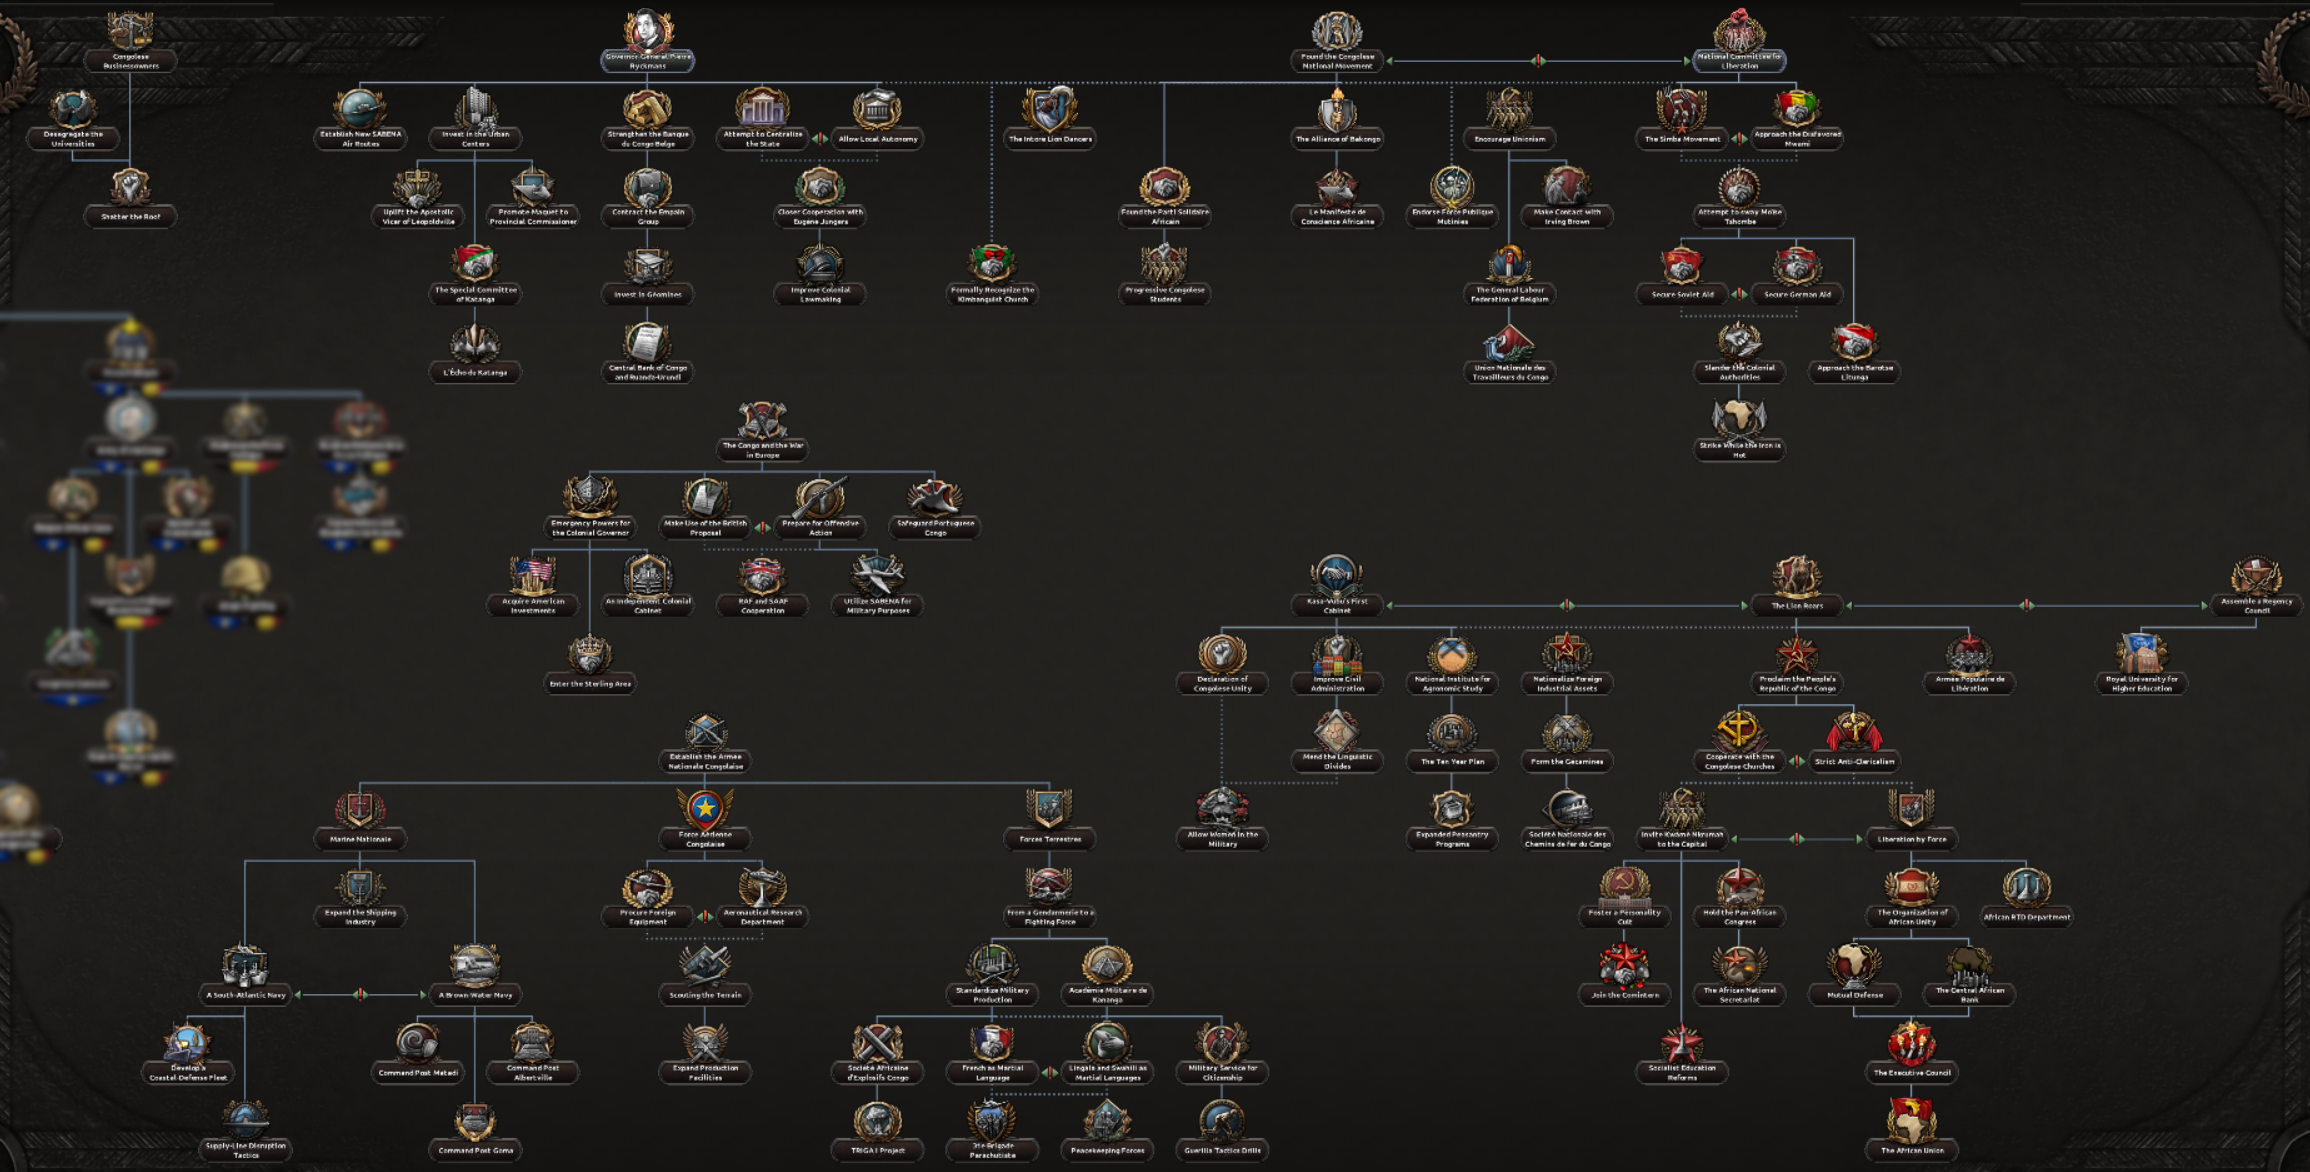
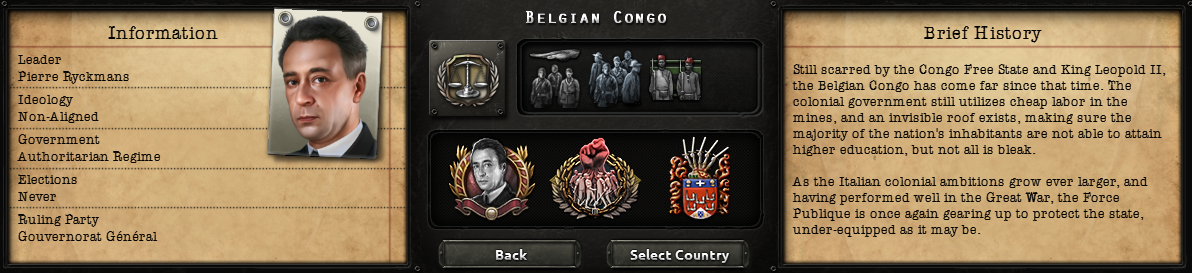
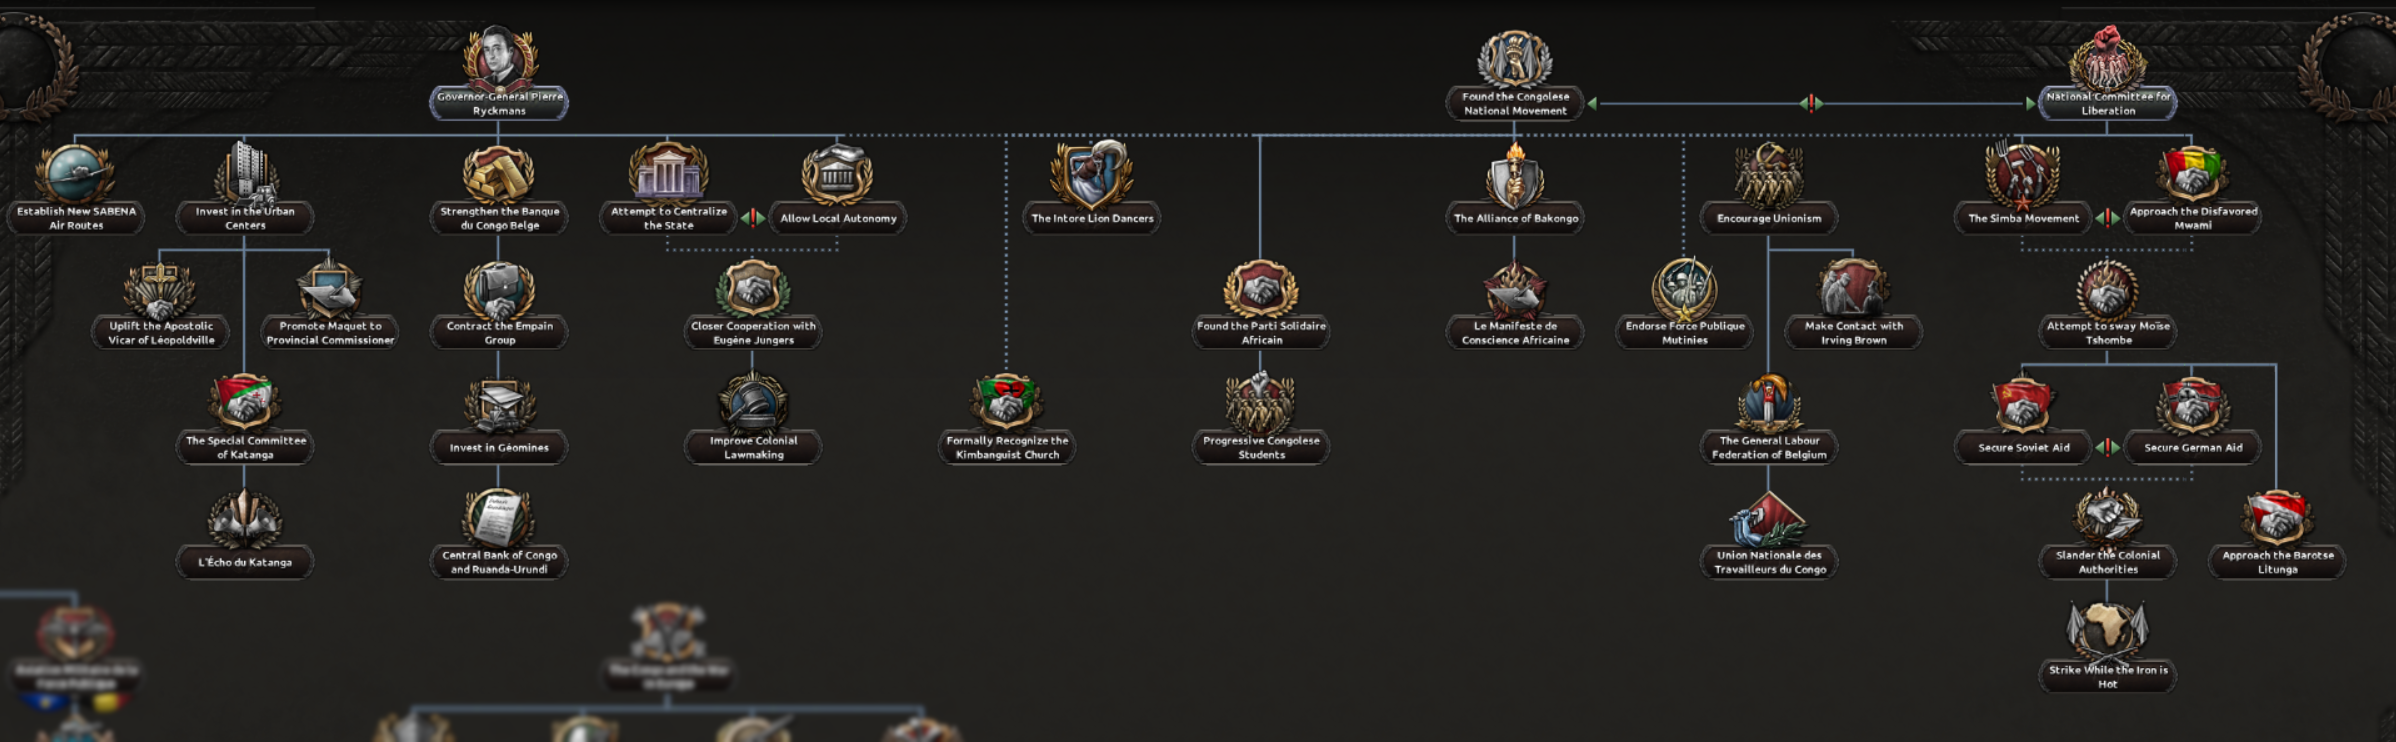
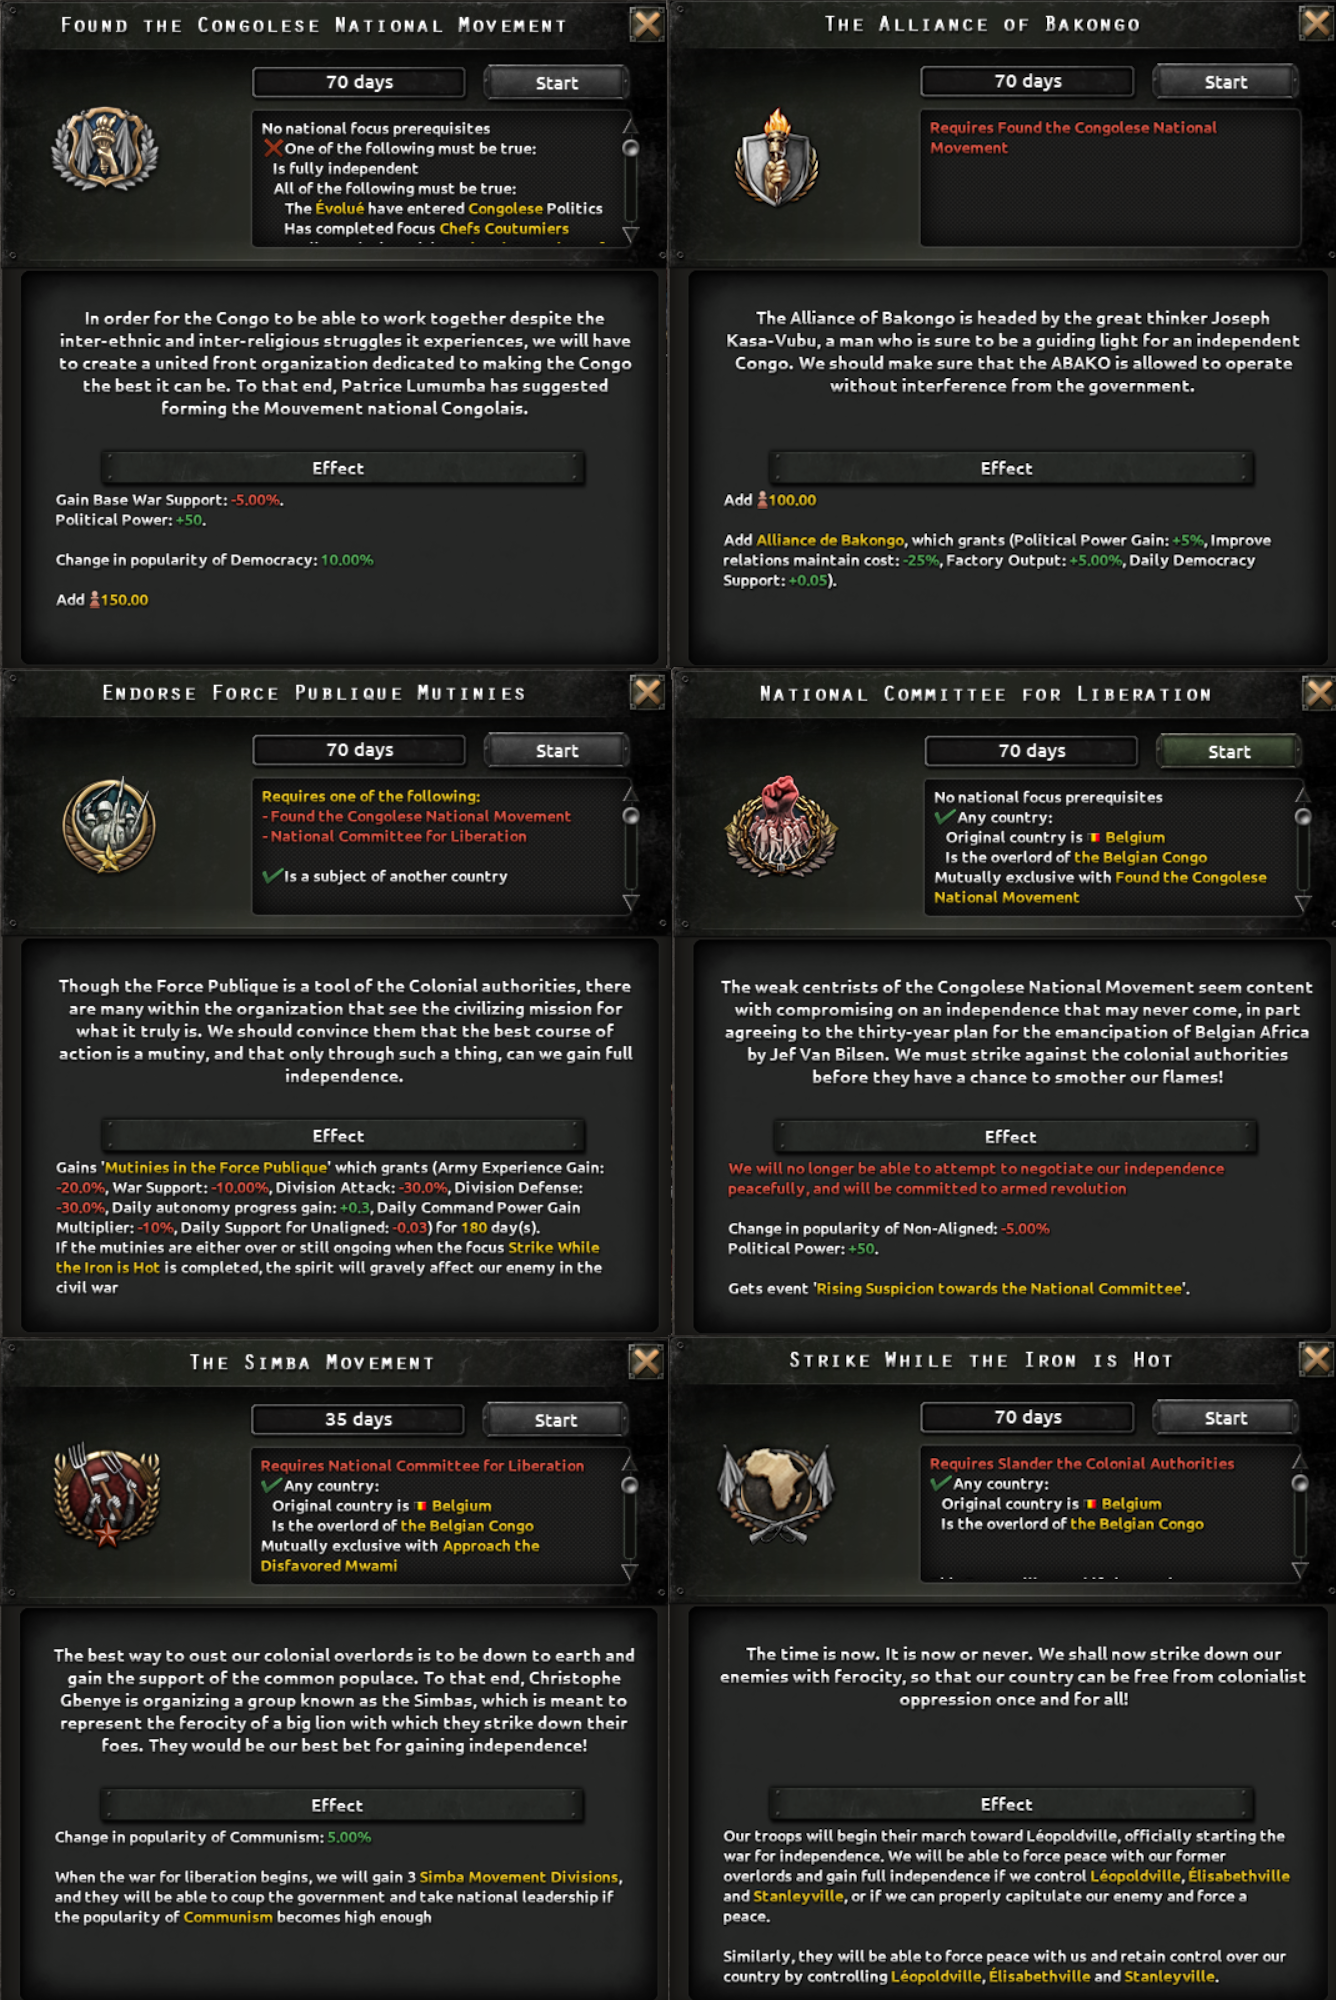
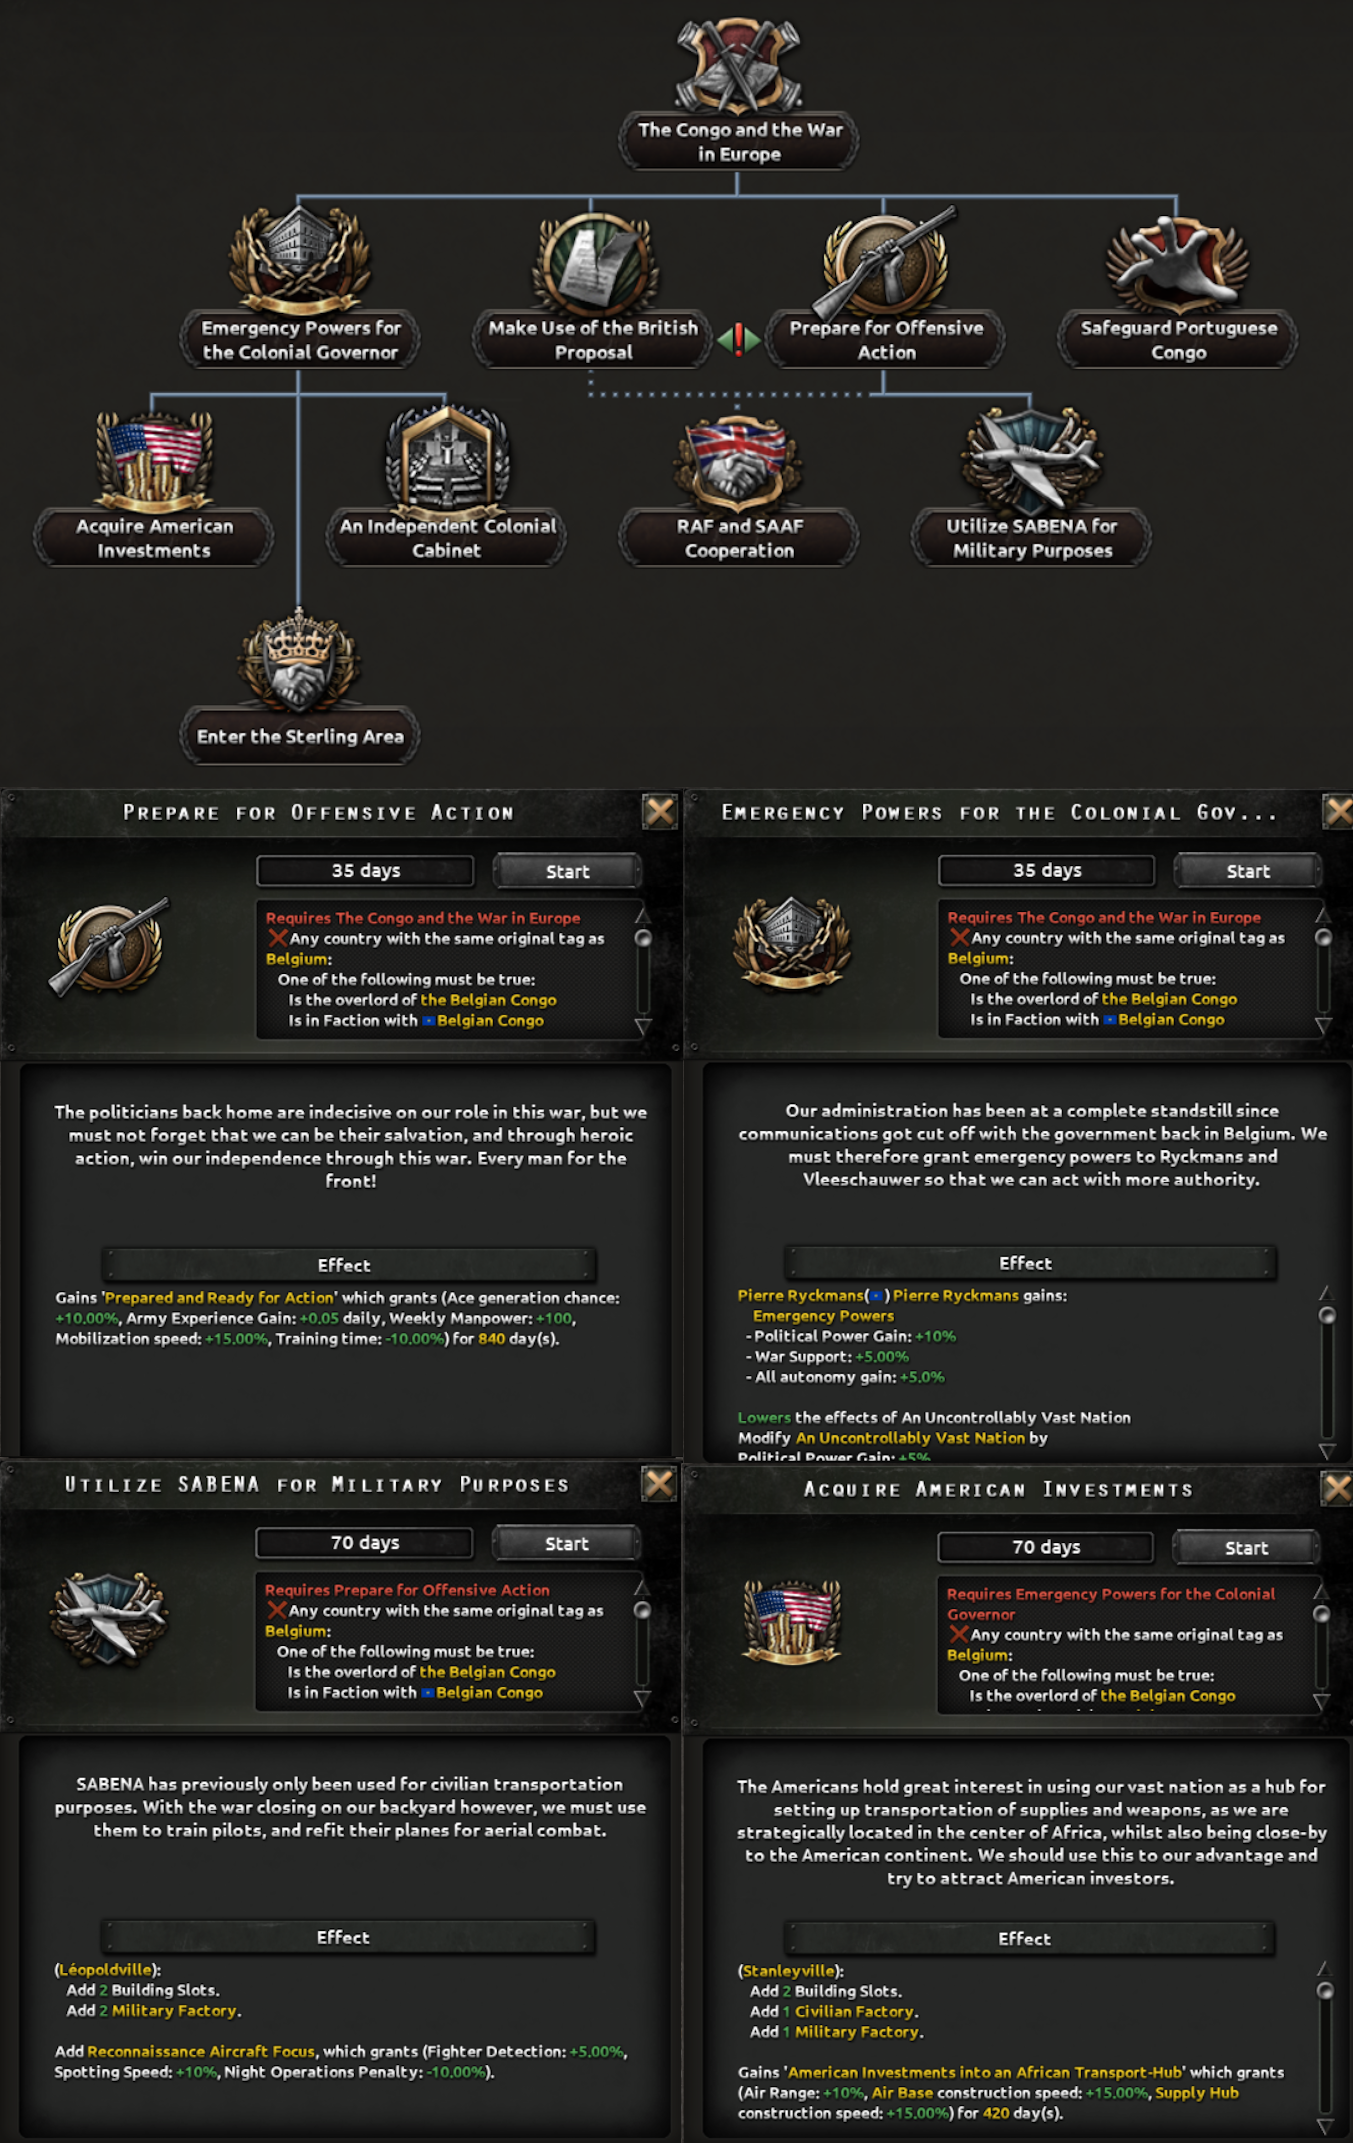
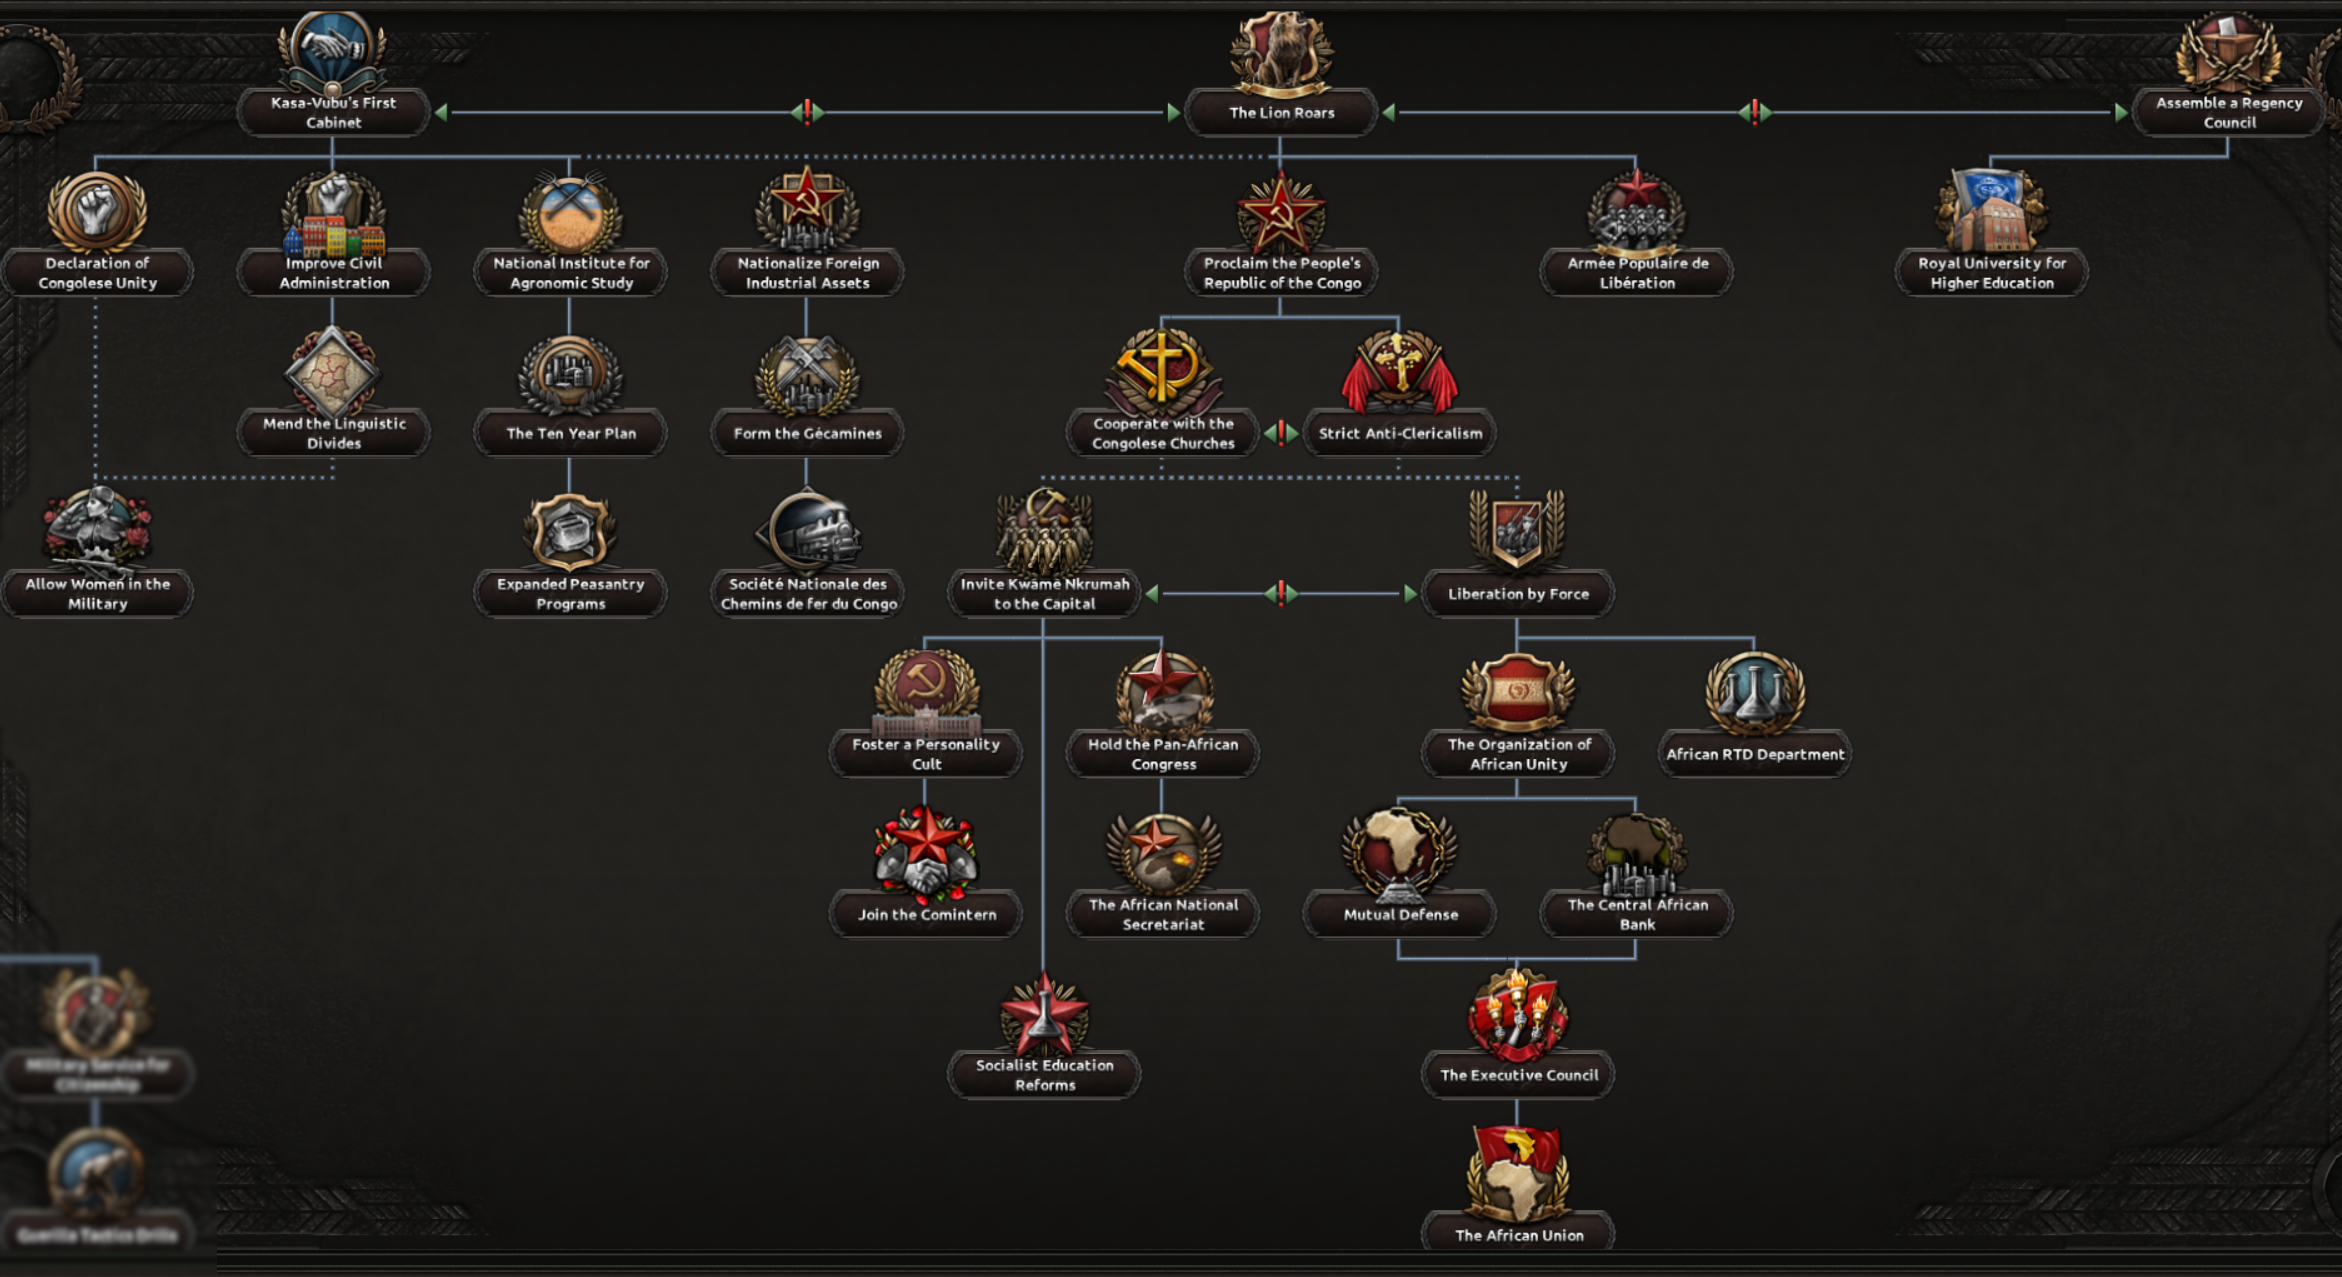
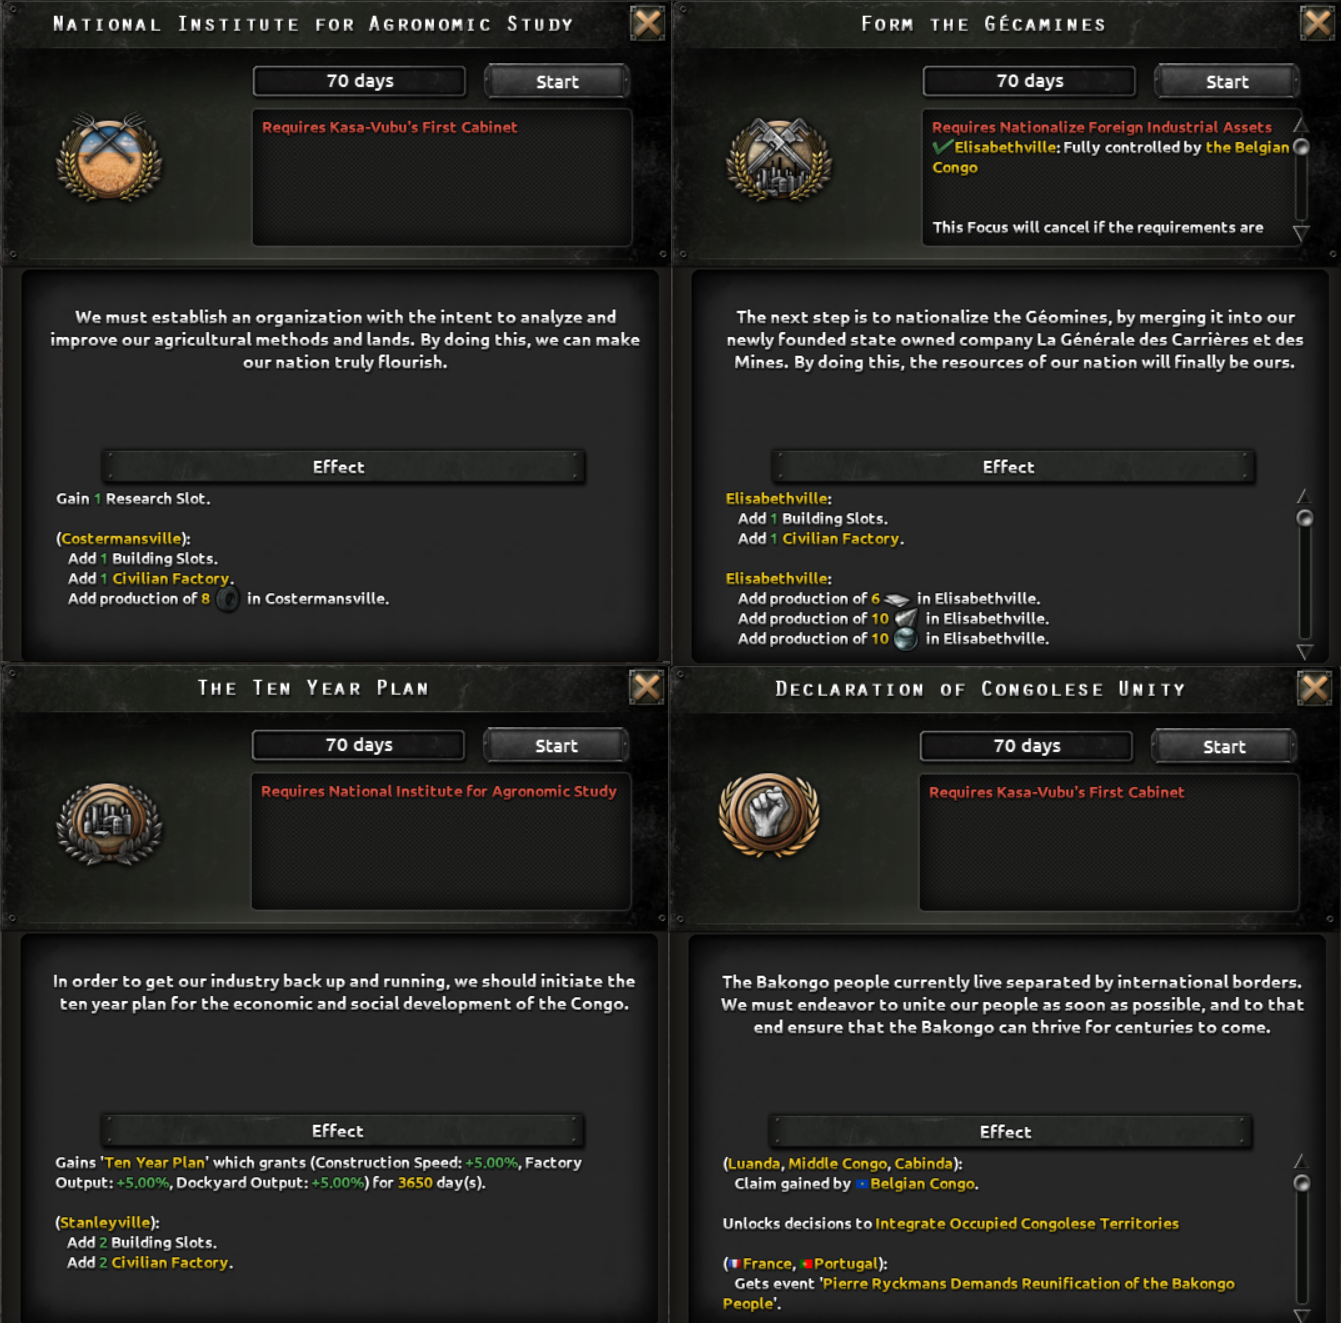
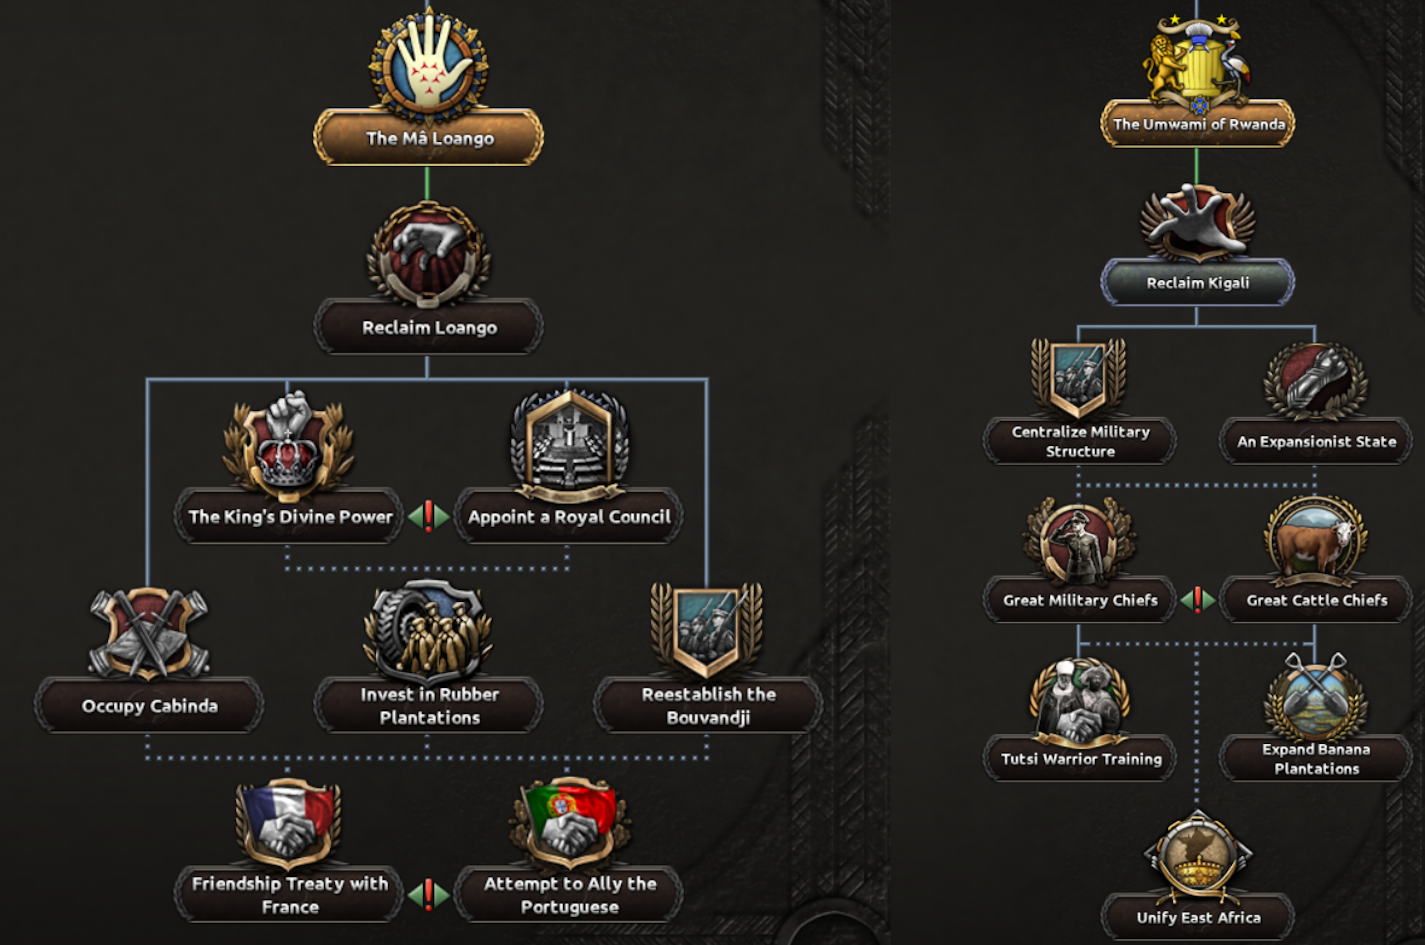
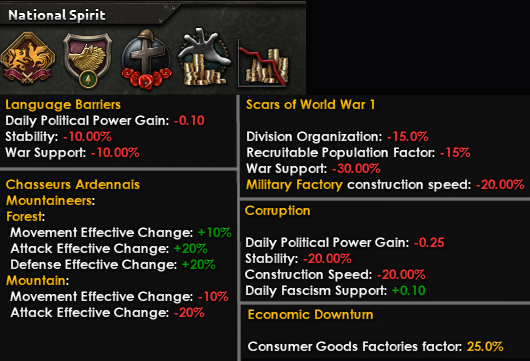
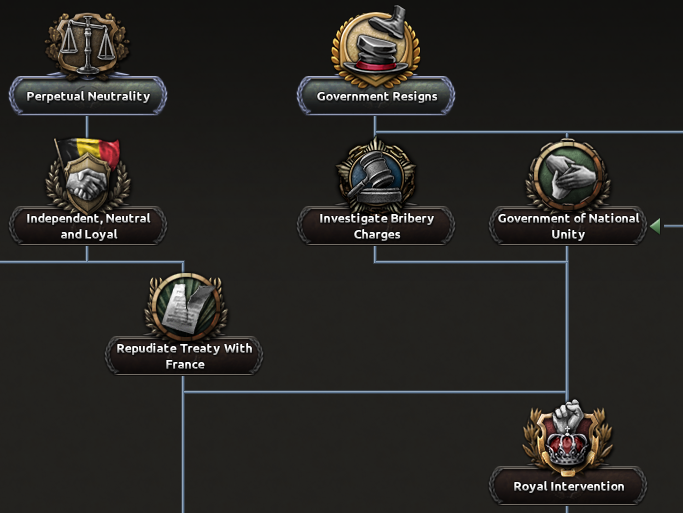
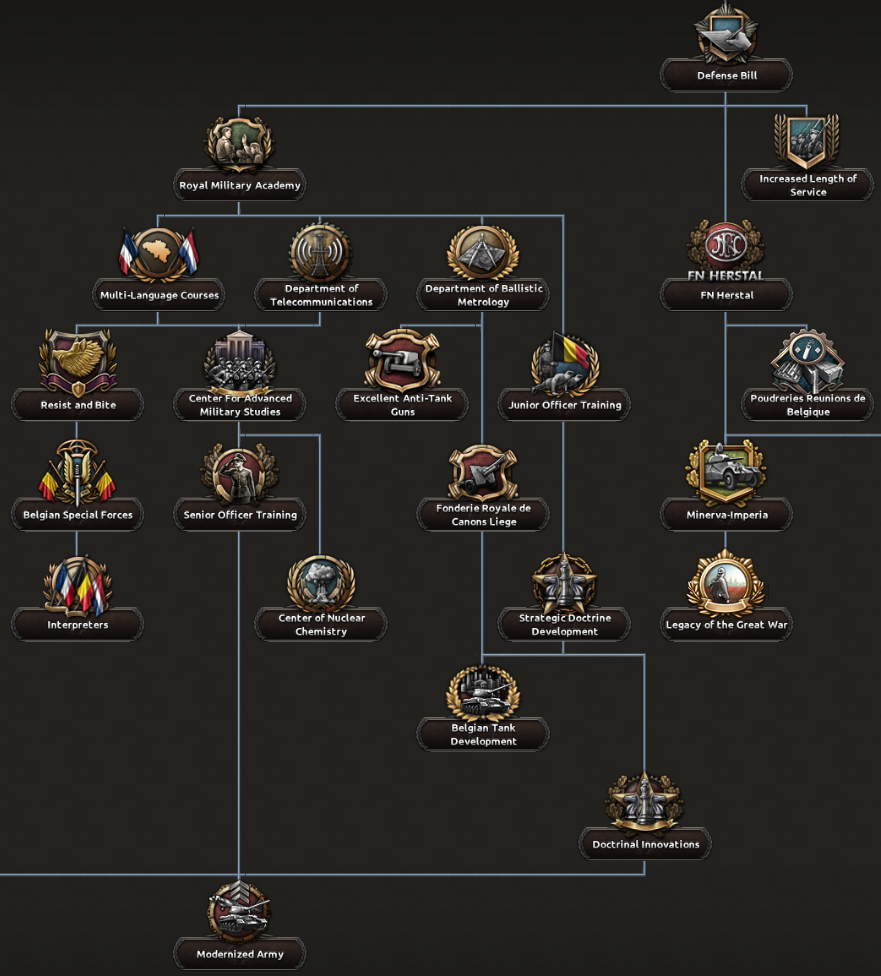
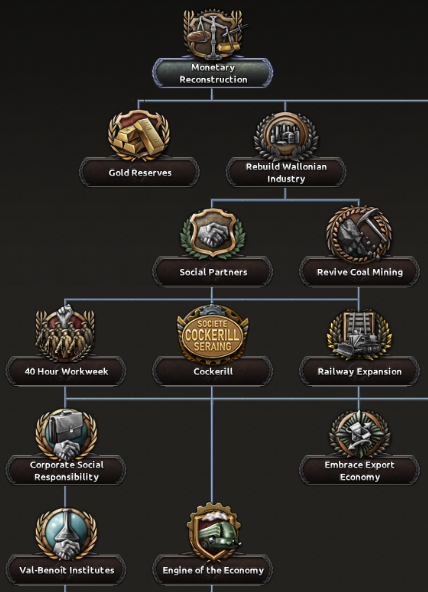
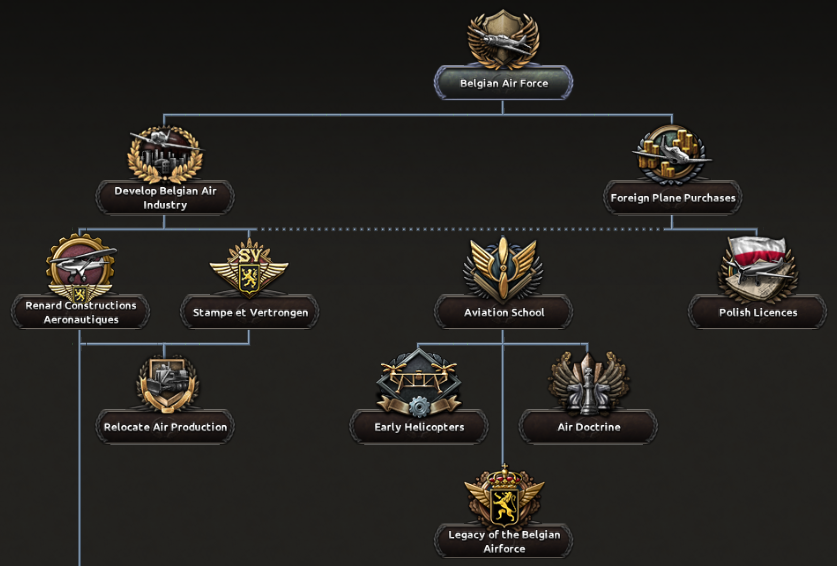
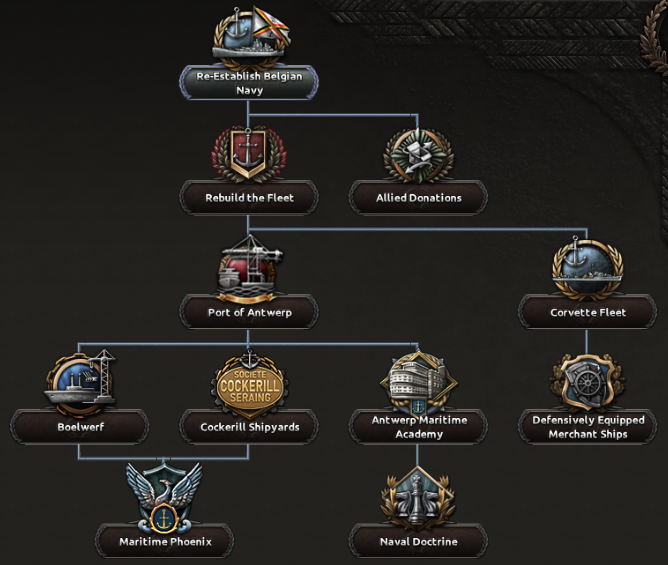
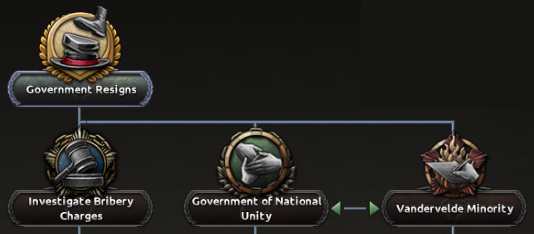
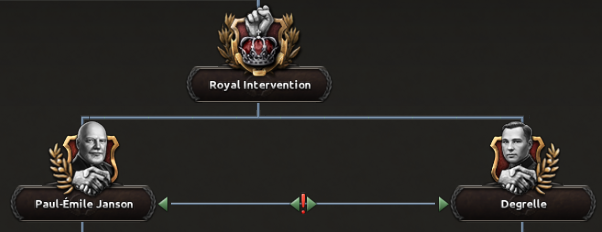
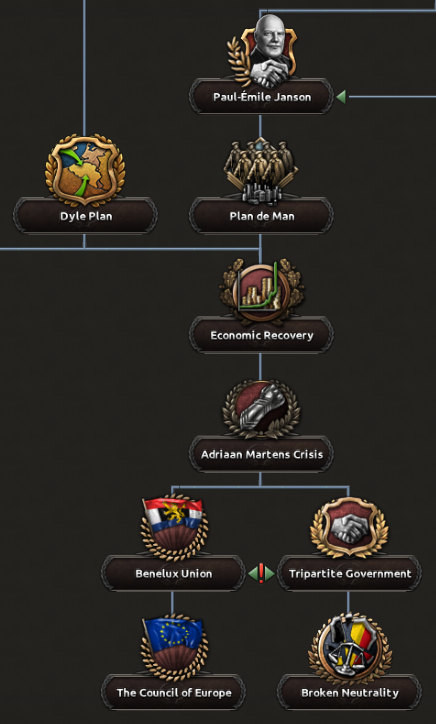
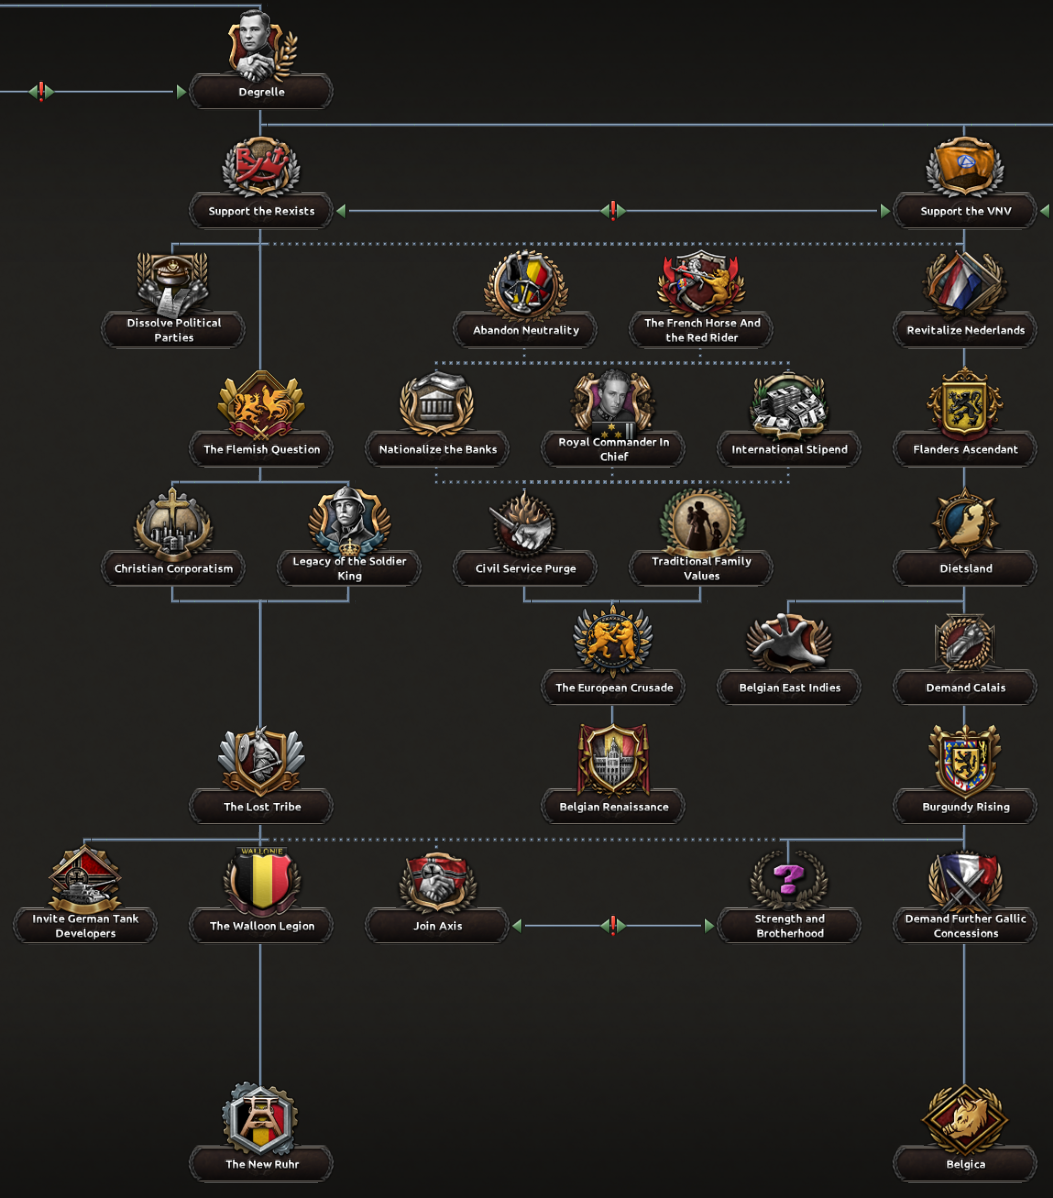
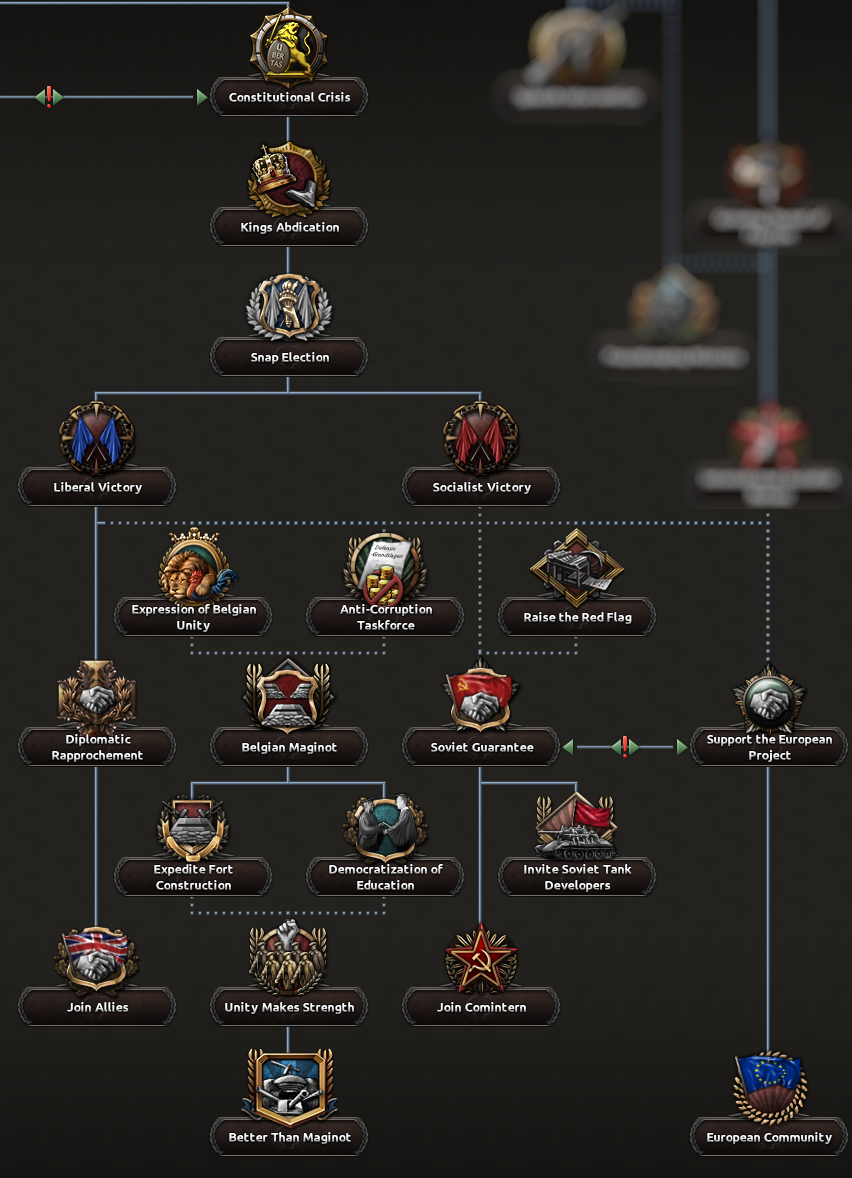
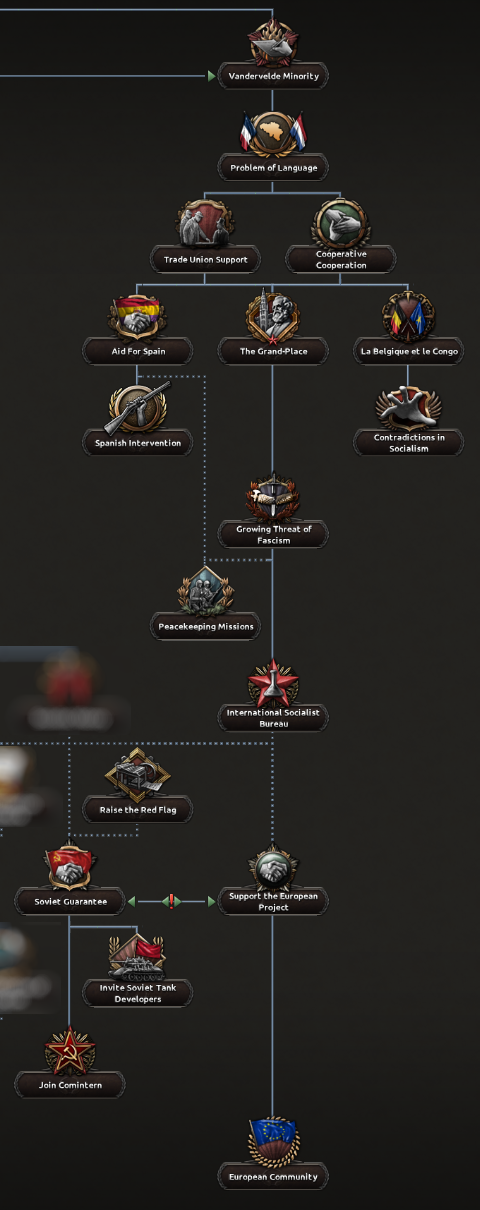
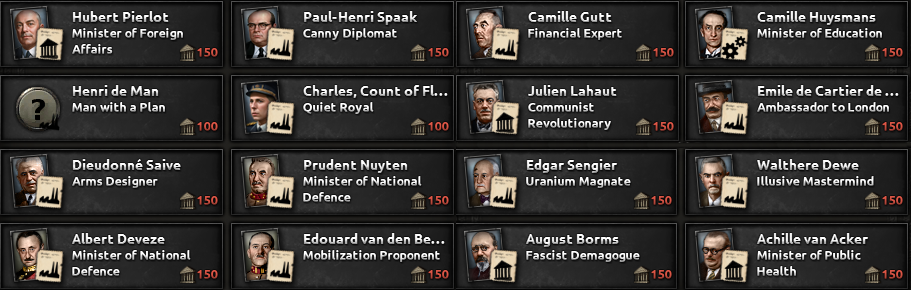
The new Belgium focus tree with ~180 focuses.
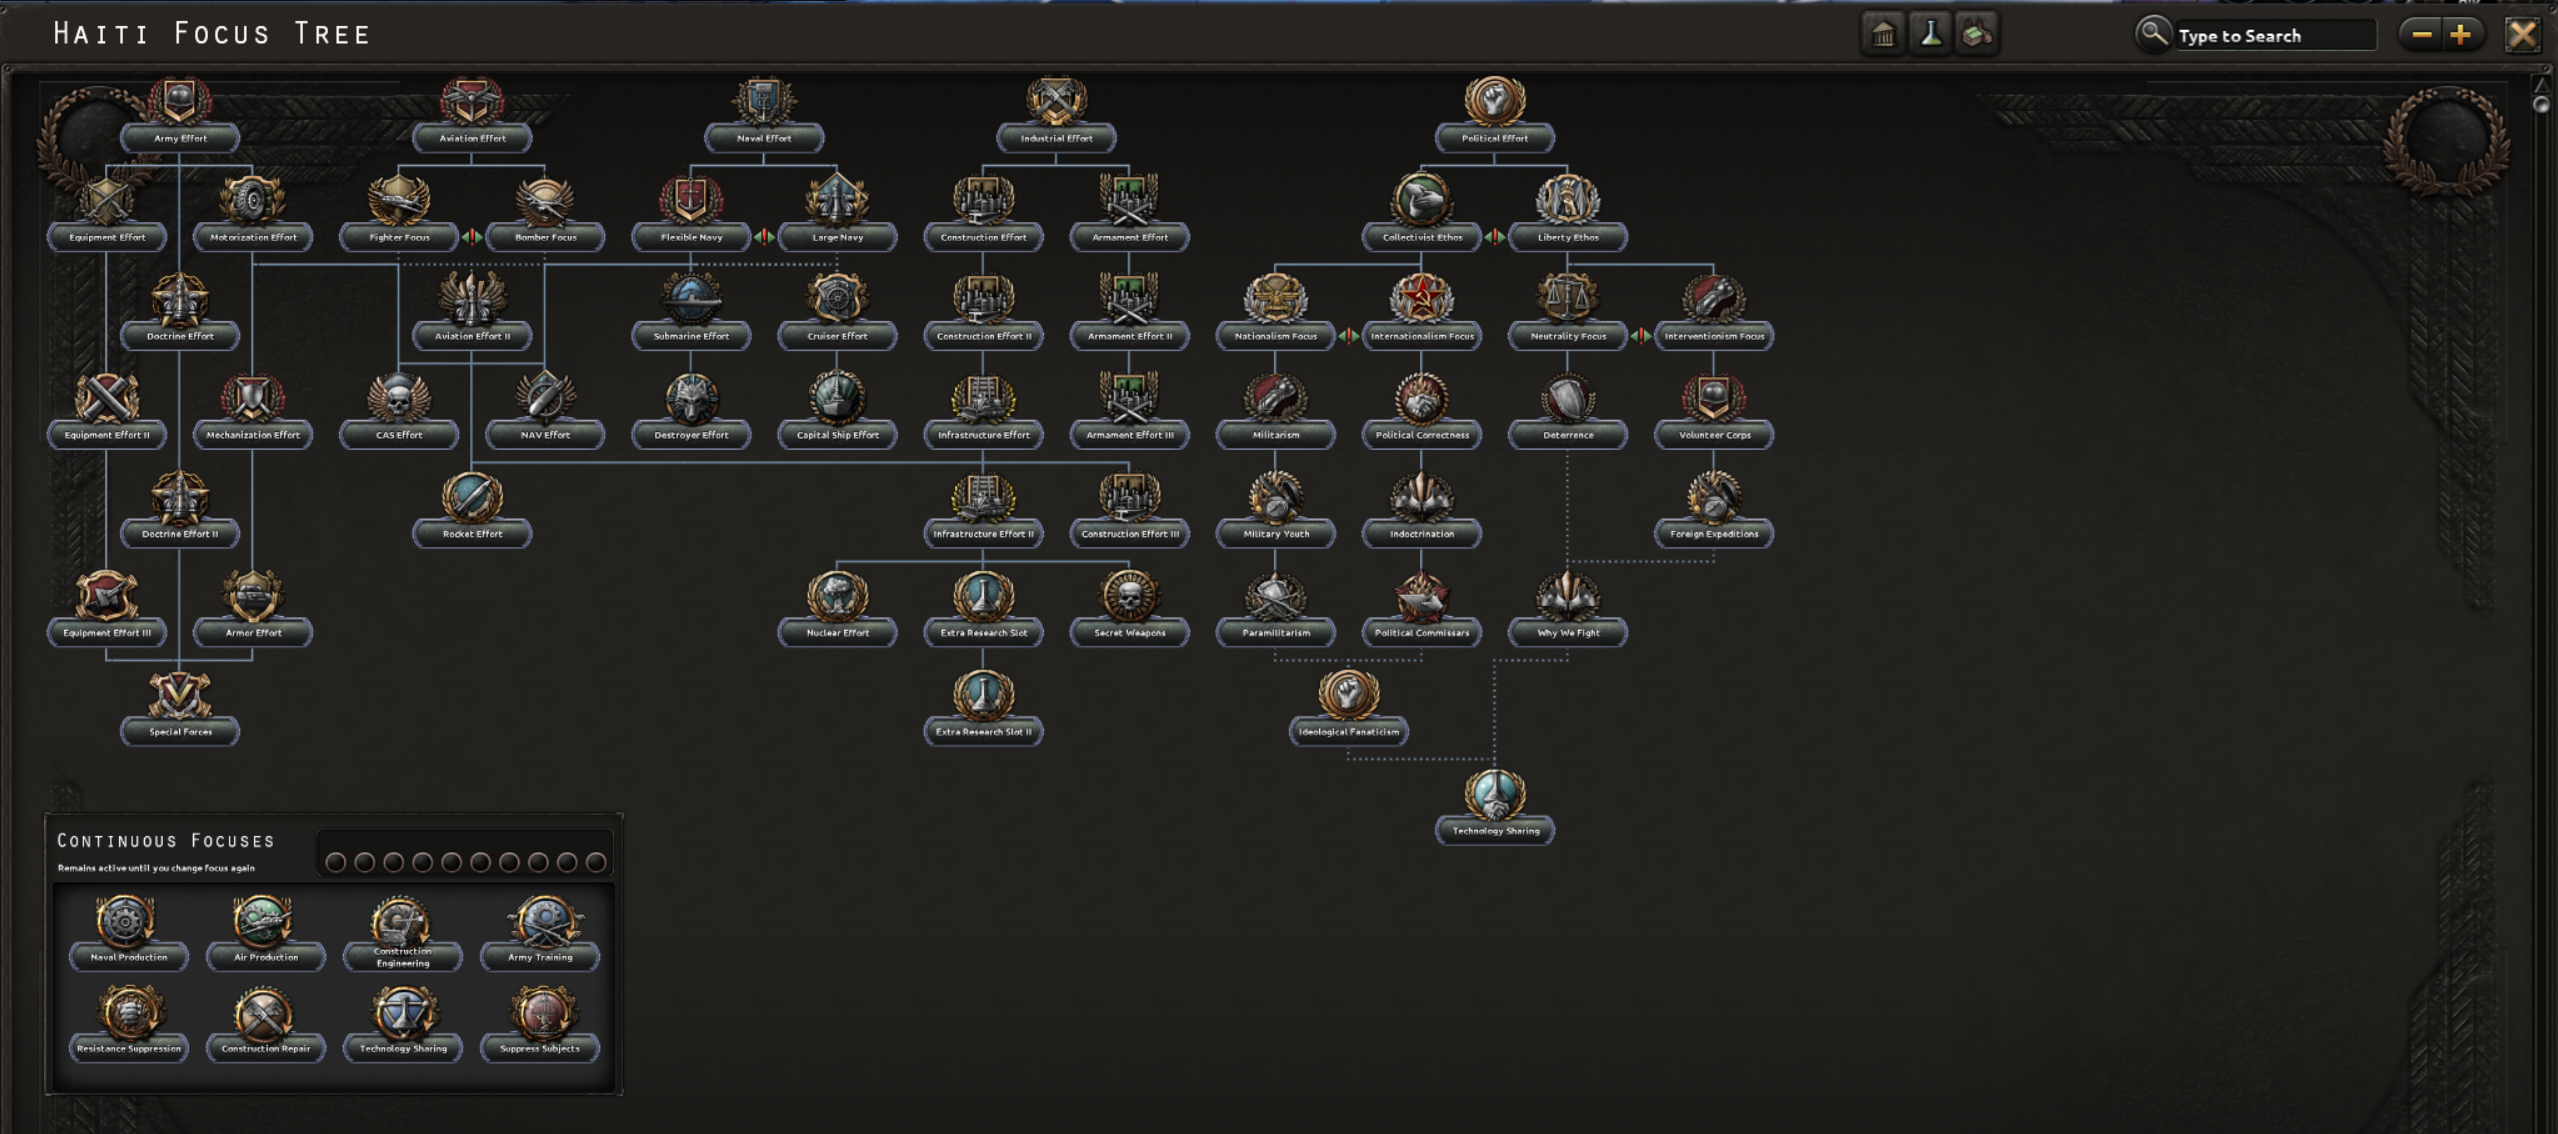
The Haiti docs tree is using the generic focus tree with ~60 focuses
The size in itself is not that much of a problem since you generally don’t have the focus tree open at all times. However, we have a nifty functionality to bypass focus. Over time this function has taken more and more performance to run. Guess why? It checked every single focus in the game, every single time. At some point in time that might not have been an issue but with the size of the current focus trees? The good thing is that it’s not as bad anymore. We now only check the focus that has a remote chance of being bypassed.
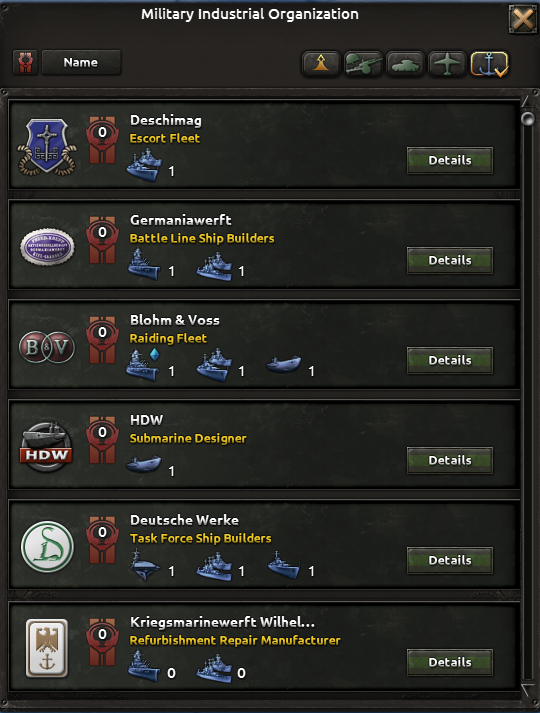
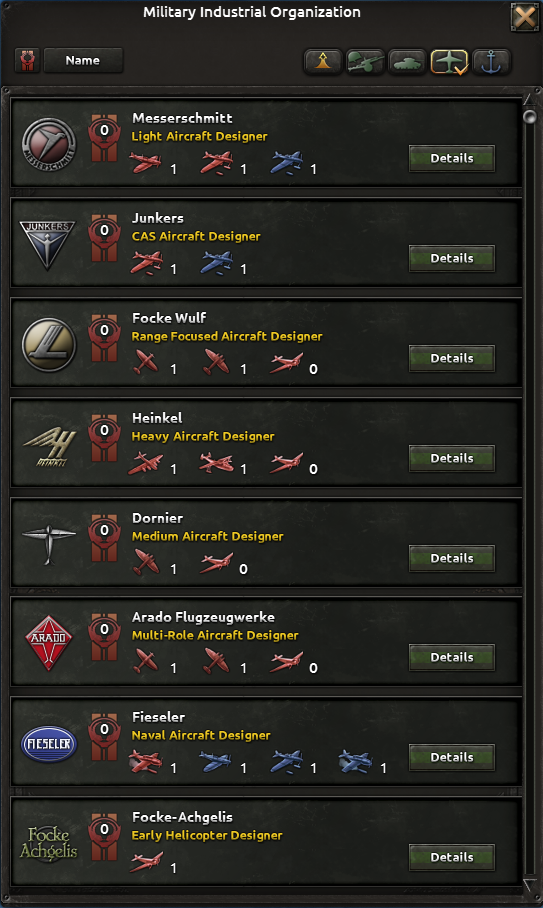
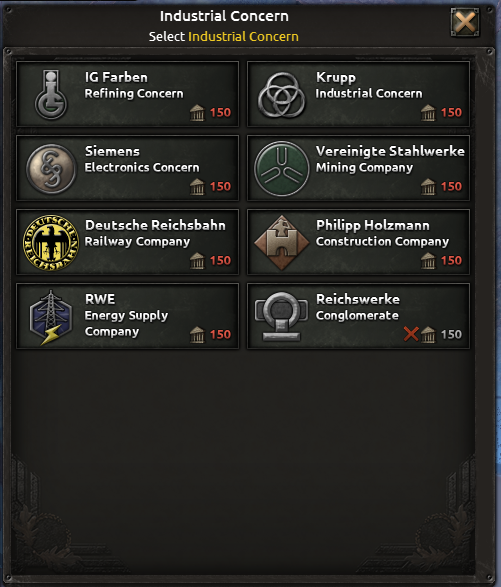
Another hidden inefficiency that we’ve found is the increase in the number of equipment variants. Before, there was a very limited amount of equipment variants in a game but now, there’s a lot of them. Every single MIO update can create a multitude of different variants. And not to mention that International Market and Lend Lease pass these variants around in the game. Now throughout the code base, there are a lot of things that interact with equipment. Every interaction wasn’t adding much but all put together, that’s quite a bit. I won’t say that variants are free but please go ahead and add more, there should be less performance impact now than before at least.
Traditionally, this meant that `REASON` was replaced with something that was provided by the game (i.e. not scripteD). In many cases, these variables were just replaced with some other localized string. So to avoid having to update the source code every time we wanted to change this, we introduced a new concept to the scripting language: Bound localization.
Bound localization simply allows you to bind variables to the localization from script. So instead of opening up the source code, we can now simply update the script files like the following:
The localization for the sort by name button injects the sort key from script to localization.
Oh, and did I mention that it’s recursive so you can do stuff like this if you want to:
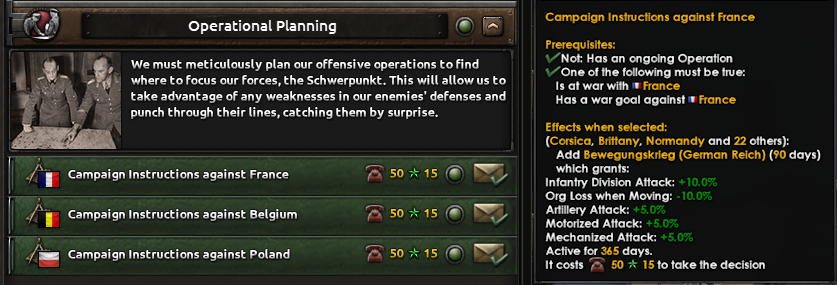
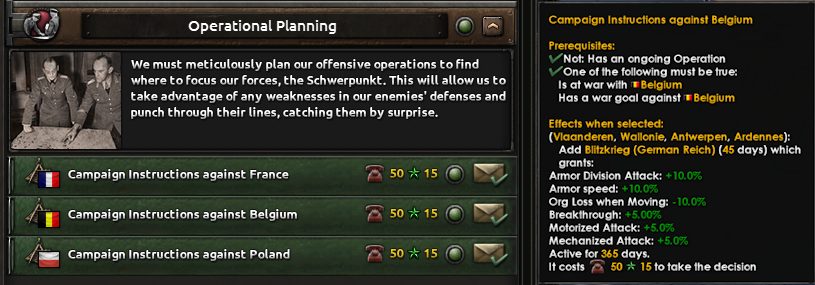
Naturally, doing this was opening up Pandora's box with requests from some content developers so we continued a bit more to push the boundaries. For example, in the German focus tree we can find the following odd syntax:

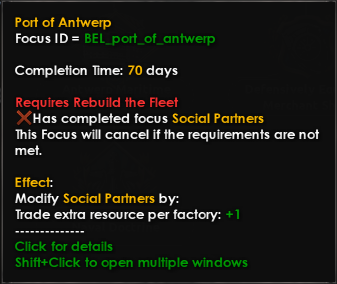
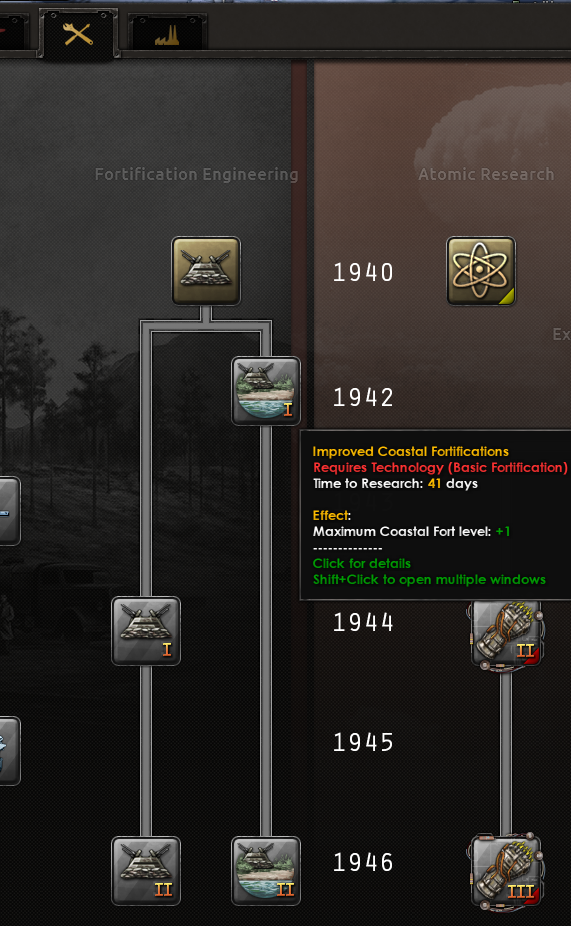
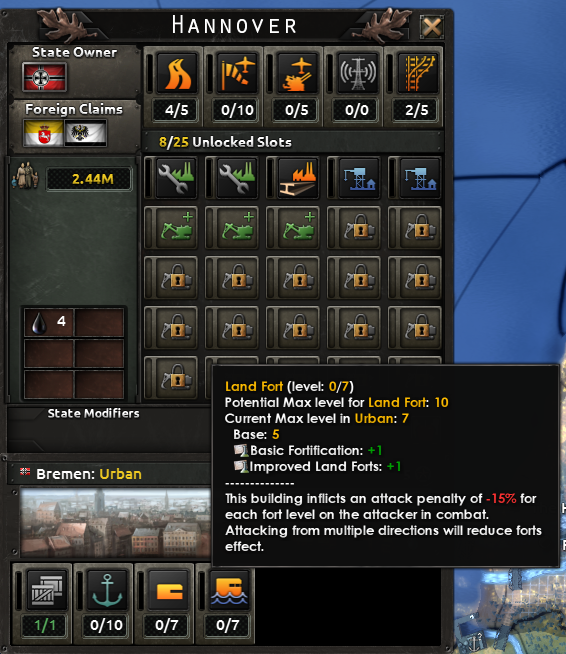
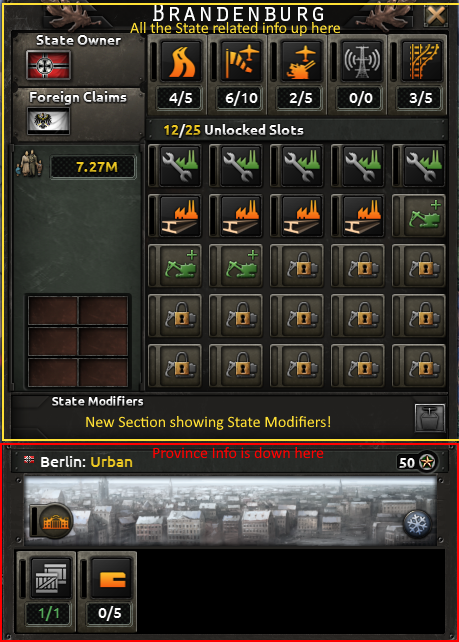
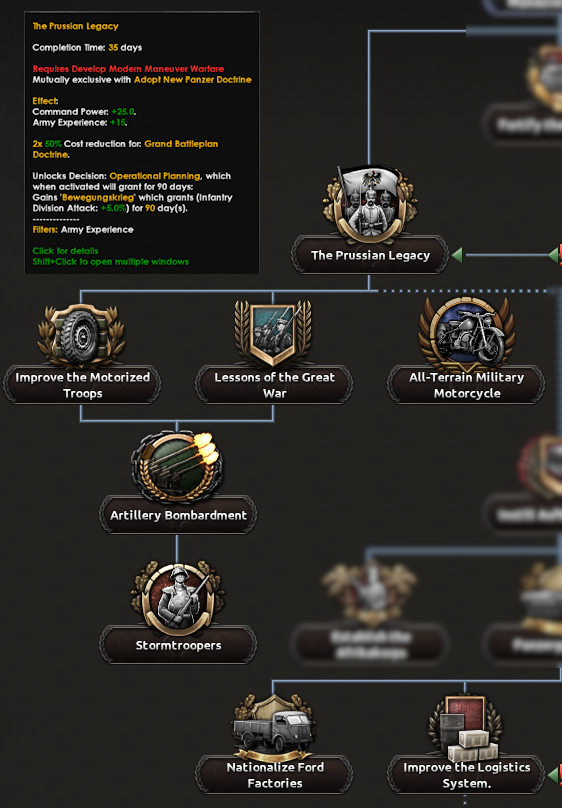
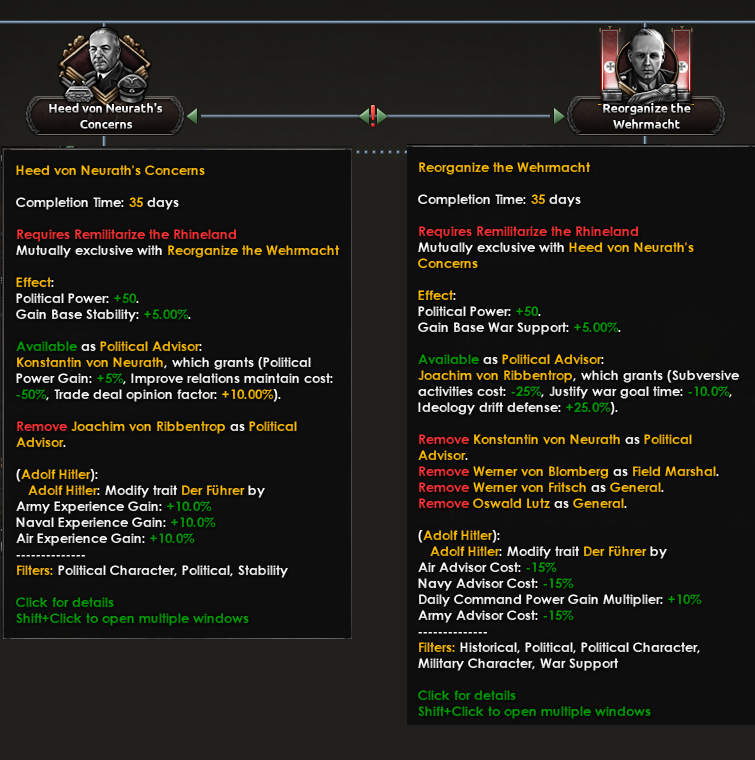
The custom effect tooltip that shows the state modifiers for a dam with a custom indentation to fit this very specific tooltip.
This adds another new concept we introduced: localization formatters. Essentially, it allows you to get a localized text property of some static token (in this case then state modifiers for
the `dam` building). You’ll recognize a text formatter when you see a localization key that has the format `<formatter>|<token>`. Some of the formatters also take some parameters (such as the `INDENT` in the example above). The benefit of using these over new tooltip overrides for effects or triggers is that the localization formatters are usable in every place a bound localization is usable (some might require that it’s localized with some context but that should be documented).
One of the main drawbacks with the new things we add, is that you can in general only use it in specific places that is pointed out from source code. Unfortunately, this still holds for the new stuff but the goal was for fewer requests for tooltips so we made some effort to make it a bit more usable. For example, you can use this in the very much (ab)used `custom_effect_tooltip` effect, `custom_trigger_tooltip` trigger as well as in some of the new places (see for example, the building database). But the main thing is that we added support for this in GUI files.
All our GUItypes now support the new tooltip `bound_tooltip` construct. If you use this, then you'll be able to use the bound localization. And maybe more interesting is the `context_aware_tooltip` construct that is a bound localization but it will be localized with a context so you can use contextual localization. Unfortunately, this requires us to provide the context from the source so mostly new places support this (and we try to document it in the GUI files, when and where it is supported). Note that this is recursive so if a parent object is localized with a context, then all children objects will be localized with the same context.
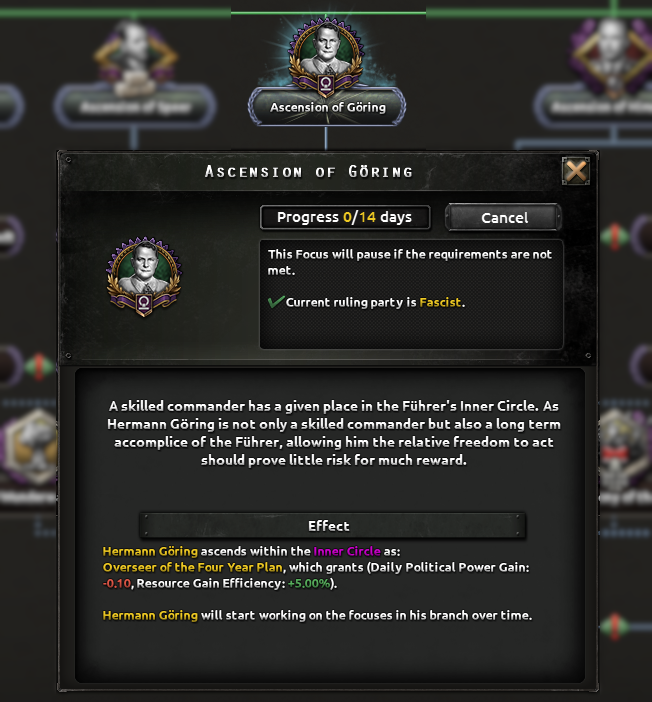
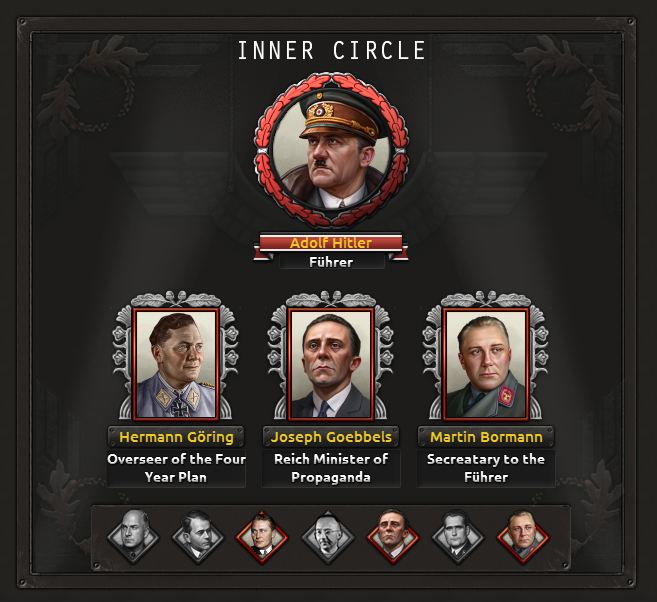
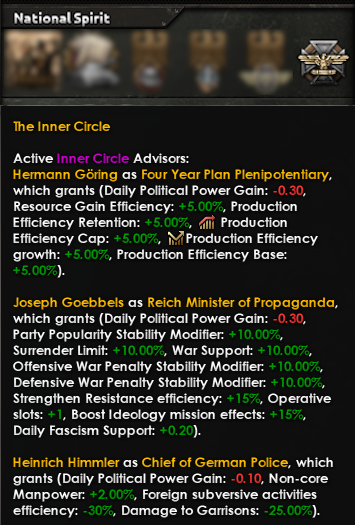
We'll come back to this in a short while when digging into the tech behind the new inner circle GUI in the focus tree.
We can take Turku as an example, this Finish area has both a Finish and a Swedish name (Turku being the name in Finish and Åbo is the name in Swedish). Before we had quite some script to change the name of the state depending on its owner but now we simply have to prefix the name with the correct country tag in the localization file:

The state of Turku (i.e. Finland owns the state).
The state of Åbo (i.e. Sweden owns the state).
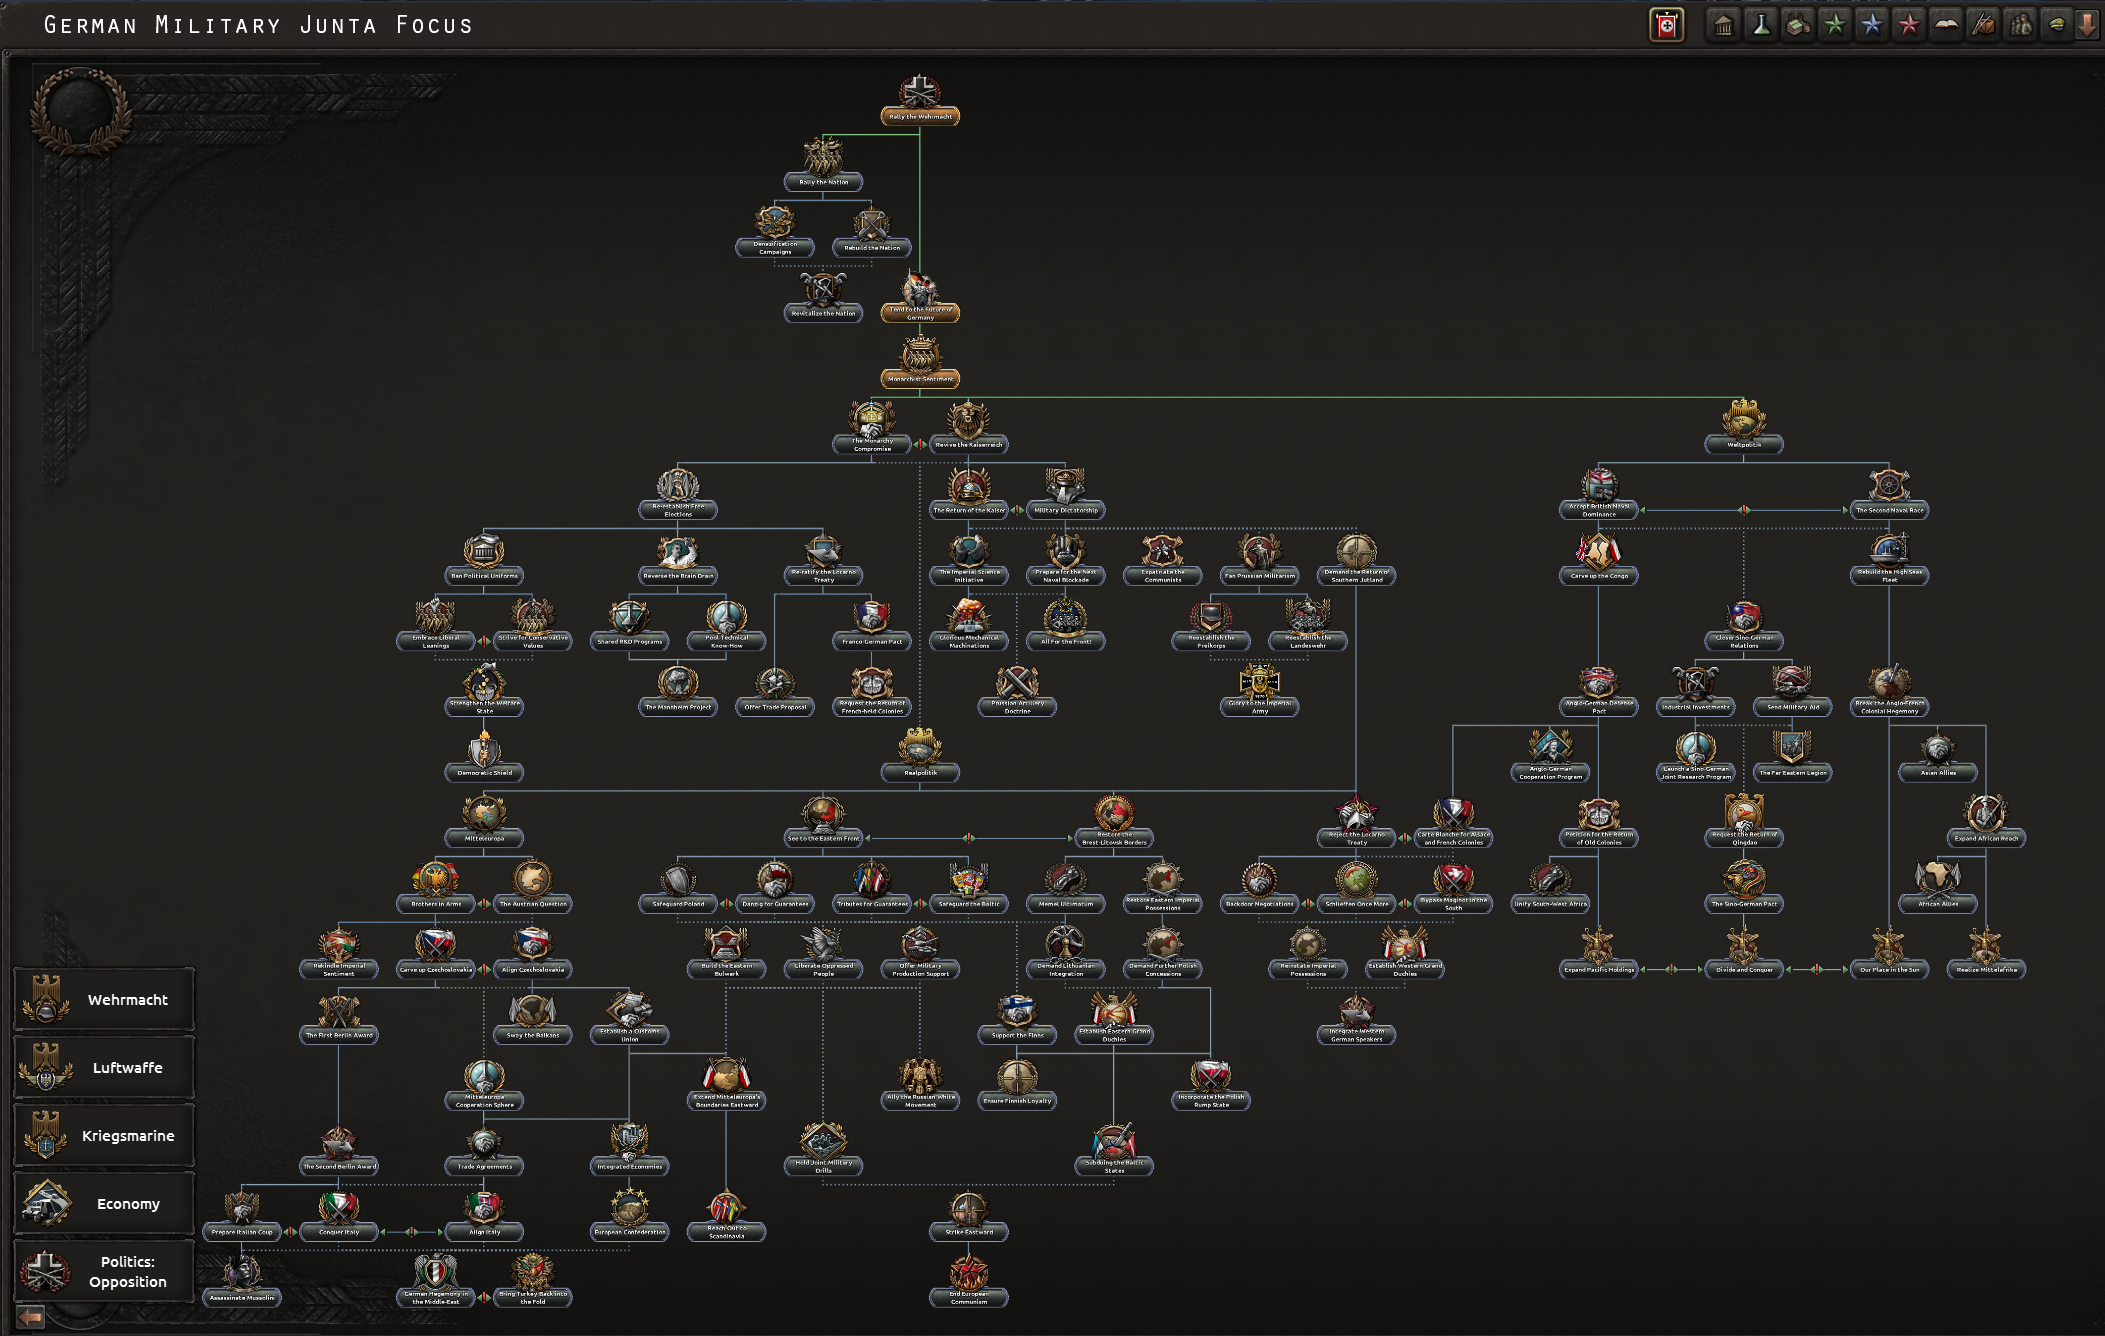
The focus navigation tabs for the new German tree.
If we click for example the “Economy” navigation tab, then we’ll be moved to the economy section of the tree with a nice zoom level for it. Naturally, this is completely scriptable so you can modify the focus trees to your liking for your mods.
Let’s go through an example: We want to display all the potential members of the Nordic Defence Council and if they have joined. For some reason it’s also very critical for us that we show the leaders of the countries. Something like the following:
A focus inlay window to show the potential members of The Nordic Defense Council with access to the joint focus tree.
When defining a new inlay window, there's three main components that you need to implement: The inlay window definition; the GUI definition; and add it to the focus tree(s) it should be shown. Let's start with the completely new construct, the inlay window definition.
As for most components in HoI4 different databases have different folders and so has this. The inlay windows are located in the `game/common/focus_inlay_windows/` and we can throw up the first definition of the inlay window as follows:
This is actually a minimum working example for a focus inlay window definition. We've now a new inlay window with ID `nordic_alliance_inlay_window` that points to a container window named `nordic_alliance_ui_window`. Let's continue with adding more stuff to this later on and continue with the GUI itself.
The GUI components aren't anything new, but I've thrown in some of the new localization capabilities to give you an example. Since all focus inlay windows are localised with the focus tree country as the context, we're free to use all the new fancy stuff when writing the localization. We have one `context_aware_text` that uses the contextual localization to grab the faction name. Another that uses bound localization to localise `NORDIC_COUNCIL_MEMBER` with the parameters `IN_FACTION` and `COUNTRY` with the result from localising `[SWE.NordicCouncilMemberInFaction]` and `[SWE.GetNameWithFlag]`, respectively. I’ve also thrown in a `context_aware_tooltip` to get the name of the leader when hovering over the portrait.
While we're at it, we can complete the localization by adding the following scripted localization to the game (in `game/common/scripted_localisation`):
And add the localization key `NORDIC_COUNCIL_MEMBER` to a loc file:
With the localization done we only need to fix the portraits of the country leaders. Defining dynamic images for focus inlay windows is done in the focus inlay window definition:
The `scripted_images` entry contains a list of image definitions that will be used in the focus inlay window. In this case, the icon named `Sweden` will have its image replaced with `GFX_portrait_SWE_per_albin_hansson` if Swedens’ current country leader is `SWE_per_albin_hansson`. If this doesn’t hold, then the next entry in `Sweden` will be checked and so on until something that evaluates to true is encountered. The last entry in this example (`GFX_blank_leader_portrait`) always evaluates to true and is therefore the default image if no other is true.
Now there’s only some final touches to be made. Firstly, we’ll restrict the inlay window to only be shown if the country has formed (or joined) a Nordic joint alliance (i.e. has completed the `NORDIC_form_joint_alliance`. Secondly, we’ll set the window to only be visible to the country owning the focus tree (so no other player can view it).
That’s it, really. We’ve now completely defined a focus inlay window. All that remains to do is to add it to the relevant focus trees:
I really look forward to seeing all the cool stuff you can come up with the focus inlay windows. And I hope you all enjoy the new modding constructs.
Happy modding!
Make sure to check out the Expansion Pass Here:
https://store.steampowered.com/app/3152810/Hearts_of_Iron_IV_Expansion_Pass_1
I'm gonna start off with some outdated news from the past: Did you know that we did a performance pass on Trial of Allegiance? I honestly hope that you didn't. Being a country pack, we never intended to improve the performance but we did make improvements to counter the influx of data that happens when we add more content.
But I know you don't want to listen to ramblings about the past. So let's get started on what we've done this time. While we've taken time to look at the performance and improve parts of it, we've also added some new generic features that we hope our modders will like.
Performance
I'm gonna be brutally honest with you from the start: The performance goal of this DLC was to not decay performance. (Un)fortunately, this doesn't mean we can lean back and ignore it. More content and new features all add to the computations we need to run and I wanted all the new stuff to happen at net-zero performance cost. Essentially, the same thing as for Trial of Allegiance, but with much more. So we had to do something to maintain the status quo with performance.So whenever our performance tracking indicated a slowdown for the first time I took a look at what we could optimize and became a bit disheartened. The French Paradox did a very good job at parallelising much of our code for AAT. There were not many easy options for parallelisation left but we managed to identify a few places. Even on our machines with quite a lot of cores, this wasn’t enough so we took a step back and looked at optimizing the sequential parts of the code. I hope this is quite good news for all of us that run on hardware with fewer cores.
The hunt for optimization opportunities led to looking at old systems that now had more data and the uncharted lands of legacy code. I’m just gonna give you a few tidbits of old systems that we found interesting assumptions about the data in or simply interesting ways of solving it.
Focuses
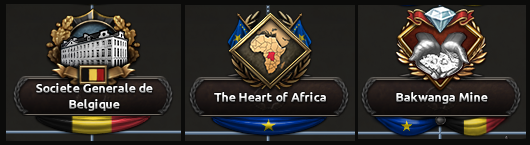
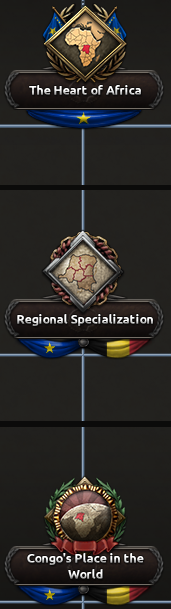
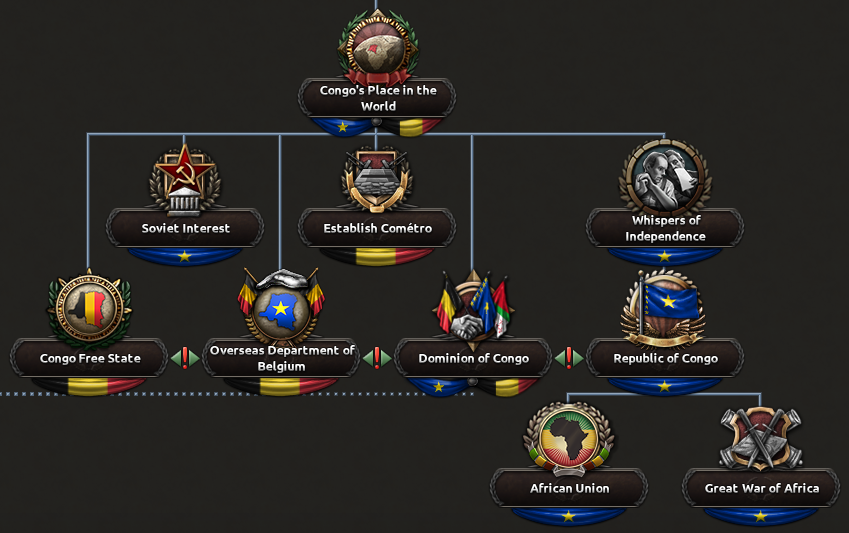
I imagine some of you have been with us from the start. Do you remember the size of the original focus trees? And for those of you who don't, simply open up the generic tree to get an idea. Over the years, we've had a large influx of focuses in the focus trees. For example, we have ~60 in the generic focus tree compared to the ~180 national focuses in Belgium, not counting the Belgian-Congo part. And the size of the Belgium focus tree doesn't even compare to the new German one (which is somewhere between 350 and 400 focuses).The new German focus tree with 350-400 focuses, which I couldn’t even fit into a 2k screen.
The new Belgium focus tree with ~180 focuses.
The Haiti docs tree is using the generic focus tree with ~60 focuses
The size in itself is not that much of a problem since you generally don’t have the focus tree open at all times. However, we have a nifty functionality to bypass focus. Over time this function has taken more and more performance to run. Guess why? It checked every single focus in the game, every single time. At some point in time that might not have been an issue but with the size of the current focus trees? The good thing is that it’s not as bad anymore. We now only check the focus that has a remote chance of being bypassed.
Dynamic memory and paralelism
When we started looking at the sequential parts of our parallel code we found a quite interesting trend. There's a lot of dynamic memory allocation. Now every time we do something that requires dynamic memory allocation, the operative system may grab a global lock. Essentially, risking the algorithm to become at least partially sequential. Finding this caused a period of going through the code and eliminating the worst of these dynamic memory allocations.Hidden AAT Inefficiencies
AAT was the expansion that optimized HoI4 (in modern times). Now there’s a drawback with the drastically improved performance: All the inefficiencies from the new systems in AAT were hidden by the drastic improvements in the rest of the game. A lot of old content was optimized by a large margin, and as a result new performance overhead simply got lost in the steadily improving numbers. For example, on my machine disabling the international market automation saved me 2ms per daily update. It’s not a lot (about 0.5% of the overall performance on my machine). But for market automation? Good news, it’s way less now. Bad news, you can still improve performance a very small amount by disabling it (though, manually clicking will have way worse performance in terms of speed).Another hidden inefficiency that we’ve found is the increase in the number of equipment variants. Before, there was a very limited amount of equipment variants in a game but now, there’s a lot of them. Every single MIO update can create a multitude of different variants. And not to mention that International Market and Lend Lease pass these variants around in the game. Now throughout the code base, there are a lot of things that interact with equipment. Every interaction wasn’t adding much but all put together, that’s quite a bit. I won’t say that variants are free but please go ahead and add more, there should be less performance impact now than before at least.
Modding
Now let’s leave the area of performance and continue with some other things we’ve looked at from the tech side: New fancy modding stuff. During the development, I got a bit fed up with requests for support for new tooltips. So we sat down and thought: How can we get content developers to write the tooltips themselves? While we couldn't backport Jomini to HoI4, we took some inspiration and made it possible to write more complex tooltips in the GUI and script files.Localization, localization and localization
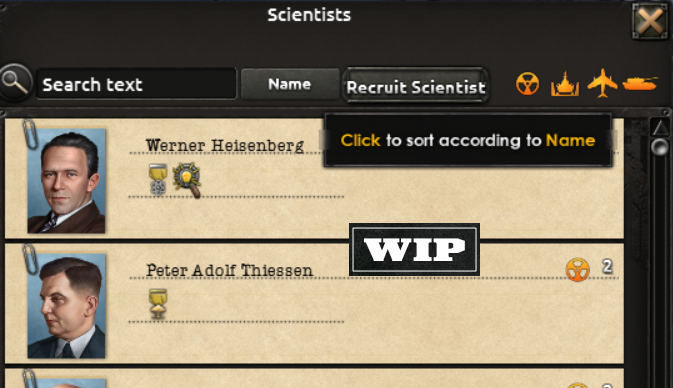
If you have looked into our localization files before, you've probably noticed something like the following:SCIENTIST_ROSTER_SORT_BUTTON_TOOLTIP: "§YClick§! to sort according to $REASON|Y$"
Traditionally, this meant that `REASON` was replaced with something that was provided by the game (i.e. not scripteD). In many cases, these variables were just replaced with some other localized string. So to avoid having to update the source code every time we wanted to change this, we introduced a new concept to the scripting language: Bound localization.
Bound localization simply allows you to bind variables to the localization from script. So instead of opening up the source code, we can now simply update the script files like the following:
bound_tooltip = {
localization_key = SCIENTIST_ROSTER_SORT_BUTTON_TOOLTIP
REASON = SCIENTIST_ROSTER_SORT_BY_NAME_REASON
}
The localization for the sort by name button injects the sort key from script to localization.
Oh, and did I mention that it’s recursive so you can do stuff like this if you want to:
bound_tooltip = {
localization_key = SCIENTIST_ROSTER_SORT_BUTTON_TOOLTIP
REASON = {
localization_key = COLOR_GREEN
DATA = SCIENTIST_ROSTER_SORT_BY_NAME_REASON
}
}
Naturally, doing this was opening up Pandora's box with requests from some content developers so we continued a bit more to push the boundaries. For example, in the German focus tree we can find the following odd syntax:
custom_effect_tooltip = {
localization_key = building_state_modifier|dam
INDENT = " "
}
The custom effect tooltip that shows the state modifiers for a dam with a custom indentation to fit this very specific tooltip.
This adds another new concept we introduced: localization formatters. Essentially, it allows you to get a localized text property of some static token (in this case then state modifiers for
the `dam` building). You’ll recognize a text formatter when you see a localization key that has the format `<formatter>|<token>`. Some of the formatters also take some parameters (such as the `INDENT` in the example above). The benefit of using these over new tooltip overrides for effects or triggers is that the localization formatters are usable in every place a bound localization is usable (some might require that it’s localized with some context but that should be documented).
One of the main drawbacks with the new things we add, is that you can in general only use it in specific places that is pointed out from source code. Unfortunately, this still holds for the new stuff but the goal was for fewer requests for tooltips so we made some effort to make it a bit more usable. For example, you can use this in the very much (ab)used `custom_effect_tooltip` effect, `custom_trigger_tooltip` trigger as well as in some of the new places (see for example, the building database). But the main thing is that we added support for this in GUI files.
All our GUItypes now support the new tooltip `bound_tooltip` construct. If you use this, then you'll be able to use the bound localization. And maybe more interesting is the `context_aware_tooltip` construct that is a bound localization but it will be localized with a context so you can use contextual localization. Unfortunately, this requires us to provide the context from the source so mostly new places support this (and we try to document it in the GUI files, when and where it is supported). Note that this is recursive so if a parent object is localized with a context, then all children objects will be localized with the same context.
We'll come back to this in a short while when digging into the tech behind the new inner circle GUI in the focus tree.
Naming is Hard
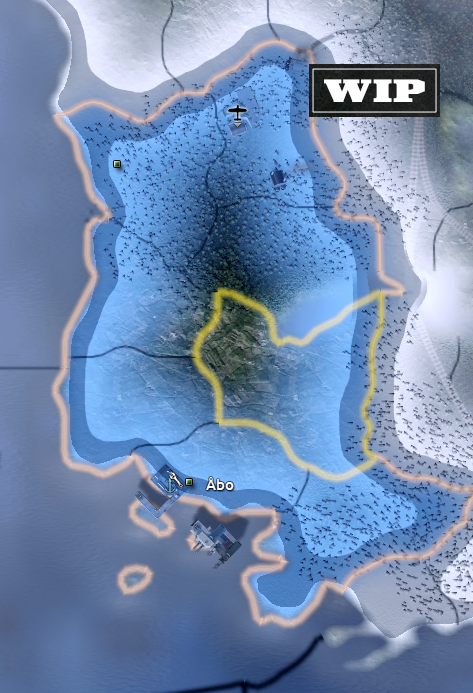
Imagine that you have a province or state that, depending on who you ask, has a different name. For techs, equipment and a lot of other things we’ve had the support to add country specific names (we call it cosmetic tags) by simply adding the countries tag before the name of it. Now we’ve added the same support to province and state names as well.We can take Turku as an example, this Finish area has both a Finish and a Swedish name (Turku being the name in Finish and Åbo is the name in Swedish). Before we had quite some script to change the name of the state depending on its owner but now we simply have to prefix the name with the correct country tag in the localization file:
STATE_926: "Turku" # Default name
SWE_STATE_926: "Åbo" # Cosmetic name for when Sweden owns the state
The state of Turku (i.e. Finland owns the state).
The state of Åbo (i.e. Sweden owns the state).
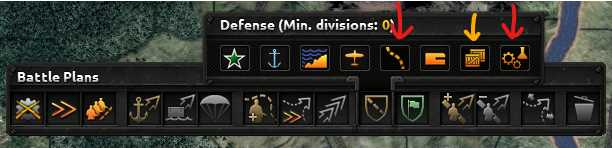
Focus Navigation
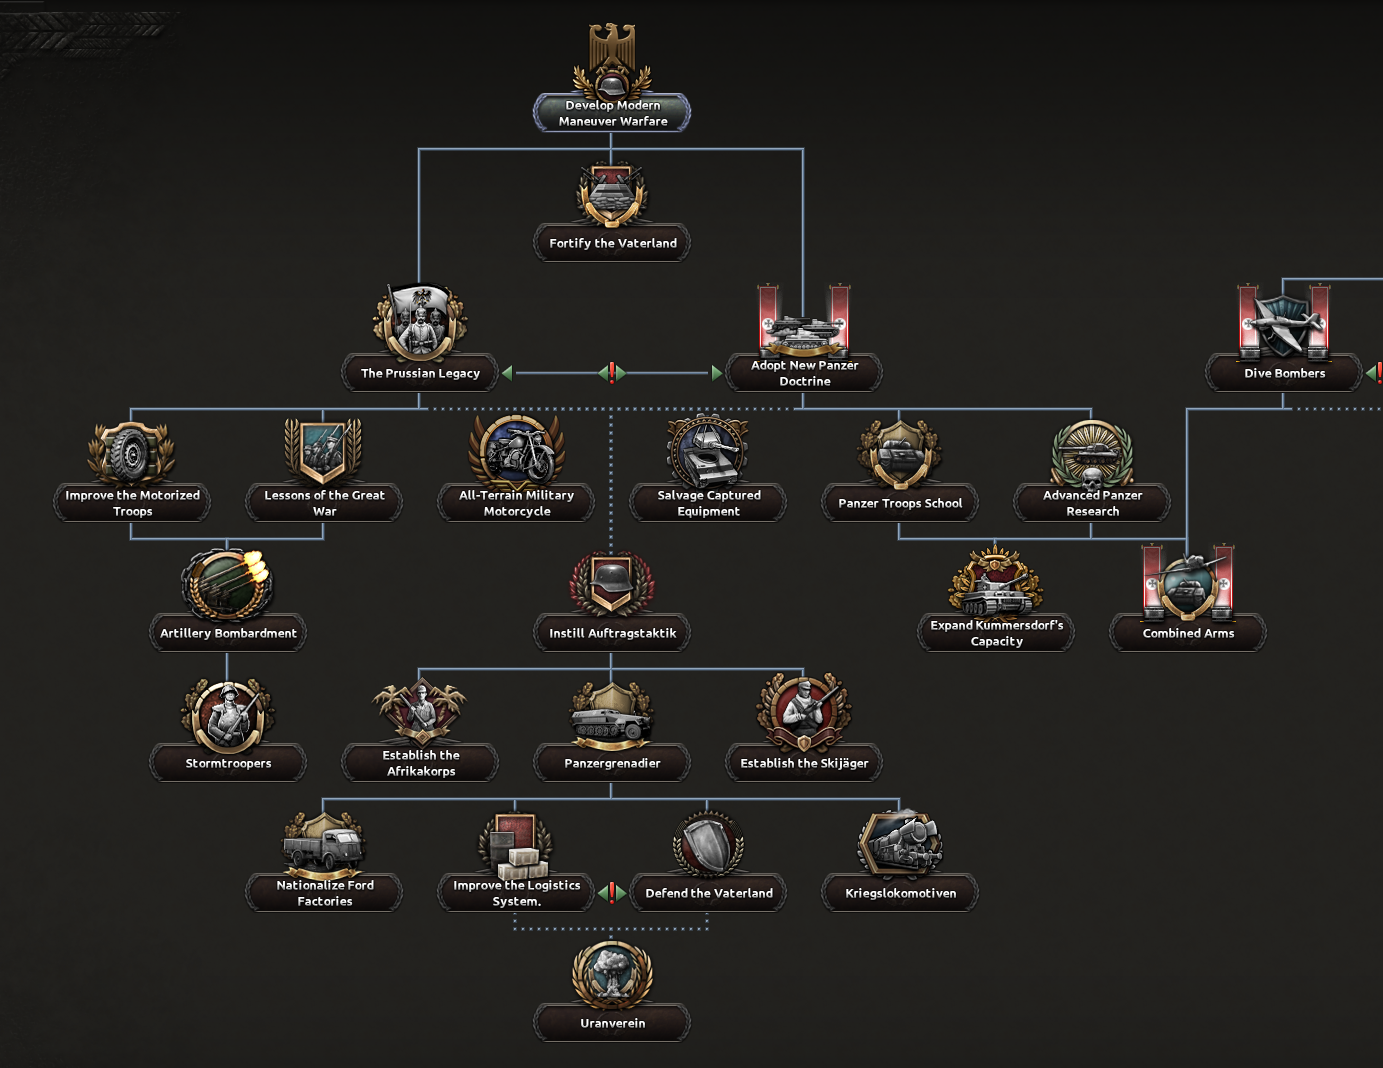
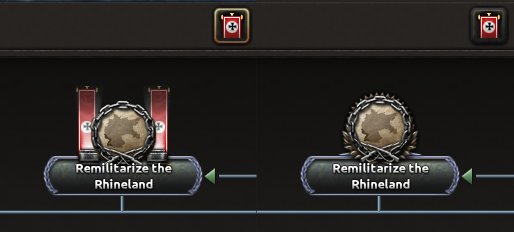
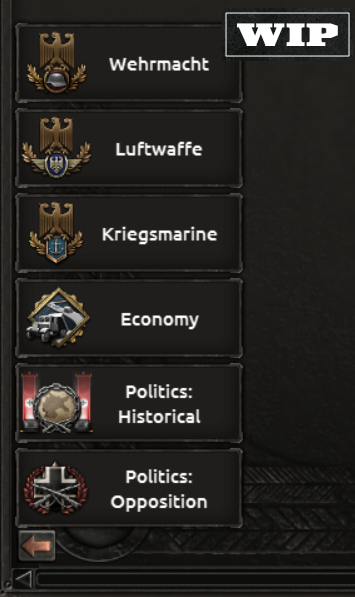
More national focus means more fun, right? But at some point it just becomes hard to navigate the focus tree. Fear not, we’ve added an option to add navigation shortcuts to focus trees. The new German tree has 6 different navigation icons (as of me writing this).The focus navigation tabs for the new German tree.
If we click for example the “Economy” navigation tab, then we’ll be moved to the economy section of the tree with a nice zoom level for it. Naturally, this is completely scriptable so you can modify the focus trees to your liking for your mods.
Focus Inlay Windows
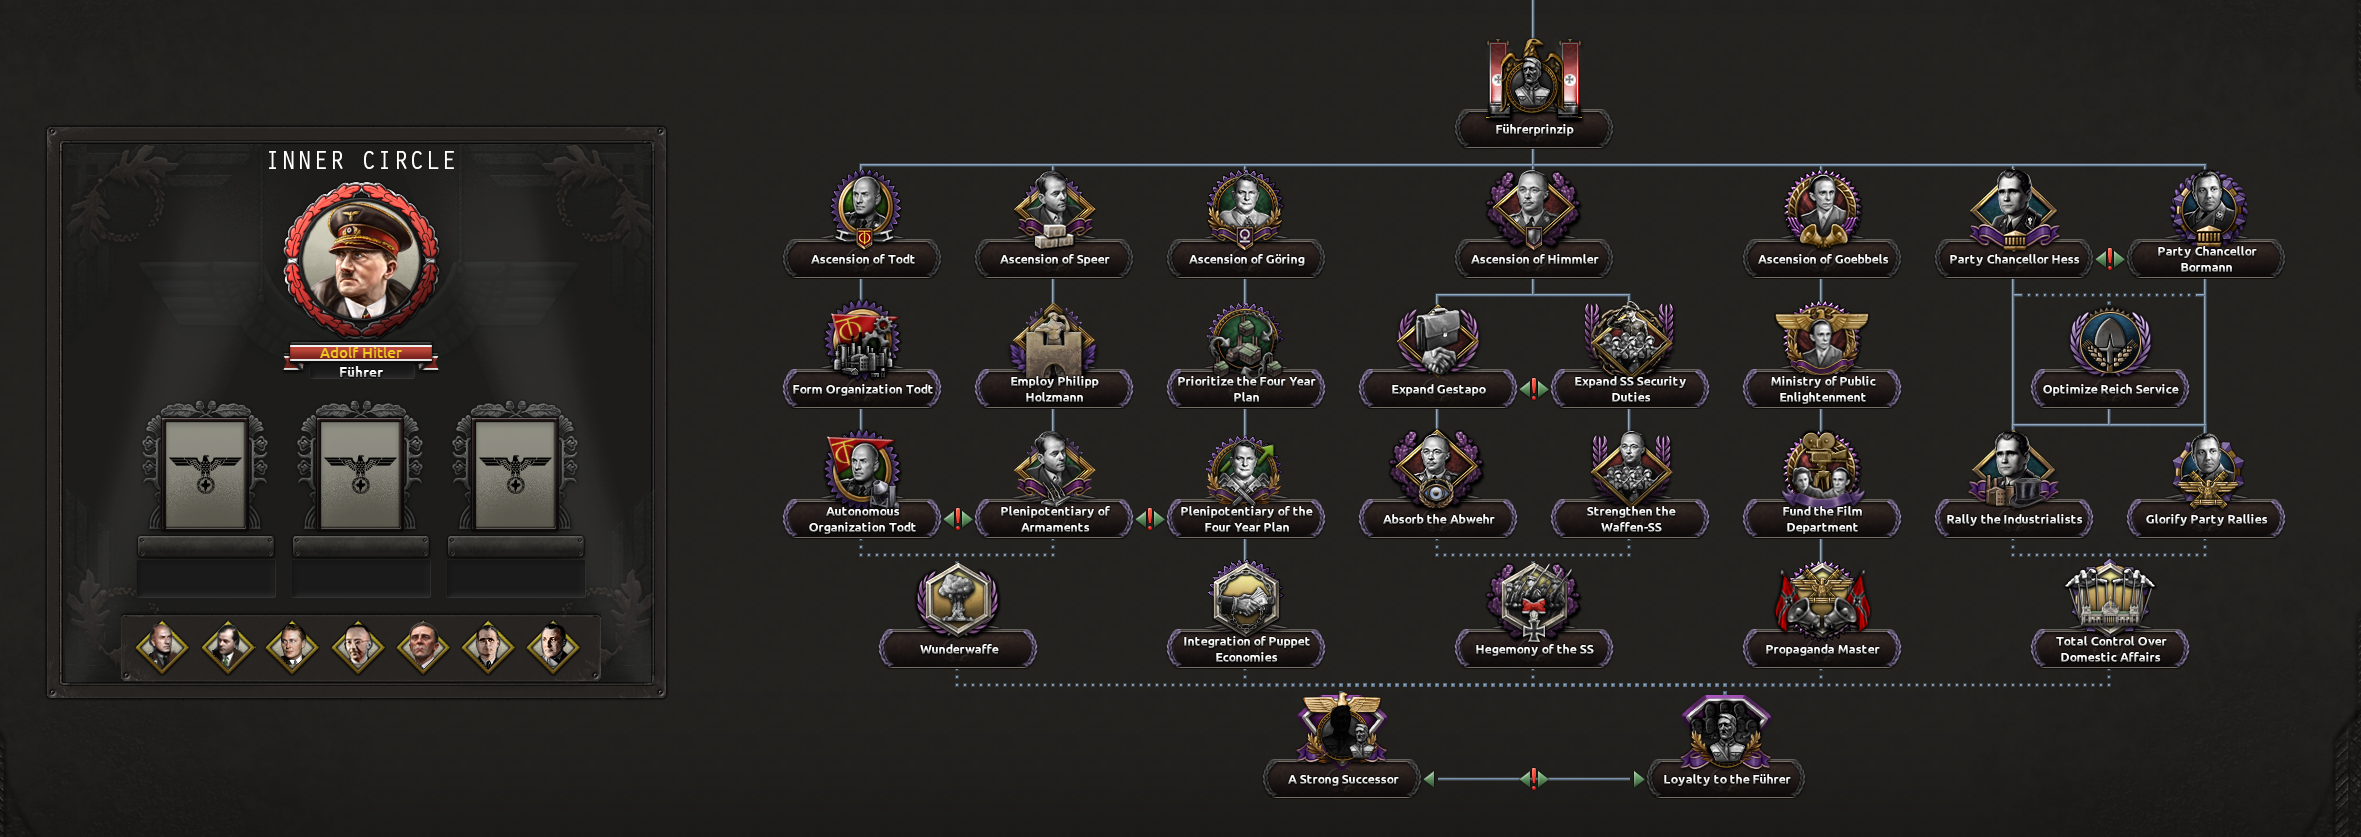
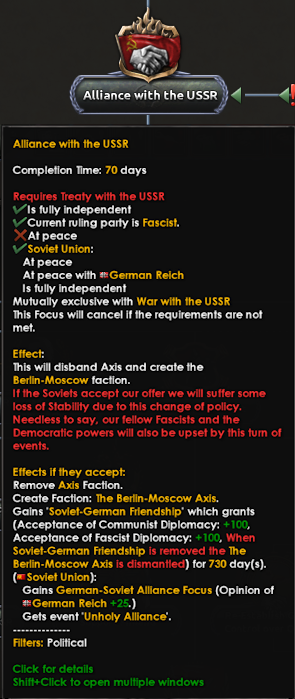
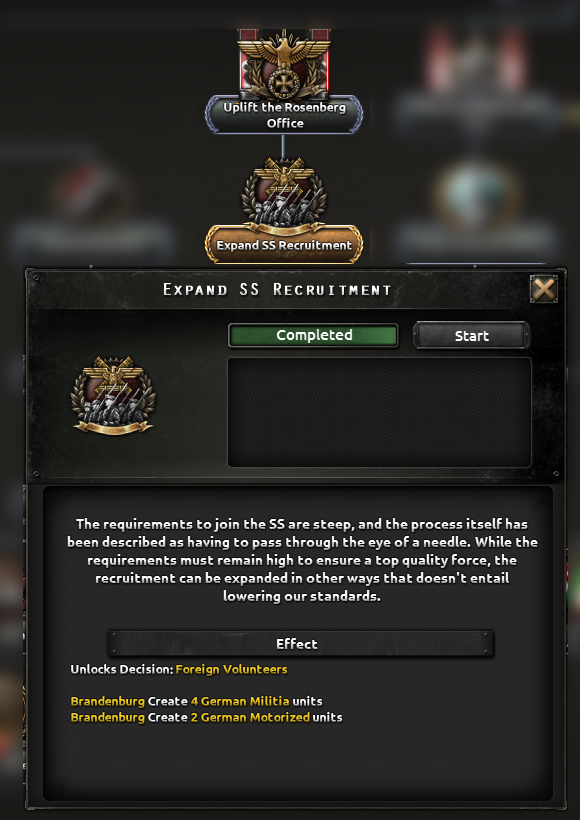
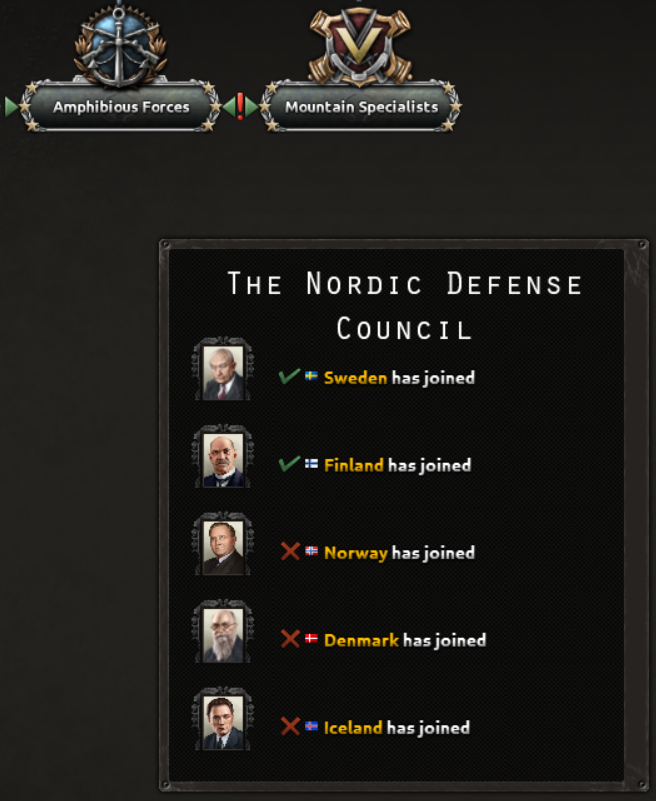
You've probably seen the Inner Circle GUI in another Dev Diary by now, but did you know that the whole GUI is written in script, and it doesn’t contain a single scripted GUI window? The inner circle is the first usage of what we call focus inlay window. A focus inlay window is, similar to the continuous focus window, a GUI object that is drawn inside the focus tree view..Let’s go through an example: We want to display all the potential members of the Nordic Defence Council and if they have joined. For some reason it’s also very critical for us that we show the leaders of the countries. Something like the following:
A focus inlay window to show the potential members of The Nordic Defense Council with access to the joint focus tree.
When defining a new inlay window, there's three main components that you need to implement: The inlay window definition; the GUI definition; and add it to the focus tree(s) it should be shown. Let's start with the completely new construct, the inlay window definition.
As for most components in HoI4 different databases have different folders and so has this. The inlay windows are located in the `game/common/focus_inlay_windows/` and we can throw up the first definition of the inlay window as follows:
nordic_alliance_inlay_window = {
window_name = nordic_alliance_ui_window
}
This is actually a minimum working example for a focus inlay window definition. We've now a new inlay window with ID `nordic_alliance_inlay_window` that points to a container window named `nordic_alliance_ui_window`. Let's continue with adding more stuff to this later on and continue with the GUI itself.
guiTypes = {
containerWindowType = {
name = nordic_alliance_ui_window
orientation = lower_left
size = {width = 400 height = 450 }
clipping = no # Never clip in focus inlay windows due to some legacy bugs
background = {
name = background
quadTextureSprite = "GFX_tiled_window_1b_border"
alwaystransparent = yes
}
instantTextBoxType = {
name ="faction_name"
orientation = upper_left
position = { x = 0 y = 20 }
font = "hoi_36header"
context_aware_text = [Country.GetFactionName]
format = center
maxWidth = 400
}
iconType = {
name = "sweden_frame"
spriteType = "GFX_ascended_advisors_unappointed_frame"
orientation = upper_left
position = { x=55 y=107 }
centerPosition = yes
scale = 0.4
}
iconType = {
name = "Sweden"
spriteType = GFX_blank_leader_portrait
orientation = upper_left
position = { x = 40 y = 90}
context_aware_tooltip = [SWE.GetLeader]
scale = 0.2
}
instantTextBoxType = {
name = "sweden_text"
orientation = upper_left
position = {x = 100 y = 105 }
context_aware_text = {
localization_key = NORDIC_COUNCIL_MEMBER
IN_FACTION = [SWE.NordicCouncilMemberInFaction]
COUNTRY = [SWE.GetNameWithFlag]
}
}
# Below are copies for the Sweden entries adapted for the rest of the Nordic countries.
[...]
The GUI components aren't anything new, but I've thrown in some of the new localization capabilities to give you an example. Since all focus inlay windows are localised with the focus tree country as the context, we're free to use all the new fancy stuff when writing the localization. We have one `context_aware_text` that uses the contextual localization to grab the faction name. Another that uses bound localization to localise `NORDIC_COUNCIL_MEMBER` with the parameters `IN_FACTION` and `COUNTRY` with the result from localising `[SWE.NordicCouncilMemberInFaction]` and `[SWE.GetNameWithFlag]`, respectively. I’ve also thrown in a `context_aware_tooltip` to get the name of the leader when hovering over the portrait.
While we're at it, we can complete the localization by adding the following scripted localization to the game (in `game/common/scripted_localisation`):
defined_text = {
name = NordicCouncilMemberInFaction
text = {
trigger = {
is_in_faction_with = ROOT
}
localization_key = TRIGGER_FULLFILLED_PREFIX
}
text = {
trigger = {
always = yes
}
localization_key = TRIGGER_UNFULLFILLED_PREFIX
}
}
And add the localization key `NORDIC_COUNCIL_MEMBER` to a loc file:
NORDIC_COUNCIL_MEMBER: "$IN_FACTION$ $COUNTRY|Y$ has joined"
With the localization done we only need to fix the portraits of the country leaders. Defining dynamic images for focus inlay windows is done in the focus inlay window definition:
nordic_alliance_inlay_window = {
window_name = nordic_alliance_ui_window
scripted_images = {
Sweden = {
GFX_portrait_SWE_per_albin_hansson = {
SWE = {
has_country_leader = {
ruling_only = yes
character = SWE_per_albin_hansson
}
}
}
GFX_blank_leader_portrait = yes
}
# Insert definitions for the rest of the nordic countries below
[...]
The `scripted_images` entry contains a list of image definitions that will be used in the focus inlay window. In this case, the icon named `Sweden` will have its image replaced with `GFX_portrait_SWE_per_albin_hansson` if Swedens’ current country leader is `SWE_per_albin_hansson`. If this doesn’t hold, then the next entry in `Sweden` will be checked and so on until something that evaluates to true is encountered. The last entry in this example (`GFX_blank_leader_portrait`) always evaluates to true and is therefore the default image if no other is true.
Now there’s only some final touches to be made. Firstly, we’ll restrict the inlay window to only be shown if the country has formed (or joined) a Nordic joint alliance (i.e. has completed the `NORDIC_form_joint_alliance`. Secondly, we’ll set the window to only be visible to the country owning the focus tree (so no other player can view it).
nordic_alliance_inlay_window = {
window_name = nordic_alliance_ui_window
internal = yes
visible = {
has_completed_focus = NORDIC_form_joint_alliance
}
[...]
}
That’s it, really. We’ve now completely defined a focus inlay window. All that remains to do is to add it to the relevant focus trees:
focus_tree = {
id = sweden_focus
[...]
inlay_window = {
id = nordic_alliance_inlay_window
position = { x = 6500 y = 1000 }
}
[...]
}
I really look forward to seeing all the cool stuff you can come up with the focus inlay windows. And I hope you all enjoy the new modding constructs.
Happy modding!
Make sure to check out the Expansion Pass Here:
https://store.steampowered.com/app/3152810/Hearts_of_Iron_IV_Expansion_Pass_1
Share: 


 video here
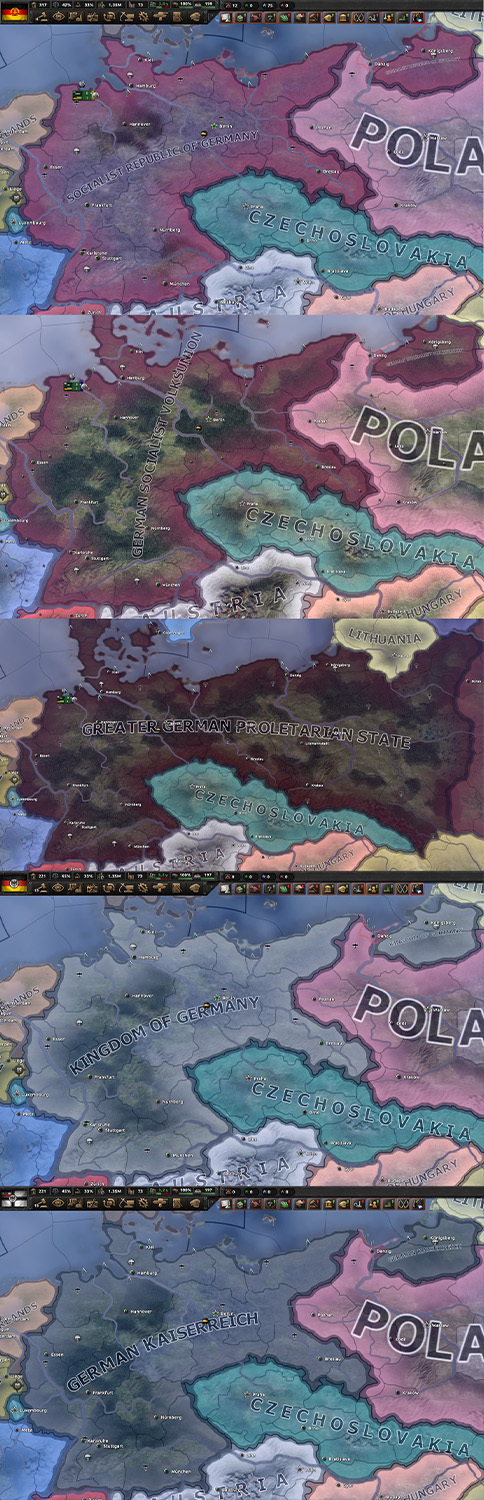
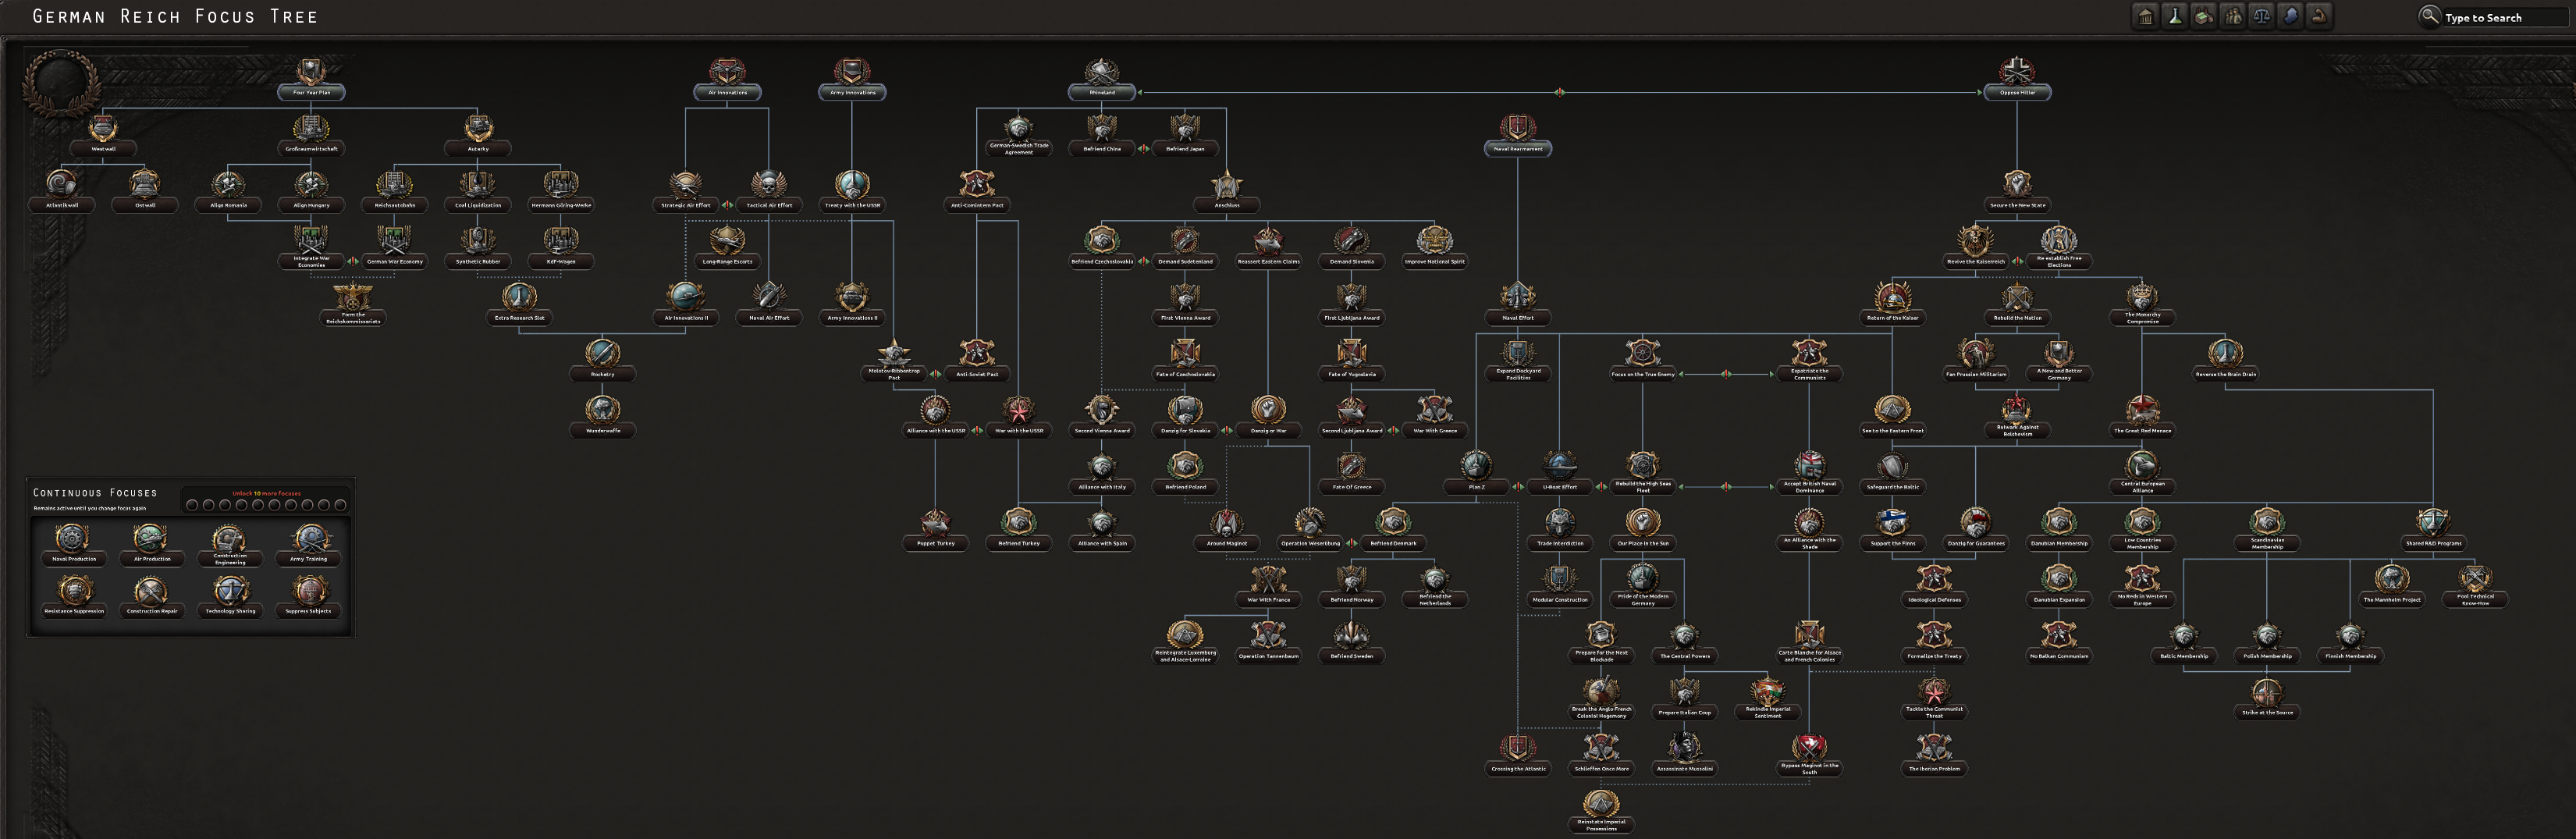 The Old German Focus Tree has served us well over the years
 But it’s time to let a new German Tree sprout
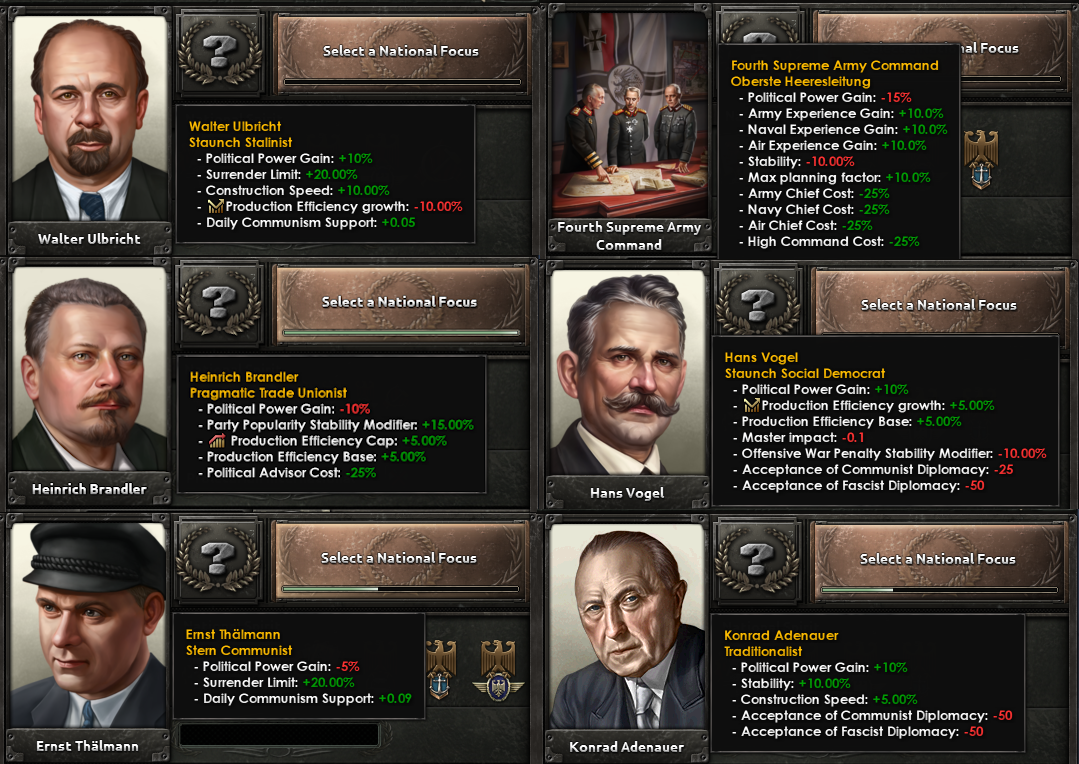
 Germany’s democrats and monarchists have received more to do and are now even accompanied by the communists
 The Democratic and Monarchist paths share most focuses but cater to different playstyles while not excluding any of them
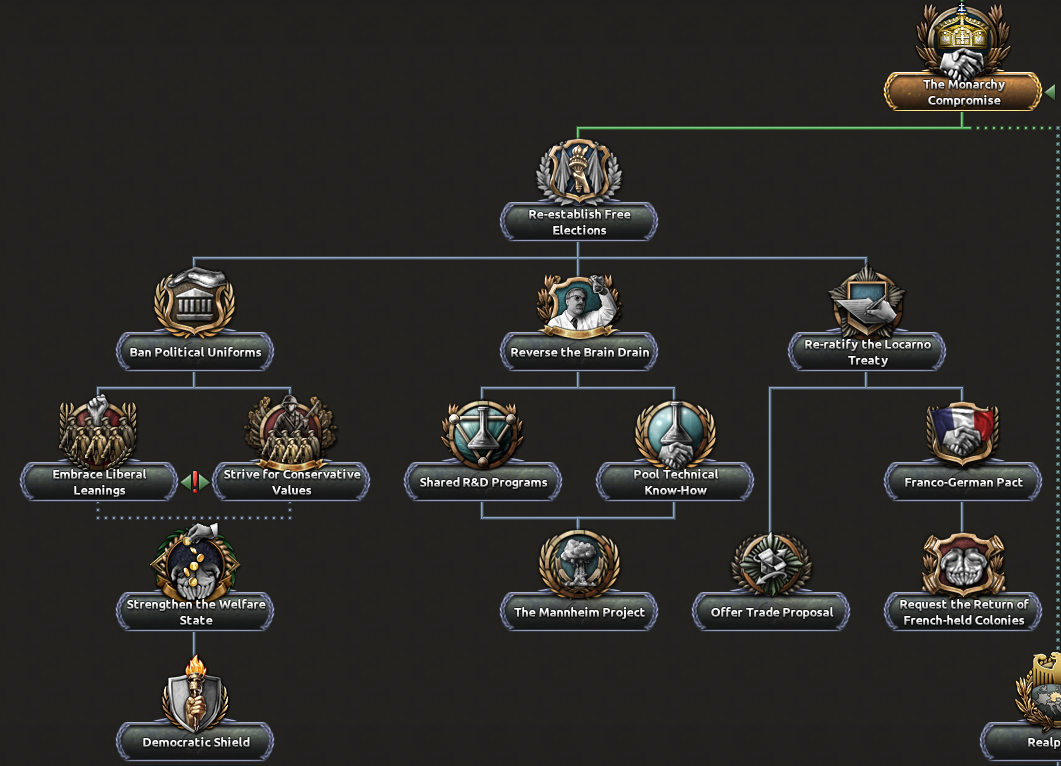 After you Re-establish Free Elections you can become a technological powerhouse, secure better relations with your Western neighbours, but also become a beacon of Democracy
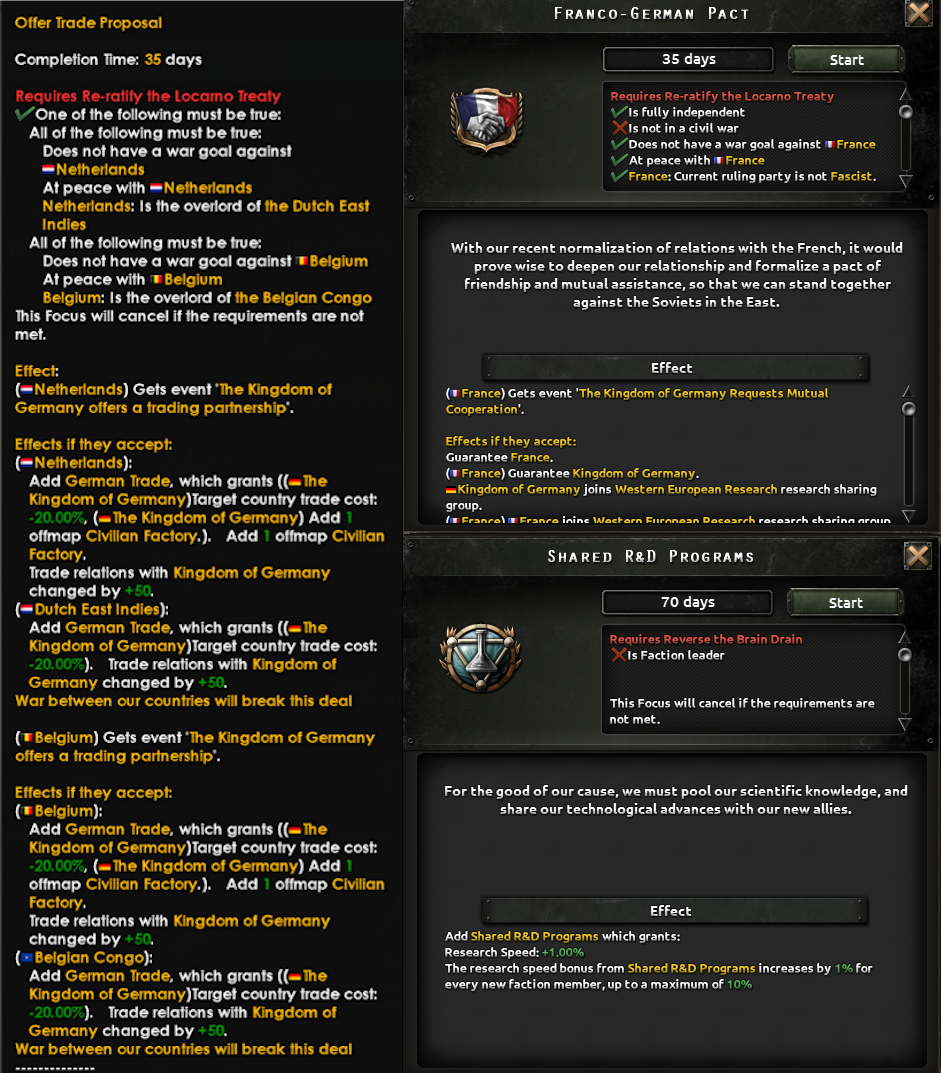 Cooperation and reconciliation will lead to technological innovations and more trade
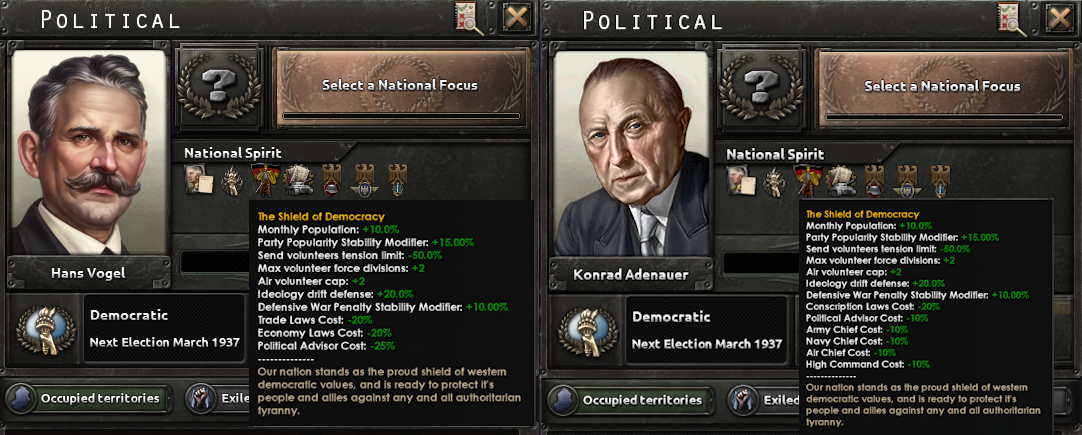 The Shield of Democracy comes in two different flavours
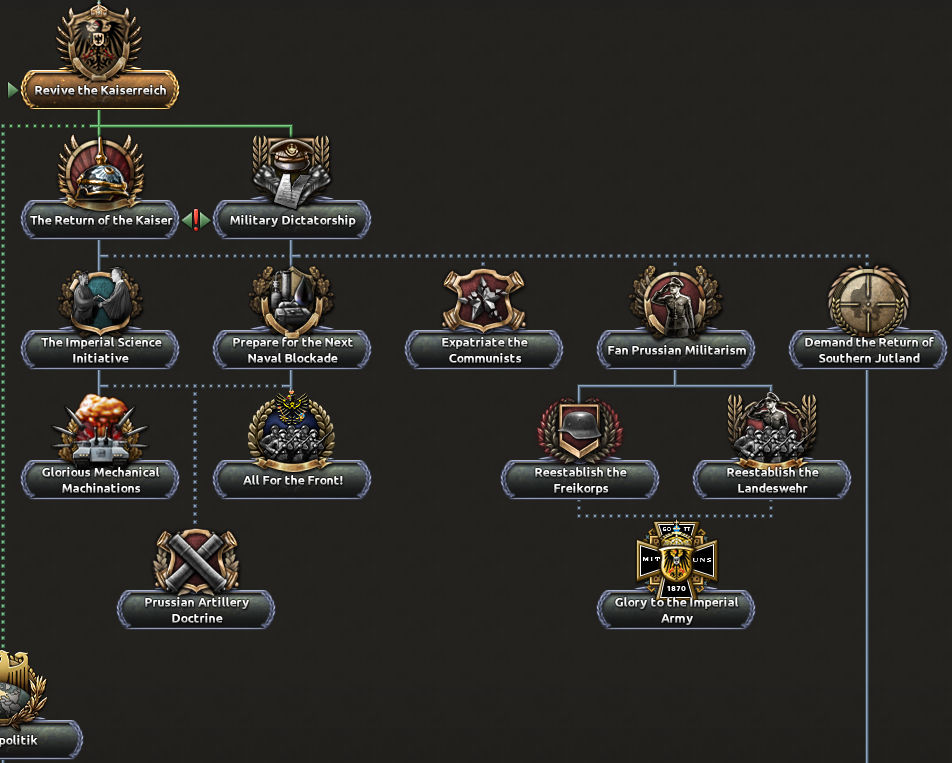 After you Revive the Kaiserreich you can start to realize the Imperial Forces’ true potential
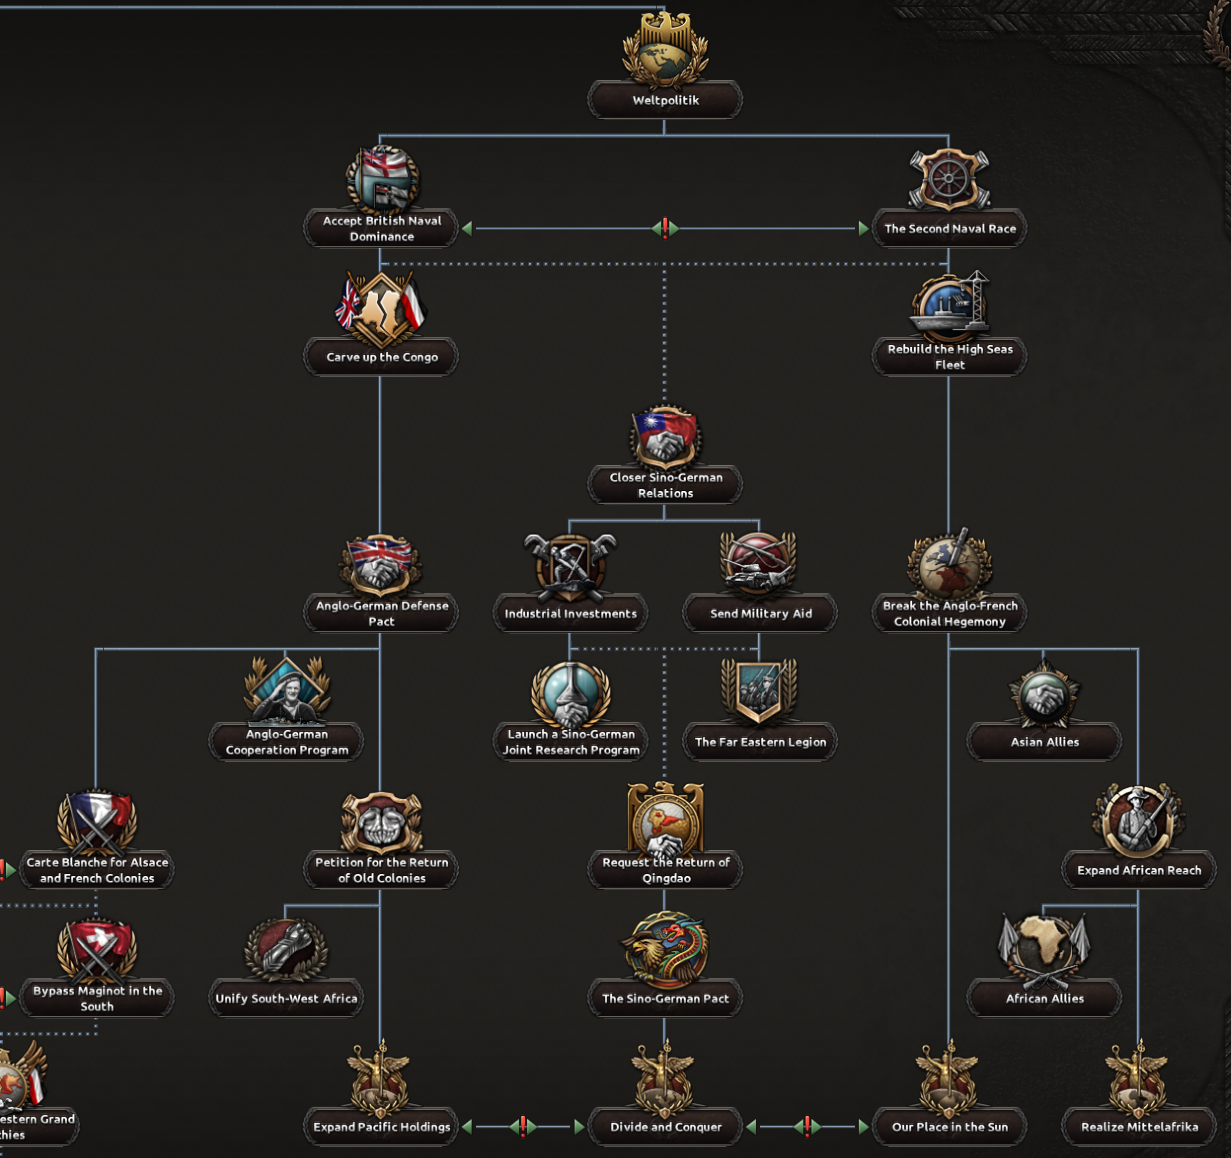 With Germany’s old colonies lost, the question is how you will regain them
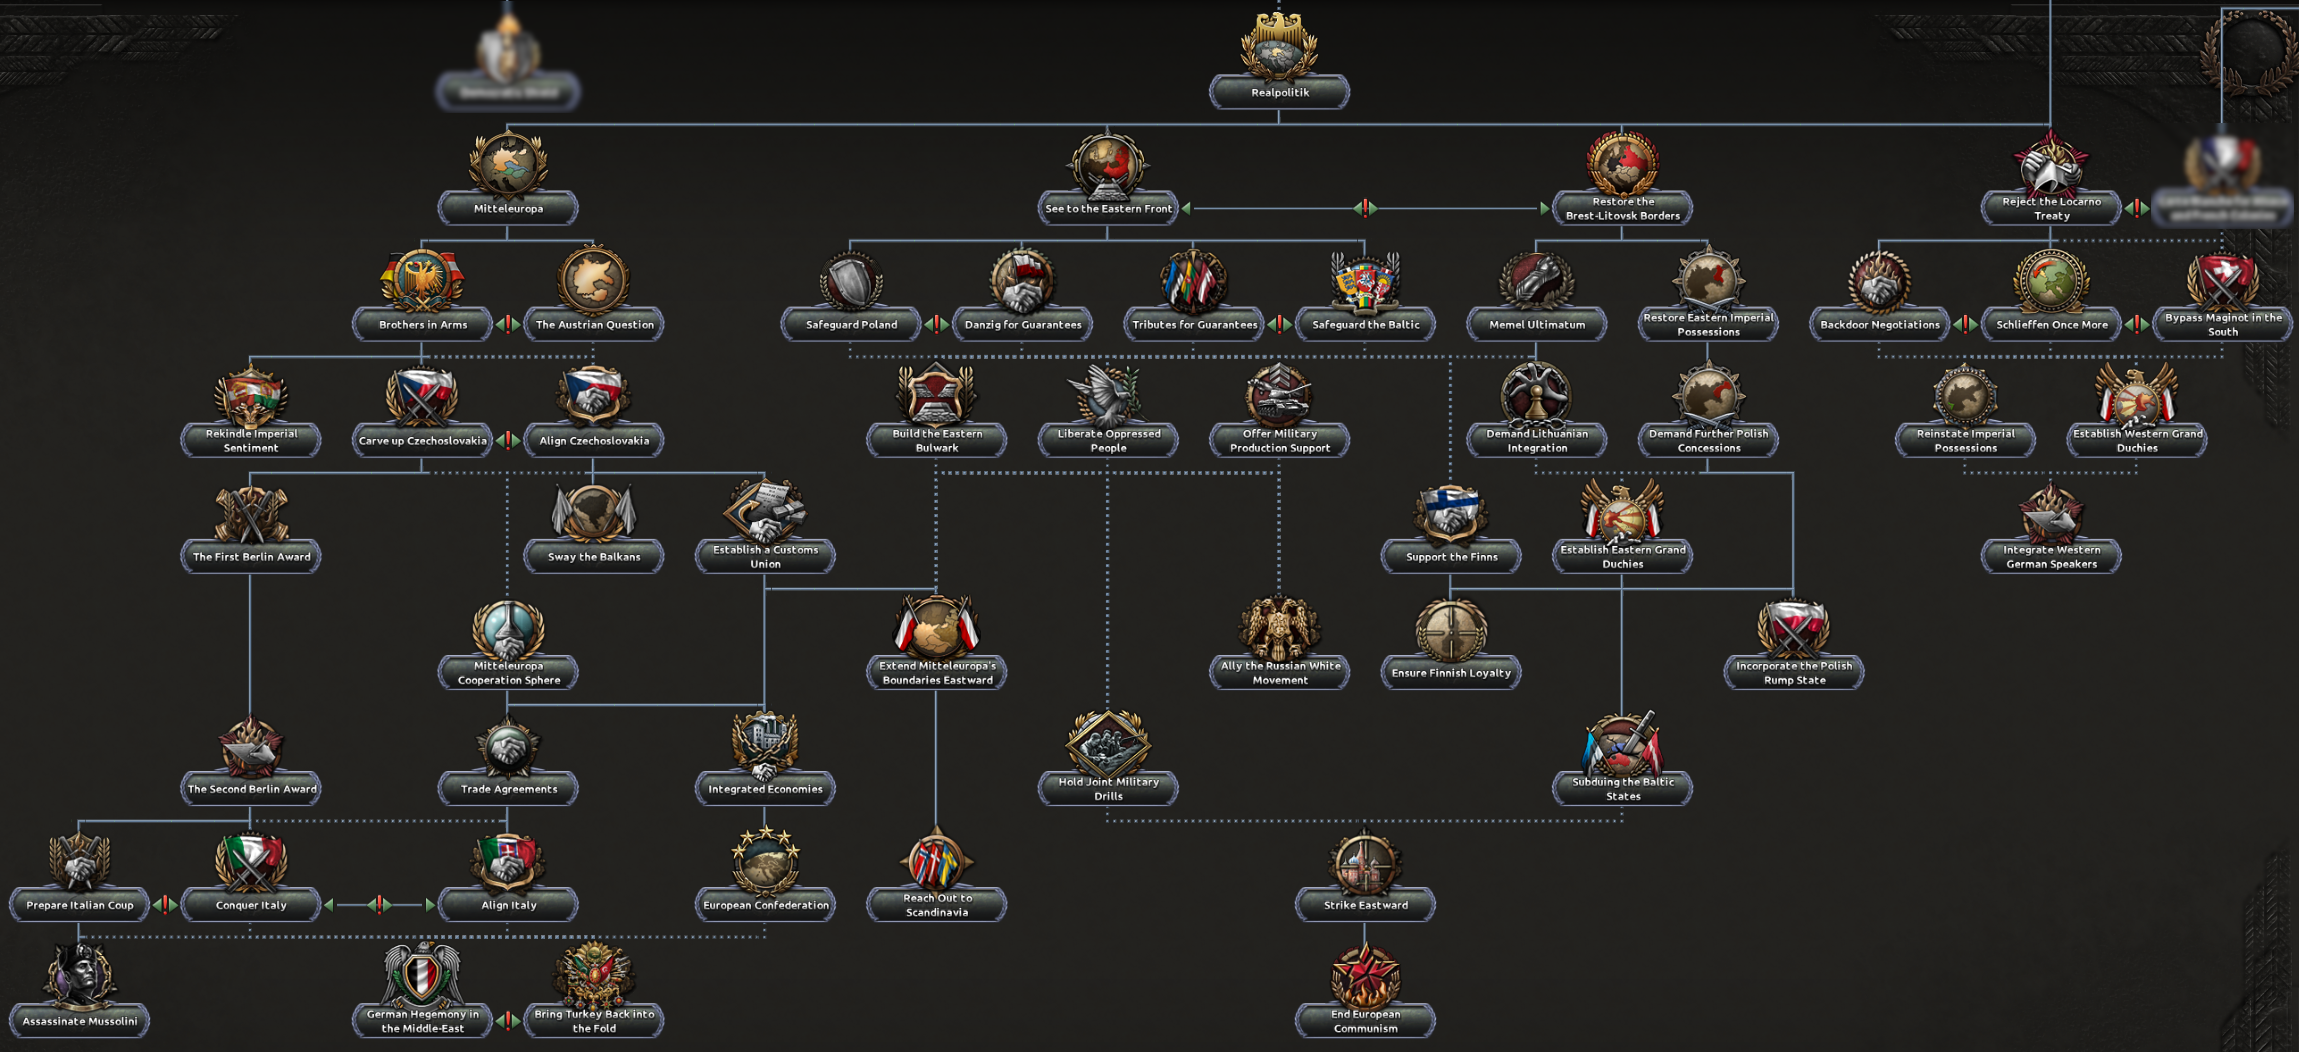 What alliances and deals will you strike to strengthen Germany?
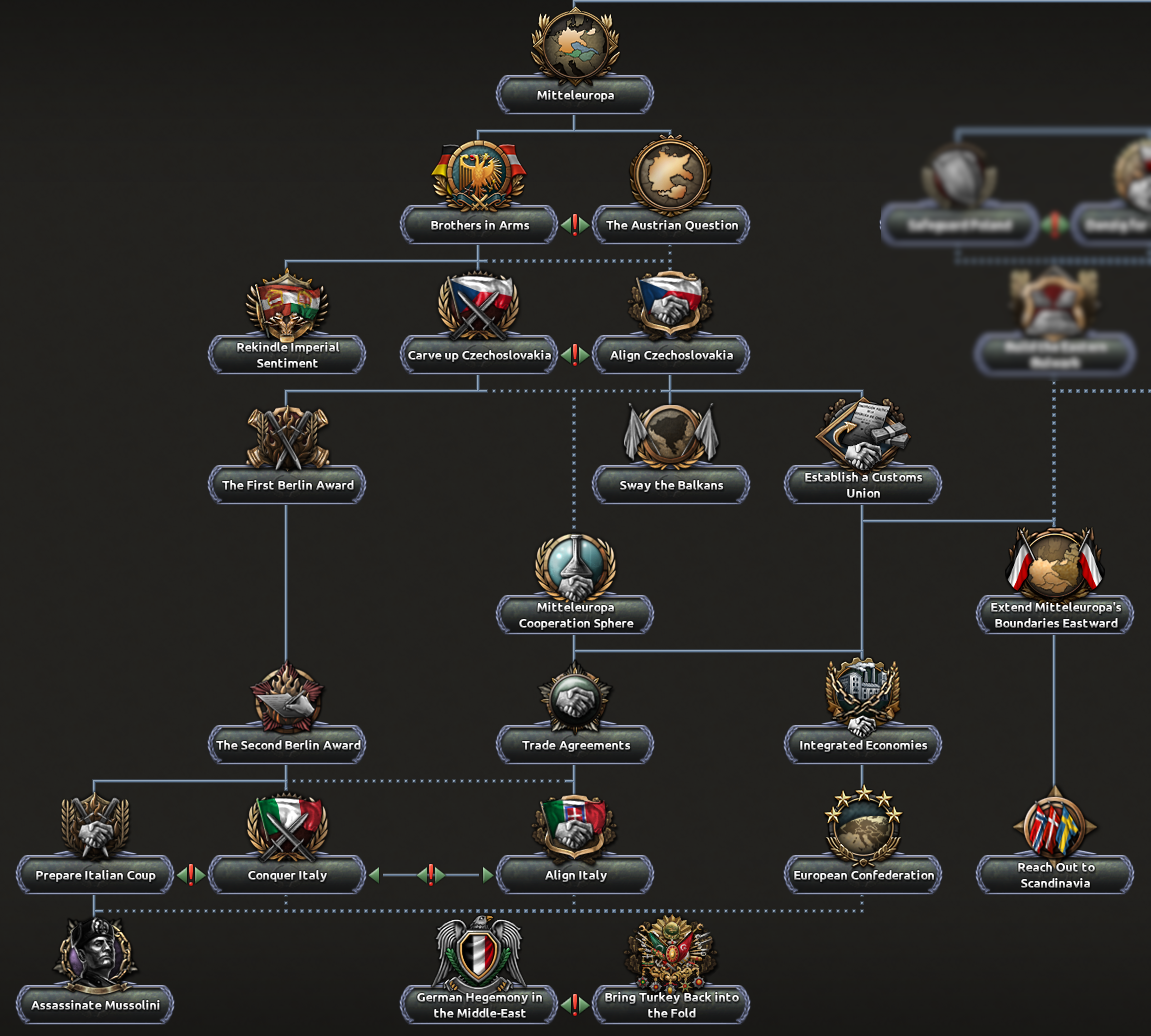 Tie other nations closer to Germany by strengthening their industries and exploiting their resources
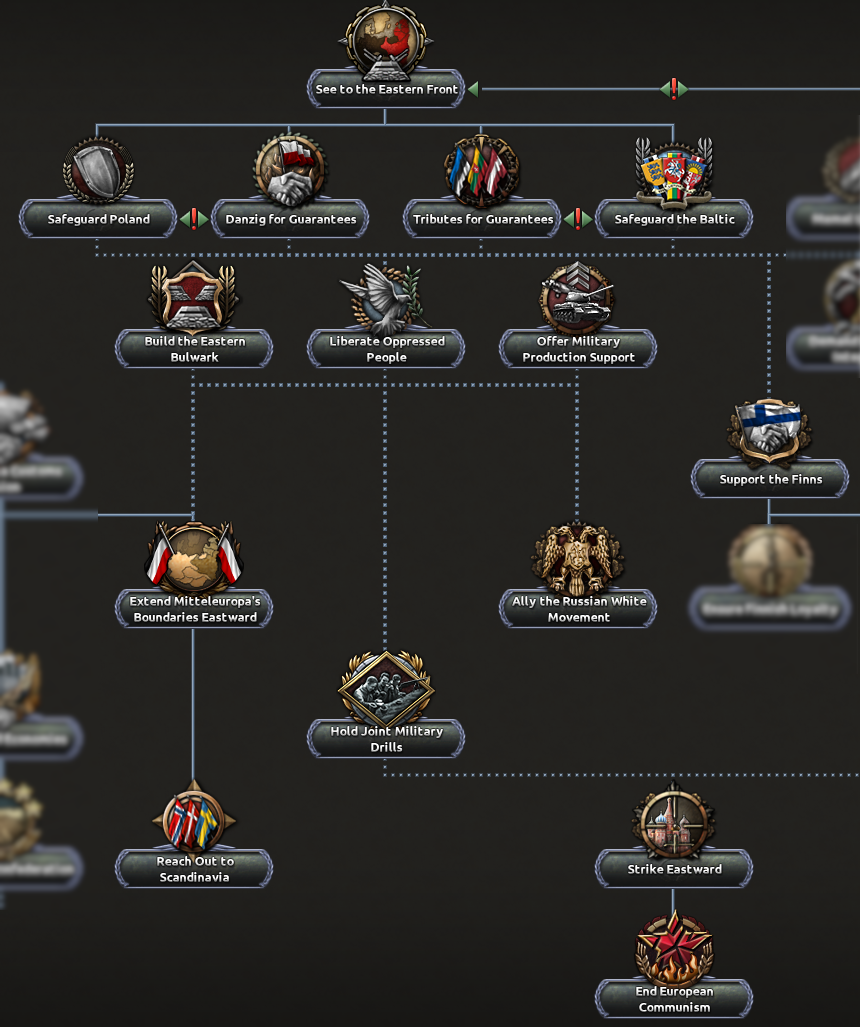 Who said playing nice can’t be fun? Protect Eastern Europe before the Soviets come knocking on your door
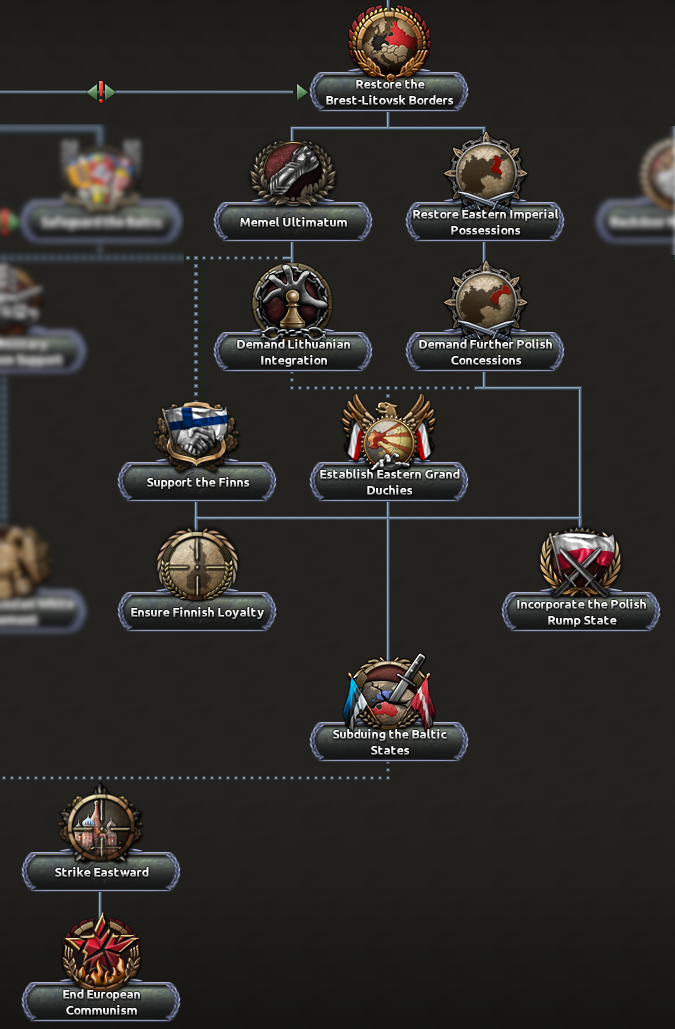 Coerce your eastern neighbors into giving up lands so you can restore the borders set by the Treaty of Brest-Litovsk
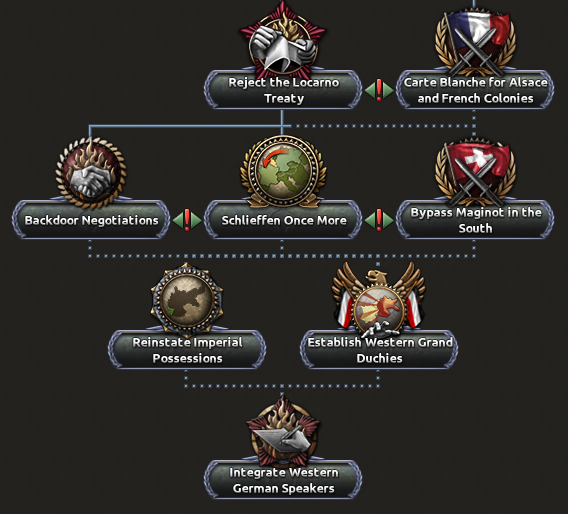
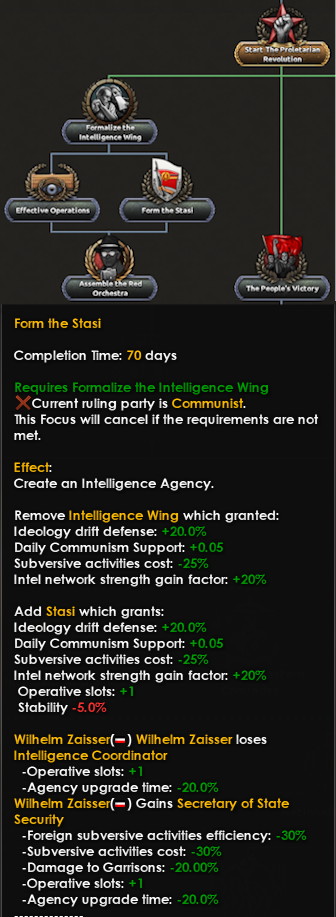
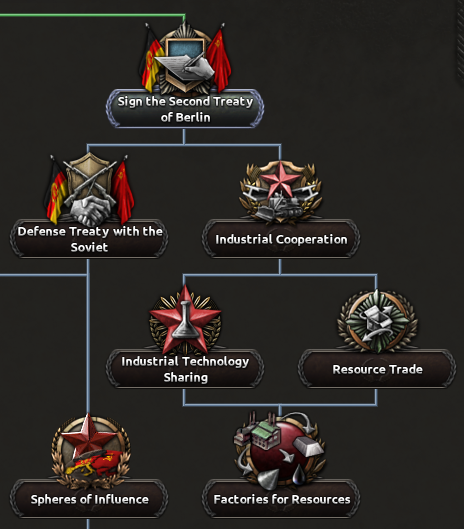
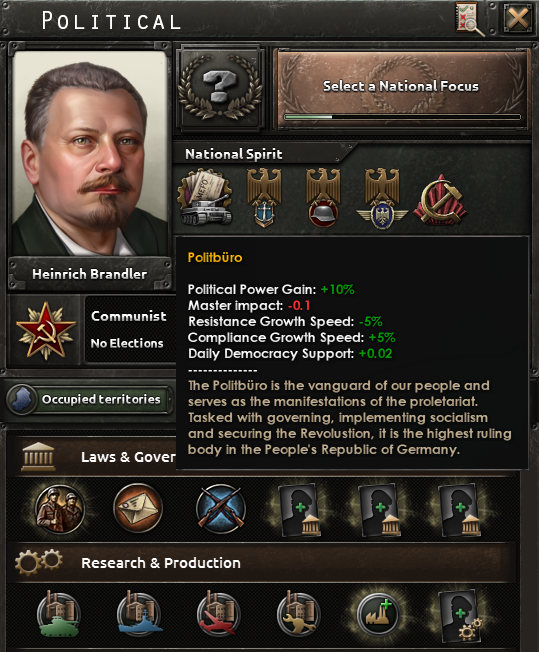
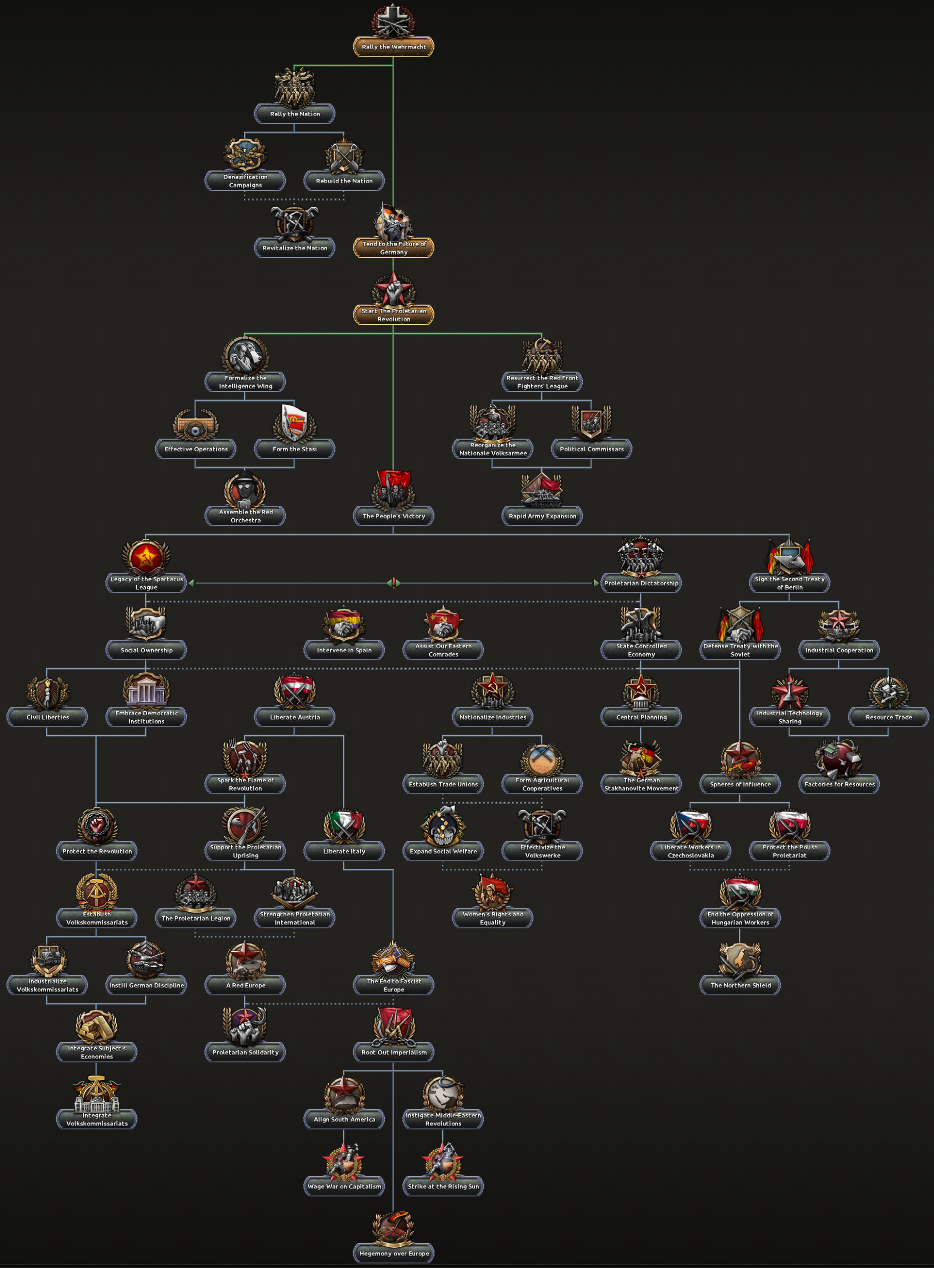 Throw off the shackles of capitalism and free workers around the world as Communist Germany
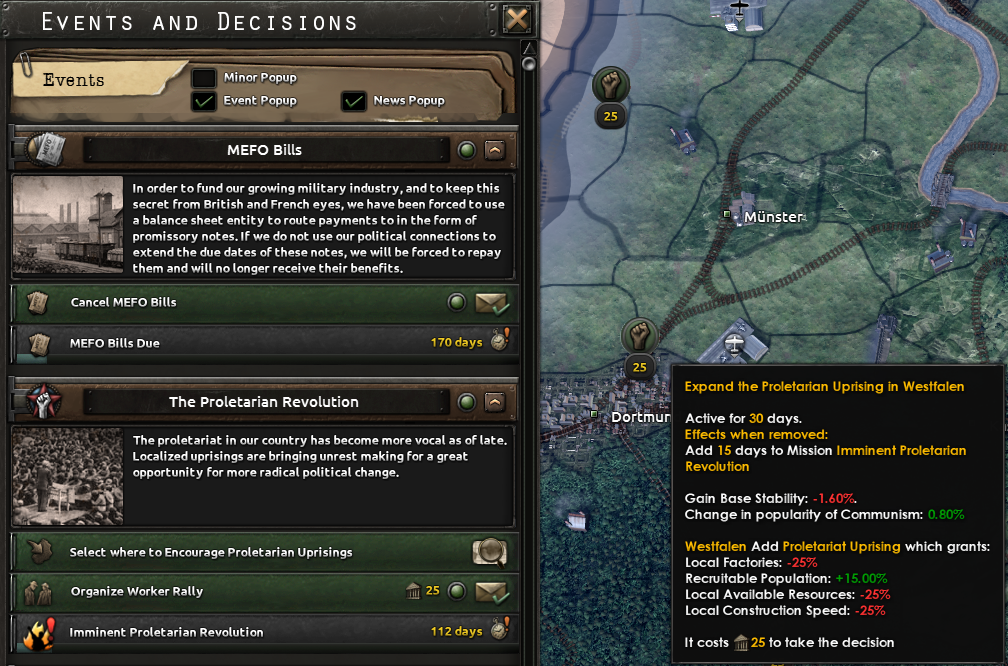 Spread the Proletarian Revolution to new states to gain momentum for your cause!
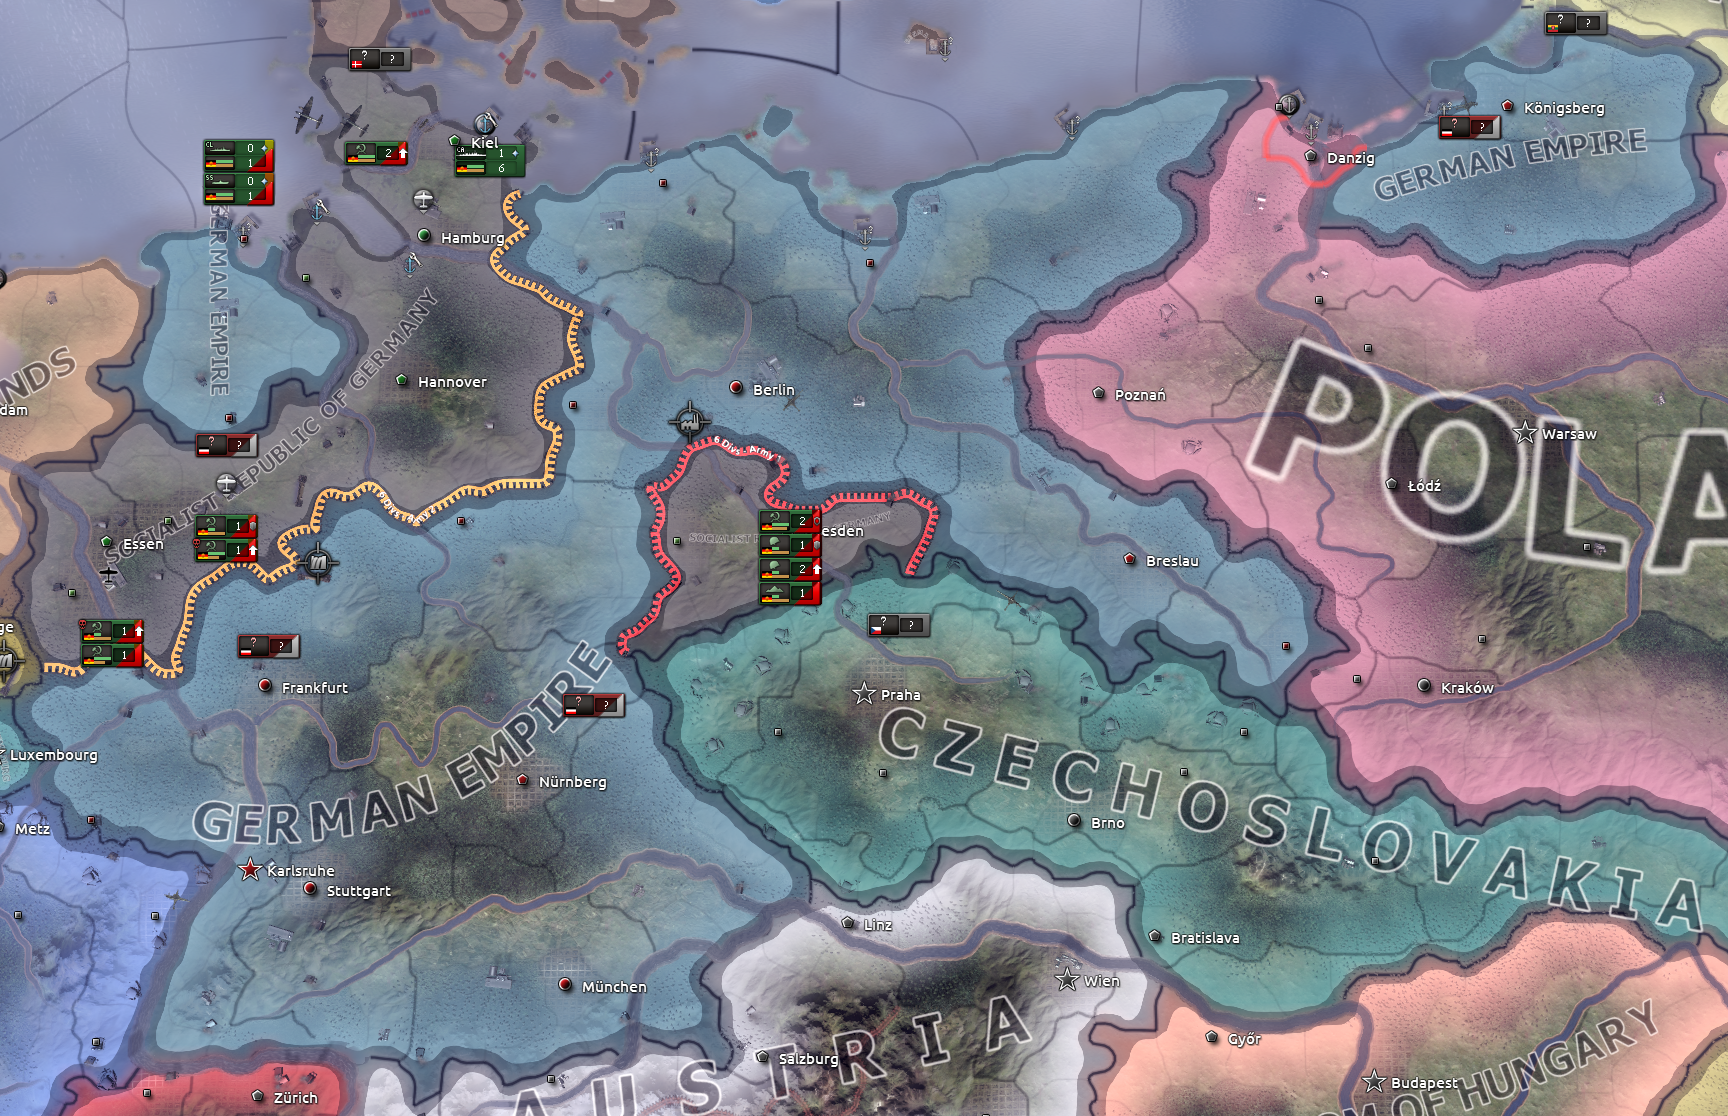 The Second German Civil War
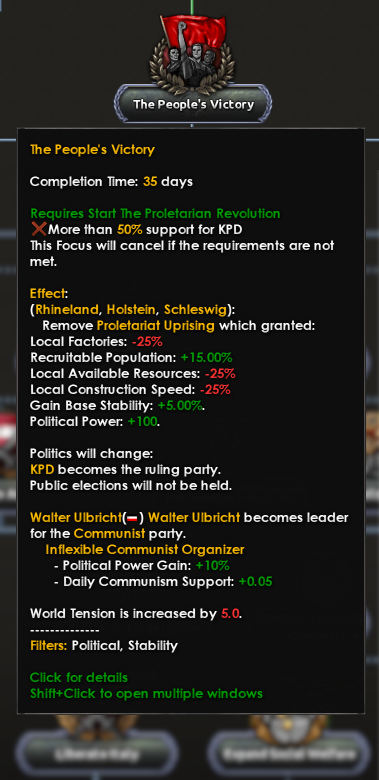
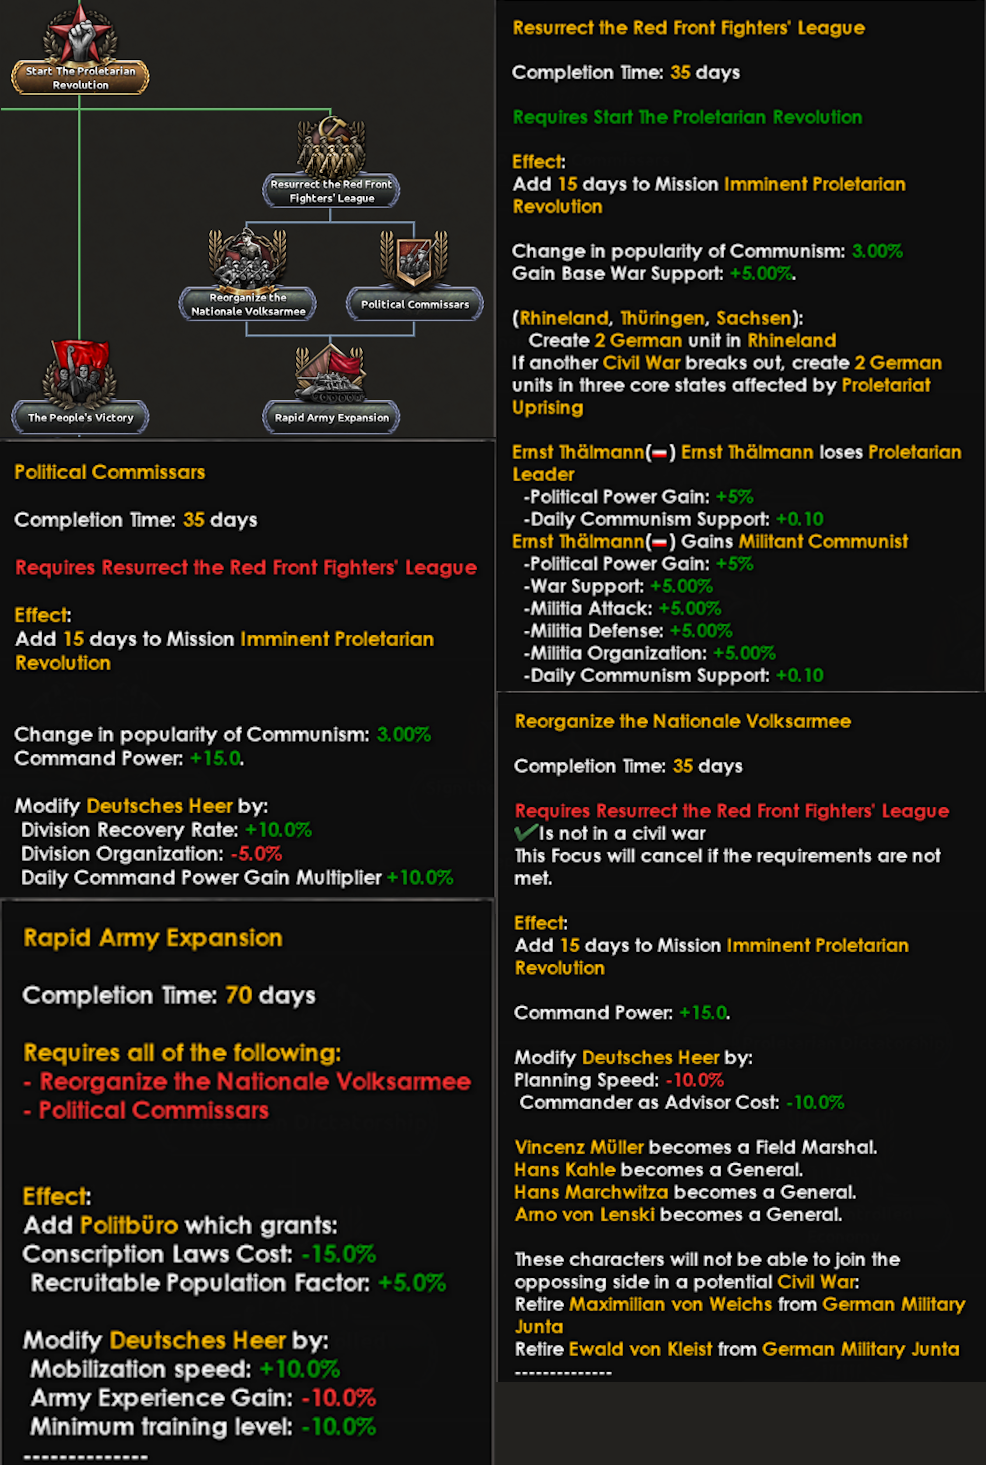 Get Communist militias and upgrade Ernst Thälmann’s advisor trait in the Nationale Volksarmee branch (where you might have to sack some generals but also get new ones)
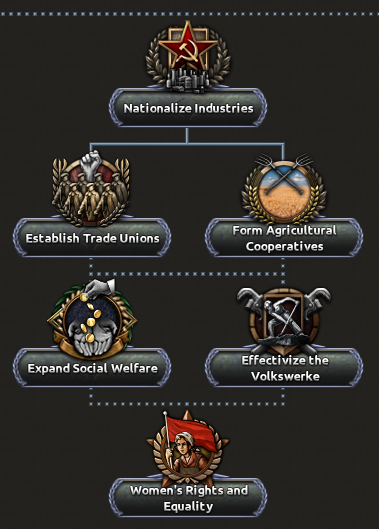
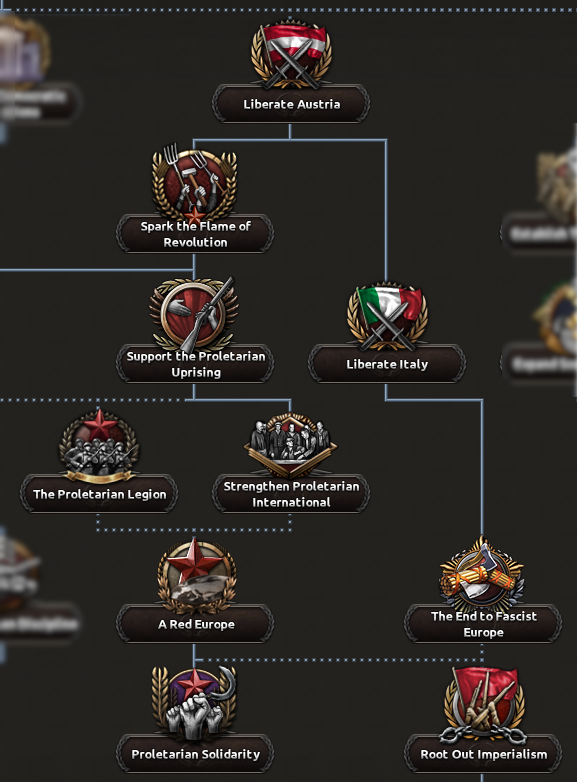
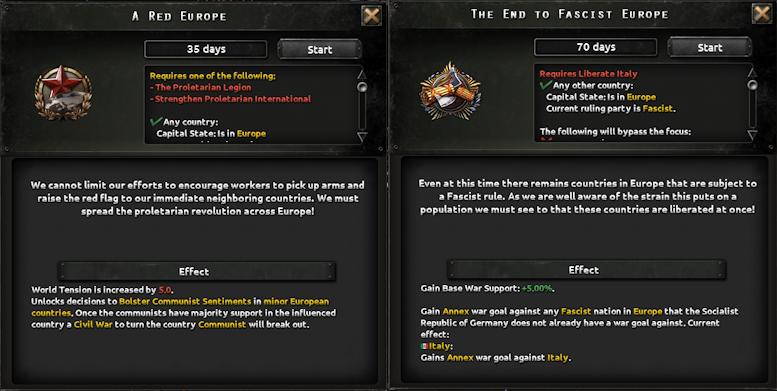 Turn all of Europe Red to bolster your faction in ever-growing numbers and put an end to Fascism in Europe
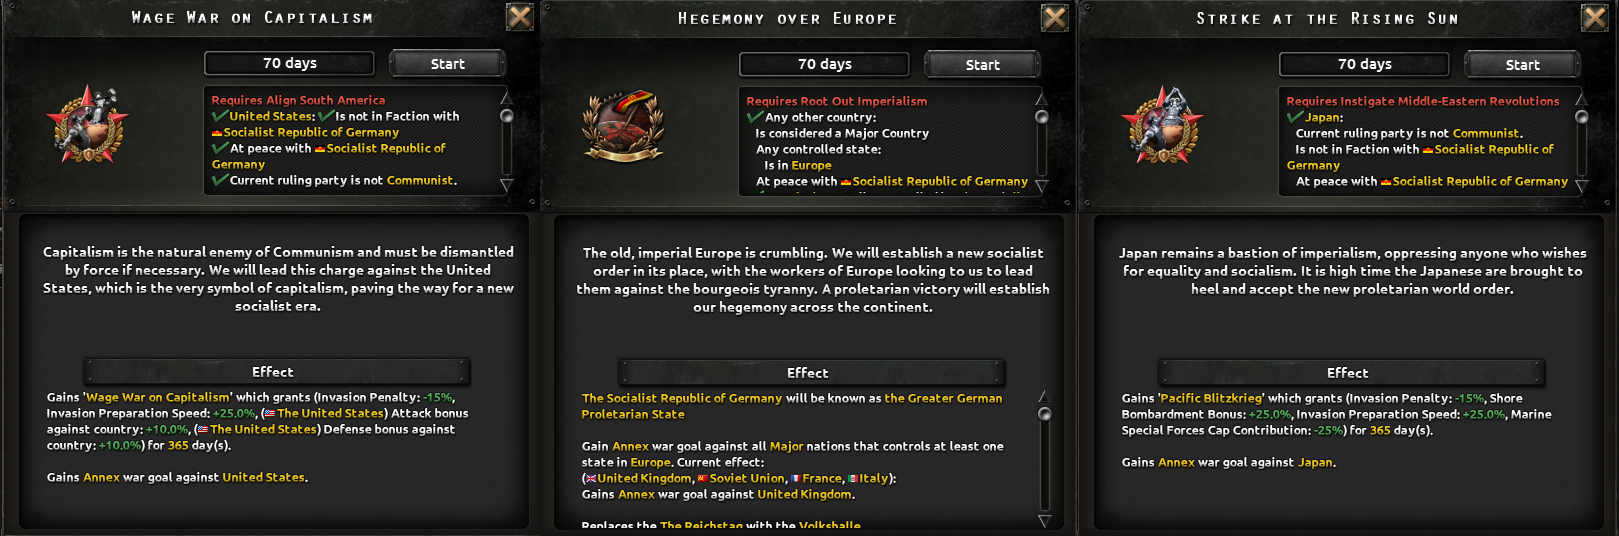 Communist hegemony won’t be realized until we have Hegemony over Europe
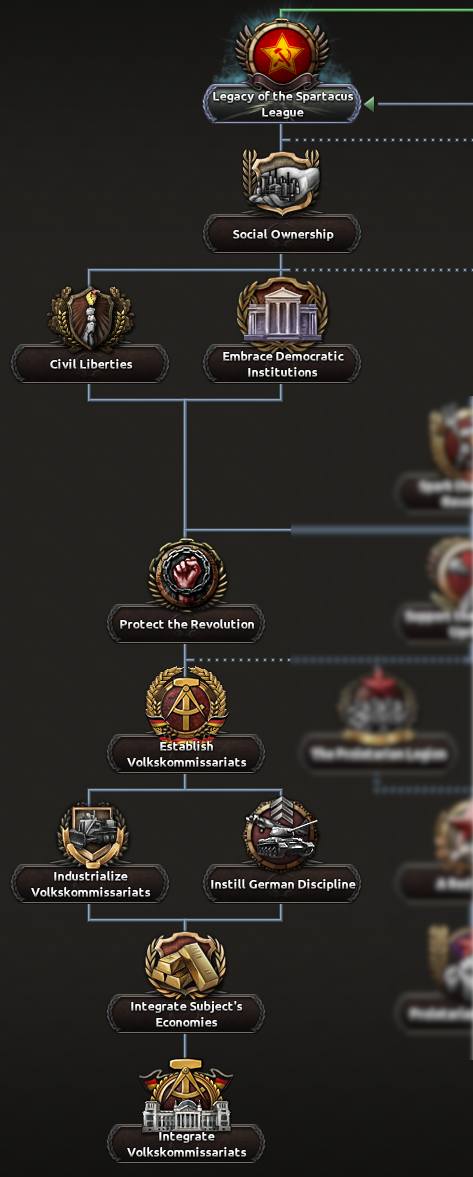
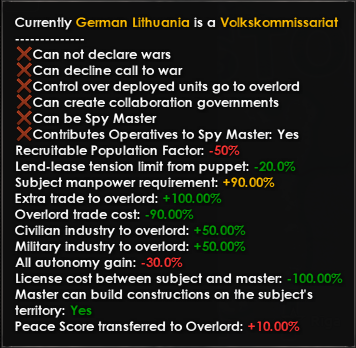
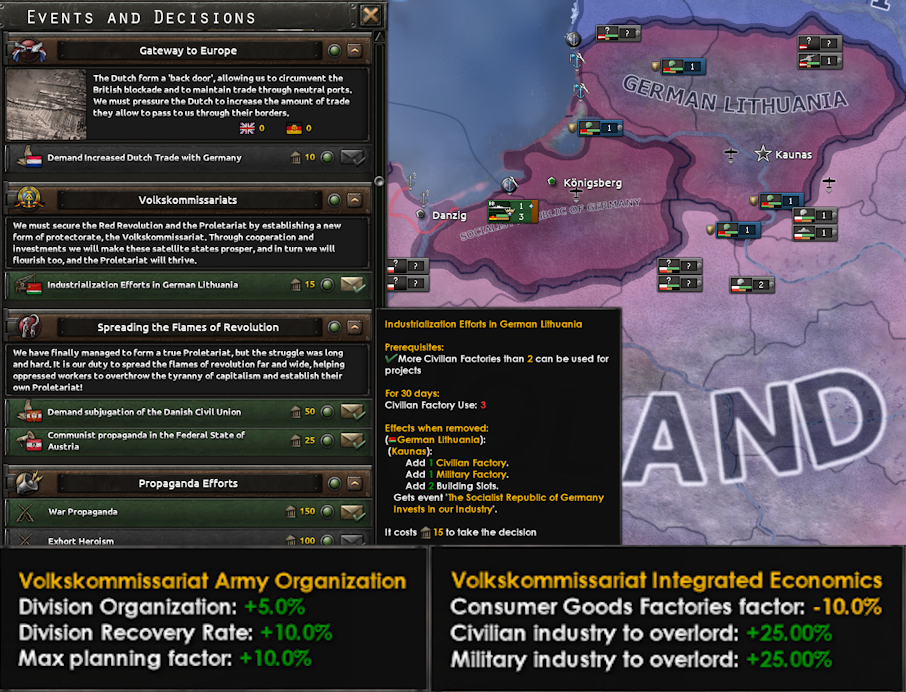 Boosting your Volkskommissariats will inevitably strengthen you too
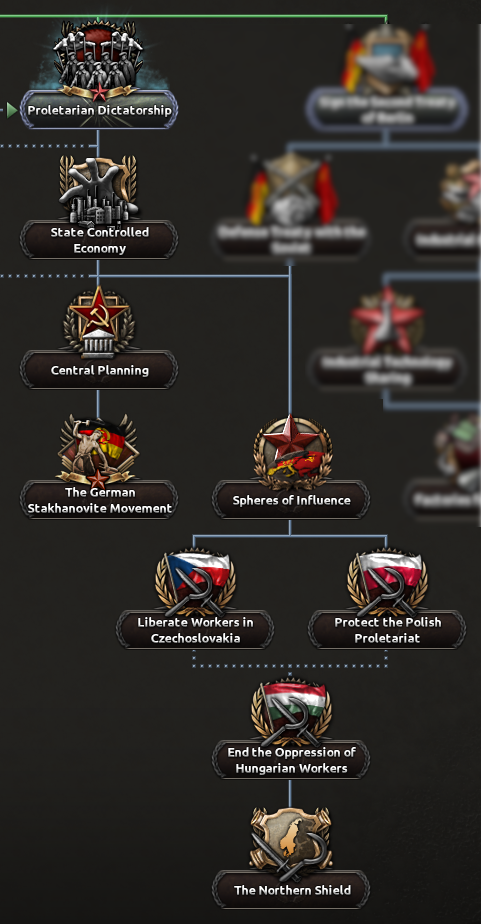
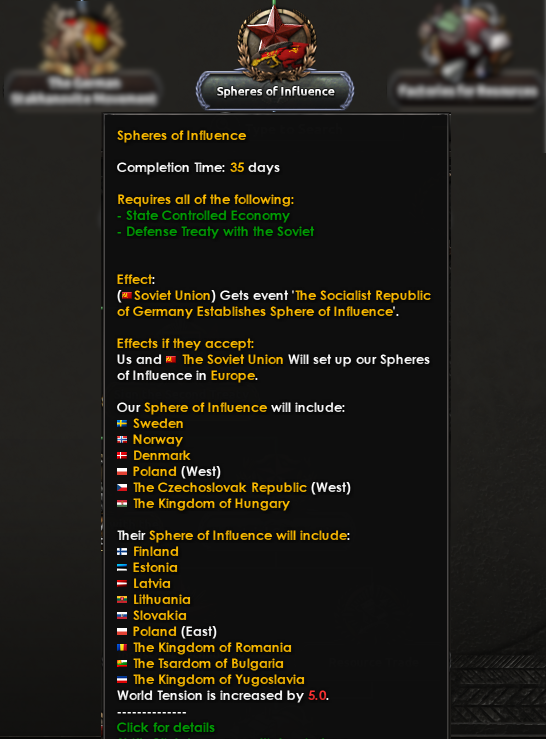 The Spheres of Influence will divide Europe between you and the Soviets