Other Plushies lack a certain flair or Discipline, whereas THIS Duck-Kaiser-billed platypus has all the authority and gravitas befitting the Ruler of PLUSSIA! Equipped with the formal regalia befitting their station, this little Imperial will rule over your display shelf with all the venom a semi-aquatic turn of the century ruler should!
Get your LIMITED EDITION Hearts of Iron plushie TODAY and give your collection some Plussian might! The campaign will only run for a limited time, so make sure to order your Kaiser Platypus right now and don’t miss out!
Hi, Thomas here talking about game mechanics again. I work as Design Manager and Design Lead on Hearts of Iron. Today we are looking at another of the new features that comes with Götterdämmerung, namely Raids. The normal caveats apply, everything you see here is subject to change, especially visual details as some are awaiting final art touches at the time of writing, and other things, such as balancing and tweaking are ongoing. But you probably know the drill by now.
The Raids feature allows you to plan and execute targeted strikes on enemy installations, or perform unique missions of various kinds. Whereas strategic bombing targets enemy industry and infrastructure in a general way, Raids are pinpoint strikes against very specific targets that usually require months of preparation. Targets can vary, but the general goal of a raid is to inflict strategic damage to your opponent that will hamper their war machine for an extended period of time.
Perhaps one of the most important functions of the Raids is that you can use them to target enemy experimental facilities in order to disrupt their special projects. Once you know the location of a facility, you can start planning a raid to damage it, and inflict a setback to the ongoing project there. A successful strike not only damages the facility, slowing research down until repaired, but can also damage equipment etc. and set the progress back by weeks or even months.
The feature also allows you to replicate things such as Operation Chastise, more commonly known as the Dambusters Raid. You can develop the Barnes Wallis' bouncing bomb, and then target an enemy dam with one of your raids. A successful strike not only knocks the hydroelectric power plant out, it also floods the region, hindering enemy troop movement.
Or, if you want to take that concept even further, you can try to blow up the canal locks in the Panama Canal, to stop enemy ships crossing from the Pacific to the Atlantic Ocean. But you will probably need a very long range bomber for that - unless you start in Central America of course…
Let's take a look at how to work with the Raids:
Setting up a raid
The main interaction point for the Raids feature is the map. You see potential targets on the map and when you hover them you get more details about them.
When you click the target icon, you start setting up a raid against that target. Some targets might have more than one viable Raid type, in which case you first decide what top target with this particular raid. What do you want to strike, the Reichstag, or the experimental nuclear facility in Potsdam? (Just an example, right. Germany does not start with a secret nuclear lab, Promise!)
Deciding on a target for a Raid in Northern Germany
After having selected your target, you need to find a unit to perform the Raid, be it paratroopers, an air wing, or whatever is required by the Raid. You can do this from the map as well, or you can select from a list of units that is displayed at this stage. Various factors affect how good a unit is at executing a Raid, but the most important one is usually how experienced it is. The more experience, the better the chances of getting a really good result. But again, other things apply as well.
Time to choose the airwing
The last thing you need to select is from where to launch the Raid. If it is an air wing you need to pick an airfield within range of the target. Once you have made these choices, the selected team is ready to start preparing for the Raid.
Let’s launch from a safe place
Assembling and preparing
You can’t launch the Raid immediately. The unit must travel to the starting location if not already there. Usually there are other requirements as well. It might require extra equipment of some kind. (Common examples being convoys, transport planes, infantry equipment, or even nuclear bombs…)
Once everything is in place, the unit can start preparing. Equipping the right type of bombs, undergoing special training, and so on. The amount of time needed depends on the Raid type.
Once preparation is complete, you can launch the Raid whenever you choose to - as long as the launch criteria are met. What does that mean? Well, some raids can be prepared in peace time for example, but can’t be launched unless a war is ongoing.
It’s going to take some time, but hopefully it will be worth it
But what if I don’t want to sit and monitor whether a Raid is ready to be launched? First of all, you get an alert when a Raid finishes preparation, so you don’t really have to monitor it that closely. Second, if you feel that it is not necessary to time it exactly you can select auto launch instead. When you do that you get the option to only launch when your chance of a successful Raid is at least at a certain level.
Launching and Success
As said above, the Raid can be launched either manually or automatically. Or if you prefer, you can launch all prepared raids at the same time with the press of a single (red) button.
Once launched you will see a 3d model travel to the target, executing its orders. And when it strikes you get a report of the outcome.
Getting there
A Raid will not automatically be successful. There are a number of factors that come into play when executing a Raid. Some depend on the unit itself (experience for example), others on specific conditions, such as for example air superiority, and others again on what the enemy does and how they have set up their defenses. You see a general indication of your chances on the Raids display, and when you hover the display you get a more detailed breakdown in the tooltip. As a defender you do various things to decrease the chances of a successful Raid. If it is an air strike you can add Anti Air and you can try to gain air superiority, for example.
Our chances aren’t super high, maybe time to do something about it
There is one further lever you can pull. By increasing the risk taking of the unit you can increase the chance, but if they don’t succeed they run a higher risk of taking severe losses. And vice versa, you can lower the risk taking, and thereby minimizing the risk for a disastrous outcome, but also somewhat lowering the chance of a very positive outcome.
It worked flawlessly
Cost
Starting a Raid is a bit of an investment. Especially in time, as the unit involved will be unavailable for quite some time. In addition, additional equipment is sometimes needed, forcing you to have it in your stockpile. Finally, there is a Command Power cost to Raids, lowering your max cap while preparing and executing.
We’ve allocated 25 to this, but we still have plenty to go
Filtering
Together with the map mode selection ui, you have a new section with raid filters. This allows you to hide and display your raid targets and raids depending on your preferences. If you are only interested in displaying Air Raid targets for example, you can hide other categories. Or if you want to hide them all in the Land/Sea/Air map mode, you can do so, and only access them through the raids map mode.
Types of raids
There are a few different types of Raids to choose from in Götterdämmerung, some of which I will talk a bit about below:
As mentioned in the beginning, you can for example do a strike against an enemy experimental facility - much like the historical Raids on Penemünde. This will, if successful, cause damage to the facility; making it slower, and you can set the actual project work back by a number of weeks or even months, buying you more time to defeat your enemies.
If you do the Bouncing Bomb special project first, you can strike an enemy Dam. Dams are a new building that we have added. They apply state level bonuses, and thus are useful for boosting your industry, but of course they can be a bit of a liability if your enemy comes up with a way of destroying them. You can’t build Dams per se, instead you get a few starting ones, and then certain countries can get more through their focus trees where appropriate.
Additionally, if you have developed the bouncing bomb, you can do lock strikes. There are two major locks represented in the game, Panama and Kiel. Blowing up one of these will stop naval traffic through the canals. And no, there are no locks or anything you can blow up in Suez… Sorry… It’s just a flat stretch of water through sand…
Raids can be used as counters to enemy super weapons as well. If your enemy develops the V3 mega gun project, you can use your earthshaker bombs to target and destroy them.
Another thing you can do is to try to strike at your enemy’s resources. For example, you can try to target the Ploiești oil fields, as was done by the USA in Operation Tidal Wave. A successful strike here will lower the oil output from Romania for quite some time, thus hampering the German (and Romanian) war machine.
Hampering the German access to oil
A somewhat different type of Raid are the nuclear strikes. Yes, nuclear strikes are now planned in advance and you need to designate a unit to drop the bomb, you no longer just press a button in the state and province view. The nuclear raids work very similarly to other raids, with one major exception. Instead of having one or more set targets, the UI lets you select any province when planning a nuclear strike - as long as they can be reached. You can plan strikes against neutral countries, but you can’t launch unless at war, and you cannot target your allies - they wouldn’t be your allies if you could, right?
In addition to the initial destruction caused by nuclear bombs, they also now have some lingering effects, making them a bit more devastating than they used to be for the country getting nukes dropped on them
Selecting a place to bomb
Custom Raids
Not all Raids are available to everyone. In order to make raids even more flavourful, we have also added a few custom raids; such as the German Eben Emael raid where Germany had spent a vast amount of money and resources on preparing for a combined paratrooper and glider attack on the Belgian border fortress - having their soldiers train on every step of the attack beforehand. Or as the UK, you can replicate the British bombing of Berlin during the early stages of the war (this was, and is in game, mainly a morale booster). We have also included some of the more odd but rather flavourful Raids, such as Operation Jericho where the UK tried to free French resistance fighters by blowing up a prison using Mosquito fighter bombers.
Chinese Bombers enroute to Japan - but wait what are they dropping?
That's all for this Developer diary, we hope you enjoyed it. Stay tuned, more Götterdämmerung content will be arriving on Wednesday where we will be talking about Belgium and neutrality. Surely Belgium can manage to stay out of the war this time…
Last time we talked about the Common Branches and the Historical Branch of Germany. Now, I, Paradox_Danne, ManoDeZombi, D3vil and Nattmaran (please insert joke about how many content designers it takes to make a Germany) will at least try to explain the various new systems for Germany. As we alluded to and hinted at in the last German Dev Diary, Germany has a whole swath of new mechanics we’d like to go through with you. Keep in mind that all of this is still very much a work in progress, which means things may change. So without further ado, let’s press on!
The MEFO Bills
Historically, the MEFO Bills played a major role in the German rearmament in the 1930s and were devised by Hjalmar Schacht. It was partly a way to keep military production hidden (because it directly violated the Versailles Treaty from WW1) and functioned as a means to pay for the actual rearmament program. While Austrian and Czech gold reserves that were seized helped to bolster the economy and staved off an impending collapse, it only bought the Germans some time. In the end, this glorified Ponzi scheme almost bankrupted the country and can be seen as a motivation for why Germany went to war when it did. The armament program constantly required new resources to devour, so Germany was forced to continue to feed the beast as it were. This led to large-scale plundering and theft wherever the Nazis and the Wehrmacht went, to sustain the ever-hungry war machine.
In-game, this economic collapse was never really seen or felt, and it wasn’t until after the first war that you had to pay back the MEFO Bills. This means that the vast majority of players probably never even knew there was a price to pay for them. This is all changing. The intention of the reworked MEFO Bills is partly to slow down early German build-up somewhat and at the same time drive a German player to go on a conquering spree.
The MEFO Bills at the start of the game in1936
Granted, this is a far cry from what the MEFO Bills looked like in the old version, but if you read the previous German Dev Diary (which you really should) you know that this National Spirit can be improved. But something else you probably picked up on, is that Consumer Goods Factories factor (that is to say, the percentage of your civilian factories that are put on producing Consumer Goods, ergo not able to trade or build anything) is increasing each month, and it will continue to increase until it reaches 100%. This is the price Germany pays for quickly rearming again; all available resources are diverted to military production. The keen-eyed among you have also read two other things; additional penalties will be added once you reach 100% Consumer Goods Factories factor (henceforth known as CGFF because I can’t be bothered to type all of that out every time I refer to it), and that the rate of increasing CGFFwill be higher based on the amount of non-core states controlled by Germany. What does all of this even mean? Well, simply put, if you fail to feed the beast that is your arms industry, you will start to produce less material. And by controlling non-core states, you’re diverting valuable resources away from rearmament.
Bad things will happen if you can’t manage the MEFO Bills
Price Controls There are of course ways you can manage the MEFO Bills - at least for a while. Institute Price Controls will not only lower the monthly CGFF increase by 0.5% (so from 3% to 2.5%), but it also unlocks decisions to temporarily lower the CGFF.
Institute Price Controls will reduce the monthly CGFF increase ever so slightly
Price control measures will be crucial to managing the MEFO Bills
Seizing Gold Reserves
Sooner or later you’ll run out of tricks to keep your economy afloat though, and what do you do then? You do what every other dictator does when things are going south at home; go to war. Going to war will trigger an event, asking you if you want to get rid of the rearmament program and receive Recovering Economy instead, or if you want to switch MEFO Bills for Economy of Conquest and unlock the decision to Seize Gold Reserves.
Would you rather have a Recovering Economy or an Economy of Conquest
The decision to Seize Gold Reserves is key to managing the ever-increasing CGFF. Once you have capitulated a country (and this is important; the country must have capitulated to you or one of your subjects) you will be able to seize their gold reserves. This will temporarily reduce the CGFF - just as with the Price Controls decisions. The CGFF reduction is based on the number of total factories in the core states of the targeted country you control. Ergo, more developed countries will reduce the CGFF more. These decisions can however only be taken for countries in Europe - so don’t go around thinking you can seize the USA’s gold reserves. There’s one catch though; seizing the gold reserves of a country will increase Resistance and lessen Compliance in the states. I’m also toying with the idea of giving each state a productivity penalty for a short amount of time.
Seizing Gold Reserves
Seizing other country's gold won’t fix your own economy though, it’s just buying you more time. Is there a way of getting rid of the Economy of Conquest? Why yes, yes there is! But it obviously involves a lot of conquering before you can fix the mess you’ve put your economy in.
By completing Autarky Achieved you will transform your economy and gain Wirtschaftswunder
As you can see, you need a lot of natural resources. (Just a quick fyi here; these numbers are not set in stone yet and might change before release.) Not only will Autarky Achieved replace Economy of Conquest with Wirtschaftswunder (or Economic Miracle, for those who didn’t read the previous German Dev Diary - naughty, naughty!) but it will also improve the Trade Law Autarky.
And that’s all there is to say about the MEFO Bills and Economy of Conquest and how to manage them. Let’s move on to another brand-new mechanic, an utterly unique one for Germany.
The Inner Circle
The Nazi government functioned in a pretty peculiar way; on the one hand, you had the proper government and all its institutions and whatnot, but on the other hand, you had the Nazi party functioning as a parallel ruling body. This system of having two governing bodies often clashed with each other, and people within the Nazi hierarchy often plotted and intrigued against each other to gain the favor of Hitler. Hitler was happy to let them do this, he even encouraged it - as long as the results benefited him. Nazi officials often had overlapping roles, and these roles often overlapped with government institutions, creating a chaotic administrative system. We knew that we wanted to have this represented early on - but we struggled for a long time to get it right. Finally, Arheo and ManoDeZombi found a very (imho) interesting solution.
The people of the Inner Circle will try to ascend within the Nazi hierarchy
So how will we represent the in-fighting between these fellas and the parallel administrative system that existed? By letting each one of them work on and complete focuses in their own mini-branch. This means that you will be able to work on multiple focuses at the same time.
An Ascending Reichsleiter will work on and complete his own set of focuses
If you paid close attention you will have noticed that the GUI (Graphical User Interface) for the Inner Circle is shaped like a pyramid with Mister Mustacheman himself on top, and three empty slots just under him. And some of you might already have guessed that you can only have three Reichsleiters ascending (that is, working on their own focuses) at the same time. Yes indeed, you can only have three Reichsleiters simultaneously completing focuses.
Only three Reichsleiters can Ascend within the Inner Circle at the same time
The cool thing though, is that you can swap out which of the Reichsleiters you want to ascend within the Inner Circle, which means that you can prioritize different things depending on your needs.
Swap out your Inner Circle depending on your current and future needs
This doesn’t mean that swapping out one Reichsleiter for another will save you from the jaws of defeat; it takes them quite some time to complete the focuses they work on.
Letting a Reichsleiter ascend within the Inner Circle takes time and investment
Besides, why would you even want to let someone ascend within the Inner Circle? Well, they all offer different bonuses based on their historical roles. You can see their traits and bonuses both in the new UI in the Focus Tree, by hovering over the portraits, and in the National Spirit tab.
All Reichsleiters have their unique traits and bonuses
Worth mentioning, most of these advisors have a small daily PP cost when ascended, which increases once they complete their second focus in their branch. On the other hand, your Party Chancellor (be it Bormann or Hess), will grant you daily PP bonus which counters part of the PP cost from the others, so if you are not swimming in PP it might be a good idea to save one of the Ascending slots for the Party Chancellor of your choice.
Another reason why you’d let someone ascend is if you want to swap out Hitler. Who needs that low-life scumbag anyways, right? Surely Himmler, Göring, or Goebbels could do a better job! Or why not maybe Hess? They all seem like very reasonable and stable people…. Yes, this is how you get to play with an alternative Führer. They keep their Inner Circle traits and get a new one to boot!
A new Führer has Ascended
How do you go about usurping Hitler then? Well, first off, you have to have three Reichsleiters completing all of their focuses they can complete and then finish A Strong Successor.
Whoever will you choose to become the new Führer
We hope you like this new feature and find it interesting! It took a lot of blood, sweat, and tears (mostly ManoDeZombi’s) to get this working. One of the main goals of this system was to declutter a bit the otherwise-overcrowded political advisor list, so players can choose different political advisors within the three political advisor slots, while still being able to pick among historically party figures in the Inner Circle, which can in turn evolve and provide different bonuses and effects on their own, allowing the player to utilize the invaluable focus time in whatever branches they consider most important.
Moving on, we would like to mention a small system that we didn’t have the time to talk much about in the first German Dev Diary, and that is quite interesting and can prove to be pretty useful if you are planning on expanding your influence across the Ocean, and challenge the USA’s hegemony in America.
The Monroe Doctrine
Hello again, Malin Monroe (it’s actually Nattmaran though) here to talk about the Monroe Doctrine. We’ve all come to know the Monroe Doctrine through Trial of Allegiance, but as a recap; the Monroe Doctrine was USA’s attempt at keeping the peace in America, primarily to make sure no one else, and certainly not someone hostile, got a foothold that close to them. Of course, the Germans however, would most certainly have liked to have a foothold that close, and we wanted to represent this in game.
The focuses below Crossing the Atlantic are meant to give you the tools to challenge the USA’s military and influence over America
Decisions on the map will appear to sway American countries, once you have brought at least five countries into opposition, you will be allowed to destabilize the doctrine once and for all.
The decisions are rather straightforward, you can bolster sentiments to boost the popularity of fascism in the target country. A fascist country is more likely to oppose the Monroe Doctrine. You are not alone in this endeavor however, the United States will be alerted of your actions, and like you, they might very well start their own campaign in search of support. Once you have garnered enough support (which is actually opposition) you can click the button, and demand the dismantling of the Monroe Doctrine, and as such, you will most likely have a good landing point for further American crusades, invasions and expansions.
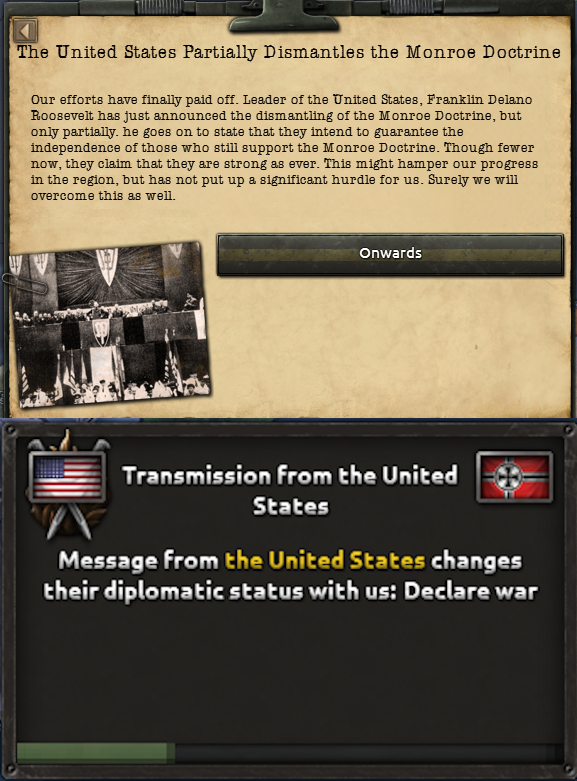
Finally we are rid of some of the guarantees…when I took these screenshots, it came at a high cost however…
And we have one last system we need to talk about before wrapping up this Dev Diary, namely-
The Reichskommissariats
And now for the new Reichskommissariat mechanics, brought to you by D3vil and ManoDeZombie.
Hi, it’s me, Jonathan here again to now introduce all of you to the new mechanics and content surrounding the Reichskommissariats! Starting off with how to get them, you will enable the mechanic after completing the focus Uplift the Rosenberg Office near the top of the fascist part of the focus tree.
The focus in question.
Alfred Rosenberg, head of the Reichskommissariat projects, will not show up as a regular national spirit or advisor. Instead, he will show up in his own GUI in the decision category, and you will be able to see what effects he grants by hovering over his icon.
Alfred Rosenberg.
Now I hear you asking, why would I create these puppets when I could just occupy the territory normally? Well about that, as explained previously, the MEFO bills/Economy of conquest grows ever more taxing the more non-core territory you occupy yourself, not counting puppets. Apart from that, these special puppets have various bonuses to both their leaders and national spirits, and not only that, because Alfred Rosenberg gets stronger the more Reichskommissariats you create.
Alfred Rosenberg becoming stronger when founding a Reichskommissariat.
As seen in the image above, creating Reichskommissariats also gives you the choice of what kind of leadership you want to instate. One of them being a German governor who is better at keeping resistance down and granting more resources for you, the other being a local collaborator, one who will be better at gaining compliance in the Reichskommissariats-owned territories. The new Reichskommissariats do not have any cores, similar to Italian East Africa, but that shouldn’t be too much of a problem due to the bonuses they possess.
The event you get when creating a Reichskommissariat. Reichskommissariats also possess a new type of ownership referred to as contested ownership, where, apart from their established capital state, they do not actually own states unless you own them first before selecting their respective decision. This helps to not mess with the surrender progress of the nation you are invading, for example the Soviet Union, so that you won’t have to push past the Urals because you founded RK Ukraine, whilst also ensuring that not only the capital (for example Kiev for RK Ukraine) counts for the Reichskommissariats own surrender progress.
How contested ownership looks.
From the beginning, only European Reichskommissariats are available to you, but there are a few focuses that can enable the creation of such states in other continents as well.
All of the Reichskommissariat focuses.
And as one final thing before moving back to Paradox_Danne, here is how the world looks when having created every possible Reichskommissariat.
The New World Order.
Closing Words
Paradox_Danne here one last time for this Dev Diary, just to say that’s it from us! All of these systems and mechanics are part of the German rework and won’t require the Götterdammerung DLC, but will be baked into the base game. Hopefully, you’ve enjoyed this Dev Diary about German Systems. We hope these systems will distinguish Germany from any other nation, and more importantly, that you feel they’re interesting and fun. But wait, we’re not quite done with Germany just yet! We still have to talk about the alt-historical branches for Germany; how will we handle the old Democratic and Imperial branches, and will there be a Communist one? Who knows! Tune in for the next, and last, German Dev Diary coming later. But before that, why not stop by to read the very next Dev Diary that’s coming on October 28th about Raids? And if that doesn’t sound too interesting, we have Belgium to look forward to as well!
Hey everyone! I'm Plankie, one of the game programmers on hoi4, and one of my favourite parts of developing a game is to work on the game AI. So when I was asked, almost a year ago, whether I wanted to take charge of a small AI feature, I was delighted! The goal of this feature was to make the AI better at concentrating their hardest and meanest divisions instead of spreading them out along an entire front line. This is something we've wanted to do for a long time and with the Germany-focused Götterdämmerung expansion, we had the perfect opportunity. We call this feature AI Force Concentration, or AIFC for short (an acronym which has caused many football-related jokes in the team).
AI Force Concentration
So WHY did we want to focus on this?
Well, first of all, the AI has frankly not been very good at handling their armoured divisions. Sure, they produce tanks and assign them to fronts, but they are seldom concentrated enough to actually pose a threat for the defender. Second, the AI always pushed along the entire front with equal effort. There's nothing strictly wrong with that, but most military operations have a strategic goal like capturing a city or a supply hub rather than just taking ground, so making a concentrated offensive effort towards a specific goal seems more realistic and human-like. Third, we want to make the combat gameplay more dynamic and interesting for you as a player. If the enemy concentrates more and better divisions in a certain sector, it requires you to make choices. Should you meet the anticipated offensive head on, will you lure them into a trap, or use the opportunity to attack somewhere else?
The days before Operation Barbarossa. The AIFC divisions are visible in the right picture as the turquoise army, preparing to quickly take a supply hub in Volyn when the war kicks off.
Cool! How does it actually work then?
For the most important fronts, the AI considers whether it wants to concentrate its forces. If it has enough units available to both hold the line and still allocate units for offensive duty, then it will create an AIFC army. This army will receive the "best" divisions along the frontline, taking into account factors like attack and breakthrough stats, how experienced they are, how fast they can move, and so on.
The AI then evaluates possible targets close to the front line, for example supply hubs, ports, large cities and so on, and it finds a path from the front line to the chosen target. This path is determined according to the path-of-least-resistance principle, which essentially means that it tries to avoid river crossings, bad terrain, fortifications and so on, while also following railway lines in an attempt to avoid ending up in a situation where it can't supply the troops.
The paths evaluated by Germany before Barbarossa.
The AIFC armies follow those paths-of-least-resistance and will continuously update their orders to make sure that the front lines match up with the intended path. Of course, since placing too many units too close together might cause some problems with your Amazon deliveries (a.k.a. your supply situation), they will spread out somewhat along the neighboring provinces.
But as they say, "a plan never survives contact with the enemy". This can be true for the AI as well. Because of this, it keeps track of how well an AIFC offensive is going. If the offensive is going well, by all means let's continue pushing. But if it stagnates and fails to make progress towards the target, then the AI sooner or later decides that the plan indeed didn't survive the enemy contact, and it tries to find another target for its next offensive. Similarly, if the offensive succeeds and the target is taken, the AI will start looking for new opportunities to concentrate their forces and break through, taking into account the newly conquered areas as a potential start of the offensive.
In order to make it feel like the AIFC behavior is not static, the degree to which it is used is (mainly) tied to the doctrines an AI has unlocked. This means there will be a difference between for example fighting an early war Soviet Union compared to a late war Germany. Doctrines which narratively and stats-wise promote a higher force concentration will make the AI prefer using AIFC to a higher degree (fully scriptable of course, so all our wonderful mod creators can play around with it).
On the receiving end of an AIFC offensive.
More new things
Thomas here now to add some more info about a selection of other things we have been working on. Aside from the AIFC, we have - as we tend to do - tried to touch up things here and there during the development of Götterdämmerung. So let’s take a quick look at some of the other smaller features and changes we have done:
New Technologies
The tech tree has as mentioned in the Special Projects Developer Diary received a few new techs relating to Special Projects. But those are not the only changes we have made to it. We have also added a few new techs to make research and gameplay slightly more diverse, and give you a few more options.
First of all we have added a few new Transport Plane Techs and related tech and equipment icons. The main benefit of researching these is that your transport planes gain more range, allowing you to paradrop or supply your troops at a greater distance.
One cannot have too many Junkers, right?
The other, slightly bigger change we have made is to Forts. Previously everyone could build level 10 forts everywhere from the get go. Now the max fort level depends on the terrain the fort is in, and the techs you have researched - as well as other modifiers you can get from e.g. focuses. This means the engineering tab has received 5 new techs for forts - one general, and two each for Land Forts and Coastal Forts.
Initial maximum fort levels, without techs or other country specific modifiers are set to 6 for all Coastal Forts, and Land forts are as follows: Plains: 5 Hills: 5 Urban: 5 Forest: 4 Mountain: 4 Desert: 4 Jungle: 3 Marsh: 3 (Note that values might change before release. Yes I know that I’ve said this already, but just to make sure the message gets across :) )
The new fortification techs,
Here we have upped our fortification capabilities a bit, just need to construct the actual forts
Command Power Cap
We have also slightly changed how the Command Power Cap works. Now your High Command will actually increase the Command Power Cap, so that with a good set of military commanders, you will have more Command Power at your disposal. This should make it less punishing to build up your high command, rewarding you for having a competent staff.
By adding von Rundstedt to our staff, we increase the Max Command Power by 20
Dams
As Mentioned in other dev diaries, there are now Dams in the game. They can be targeted by Raids which makes them a bit of a liability, but not by strategic bombing so they are relatively safe. What do they do? Their main effect is that they boost the state they are in, making it easier and better to invest in industry there. You can’t build new dams except through specific focuses.
Landmarks
Another thing you can see on the map, and that several of you have already noted in previous diaries and streams are what we call Landmarks. First of all, these look super cool on the map, and make countries more unique. But additionally they have small country level effects. A bit like National Spirits, but as buildings on the map. The cool thing with these bonuses is that they only apply to the country that originally owns the Landmark, so by capturing for example the Statue of Liberty, you can deny the USA their bonuses, but you won’t get them yourself.
A landmark in the UK
State and Province UI - minor QoL changes
In order to make the difference between State and Province effects a bit easier to see at a glance we have made some changes to the State and Province UI. The main focus of these changes were to ensure that Province Effects are in the lower part of the window, and state effects are in the upper section. A special area for all state effects and a summary of all state related effects from buildings has been added at the bottom of the “State section”.
Some of the more unique Province level buildings, such as Dams, Landmarks, and Experimental Facilities, are displayed in the “Terrain section”, while the rest are displayed beneath it as before.
The upper section, marked in yellow in this image, contains things that are relevant for the entire state, so e.g. state related modifiers have been moved up there. Down in the bottom section, we have collected all the info that relates to the province, such as terrain, weather, victory points etc. Not a drastic change in any way, but hopefully it should be a bit easier to understand what relates to what.
Area Defense QoL
We have also done some minor quality-of-life updates to the Area Defense settings. First of all, no specific settings are active by default when you open it up (unlike the old behavior where all settings were activated by default). Instead, if no special setting is specified, the divisions will spread out as evenly as possible in the selected area. We changed this since a very common pattern when using Area Defense was to immediately unselect all the options one wasn't interested in, which led to a lot of unnecessary clicks.
The new Area Defense settings for guarding borders and special project facilities (red arrows), and the updated supply setting (orange arrow).
The supply setting has received some small changes: Instead of trying to cover the supply hubs and ALL the railways, it will now cover supply hubs and railway junctions. It has also received a new icon depicting a supply crate instead of the previous railway icon. We have also added two new settings to Area Defense: Guarding borders, and guarding special project facilities.
The new Area Defense setting for guarding borders
Horsies with different colours
All horses aren’t bays, or browns for that matter. This is something one of our artists, who happens to really like horsies, was very aware of and wanted to do something about. So after having convinced one of the programmers that this was a brilliant idea, they set out to make a few new textures and ensured that the horsies in the game now have more varied and realistic colours.
I assume these would be Hanoverians…
There’s always more…
That was a selection of the things we have been working on aside from the major features for Götterdämmerung. Of course, we have been up to more things. There is always some balancing, tweaking, and bug fixing work going on. And fixes to code and to the AI in general. We have made some changes to how we script things for example, that we hope to describe more in the upcoming modding diary (together with some other cool stuff). But for now, we hope that you have enjoyed this diary.
Guten Tag oder guten Abend depending on when you’re reading this!
Me, Paradox_Danne and ManoDeZombi will guide you through the big boi; the myth, the legend, the one and only - the German Focus Tree. Yes, you read that right (and probably expected as much), Germany is getting a (much-needed) facelift. But what does this mean? It means that most of the old base Focus Tree is getting yeeted out, and replaced with a reworked version. Now, before we go any further, please remember and keep in mind that this is very much a WORK IN PROGRESS, which means, but is not limited to, missing icons, placeholder texts, and weird modifiers. Things might and will change, so feedback is very much appreciated so we can make the best possible German content possible. We know you’re eager to delve into this, so let’s get moving!
Quick Historical Recap
I think we all know this part of history pretty well, but let’s quickly recap where Germany was at the beginning of 1936 and what it's gone through. After the defeat in the Great War, harsh stipulations were put on Germany, with the Treaty of Versailles causing resentment and economic hardship. Hyperinflation and political instability defined the early 1920s, and the Great Depression in 1929 led to rising support for extremists like the Nazis. By 1936, Hitler had become the absolute ruler of Germany and started to rearm, breaking the Treaty of Versailles.
The country select screen for Germany, a TL:DR for the historical context
What’s that? New National Spirits and Focuses?! Oh, we’ll get to the new Focuses - either in this Dev Diary or an upcoming one, don’t you worry ;) But let’s start with the political situation in Germany in 1936:
The Political Situation for Germany in 1936
As you can see, the Führer himself got a facelift as well. But what might be more interesting are the new National Spirits:
The National Spirits in 1936 for Germany
Out of all of these, the reworked MEFO Bills might be the most interesting one, but it’s also the one we won’t be discussing today; that’s for another day and another Dev Diary about German Systems, so stay tuned. What I will say is that Germany was nowhere near ready for WW2 when they invaded Poland, and we kind of want this to be better represented. You now have to build up your strength, and this means that Germany is receiving quite the nerf without actually getting that many negative modifiers. Other than that, what might jump out is the new military Spirits, which have been split into three separate entities; Heer, Luftwaffe, and Kriegsmarine. They all have different maluses, representing difficulties they battled with.
Germany initially saw great success with their Bewegungskrieg doctrine (popularized as Blitzkrieg) when they invaded Poland and France and subjugated both nations in lightning-fast campaigns. But as they tried the same tactics yet again against the Soviets, the vastness of Russia soon put a strain on German logistics they never really overcame. The German High Command had misjudged the sheer size of the Eastern steps, and the resistance they would face.
The Kriegsmarine never saw a truly major, direct engagement with the Royal Navy - but when they did fight, the Germans mostly lost. The Battle of the Atlantic saw initial German success, but they suffered heavy losses. They lost most of their heavy-hitting ships, such as Bismarck, Tripitz, Admiral Graf Spee, and Scharnhorst in various engagements.
The Luftwaffe was very effective and devastating early on, especially in its campaigns against Poland and France, and enjoyed technical superiority as the war broke up. But underneath it suffered from internal strife and poor leadership (looking at you Göring) among other things. It took heavy losses during the Battle for Britain, and never truly recovered.
So that’s Germany at the outset of 1936. But can you improve these National Spirits, I hear you wonder. And how do you do that? Can you change your fate? Must Germany face defeat in the skies over Britain, or among the ruins of Stalingrad? I suppose you want to see the new, reworked Focus Tree, don’t you? Can’t blame you; I’ve been eager to show it off for quite some time now! So without further ado:
The Reworked Historical German Focus Tree
Yes, it’s chunky - and this is only the Historical and Common branches. It’s big, but it has a ton of 35-day focuses. And if you look closely you’ll see something completely new, something never before seen in HoI4
The Inner Circle
This is yet another new system for Germany and something we sadly won’t discuss today either, but sit tight; it’s coming up in a future Dev Diary with the MEFO Bills.
The Common Branches
The Military and Industrial Branches
Something that definitely can be said about every part of the new Focus Tree compared to the old one is that it’s bigger - you won’t be starving for things to do. And that is kind of the point; you will have to prioritize; what is absolutely necessary to have achieved before going on a world-conquering rampage to war? Germany wasn’t ready when they faced Poland and France. They more or less got lucky in France and Poland. Don’t get me wrong, they achieved some stunning victories and shocked the world with how fast they conquered Europe, but in the end, they were ill-prepared to wage a drawn-out war, especially after invading the Soviet Union and facing off against the USA. But how can you avoid their missteps? What will see you knocking down the gates of the Kremlin or cruising past the Statue of Liberty in your battleships? We’ll soon find out, but first, we need to take a look at your starting commanders.
The Army
Germany now starts with fewer Generals and Field Marshals, but more can be unlocked through various focuses, while others might get retired.
As the more astute of you may have noticed, certain generals and field marshals are missing. Where did they go, and can you get them back? Why yes, of course!
The Army branch allows you to specialize your army with an emphasis on either tanks or infantry and artillery
It’s in the Army Branch you unlock several generals and promote others to field marshal. The important choice in this branch is how you want to shape your army; do you want to rely on new tech and tactics using tanks, or do you want to expand upon the lessons from the Great War? Both options will offer different bonuses from each other and will unlock different generals. But the different paths also unlock two different Decisions to help you out with invading neighbouring countries strolling past those tedious border checks - so you don’t have to declare what you got in your luggage. You will simply speed right through. Let’s take a look at what makes the different paths so different.
Honoring The Prussian Legacy will steer your army toward infantry and artillery, rather than the historical focus on tanks.
I think the big question here is “What the Hell is Operational Planning?” That my friends, is how you speed past those pesky border checks by taking a decision that bolsters your military for a short while. This is of course meant to simulate Germany’s “blitzkrieg” during WW2, but is focused on a more traditional approach instead of tanks. (“Blitzkrieg” was never an official doctrine, but rather a term applied to Germany’s old and tested Bewegungskrieg tactics, which was all about maneuver warfare.) So what does this Operational Planning look like, how do you use it and what benefits does it have?
Operational Planning will yield a State Modifier in a country you are at war with, giving you an edge in those states
A fully maxed-out Bewegungskrieg will look like this. Operational Planning is specifically designed to not make Germany too overpowered, while still giving some nice military bonuses and at the same time representing the lightning-fast invasion they are so famous for. The state modifiers will last 90 days, and the decision will be repeatable once a year to simulate the various offensives Germany launched throughout its Russian campaigns. Another cool thing you get from The Prussian Legacy path is this new Support Company, called Sturmtruppe
The Sturmtruppe Battalion is an elite force meant to help break through enemy lines and fortifications
But what happens if you want to go down the historical route and have your panzer divisions steamroll the enemy? Luckily, there’s an option for that too!
The Blitzkrieg state modifier puts an emphasis on tank warfare
While the Blitzkrieg state modifiers might not last as long as the Bewegungskrieg one, they’re packing quite a punch nonetheless. And choosing to develop your panzer forces will unlock two familiar faces:
Taking Adopt New Panzer Doctrine will unlock both Rommel and Guderian as generals and military advisors
To round this part off, let’s check out what a maxed-out Deutsches Heer looks like by completing the Army Branch and compare the bonuses from The Prussian Legacy and Adopt New Panzer Doctrine paths with each other:
The left picture shows a fully developed Heer after completing the Adopt New Panzer Doctrine path, and the right picture shows a fully developed Heer after completing The Prussian Legacy
The Airforce
The Luftwaffe branch
The important choice to make here, is how you want to specialize the Luftwaffe; will you go down the historical route and focus on dive bombers and CAS, or shift your doctrine towards tactical or strategic bombers?
The different bomber doctrines will yield different bonuses
If you want to fix the issues that plague the Luftwaffe you have to Reorganize the Luftwaffe and Solve the Logistical Bottlenecks, but you can’t do that while Göring is in charge. Speaking of the Devil, he’s got a wholly unique trait to reflect the central position he held, not only in the Luftwaffe, but within the Nazi regime as a whole
Herman Göring now has the trait of Reich Marshal, which will allow him to produce more aircraft
If you decide that you don’t need him, you’ll unlock Helmut Wilberg, who historically played a major role in developing German air warfare and combined arms tactics - but since he was of Jewish descent you can’t hire him with a Fascist Government (he was so crucial and competent though that Göring himself helped hide this fact). While the Luftwaffe can’t be improved a whole lot, you’ll gain a lot of bonuses toward Special Projects for Rockets and Jets, and a whole bunch of timed ideas, and by far the most Aces in any focus tree (ALL aces from WW2 with 100 or more victories are German, but only roughly 50% survived unscathed).
A fully developed Luftwaffe could look like this
The Navy
The Kriegsmarine Branch will give you hegemony over the seas - and under them
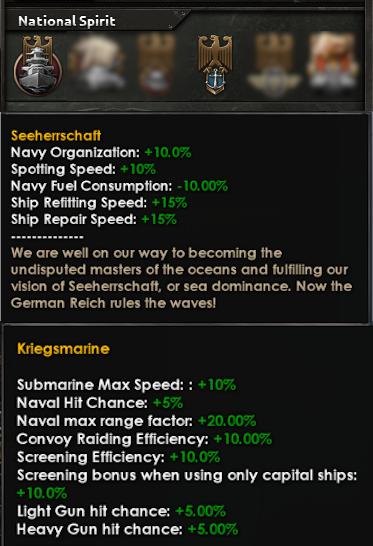
The Naval Branch works in a slightly different way than most other branches; there are no mutually exclusive choices here, but you will be forced to prioritize nevertheless. You cannot work on both the Plan Z and Trade interdiction paths at the same time; once you’ve started one of those paths, the other one gets locked, until you have completed The High Seas Fleet or Unrestricted Convoy Raiding respectively - and once you complete one of those focuses, the rest of that path gets locked. This got convoluted real quick. Let’s try with an example: Say you finish Trade Interdiction first; this will lock you out from even beginning the Plan Z focus. To unlock that focus, you will have to complete Unrestricted Convoy Raiding, but this will also lock you out from doing any more focus under Trade Interdiction. In the end though, you get a much stronger Kriegsmarine, and completing Seeherrschaft yields even further goodies
A fully realized Kriegsmarine could look like this, together with Seeherrschaft
Wunderwaffen
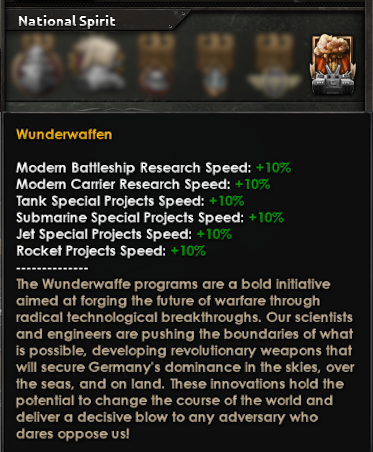
Something I’ve only touched upon but haven’t delved any deeper into is the Special Projects bonuses that Germany can get, which is a central theme and mechanic of this expansion. Germany famously tried to turn the tides of the war by putting their hope in these “miracle” weapons, but their doom was already sealed. But what if they put more effort into this earlier? Well, you can do that now, and the results come with one of the coolest icons in the game
Wreak havoc upon the world with your glorious wunderwaffen
Industry
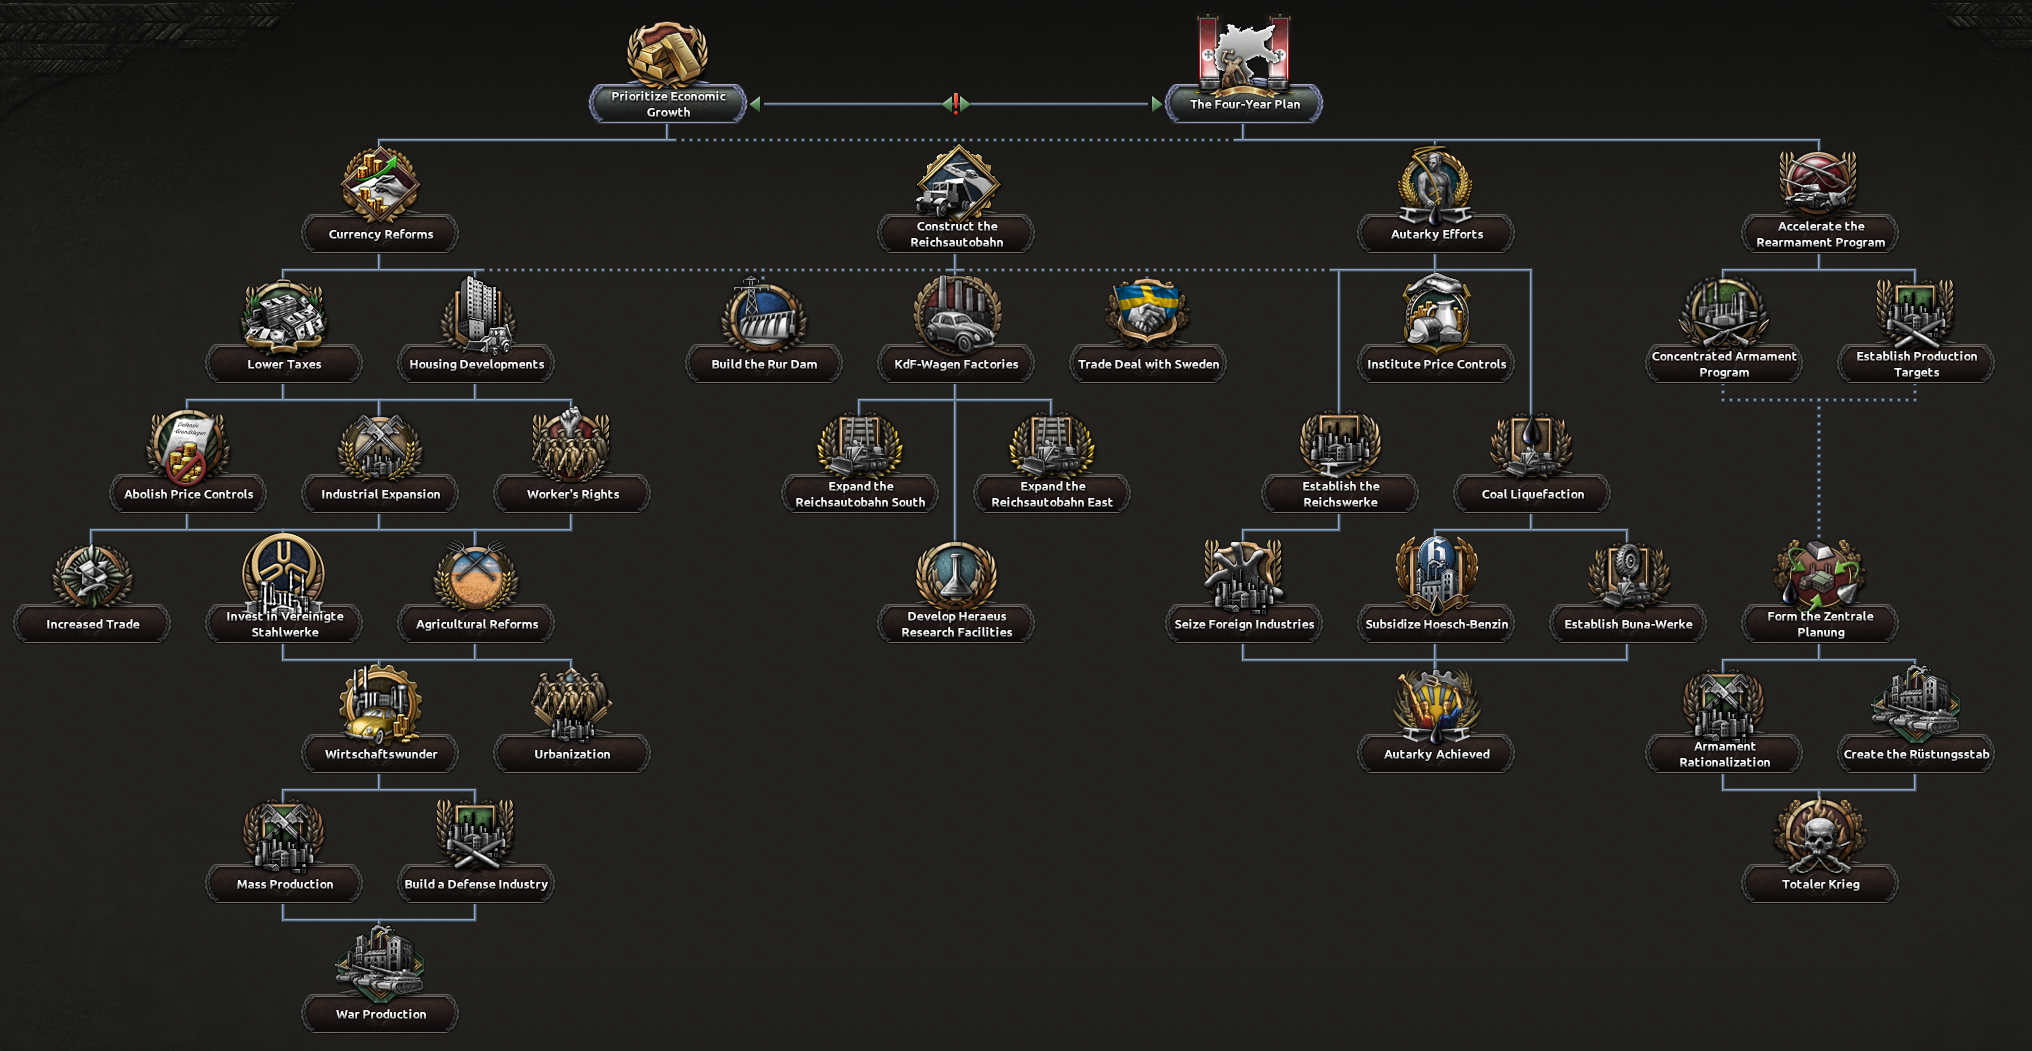
The choice of Industrial path will have big ramifications on how you play as Germany
Hellbent on becoming self-sufficient, Hitler launched the 4-Year Plan in 1936. The goal was to strengthen the industries so he could carry out an ambitious and rapid rearmament program. Going down this path will make you stronger in the short term, but will leave you open to other problems caused by the MEFO Bills (which, you will remember, we won’t talk in-depth about in this Dev Diary). Suffice to say, the Four Year Plan will put a strain on your economy, but you’ll be ready for war sooner. This strain will be somewhat offset by, not one, but two unique laws for Germany and this path; Autarky and Totaler Krieg. Both new laws come with a price though; it will either remove another law or lock others from being accessible.
Autarky Efforts will unlock the new Trade Law of Autarky, but locks other laws in turn
The second unique law is the Economic Law of Totaler Krieg
This particular path is closely tied with the MEFO Bills, which we will talk more about in a later Dev Diary, and the impact it has on your economy. For now, though, let’s look at the non-historical Industrial path, which starts with Prioritize Economic Growth.
Prioritize Economic Growth will absolutely gut your economy, but you can rebuild it stronger than ever
This path will ruin your economy, but fear not, because down the line you can rebuild it, stronger than ever. In pure numbers, you’ll get more factories from this path, but they take longer to come by. You even get more building slots, leaving room for even more factories. The trade-off is that the focuses take longer to complete and are locked behind tech and stuff. You might also notice that this focus unlocks a new advisor, Ludwig Erhard. This was the man behind the “German Economic Miracle”, or Wirtschaftswunder, after WW2 which this path is loosely based on.
After having paid off the MEFO Bills you’ll have a Recovering Economy with plenty of penalties but that can flourish into the Wirtschaftswunder
And just for funsies, let’s compare a fully developed Wirtschadftswunder with the evolved version of the MEFO Bills, namely the Economy of Conquest (mainly because I wanted to leave you all with a cliffhanger; whatever could Economy of Conquest be?)
Wirtschaftswunder vs Economy of Conquest and Wehrwirtschaft
And now, onward to the really juicy bits - the political branch!
Political Branches
This part of the focus tree was mostly designed by the one and only ManoDeZombi , but he’s frantically doing other stuff, so I’ll walk you through the political branch. As you already have seen we have expanded the historical path for Germany quite a bit and changed existing focuses. We have built the new Focus Tree around the core of the old so that some things will be familiar.
The Political Branch is structured so that Far Eastern foreign policies are to the far right, European policies are in the middle, while Internal politics are to the left.
The beginning of the political branch starts as before, with Remilitarize the Rhineland, whereafter you can decide where you want to take the Reich; perhaps focusing on re-establishing the old German colonies throughout Asia and Africa, to eventually invading the USA from the West, or influence the Middle East and secure beneficial trade deals for those countries, or tie the Baltic states and Scandinavia closer to you. There are plenty of possibilities here! But before we travel to the Far East and see what you can do there, let’s take a minute and explain something you probably have seen throughout this Dev Diary and the focus tree and are wondering about - what the hell is this:
Introducing Historical Frames
These are new icon frames meant to help players understand which focuses were historically taken - they act as a visual guide. Since this Focus Tree is pretty big (way bigger than the Soviet or Italian ones) we wanted to highlight and differentiate the historical path from alt-historical options. Oh, some of you don’t like these handy guides? Fret not, we got you covered!
You can easily turn the Historical Frames guide on and off with the push of a button
The Far Eastern path allows you to reclaim old colonies and align more closely with either China or Japan and decide how you want to handle the Soviets and/or the USA.
This path is all about cooperation and negotiation to get your old Asian colonies back, and getting claims on your old African possessions. Ultimately, you’ll have to decide if you want to approach the Chinese in order to take down the Japanese, or if you’d rather strengthen your ties with Japan for a more advanced navy and go after the USA. A little bit to the left, and West as it were geographically, you’ll find focuses concerning the Soviet Union. These largely remain the same as in the old Focus Tree, except that the unholy Berlin-Moscow Axis you get through Alliance with the USSR only lasts two years now; an alliance between these countries would never have lasted anyway. So you’ll have your cake and eat it too in the sense that you can turn your attention to the Western front without worrying about the East, but also rolling your panzers across the wide-open Russian steppe and knocking on the gates to Moscow. It’ll just have to wait a little while longer ;)
An alliance of convenience with the Soviets will make you both stronger when eventually facing off
Now, let’s turn our gaze towards Europe - the bread and butter of the Historical branch. As we already stated, we built this part around the old focus tree, just adding bits and pieces here and there. You might notice that there’s now a focus for Operation Sealion and an entire mini sub-branch for tackling the Americas. There are also alternative focuses for using diplomacy to sway countries to your side, instead of having your panzers run over everyone - if you like that kind of thing. Me, I prefer my enemies as flat as possible ;)
Do you want to conquer all of Europe by force or would you rather use diplomacy to get your way? Some conquering may be required
You’ll notice that before you can do Anschluss and use Austria as an appetizer, you have a choice to make; are you siding with Ribbentrop to Reorganize the Wehrmacht or will you Heed von Neurath’s Concerns? The first option will lead to the infamous Molotov-Ribbentrop Pact and a non-aggression pact with the USSR, and the dismissal of several of your generals. The reorganization of the Wehrmacht was a very important event in Germany in 1938 just before the outbreak of war and is how Hitler assumed direct control of the armed forces as Supreme Commander. The second option will instead have you listen to the concerns of von Neurath and the Wehrmacht, which will prepare you for the wars to come. The downside is of course that you won’t have that non-aggression pact with the Soviets…. Oh well, it can’t be that important.
Do you Reorganize the Wehrmacht or do you Heed von Neurath’s Concerns?
Having made your choice you now face a revamped Anschluss, as alluded to by Nattmaran in the Austrian Dev Diary (go read it if you haven’t!). The requirements to start this focus have changed, and while the numbers might seem ludicrously high, you have to remember that Austria doesn’t have a big army to begin with, and is severely hampered to expand it. Basically, what you need is a bigger army than the Austrians, and it has to be well-equipped. Having gobbled up Austria, the world is your oyster! One final thing before we start looking into our new (and old) advisors and 3D models, we have one last mini branch to look at.
To Bribe Senior Officers was a very real thing and part of the reason why so many generals remained loyal to Hitler
Some of you may be wondering why there haven’t been any mentions of a Balance of Power for Germany - and that’s because there is none. We just wanted to spell that out so no wild speculations are going on as to what it might entail. Something else we didn’t touch upon on this Diary was the Reichskommissariats, and that’s because they’ve been expanded upon and new features have been added to it. But that’s for another time and another Dev Diary - namely (you guessed it) for the German Systems.
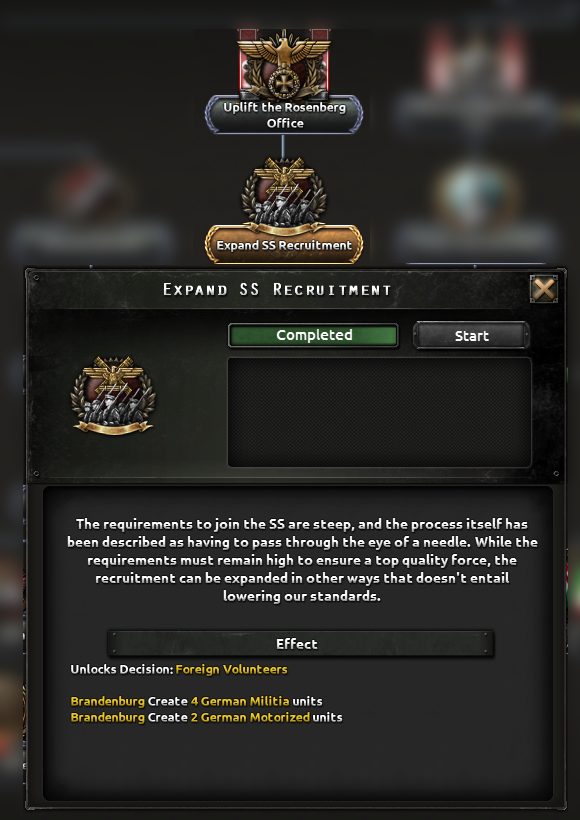
Regarding the SS divisions, the system has been reworked a bit. SS Divisions are now unlocked by the focus Expand SS Divisions which will not only allow for the recruitment of foreign SS units, but it will right away spawn some historical German units. Infantry battalions within these divisions are now represented as Militias. These militias can also be significantly improved by Himmler within the Inner Circle system. And they also got a new model!
The focus Expand SS Recruitment unlocks the recruitment of SS divisions.
And these militias have gotten a new 3D model too!
Advisors, Designers and Concerns
Phew, we’re nearly done! Thanks for sticking around this long (and it’s been quite a long read) - we’re nearly done now. With all of the Focus Tree finally being discussed, let’s turn to internal affairs, specifically advisors of all kinds, designers, and industrial concerns - because there are quite a few to go through! Let’s start with the advisors you can hire (and those you can’t ). There are way more advisors to choose from now; some are locked behind ideologies and others behind focuses. Quite a few of these can be “upgraded” and plenty have unique traits now.
Advisors
German political advisors
You might be wondering what happened to some of the more prominent historical figures, like Himmler, Goebbels, Speer, etc. Well, they are gone… from the political advisor roster, they now belong to the new Inner Circle system, we’ll go through it in detail in the German Systems Dev Diary in the near future.
German military theorists
German High Command
German Army, Navy, and Air Chiefs
MIO's
MIOs (or rather Military Industrial Organizations) were added in the last major DLC Arms Against Tyranny where I was forced to expand the Danish Focus Tree beyond the two focuses they realistically should have had happily worked on Denmark and where ManoDeZombi made sure the Finns could stop the onslaught of the Soviet in… well, Finland. Anyways, Germany’s MIOs have also been expanded upon with unique traits and even organizations. Let’s do another blitz!
German Tank MIOs
German Ships MIOs
German Planes MIOs
German Material Equipment MIOs
And lastly, we have the Industrial Concerns, and guess what? There’s more of them too now!
German Industrial Concerns
In terms of 3D models, and without getting into Special project content, Germany has gotten a few nice additions:
You can now proudly deploy the old Leichttraktor
Some infantry models, including colonial troops unlocked by the Far East and Africa -related focuses
German soldiers are now way more comfortable under extreme weather thanks to the newest tactics developed by the Wehrmacht: rolling sleeves and furry hats!
Conclusion
And that’s more or less everything from us! Remember to look out for the next Dev Diary, which is all about Small Features. Among other things, this will dive into AI, Command Power and New Technologies. This will be airdropping on or near you October 21st.
Auf Wiedersehen!
(Note: We are also working on a video for Historical Germany; it will be added next week!)
Jonathan here to bring you another Dev Diary for the upcoming DLC Götterdämmerung! I will be (re)introducing you all to Hungary. Originally we had planned to do a minor update to accommodate the Austria rework, but quite early on in the project we decided to give it a proper overhaul as we were going to rework it anyhow and felt it could do with one. Well, since it’s been a long time since the last Hungarian dev diary (7 years to be more precise), let’s start off with a bit of historical context!
Oh, and as usual, please do keep in mind that everything you’re about to see is still WIP so things might change before release and you may see some placeholder art and WIP values. The team thanks you for your understanding!
The new country select screen for Hungary, with a TL:DR for the historical context
A zoomed out overview of the Hungarian Focus Tree’s general layout
From Austria-Hungary to World War 2
So to keep it very brief and as simple as possible; at the end of the Great War, Hungary, alongside other states such as Czechoslovakia and the State of Slovenes, Croats and Serbs, broke off from Austria-Hungary in an attempt to avoid partition and blame for the war. History would not however be lenient on the Hungarian state, and through many twists and turns, the Treaty of Trianon was signed, leaving them with 92,962 of the 325,408 square km that had constituted the Hungarian crown, as well as with a practically completely dismantled military, and large reparations to be paid. The first Hungarian Republic had been declared, but was soon toppled and reorganized into the Hungarian Soviet Republic. In an attempt to reclaim lost territory the soviet republic entered wars against Cechoslovakia, Romania, the Kingdom of Serbs, Croats, and Slovenes and the Hutsul Republic. All of this resulted in the destruction of the Soviet regime and a counterrevolution which in turn led to the reestablishment of the Kingdom of Hungary, where admiral Miklós Horthy would take up the role of regent, a role which he held until the Kingdom was disestablished at the end of the second World War.
I know that you all didn’t come for a history lesson, so let’s move on to Hungary’s starting situation in the game.
The National Spirits at startup for Hungary
Hungary now starts with four national spirits instead of the old usual one. As can be seen above however, this isn’t a purely negative thing for them, though the Treaty of Trianon has been made harsher to be more accurate to the historical stipulations. Apart from that one, Hungary starts with an economic dependency on Germany, as well as with two different types of active paramilitary organizations in favor of the government.
Apart from this, admiral and regent Horthy also shares a part of his power with Prime Minister Gyula Gömbös, who signed the previously shown treaty with Germany, and who seeks greater influence over Hungary's politics.
Miklós Horthy and Gyula Gömbös
And with this background and knowledge of the starting situation, we can finally jump into the focus tree, starting with the industrial and military branches!
Common Branches
An overview of the common branches, with the industrial tree on the left, and the military branches on the right.
As can be seen above, with the rework of the focus tree, I tried to keep it in similar shapes and general positions as the old one, so that the memory and muscle-memory of our old players won’t fail them when starting a new game as Hungary.
The Industrial branch on the left eventually leads into the military branches in the center and right, and contains most of the expected factories and research slots, whilst the air force, land forces and naval trees contain bonuses and effects that pertain to their respective branches of the armed forces.
These focuses which previously started the political branches, now start the industrial branch.
The main goal of the industrial branch is to get the Győr program up and running, in order to resuscitate national industries and expand Hungary military capabilities, a program historically launched by Prime Minister Kálmán Darányi.
A few of the effects and items relating to the Győr program.
The start of the military branch revolves around getting rid of the Trianon restrictions, just as it did before. With the right-most side of the land branch being available immediately, the more technology and industry focused parts on the left of it, as well as the air force branch, require the Győr program to have been started before becoming available.
The Air and Army branches.
That should be a good overview of the common branches, so let's move over to the real highlights: the political branches!
Historical Branch
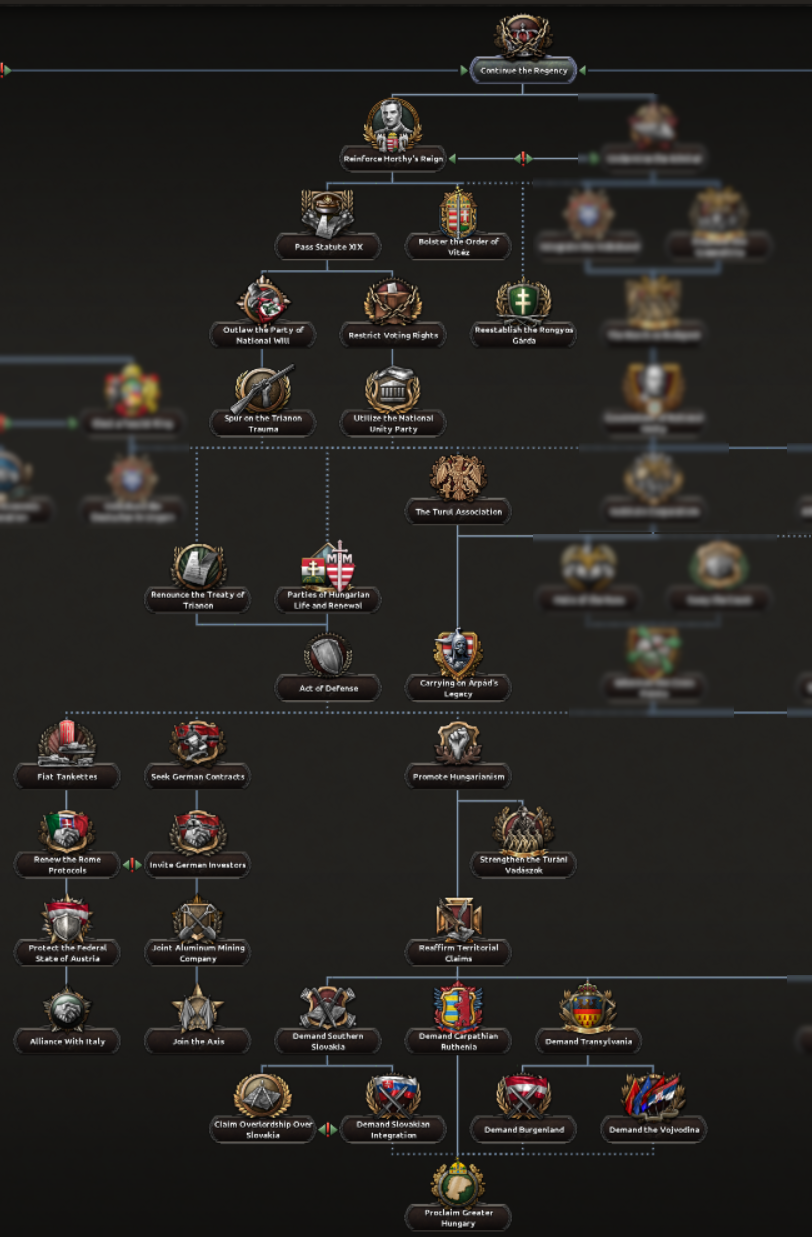
The focuses available to Historical Hungary
The general shape and feeling of the old Hungarian focus tree has been preserved, while being expanded upon. The main difference to the old Hungarian tree however is that historical Hungary, though joining the Axis, now stays as non-aligned under Horthy. The reason for this is that when seeking to gain peace with the Allies and the Comintern and betray Germany, Hungary was invaded and Horthy was replaced by German puppets (with a bit of a back-and forth), the leader and party of whom is now the fascist party for Hungary, with its own branch if they are what you want to play.
The tree starts with reinforcing the regency and the admiral's grip on the nation, while repairing it and repressing opposition groups. The latter half focuses on alliances (to the left) and expansion (to the right).
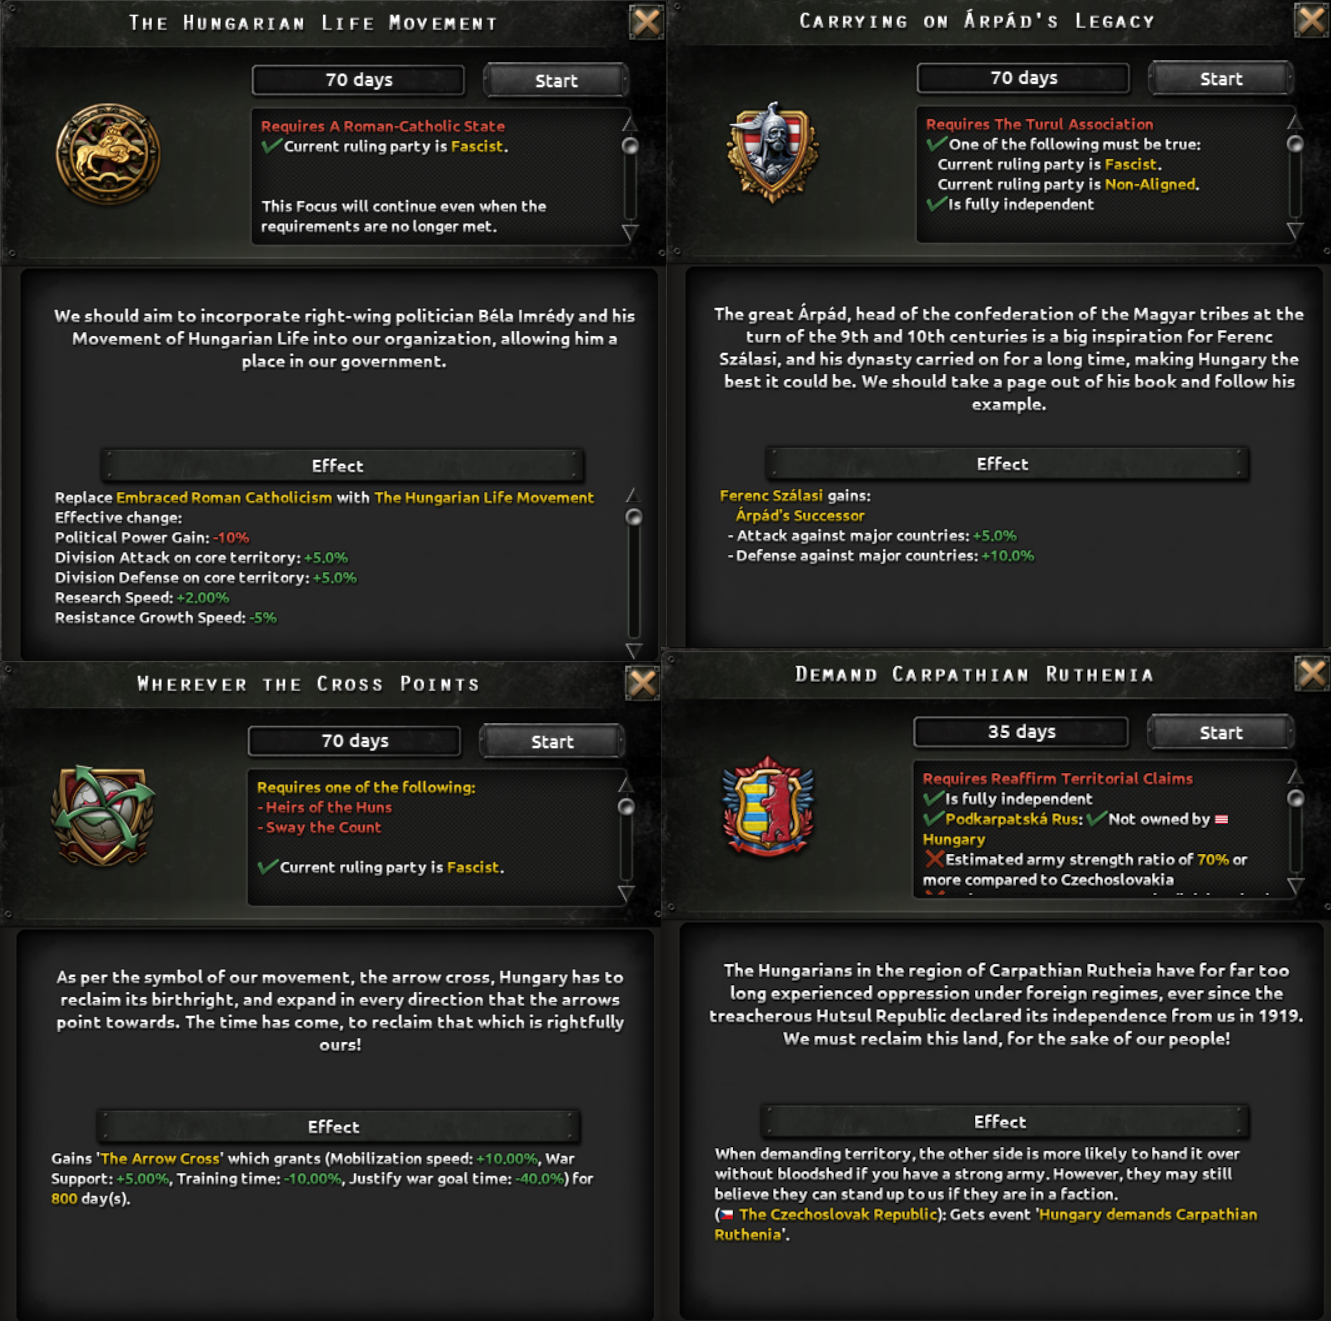
Some of the focuses and their effects
The ultimate goal of post-trianon Hungary is almost always to restore Greater Hungary in some shape or form, as will be seen in other branches as well.
Greater Hungary, restored.
And as historically, Gyula Gömbös will eventually die, leading to you having to decide on how to deal with the M.O.V.E, the paramilitary organization loyal to him.
But now, on to some alternative history, starting with the actual fascist branch.
Fascist Branch
The fascist branch begins with the same focus as the historical focus, deciding to continue the regency. After that though, things will start to change for Hungary.
The Hungarian fascist political branch.
Here you will start the game by having Gyula Gömbös attempt to overthrow Horthy and take the mantle of regent for himself. To do this he will strengthen the fascists, which in turn has some unintended consequences…
The Lead Up events to becoming fascist.
Gyula Gömbös and Ferenc Szálasi as country leaders.
Though I will not take too much of your time for this branch, here you can see some of the focuses available to the fascists in a bit more detail.
Some both early and later game focuses.
You can also embrace the Turanist ideas of Hungarian origin.
But that’s that. Now I think it’s time to show a lot of players’ most anticipated parts of the tree, the monarchist branches (Yes it is indeed in plural).
Monarchist Branches
The monarchist branches start differently from the historical or fascist branches. There are a total of 5 different monarchist branches available to Hungary, that share certain parts with each other or with the historical/fascist branches. They revolve around Horthy deciding to actually name someone king, either choosing to comply with the stipulations laid out by the little entente and thus selecting a non-Habsburg monarch, or going against their will and doing just that, leading to some elevated tensions with your neighbours.
The monarchist branches in all their glory.
Before we go into detail on any of their specific branches, though there are only five branches, here are the six different country leaders you can get throughout these branches.
The different monarchs.
So starting on the right, and going to the left, first up we have the fascist king, which works relatively similar to the old version. The reason this is still around is to enable for a only slightly alt-hist Hungary, as well as being able to go a flavour-wise different route while still sticking with the Axis. Friedrich Franz’s two completely unique focuses are these:
The Fascist Kings focuses.
To the left of him lies the democratic king, which is no longer the only way for Hungary to go democratic, but which has been expanded to have a bit more to do, such as hold referendums to regain territory, reverse the Hungarian brain drain and get a head start on some nuclear projects, or even propose a union between themselves and Romania, forming Hungary-Romania. (And perhaps Carl V Wilhelm might want to return to claim the Swedish crown as well)
Some of the Democratic King’s focuses.
If none of these are to your liking however, but you still don’t want a Habsburg on your throne, perhaps Horthy has just the thing you are looking for. As seen previously, he or his more popular son can now be crowned king, and they have a chonky branch of their own.
Horthyist monarchist focuses.
Taking this or the democratic king path, the fascists will begin preparing to oust you, as they won’t endorse a new dynasty nor some liberal Swede. This takes the form of a short decision system, in which you can attempt to stamp it out before it has the chance to escalate to a civil war.
The Arrow Cross’ coup attempt.
But with those brief appetizers out of the way, it is time to move on to the main course, namely the Habsburgs, of which we will start with the last Habsburg ruler in Hungary, namely Palatine Joseph August.
Joseph August’s focuses.
His goal is to recreate Greater Hungary, unlike Otto who will attempt to restore Austria-Hungary.
Some highlighted focuses from the branch, including Hungary’s own “fifth empire” focus.
And now on to the last (but most certainly not least) of the monarchist branches, Otto’s Austria-Hungary tree!
The new Austria-Hungary branch.
Oh, and do not fret, for I have not forgotten @Nattmaran promising that I would show you what we refer to as the Austro-Hungarian joint focus tree, something accessible by not only Austria and Hungary when going down their relevant branches, but also by any of their puppets who were a part of the former Austro-Hungarian empire, such as Czechoslovakia, Croatia or Lombardy-Venetia, to name a few. This branch allows you and your “newfound friends” to jointly build up and increase the combined strength of the new Austro-Hungarian empire (or Danubian Federation if that is more your style).
The Austro-Hungarian JFT.
Otto’s new tree starts off with restoring the personal union between Austria and Hungary, now with Hungary as the “main part” of the union. While the tree however plays using the new puppet type of “Austro-Hungarian vassal state”, which was introduced in the Austrian dev diary, there are two avenues to annexing your puppets and gaining the old Austria-Hungary cosmetic tags, this being through the focus “A Thousand Year Federation” at the end of the joint focus tree and “Renovatio Imperii” at the end of Otto’s tree.
The foreign policy of Austria-Hungary can be very flexible, as it has the option to either formalize an alliance with a monarchist Germany if there is one, sign an agreement to join the Allies by calling back to the Grand Alliance, or to only trust family, and found the Habsburg Alliance. If you are rejected from joining another’s faction, the Habsburg Alliance focus will be automatically completed.
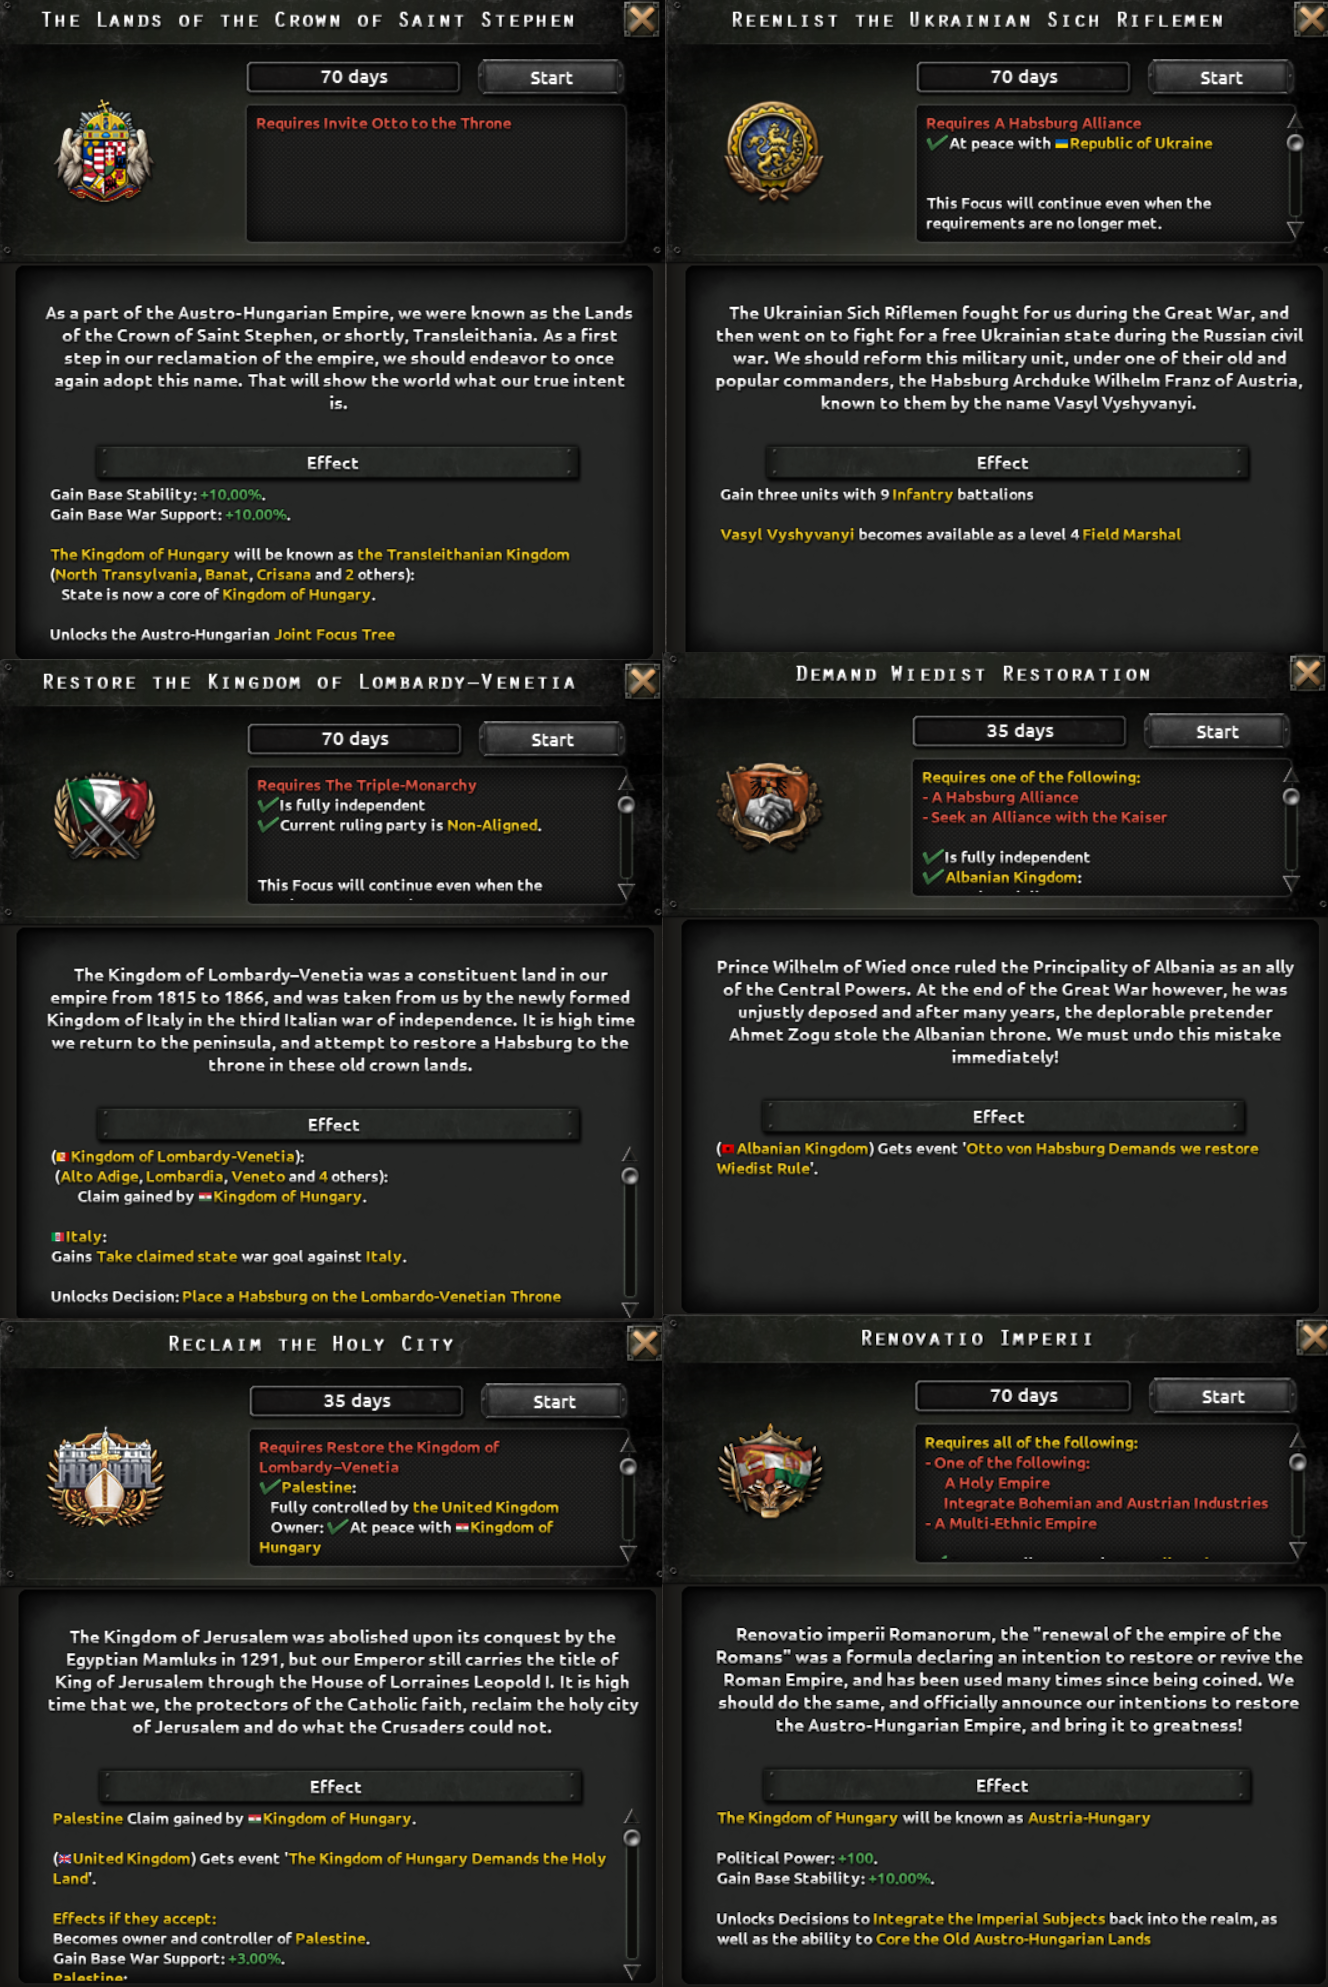
An image can say more than a thousand words (well I guess in this case because the images themselves contain words..), so I will now highlight some focuses and other interesting things in the Austro-Hungarian branch.
Some of Otto’s focuses.
And though many Habsburgs were mentioned in the Austrian dev diary, there are always more. Among those are Carl Pius of Spain, Vasyl Vyshyvanyi, Joseph Ferdinand of Tuscany, and Maria de Iturbide of Mexico. There are also other figures that can appear as you play, such as Ferdinand Pius of Bourbon-Two Sicilies, Wilhelm of Wied, and George Bagration “to name a few”.
Enough about monarchism and traditionalism though, how about some republicanism?
Republican Branches
The Republican branches in the focus tree.
The republican branches all start with preparing for the only required civil war in order to go down a certain political path in Hungary, where they will eventually oust Horthy from power and dismantle the regency. When the civil war is over, it will be time to choose who will lead, all of which will take you down different paths in the tree.
The possible republican country leaders, main three at the top.
Starting left to right of the branches we have Mihály Károlyi and the Second Republic branch, a democratic branch in which you will also have the option to elect any of the bottom two characters above to become your president. In this branch, the two main choices are between taking the diplomatic approach and attempting to formalize a Danubian Alliance, also unlocking the Austro-Hungarian joint focus tree, or to go for achieving Hungary's ultimate goal of reclaiming the lost lands, doing all in your power to restore Greater Hungary.
Some democratic focuses.
Now to the communist branches. The first one is Mátyás Rákosi and his Comintern-friendly branch, which centers around utilizing connections with the Soviet Union to build up the industry and military, eventually becoming their bulwark towards the west, acting as a strong minor power in the Comintern.
Some of Rákosi’s focuses.
And last but not least we have Béla Kun and his, well, Comintern unfriendly branch. As someone who was on good terms with Lenin, but who was nearly executed by Stalin, Béla Kun will attempt to establish his workers paradise in Hungary, no matter the costs. His ultimate goal, like that of many Hugnarians during this time, is to restore Hungarian borders, just like the reds tried to during the civil war. The end goal however in the branch, once you have achieved your peak form, is to take down Stalin’s empire of evil and bring an end to his Marxist-Leninsit charade.
Some of Kun’s focuses.
And before we end this, here is a quick peek at some advisors and such available to Hungary.
Political Advisors.
Generals at the start of the game.
Conclusion
And that’s all for today folks. I hope this brief introduction has wetted your appetites and has enticed you to load up a game of Hungary once the DLC drops. Up next is the big one that you have all been waiting for, Historical Germany brought to you by ManoDeZombi and Paradox_Danne.
Oh, and speaking of dev diaries, as a fun throwback I must say, we sure have come a long way since Death or Dishonor
I am Thomas, the Design Manager and Design Lead on the Hearts of Iron Expansion Team. Today I am here together with Manuel, also known as Mano de Zombi to introduce one of the new features of the upcoming Götterdämmerung expansion: Special Projects.
As always, please note that everything here might change before release… The UI in particular is receiving final touches at the moment, so it can most certainly look different on release day, but also any values, texts, etc you see in screenshots might change. But you know this already, right?
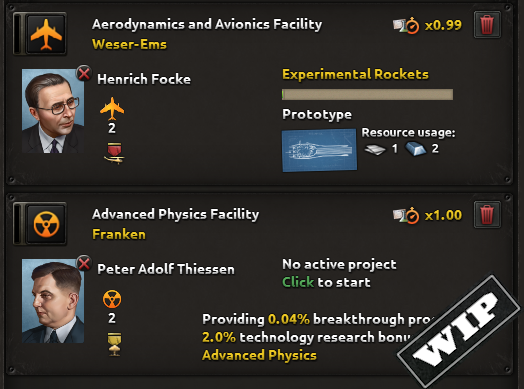
In Götterdämmerung, we have added a new way of acquiring super weapons and other experimental technological advancements that can give you an edge over your opponent. You can now construct secret experimental facilities, assign lead scientists and start up Special Projects there - trying to beat your enemy to getting those long range rockets, the atomic bomb, or the land cruiser mega tank.
With this new feature, Special Projects, you invest time and resources into specific fields, in order to produce those new super weapons, or similar things that can hopefully affect the outcome of the war, or at least will look cool and impress neighbouring countries :)
Experimental Facilities and Specializations
Okay, so how does one start one of these Special Projects? Well, the first thing you will need is an Experimental Facility. This is a new type of building that you can only have one of in a state (of any kind).
There are four types of Facilities, and all Special Projects are grouped into one of four specializations that match the types of Facilities.
The four Experimental Facilities are:
Advanced Physics Facility (mainly nuclear related projects)
Naval Engineering Facility (Naval, both Surface and Submarine projects)
Aerodynamics and Avionics Facility (Air and Rocket projects)
Land Warfare Facility (mainly Tank and Artillery related projects)
New Mexico seems like a safe place to construct an Advanced Physics Facility
Once constructed, you can see your Facilities on the map, and can click them in order to assign a scientist (more on them later) and start a Project from the map - or if you prefer from the top menu. And here we have our new Experimental Facility, ready to change the world as we know it
The old research button found on the top bar has been given a “Facelift”. If you click it as before, you open the research menu as before, but there is now a second tab that you can click to access the Special Projects. Or if you prefer you can right click on the research top menu item and go directly here. The third option, as I mentioned earlier, is to click on the Facility on the map. I wonder who would be the perfect candidate to assign to our new facility in New Mexico?
Unlocking and Breakthroughs
So you need an Experimental Facility to start a Special Project. However, you can’t start a project just because you have built a facility. In order to start a project you must first have at least one Scientific Breakthrough in the current field/specialization.
Breakthroughs are earned in two ways. The fastest and most efficient is by researching related technologies. This will generate progress towards a breakthrough in the field. For example, researching regular aircraft technologies will generate progress towards a breakthrough in the Aerodynamics and Avionics specialization.
Once you have gotten a Breakthrough, you can use it to start a Special Project from among those that you have available. So basically, regular technology research will give you the chance to start specific Special Projects. If you focus your research on Air technologies, you will more quickly generate Breakthroughs in Aerodynamics and Avionics.
Some projects are more advanced and require you to have more than one breakthrough in order to start working on them.
The other, and slightly slower way (at least with a less experienced scientist) to generate Breakthroughs is to have a scientist attached to an Experimental Facility with no active project in it. The Scientist will then do Basic Research in the field, and this will generate progress towards the next breakthrough. Researching Air techs generates the majority of the Breakthrough progress here, but Heinrich Focke helps as well.
Of course, not all projects are available from game start. Some will be, but some require you to have a basic technology researched in order to become available. For example, Submarine Special Projects are only available once you have researched Submarines.
Additionally, some projects require other projects to be completed before they show up. That could be in the same Specialization, or in another, or even both. For example, in order to start the ICBM Project, you need to have completed a few other Rocket Projects, but also the Nuclear Warheads Project.
Prototyping
Projects take a long time to complete, and they are done in a number of prototype iterations. At the end of each iteration, progress is generated to the project.
Sometimes other things can happen as well. Work with the project can for example give a research bonus in a related technology, or army xp, or similar things, depending on the outcome of the iteration phase. If you are unlucky, some powerful-yet-dangerous projects could make the facility suffer damage due to an onsite explosion… Iterations generate project progress, but sometimes you get other interesting things
Simple Rewards Some iteration outcomes will lead to a choice that can affect the final project output as well. Do we want our rockets to be range focused, or is explosive power the main thing? This gives the project a bit more life of its own, and makes not all end results be the same. But in general, each prototype iteration brings the project closer to completion.
Researching a Special Project is, as mentioned in the beginning, a bit of an investment. First you need to have, or build, the experimental facility of the appropriate specialization. The project also takes time, during which you cannot do anything else in the facility. In addition, the Facility needs to be hooked onto the supply network (you can only build them on or next to a supply depot or naval base) - and lastly, some Special Projects consume resources while you run them.
Firepower is what we go for here
Completing a Special Project
When project completion reaches 100%, the project finishes, and you get whatever it is you get :) from completing it.
This could be a new piece of equipment that you can produce, a new building you can build, or something else. Usually you also get something more tangible as well. Couple of examples: The Nuclear Reactor Special Project will not only unlock the Nuclear Reactor Building type for you, but you will also get a Reactor for free in the same state as the Experimental Facility - assuming there is space for it that is. The Super-Heavy Railway Gun Project will not only unlock the Super-Heavy Railway Gun equipment to be produced, but it will also spawn one on completion.
Some projects also unlock new technologies in the basic tech tree that are not available, or even visible if you haven’t completed the Special Project in question. For example, when you complete the V1 Project you get access to tech that you can research to improve your rockets, but also to rocket powered bombs, that can improve your strategic bombers.
Some projects, like the Bouncing Bomb Project only unlocks a new module for your airplanes. But that module in itself unlocks special Dam Busting Air Raids that allow you to try to destroy enemy dams, disrupting their industry and strategic movement in the affected state.
Oh, and yes, dams are a thing. I’ll talk more about dams in a future Dev Diary…
Capturing Experimental Facilities
If you manage to capture an enemy Facility with an ongoing project, you will not only get to keep that Facility, but also earn some progress in that project - if you have it unlocked and it is not already completed. Additionally you will gain some breakthrough progress in the field related to the specialization.
Scientists
An Experimental Facility needs a scientist leading the work. All major powers and some minor countries start with historical scientists and all countries can recruit more if needed.
Scientists have a skill level related to the field in which they work - some may have more than one. The skill level affects how long prototype iterations take, and thus how long the projects take to complete.
Skill level also affects the previously mentioned Basic Research. When involved in Basic Research, the scientist will generate progress towards a new breakthrough as described above, and the amount generated depends on the skill level of the scientist. Additionally, by doing Basic Research, the scientist will speed up regular research in related technologies.
Aside from skill levels they can come with traits, for example making them better at a subset of projects, or giving them other bonuses/penalties.
Worth mentioning that scientist is a new character role, and as such all the old Nuclear/Rocket Theorists, along with a few other relevant scientists/engineers previously represented as advisors, have now become scientists instead. Any scientist with level 1+ on a specialization can work on those projects. However, traits can boost specific projects making a scientist faster than the others at researching certain projects.
The Projects Themselves
The expansion comes with a decent number of Special Projects. There are, of course, projects allowing you to do your own Manhattan Project, and to take it even further… There are various Rocket Projects, you can develop the V1 Flying Bomb or the V2 Ballistic Missiles as was done historically.
We have included some (slightly) fantastic Special Projects that were perceived/started during the era, like Project Habakkuk (the British Ice Carrier Project), or the Ratte Project (The German Mega Tank) as well, but we’ve tried to stay on the feasible side of things, so some of these might not be very efficient on their early stages, but might become more powerful and viable if you research further technologies unlocked by their Special Projects.
In general, most projects will unlock a piece of equipment (Super-Heavy Howitzers, Parasites-Mothership Aircraft), a unit (Land Cruiser, Early Helicopter, Habakkuk), a module (Flamethrower Tank, Earthshaker Bomb, Anechoic Tiles) or a building (Nuclear Reactor, V3). Some projects can also boost existing equipment and projects that unlock very big things might also create a unit or a production line with progress in it.
A few projects have more unique effects, such as the Naval Project, Underway Replenishment, which unlocks a new feature that Naval Task Forces can use.
Here are some examples of projects: We have a few Naval Projects to choose from, and there are more hiding
Changes to Old Content
There has been some rework to the tech tree: We have added some new technologies, most of them invisible at game start and unlocked by Special Projects. Some previously-existing technologies are now hidden at game start and unlocked via Special Projects.
Besides the aforementioned V2 and the Manhattan Projects (rockets and nukes), other equipment has been moved into the Special Project feature, For example: Flamethrower tanks are no longer unlocked by Engineers II technology, but they have their own early Special Project, with an additional technology mid-game that will boost the flamethrower. Cruiser and Midget Submarines, previously equipment only available to very specific countries, will now have their own Special Projects making them accessible to any country.
With the addition of the Super-Heavy Railway Gun Special Project, we can now differentiate between “normal” Railway Guns, and insane much bigger ones, like Schwerer Gustav and Dora. This means that Germany gets a new model and icon for the regular Railway Gun researchable in the tech tree, and Dora becomes the Super-Heavy Railway Gun unlocked by a project.
A Word About Rockets
In the old systems, there was one type of rocket. Now there are several. The V1s are classed as Flying Bombs. These work similarly to before, but the rocket bases themselves have changed somewhat. The V2s however, are now classed as ballistic missiles. Ballistic missiles use another type of air mission, and are not affected by anti air. No one during the WW2 era had the capability to knock these rockets out, so that is something for later. Different types of rockets to choose from
Oh, yes. You do have to actually produce rockets now, they are no longer constructed by rocket sites.
We have made some quality of life improvement to the Rocket interface as well, making it easier to select target and mission. You decide which type of rocket you want there, from the ones you have available, and then you can just right click on their target, as they each have only one mission available - so you do not need to pick mission type first. Sending some rockets to the low countries
That’s all for now. Next Dev Diary will be about something completely different… A country that we decided to do a rework on in this expansion, namely Hungary.
Nattmaran here to kick off the Dev Diaries for Götterdämmerung! This will be the first Dev Diary I write, and you can bet that I am excited to finally show you what I have been working on! We are going to start out with a country that many of you have been requesting, Austria! Let’s get right into it with a little bit of context shall we?
The country select screen for Austria, a TL:DR for the historical context
A zoomed out overview of the Austrian Focus Tree
Interwar Austria
I won’t go into what happened during the Great War, but it was a bad time to be Austrian. Unfortunately for the Austrians, this did not let up much during the interwar years, it simply took another form. With next to no army due to the Treaty of Saint-Germain-En-Laye, half of the country unemployed, an economy in shambles, not being allowed to gang up with their old buddies in Hungary or Germany and violence between political paramilitary groups, it is safe to say that the country was in a really bad state.
The National Spirits at startup for Austria
Just after the Great War Austria operated as a republic, with decently functional elections and a parliamentary system. However, paramilitary groups still clashed frequently and these clashes led to numerous conflicts. Perhaps the most notable was the July Revolt of 1927 when the Ministry of Justice was burned to the ground by the Social Democratic paramilitary group Republikanischer Schutzbund. Conservative sentiments grew much stronger following this uprising.
The Austria you will come to know was formed in 1932 as Engelbert Dollfuss was elected chancellor. Dolfuss had great plans, and they started with removing the parliament. Said and done, via the so-called Self-Elimination of the Parliament, Democracy was abolished in one fell swoop. Under the ideology of Austrofascism, a combined right-wing party Vaterländische Front was formed from various conservative parties and agrarian leagues. All other parties were banned, making Dolfuss more of a dictator than a chancellor. Ideologically Austrofascism was more like the Fascism found in Italy, than the German counterpart. Ironic as it sounds, the rather Fascist VF banned the Austrian wing of Hitler’s NSDAP, DNSAP, from operating in the country. The bans were largely ineffective, and in 1934 Engelbert Dollfuss was assassinated in a coup attempt by DNSAP.
But, let’s get into the actual content of the game! In 1934 Kurt Schuschnigg took over as chancellor, and in -36 he also assumed leadership of Austria, which was now in an almost even more precarious situation. Still no army, the economy only slowly recovering, unemployment rates still high, political violence still rampant and now the Germans seem to be on the prowl as well. What a great time to come to power!
TL:DR; The interwar period was a very bad time to be Austrian!
This is how things will look as you load up the game. As you can see, VF is listed as Non-aligned, this is to attribute their past, and the fact that they are a hodgepodge of different political groups
"Historical" Branch
This needs a rather obvious disclaimer. We all know what happens with Austria in the Second World War, they get Anschluss’ed and die early on. As a player you will have to stave off this threat, and I have faith that you will, but it will mean that should you survive, a historical playthrough of Austria won’t be that… well historical. Not only regarding Austria, but regarding the rest of the world, and war, as well. Almost all of the focuses you find in the “Historical” branch have been drawn from some of the actual actions taken to attempt to stave off Anschluss, and later on in the tree was based on what was deemed a likely Austrian ambition depending on their political stance.
Oh! And as always, everything shown below is subject to change or fixes before release.
The path that Historical Austria will follow has them attempt to secure the guarantees they were promised to survive the German threat, and then, try to regain what they lost
Let’s ignore the Anschluss system for now, there will be a separate section for it further down. As we learned earlier, Austria is already rather authoritarian, but not ruled by a single Fascist party. We start out Non-aligned, but Schuschnigg and his cabinet will soon overturn this making the country properly Fascist. DNSAP was historically already banned by this time but by further clamping down on the party it can be fully dissolved. Unfortunately for us, much like in history, this doesn’t fully get rid of them but instead makes them Non-Aligned and us Fascist. Worse yet, this angers the German Reich. In response to this obvious slander, the Germans might demand concessions, or even, as was historically done, influence in the Austrian cabinet.
Arthur Seyss-Inquart, who indeed looks comically like a stereotypical fascist, just so happens to lead both DNSAP and Grossdeutsche Volkspartei. Anywhere you ban, or disband, DNSAP, no matter the branch, the Germans might “kindly” insist that you have him in your cabinet. Concerning.
This means that the threat has become very real for Austria and fast. At this point most of your effort will likely be spent on finding ways of delaying the inevitable. The Treaty of Saint-Germain-En-Laye stops Austria from building troops, but it also stipulated that certain countries would help protect Austria, if need be. Now, historically, the guarantors just decided to not help Austria, but maybe you can sway them?
Help plz? Anyone?
After making use of the good part of the Treaty, it has to go, you need those troops! You can of course ask permission from the other parties of the Treaty, but there is no guarantee that they will oblige, or you could just rip those useless papers and be done with it! Easy! It might annoy the other parties though, and anyone who guaranteed you might even retract that guarantee if you do.
There are different ways of going about getting rid of the Treaty of Saint-Germain-En-Laye, appeasement may be safer, but success cannot be guaranteed. If no agreement can be reached the consequences will be similar to outright disregard
No matter which way is chosen, rearmament will be necessary. Unless Germany has decided against their usual plans there will be a race against the clock to prepare as best as possible. The Heimwehr militia can be enlisted to help your regular army, and eventually, they can be integrated into the army proper. Below “Poised To Strike” we find an assortment of focuses to help develop Austria into the Austrofascist Corporate State that Schuschnigg had envisioned and on the left, we find a part that is actually shared with the Monarchists.
Austria post-rearmament has quite a few options for both building up the state, but also for expanding and reclaiming their old lands. Eventually, they can get cores, and proclaim the Austrian Empire
So here is one of those cases where I have had to extrapolate from what little history gave us and create some fun for you folks! Austria, had it been left to live, would likely have had a bit of a revanchist sentiment, at least on the Fascist and the Monarchist paths. Since I know you like map painting just as much as us devs, it is time to conquer! Starting with the obvious target, Hungary, Austria will slowly claw back their former territories, and can even try to get the old Central Powers gang together! There is also an option to join the existing fascist faction, but if the current faction leader is a historical Germany, they might not be keen on letting the Austrians in considering that they would probably like that land for themselves.Towards the end of these branches, you might see a familiar colour combo of yellow and black, and you’d be correct. You will be able to form a Fascist Austrian Empire and be a force to be reckoned with, being cause for concern for Germans, Soviets and just about anyone else. Finally Austria can live up to that one article that described Schuschnigg as wanting to “Out-Hitler” Hitler and create a “Better German State”!
Anschluss
The Anschluss system is one that is shared between all branches. Each branch might have a few unique ways of trying to stave off the threat, like the Fascist branch seeking guarantees, but this system stays the same. An important thing to note is that historically, a large portion of the Austrian people welcomed Anschluss, but the politicians most certainly did not. It is rather telling that Schuschnigg, who was very authoritarian, was trying to stage an election, to prove that the people did not want Anschluss, in the hopes that that would make the Democratic powers finally help them. These efforts failed, of course, but you might not!
The Anti-Anschluss Measures decision system is where you will find decisions to strengthen your country to prepare if this diplomatic conflict turns hostile
As you can see there is a risk level displayed. The amount of decisions available depends on the risk level, starting things like civilian factory construction and extra garrisons, ranging to emergency conscription, fortification construction and extended work shifts. The risk is an indication of how close Germany is to being able to complete the focus for Anschluss. The requirements for the focus has been revamped slightly to use a ratio of equipped manpower instead of a flat number of manpower in the field for Germany. But, I’ll let Paradox_Danne and ManoDeZombi explain that instead as it is more closely related to Germany than it is Austria.
Monarchism
Historical in all its glory, but sometimes we want something different. With both the Austrian Empire, and the Austro-Hungarian Empire being somewhat recent to our time period, what needed to be done was obvious. We need Habsburgs.
The Monarchist path in all its glory
By ripping up the old May Constitution Austria can start down a new path, and with the Monarchist path, this starts with reinstating the Herrenhaus. Replacing the parliament with a bunch of nobles allows for alternative ways of electing a leader, such as by name. How does Habsburg sound to you? Unless the pesky Hungarians have already installed Otto von Habsburg on their throne, you can place him on the throne of Austria. Should the Hungarians have unjustly stolen him, the Prince of House Starhemberg, Ernst Rüdiger Starhemberg, will happily step up to take the crown. (google that man, he had an interesting life)
The two candidates for becoming ruler of a monarchist Austria
Of course, both of these men can later also go from Prince to King, and that will give you a new snazzy flag! Though you will still “only” be called a Kingdom…
Back in business with their old flag and a Habsburg on the throne, like it should be!
If you want to become an Empire once more, you will have to rebuild. As soon as you have gotten rid of the Treaty with the “Rebellious Rearmament” focus the branch splits into two, one more focused on building yourself internally and one more expansionist. Expansion can be done in two ways, much like the fascists, you can go down the route to annex your old lands, if you wish to reform the Austrian Empire, but there is also another option. Led by Otto von Habsburg, Austria can strive to form a new Austria-Hungary by attempting to puppet their old lands instead.
Time to rebuild your Empire, starting with Hungary and moving on to all of your old lands, targeting both countries that currently exist, and breakout states in the event that they exist
By going through this branch, you also unlock a Joint Focus Tree with your puppets! I won’t show it here today, but rest assured, someone, potentially named D3vil, will show this to you soon.
“But Nattmaran, we wanted map painting!” I hear you call, and do not fret, I also enjoy map painting, so of course, you can paint the maps. You get a specific type of autonomy for your puppets by puppeting them through this system for this reason! It should be noted that the annex system uses the same decisions leading up to annexing or subjugating the country. This will allow you to decide if you want to spend time on trying for a diplomatic annexation or subjugation, or if you’d rather take your chances and if needs must, take what is rightfully yours by force.
The system for subjugating those formerly within the Empire. If diplomacy fails and your formerly loyal subjects have turned defiant, you can always puppet them by force. Your puppets also have an appropriate colour for what they are, Austro-Hungarian Vassals
As you can see, once some of the countries have been subjugated we can do what a Habsburg does best; spread, everywhere! This might not have the biggest effects, but I thought it was a fun little touch!
How does Joseph-August von Habsburg of Hungary and Karl Albrecht von Habsburg of Czechoslovakia sound? Or maybe you can catch some more elusive ones, like Joseph-Franz or Robert von Habsburg that can crop up elsewhere. And no Habsburg run is complete without controlling the true homelands.
Depending on your ambitions, you may also join a faction, or create your own, before you take on the Germans, the Soviets… or both! The world really is your oyster if you make it to this point!
You might have noticed the lack of mention of branch-specific anti-Anschluss mechanics for the Monarchists. See, that’s the caveat. Austria as a Monarchy would be a very proud and independent country, not wanting to rely upon anyone else after the troubles they have been put through. It is unlikely that a Monarchist Austria would have gotten, or asked for, any help. Going down the Monarchist path for Austria will mean an uphill fight to stave off the Anschluss.
Democratic
Say you decide to adhere to the Treaty a bit more, and wish to reinstate Democracy again. After all, the Self-Elimination of the Parliament wasn’t too long ago so the nation could still be yearning for Democracy. Much like the Monarchist branch we must first tear up the old constitution, and then before an election can be held, political opposition must be allowed once more.
The Austrian Democratic Branch
The election will be close, it will fall to you as the player to decide the course the nation takes. From the three candidates we have a Social Democrat, Karl Renner who had previously held power in the parliament, Vinzenz Schumy of the Landbund, and… wait… is that Kurt? Again?! Yes, Again! Kurt Schuschnigg starts out as the Non-aligned leader of a combined party Vaterländische Front, and can then swing both ways, going Fascist with VF, or Democratic with his old Christlichsoziale Partei, depending on which path is taken. Surprisingly enough, Kurt isn’t even the most right-leaning candidate, as Vinzenz Schumy and the Landbund were by far more right-leaning.
All three Democratic candidates have their strengths, and they all lean different ways politically. Renner will have access to one extra Communist focus, but otherwise there will not be much of a difference, apart from their trait bonuses
With a Democratic system in place, surely you should be safe from the threat of Anschluss? Unfortunately, no, you still have no army and can’t train troops, yet. Much like the fascists, you will be requesting help on the basis of the Treaty. Leveraging the fact that you are now a Democratic country, Austria will be slightly more likely to actually be allowed to rearm by the guarantors in this branch. Otherwise, you could always bribe them, and if they end up rejecting, it means that they are not following the treaty. And if they aren’t, why should you?
The focus ”The Right to Rearm” opens up the small but potent military branch for Democratic Austria, but it also has an effect for Non-Aligned countries, reasons to be explained soon
As with most Democratic branches, you will be able to join the Allies, but you can also create your own faction called the Alpine Federation. Either way your goal will be similar, end Fascism in Europe.
The Danubian Federation
Did you notice that chunk in the middle that neither Monarchist nor Democratic touched upon, and that “The Right to Rearm” has an effect for the Non-Aligned, despite being in the Democratic branch?
Democratic branches can feel a bit samey, and I wanted to avoid this, or at least spice it up a bit. The perfect opportunity for this presented itself via… Habsburgs of course! Hear me out; Otto von Habsburg was a long standing member of the EU parliament after its formation, and it would not have been too far fetched that he would have lobbied for something similar to be initiated if he came to power. And surely if Otto had that idea, someone in a Democratic party might have had similar ideas, right?
The Danubian Federation is a branch available to both Democratic and Monarchist branches in place of their more “traditional” routes
The Danubian federation starts out as a faction, but it also unlocks the Joint Focus tree for Austria-Hungary. Meaning, even if you are Democratic you can now access some Austro-Hungarian content! It will be a different way of playing, depending more on inviting a plethora of countries and building a strong faction. By ensnaring your faction members more closely to you, you will be able to subjugate them, and, in the Joint Focus Tree you might be able to take things even further.
Communism
Last out of the political branches is the Communist branch. Though not the most likely, Austria still had some Communist movements. The branch starts out with Austromarxism, which was a real ideology, situated somewhere in between Social Democracy and “proper” Communism. Considering this, there is an overlap between Communism and Democratic in Austria
The Communist Focus Branch
Apart from the “Gain Schutzbund Support” all of these are available to both Communists and Democrats. “Gain Schutzbund Support”, granting bonuses to your militias, is available only to Communists and Social Democrats, led by Karl Renner.
As I’m sure you’ve figured out, Austria has a long way to go to become a Communist state and for most, this road will involve a civil war. To have a fighting chance, the Treaty has to go. Austria preparing for civil war simply does not care about what anyone thinks and will be allowed to just shred the Treaty and enact Emergency Measures to rebuild more rapidly.
Once you feel ready, or once you feel that you cannot delay any longer, the Civil war can be started from the focus “Reclaiming Red Vienna”.
As you can see from the tooltip, you can avoid the civil war entirely by building enough Communist support. Otherwise, the civil war will trigger, and if the focus “Gain Schutzbund Support” has been completed, three new militia units will spawn on your side along with an amount of units comparable to your communist support. If you have 50% support, you get 50% of the troops and so on. Dealing with this civil war is difficult on your own, so there is a choice to be made, you can ask the Soviets for help, or you can invest more heavily in your militias to try and gain the upper hand. Once the civil war is over these two sub-branches will eventually lead to either joining the Comintern, or establishing a new Faction called the Danubian Bloc.
The final parts of the Communist branch will allow for spreading Communism in the Danubian countries, and countries that historically had an interest in the Danube. The decision system for this will be unlocked by completing “Encourage Communist Sentiments” and then expanded upon in “Demanding the Liberation of Workers”, and will allow you to sway your targets towards Communism, and then start a civil war, in case they disregard the needs and wishes of the proletariat. Finally there is a possibility to retake some land in Galicia, or tell the Soviets who’s the better communist state in a rather violent way. As long as you are not in the Comintern that is!
Military & Industry
As mentioned previously, Austria was in a terrible state economically, industrially and militarily, so now let’s have a quick look at what we can do to make it less bad, to start with, and great, later on.
The Austrian Industrial Branch is split in four distinct paths to make it easy to navigate where you need to go when your industrial problems become too pressing.
The Industrial branch is rather straightforward, there are four main branches focusing on four things. From left to right we have the resources branch for boosting your domestic resources, the infrastructure branch for connecting the country, the economic branch to save your crashing economy and the industrial branch to build and improve construction of factories. All branches have interesting points but they are the most potent together.”Economic Resuscitation” can salvage the most broken of economies and lessen a Consumer Goods malus from 40% to 20%. By going down the Industrial branch several problems can be solved with one focus as “Start Apprentice Programs” will alleviate issues with stability, political power and consumer goods all at once. And “Expand the St. Pöltner Steelworks” gives both heaps of steel and a factory Austria has tried the 2877% inflation rate before and this branch ensures that she is not going back there.
Not the largest air branch, but enough to build up a functional air force if there is need for one
While Austria was technically allowed to have an air force, it was not prioritized. As such, you will pretty much have to start from scratch. There will be two main paths, focusing on domestic production, or focusing on establishing foreign partnership and importing your fleet. They both have their ups and downs, both requiring significant investment, one in the form of getting the funds to purchase aircraft, the other… Well, you need factories and research to build them, right? Towards the end we can improve the infrastructure around our air force with anti air, radar stations and air base construction bonuses. “Wiener Flaktürme” were a real thing, they were however built by the Germans after the Anschluss. No matter, they will likely be useful in the air war. Though an air force might not be your initial concern, this branch will be here once you need it.
Though primarily locked behind getting rid of the Treaty of Saint-Germain-En-Laye, Austria boasts a rather sizable army branch.
The army branch is the largest of the Military branches, as this is what Austria mainly focused on historically. In this branch you will find that there is one major choice to be had between Franz Böhme and Alfred Jansa, both of whom are, ironically, historical.
Jansa’s defense might come in handy in holding off the Germans, but so might Böhme’s more aggressive tactics
Alfred Jansa was from an early point worried about Germany’s plans for expansion and had a plan laid out to counter this. Naturally, the Austrian cabinet, who were equally worried about this, appointed him as a chief of army. Just as naturally, the Germans protested this, not wanting a man with a defensive focus in power. Böhme was much more favorable towards Germany, so demanding that Austria replace Jansa with him was a win-win, and historically the Austrians did comply. That doesn’t mean that you have to though…
The Navy branch is unlocked only when you actually gain control over at least one coastal state. Considering Austria’s geographical location, this might not be the most prominent branch…
As Austria doesn’t have a coastline this branch starts out locked. But in the event that you acquire a coast line, this branch is for you. This branch has some rather hefty bonuses to bring you up to speed, but you’ll have to pick. Focus on larger ships like battleships and heavy cruisers with “Rebuild the Armada”, or gear yourselves towards submarines and destroyers with “Defending the Coast”. There’s even a few somewhat historical admirals for you to recruit. We even have MIOs (Or Designers if you have yet to pick up Arms Against Tyranny) to help build Austria into a great Naval nation!
Okay that might be stretching it, but you get the point!
Conclusion
There we have it, thank you for staying a while and reading through this Dev Diary! Austria is a country with many challenges before her, but with some cunning plans and strategies, ripping up some treaties and a staunch refusal of German advances this little country can become quite the powerhouse.
Just as a funny little note to end on, the work presented here was initially planned for both me and D3vil to do together. However, when we were told to do Austria-Hungary and just mildly touch up Hungary we instead decided to split the work and give you both Austria, and a full revamp of Hungary! You’ll get to see what has been improved and expanded for Hungary in a week, but first, on Wednesday, you’ll get to see some really special projects!
Auf Wiedersehen!
A peek of the brave units that will help protect your country
Aaand there we have it, with the release of this video there can be no more subterfuge: our expansion Götterdämmerung drops November 14th.
Of course, we’ve kept this one under wraps for a bit longer despite some … subtle hints, so now is our opportunity to explain a little about what Götterdämmerung heralds, and what else is coming for Hearts of Iron in the near future.
With the above said, I’d like to draw attention to the fact that Dev Diaries and related events will be arriving with high frequency over the next six weeks - two or three items per week up until launch. This means today we won’t be diving into extreme detail on each of the headline items, but you won’t have long to wait to see more.
Note: The original schedule was changed to swap the Raids and the Small Features DD's to give the Devs more time with the Raids DD
Special Projects
A German themed expansion is something many of you have been clamouring for for many years, and as we’ve been quite clear about in previous roadmaps, we’ve also wanted to work on a super-weapons feature since the release of HoI4. Naturally, these two things made sense to tackle together.
War drives all sorts of technological innovation in an attempt to out-do opponents and although many projects ultimately never saw the battlefield, Götterdämmerung aims to tie together existing research systems with a new experimental research mechanic that allows for both historical and less historical but plausible super-projects to be pursued. The research process will become an important part of gameplay, with scientists, map-located experimental facilities, and supporting infrastructure all combining to produce a wide variety of outcomes that can augment your forces or change the very nature of the war you are fighting.
Military Raids
Of course, the story of experimental project development during the war was one fraught with strategic implications. From the secrecy around the Manhattan project, to the dambusters raids or targeted strikes on important facilities such as Peenemunde, there are numerous examples of targeted military strikes that had a severe impact on the nature of the conflict.
The military raids feature aims to add more narrative to your conflict while remaining an inherently strategic tool in your arsenal. Target experimental facilities, important military installations and more with high-risk, high-reward planned operations across multiple disciplines. We’ve aimed to have as much integration as possible here with special projects: raids will be one of your main counterplays to an opponent scheming to develop their own [redacted].
Germany
Germany will be receiving a totally revised historical national focus tree and a host of new alternate historical paths. We’ll go into further detail about exactly what is coming here, but we’ve put a high premium on retaining the core feeling that Germany’s old tree gave the player: a sense that they are the protagonist in the events leading up to the war; that the conflict revolves around their actions.
Austria
Resist the oncoming storm, cast off the shackles of enforced military impotence and retool your nation around your chosen identity. Forge a new history for Austria free of German control, standing as a beacon of resistance or reclaiming your fractured empire.
Revised Hungarian Focus Tree
A completely overhauled Hungarian focus tree, with a detailed historical revision and a completely unique perspective on reforging the Austro-Hungarian Empire, independent of Austrian content.
Belgian Focus Tree
Resist or welcome German supremacy. Draw on the natural wealth of the Congo and build potential for an African government-in-exile. Alternatively, play as the Belgian Congo, and either support the war effort, or throw off your old masters.
And of course that’s not all. With any release there’s a host of other items that will appear, some small, some bigger, and notably some pretty nice improvements to the way the AI will play on a tactical and planning level.
Expansion Pass
With Götterdämmerung we’ll be trying something a bit new. The release will be part of an expansion pass. Expansion passes are our way of both giving you a Roadmap for the content that’ll be arriving over the next few releases, and for letting you sign up to get that content when it arrives with a discount of 20%.
The expansion pass will include:
Instant unlock of three new 3d tank models and a music track
The Götterdämmerung expansion (Nov 14th 2024) - $24.99/£21.99/€24.99
The Graveyard of Empires country pack (Q1 2025) - $14.99/£12.79/€14.99
Prototype Vehicles unit pack (Q3 2025) - $6.99/£5.89/€6.99
https://store.steampowered.com/app/3152810/Hearts_of_Iron_IV_Expansion_Pass_1 Now to get ahead of the game here: we understand that this method won’t appeal to everyone. All items listed above except for the first bullet-point will be available for purchase individually as usual, or in the DLC subscription.
The latest War Effort update is here and with it arrives more bugfixes and balance changes, with a few changes to France, the Warlords in the east and some changes to certain spirits!
Check out all the changes below and let us know what you think, and what other changes you'd like to see~
- Brazil: focus "Potenji River Conference" changed so that instead of having Brazil declare war on American major enemies, they now instead join the American war, thus not applying the Defensive War bonus on the Axis and Greater East Asian Co-Prosperity Sphere in the late-game. - Brazil: now even more extra hyper-unlikely to reject unification with Portugal if their ideologies match - Czechoslovakia: focus "United Population" now grants 10% stability and war support as well as 150 political power if the "Divided Nation" national spirit has already been removed by the focus "Czech Socialism". - France: Fixed an issue where SOMUA S35 was previously called SOUMUA S35. - France: focus ""Begin Rearmament"" will no longer be cancelled if you drop below the required war support. - France: wargoals for the French focus ""Secure the Crown"" target all Spains. - France: the Orleanist focuses Slum Clearing and Counter-Action are both now 35 days focuses, and added an extra building slot to the Slum Clearing focus. - France: focus ""Diplomatic Freedom"" now takes 35 days and give 50 political power. - France: fixed an issue with offsets in the tree when taking the focus ""Revive the National Bloc"". - France: focus ""Defensive Focus"" now gives 30 command power. - France: focuses ""Invite Yugoslavia"" and ""Invite Romania"" now are 35 day focuses. - France: Trimmed down the decision tooltips in the focus "Reorganize Aviation Industry" and added 2 Military factories as an instant completion reward in the focus. - United Kingdom: Fixed an issue with a duplicated available trigger in the British focus “Commonwealth Ties”. Also changed the focus to include British Malaya in its targets, as well as give the targeted nations 50 political power each. Also made it into a 35 day focus. - Warlords: focus Industrial Investments now gives 2 civilian factories instead of one. - Warlords: now start with the national spirit “Warlord State” which can be upgraded through 3 different new focuses, and which is removed upon becoming any other type of state. - Warlords: national spirit “Long Term Economic Planning” now also gives a 10% construction bonus to Supply Hubs. - China: national spirit “Public Works” now also gives a 5% construction bonus to Railways. - Warlords: focus “Personal Leadership” now takes 35 days and additionally grants 30 command power. - China: national spirit “Rapid Mobilization” now also gives a 10% bonus to mobilization speed. - Warlords: focus “Opposition” now also grants 5% war support. - Warlords: focus “Cooperation with the Nationalists” now also grants 5% stability. - Warlords: focus “Cooperation with the Communists” now also grants 50 political power. - Warlords: focus “Cult of Personality” now also grants 5% war support. - Warlords: focus Local Arms Production now gives 2 military factories instead of one. - Spirits: Professional Officer Corps now grants 15% division experience gain and 30 max command power in place of 5% land XP, -5% doctrine cost and 0.20 daily command power - Spirits: Elevated Engineering Corps no longer grants a 25% engineer trait xp gain factor. Railway gun bombardment bonus is now 25%, from 20% - Spirits: Proper Heritage no longer grants 5% cavalry attack, and instead grants 10% Leader Experience Gain - Spirits: State Serves the Military now grants 10% offensive war stability, from 10% political power gain - Spirits: Logistical Focus spirit now grants -10% fuel consumption instead of -5% - Cavalry Recon now gains a 15% speed bonus from the Mass Assault doctrine "Pocket Defence". - Horseback Infantry now have several early benefits in military doctrines. We would still like to see them phased out in favor of motorized infantry, but for countries with no real options in the early game they should lose their shine a little later then currently. - The Dutch MIOs Fokker and DAF are now both available from game start, and instead of being unlocked, are granted 2 extra levels when taking each MIOs respective focus. - Increased the spirit of the naval acadamy spirits chance to gain +skills on level up from 40% to 50% to be in line with the army spirits - the AI will be significantly less likely to leave countries alive on tiny islands during peace conferences
- Added decisions for Wales and Y Wladfa to core each-others states if they control them. - The Free French focus “Refus Absurde” can now also be completed if at peace to remove the Defeatism spirit, and the focus “Form the Provisional Government” now also removes the spirit in case it hasn’t been removed earlier. - Finland no longer cedes Petsamo to the Soviets when losing the Winter War.
- Bulgaria: Players with BftB should no longer encounter Fatherland Front when going to war with the Soviet Union while wrong ideology - The Request Expeditionaries feature works with size 0 armies once again - corrected railways around lille and dunkirk - All single category MIOs (naval, air, land) should now use the correct XP type - Fixed a bug when if you had a spirit of the army (leftmost army spirits) would cause any spirit from spirit of the naval academy (leftmost navy spirit) to not work properly - Fixed a wrong tooltip where the % chance to gain +attack/defense/manouver+coordination in the spirit of the naval academy would say you a way lower % chance to get the benefit that what it really was (it said 20% but it was in fact 40%) - Fixed a number of Soviet CCP icons that were not appearing correctly when the pack is enabled. - Fixed an issue where Argentina could core only Guatemala and no other central-american nations using their South-American unity decisions, as well as making them able to core Easter Island. - Fixed an issue where the 30 day cooldown for the damage dealt by Paratroopers after taking the "Combat Insertion"doctrine wasn't working and could be done an infinite number of times in the same state. - Fixed an issue where a Warlord state that had inherited Nationalist China's focus tree couldn't remove their version of the Ineffective Bureaucracy spirit through the Examination Yuan focus. - Fixed an error where the British Plan R-4 couldn't be successfully completed. - Land Doctrine: People's Army now correctly applies cavalry suppression buff to Military Police; buff reduced to 0.35 Suppression Per Honse from 0.5 - Unit supply consumption now correctly uses 2 decimal places in tooltips and UI (functionality remains unchanged) - Fixed an issue where the "Blockade Venezuela" decision would still be visible when Venezuela didn't exist. - Fixed an issue where the leader trait “Unbreakable” wasn’t properly granting attack and defense modifiers. - Fixed an issue where the Spanish national spirit “The Anti-Fascist Crusade” wasn’t properly granting the attack it said it was. - Fixed an issue where the Nordic national spirit “The Nordic March” wasn’t properly granting the attack it said it was. - Fixed an issue where the Nordic national spirit “To Arms Against Tyranny” wasn’t properly granting the defense it said it was. - Fixed an issue where the Latvian national spirit “Dievturība” wasn’t properly granting attack and defense modifiers. - Fixed an issue where the various Italian Papal national spirits weren't properly granting attack and defense modifiers. - Fixed an issue where the Spanish national spirit “Embrace the Spanish Destiny” wasn’t properly granting the attack it said it was. - Fixed an issue where the Spanish “Crusade Against Democracy” national spirits weren’t properly granting the attack and they said they were. - Gdynia is now also included among the states that Poland can return to a democratic Germany if they are close to capitulation. - Fixed various issues with the requirements and effects of the Norwegian decisions to convert convoys into destroyers. - Fixed an issue where Chile couldn't bypass the focus "Demand the Guyanas" when already controlling all three target states. - Fixed an issue where the Portuguese focus "Portuguese Artillery" didn't grant funds to the correct MIO. - Fixed an issue where the Brazilian focus "Bribe the Military" wouldn't grant a dockyard due to incorrect checks in the focus. - Fixed various issues where the Japanese Zaibatsu national spirits could join the wrong side of a civil war. - Fixed an issue where the Latvian focus "Renew the Constitution of Latvia" wouldn't correctly swap the trait of the political advisor Alberts Kvesis as it said it did. - Fixed an issue where the French focus and decisions for "Arms Purchases in the US" could be completed despite the requirements not being properly fulfilled. - Entrenchment Chief no longer refuses to follow naming consistency rules (Thanks Reddit, we hated it too)