Jun 29, 2022
Hearts of Iron IV - PDXMidgeman
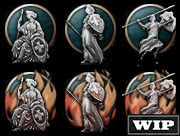
MAJOR DISCLAIMER - This dev diary is written before the majority of art has been delivered, so it features a lot of placeholder graphics - you have to imagine really cool focus icons, and a lot of characters with hats that are beyond fabulous, for example
But we have some cool art coming!
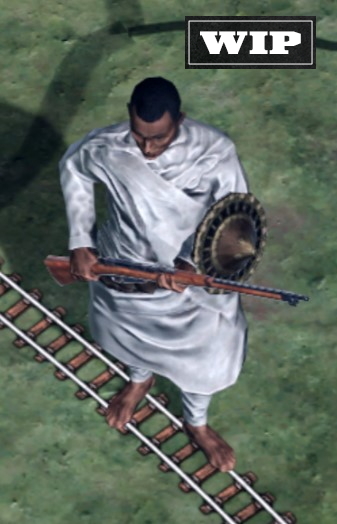
Work in progress image of Ethiopian Irregular Infantry
So, I was asked to write a dev diary about the development of a focus tree and related stuff for Ethiopia. Mainly because I was the one asked to do Ethiopia in the first place*, I guess. It would probably have felt weird to do a dev diary on something else then…
Anyway, Ethiopia. I wanted to make playing Ethiopia a somewhat different experience than the average game of HoI. It has to be, right? For one, Ethiopia starts at war, which puts some constraints on the design. Also, it is a war that they historically lost. After the initial invasion in October 35 they more or less managed to push the Italians back to their starting positions in what became known as the christmas offensive, but by the time we are entering the scene the Italians were preparing to once again go on the offensive. And historically this time Ethiopia didn’t stand a chance. However, in 1942 Ethiopian units such as the Gideon force and the Arbegnoch were fighting alongside the Allies to retake their country. So the design had to feature that as well.
But enough of that - lets take a look at Ethiopia and what we did with it for the DLC:
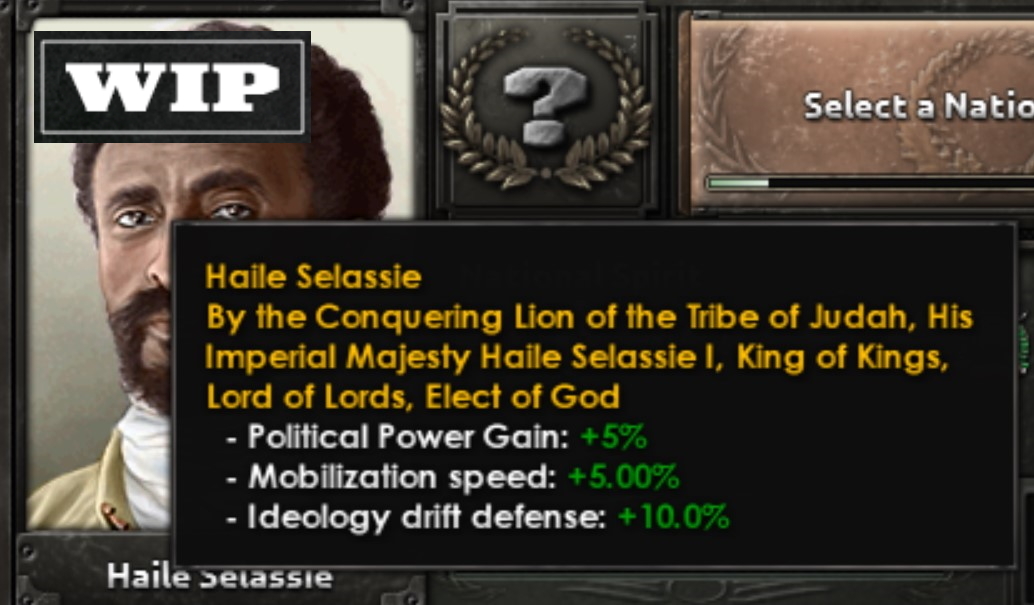
First you might have noticed, that Haile Selassie has himself a new trait - with one of the cooler names so far in HoI history
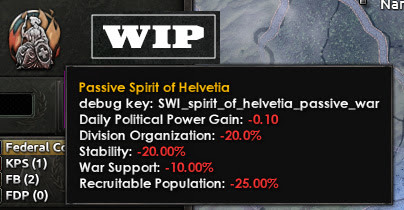
And the country also starts with a set of national spirits (compared to before where it was severely lacking on that front):
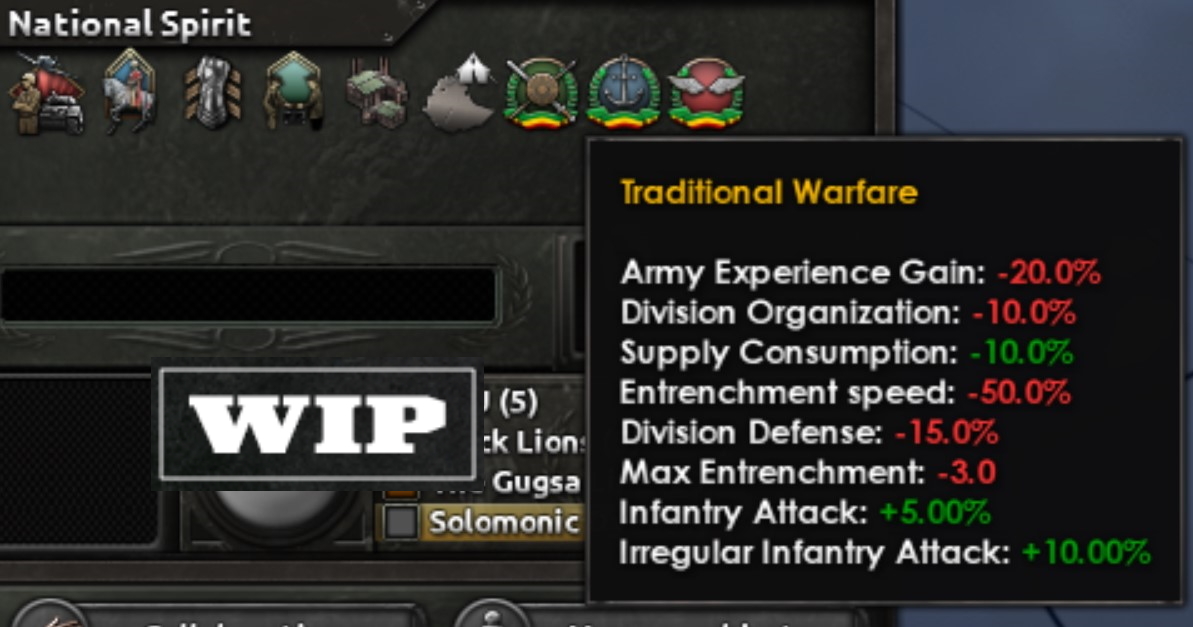
Not all of which are entirely positive however….
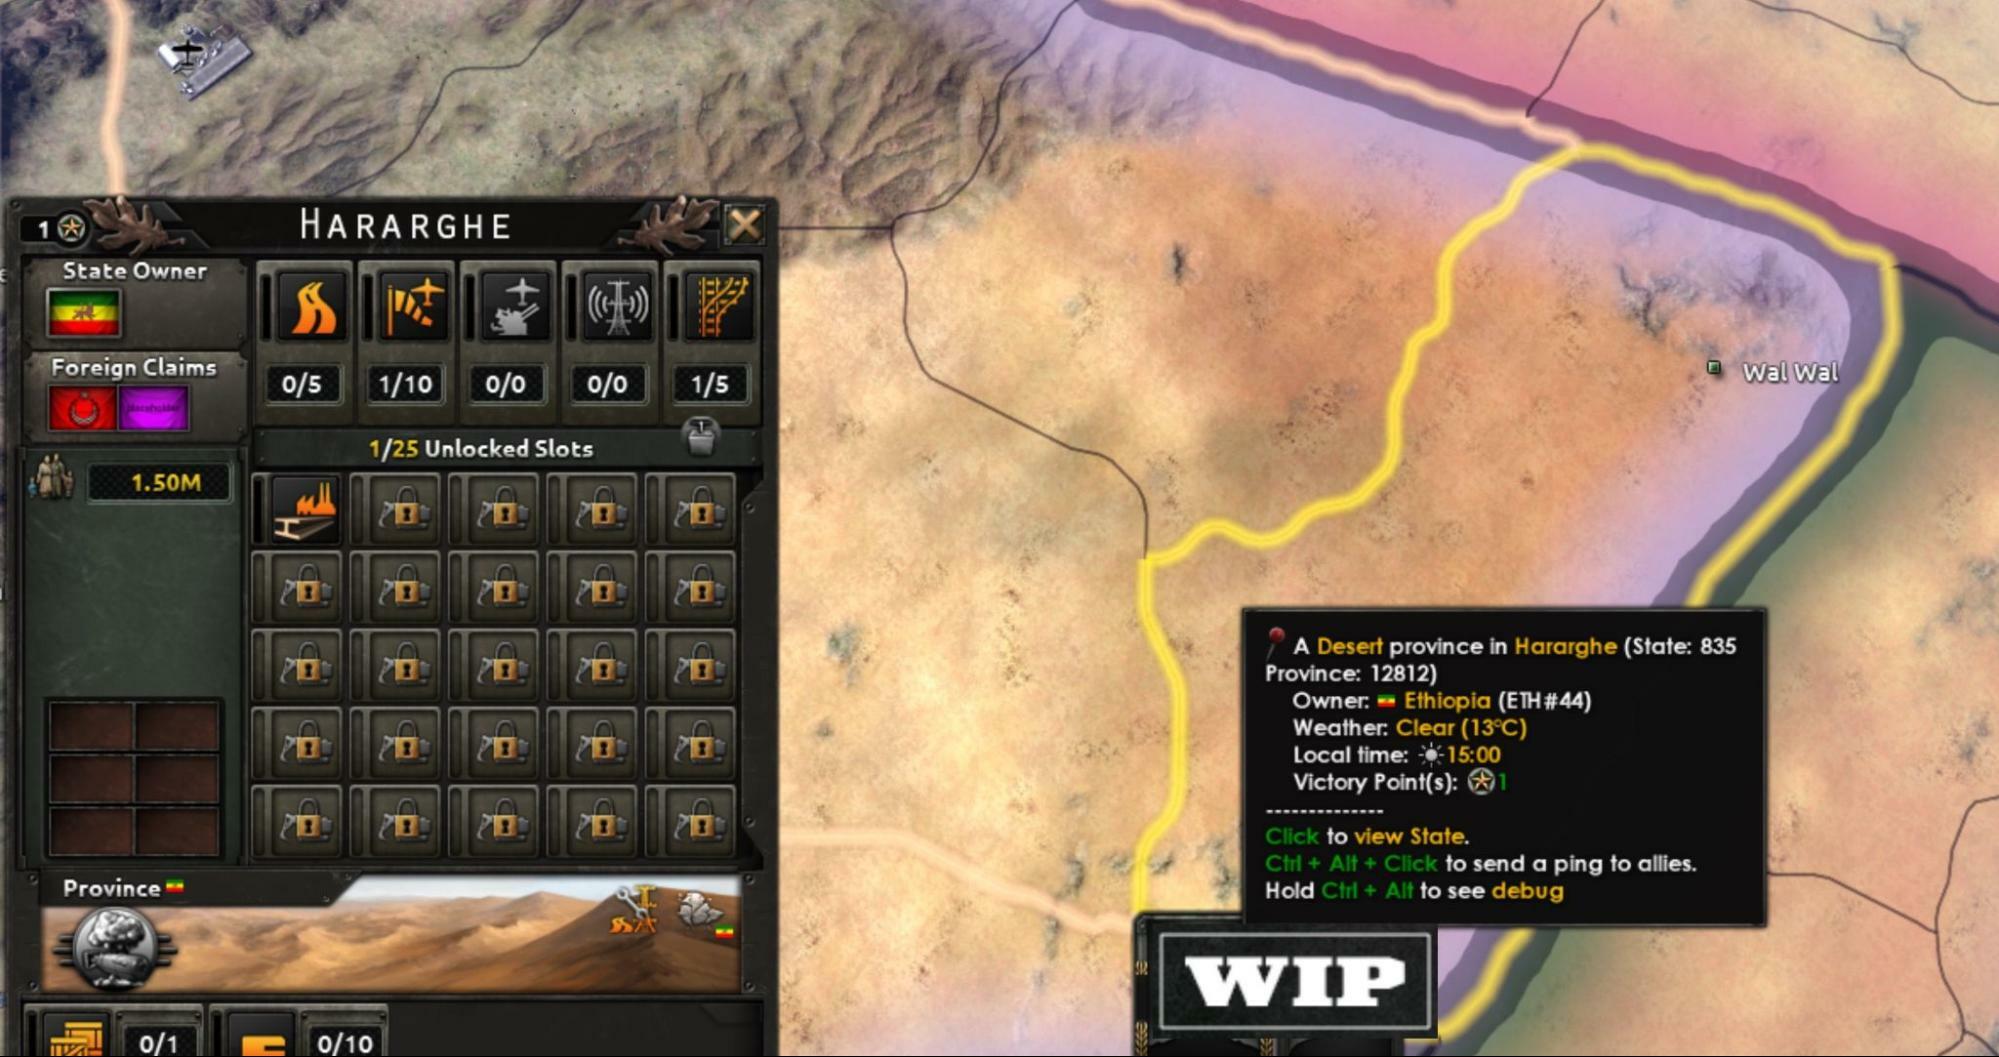
Additionally, the Ogaden desert is now classed as - well, yes - desert:
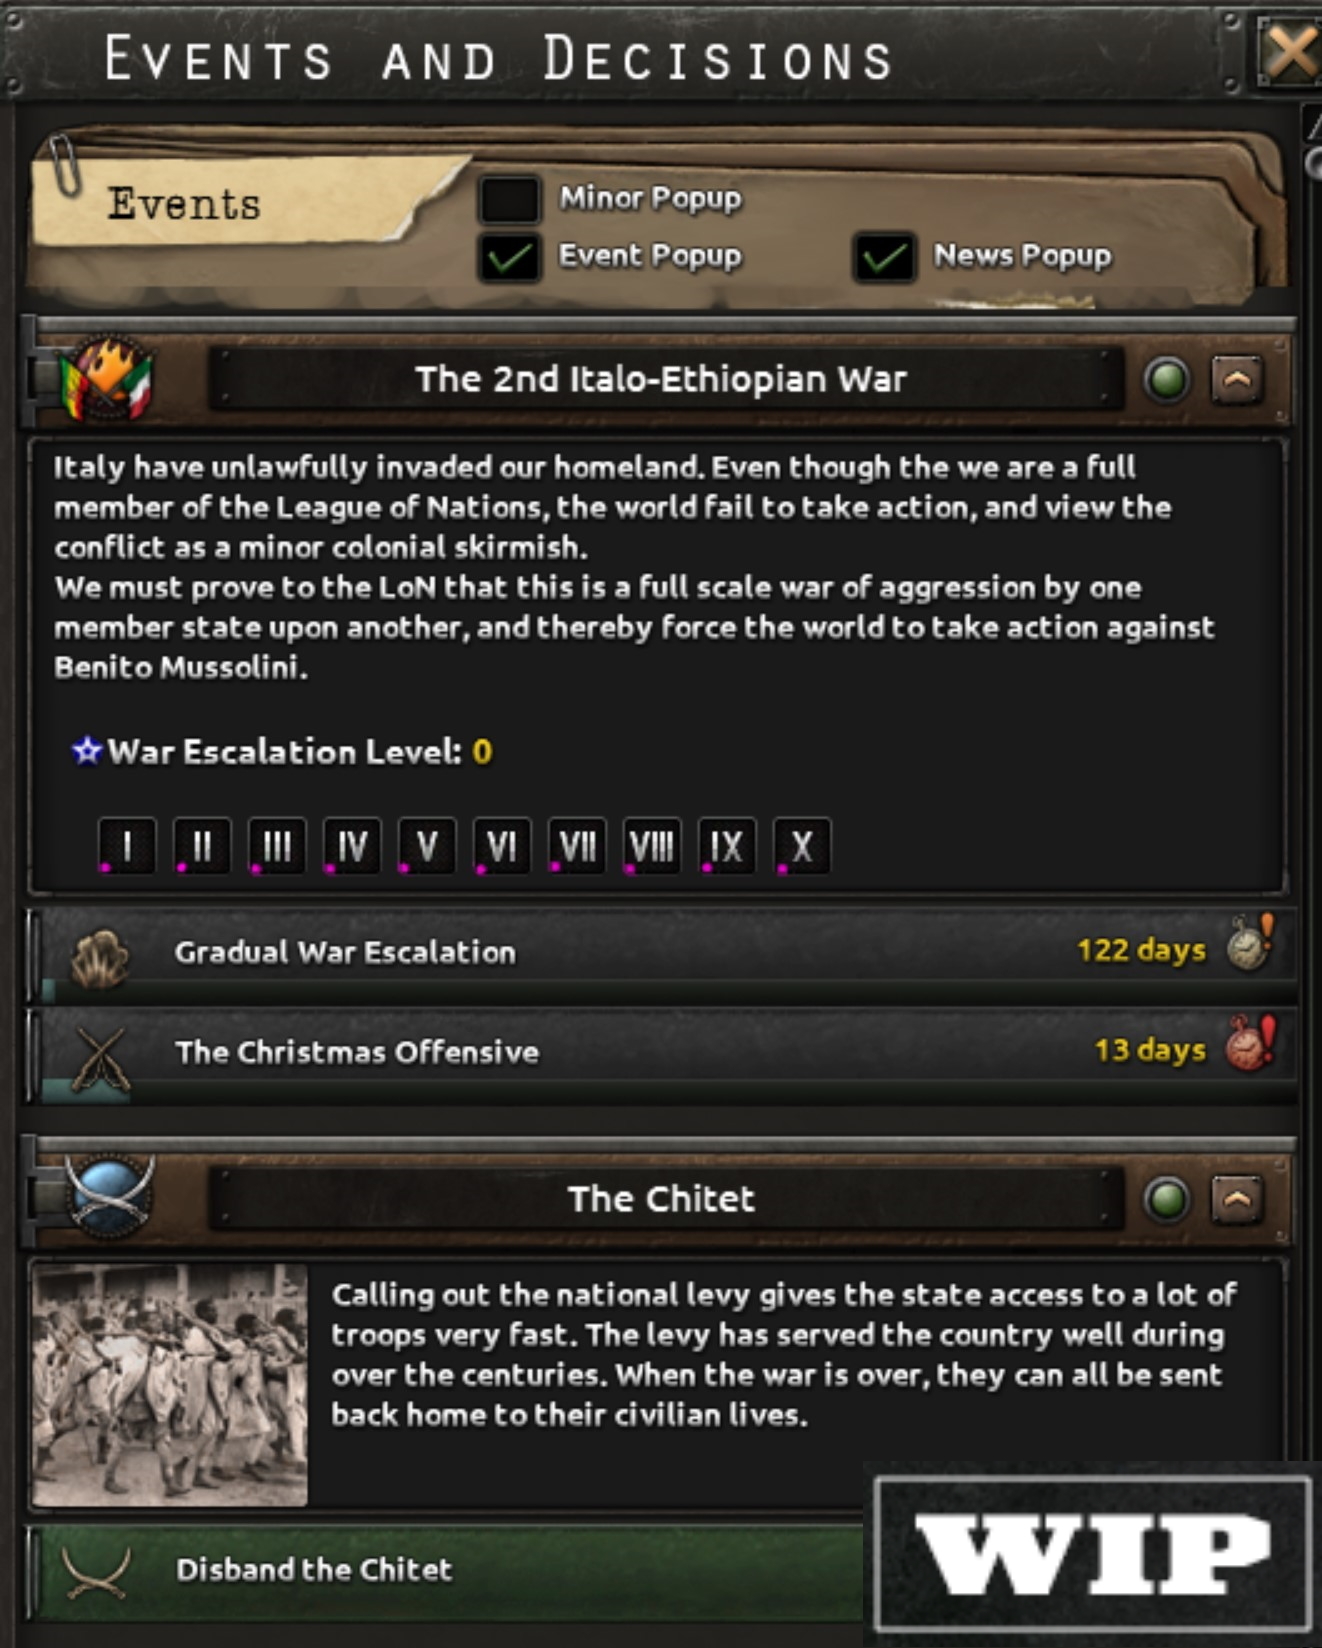
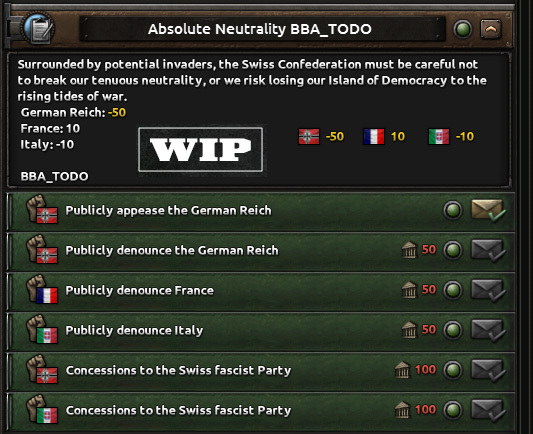
The thing is, Haile Selassie really hoped the International Community would do something to stop Italy. After all, both nations were part of the League of Nations. We decided against doing a full scale League of Nations feature, so instead it is tied to the Ethiopian focus tree, and a small mechanic that affects both Italy and Ethiopia. (After all the LoN was mainly active before 36, so it makes sense I think)
There were numerous reasons why the League didn’t act against Italy, who in turn tried to play down their invasion as something of a border dispute in one of their colonies. But the longer Ethiopia holds out and the more Italy commits to the war, the harder it will be for Mussolini to downplay the conflict and for the LoN to turn a blind eye.
So to simulate this we have a ticking “War Escalation” that affects both sides in the war.
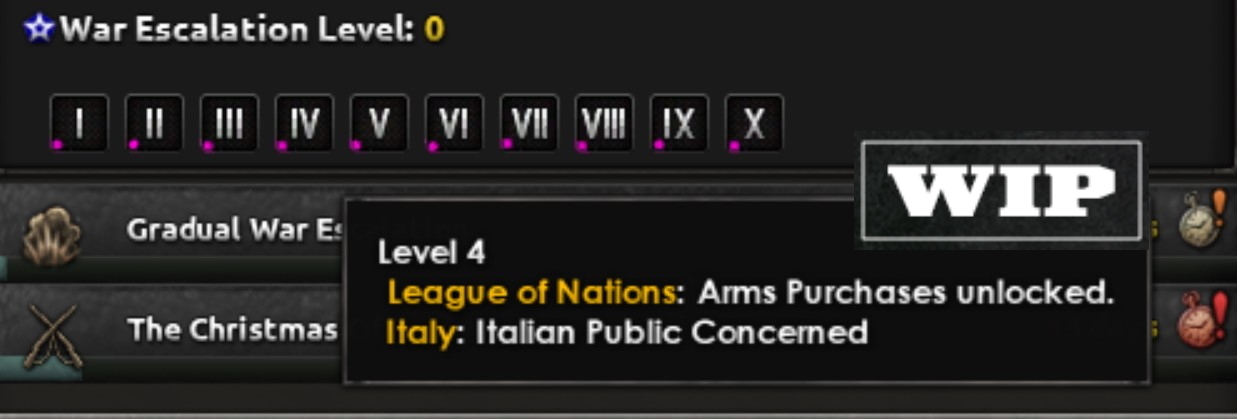
The higher it ticks, the more focuses you unlock for Ethiopia - should you decide to go to the League to plead your case - and additionally both sides will get events that affect their ability to continue the war.
We’ll get back to that stuff further down the line…
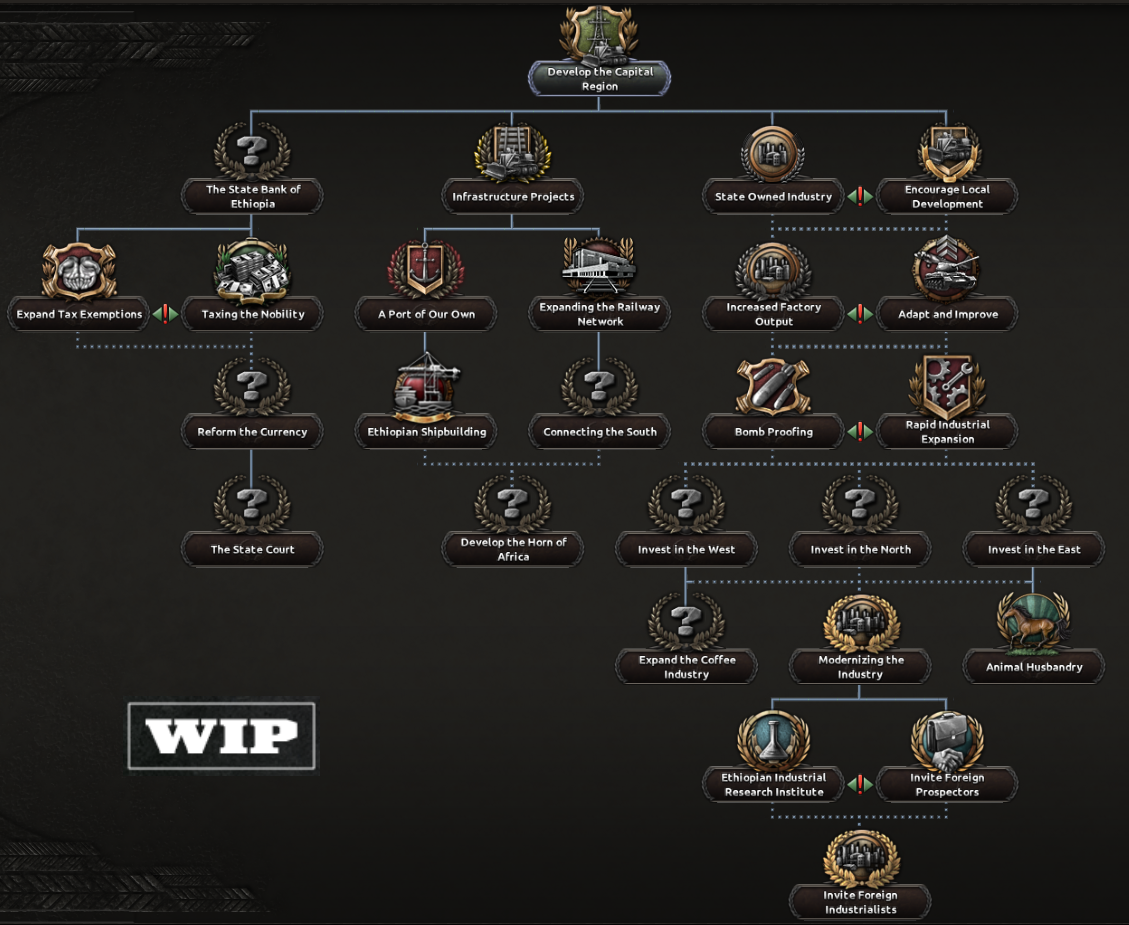
The entire industrial tree for Ethiopia.
In 1936, Ethiopia starts without any major industrial capacity. It has 2 military factories, and 2 civilian ones, one of which goes to consumer goods, and one is needed to fulfill trade requirements in order to produce the weapons needed for the war. Some more factories can be acquired through the focus tree, but many focuses are also about different bonuses and removing debuffs etc.
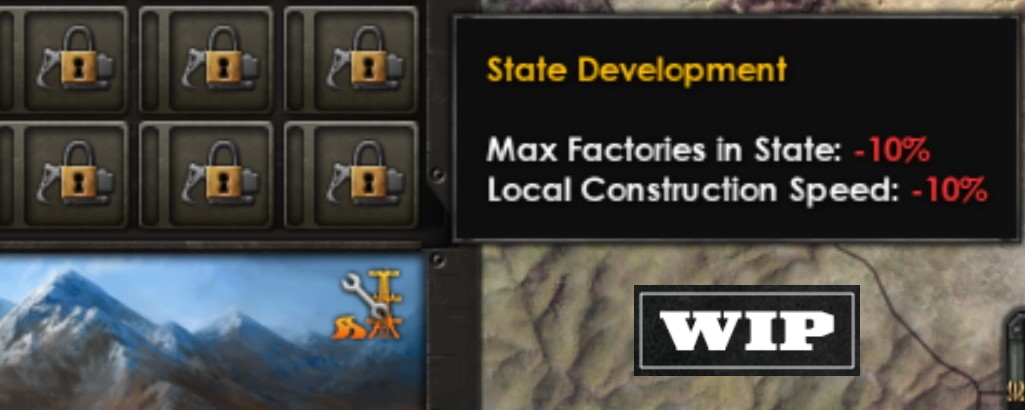
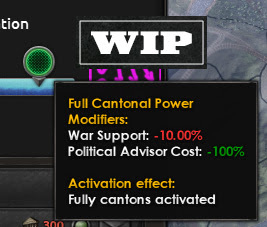
All Ethiopian states also start with this modifier, which is -30% in all states except for the capital shown here. “Develop the Capital Region” as well as other focuses in the right-most part will unlock decisions to eventually remove this modifier.
Ethiopia doesn’t start with a plethora of designers and companies like other countries, but will instead have options to invite off-shoots of companies from other nations through the “Invite Foreign Industrialists” focus.
Also I cannot stress enough how good the 2D art is looking.
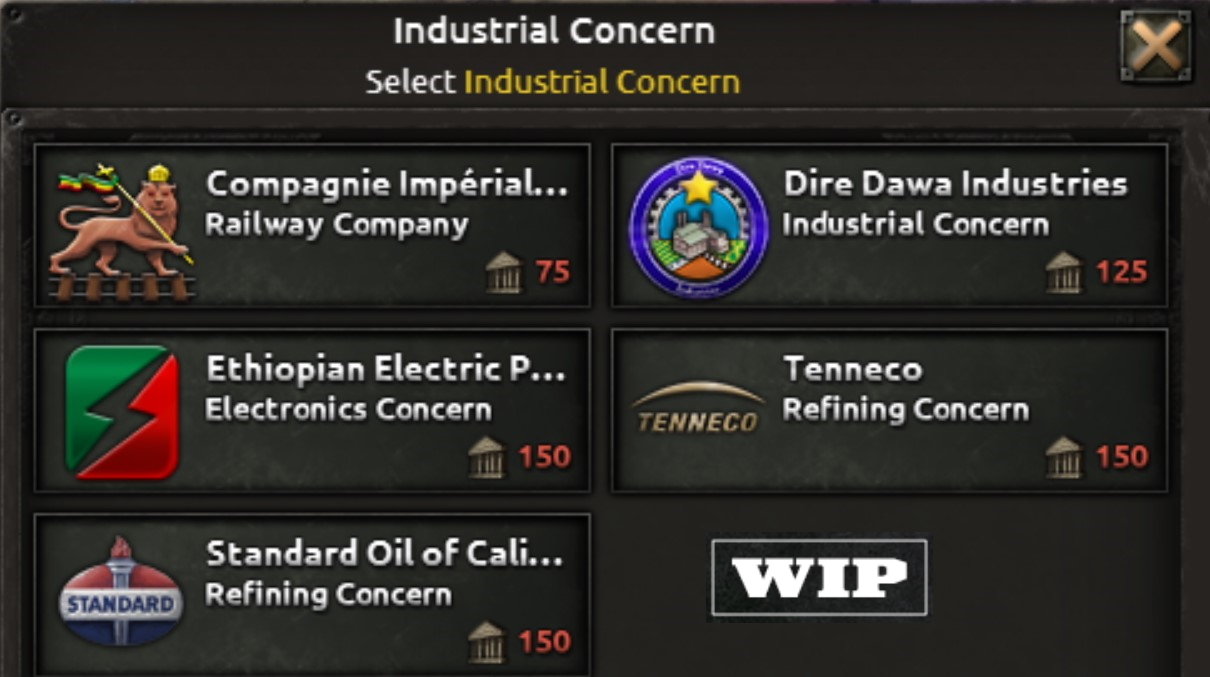
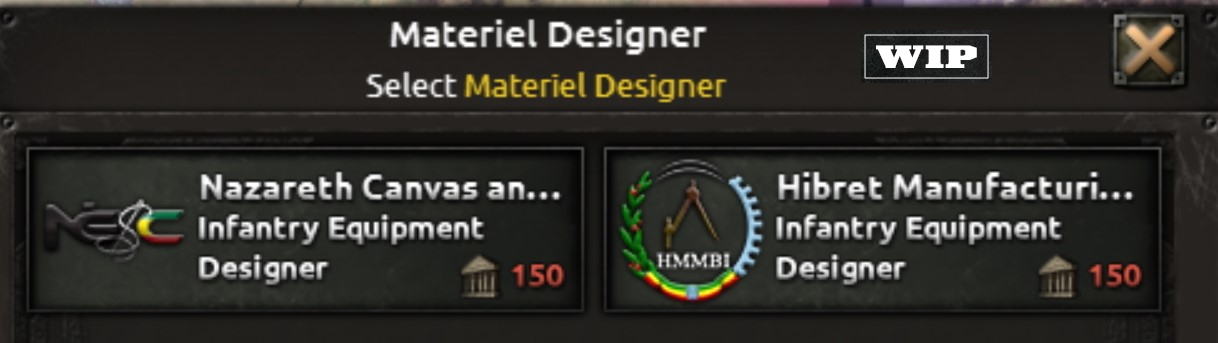
The designers and industrial concerns native to Ethiopia or unlocked through ways other than the “Invite Foreign Industrialists” focus.
The fact that Ethiopia has a different system for raising units than other countries is represented by a recruitment law unique to the country. In peacetime it allows for a rather small recruitable population, but in wartime it is increased automatically, but incur penalties to production etc.
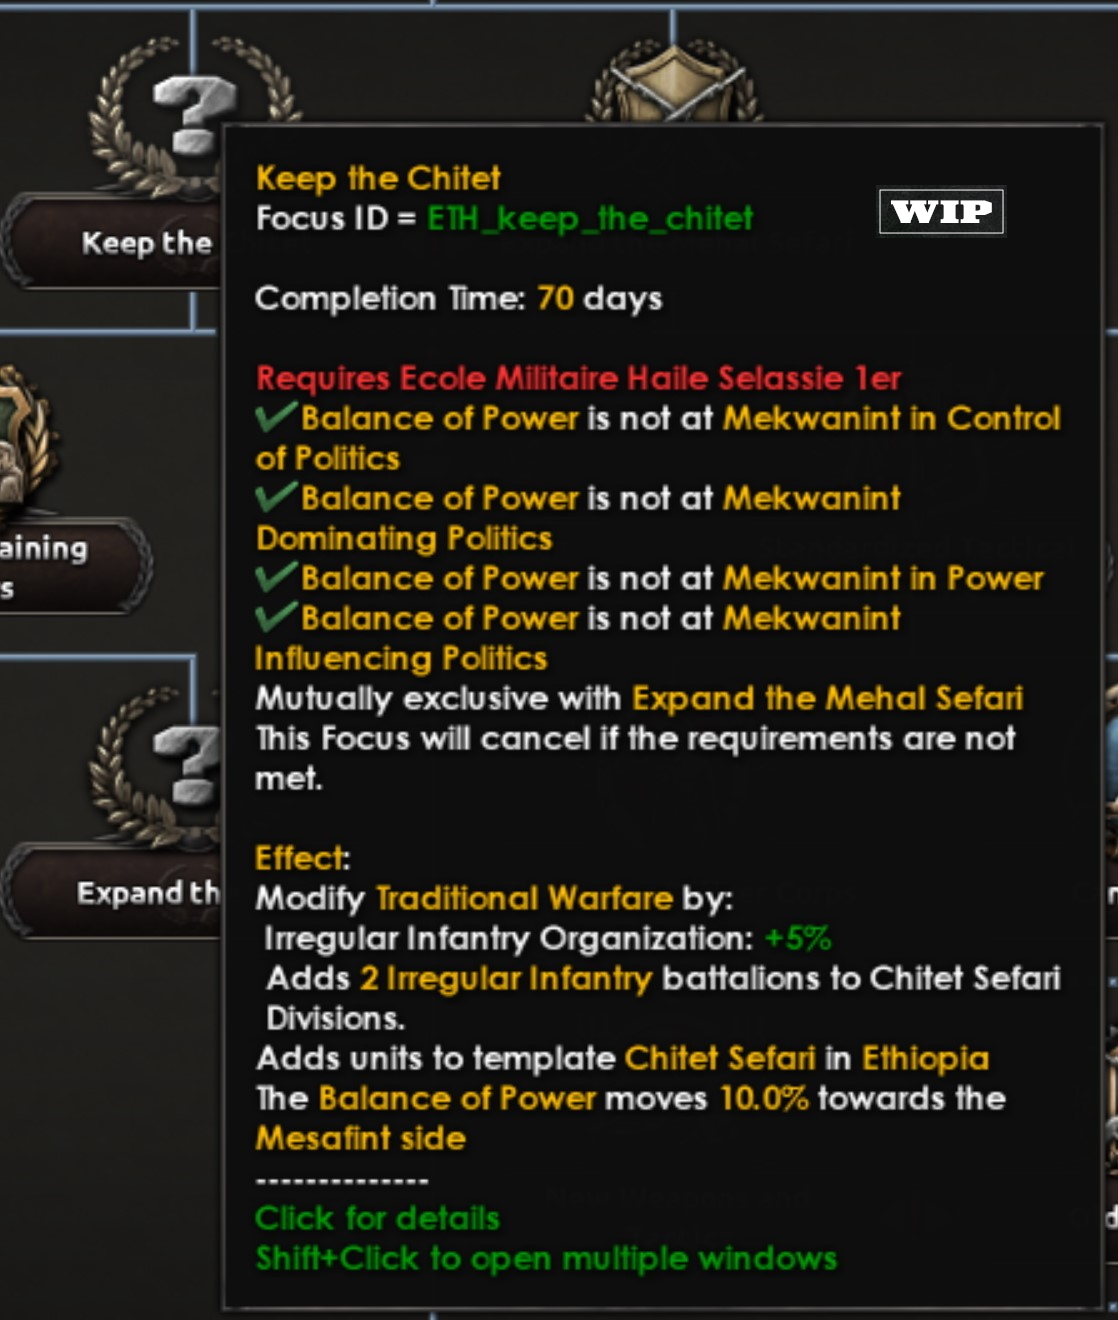
Playing Ethiopia, you will be given the choice to expand on the irregular system, or instead move towards the more “regular” system employed by other HoI countries.
The focuses in this branch will let you specialize your army to some extent, and also helps a little bit if/when you decide that an airforce and/or navy could be good things to have.
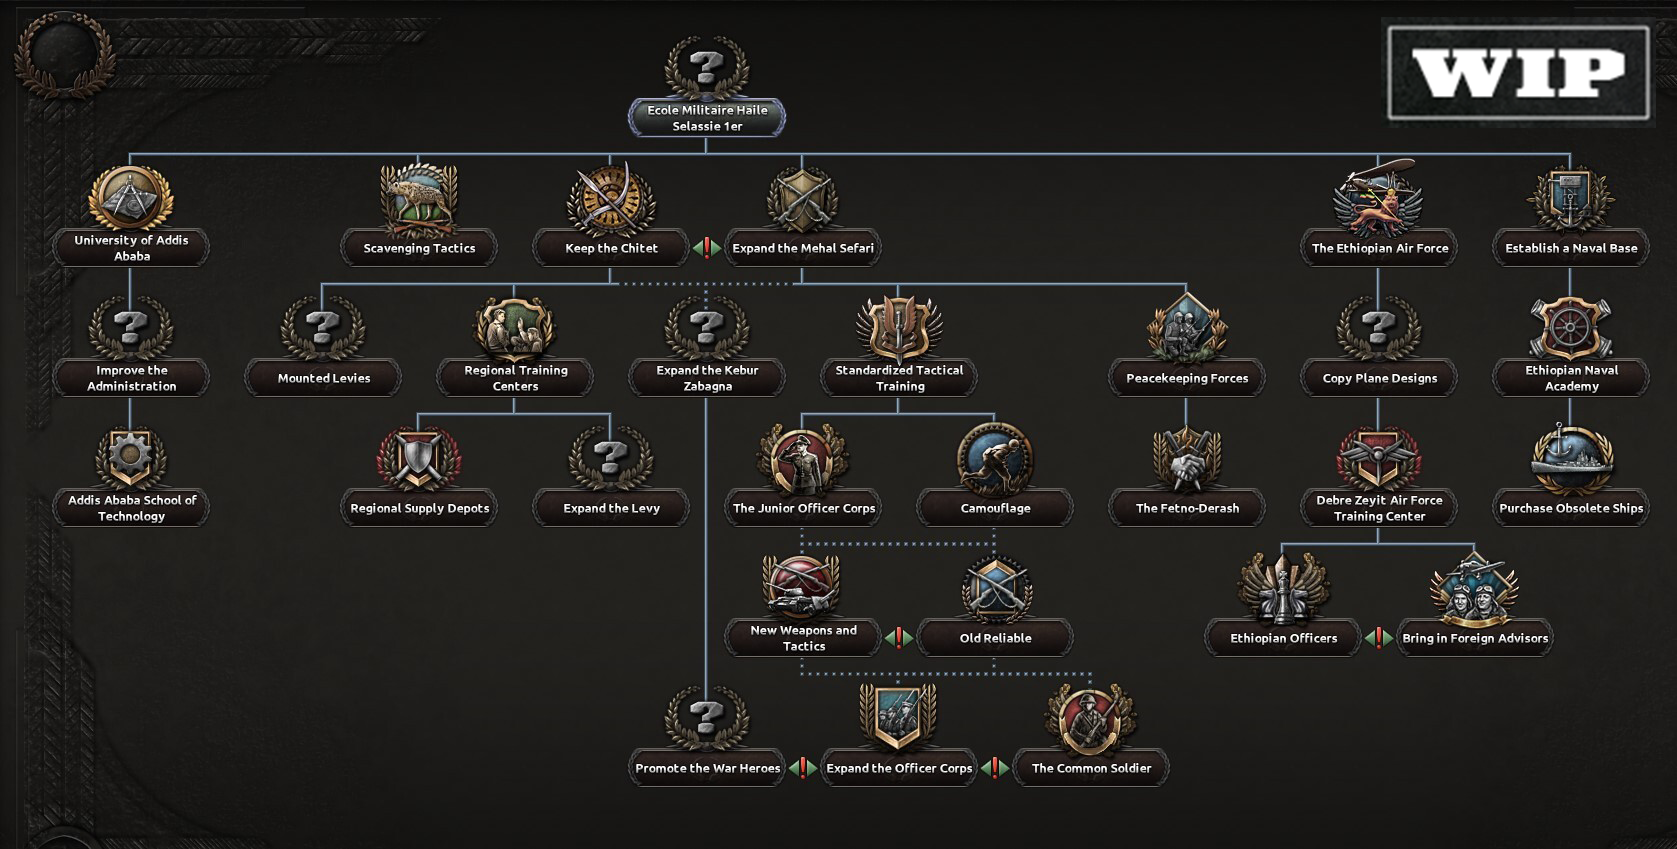
Here you can see the military branch in all its glory:
Should I go or should I stay?
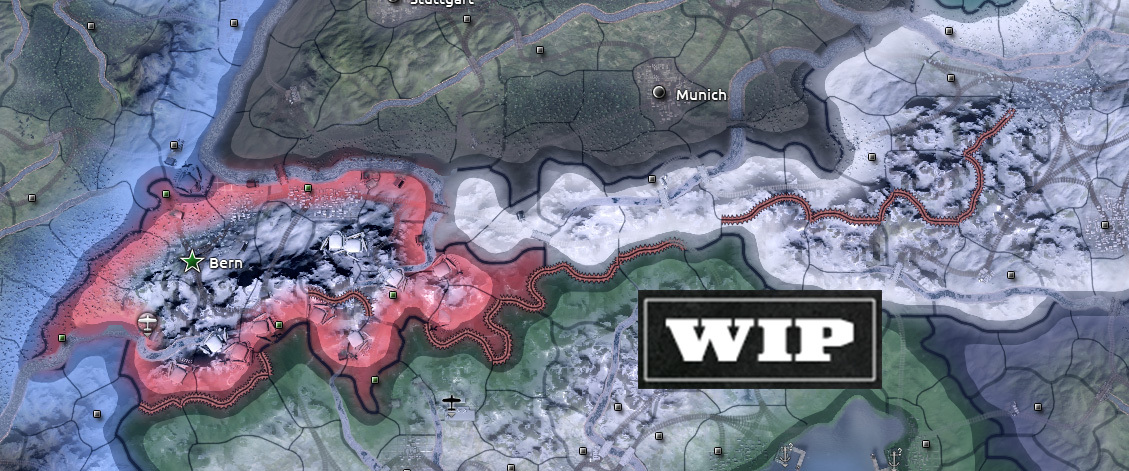
The first decision you will need to take when playing as Haile Selassie's Ethiopia is if you want him to stay in Africa and attempt to beat the Italians back the hard way (that is, without any foreign aid, which will be required for certain cult of personality-esque focuses later down in the tree) or if you want to get on the train and go to Switzerland to address the League of Nations and utilize the different focuses tied to them, which all get unlocked through different levels of war escalation.
If you decide to go for the historical option, and have Haile Selassie leave the country you get access to this subset of the tree:
The section serves the dual purpose of giving you access to focuses that can help you, if you get the war escalation up high enough, and allowing you to continue the fight in exile, should Ethiopia capitulate while the Emperor is away. The focus chain that starts with Addressing the League of Nations culminates in the “International Mediation” focus which sees the LoN pressure Italy for a white peace. (Doing this will not be able to gain you any immediate territory from them, so you will have to get to that later in the post war tree)
Additionally, the International Brigades focus is very useful, as well as fun and flavorful, as it allows you to send events to LoN members asking for volunteers, making it to where about 4-8 random minors send you a division each, becoming very colorful very quickly.
Many of the exile focuses unlock various decisions to do, in order to make a playthrough at least somewhat interesting to a player. Some focuses such as “The Patriots” and “Anti-Italian Propaganda” also unlock new unique continuous focuses for Ethiopia to do, such as increasing resistance growth and lowering compliance gain in areas occupied by Italy. This is because the only way for Italy to get rid of you once you have gone into exile is for them to get enough compliance in your states to take a decision that gives them ownership of it, eventually creating the Africa Orientale Italiana to completely erase you if you do not oppose them enough.
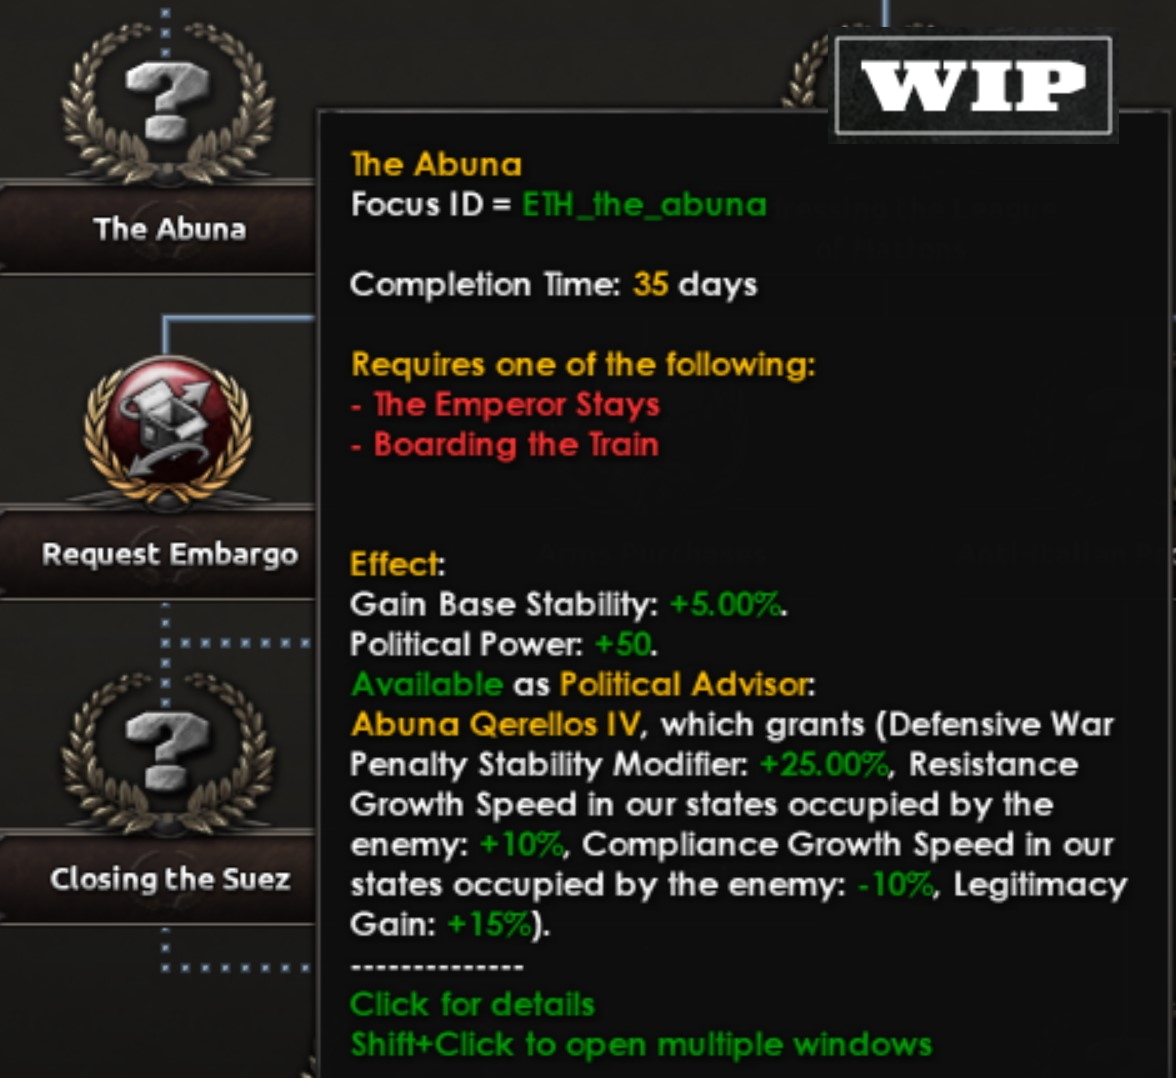
And as you can see, hiring the Abuna (leader of the Ethiopian Orthodox Tewahedo Church), Qerellos IV will grant you some bonuses which are going to prove very useful when in exile.
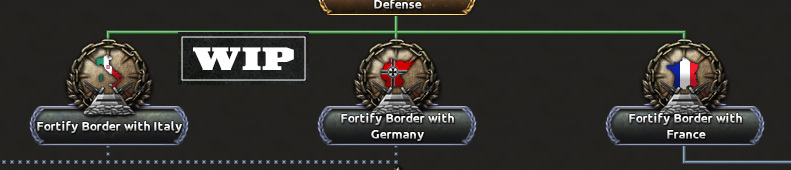
Different host-nations also means different extra focuses (all require a certain level of legitimacy to do).
As you can see in these images, your focuses and campaign will be quite different depending on what nation you send Haile Selassie off into exile to. (Be aware that you will have to ask the country for permission first, which will be very hard if they do not have good relations with you)
Also, can you guess what nations these might be? (Yes, they are very obvious, aren’t they?)
When getting peace with Italy through this branch however, you can in fact gain territory from them, as long as you control it when you complete the focus “Fait Accompli”. What makes this branch harder is not only the lack of support from the West, but also the fact that you need to at a bare minimum control all of your core provinces to do the focus that grants you peace with Italy. The focuses here do however give some nice bonuses both to Haile Selassie as a Field Marshal, but also to the troops and generals of Ethiopia.
Here is the full “war with Italy” part of the Haile Selassie focus tree.
But once the war is done, what’s next?
As you can see here, there are two sub-branches to choose from following the end of the Italo-Ethiopian war ; “The King of Kings” sub-branch and the “Rebuilding the Country” sub-branch. The latter one is accessible through any of the war with Italy branches. The King of Kings branch is however only available to you if you managed to win the war without foreign help, cementing Haile Selassie as the true ruler of Ethiopia. Here you can upgrade his ruler trait, and get decisions to restore the long-gone Empire of Axum, gaining cores and wargoals on many of the kingdom’s historical claims.
You can then also choose between a couple of different end-game options, such as taking advantage of the Rastafari movement, and requesting overlordship of Jamaica from the British to expand your influence in the Americas, or embrace the Solomonic dynasty’s legacy and attempt to reclaim king Solomon’s lands from it’s occupiers, eventually coring it and moving your capital there. However, to do either of those you must have defeated the Italians without going into exile, and built the cult around the Emperor. If you didn’t, you still have two choices open to you, which both focus on Africa.
Actually, take a look at these new advisors Ethiopia has before you leave, because they have quite a few:
And this guy:
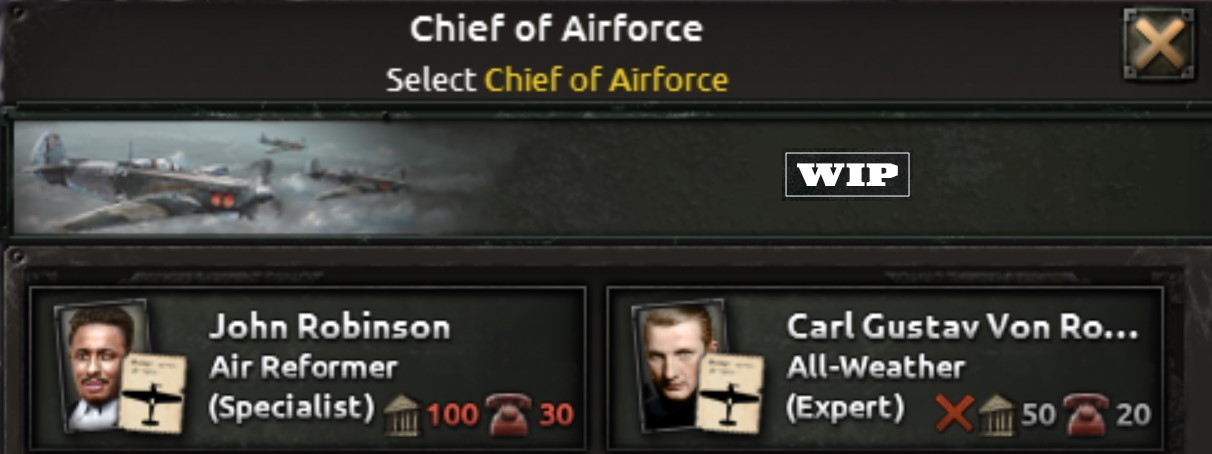
Military Personnel:
And some Swedes and an American:
But those aren’t all the advisors, as some of the ones available to the alt-hist branches are not shown here, but they can be a fun surprise for the next Ethiopia dev-diary.
That was all for this time, as I didn’t want to make this dev diary as long as the Italian one, but in a couple of weeks Ethiopia will return to showcase its BoP in more detail, as well as its a-historical paths.
* Tbh - asked is a bit of an oversimplification. It was decided that Ethiopia would feature in this expansion - I was (figuratively) jumping up and down saying equivalents of pretty please… So in the end arheo et.al. caved in and gave it to me
But we have some cool art coming!
Work in progress image of Ethiopian Irregular Infantry
So, I was asked to write a dev diary about the development of a focus tree and related stuff for Ethiopia. Mainly because I was the one asked to do Ethiopia in the first place*, I guess. It would probably have felt weird to do a dev diary on something else then…
Anyway, Ethiopia. I wanted to make playing Ethiopia a somewhat different experience than the average game of HoI. It has to be, right? For one, Ethiopia starts at war, which puts some constraints on the design. Also, it is a war that they historically lost. After the initial invasion in October 35 they more or less managed to push the Italians back to their starting positions in what became known as the christmas offensive, but by the time we are entering the scene the Italians were preparing to once again go on the offensive. And historically this time Ethiopia didn’t stand a chance. However, in 1942 Ethiopian units such as the Gideon force and the Arbegnoch were fighting alongside the Allies to retake their country. So the design had to feature that as well.
But enough of that - lets take a look at Ethiopia and what we did with it for the DLC:
The Themes
The theme of the design for Ethiopia was actually twofold. Firstly it is about survival. As mentioned, you start under attack from Italy. Outgunned and outmanned. So initially you will mainly focus on finding a way to survive. There will be a few different options there, some that will be discussed today, and some that will be discussed later. Secondly, it is about modernization. Ethiopia was not industrialized at all, and the army was in many ways still partly feudal; and as such you will need to work hard to improve the country and the armed forces if you are to compete with the rest of the industrialized world.Country set up
Now then, let’s take a look at how Ethiopia looks in-game in 1936:First you might have noticed, that Haile Selassie has himself a new trait - with one of the cooler names so far in HoI history
And the country also starts with a set of national spirits (compared to before where it was severely lacking on that front):
Not all of which are entirely positive however….
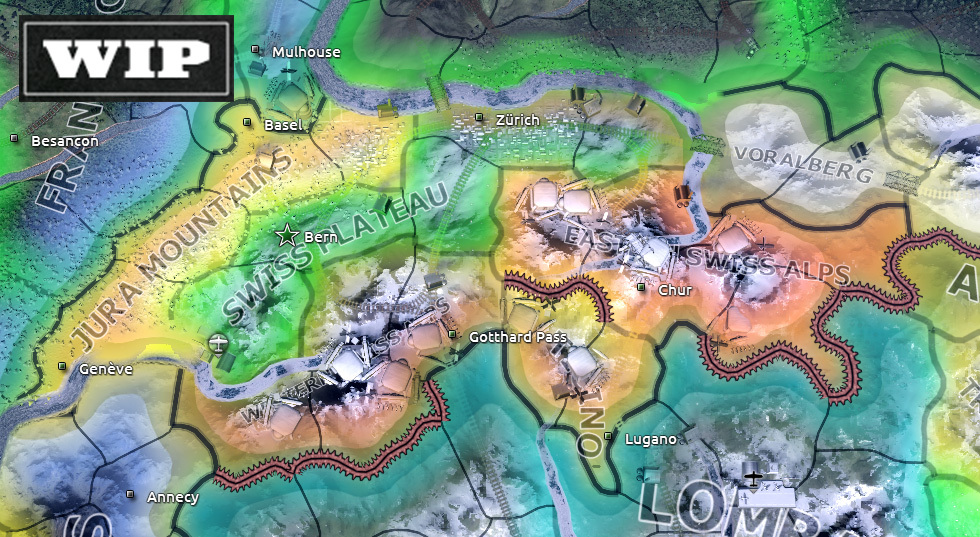
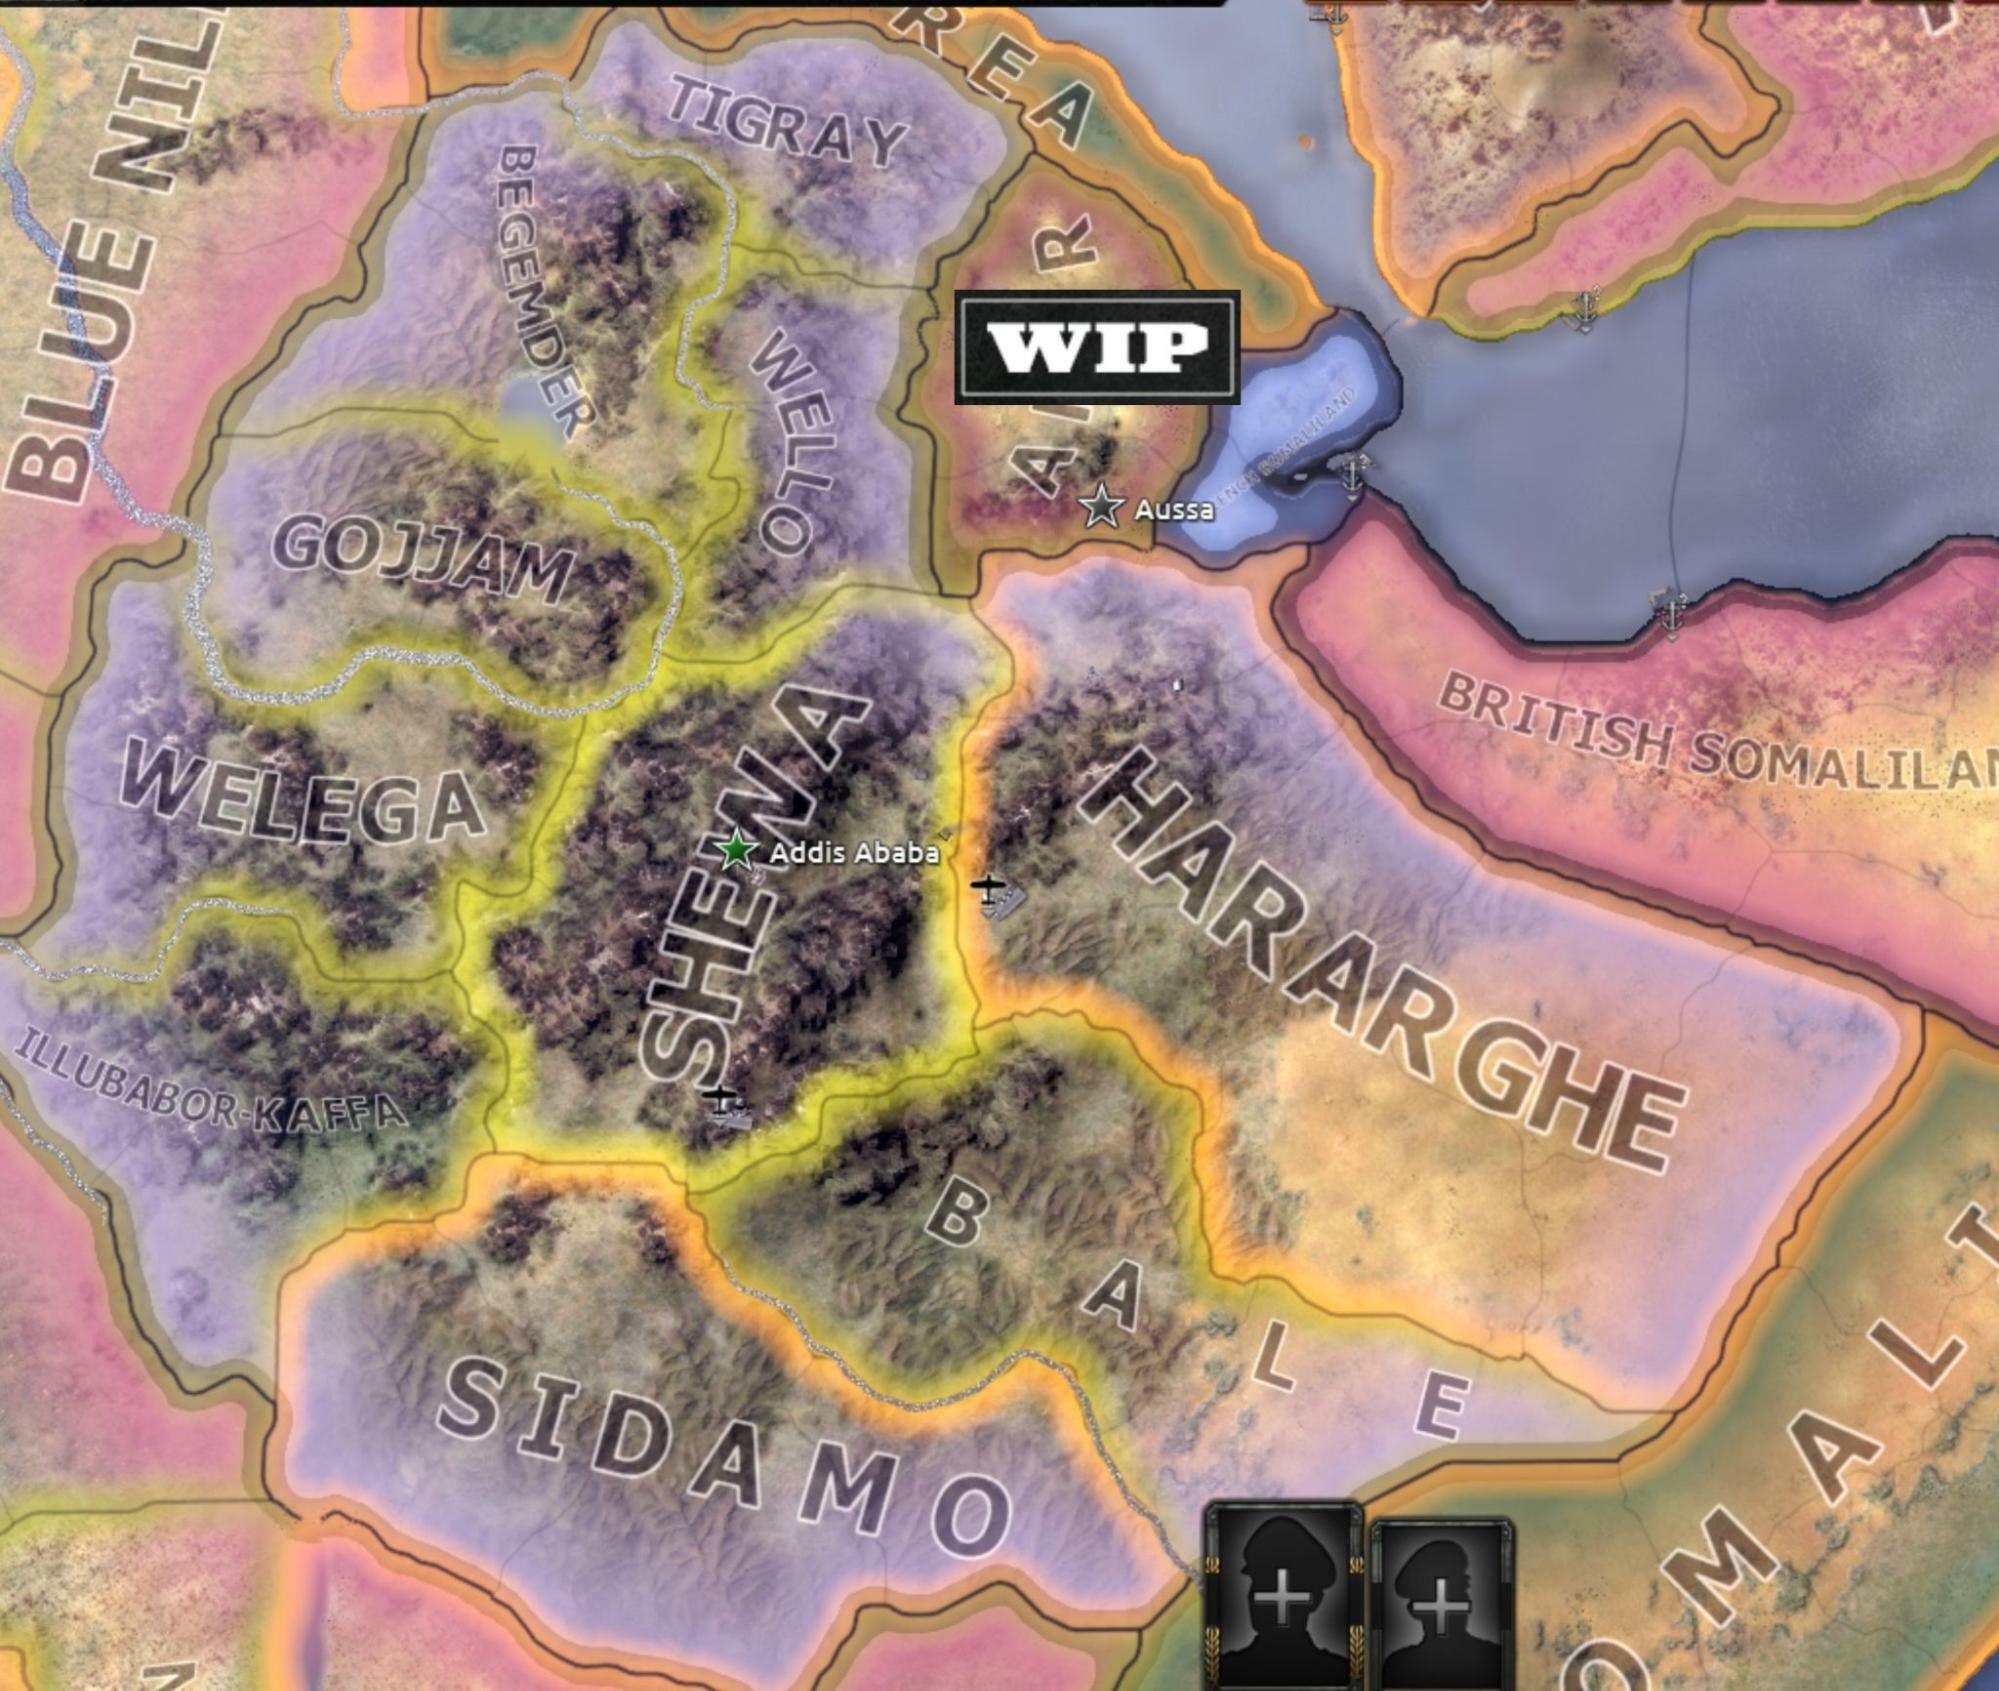
The map
One of the first things you will see is that what used to be a single state called Ethiopia is now split up into a bunch of new ones. Some of the extremely large provinces have been split into smaller ones as well, to allow for a more interesting gameplay and more realistic combat and supply-lines. While doing that I also added a few victory points to make the map look a bit more interesting, and to give the players something more concrete to fight over. Finding the right level when doing this is always a bit of a balancing act between gameplay, consistency with other things, and what you would ideally want. Sacrifices were made, but this is what we ended up with:Additionally, the Ogaden desert is now classed as - well, yes - desert:
Starting at War
As mentioned above, Ethiopia starts at war with Italy. To simplify things a little bit when you start up the game, all units start within their own borders, just like before. It is not too far from the truth as the Christmas offensive of 35 had basically pushed the Italian army back all the way, so I feel it works (even though technically some parts of Tigray and some areas in the south were occupied by Italy at this point in time).The thing is, Haile Selassie really hoped the International Community would do something to stop Italy. After all, both nations were part of the League of Nations. We decided against doing a full scale League of Nations feature, so instead it is tied to the Ethiopian focus tree, and a small mechanic that affects both Italy and Ethiopia. (After all the LoN was mainly active before 36, so it makes sense I think)
There were numerous reasons why the League didn’t act against Italy, who in turn tried to play down their invasion as something of a border dispute in one of their colonies. But the longer Ethiopia holds out and the more Italy commits to the war, the harder it will be for Mussolini to downplay the conflict and for the LoN to turn a blind eye.
So to simulate this we have a ticking “War Escalation” that affects both sides in the war.
The higher it ticks, the more focuses you unlock for Ethiopia - should you decide to go to the League to plead your case - and additionally both sides will get events that affect their ability to continue the war.
We’ll get back to that stuff further down the line…
Modernizing the Industry
Before we look at the war and foreign politics part of the tree, we will need to look at the prospect of modernizationThe entire industrial tree for Ethiopia.
In 1936, Ethiopia starts without any major industrial capacity. It has 2 military factories, and 2 civilian ones, one of which goes to consumer goods, and one is needed to fulfill trade requirements in order to produce the weapons needed for the war. Some more factories can be acquired through the focus tree, but many focuses are also about different bonuses and removing debuffs etc.
All Ethiopian states also start with this modifier, which is -30% in all states except for the capital shown here. “Develop the Capital Region” as well as other focuses in the right-most part will unlock decisions to eventually remove this modifier.
Ethiopia doesn’t start with a plethora of designers and companies like other countries, but will instead have options to invite off-shoots of companies from other nations through the “Invite Foreign Industrialists” focus.
Also I cannot stress enough how good the 2D art is looking.
The designers and industrial concerns native to Ethiopia or unlocked through ways other than the “Invite Foreign Industrialists” focus.
What about the army?
The Ethiopian army has been revamped a bit in BBA. It is larger than in vanilla, and it now consists of two main parts, the regular Mehal Sefari and the irregular forces raised and paid for by the various lords and regions of Ethiopia. The irregulars are fast to raise, have some bonuses in certain types of terrain, but are generally weaker than regular units. You have a limited amount of them as well.The fact that Ethiopia has a different system for raising units than other countries is represented by a recruitment law unique to the country. In peacetime it allows for a rather small recruitable population, but in wartime it is increased automatically, but incur penalties to production etc.
Playing Ethiopia, you will be given the choice to expand on the irregular system, or instead move towards the more “regular” system employed by other HoI countries.
The focuses in this branch will let you specialize your army to some extent, and also helps a little bit if/when you decide that an airforce and/or navy could be good things to have.
Here you can see the military branch in all its glory:
Balance of Power
Ethiopia will start with an active balance of power, similarly to how Switzerland and Italy have one, which is a connecting thread between the nations in By Blood Alone. Ethiopia’s BoP will focus on the power of the Mekwanint on one side (the centrally appointed officials) and the Mesafint on the other (the hereditary nobility of Ethiopia). Pushing towards one side or another will bring different benefits as well as penalties, as well as both having potentially catastrophic effects if one side gets absolute power over the other, but more on the details of the BoP system for Ethiopia in its next dev diary!The Second Italo-Ethiopian War Branch
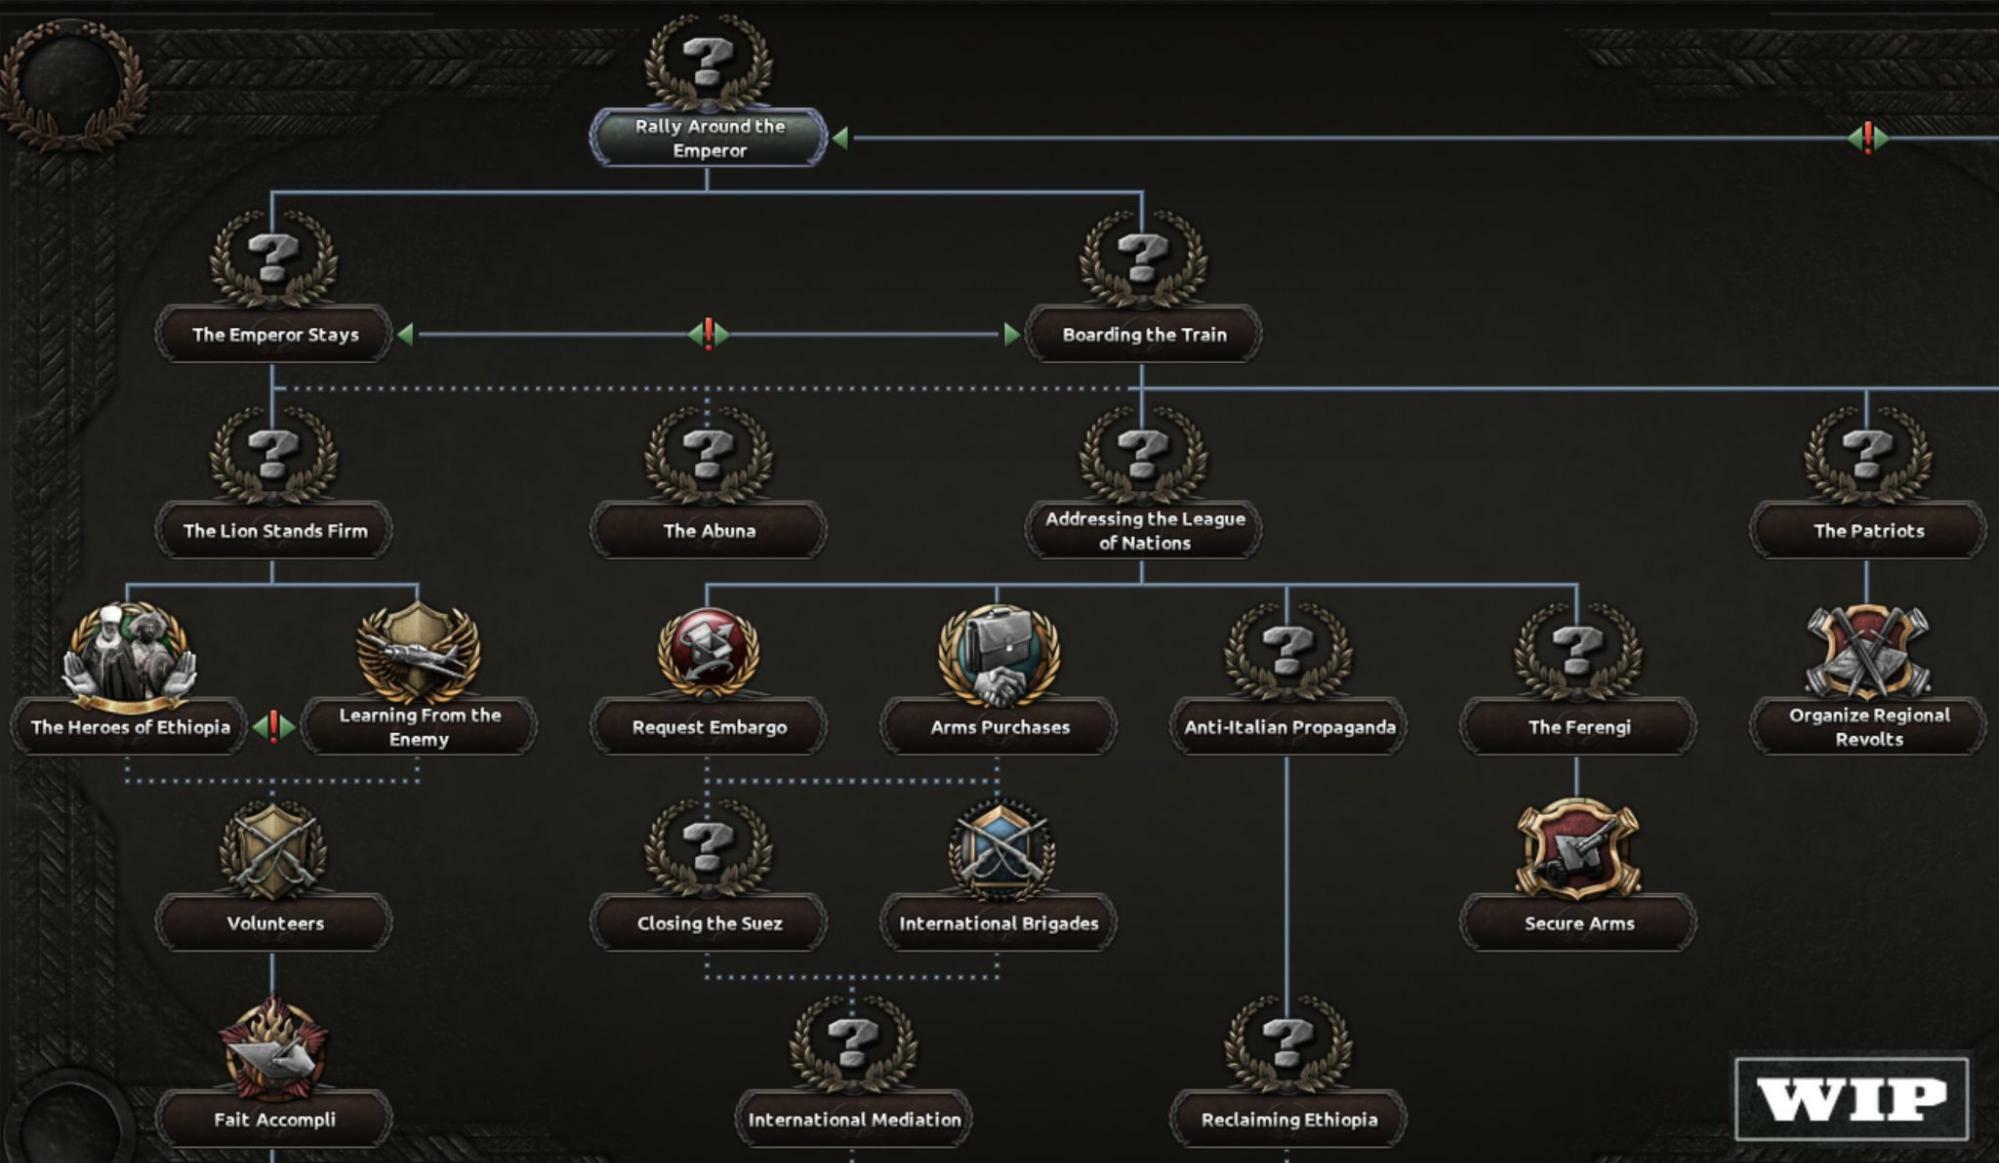
As Italy and Ethiopia start at war, Ethiopia gets a number of (mostly 35 day) focuses to help them customize how they want to run the war. These are all blocked once the war is over one way or the other.Should I go or should I stay?
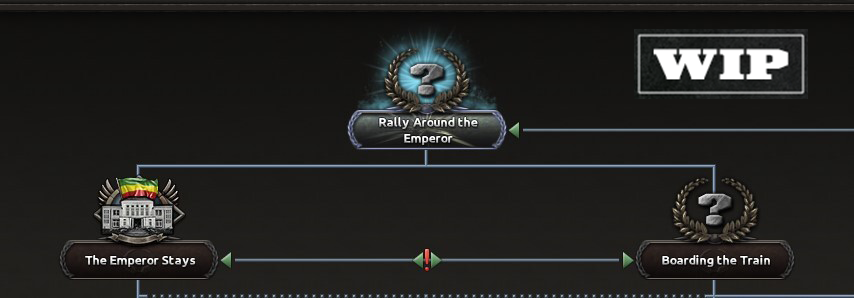
The first decision you will need to take when playing as Haile Selassie's Ethiopia is if you want him to stay in Africa and attempt to beat the Italians back the hard way (that is, without any foreign aid, which will be required for certain cult of personality-esque focuses later down in the tree) or if you want to get on the train and go to Switzerland to address the League of Nations and utilize the different focuses tied to them, which all get unlocked through different levels of war escalation.
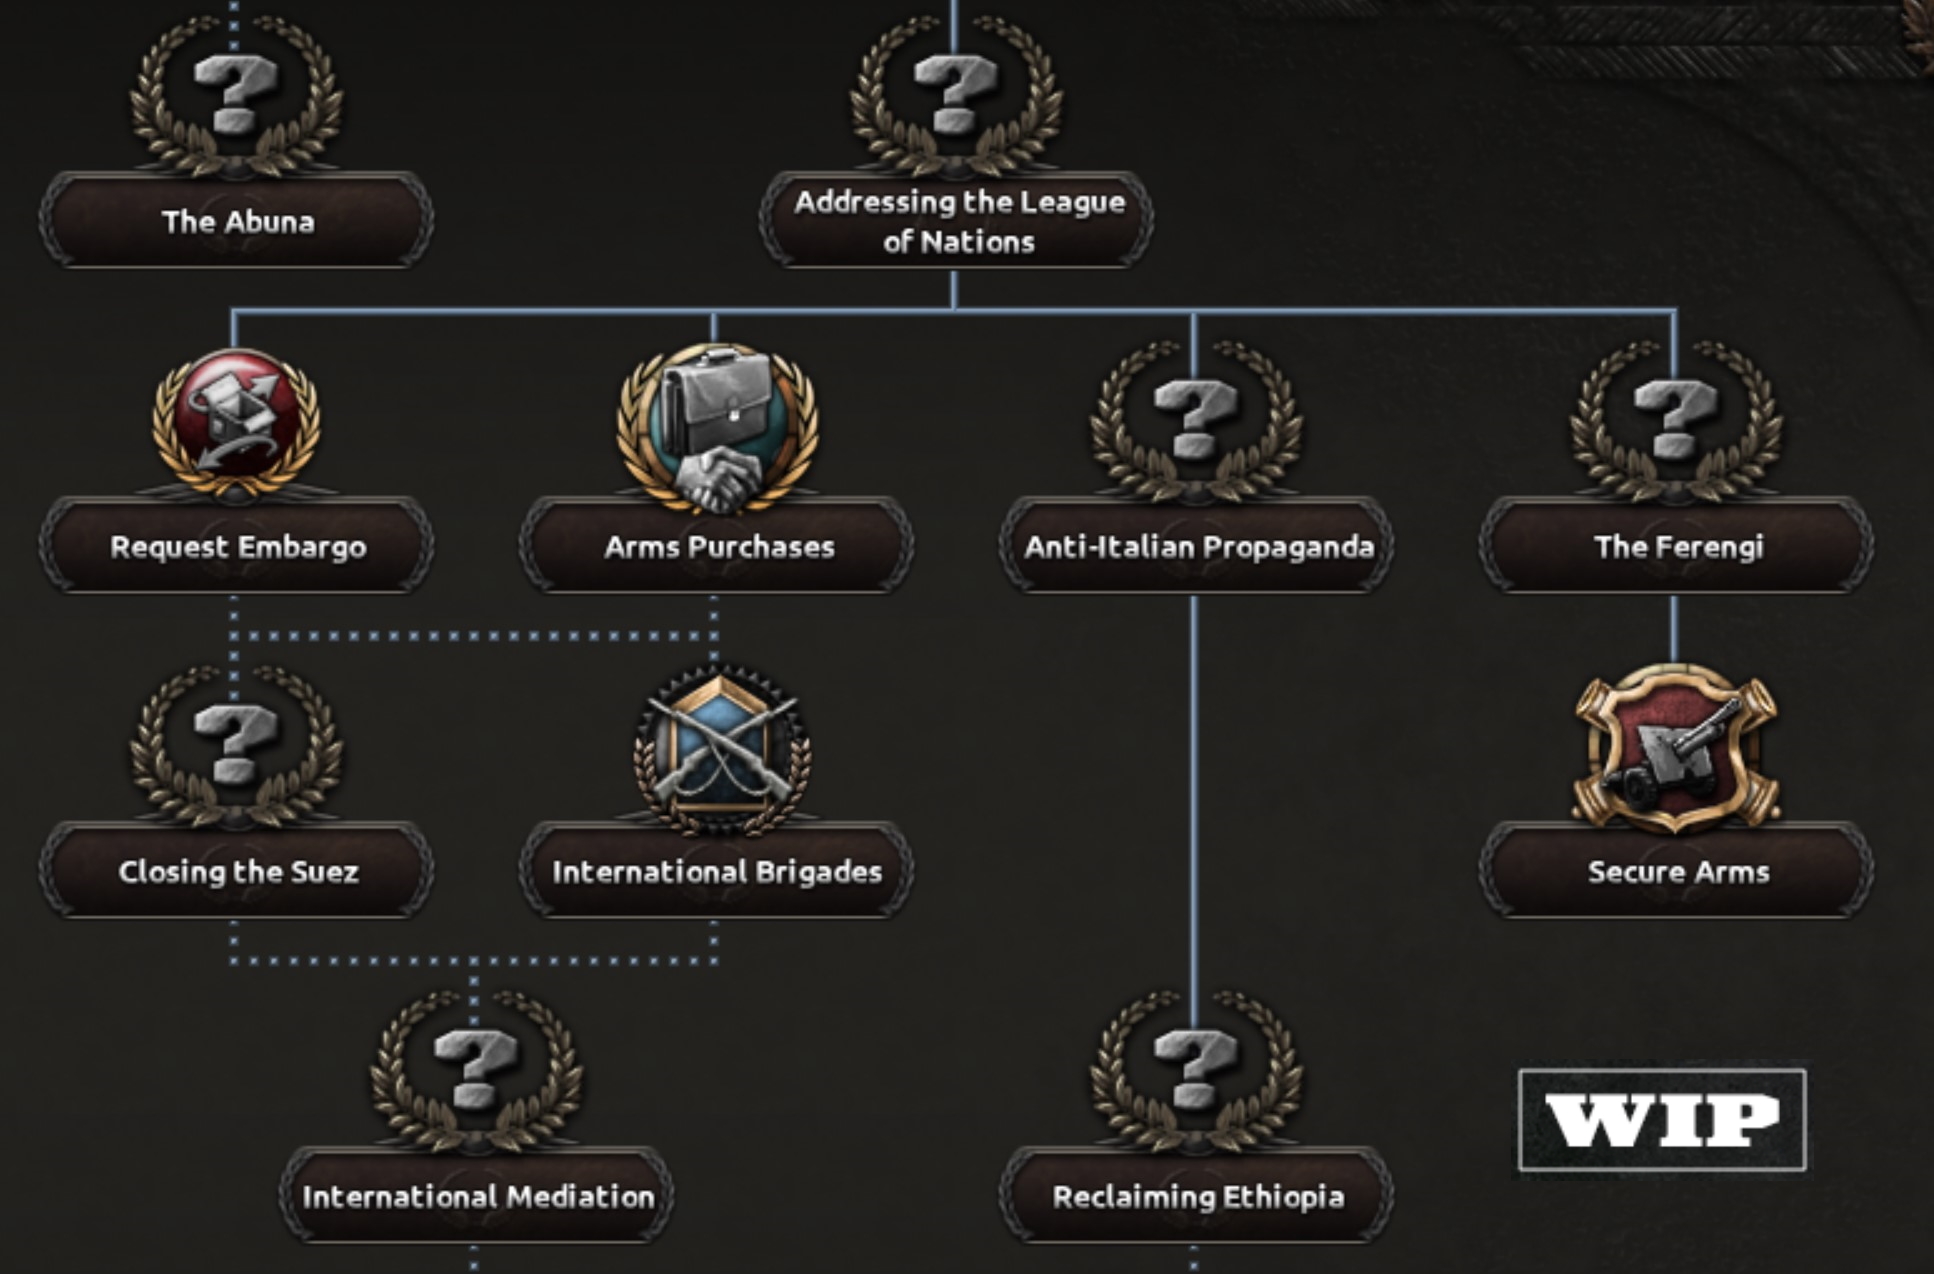
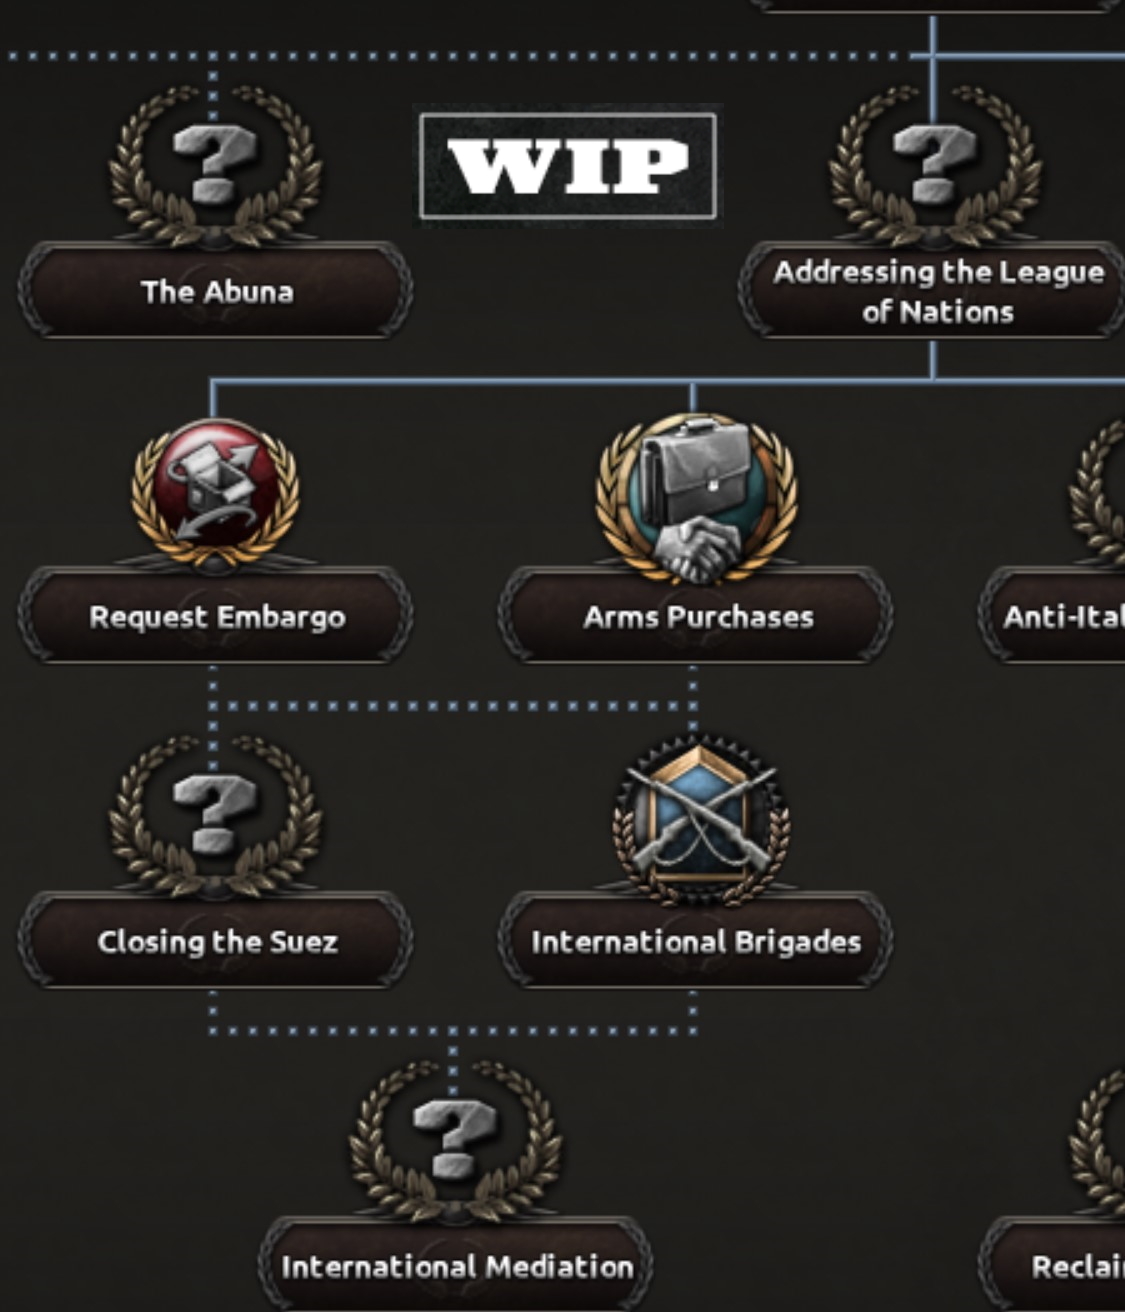
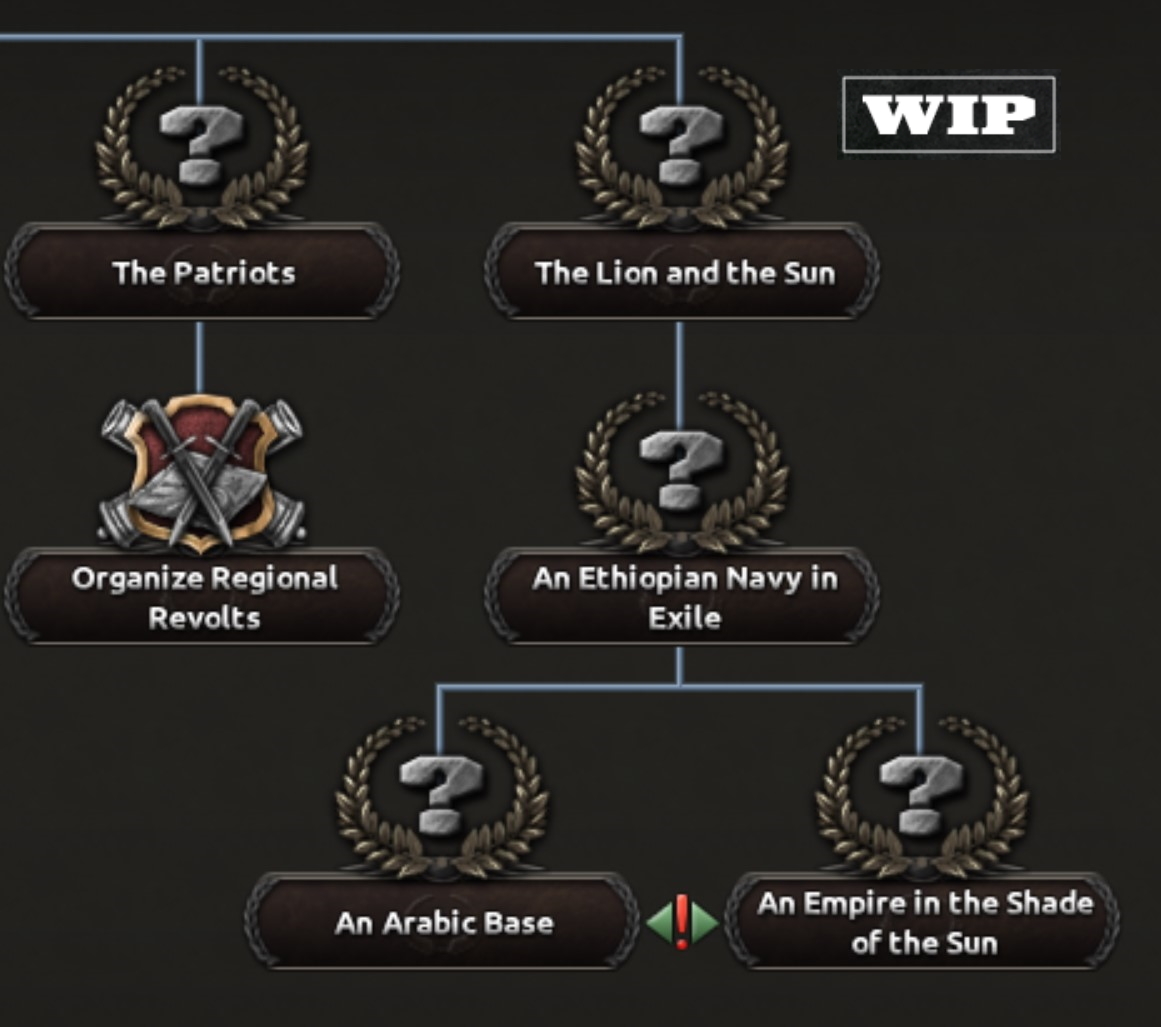
If you decide to go for the historical option, and have Haile Selassie leave the country you get access to this subset of the tree:
The section serves the dual purpose of giving you access to focuses that can help you, if you get the war escalation up high enough, and allowing you to continue the fight in exile, should Ethiopia capitulate while the Emperor is away. The focus chain that starts with Addressing the League of Nations culminates in the “International Mediation” focus which sees the LoN pressure Italy for a white peace. (Doing this will not be able to gain you any immediate territory from them, so you will have to get to that later in the post war tree)
Additionally, the International Brigades focus is very useful, as well as fun and flavorful, as it allows you to send events to LoN members asking for volunteers, making it to where about 4-8 random minors send you a division each, becoming very colorful very quickly.
Going into exile and Coming back
After having done the focus “Boarding the Train” and having found a host nation to flee to, Haile Selassie will go there to continue the fight if and when Ethiopia capitulates to Italy, just like he did historically. Due to the LoN resolution however, he cannot ask his host to join the conflict before completing the focus “Reclaiming Ethiopia” at the end of the exile branch, and they also cannot ask him to let them join the war.Many of the exile focuses unlock various decisions to do, in order to make a playthrough at least somewhat interesting to a player. Some focuses such as “The Patriots” and “Anti-Italian Propaganda” also unlock new unique continuous focuses for Ethiopia to do, such as increasing resistance growth and lowering compliance gain in areas occupied by Italy. This is because the only way for Italy to get rid of you once you have gone into exile is for them to get enough compliance in your states to take a decision that gives them ownership of it, eventually creating the Africa Orientale Italiana to completely erase you if you do not oppose them enough.
And as you can see, hiring the Abuna (leader of the Ethiopian Orthodox Tewahedo Church), Qerellos IV will grant you some bonuses which are going to prove very useful when in exile.
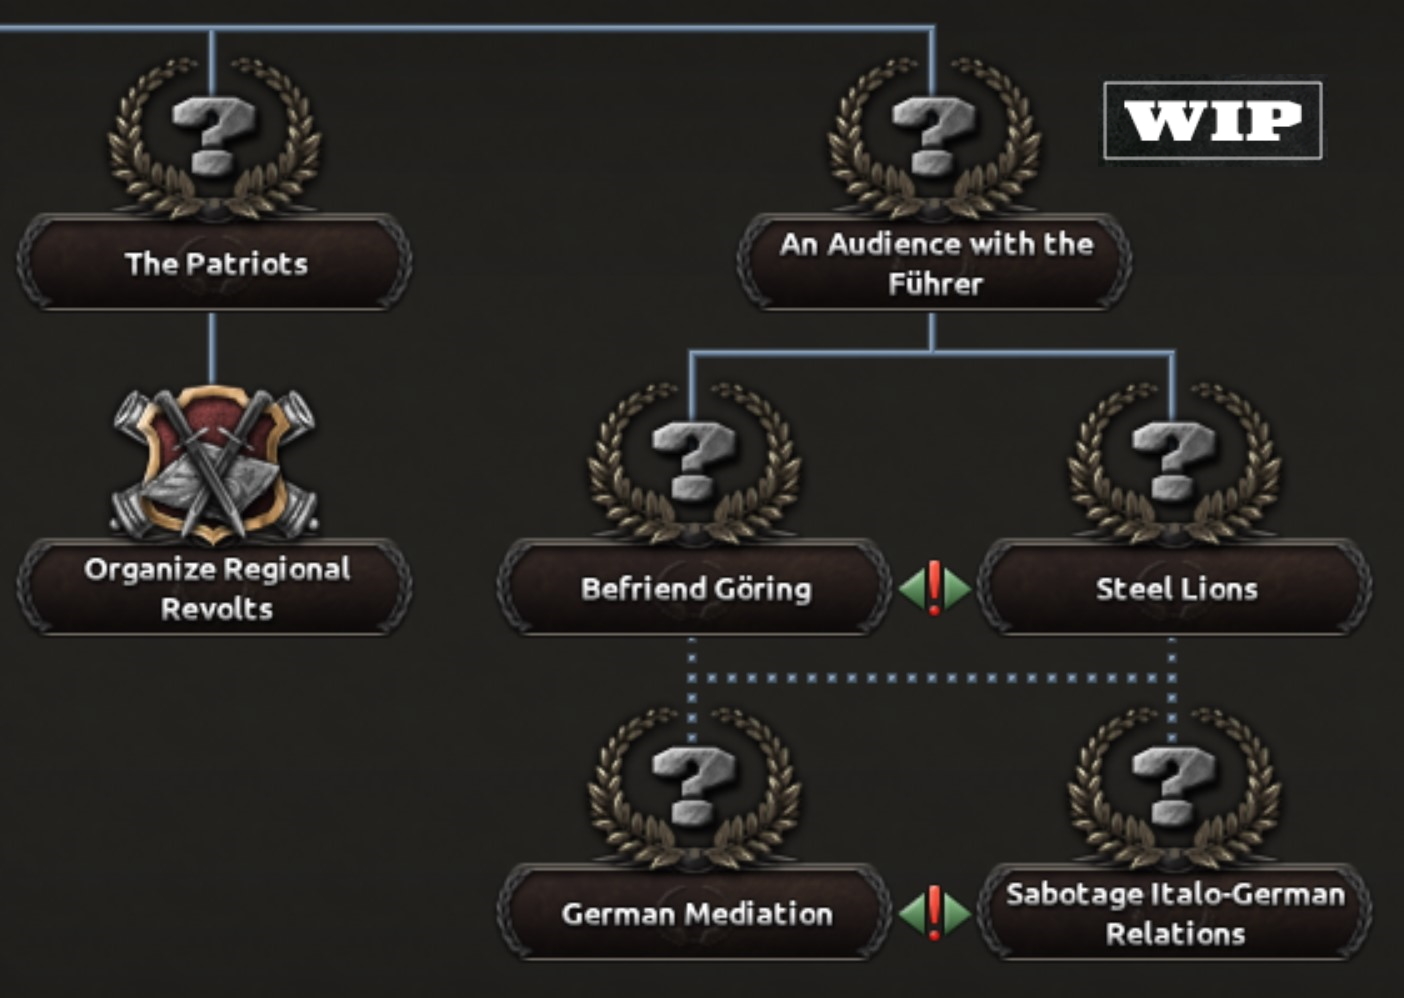
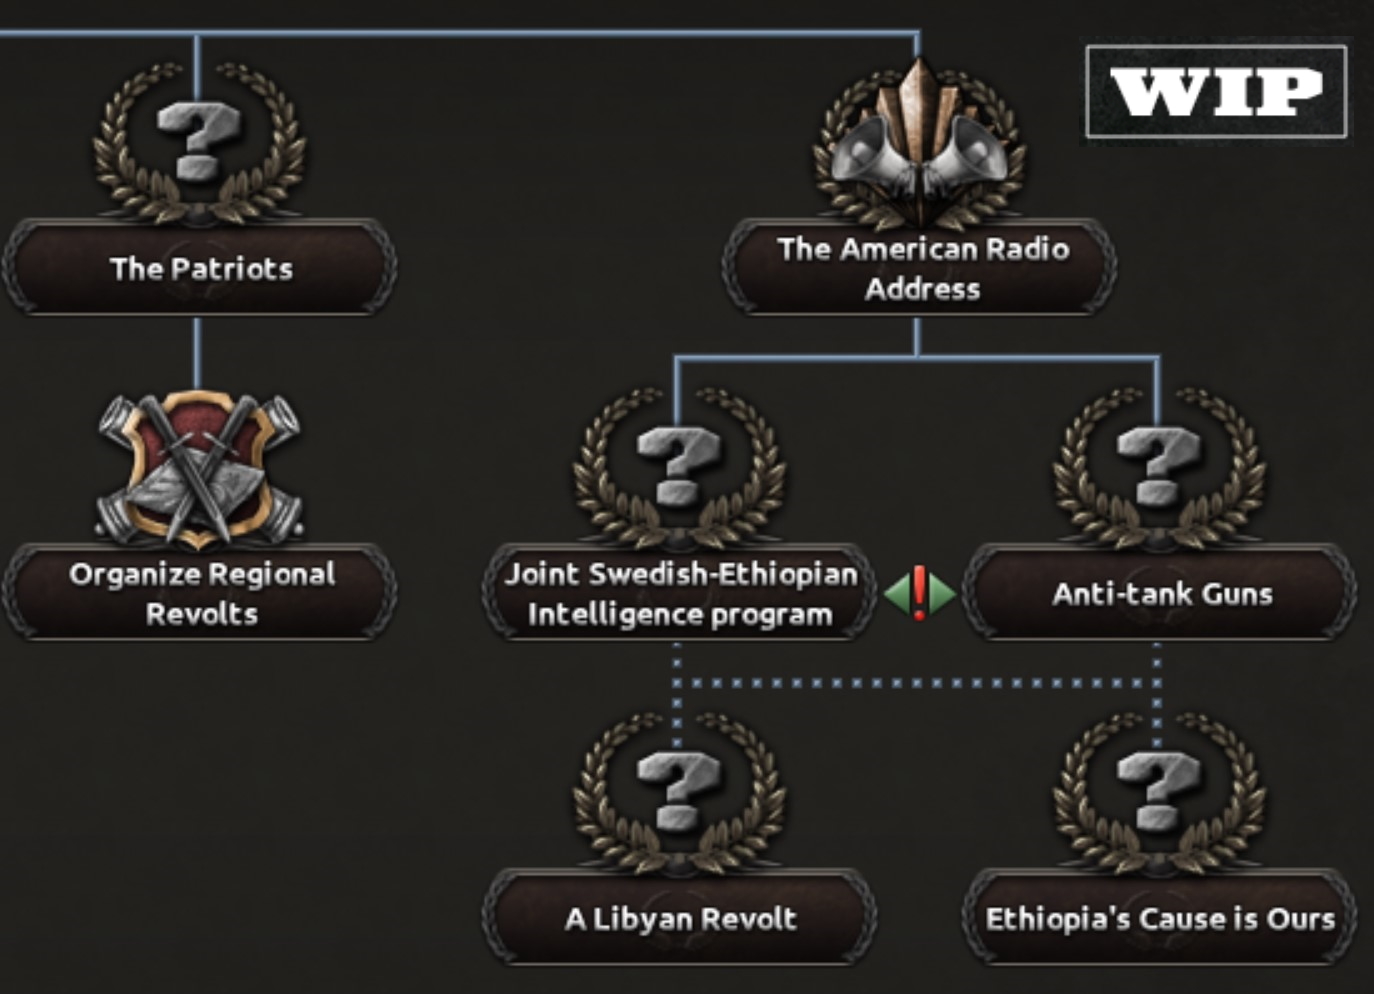
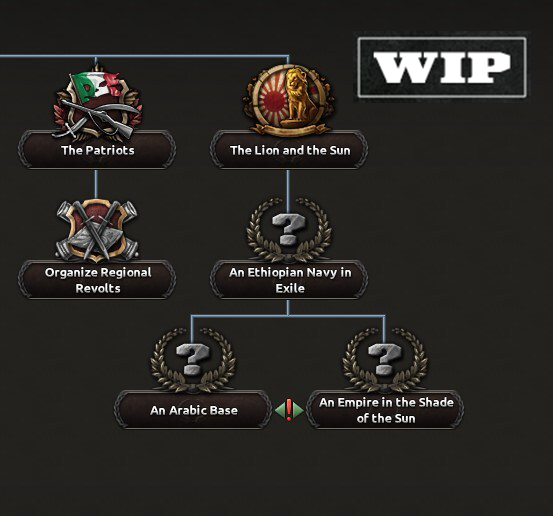
Different host-nations also means different extra focuses (all require a certain level of legitimacy to do).
As you can see in these images, your focuses and campaign will be quite different depending on what nation you send Haile Selassie off into exile to. (Be aware that you will have to ask the country for permission first, which will be very hard if they do not have good relations with you)
Also, can you guess what nations these might be? (Yes, they are very obvious, aren’t they?)
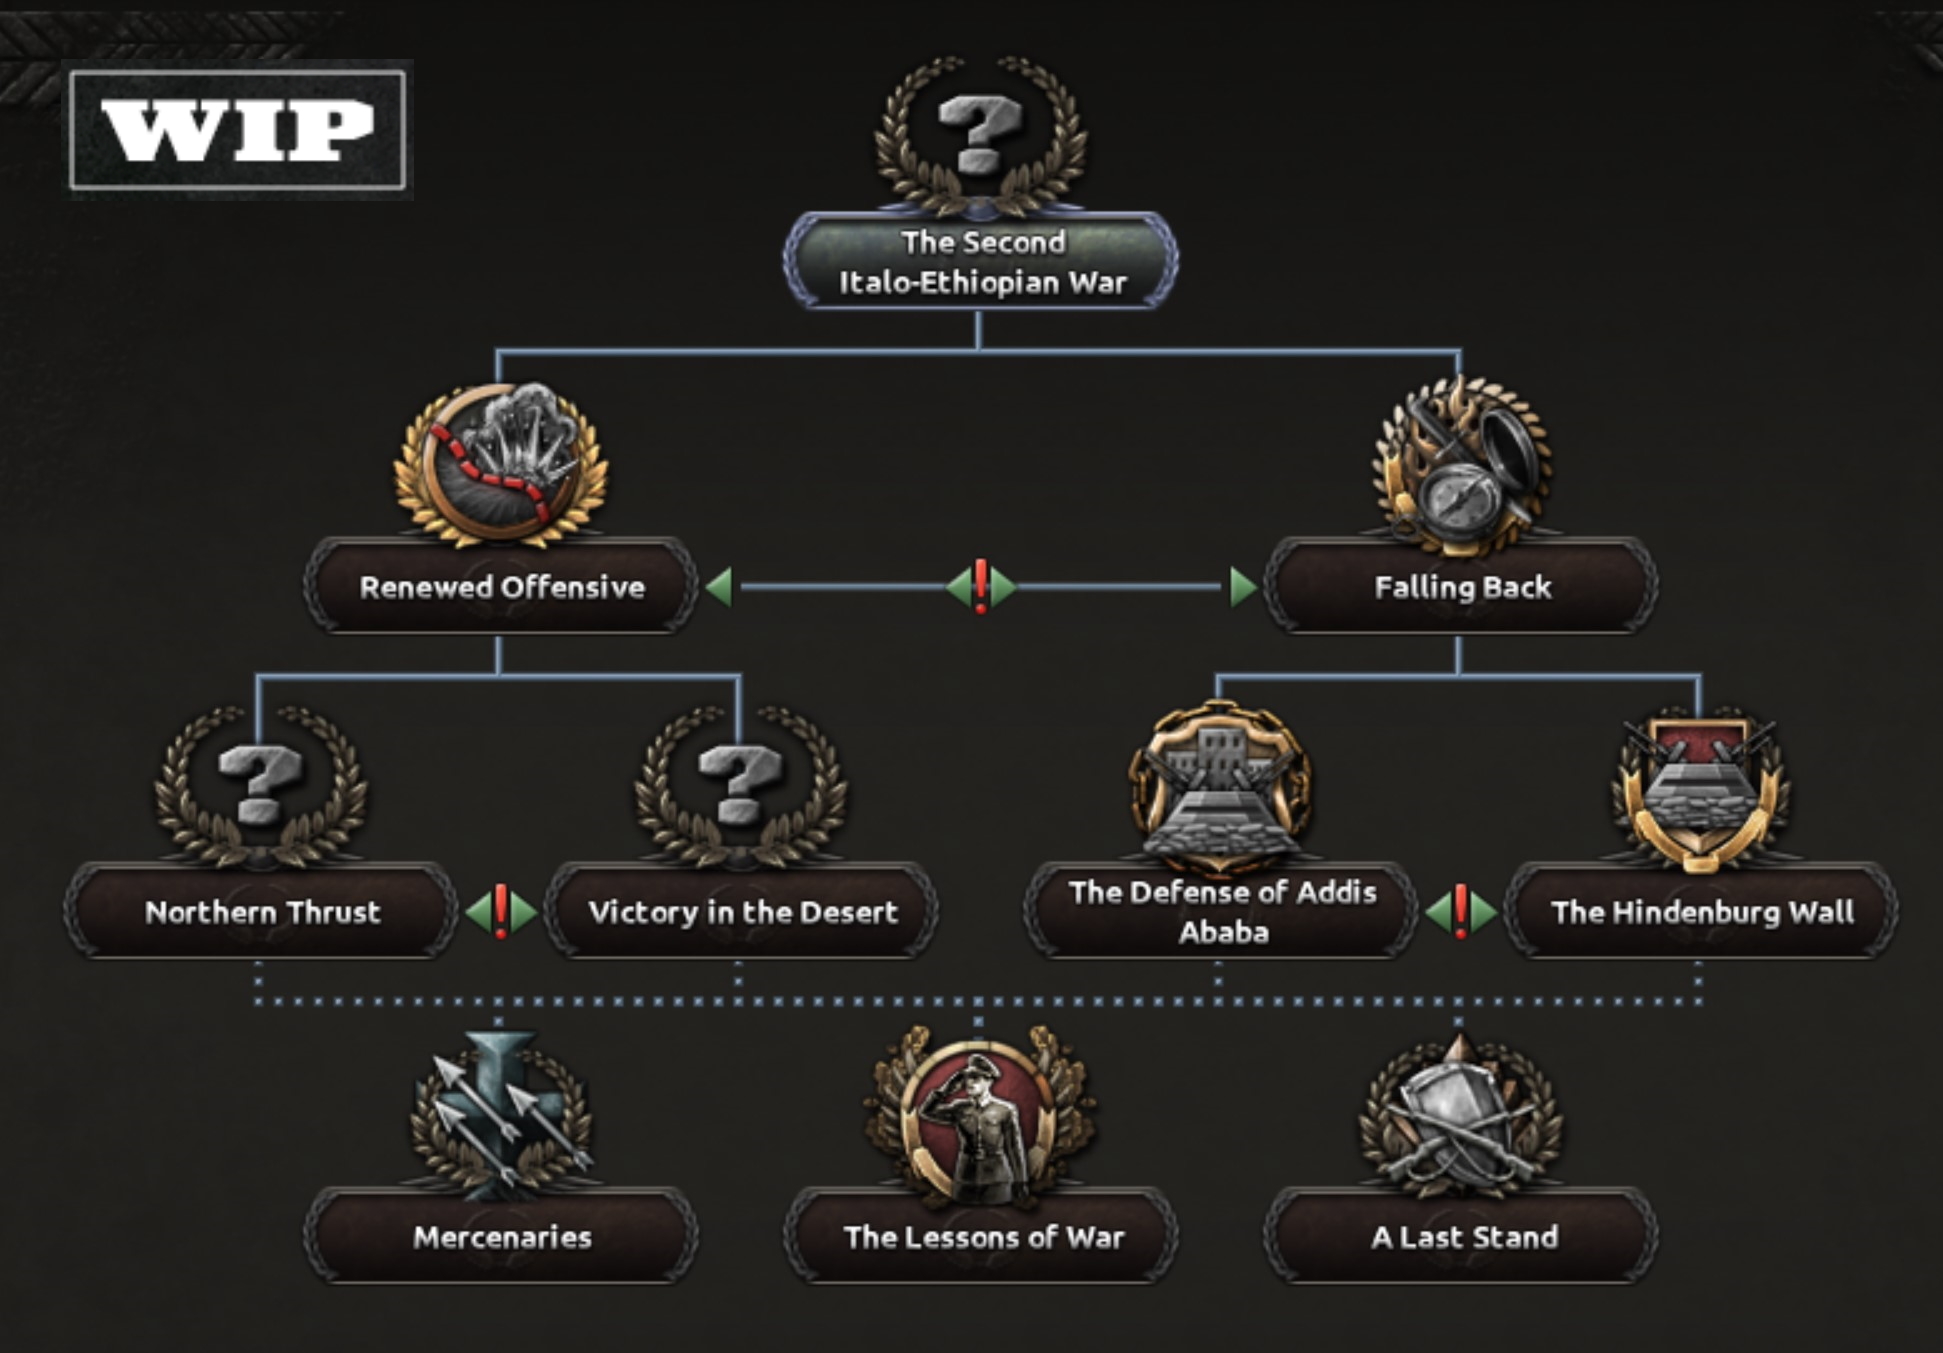
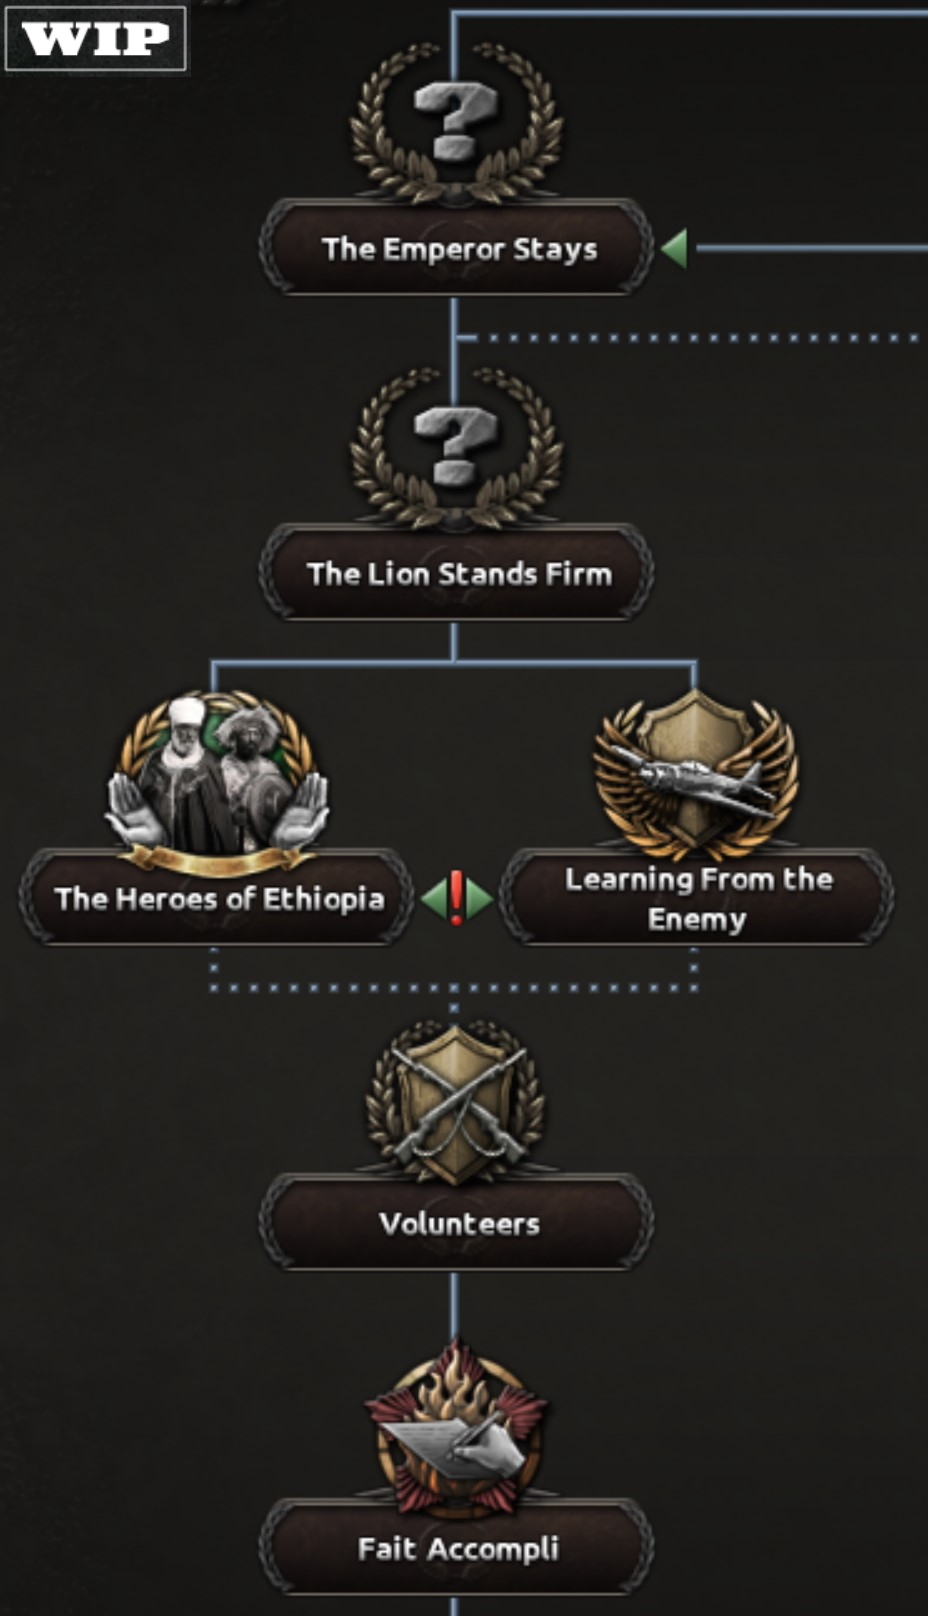
Staying to fight
Now you might be wondering, what happens if I choose to refuse outside help? Well first of all, it is much harder to win. Below you can see the entire pre-peace branch for choosing to stay:When getting peace with Italy through this branch however, you can in fact gain territory from them, as long as you control it when you complete the focus “Fait Accompli”. What makes this branch harder is not only the lack of support from the West, but also the fact that you need to at a bare minimum control all of your core provinces to do the focus that grants you peace with Italy. The focuses here do however give some nice bonuses both to Haile Selassie as a Field Marshal, but also to the troops and generals of Ethiopia.
Here is the full “war with Italy” part of the Haile Selassie focus tree.
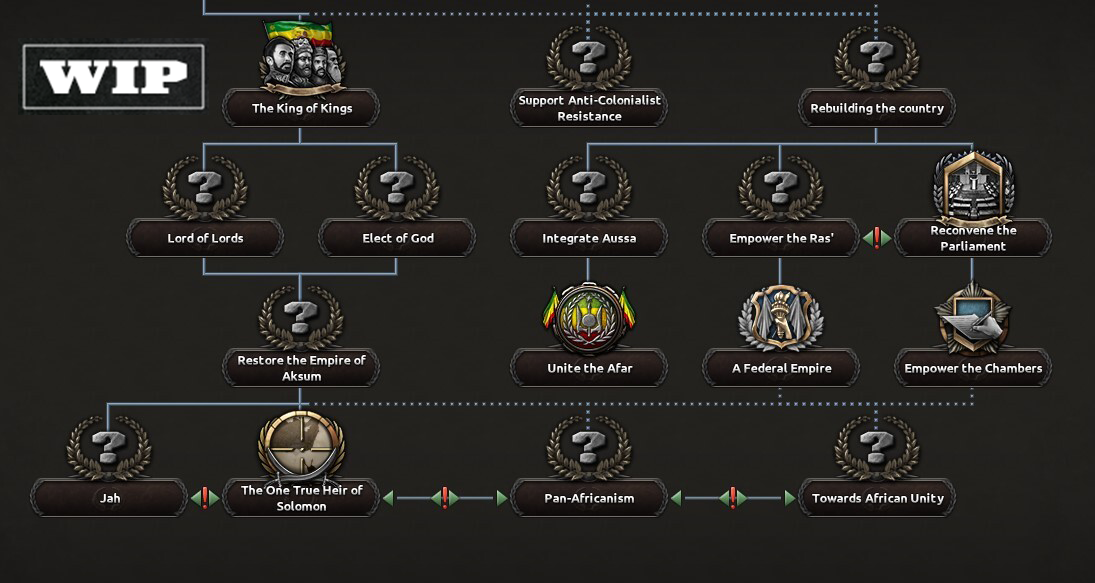
But once the war is done, what’s next?
As you can see here, there are two sub-branches to choose from following the end of the Italo-Ethiopian war ; “The King of Kings” sub-branch and the “Rebuilding the Country” sub-branch. The latter one is accessible through any of the war with Italy branches. The King of Kings branch is however only available to you if you managed to win the war without foreign help, cementing Haile Selassie as the true ruler of Ethiopia. Here you can upgrade his ruler trait, and get decisions to restore the long-gone Empire of Axum, gaining cores and wargoals on many of the kingdom’s historical claims.
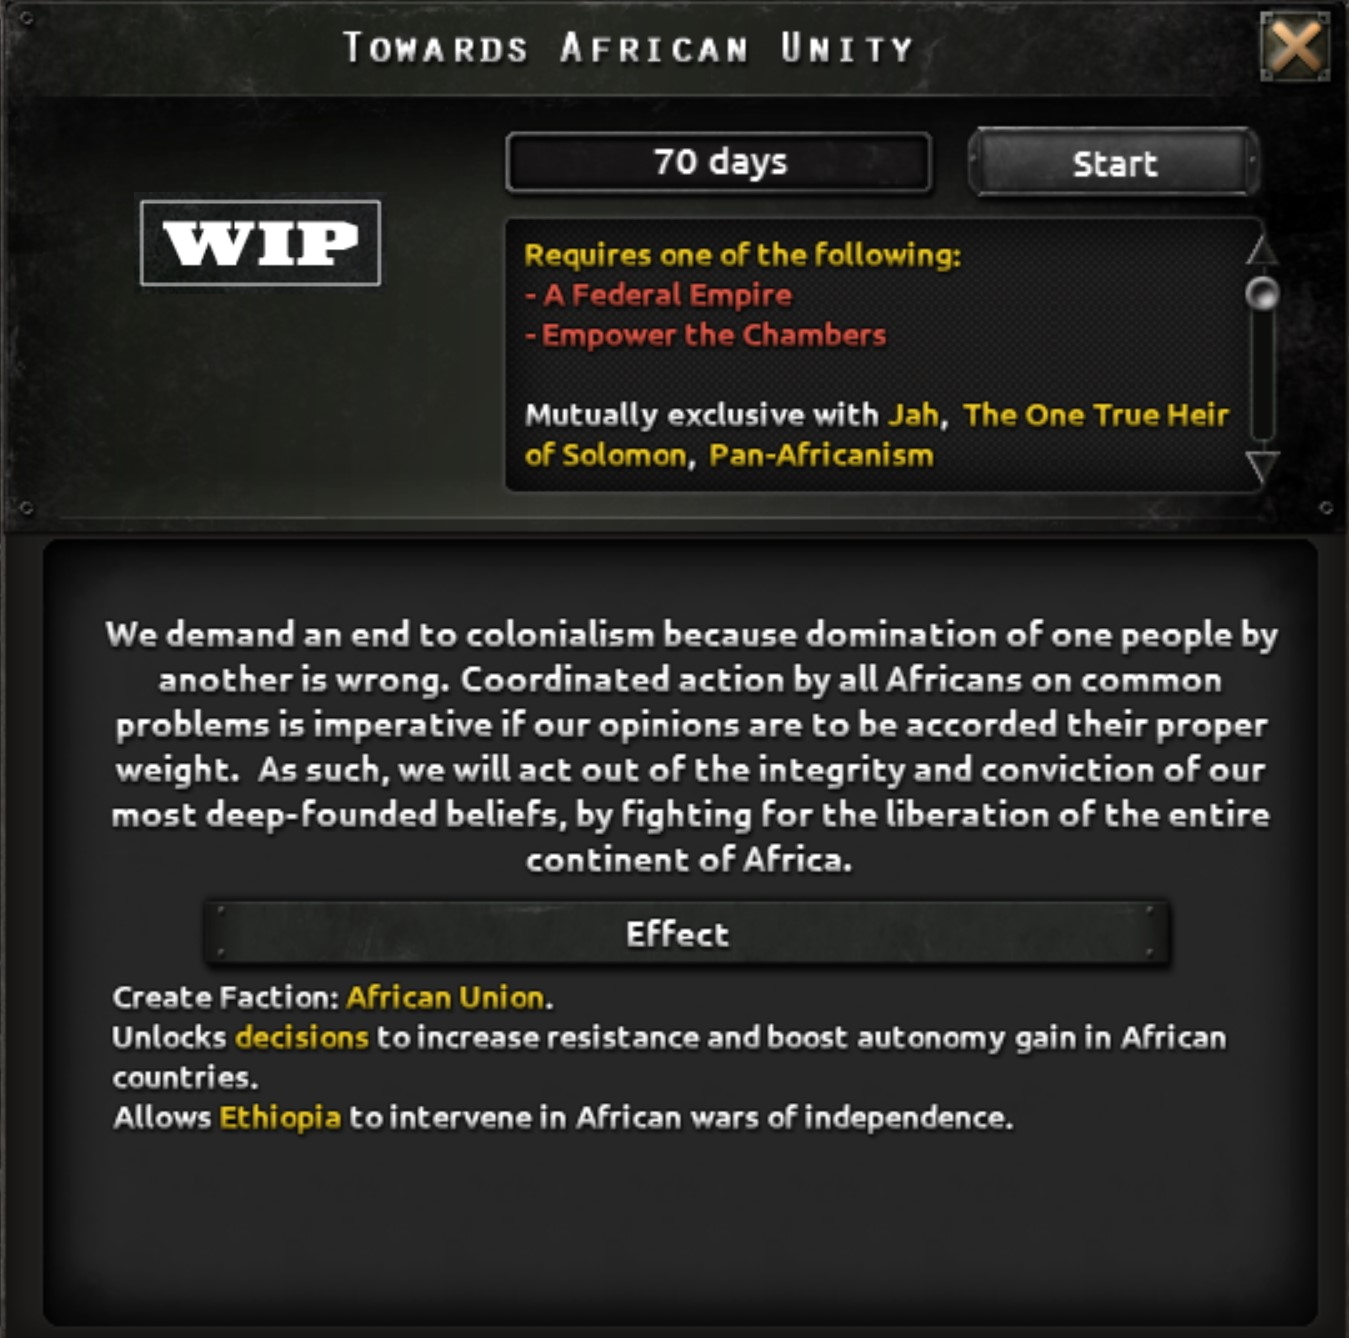
You can then also choose between a couple of different end-game options, such as taking advantage of the Rastafari movement, and requesting overlordship of Jamaica from the British to expand your influence in the Americas, or embrace the Solomonic dynasty’s legacy and attempt to reclaim king Solomon’s lands from it’s occupiers, eventually coring it and moving your capital there. However, to do either of those you must have defeated the Italians without going into exile, and built the cult around the Emperor. If you didn’t, you still have two choices open to you, which both focus on Africa.
Some more stuff
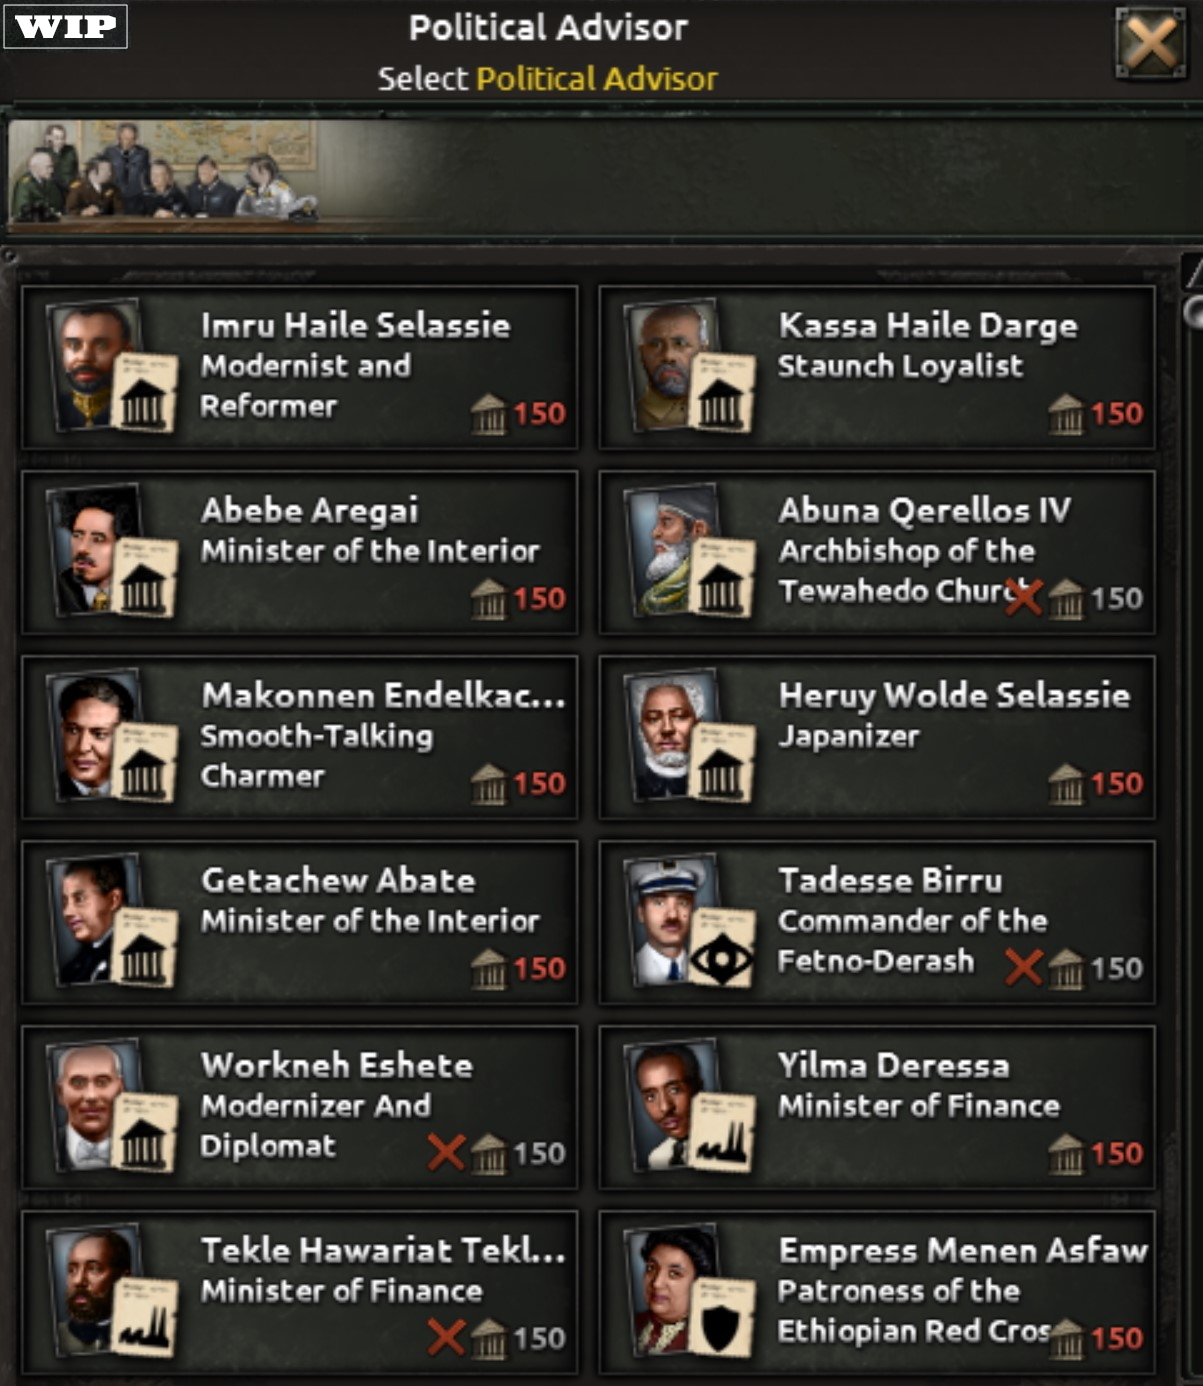
Actually, take a look at these new advisors Ethiopia has before you leave, because they have quite a few:
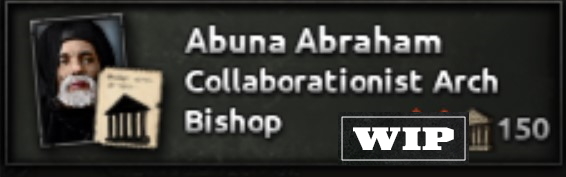
And this guy:
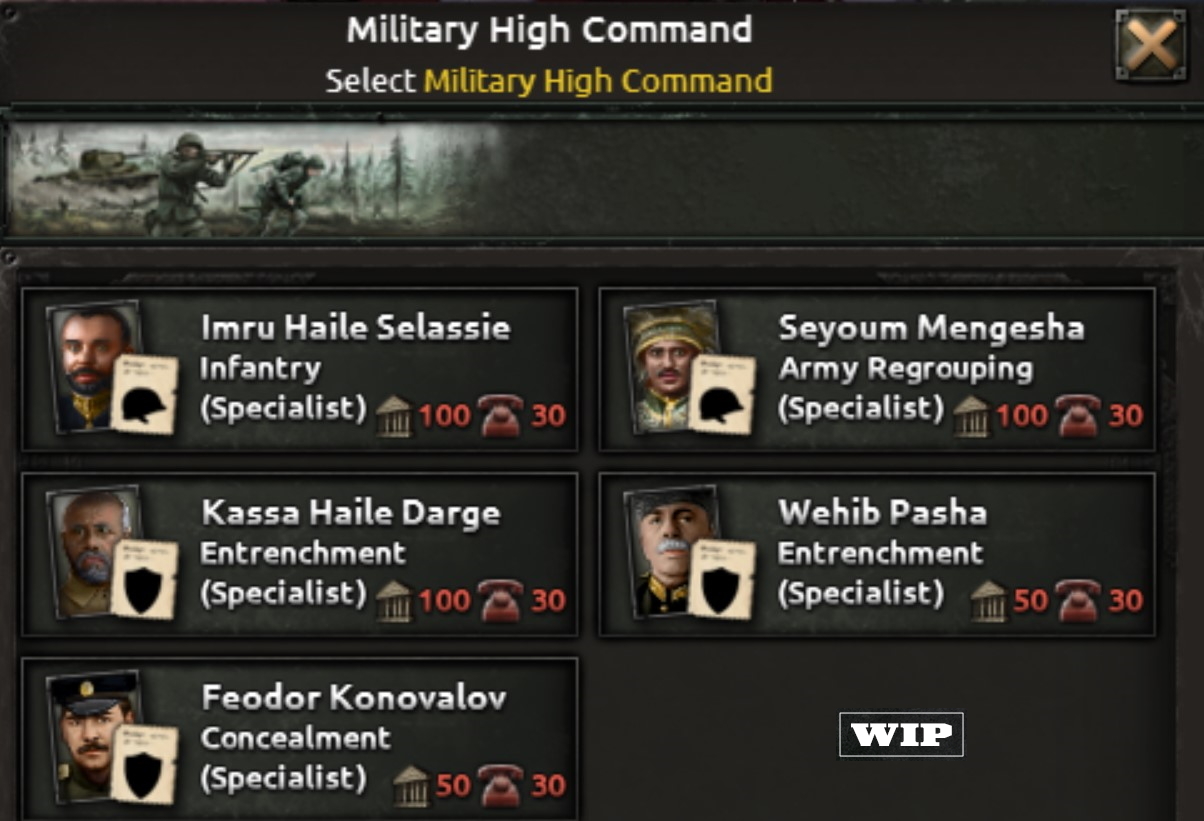
Military Personnel:
And some Swedes and an American:
But those aren’t all the advisors, as some of the ones available to the alt-hist branches are not shown here, but they can be a fun surprise for the next Ethiopia dev-diary.
That was all for this time, as I didn’t want to make this dev diary as long as the Italian one, but in a couple of weeks Ethiopia will return to showcase its BoP in more detail, as well as its a-historical paths.
* Tbh - asked is a bit of an oversimplification. It was decided that Ethiopia would feature in this expansion - I was (figuratively) jumping up and down saying equivalents of pretty please… So in the end arheo et.al. caved in and gave it to me
Share: