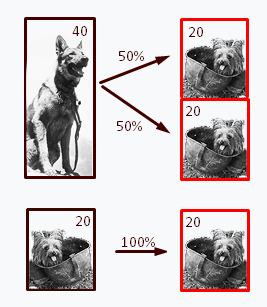
I'm not much of a forum goer, so most of you probably never heard of me, but I am the Art Lead on Hearts of Iron 4.
Today I bring you a rather special Dev Diary. This was prepared for you all by our 2D artist on HoI4 and should give you a glimpse into the work that goes into each new loading screen. We hope that you will all find this to be an interesting and enjoyable read.
Without further ado, I now hand over to the artist.
The loading screen for The Krojanty Battle - An artist's journey
So where does an artist start?
First and foremost, to have a tool to gather the most crucial thing to build an epic looking loading screen is a reference board. The tool that our artist uses is called PureRef. It keeps track of your images and is easy to organize and customize.
And of course, photoshop to draw in. Can’t forget the most important of them all now, can we?
So! The tools are in place, the artist is ready and the prompt lands on their desk, saying “Polish cavalry attacking resting German soldiers early in the morning”. Google time!
You may be familiar with the illustration by Jersy Kossak who specialized in painting military scenes. This was one of the first images that our artist found and immediately banked it in their PureRef for later use.
The myth, the legend, the Krojanty Battle:
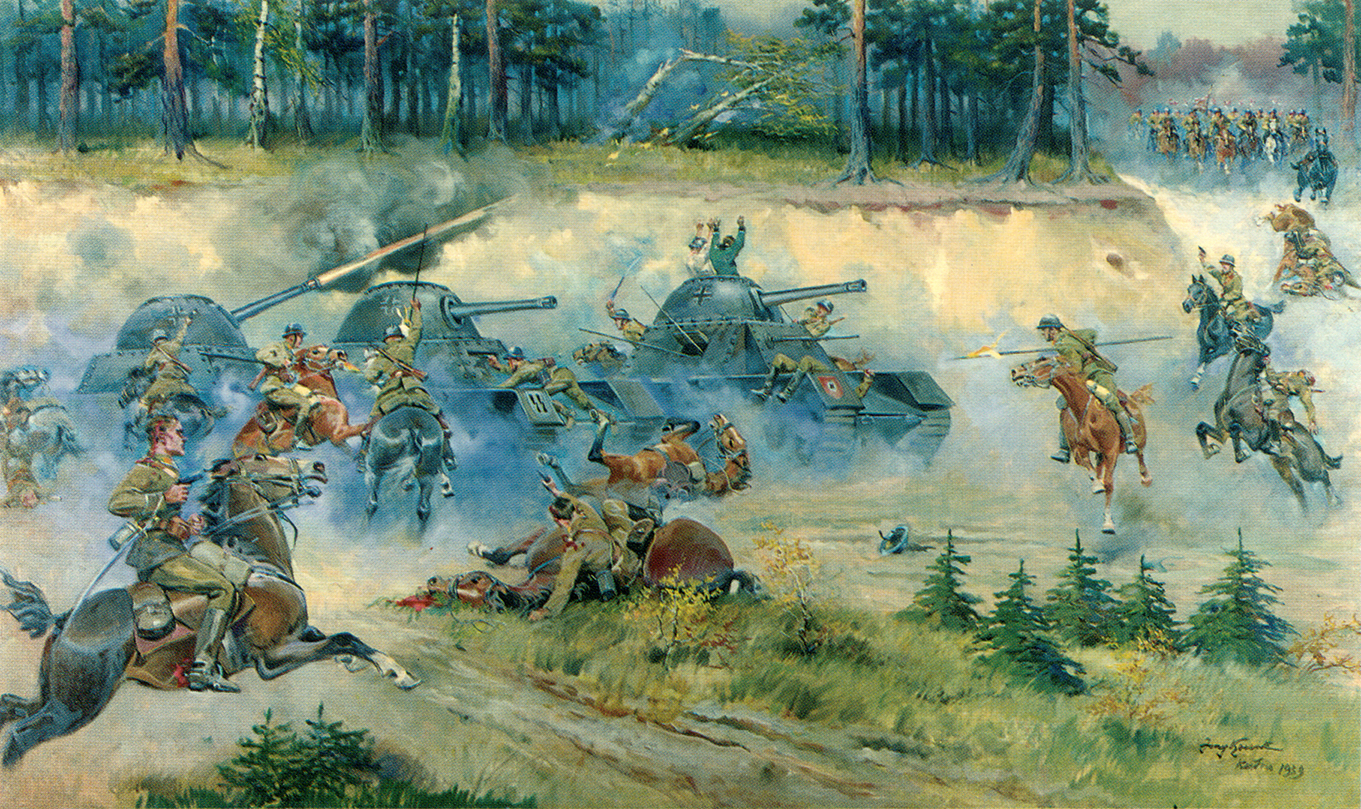
It's epic and cool but oh so inaccurate. But it is a start!
Doing some more research led our artist to a reenacting movie about the battle. Of course still not accurate but a great score for poses, mood and composition. They also only had the trailer/making of available to them but that never stops an artist. Screen grab galore took place, no regrets.
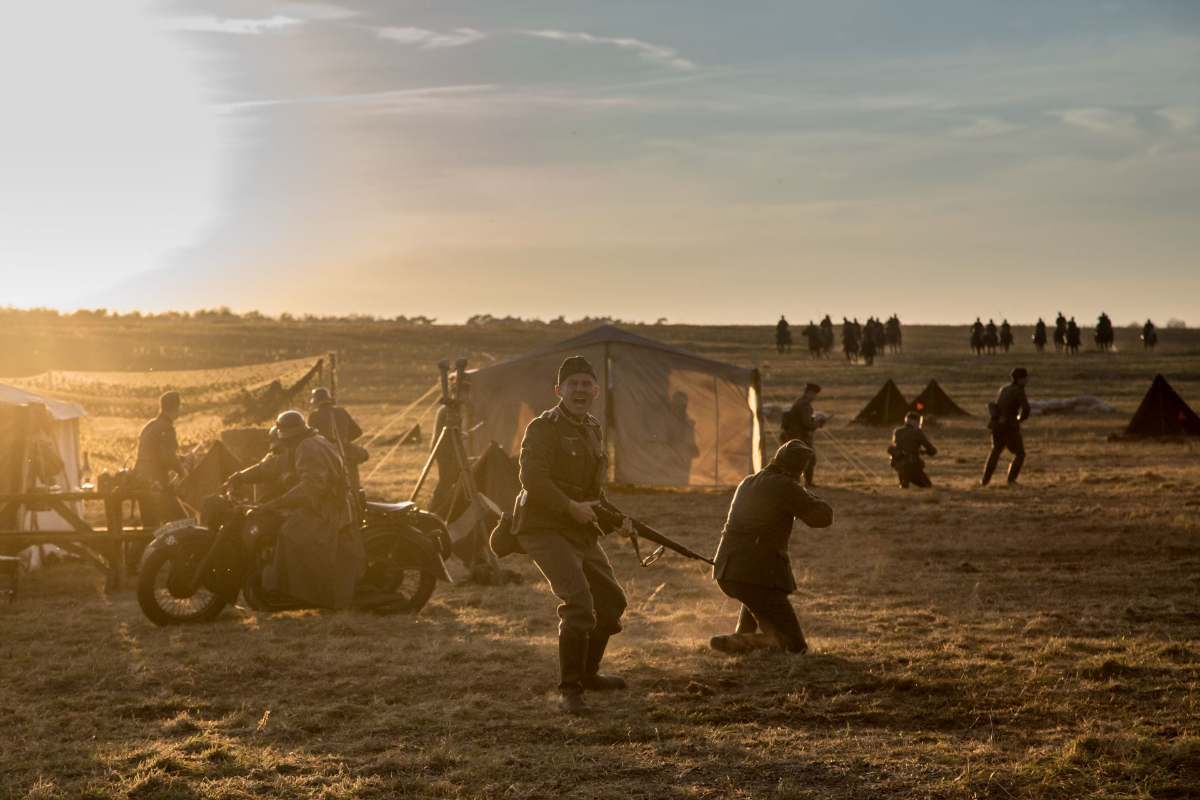
Epic light in this one ^
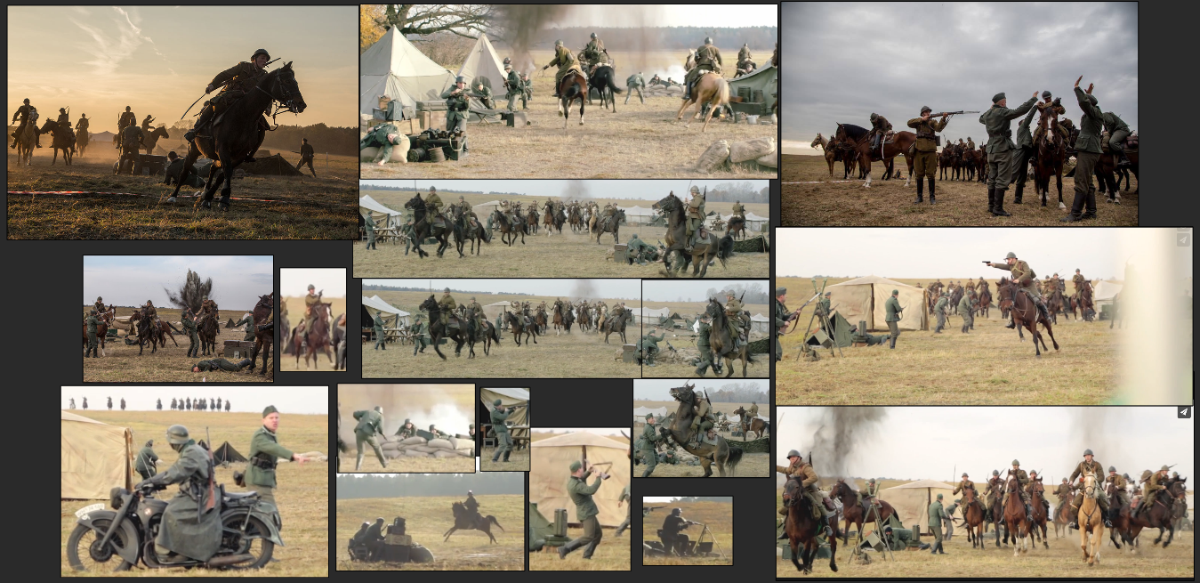
Great references for poses in these^
Of course our artist can’t stick to one source. Time to hit google again and this time they found some more reenacting scenes to add to their growing collection. 
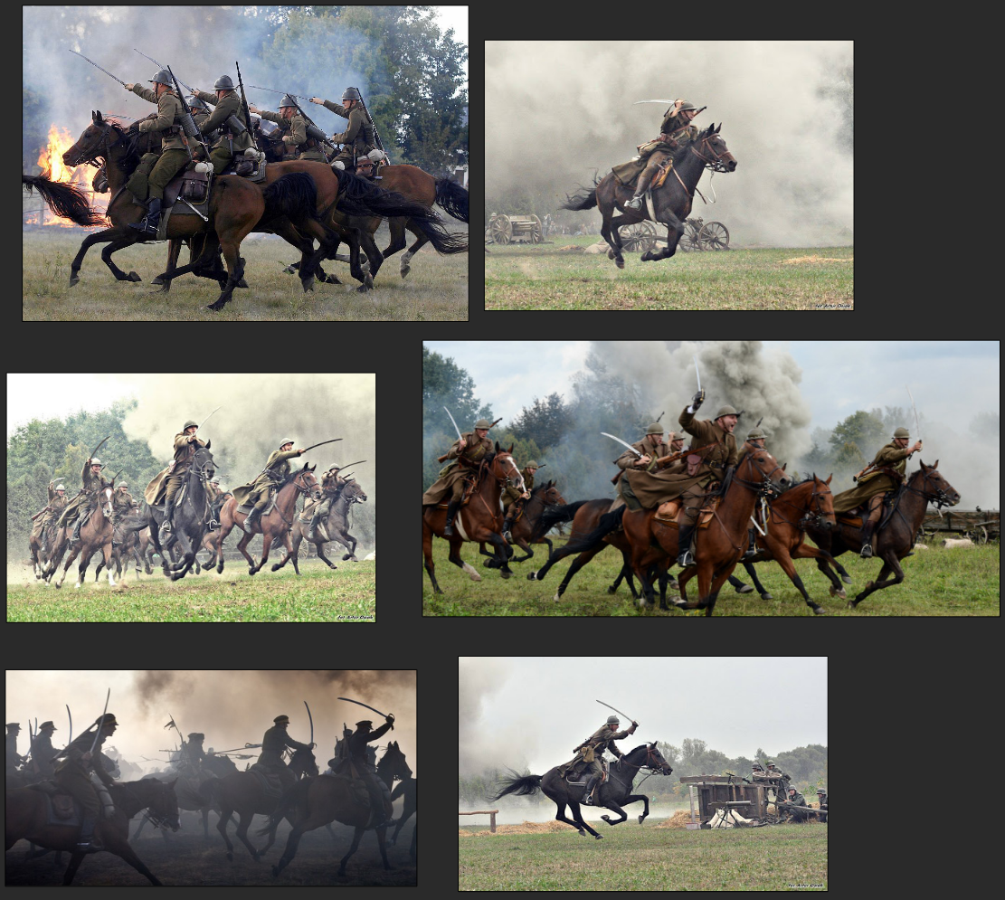
More poses and epic looking horses ^
With a PureRef filled to the brim with interesting angles, poses and an interesting mood and light our artist now starts to work on something that’s called “Thumbnailing”.
It essentially means that our artist is making quick, easily viewable suggestions for the loading screen depicting a cool looking battle, sketched up with the help and guidance of the reference material they gathered.
Fun fact; the word “thumbnailing” is actually a direct reference to the human thumbnail in size and the word has been used as early as back in the 17th century for small imagery. Kind of gross... kind of accurate, but still.
These are the thumbnails that they did for Podcat and Archangel85 to pick from!
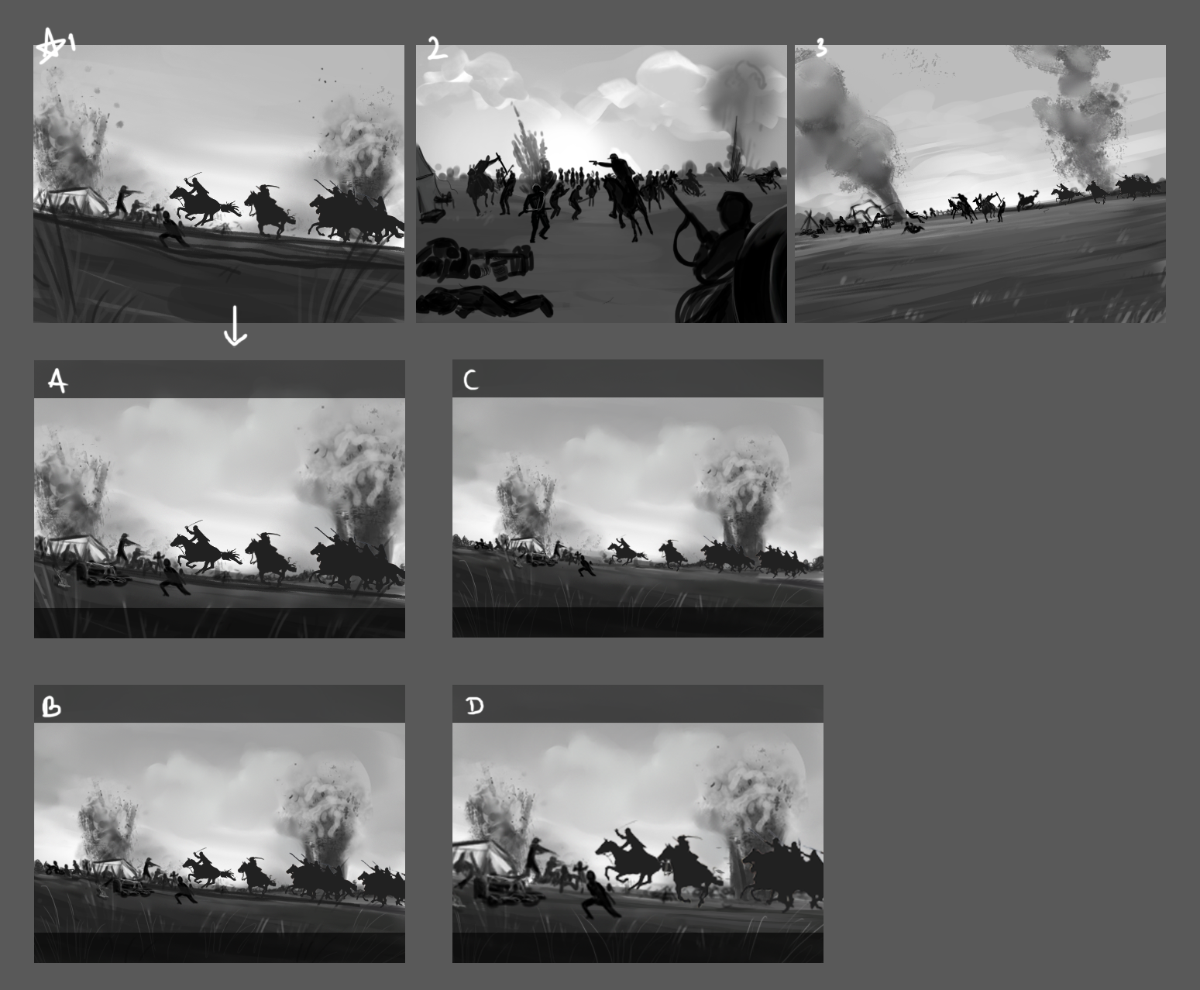
Yes. They are that ugly. Yes they take no time to make, that’s the point. There's a bunch of ways to go about thumbnails and our artist usually use grey scale when doing these. Mostly to be able to tell hierarchy in the scene quickly. For example, the darkest parts are the most visually interesting ones where we want you to look first and the lighter ones are secondary and not as important. Here we also see our artist giving us the A-B-C-D options for easier communication with the team. Pro tip here is always be clear on communication with the team to deliver the most accurate representation you can as well as often showing the progress to steer the illustration in the right direction.
So the Work In Progress phase begins. The first WIP that’ll be shared is the very first “clean” thumbnail that Podcat and Archangel85 together with our artist went for. They choose to change the direction of motion from left to right because that is the way we read as well as adding another rider in the foreground to give visual depth of the image.
Next phase in the WIP series is colours! We wanted the illustration to be time accurate, so what do we know? We know that the cavalry attacked early as heck in the morning. We know the German soldiers were camping near a forest. We know that the cavalry came through it. But what kind of feeling was most interesting/epic? Our artist made two colour variants to choose from: ^ More time accurate with a cooler tone of morning
^ And this one is more romantic/golden hour esque which in the end we went with. This felt more on-style with what we wanted to portray even if the time of day is wrong this feels more HOI.
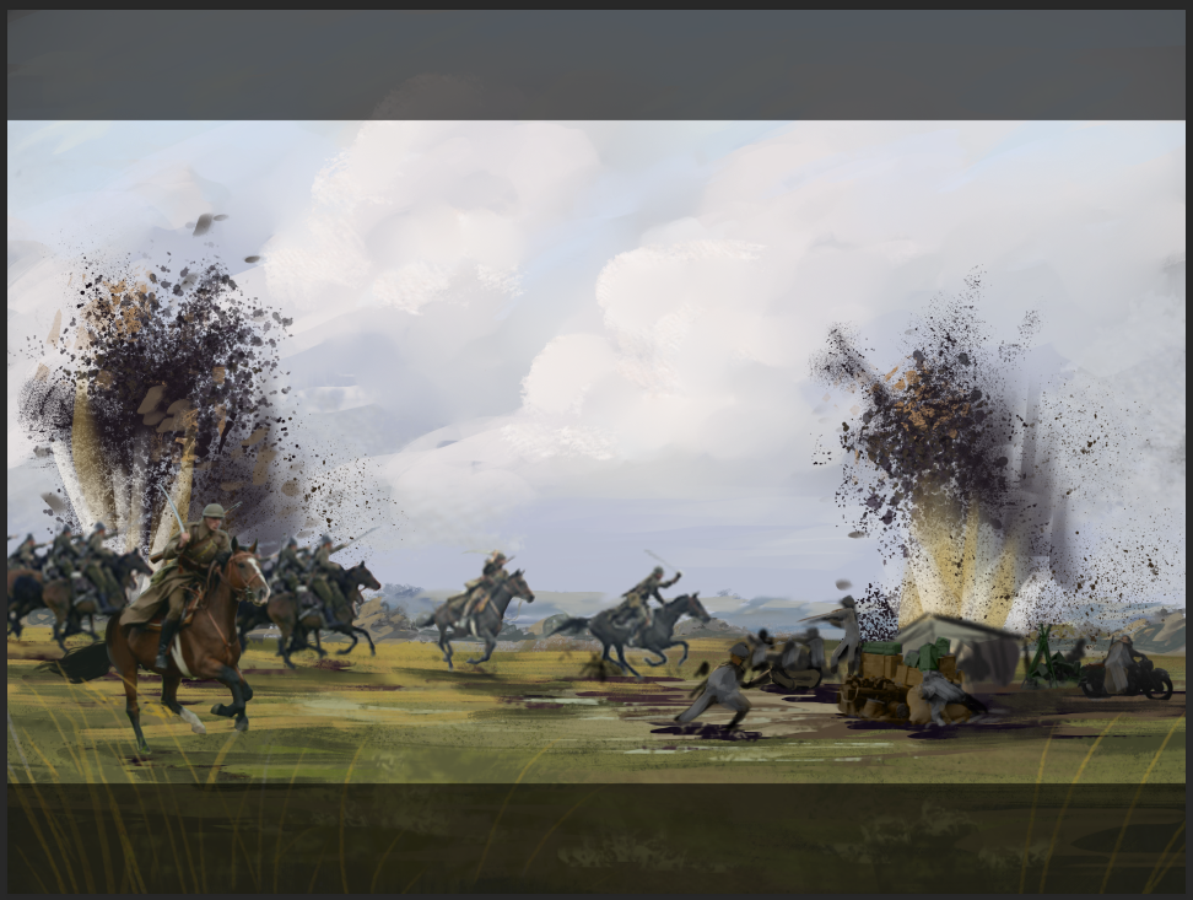
After working some more with what tone and mood of the illustration should lean towards, our artist start to define some more characters. Right now they are just blurs and blobs as well as straight up photos.
At this stage our artist went in the direction of adding more drama to the background. A new skyline was added with a helping paintover to show direction from HOI’s art lead as well as defining the landscape some more.
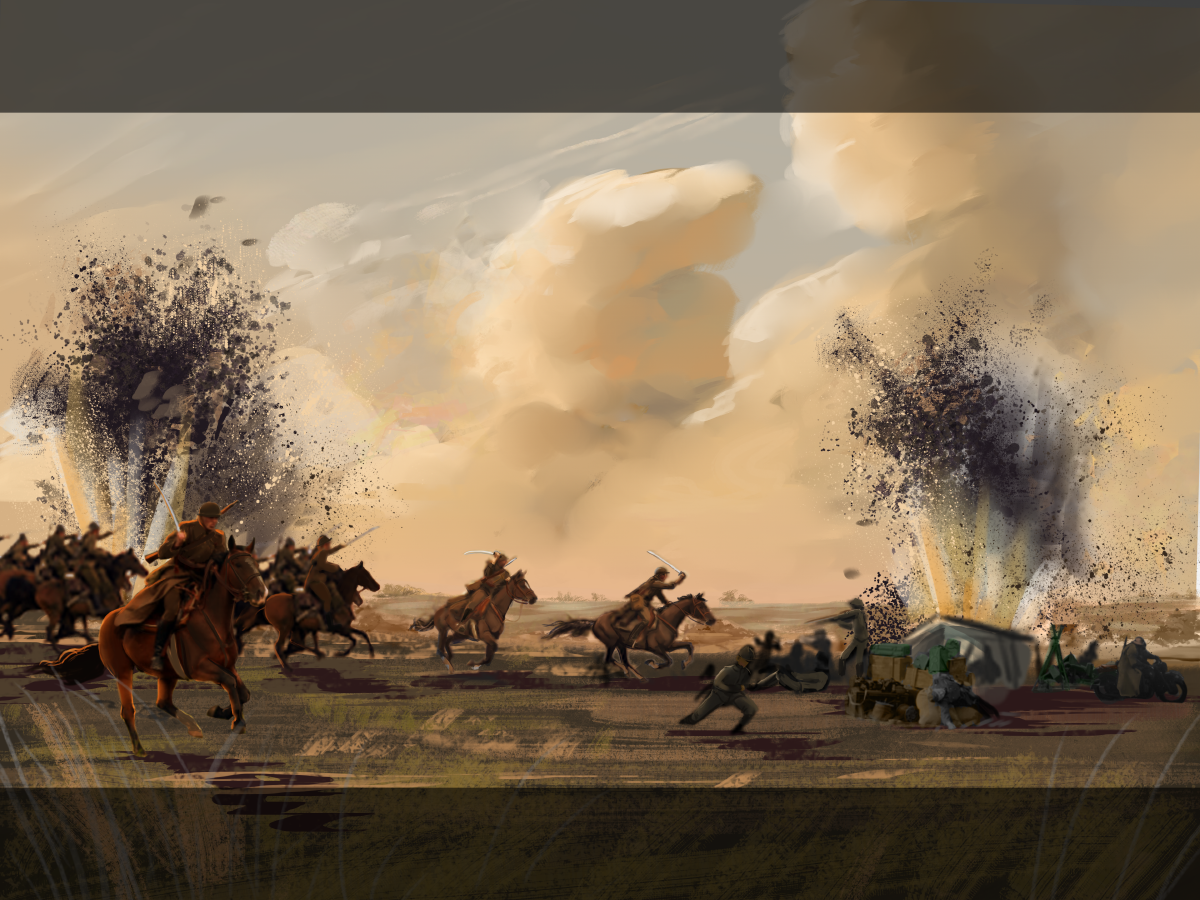
In this stage our artist also started to add some more definition of the soldiers who suddenly got multiplied (in the distance you could hear sad artist noises who realized they had bitten off more than they could perhaps chew). But as we say in Swedish “Skam den som ger sig!”
And yes… You saw right. Was that gear time period accurate? Were those crates truly used? What's up with those crazy large tents? Why are they even white? How strange… So yes. Sad artist noises were once more heard as they realized the finds they had collected in their PureRef were indeed inaccurate for the time period. It dawned on them that they had to re-do some stuff. There's a reason why artists live by “kill your darlings”. Sad, but oh so true. But also a very good thing to do! Sometimes you just have to realize that the best way to fix something is to start over. Now this was of course not the case. But still a hefty re-paint was in order.
Thanks to Jamor who so kindly rallied to our artist’s aid, gave them proper reference material and managed to steer clear of an embarrassing illustration. 
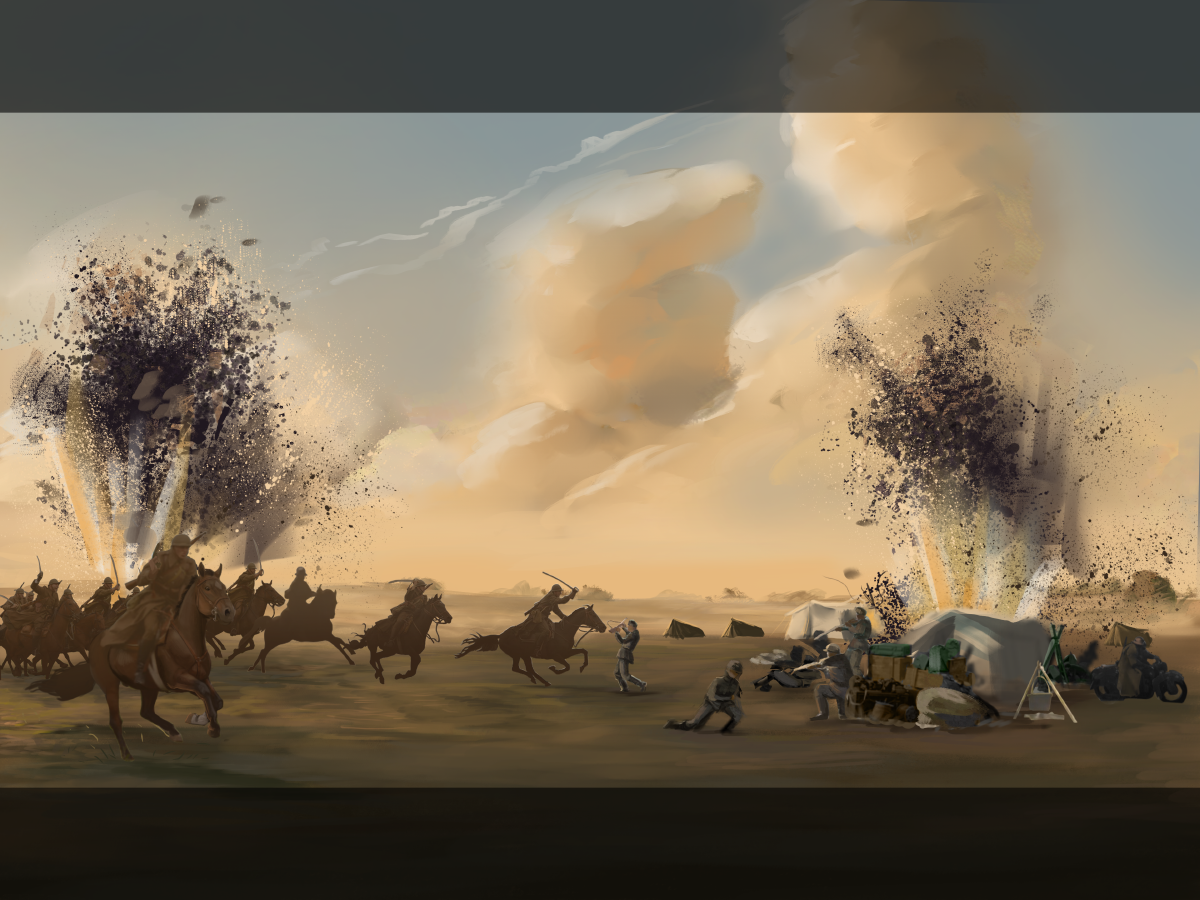
So now we are heading somewhere! The noisy background elements were taken out because it was too distracting which wasn’t entirely the case up until now. Remember the thumbnailing? Yeah those explosions had suddenly stolen the show which was a big no-no. Let the horses be the stars! And in this stage the character got more defined as well as the background getting more painterly.
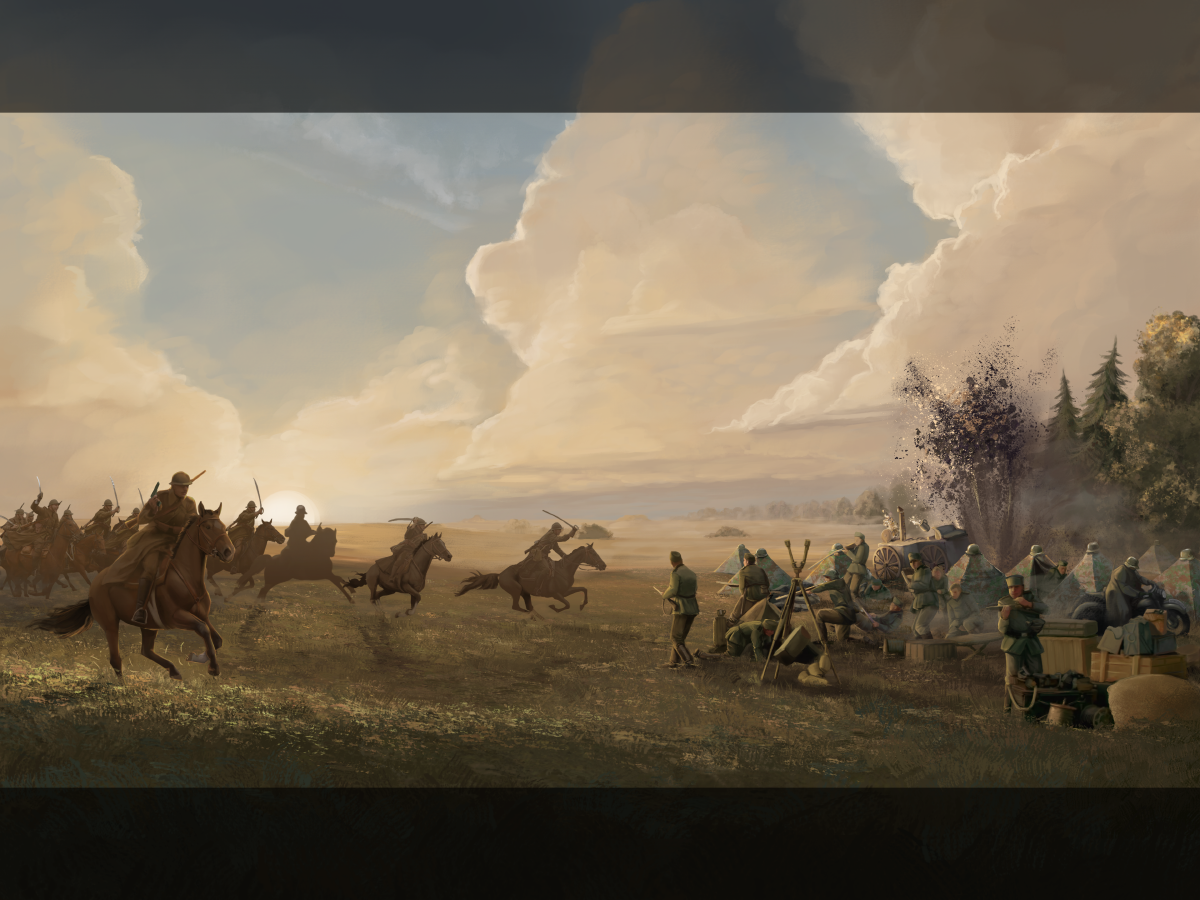
Well, we finally arrived where it really started to come together! It looks epic, the mood is heroic and you can feel the battle about to happen. This was therefore a time to go back to the beginning, to look at how the other loading screens had been made to maintain an equal feeling and style of rendering to this new piece! Grabbing a bunch of older loading screens our artist studied the brush strokes, textures and colours that had been used.
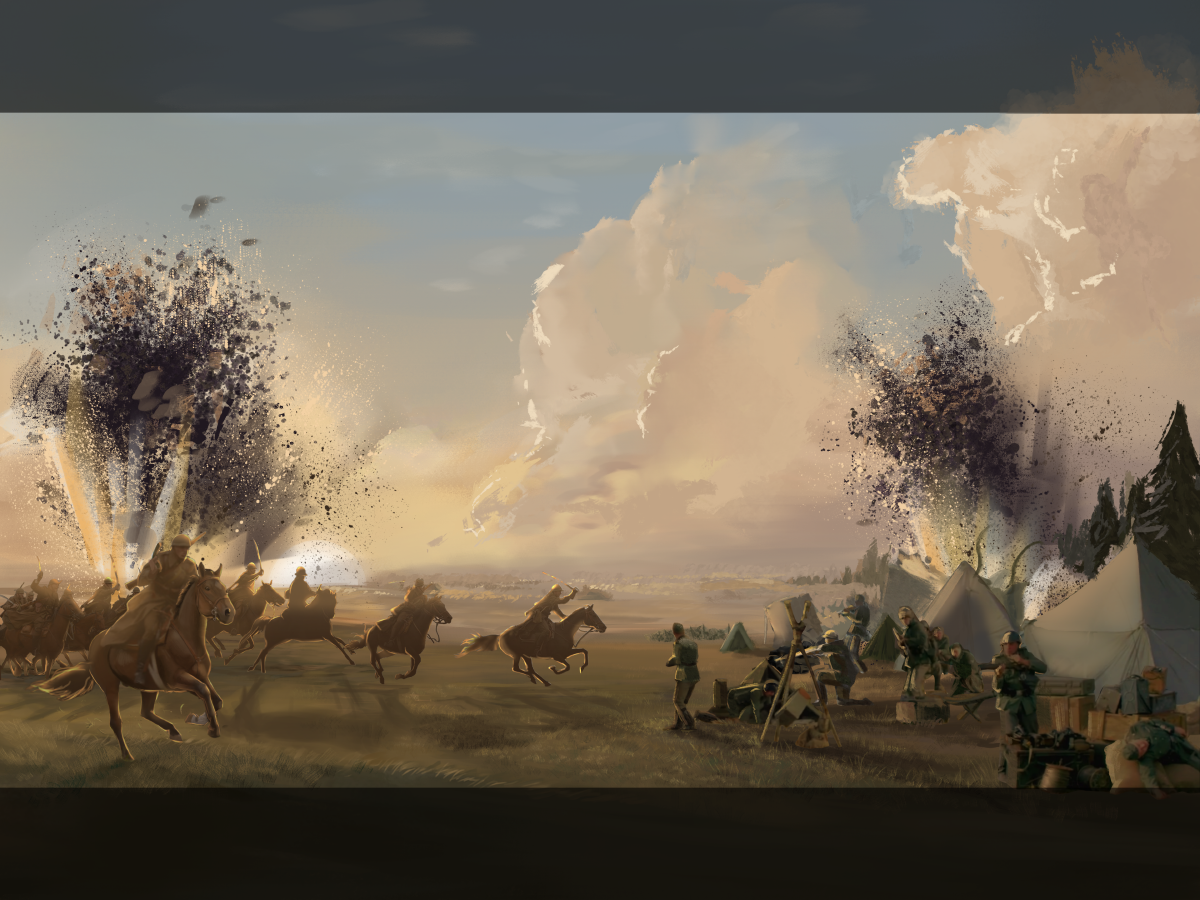
Aaaan back to the illustration! More textures are now added to mirror the old style as well as adding to the foreground and middle ground as well as details in and around the camp. Some soldiers got new jobs, instead of lying dead someone is now defending the camp and some more soldiers crawl out of the tents. Our artist wanted the feeling of “panic” to be visible in the camp.
Here the decision to actually raise the ground a good chunk to balance the whole image better was taken. And at this stage our artist, together with lead artist and art director, checked the values of the image. Arguably this could have been done much earlier in the process but sometimes you simply forget until it bites you in the ass. Luckily tho it was at least caught! For example, the darkest part of the field kitchen was too dark to match where it stood in the field and our artist had to make it lighter in value to push it back where it belonged in the image.
Not to get in and be TOO technical about what was happening in this stage, in short, our artist checked the contrasts to make them feel believable. The things at the foreground should be the darkest and as further back you go in the image the lighter in value it is. The example with the field kitchen was that it didn’t look believable. The darkest part of it matched the darkest parts of the horse and rider in the foreground and therefore looked off in its position. Flipping a adjustment layer of Black and White on and off helped with a quick overlook of the scene since sometimes colours can deceive. Being able to toggle a grey-scale filter on and off can do wonders and give a new perspective and light to the image.
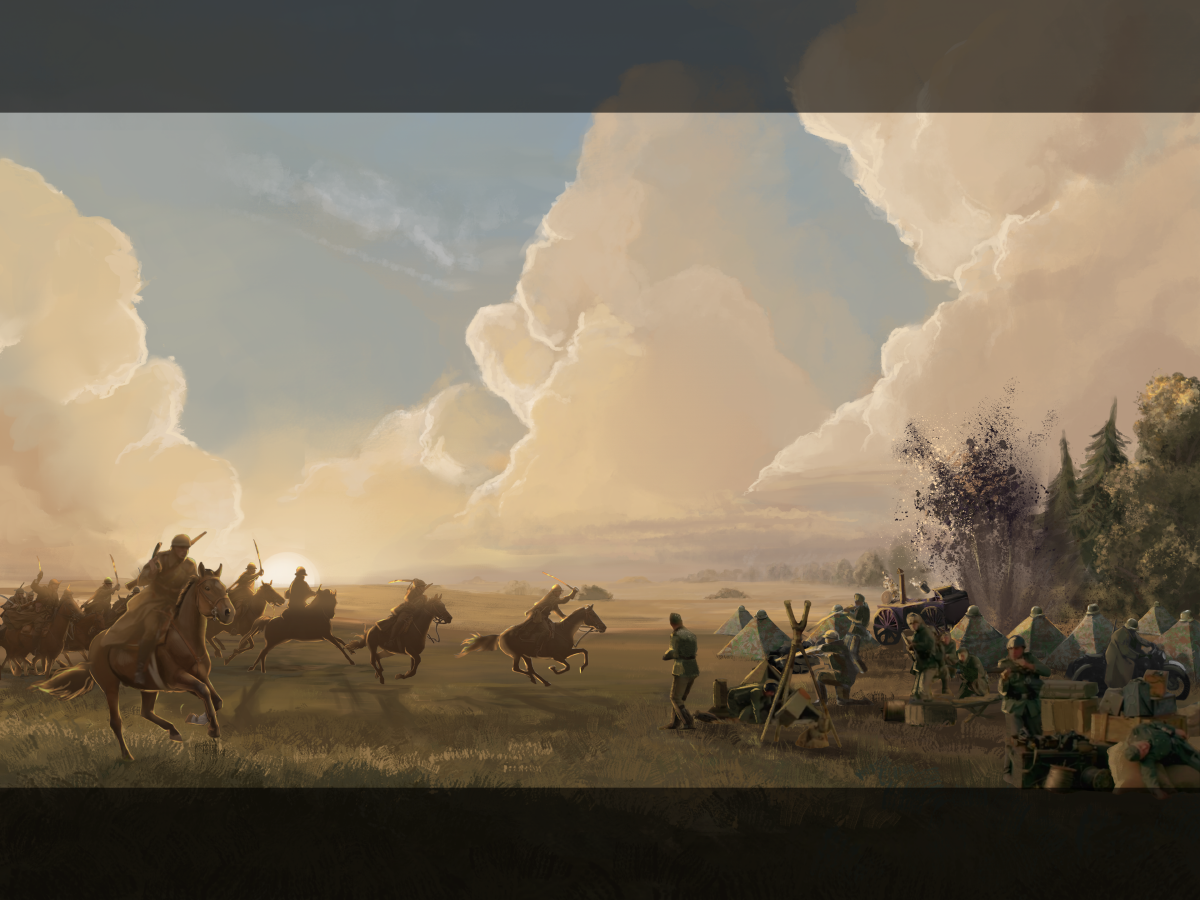
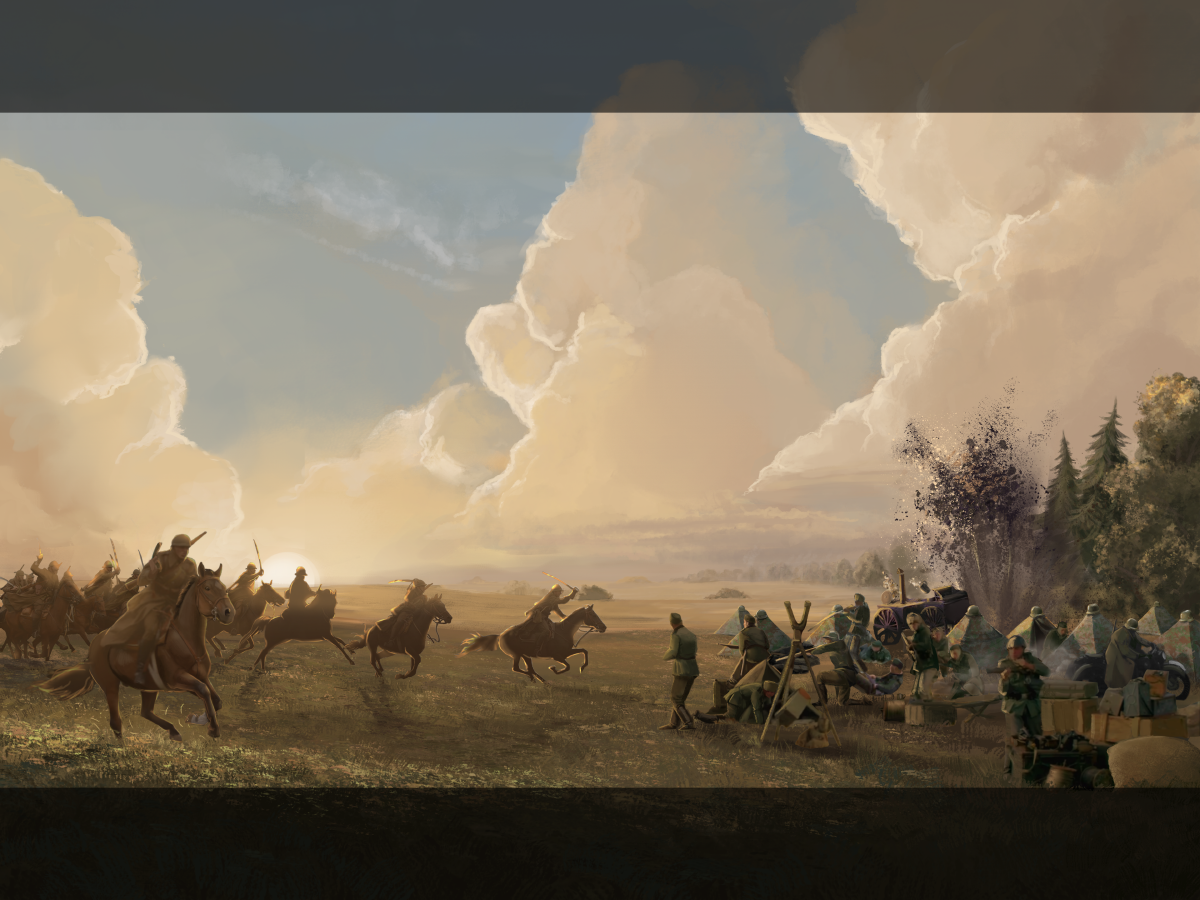
The final stretch of “last minute fixes”, here we go!! Here our artist started to do those last 10% of the image to take it over the finish line! Fun fact, usually the last 10% are referred to as the longest and most tedious part of an illustration. Here they are adding details and more life to all the characters as well as adjusting and fine-tuning the background and the light in the illustration.
The whole illustration from gathering references to thumbnailing to finally done took approximately 3 weeks, 2 of which were dedicated to be set after each other, while the rest of the remaining days were spread out in between other work our artist had to prioritize.
Our artist sure did an amazing job here and can you believe that this was the first time they ever created such a huge piece of art?! Their usual work on HOI is to create the icons and buttons you like to push and glance at as well as a few portraits here and there so this was indeed a challenge for them. But least to say is that they sure had fun (despite some suffering, but let's be honest… what is an artist if they're not suffering) and enjoyed the challenge and above all the experience the loading screen delivered, and hopefully you’ll agree with them that it looks pretty cool.
And perhaps we’ll see them take on another loading screen again in the future.
But before I let you go, I have a little meme from our artist to you. 
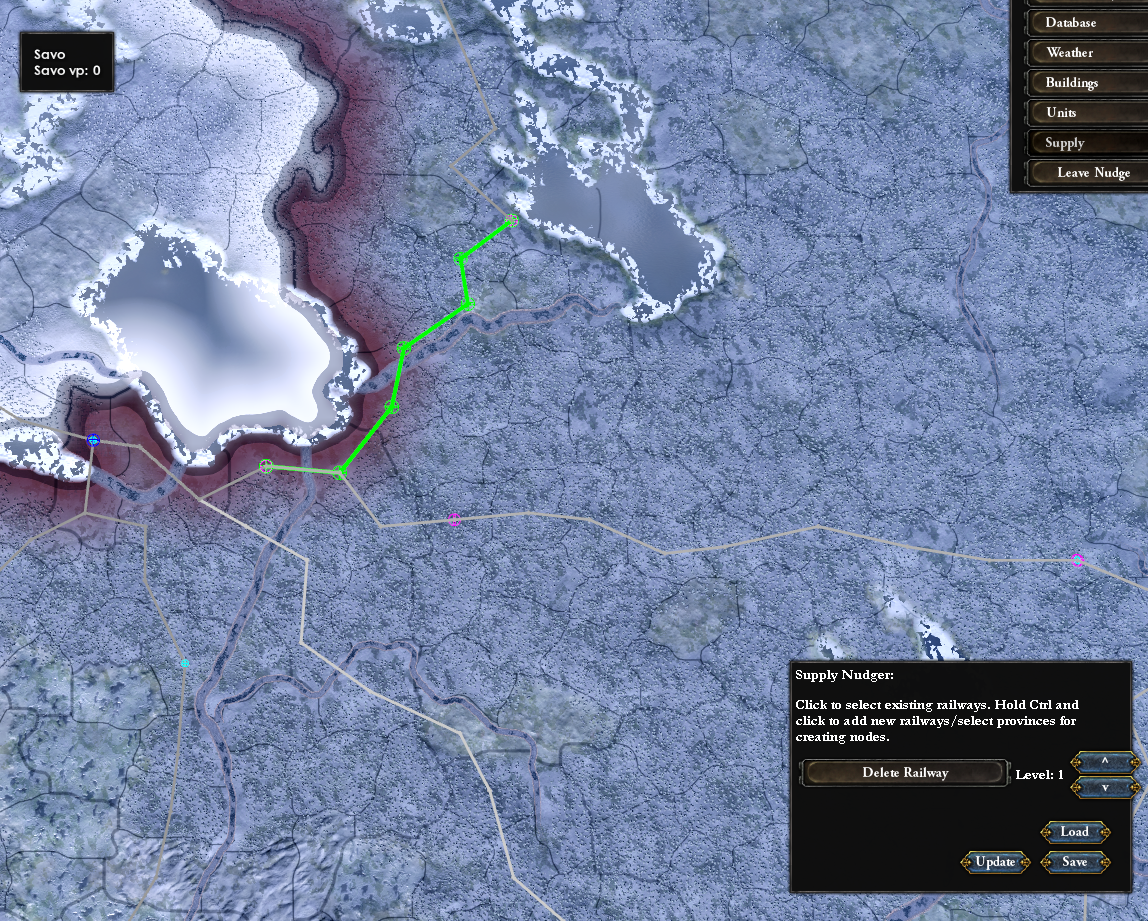
(artists are artists, not programmers )
-------------------------------------------------------------------------------------------------------------- Now for something completely different.
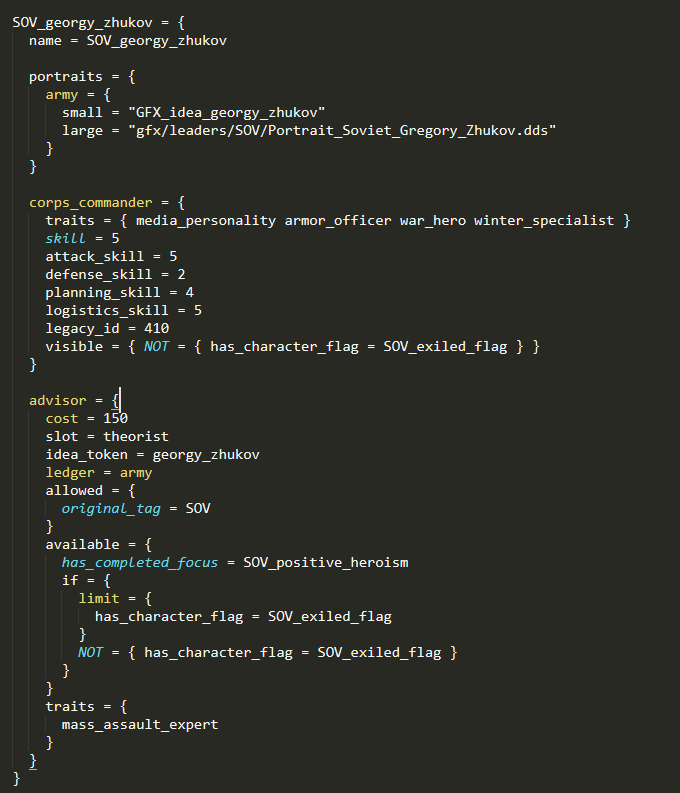
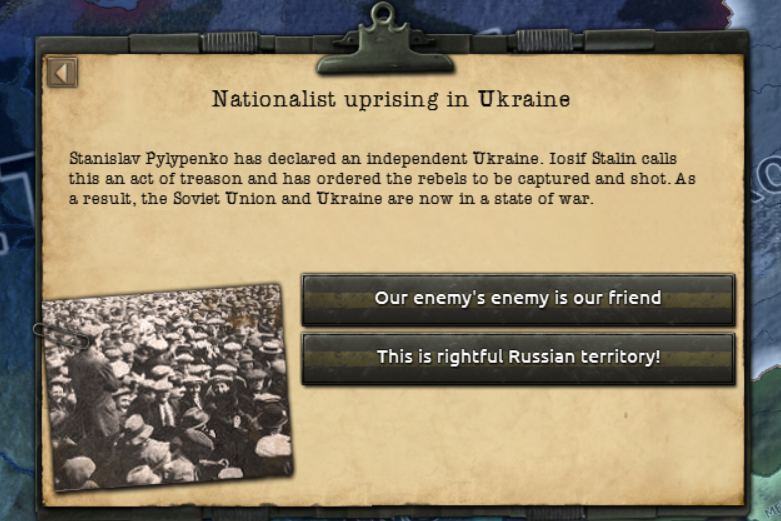
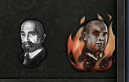
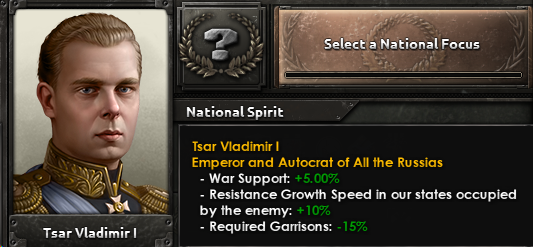
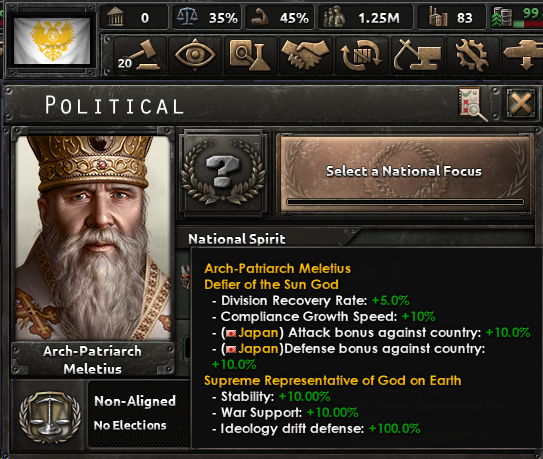
Portraits + Focuses
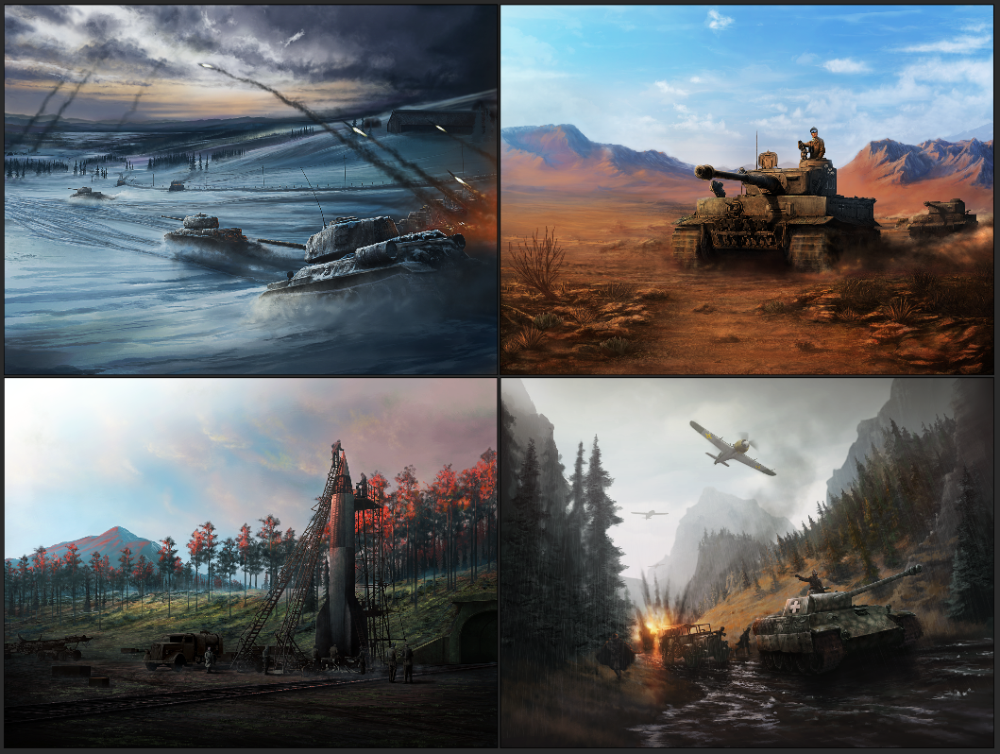
Here are a few of the new portraits you can expect to see in No Step Back.
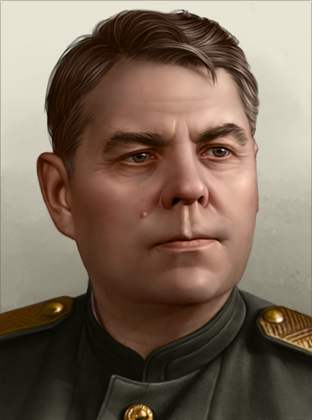
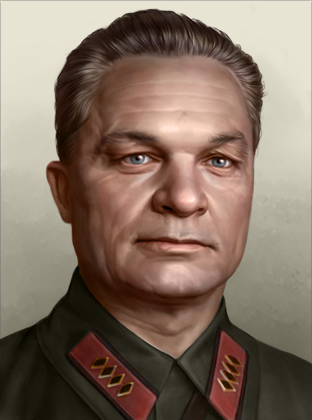
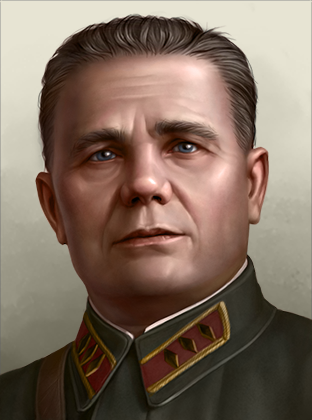
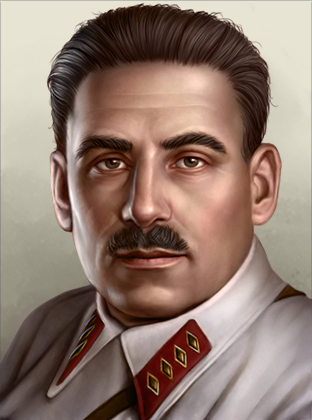
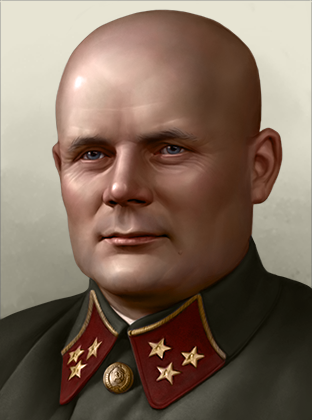
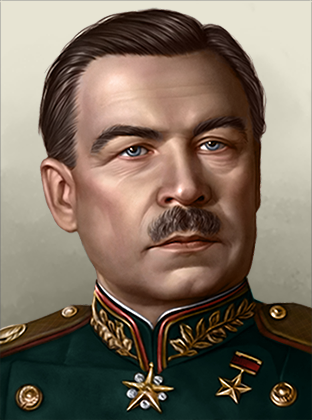
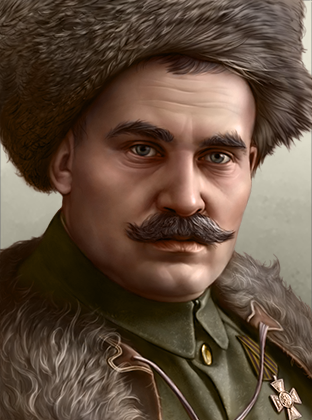
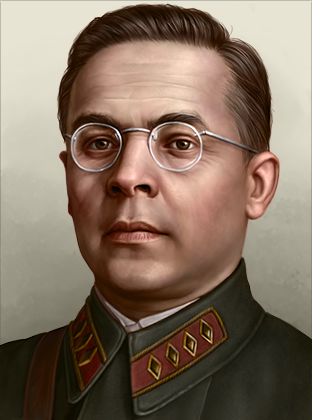
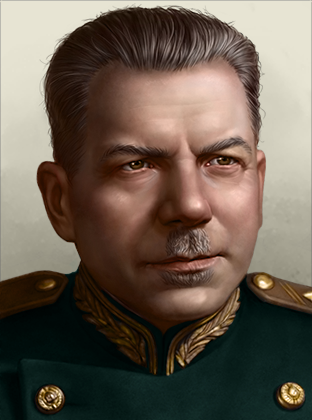
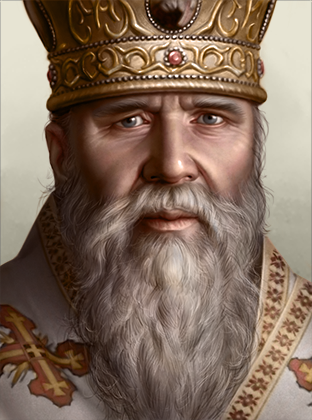
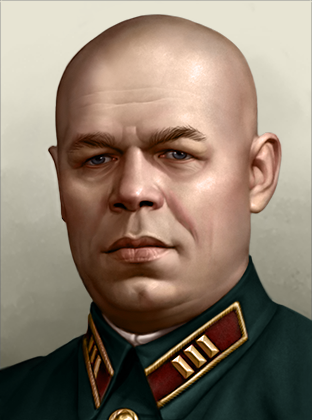
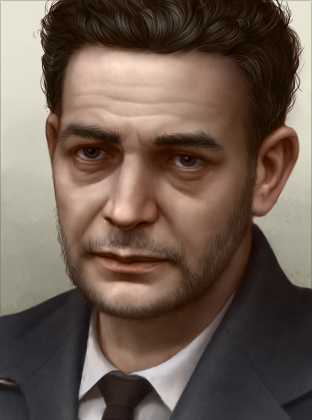
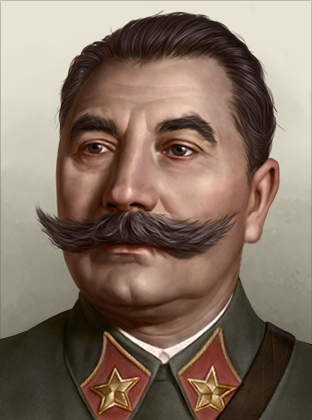
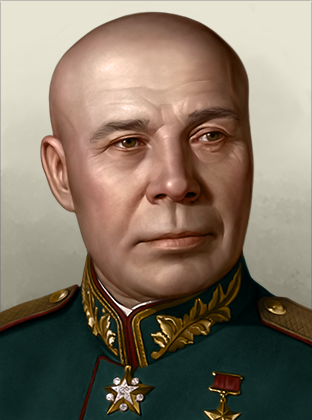
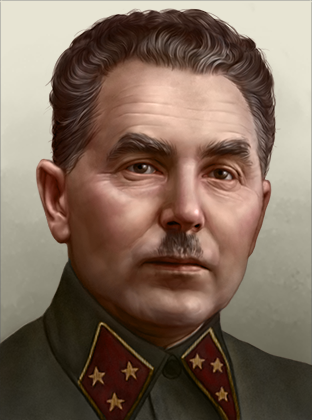
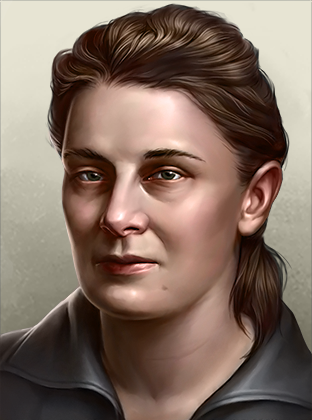
There are plenty more where these came from. ;) 
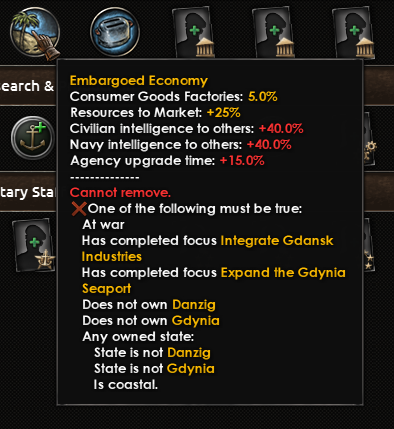
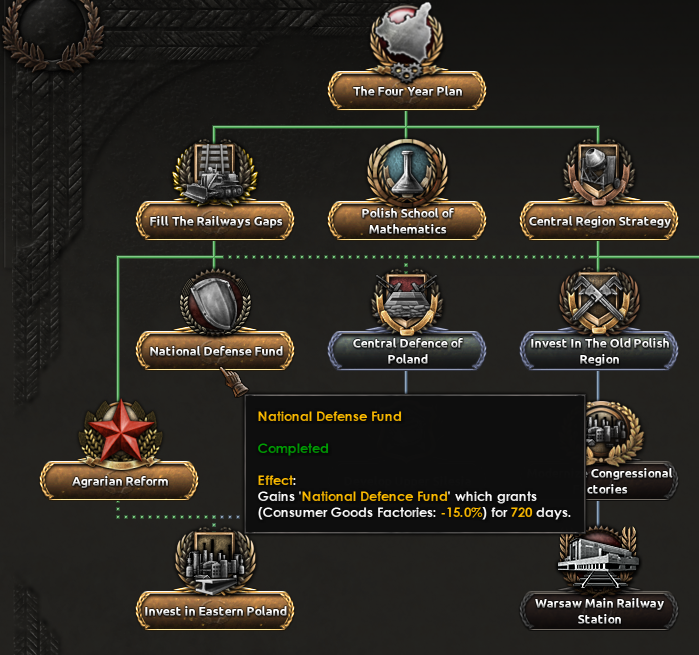
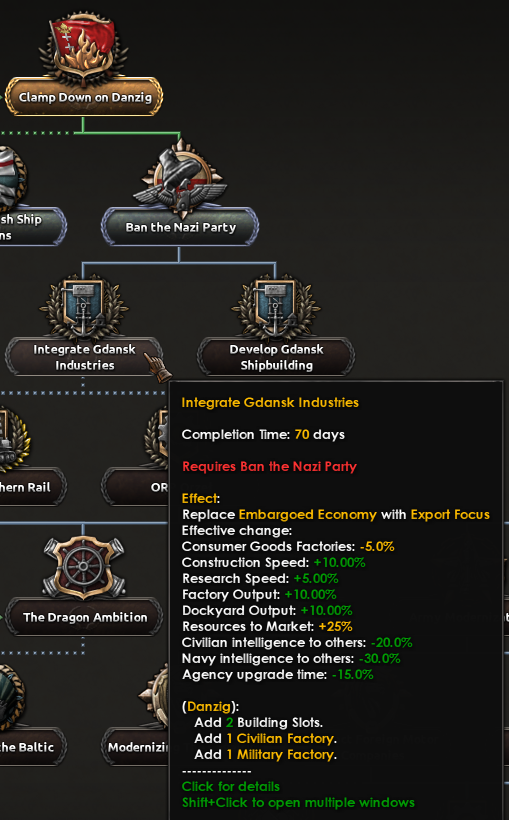
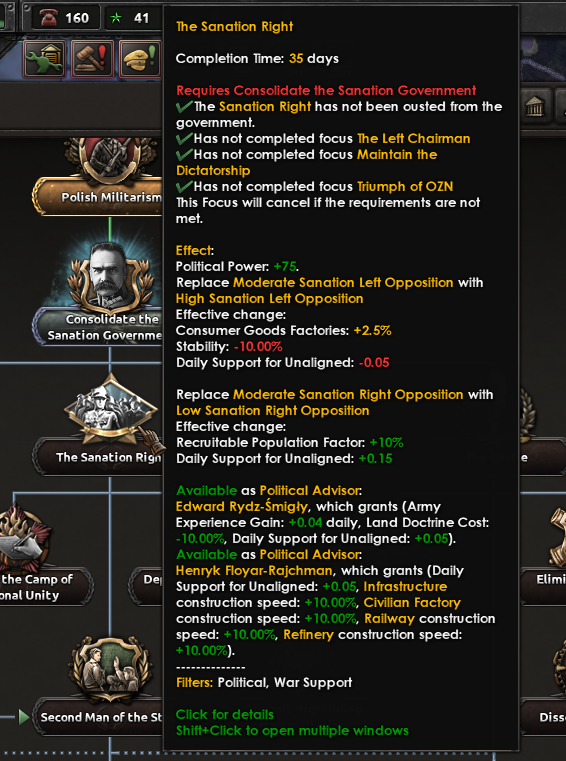
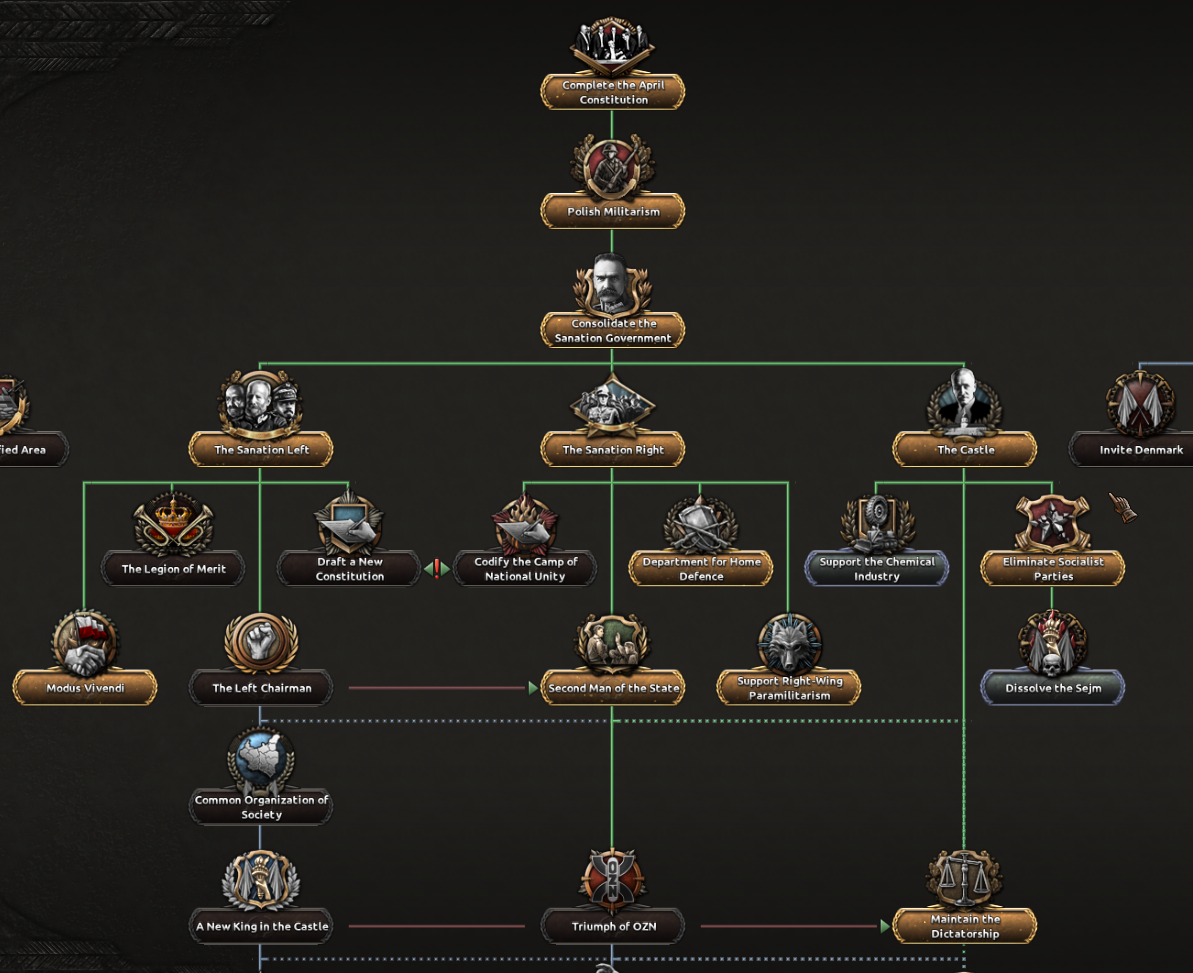
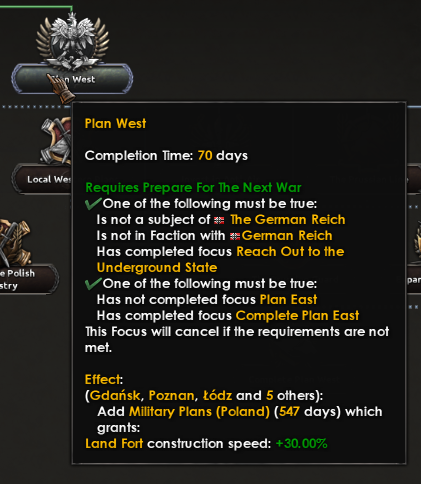
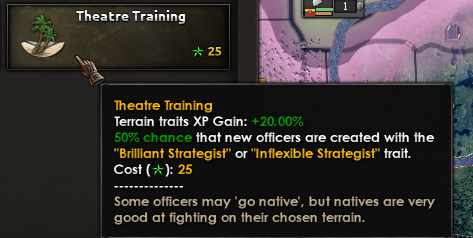
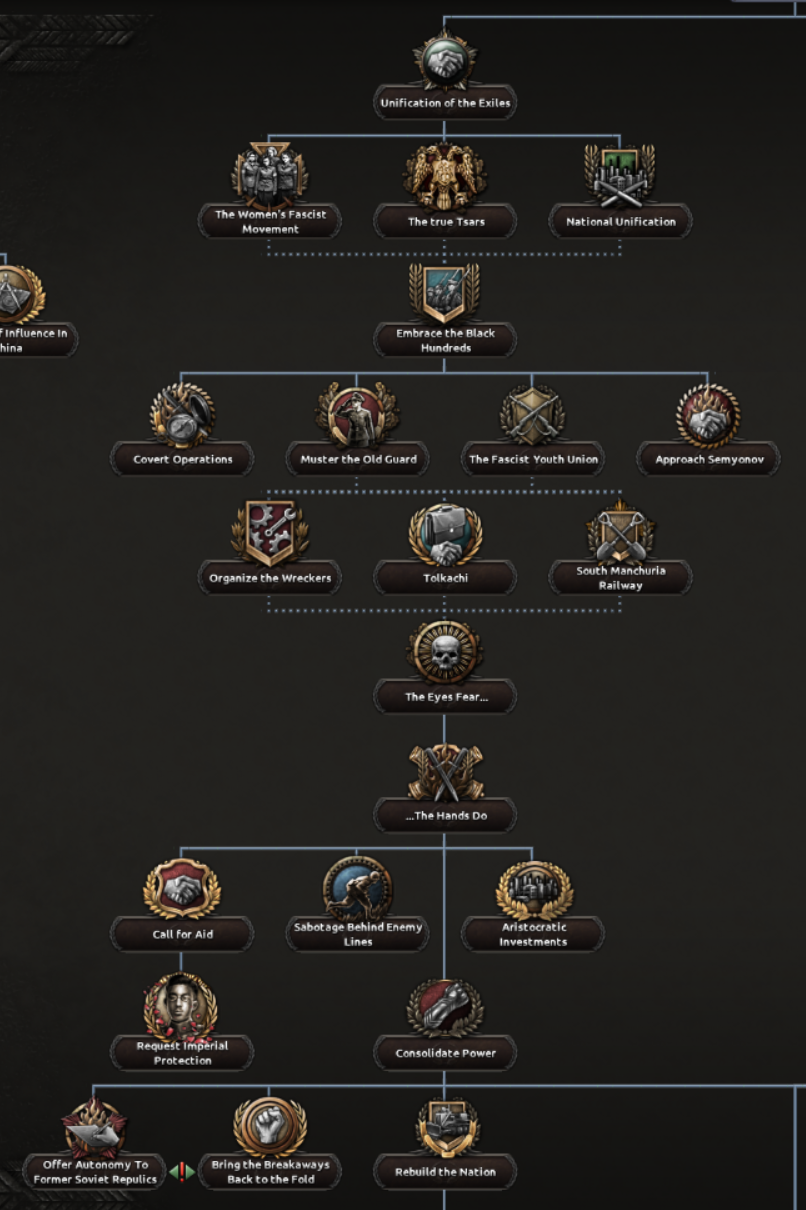
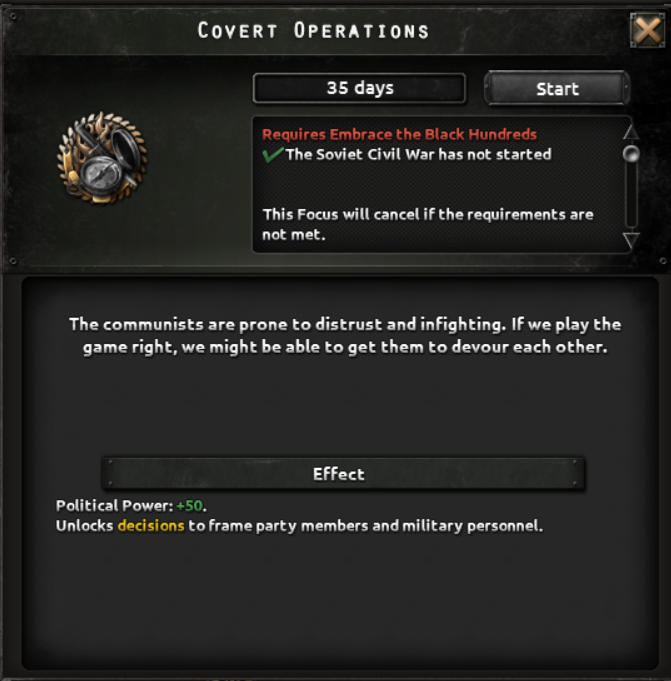
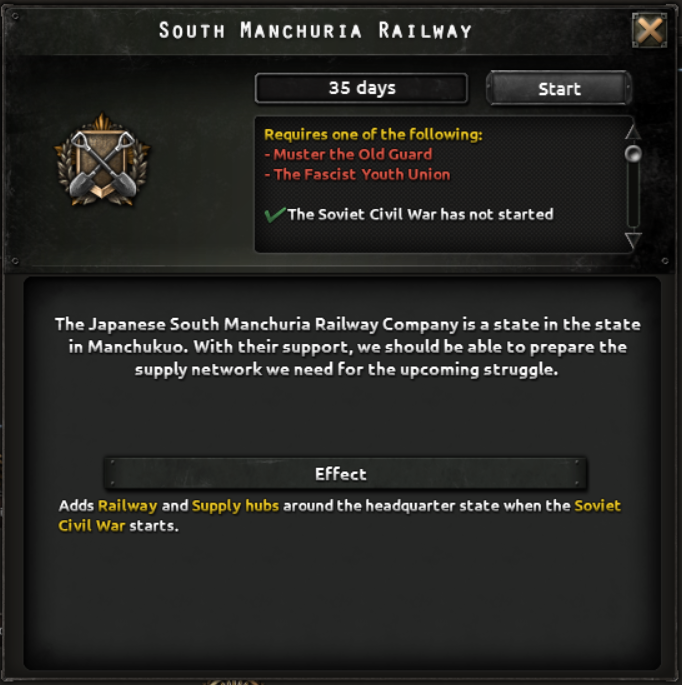
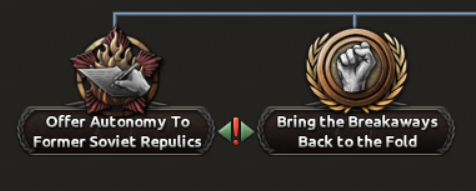
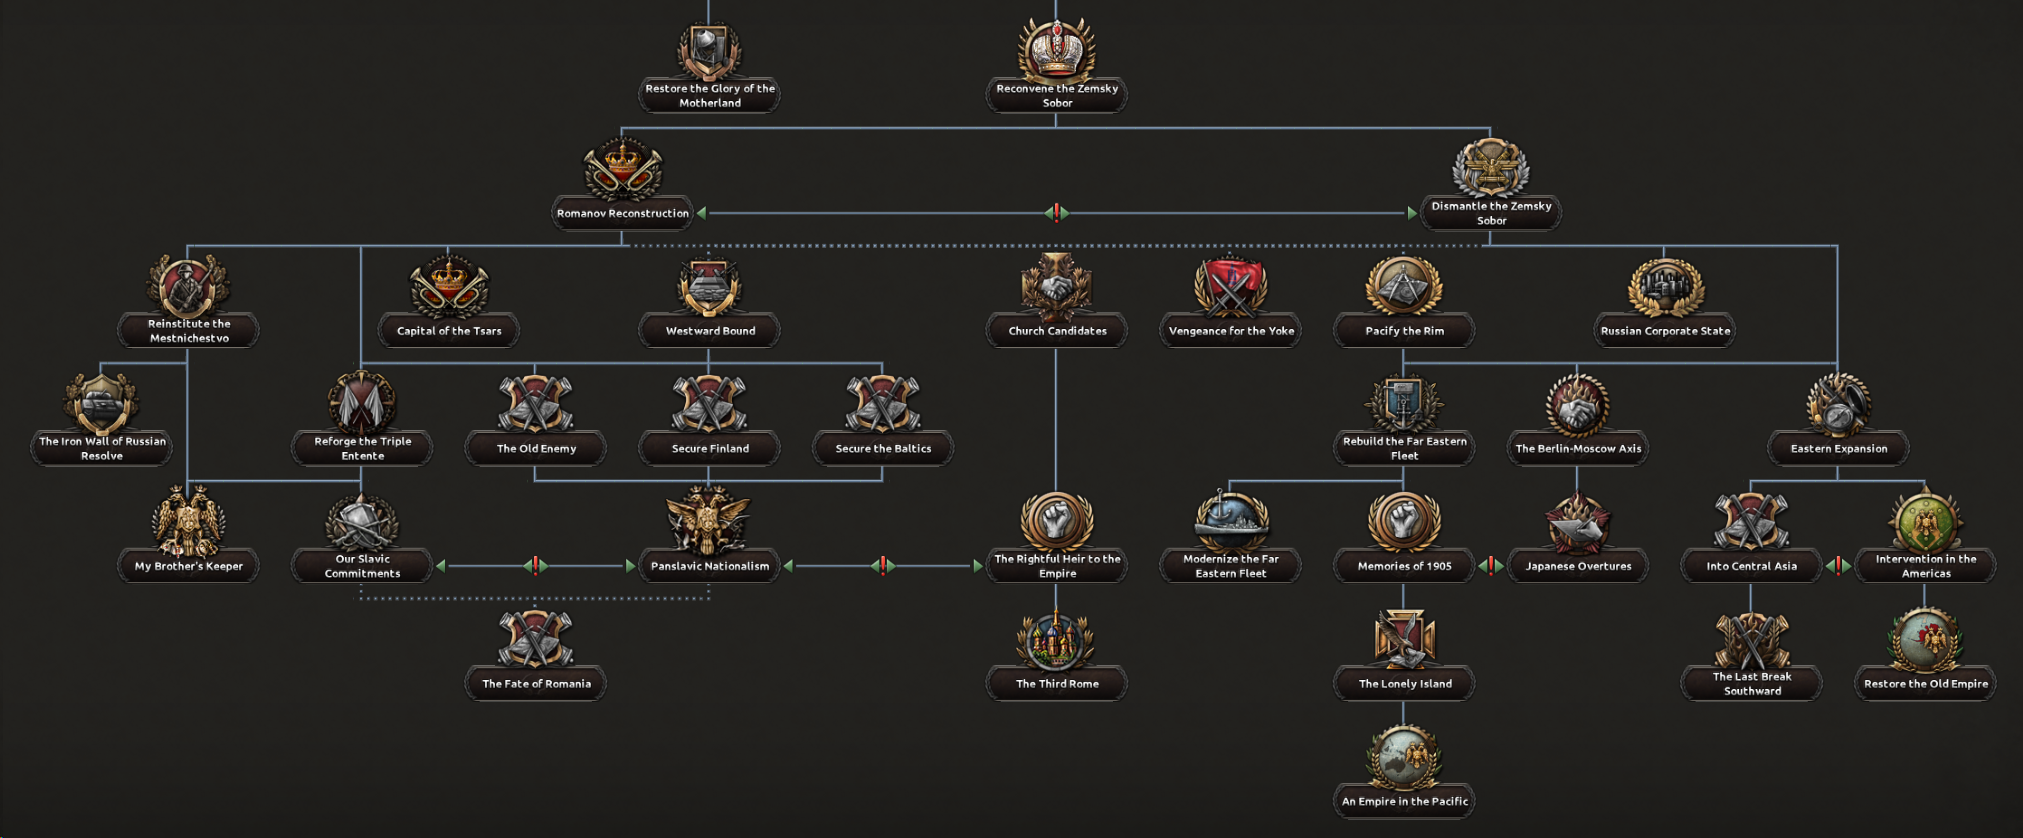
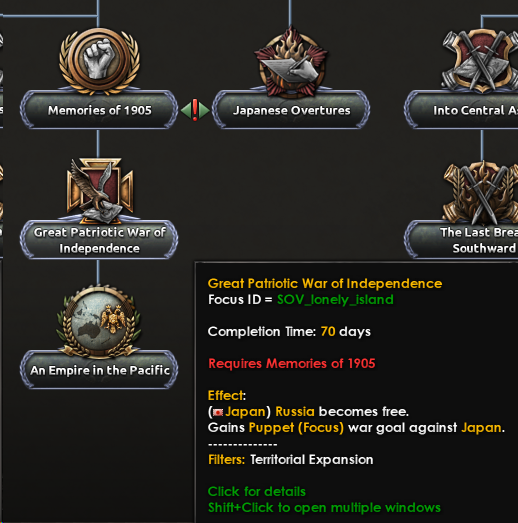
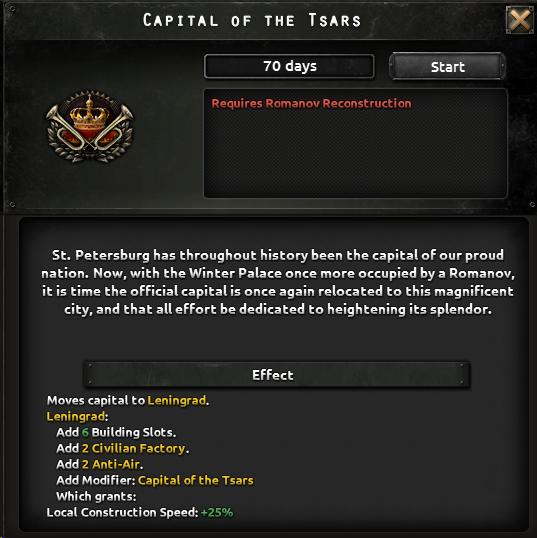
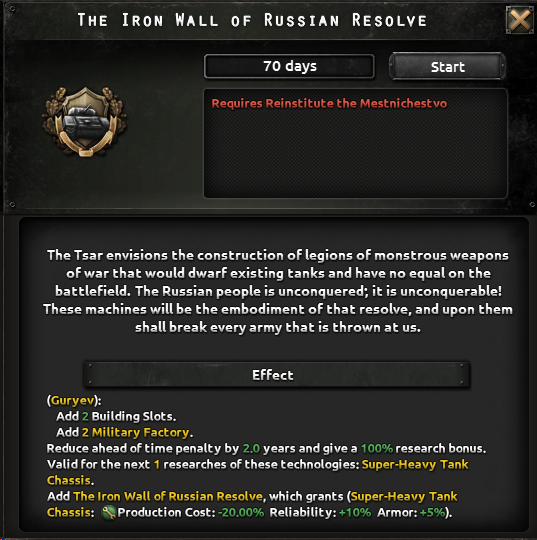
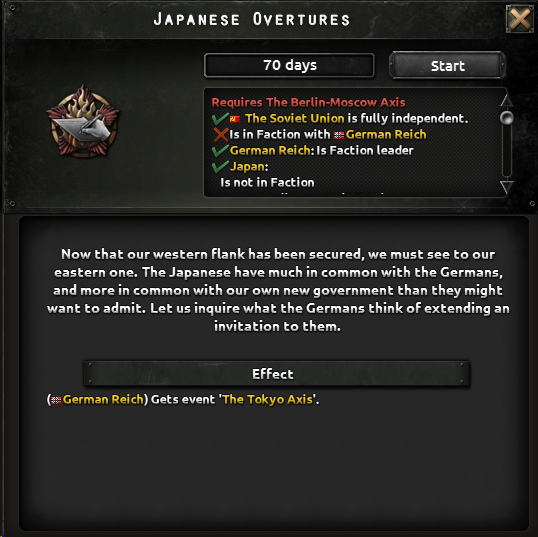
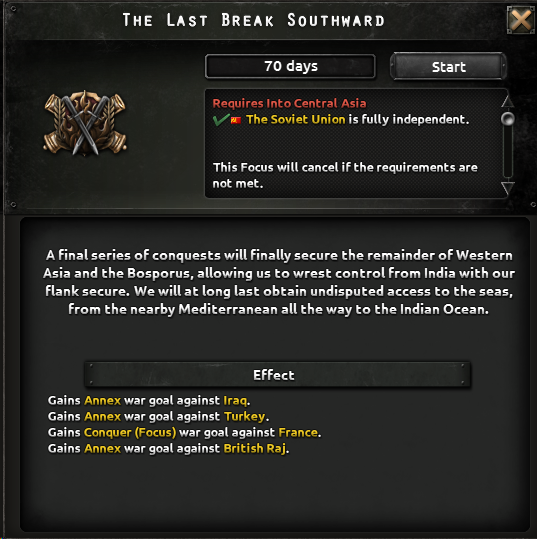
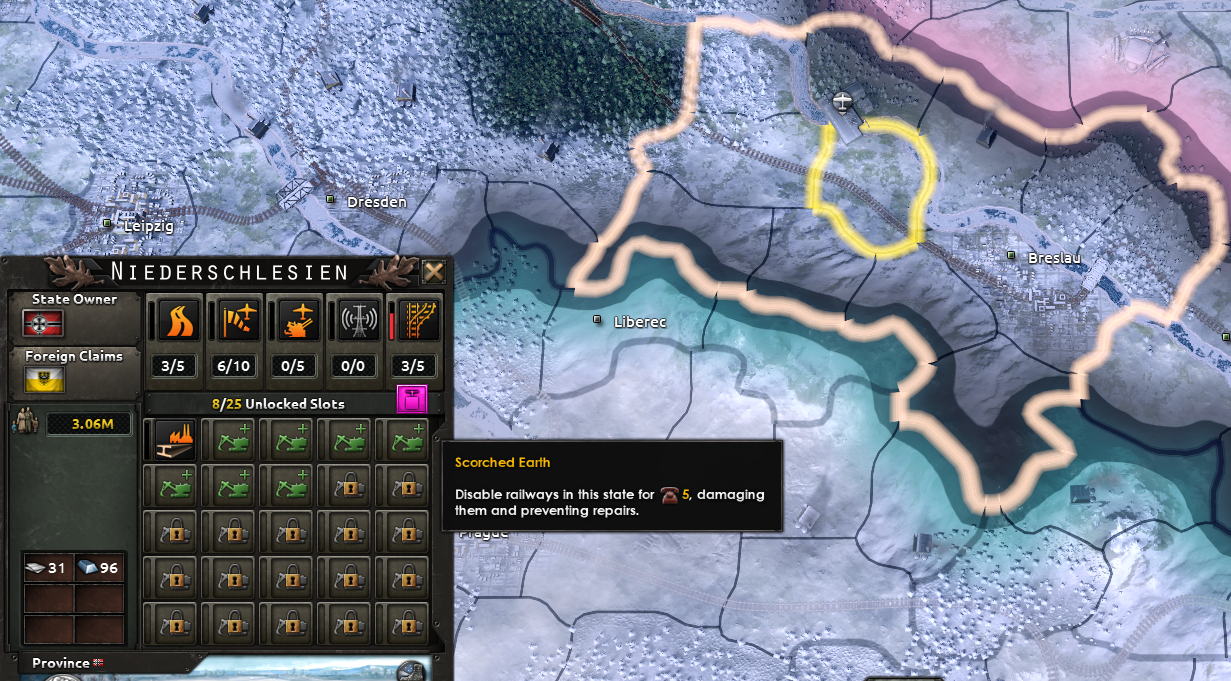
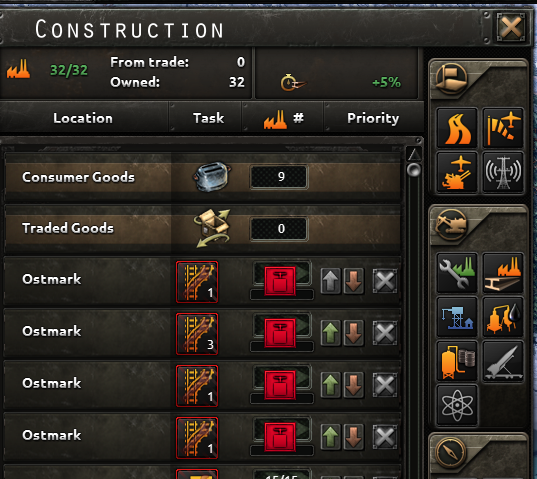
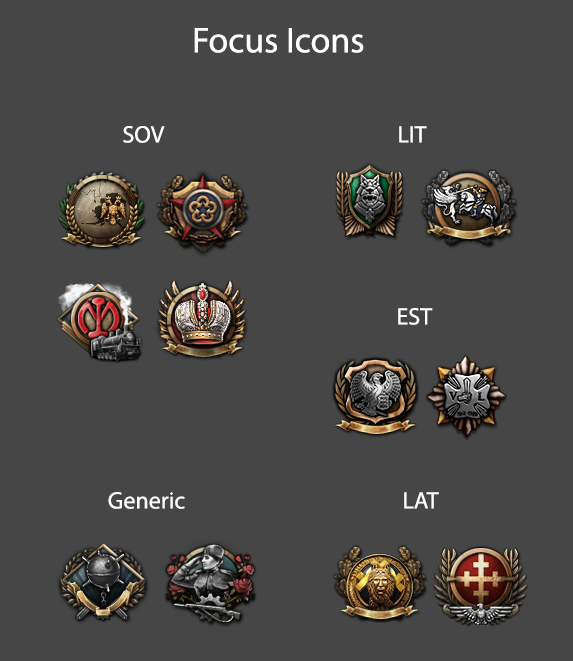
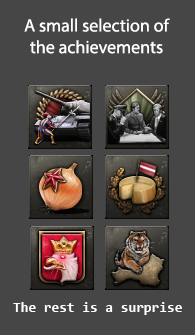
Additionally, here is a peek at some upcoming focus and achievement icons:
Well... That's all from us for now, folks. 
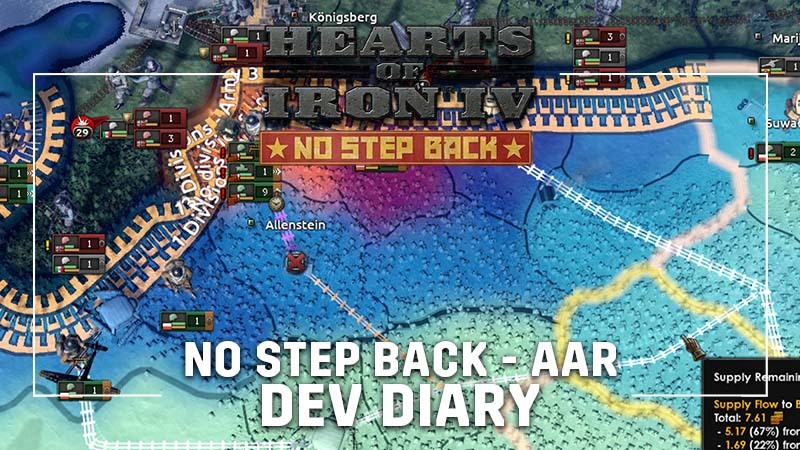
We hope you are all as excited about playing No Step Back as we are to have you play it.
Oh and one last thing:
The No Step Back feature streams are starting this week, with a first look at the new focus trees in action. The first stream is today (Wed 27th) at 16:00 CEST, during the normal HOI weekly stream slot!
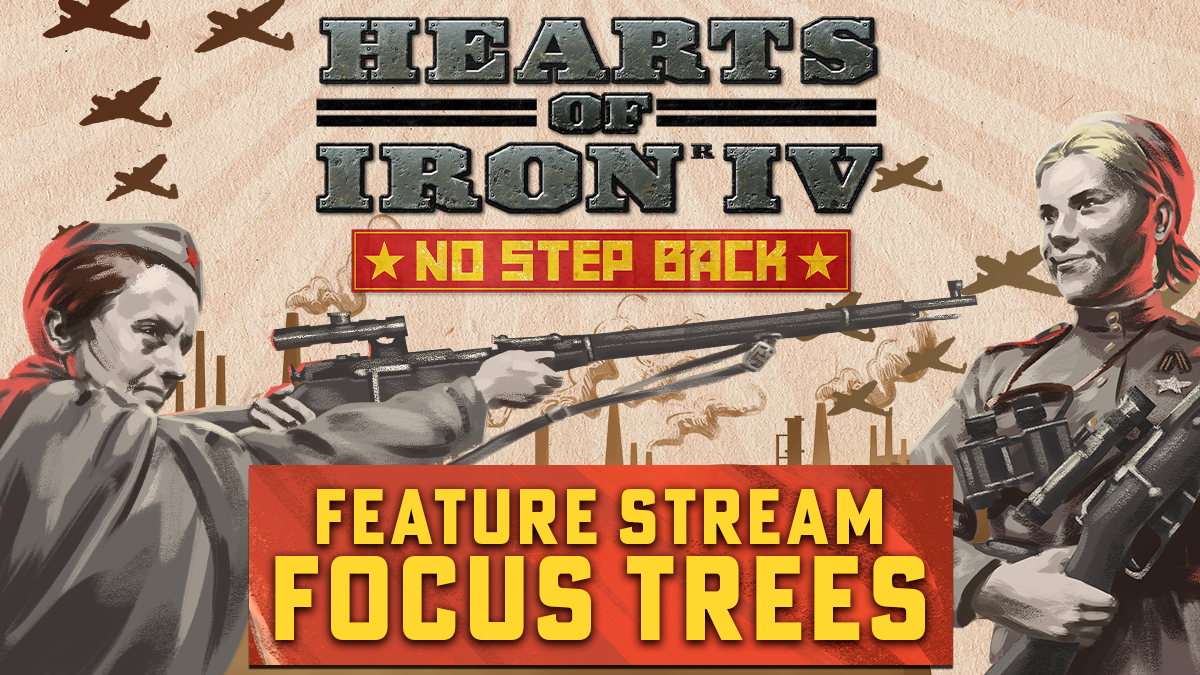
Hello, and welcome back to another Dev Diary for No Step back and 1.11 Barbarossa. Today we will be pulling back the veil a bit and show you how modders can affect and use the new features coming in 1.11.
For those of you who do not get unreasonably excited by hearing about new script commands and changes to databases, the long and short of it is this: We made some fundamental changes to the way the game handles some things, which will probably require your favorite mods to spend some time updating. On the flip side, those changes also allow for some exciting possibilities down the line. If you came here hoping for a release date, we must ask you for just a little more patience. We promise the announcement is very close - but not today.
Characters
Probably the biggest change is in how we handle people on the backend (or ponies, for that matter - we do not discriminate). In the current live version, the game has no real concept of a person as a distinct thing. It only knows about country leaders, military leaders, political and military advisors, and operatives. Cases where a country leader could also be a general had to be handled manually, leading to lots of exciting bugs when the country leader was removed but the general was forgotten about and other such cases.
We have overhauled that side of the game from the ground up with the introduction of characters. This should dramatically reduce the amount of potential zombie generals shambling around, which I am sure the non-zombie population will greatly appreciate.
Characters are defined in the common/character folder, and their definitions look like this:
Every character is defined as a container for different roles they can fulfill, like General (corps_commander), Advisor, country leader etc. Due to technical concerns, Operatives remain their own thing. On the character level itself, things like name and gender are handled. This also means that character names can now be localised and you can refer to a character by ID instead of by name (this helps a lot with character names that have non-english characters in them - turns out this broke some triggers and effects).
This also means that if a character is removed from play - say, through a purge - they are automatically removed from all roles that they could have, which makes such systems a lot easier to do script-side. It also means that if we wanted to allow Zhukov to become a country leader, we could simply add a country leader role for him in the character file, like this:
Or we could also add the role later on, via focus, event, decision... like we do here with Beriya:
hat means there is a lot less confusion and duplication of effort necessary when putting a character into a new role, since stuff like portraits, name etc. are already handled. A broken portrait only needs to be fixed in one place instead of five etc.
Once defined, characters are recruited in the country history file in order to be added to the game. As you can see in the first screenshot, you can use visible triggers for unit leaders to ensure they are not shown if you don’t want them to be.
Characters that can potentially become country leaders are made into country leaders using the promote_character effect, like so:
This is a clear departure from the practice in the live version of the game, where you would create a new country leader in that effect. The old script with create_country_leader and other such effects should still be working, but obviously you don’t get any of the advantages of the unified character system.
So let’s talk about some more things you can do with it!
You can set and check character flags for nefarious purposes:
You can change the traits of advisors without having to make a whole new advisor:
You can check if a character is a certain type of character:
You can save the character as a variable to refer to them later, such as spamming debug messages in the console!
Tank Designer
Next, let’s talk a bit about how the tank designer works on the backend. It shares a lot of concepts with the ship designer, such as modules and module slots. It does, however, work a little differently in some other, important aspects.
While the system pretends that there are only a handful of chassis (light, medium, heavy, super-heavy, amphibious, modern), this is not technically true. Instead, the system maintains a whole host of other, dynamically created chassis. This allows us to make sure that tank designs with the tank destroyer role actually go into tank destroyer battalions etc.
However, these dynamic chassis are still generated from the base chassis, so any changes to them will carry over.
The roles are enabled and disabled on individual modules:
For the unlock of new module categories, you can then use this on a module to unlock that category:
Railways
Railways function a little differently from other buildings. While they are technically province buildings like forts, they are in reality closer to a building that connects two provinces. A railway line is effectively a series of two-province connections, and the lowest one in the chain determines the level of the railroad connection between two supply hubs.
To make it easier to change and maintain the historical railway setup, we have added an option to draw railways into the nudger tool, which you can access by using the nudge command in the console.
The railway setup is in the supply menu in the nudger, and you can easily add new railway lines to the existing setup in this way. It took me about a week and a half to do the entire 1936 setup, including tracking down reference maps (with a lot of help from some of our testers).
If you want to add railways through script, you have the build_railway effect. It gives you a lot of options, with the most basic one being to lay out the path one province at a time:
This is obviously a little cumbersome for longer railways, especially if you don’t really care about the exact path. For that, you have the option to define a start and an end province:
The game will then automatically generate a path from one end to the other using advanced neural network-based self-learning algorithms that use blockchain (read: I have no idea how it works but this sounds impressive).
If finding the province is too much work, or if you want to be somewhat dynamic, you can even use start and end states (also note that you can specify what level of connection should be built):
Note that you can’t mix these, so you can’t define a starting province and a target state for example.
There are also corresponding triggers like can_build_railway and has_railway_connection:
The first checks if a railway can be built between two locations, while the other checks if one such connection already exists.
Finally, there is has_railway_level, which checks if the specified state has a railway line in it with the specified level:
Miscellaneous new effects, triggers, modifiers
In addition to the things described above, we have added a number of useful things that some of you might find useful:
Building_cost_factor: a new modifier that affects the construction cost of buildings. This takes the buildings from the 00_buildings file, so it should work with mods that add more buildings.
Core_state scope list, allowing you to run effects and triggers on a country’s core states:
Add_equipment_to_stockpile effect can now take a variant name to ensure that you add the right kind of equipment.
That’s all for today, I hope you enjoyed these little insights and we are all excited about what crazy things you will do with the new tools at your disposal.
Hi all, and welcome back to today’s developer diary!
It can be very easy to get super-focused on details when looking at individual systems or parts of features - something we often tend to do when writing developer diaries. Each week, we’re going to give you an overview of a core system that we’ve so far introduced in parts, and will include all of the changes we’ve made to that system over the course of development, since we first looked at it.
In addition to this, we’ll also take a look at some changes coming to the AI in No Step Back, so if that’s more your jam, feel free to skip to the end ;D
We’ll begin with an overview of the Officer Corps:
This image represents a near-final take on what the office corps screen will look like.
As you can see, the branch chiefs, theorist, and military high command have found their way to the officer corps screen, though for ease of access you may still view and appoint them in the country overview screen like before. This kind of change is the sort of thing that comes up during playtesting - while it made sense to collect similar things together, there was no good reason to change the player’s flow expectations.
The manner in which you’ll appoint advisors has changed a bit. We decided during the officer corps development process, to make a bigger deal out of the advisor ‘level’ (specialist, expert, genius) that all non-theorist advisors possess. In addition to adding a flat command power allocation (reduction of max command power) which is reduced by high advisor ranks, political power costs are raised by having a higher rank advisor.
Branch advisors now grant daily experience gain, meaning stacking your command cadre well is vitally important to the pre-war development of your military. To add to the choices, doctrines now cost experience rather than being something you spend a research line on:
For owners of No Step Back, military branches also possess several specialization options in the form of Military Spirits, which are also unlocked with experience:
We found during development that less was more when it came to creating a tightly balanced set of choices, and we’ve limited the number of options in each category to around six, with each category being strongly themed around Academy, Military Service, and Command.
To add slightly more nuance to choices here, we ensured that several options in each category would be made available based on situational factors - ideology, doctrine branch, and in rare cases, country choice, can all make new choices available.
The most important part of cultivating a strong officer corps, is the ability to give your trusted commanders advisory roles. Commander traits earned in active combat can make your characters eligible for specific advisory roles:
Characters promoted to advisory duties this way will continue to advance their advisory rank as their commander level increases - a highly experienced field commander will grow from specialist to genius over the course of their career.
Lastly, we are introducing the preferred tactics weighting system. This allows you to set a national, field marshal, and commander-level preferred tactic, which will weight the chances of picking said tactic in a combat situation. While the national preferred tactic can be switched out for a cost, selecting a preferred tactic for your commanders and field marshals is something that remains a permanent choice, representing their adherence to a particular doctrinal theory.
Of course, a host of minor changes accompany the officer corps, including new alerts, better resource tooltips, and adding some of this information into intel ledgers for opponent countries.
The AI
And now, on to a topic that is sure not to evoke strong opinions from anybody here: the AI.
During the development of La Resistance, work was begun on adding additional tools through an imgui that allow modders and users to see various internal data. In NSB, a significant amount of time was spent adding to this tooling and providing support for future AI development, as well as laying the groundwork for easier iteration on AI behaviour and more.
One of our new in-game tools for assessing AI font priorities. These tools will be available for modders, who can continue to fine-tune AI for their own needs through the use of strategies and defines. Here, you can see that the AI has evaluated the topmost defense order as desiring a minimum of 7 divisions, an 'ideal' count of 8, and a maximum count of 50. Defense orders tend to fluctuate quite heavily in 'ideal' unit counts: they tend to be quite elastic to make up for units not needed elsewhere.
While much of the work done here was investment for the future, we’ve also made some pretty big changes to the way the AI evaluates where it commits its troops and more.
While it can be hard to indicate objective improvements in terms of AI, there are several key areas we aimed to improve for this release:
Use of specialized divisions - the AI for assigning armor and special forces to appropriate fronts has received some improvement. The practical upshot of this means you ought to see fewer armor divisions assigned to inappropriate orders (garrisons, pure defensive lines etc), and mountaineers used in frontlines that have the right terrain types.
Did I mention the AI likes tanks? Unit weight distribution - combined with the new supply system, the AI evaluation of where to put units has been totally overhauled. In practical terms, this is likely to manifest as seeing the AI commit more troops to defend key areas (ports & coasts), care more about the active supply situation on frontlines, and provide something slightly resembling a defense in depth for their own core territory, even during active frontline pushes elsewhere.
You can see that the AI considers supply carefully when assessing front unit distribution. There are certain circumstances in which the logical supply capacity of a front can be exceeded by the AI - notably when a defensive frontline is facing a numerically superior foe, or when the AI determines that it needs to win a war fast.
Once Moscow has fallen, the supply situation can get pretty dire as you push east.
Naval Invasions - logic for AI naval invasions has seen significant improvement. You should be encountering larger, less frequent naval invasions overall. The Ai will try to take advantage of weak points in coastal defences, and generally be more keen to invade to support theaters. This got so scary we had to turn the new capabilities down several times (of course, these can be tuned back up).
Counters - while it can be difficult to determine a ‘right’ time to switch templates or create a specialized template, we’ve improved logic for majors utilizing specialized divisions such as Tank Destroyers in relevant circumstances. You should see the AI care a little more about what you throw at it.
Buffer Fronts - Several AI strategies now involve the use of buffer fronts. These are specially defined area defense orders which will request a proportion of national divisions to man them. Where these differ from regular garrison orders, is that these fronts will ‘loan’ their unit distribution counts to nearby fronts or invasion orders.
For example, the heatmap below show the distribution of US troops several months prior to Overlord. The troops stationed in Alexandria and the UK are using buffer fronts, which will supply frontlines in europe, in order to avoid having to relocate troops from much further away. Here you can see the (somewhat anachronistic) defense of Greek territory being supplied by the buffer front in Alexandria, which is in turn supplied with divisions from the US mainland (arriving through the Mediterranean).
The locations and weightings of these are instructional only.
Join me as I take on the task of surviving as Poland against both the Soviets and the Germans in the upcoming No Step Back expansion. This diary will function as a sort of compilation of the new features. Normal caveat is that there might be bugs here, and balance are prone to change. It's also a pretty screenshot heavy diary.
Without further ado, let's start.
1936 - The year of housekeeping
First off let's start with some housekeeping and strategy. I know that Germany will attack first and I can’t properly defend against both the USSR and Germany. My plan is to give up eastern Poland when the USSR demands it to buy myself time and take out Germany, then swing around and take back my lost land.
Therefore I’ll focus my industry buildup on western Poland since I plan on losing eastern Poland, thus limiting my potential losses.
We start off with the looming peasant strike, which we need to deal with eventually but I like to start out taking care of Danzig first since it gives some easy factories and only takes 35 days. The strike is on a long timer so there is currently no emergency to deal with it from the get-go.
It is also the path where you can get rid of the Embargoed Economy law which is quite crippling. Since I need to build up compliance it takes some time to get rid off it, so I like to get that ball rolling as quickly as possible.
I know that I will need to increase equipment buildup since Poland has lots of borders to cover. I plan on making cheap tanks later on as well just to deal with basic infantry.
I am a bit worried about German bombing, both against my troops but also because I know that the AI likes to bomb trains, so I plan to make a token air force just to intercept bombers as well as AA tanks and get AA into my divisions.
1937 - The year of toaster buildup
I have started my industrial buildup and in early 1937 I have completed all the must have industrial focuses that I want. There are still quite a handful of very nice focuses to take here, but time is of the essence and I need to deal with the political focuses as well. I am on a very tight deadline.
The national defense fund is particularly good to kickstart the Polish industry.
I have also dealt with Danzig and achieved enough compliance to Ban the Nazi party. This will get rid of the crippling trade law. After that I will switch to dealing with internal politics.
While the industrial buildup was ongoing I was a little sneaky. Krystyna, the gunslinging seducer has quietly infiltrated the Reich with the end goal of preparing a collaboration government to make it easier to capitulate Germany.
I also started hiring military advisors for additional XP gain. Since historical Poland can’t farm XP in Spain, advisors are the next best bet.
This reduced my total command power cap, but it's more than worth it. I will need it to unlock doctrines but more importantly, design my tanks.
Mid 1937 - The April constitution
It's now mid-1937 and I am starting to deal with the internal politics of Poland. As I do this people will get more and more irritated, and I would rather avoid a civil war, but I don’t like spending 100 pp to sideline people.
Luckily for me most of the focuses in the Sanitation path can be used to modify the left and right irritation (I like to think of it as a big aspirin). There are also some really nice “bonus” focuses that can only be taken as long as you are dealing with the Sanitation, and then becomes locked out that I want to try and take. You can kinda mix and match which of these bonus focuses you want to take, depending on how much of a rush you are in.
I get the sense that someone is considerably more annoyed than the other
At the end of it all I manage to keep everyone relatively happy without too much effort.
I managed to pick up some focuses along the way, mostly advisors that will help me later on. It is now December 21’st 1938 and I am starting to feel a tingle in the back of my neck. Surely it's just my paranoia. No one is out to get me, surely.
Early 1939 - Defense prepping
So, no ones really out to get me, but just in case I start to plan for all eventualities.
Before I go back and finish up the industrial focuses that I left behind I do a detour to take Plan West, which gives me some hefy temporary construction bonuses for forts.
At this point I start to look into what type of spirits that I have available to me. Theatre training looks pretty tasty for getting terrain traits much faster, and is relatively cheap. This is a grand battleplan exclusive, but I don’t feel that I have enough XP to switch as I currently need it for other stuff, and it's pretty ok for defending.
Designing a tank fit for Poland
When all this has been chugging along I have been researching tank modules. As said previously I plan on making a cheap tank that can deal primarily with light infantry. I need to be rather quick to deal with the German enclave in Köningsberg, while also working within the rather modest industry output that Poland has to be able to get out any divisions before the war starts.
It does not have fancy bells and whistles that other tanks have, but it is relatively cheap. With a Automatic cannon it's also moderately good at taking out infantry, but terrible at going against anything else.
This means that I need to focus these tanks on infantry v tank battles and avoid German panzers as much as possible.
Armor is also quite low, but as long as the infantry does not pierce it it's fine. I usually prefer welded armor since it provides a good balance between cost and armor. I use Christie suspension and Gasoline Engine to boost the speed of the tank considerably, and a 3 man turret for some extra breakthrough, with a radio to provide some extra breakthrough (gotta have the Poles being able to listen to the latest hits)
I am also setting up a separate tank construction for some AA tanks, which is using the same modules, except I am changing it from a Automatic Cannon to a basic anti air gun
Late 1939 - Not peace in our time?
Uh oh
This is how I am currently doing. I have 3 tank divisions in the field, 1 army guarding against attacks in the south, and 1 ⅓ armies defending central Poland, mainly huddling behind rivers. A full army is preparing to take out Köningsberg and then switch around to face the Germans. As the Germans starts to pile in I spring my trap, reducing their supply to buy myself some time
Early on in the war and I am getting pummeled by CAS and Tacs, and even though my token air force manage to mitigate some damage I am quite happy that I have equipped my divisions with AA
Early in the war I am getting pushed on some fronts but I am sticking to my original plan, following the railway and sniping the ports. Katowice is lost pretty quickly, despite reinforcing it with forts. As I push into Memel I realize that my supply is getting awful. I don’t want to have to build railways at this stage as my industry is strained already. I try to alleviate the issues by motorizing the node closest to it. It did improve my situation a bit, but not enough to solve it. In November there has been some back and forth. The Germans are piling up as I try to make another push against Köningsberg. I also manage to take over and link up a new Supply hub in Allenstein A thrust has begun to form, and they are pushing quite hard as well. I need to finish Köningsberg fast. Things are looking a bit bleak, but in the darkness there is a hero ready to rise. It's Romania.
Romania coming to Polands aid, colorized
I convinced my neighbors to join our cause, and there they come, a shining beacon of hope.(A better love story than Twilight)
With the aid of the Romanian allies I managed to perform a push to take back some land, but in my negligence the Germans sent some medium tanks to Memel and quickly started pushing me back. As feared my automatic cannons could not deal with these tanks, and supply flow deteriorated quickly as supply lines were cut.
I used some of the XP I gained to add Quick Improvisation. By doing this I got the ability to do several force attacks in a row, finally cutting off Memel from the tanks. They are stranded now. With one last force attack I manage to finish the cornered Memel guard off, stabilizing the front.
1940 - Death on the Reich
With the last pockets dealt with and Köningsberg that entire army is free to deal with the German front. Poznań and Łódź will be my 2 first targets since they contain a lot of industry that was lost early in the war.
Planning to go on the offensive decide to promote Marian Rukiei, my field marshal, who has now leveled up enough to be able to be an Chief of Army. After that I plan my attack. I can see that the railways that supplies the Polish front is largely supplied by 3 points which if cut off, would create 3 breaches that would force the Germans to either fall back or start taking logistical penalties
2 of those are supply hubs which, if I take out, should force the Germans to leave Poznań . I can then go via the sea, taking the ports there for added supply all the way to Berlin.
One rail junction to the south is also susceptible to being cut off, close to Brno. I doubt I will be able to take it in the first offensive but if I can I will go for it. For now reclaiming my core territory takes priority so I will go for the two supply hubs.
Shortly after Hungary is doing what Hungary does and declares war on me, cutting a large portion of my force away from supply. I force deploy my now freed army via rails to respond. While it might have looked bad for a second it has opened up an opportunity elsewhere. I redeploy my tanks…
A coordinated push with my tanks later and Poznań is retaken, a pocket is encircled and the Berlin railway is cut off. Romania is struggling in the south against Hungary. My race-cars sees the opportunity and…
A temporary victory to be sure. The tank is alone and the railway is unguarded. I have some spare units to redeploy and I pray that they will get there in time.
Alas the tank was encircled and destroyed, but it did pull enough troops away from the front to allow me to advance and redeploy troops. With overstretched supply lines I stop my advance to allow the railways to be regauged.
As I have unlocked some tactics I set mine to Elastic Defense for some extra defense. I would have liked to have Blitz
But I feel that I don’t yet have enough tanks to make do with this tactic. I'll switch it around later Through some shenaniganry Germany managed to get a hold of Norway and Sweden. I set a small task force to deal with this. It should be simple as I took every German port, so even though I know that there are German units guarding it, they are basically sitting ducks.
As expected the Soviet Union finally woke up and on the wrong side at that.
Although I planned for this already I cant resist leaving them a parting gift
As the end of the Third Reich draws near I draft plans for doing after the USSR. The tanks made at the start of the war are now inadequate to go up against the Red army and as such I am drafting new designs
Tank destroyer with a high velocity gun and a Squeeze-bore adaptor for extra piercing
Main battle tank with medium canon and wet ammunition storage
Anti air
Flamethrower tank (these are support companies, which mainly gives attack boost modifiers to Urban, Jungle, Fort and Forests and are mutually exclusive with engineers)
1942 - Death throes of the axis
In the first month of the new year Germany finally capitulated after a series of tank offensives. Supply started to become an issue, first due to lacking trucks for motorization and after a while just due to the sheer amount of troops in the field.
The last city to fall was Vienna (I am super happy that I did the initial collaboration government , otherwise I would not have enough victory points.
The state of the world
I grab my tanks to go straight for Hungary and Italy. Obviously I prioritize Hungary first to liberate the Romanians (yes I know I should go for Italy but it’s not my fault I get emotionally attached easily). Although I am stopped pretty quickly due to the German remnants holding key strategic railways which prevents supply from reaching the new front.
Once the railways are fixed Italy is a piece of cake to steamroll since they lost most of their troops in Germany.
The final tally of the war is as follows. The vast majority of casualties inflicted (90%) on me was early in the war from Germany where I struggled the most.
Post peace conference looks similarish to what it was during the war, with the added wormy southern Slovakia in the middle of it all as a bonus The absolute nerve. Its alright we don’t need them where we are going
I now have time to prepare to retake Eastern Poland
1943-1946 - Years of the big quiet
Fast forward a couple of years to rebuild my armies to take on the Soviets. Not much happened in between since the bad man was destroyed.
I now have an army of tanks ready, with an army of mechanized to follow up behind them. I got the cost of mechanization down to quite low by upgrading its production cost.
I also produced some Railway guns for support, which now give these effects (as per popular request)
And this is how my tank template current looks like
The plan is to follow the Kiev line up to Moscow since its mostly plains.
I want to avoid the north as much as possible since there is mud and marshes galore, which really makes offensives difficult.
I also sent a part of the army to Burgas (Bulgarian coast) in the south (which was why I grabbed that part of Bulgaria to begin with) to make a naval invasion using mulberry harbors into Baku to cut off the oil for the Soviets. I formed the Międzymorze to invite Turkey into my faction since I couldn’t get access with my submarines otherwise.
With everything planned and ready I guess its ok to knock and see if anyone's home?
I successfully land on the shores near Baku. Some of the divisions land without a port, although that is no problem at the moment since I have mulberry harbors, so I don't have supply issues, but I need to take a port for permanent supply quickly.
As you can see I also have transport planes delivering supplies by air, stationed in Turkey which also helps in really bad areas.
When I land I am met with fiery resistance and although I manage to take a port before the mulberry harbor is destroyed I realize that I will be unable to take Baku immediately. Although an opportunity presents itself as Sevastopol is vulnerable and lightly defended. I take 4 tanks and zoom across the Island, managing to encircle a lot of the Soviet southern front.
As the southern front collapses the Soviets are forced to retread from Baku to fill it In the meantime a titanic air battle is happening in Eastern Poland. The enemy is trying to bomb my trains, and as the majority of my trains are War Austerity trains that leaves them vulnerable to bombing and disruptions.
As the caucasus frontline is in shambles I see an opportunity to cut off the entire supply chain. The entire frontline is supplied by just one railway, which I manage to cut off. Effectively forcing the Soviets to retreat towards Stalingrad
As the year comes to an end I have pushed quite a bit into the USSR. However I am having a harder and harder time advancing towards Moscow. The city of Bryansk is giving me quite a headache as it's quite well defended and attacking cities from multiple angles is less effective than other terrain. It also has a supply hub that I need in order to advance further, and my lines are quite stretched.
I stop for a while, build up the railway and then let them eat 2 nukes to the face. After that a breach is formed in the frontline as my tanks push towards Moscow. At its gates fierce fighting commences.
It does not help that it's January and a lot of the provinces outside Moscow are in deep snow. The red army is pretty exhausted at this point with most of its armor being destroyed. Eventually Moscow falls under a barrage of tanks, fighters and tac bombers.
During this Leningrad falls under a combined assault from Sweden by the allies and Rostov is encircled, entrapping a lot of the remaining southern army that defended Stalingrad.
1947 - The year of “please just capitulate”
Even though a lot of the army that defended Stalingrad is dead and the red air force lies in a scrapyard somewhere it is still somewhat tricky to take as the red army still controls a long stretch of the railway.
Trying to take Stalingrad head on is still impossible, so I focus on cleaning up the infantry protecting the Stalingrad outskirts. As supply becomes better (relative) I can finally perform the last push and take the city. This puts the USSR quite close to capitulation, and I only need to snipe a few victory points. Casualties just before Stalingrad capture and their eventual capitulation.
That's that! I tried to show off as many features as possible, and I hope you enjoyed reading through my craziness.. Now I guess there's only one thing to do, as a reward for being a true friend in need
Today we have two important topics to cover, for which we have reinstated @podcat with a battlefield commission, in order to detail our latest efforts to combat the width meta. In addition, Comrades @Bratyn and @Wrongwraith return for a dive into changes to the Soviet Exiles branch of the focus tree, based partly on community feedback.
Combat Meta
Hi everyone, @podcat here for a little guest appearance to tell you some more about the combat changes coming with Barbarossa. Back in the Combat and Stats Changes diary we outlined our quest to break down the 40 width meta and try to combat an “overall best division”. In there we outlined several changes such as varying terrain width without easy multipliers to exploit (meaning you can still make optimums for particular terrains but not all), as well as reduced penalties to going over widths.
To expand on this we have changed how targeting and damage spreading works. One way 40 width (and also larger) divisions were stronger than smaller ones was how they could concentrate all of their damage into one target overpowering defense more easily. Targeting is now changed so that divisions will select targets up to its own width (so a 40w can fire on two 20w), but doing so spreads the damage over them relative to their width (and just to be clear, it’s not just for 40w. This applies to any widths that match up like 30+10 say).
‘tis mathematics innit
With these changes I can say that I am not really sure what the best meta is anymore. I think there are likely some optimums depending on your opponent and location (when balancing Org versus cost and piercing and such) but what that is I look forward to see you players try to figure out :)
We also have one more change that I think will have a pretty big impact. When deciding if a division can reinforce to the battle line inside combat we no longer check in order of the order they joined combat, but instead we will now pick randomly among all waiting divisions with their chance weighted by their reinforce chance. This means that to optimize reinforcing you no longer need to pull micro feats to get the right divisions in order, and can much more safely toss in your newly designed tanks to save the day in an ongoing combat. Also, don’t forget your signal companies, they should be more impactful now!
Soviet Changes
Hi guys! This is @Bratyn and @Wrongwraith, part of the CD team on the Exiles branch for the Soviet Union. The last month has (other than lots and lots of keyboard-scrubbing...) seen some significant changes to the branch, and while we’ve kept much of the original design, we’ve also incorporated feedback from you guys, the community, and did some further iteration of our own on how the tree looks and works.
I believe we mentioned last time around that the civil war was hard if you chose to go down this path of the focus tree. Really hard. “Realistically hard” someone might argue. "Unwinnable", our testers might say. And while that might be to some degree realistic, it isn’t that fun. So we decided to make it _slightly_ less hard, while also introducing a few new elements to make the war even more interesting. Among other things, you now use Command Power to recruit units, rather than Political Power. And we have increased the amount of things you can get from countries supporting your cause.
We also added a few new focuses.
As you can see, the main structure of this section is similar to what it was before, with some minor changes. Maybe it should be stated at this point that most focuses are short focuses. The new ones that you can access before the war are these:
Why do you need these? Well You really, really need to be the one triggering the war, and you want to ensure you have control of as much land and units as you possibly can. So you need to be juggling your PP’s and CP’s while keeping an eye on the Political Paranoia of the Soviet Union. If Stalin starts the war before you are ready, it will still be very hard to win. And in order to do the latter, you can use the Covert Operations focus to try and divert the attention away from you - by providing fake evidence that e.g. the army is plotting against the state. This will cause an inquiry into army affairs, and this in turn will both damage Stalin’s army, and lower the Paranoia level temporarily - allowing you to continue with your schemes. The other new focus here is intended to give you a better supply situation when the war breaks out. Fighting through Siberia can be tough. Extra so if you don't have a supply system that supports it. So why not get some more help from the Japanese, right?
But I suppose the most interesting thing is this set of Focuses:
What do they do? Well, they give you different options in how to deal with nations that declared independence during the civil war…
A number of countries can declare independence during the war, especially if it drags on for too long. You then get the choice to see that as an act of war, or as a potential ally (for a while at least). Getting help from minor nations can be a good distraction, and something that can greatly reduce the time you need to fight against the Bolsheviks. However, being the empire -wanna be, you might not want that situation to last forever, hence the post war options.
This, together with a few other events that can happen during the war, should make the 2nd Russian Civil War winnable for the exiles, although still a challenge.
Some of the biggest criticism we received from you was the fact that the Western and Eastern expansion branches depended on whether you went down the Tsarist or Fascist branches. And rightly so! It made no sense to arbitrarily lock some of these options behind an ideology choice; a Fascist Russia would certainly have cause to wish to reconquer in the West, and a Tsarist Russia might well have even more reason to exact vengeance upon the Japanese than the Fascists would.
Making these two expansion paths available to both branches would, however, mean other focuses were required to continue to offer a unique identity to both of the ideological branches. Some people suggested more focuses geared to creating alliances, and we paired these with certain focuses intended to offer some flavor to the branches. This is the current state of the post-civil-war branches:
The difference will be immediately apparent. The tree has ‘thickened’ quite a bit, with over 10 new focuses, and the branches against Sweden, the Baltics, and Finland on one side, and Japan on the other, are now available regardless of the political choice you made, clustered near the center of the branch. Nothing has changed in these focuses, except The Lonely Island, which, if you relied upon Japanese aid too much and thus were puppeted after the end of the civil war, converts into a “war for independence” focus.
Let’s explore the newly-added focuses. On the Tsarist side, Capital of the Tsars moves the capital to St. Petersburg, and adds a bunch of goodies for the state itself. Reforge the Triple entente does what it says on the tin: reach out to the UK and France to re-establish the old alliance aimed squarely at Germany.
To emphasize old Tsarist Russia’s emphasis on being a ‘defender of the Slavs’, there’s yet another “Slavic Commitments” focus. If you elected to go down Third Rome, this will still give you an option to send guarantees to the various Slavic powers (along with some other bonuses), after which you may invade Romania (The Fate of Romania) to establish a land connection to the Balkan powers. And finally, “The Iron Wall off Russian Resolve” gives major bonuses to research and production cost, reliability, and armor for Super Heavy Tanks, incentivizing their use by offsetting the most detrimental aspect of them (their production cost), and thus offering a more unique playstyle for the Tsarists.
On the Fascist side, Russian Corporate State offers some factories and industrial bonuses. There is a focus to create a Berlin-Moscow Axis, and follow-up focus Japanese Overtures allows for an alternative choice to simply avenging the war of 1905 by going to war with the Japanese: you can invite them into the new Axis and secure Russia’s flank that way.
Eastern Expansion is now Fascist-only. After this, there is still the option of meddling in the Americas and, ultimately, declaring war on Canada and the USA for the old Russian colonial possessions on the continent. A second branch can be taken, however, offering wargoals on Afghanistan and Iran, and ultimately leading into Iraq, Turkey (if it hasn’t already been taken as the Third Rome), Syria (France), and India.
These changes should offer a bit more identity to the Exiles branches, while also allowing both to fulfil the ‘basics’ of recovering Imperial Russian possessions in the West and avenging the war of 1905 in the East.
Finally, here’s some pictures of certain characters:
As usual, the tree is still under development, and even what you see here might not match what ends up being released :) See you next week for another dev diary!
Today’s dev diary contains the details of a few smaller features coming to the table in No Step Back. In addition, I’ll get ahead of the curve here and point out that there will be no diary next week - we’ll be back the week after with more to see.
Scorched Earth
One of the enduring tactical practices of the Soviet defense during the German invasion, was the use of scorched earth. In No Step Back, you’ll be able to spend Command Power on ordering the strategic disabling of railways in the event of a tactical retreat.
(All visuals WIP!)
Enacted on a state level, every railway present receives full damage, and is immediately flagged, making sure that your eager workers do not attempt repairs.
The pending repairs will show up differently in your construction queue, and won’t be worked on. Rather than re-enable these all manually, you can toggle the state of Scorched Earth off on a state, in the same way it was enabled. All affected railways will begin repairing at once.
Scorched Earth is a pretty simple mechanic here, but has potentially devastating effects on invaders. In addition to the rail conversion time that exists on captured railway, damaged rail must now be repaired in order to continue supply flow onwards. While we considered extending some effects to factories, we determined that this was likely to affect balance far more than we wanted.
Preferred Tactics
We touched on this feature briefly during a previous diary, however, due to some good feedback from the community and from inside the team, we’ve made some alterations to how it works.
Where previously, you set a preferred tactic on a national level, giving a positive chance modifier for that tactic to be chosen in combat, your generals and field marshals will now also possess the ability to earn a favored combat tactic.
At level 5, you’ll be prompted to choose a preferred tactic for your generals. This represents their doctrinal school of war - a choice that affects all units under their command.
Note here, that we are not removing the national preferred tactic, and that the additive weight will compound from national -> field marshal -> general. To pre-empt the question, you can of course stack all 3 as the same tactic, although this drastically reduces your flexibility, and potentially makes it very easy to be countered. The overall additions granted by preferred tactics, have of course been reduced somewhat to account for this.
We wanted to avoid a rock-paper-scissors choice here, and in order to further emulate the core, doctrinal nature of a general’s fighting style, we have chosen to make this choice permanent for characters.
Strategic Redeployment
As we hinted at, strategic redeployment will now make use of railways in order to simulate more realistic army relocation. This applies a different weighting to the regular pathfinder, resulting in choices that largely look sensible where routes of a similar weight are encountered.
Here, we take a train followed by a scenic bus-tour in order to avoid the long connection.
Sometimes it becomes difficult to predict what will be considered 'sensible' in every scenario - there will be edge cases where pretty looking behaviour and logical behaviour do not overlap.
That’s all we have for today’s diary - just a final reminder that next week there will not be a dev diary - tune back in on the 29th!
As usual, I’ll be around to answer questions in the thread below!
It’s time again to reveal some more secret information that was hinted at in the last dev diary. Specifically this week will be revolving around the final part of railways and trains. So without any more need for introduction here are our stars of the show today.
The railway guns.
So to start off I'll go through how you get a railway gun on the map because it’s a little different to normal land units. First of all you are going to want to research railway guns which comes after armored trains
Then you can find it in your production tab just like building normal equipment. But unlike other equipment you build, these production lines are limited to 5 factories and the railway gun won't be added to your stockpile.
Instead, once completed, your brand new railway gun will appear in your capital, in this way they are built similar to capital ships.
Moving your railway gun is limited to provinces with railways, and so to get to the front you must have a rail connection. Taking into account the rail conversion time when capturing territory is important as you will have to wait for the big guns to be able to help you out.
You can also attach railway guns to armies just like with planes and they will attempt to place themselves relative to the frontline. If you have several, they will be distributed where possible to support your army. There is also a quick select button on the army to select all railways guns attached to an army should you need to.
Finally, the last bit of control understanding is range. Railway guns have a range in which they can support and so from any one point are limited in which provinces they can support. This range is shown by hovering over the unit icon.
On to combat now, here we can see a combat with a supporting railway gun, we have added the useful icon on the combat progress indicator that there is a supporting bombardment. This new icon will also show if there is shore bombardment happening in the combat.
The combat effects of railway gun bombardment work just like shore bombardment, causing negative combat stat modifiers to those on the receiving end of the big guns. These modifiers affect both soft and hard attack as well as defence values. Notably, these effects do not stack - it becomes more important to spread out your railway artillery than to concentrate it.
Finally we need to talk about capture and damage, railway guns can be captured via encircling them and damaged by damaging the railway they are placed upon.
Now railway guns are the biggest guns by far used on land and so it's important that we have representations of those built by the major powers. So now we look at the unique guns for the major powers.
This is the german Schwerer Gustav model you will see when playing as the germans. It's perhaps the most famous railway gun and definitely the biggest and so had to have a part in this feature.
This is the BL 9.2inch railway gun, a relic of the first world war but these big guns were kept in service until 1945.
Following that we have the french Canon de 305 another veteran of the first world war.
Next up is the USA’s 8-inch Mk. VI which remarkably first entered service as late as 1941!
Type 90 240 mm railway gun whose claim to fame is being destroyed by the retreating Japanese in the soviet invasion manchuria.
And finally the TM-3-12, three of these were made in 1938 and were used in the winter war against finland, unbelievably these where in service until 1999 (a whopping 61 years of service)
Finally here's a cool clip of the Schwerer Gustav firing in game.
Greetings, and welcome back for our last look at the supply system that ships with the Barbarossa update. As you all know, I’m British, and in Britain the trains never run on time - I couldn’t possibly break with this tradition, hence a completely intentional 10 minute delay on today’s diary.
There’ve been a couple of changes since we last looked at this, so you may find I’ll be reiterating a few aspects that we’ve already covered in previous diaries, albeit in some cases with a new twist.
Trains
As indicated in a previous diary, the logistics network that supplies your troops relies on the large-scale relocation of supply using trucks and trains.
Whereas trucks serve as an optional last-mile carrier for military supplies, trains make up the backbone of any logistics network that supplies an army which exceeds the local state supply available in its location.
The domestic production of trains is something that is unlocked via the technology tree. Many countries will start with the initial (civilian) train technology readily unlocked, however, there are several more options available to you as time progresses (more on this below!). Your overall train need for the logistics network is derived from the overall supply usage of the nodes supplying your troops, and the distance factor that supply has to travel in order to reach them. In essence, the more troops you have drawing supply, the more trains you will need to keep supply running.
Needless to say, if fewer trains are provided than are required, supply output at point of demand will incur penalties proportional to the magnitude of the shortfall.
In one of our previous diaries, we alluded to a number of interactions that could be performed on supply nodes - one of these was a train priority setting. It transpired that this did not fit well with the underlying simulation, and we’ve removed this setting from nodes.
Logistics Strike
Of course, a freight-train loaded with supply makes a juicy target for the enemy. In NSB, CAS and bombers are able to perform the new logistics strike mission, which can put a severe strain on an enemy’s ability to supply their network - actively destroying trains and trucks, as well as damaging railways in the target area.
The strategic bombing air mission will also target rail and supply infrastructure, however the logistics strike mission is a much more effective way of neutralizing an enemy’s fighting capabilities while retaining important industrial infrastructure if you intend to occupy an area for any period of time. Train Variants
As mentioned above, trains will be a researchable technology with several variants. Trains, unlike regular units, are not controllable - their movement and behaviour is entirely simulated based on the needs of your logistics flow. This said, there are several important statistical aspects to them. To begin with, most of your network is likely to be populated by civilian trains. You can construct more of these by co-opting military factories. Further on in your campaign, you can unlock a variant of the civilian train with a significantly reduced construction cost.
To combat the strategic mission mentioned above, there is one (or..is it more?) further item in your toolbox for owners of the NSB expansion. Armored trains, while coming with a higher price tag, are much more resistant to destruction from air missions, and can act as an effective deterrent against logistics disruption.
Train enthusiasts (we have none of those here, right?) will note that the trains displayed above belong to the soviet union - there is indeed unique art as well as 3d models for several other major nations. A highly camouflaged train in action. Displayed trains are based on your stockpiled train equipment. This is the german armoured locomotive!
That’s all from me for today - I’ll hand over here to @YaBoy_Bobby to go over some of the details on supply distribution at a hub level:
Hub to Province Supply Distribution
We have talked about how trains and rails feed the supply hubs, but not so much about how hubs feed divisions in the field. As hubs are fed from the capital province by a rail network, divisions are fed by hubs over land.
Every Hub has an overland range that gives it a collection of provinces that it touches. This range is constant, but the cost of moving over each province is impacted by things like weather, terrain, rivers, and infrastructure. Motorization decreases the penalty for crossing each province, thus increasing the number of provinces a hub will touch and potentially creating greater hub density and thus greater overall supply in an area. As has been alluded to with the phrase “hub density,” a province may be touched by multiple hubs. When multiple hubs touch a province, a ratio is created to determine what percentage of the supply requested each hub is responsible for. Every hub that touches a province lessens the supply burden of other hubs also touching the province.
In the final step, Divisions draw supply from hubs, depending upon the relationship between their current province and the hubs that touch that province. When a hub does not have enough supply to meet demands, the lack of supply is distributed evenly across all divisions currently drawing from the hub.
In older DDs we talked about a penalty to the amount of supply delivered to a province based upon weather, terrain, and distance. Over the summer we decided to remove this penalty as we found it compounded in a hard to predict way that created bad supply and sometimes penalized having more hubs touching a province in a way that we did not like.
Greetings all, and welcome back for a slightly less content-focused dev diary than our latter soviet efforts. Today we’ll be covering a couple of smaller additions to be added in NSB, some of which have been hinted at before, followed by a small announcement from project management.
Weather 2.0
One of our long-standing goals with the new supply system, was to introduce some changes to the way weather affects the gameplay experience. To give some strategic relevance to weather, we’ve slowed down the system to modulate between potential weather effects on a less frequent basis. This gives a player some time to react to potentially advantageous/disadvantageous conditions, as well as being somewhat more predictable on a larger scale.
In addition to this, we’ve taken a broad look at the combination of stat effects on ground conditions, temperatures, and weather, in order to mesh more closely with the new supply system, and to give a greater impact on campaigns - especially those conducted in adverse conditions:
In addition to Org recovery, weather will now affect org loss from movement, and in extreme cases, supply consumption.
While temperature has no new modifier effects, we’ve taken a pass on temperature data across the world, with the intention of improving accuracy.
Ground conditions now also have the potential to affect org loss on moving divisions. This becomes particularly important in muddy/cold conditions such as the eastern front, where the combination of various conditional effects can severely slow an advance.
New Weather Effects: (WIP)
New Ground Conditions: (WIP)
Visually the weather effects have been updated to be easier to spot on the map, with updated particle effects weather will look better than ever. This also makes it clearer when a region is experiencing a weather event so you can react to it faster.
Equipment Management
In NSB, we’re introducing the ability to manage specific equipment usage by division template. This means you can ensure that your elite breakthrough divisions have everything they need, while line divisions have equipment of a lower priority. Please bear in mind that the interface is still a work in progress!
You can access this new feature in the division designer, where you’ll have a comprehensive breakdown of all equipment types currently stockpiled.
We’ve provided several broad methods of manipulating equipment usage, in the form of a togglable setting on whether this division template should automatically have newly researched equipment enabled, and a quick method of toggling the usage of foreign equipment.
Beyond that, you’ll be able to toggle categories (such as Infantry Equipment II), all the way down to individual variants.
Changing these settings will not incur any explicit cost, though you’ll need to maintain awareness of your production lines when using these settings prodigiously. The update division tooltip, as before, will give you a summary of the scope of your changes, as well as how many divisions are likely to be impacted by this change. Lastly, it is important to note that these settings will affect reinforcement and training only - your existing divisions will not have their weapons immediately confiscated.
Allied Construction
Indeed, as hinted at yesterday, we’re introducing allied construction to the game. This oft-requested feature will allow you to build certain buildings in the territory of members of your faction.
Unlike subject construction, this will utilize only your own factories, leaving your favored ally to continue with their own constructions as before. We have limited the building types permitted for allied construction to Infrastructure, Railways, Airbases, and Radar, however this setting is easily moddable for those interested in expanding their options. We initially allowed the allied construction of forts, but, well, the office MP proved why that was a terrible idea.
For balance reasons, constructions with levels dependent on technology (ie Radar) will be limited by the tech of the recipient country, not the builder.
Graphical Encircled Unit Icons
We've taken the opportunity with NSB to add some feedback to one of the more serious situations an army can find itself in - encirclement. Whenever an encircled division is destroyed, a short animation will be played to draw some attention towards it. Of course, this animation also plays if you are the one doing the destroying.
Changing of the Guard
Here, I’ll hand over to @podcat to cover an upcoming change in the HoI development team.
Hi everyone Dan here, I want to let you know that you’ll be seeing Peter more and more as he is now taking over as game director on Hearts of Iron IV.
Looking back I have been working on HOI4 for about 7 years now and before this I worked a few years on HOI3. So it's fair to say that Hearts of Iron will always be close to my heart, but I also feel like it's time for something new to sink my teeth into.
I’m going to be working with a Secret Project which I can't tell you very much about - except that I am super pumped about it, and that it isn't HOI5. While I’m sure the time will come for that, right now we feel that HOI4 still has room to be developed with content and cool stuff.
Timing wise it fits well for me. No Step Back was the last expansion step I had penned down back when the original game released in 2016 so it's time for another 5 year plan (heh). It takes the game full circle as with NSB we will have touched on all the major systems in free updates and expansions at least once. It's also a perfect time to get more fresh perspectives to help evolve the game when most of my original ideas and plans have now been done.
Of course you will still see me around and I expect I’ll be poking around here and there in HOI (one does not simply let go of their baby so easily!), but I am confident in Peter and the team to take the helm and keep steering the ship now, and I am sure No Step Back will be awesome and that you will all love it.
Et tu, Peter?! Game development is serious business!
Peter here - I’m honored to have been asked to take the reigns on HoI. I’ve been working closely with Dan and the team over the last months, and feel confident that we can keep on building HoI in the right direction.
As some of you will be aware, I’ve come to HoI by way of Imperator, having previously worked on several PDS projects as a content designer. Prior to that, I had a long and entirely unrelated career in classical music. Historical PDS titles are something I’ve been an avid fan of from long before I worked here, and I’m super excited to take my experiences forward from Macedonian nation-building to the 20th century.
We have many plans for the future of HoI so after NSB is safely out of the door, you’ll get a chance to see my take on the future of the game. This said, I’ll point out that Dan and I are very much aligned on the creative direction of HoI 4, so to pre-empt some questions, a switch in game director does not mean lootboxes, mana, or any radical shift in core design philosophy.
What does it mean? Well, it’ll take time to see that properly. We’ve made no secret of the intentions around future dlcs and content (see last PDXcon for more details!), so the best answer I can give you there is that we’ll be doing our utmost to meet this potential roadmap while I begin to put my personal spin on the game. I’m more than happy to try and answer broad questions about my thoughts on the future of this excellent game, my industry experiences thus far, or myriad other topics, but please be aware that (beyond what I’ve already implied) we will not, as usual, be able to answer qualitative questions on future releases.
In general, you’ll find me present and willing to engage in polite discussion on the forums and other media inasmuch as my time allows, so I expect to begin interacting more with this passionate community in the near future!