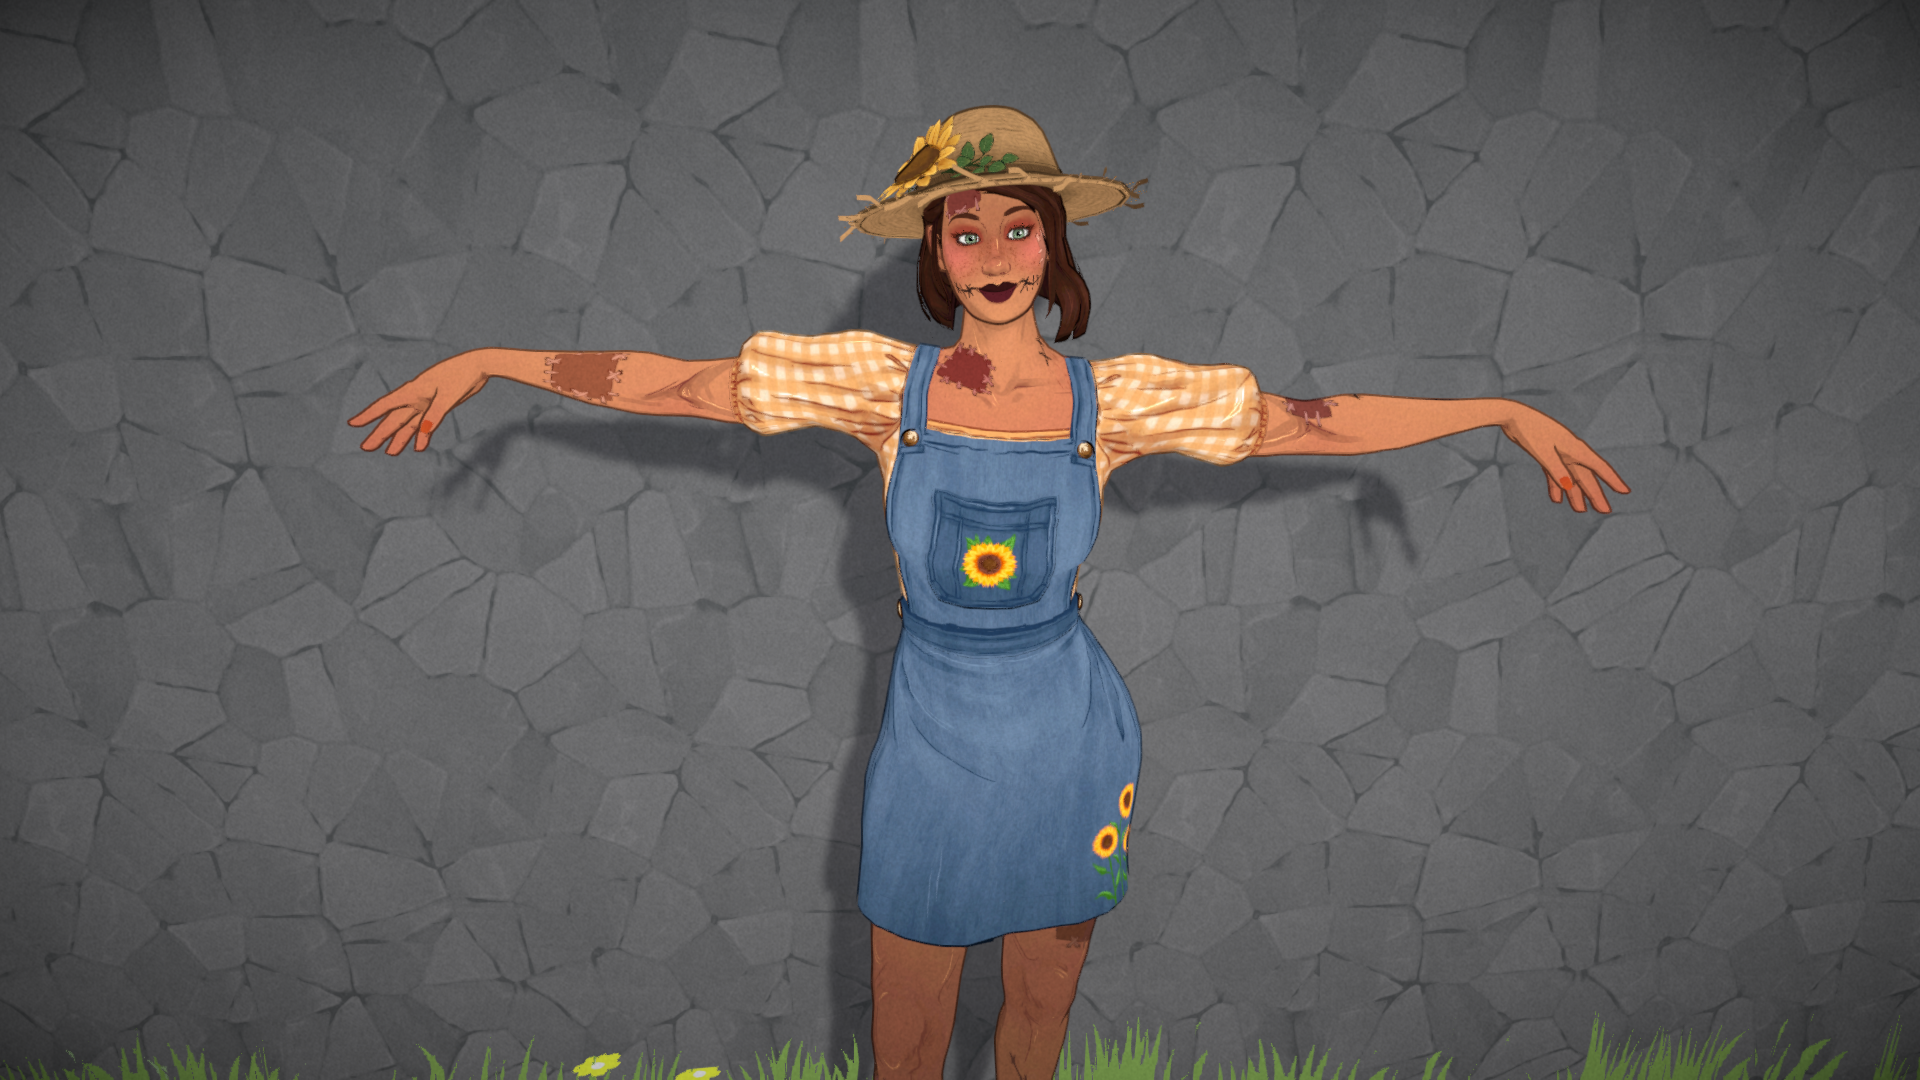
Paralives - Frodonnette
Check out the following Patreon-only Dev Diary now available to everyone!
Click here to read the complete Patreon post!
Hello everyone, it’s Léa!
I’m taking over for a brand new development diary! This week I’m going to tell you a little bit about how we create a piece of furniture or object that you can place into your home in Paralives.
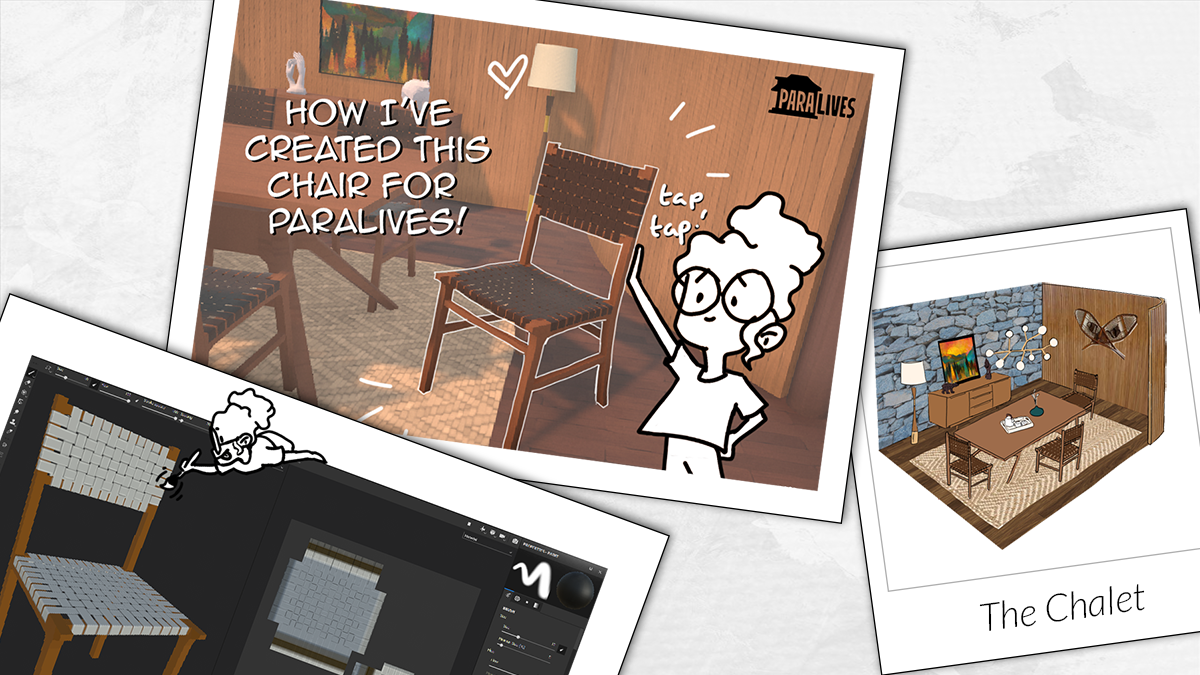
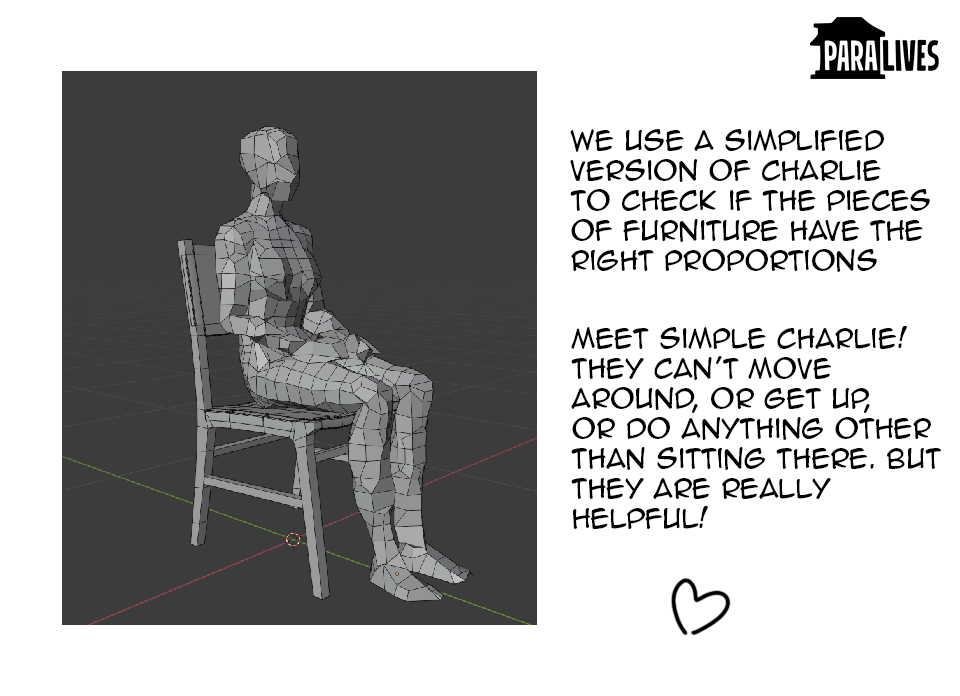
I’m going to introduce you to the different steps needed for the leather straps chair that you can see in the Chalet video. This chair is one of the easiest objects you could integrate into the game, as it isn't resizable and hasn't any fancy properties.
If you’re a beginner in 3D and want to make custom content for the game, starting with an object like this could be a good way to learn how to use our mod system!
This is not really a tutorial since it will need to be quite longer than a Patreon post. When Paralives will be released and the mod system fully ready, we will create step by step tutorials for you, aspiring or experienced custom content creators!
Everything Starts with a Mood Board
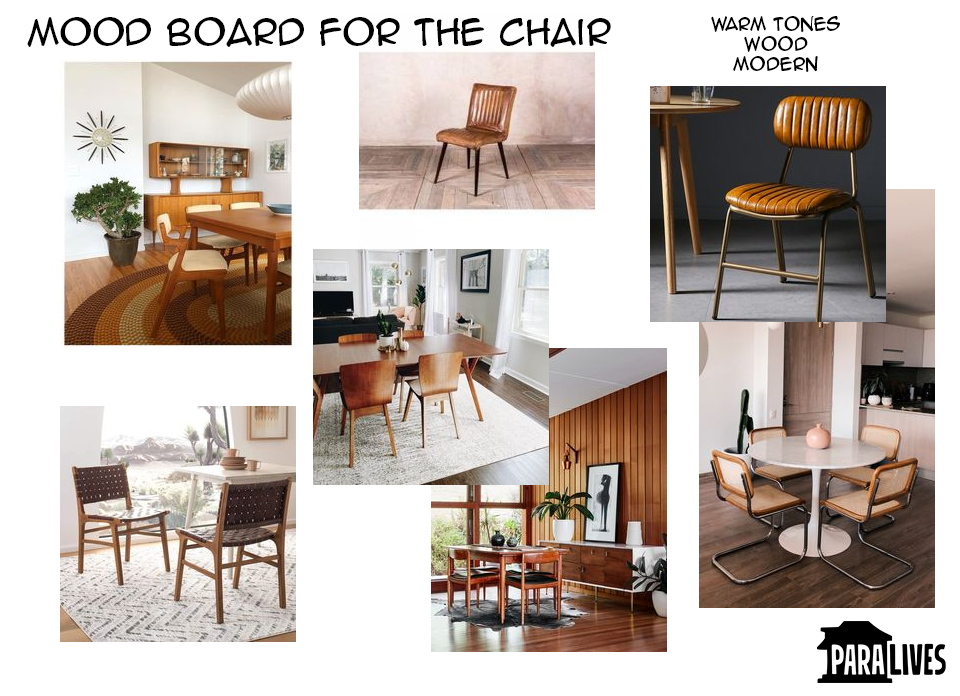
So, a few months back, Alex gave us the green light to start working on the design of the Chalet, the tools were ready for us and we could now focus on what the Chalet would look like, what furniture Sonia and I were going to create for the game.
We started by creating a mood board, which is a set of visual references, that became our best friend for the next steps to come. I looked for cool ideas and made a collage of every piece of furniture that I thought would look good in the game. Having all this furniture lined up helped us choose and narrow down the choices that we had, it also gave the team an idea of the direction that we were taking.
If you are looking for an easy way to create mood boards, Sonia and I are using PureRef, a free software that is heavily used in the industry.
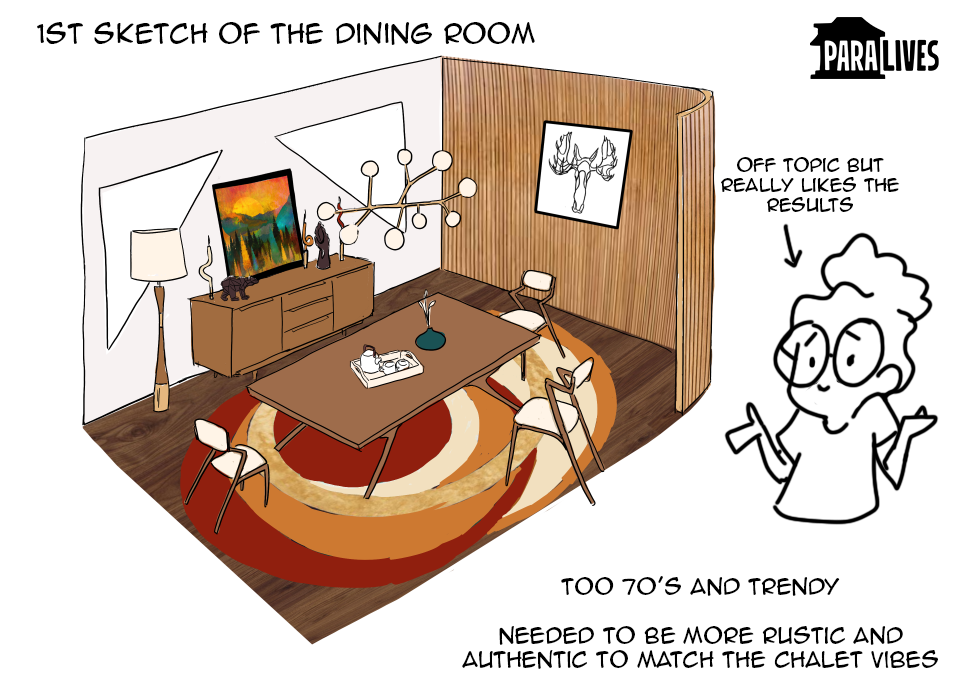
Sketching and Staging the Object
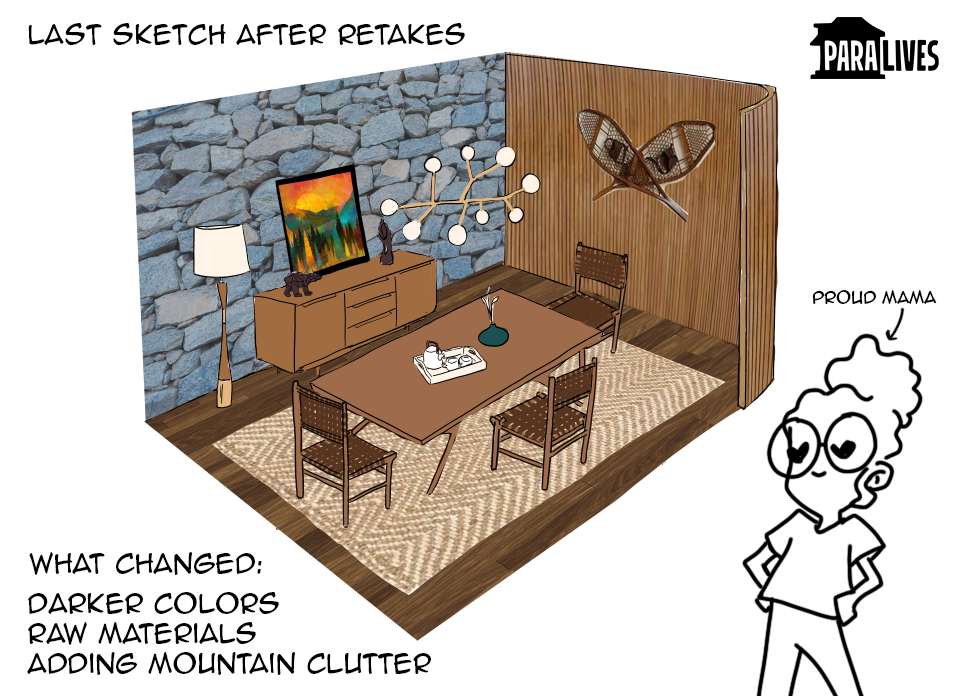
This step is important because we are working as a team. I started by doing a quick sketch of the design I had in mind for the room, so that we could have a starting point for our discussions. Then, we could choose together what to modify if needed. Here, our goal was to stage the object: put it in the room with the others to see if they go well together. We also used it to work on the color palette!
If you are designing several pieces of furniture to create a small collection, this step could be interesting for you: that way you can make sure that everything is assorted and in the same vibe!
The first sketch that I did wasn’t in the right “mountain” mood for the chalet, I went full 70’s. We decided that it wasn’t the look we wanted for the video and chose to have something more rustic, changing the objects, deleting those who were too fancy.
Making the Object in 3D
Ok, the design has been approved, and now it’s time to create the chair!
At the studio, the software we use for 3D modeling is Blender. It’s very convenient for us as it’s completely free, there’s an extended community and lots of resources online. If you want to learn 3D and become a modder, you could use Blender to create your objects for the game, just like we do! There are a lot of tutorials on Youtube.
I won’t go into details on how to build the chair in 3D, but I can explain why I chose to do what I did.
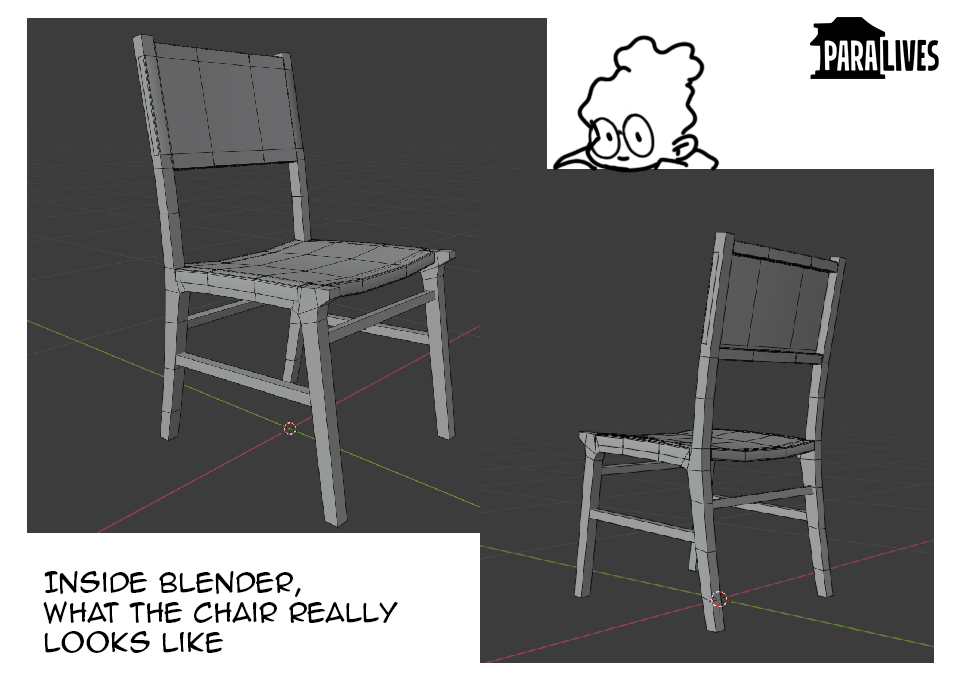
As you can see I didn’t sculpt every strap of the chair. Instead, I chose to have it inside the texture with some transparency, that way I’m keeping the object really simple.
The design of the chair is clean but needs to have personality, just like in the reference, so I added details and curved the legs, for example.
The next step is UV unwrapping: basically, we need to tell the future texture how to place itself nicely on the different points of the object.
Time to export the chair! Our system uses the .fbx format for our objects, which is a pretty standard format for 3D models.
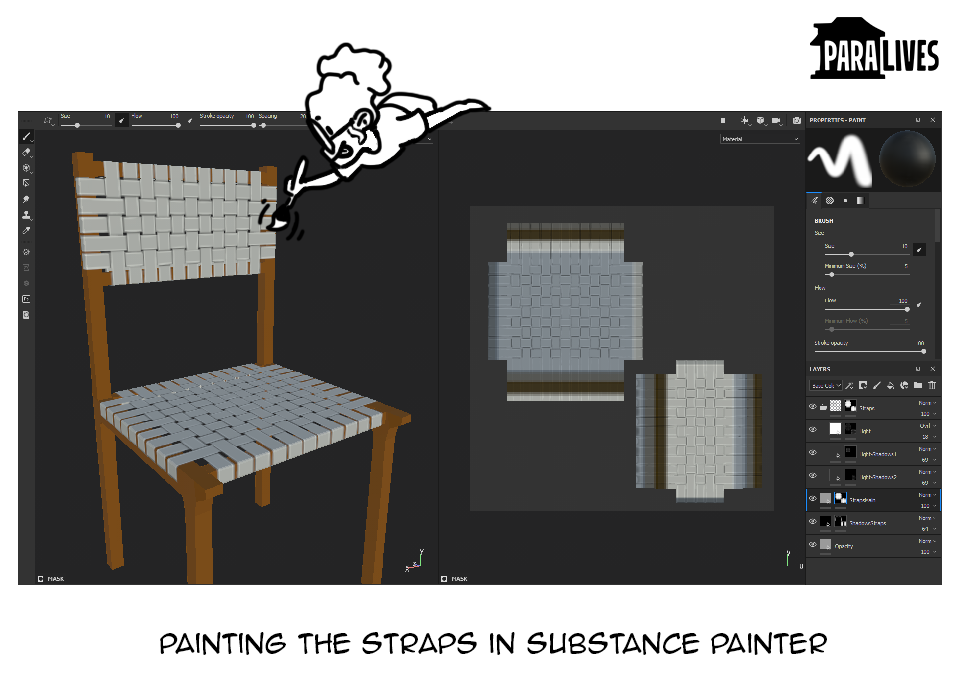
Let’s Draw those Straps
This step is happening inside another software made specifically to draw textures on 3D objects: Substance Painter.
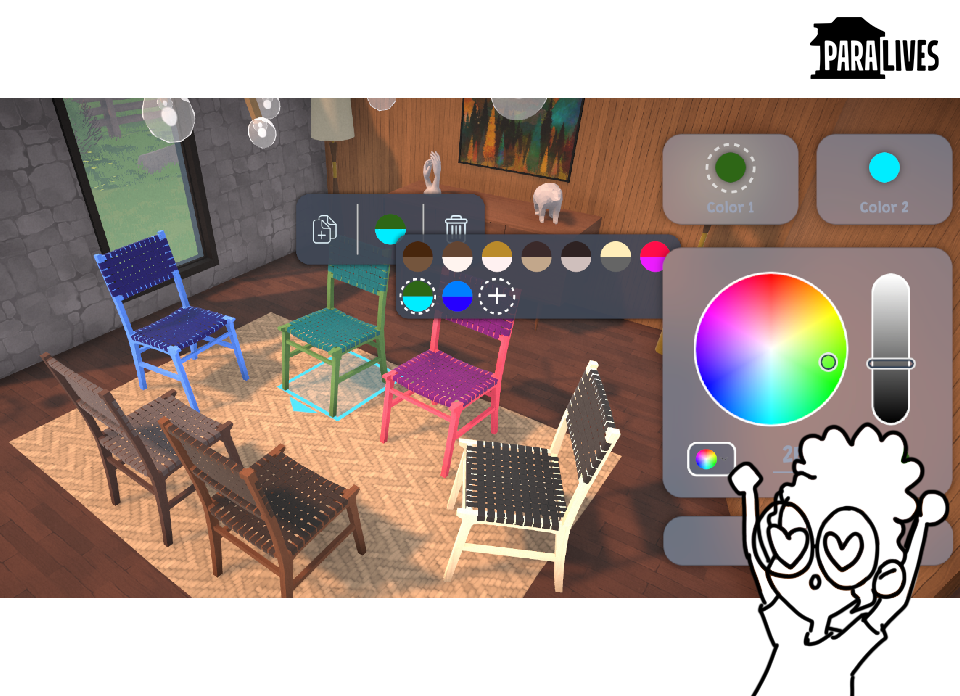
Substance Painter allows you to draw directly on the object, so I could choose where I wanted the straps to go, adding the shadows and lights. I kept it simple because the texture will be recolorable in the game!
Integrating the Object Inside the Game
Ok, this is it, we have our chair, the texture, and everything that we need for it. It’s time to put it in the game!
As you may already know, we are developing tools to allow future content creators to easily integrate new objects to the game. As developers, we are using these tools ourselves. That means custom content creators will have access to the same set of powerful and flexible tools and will be able to add objects to the game, just as a developer would do.
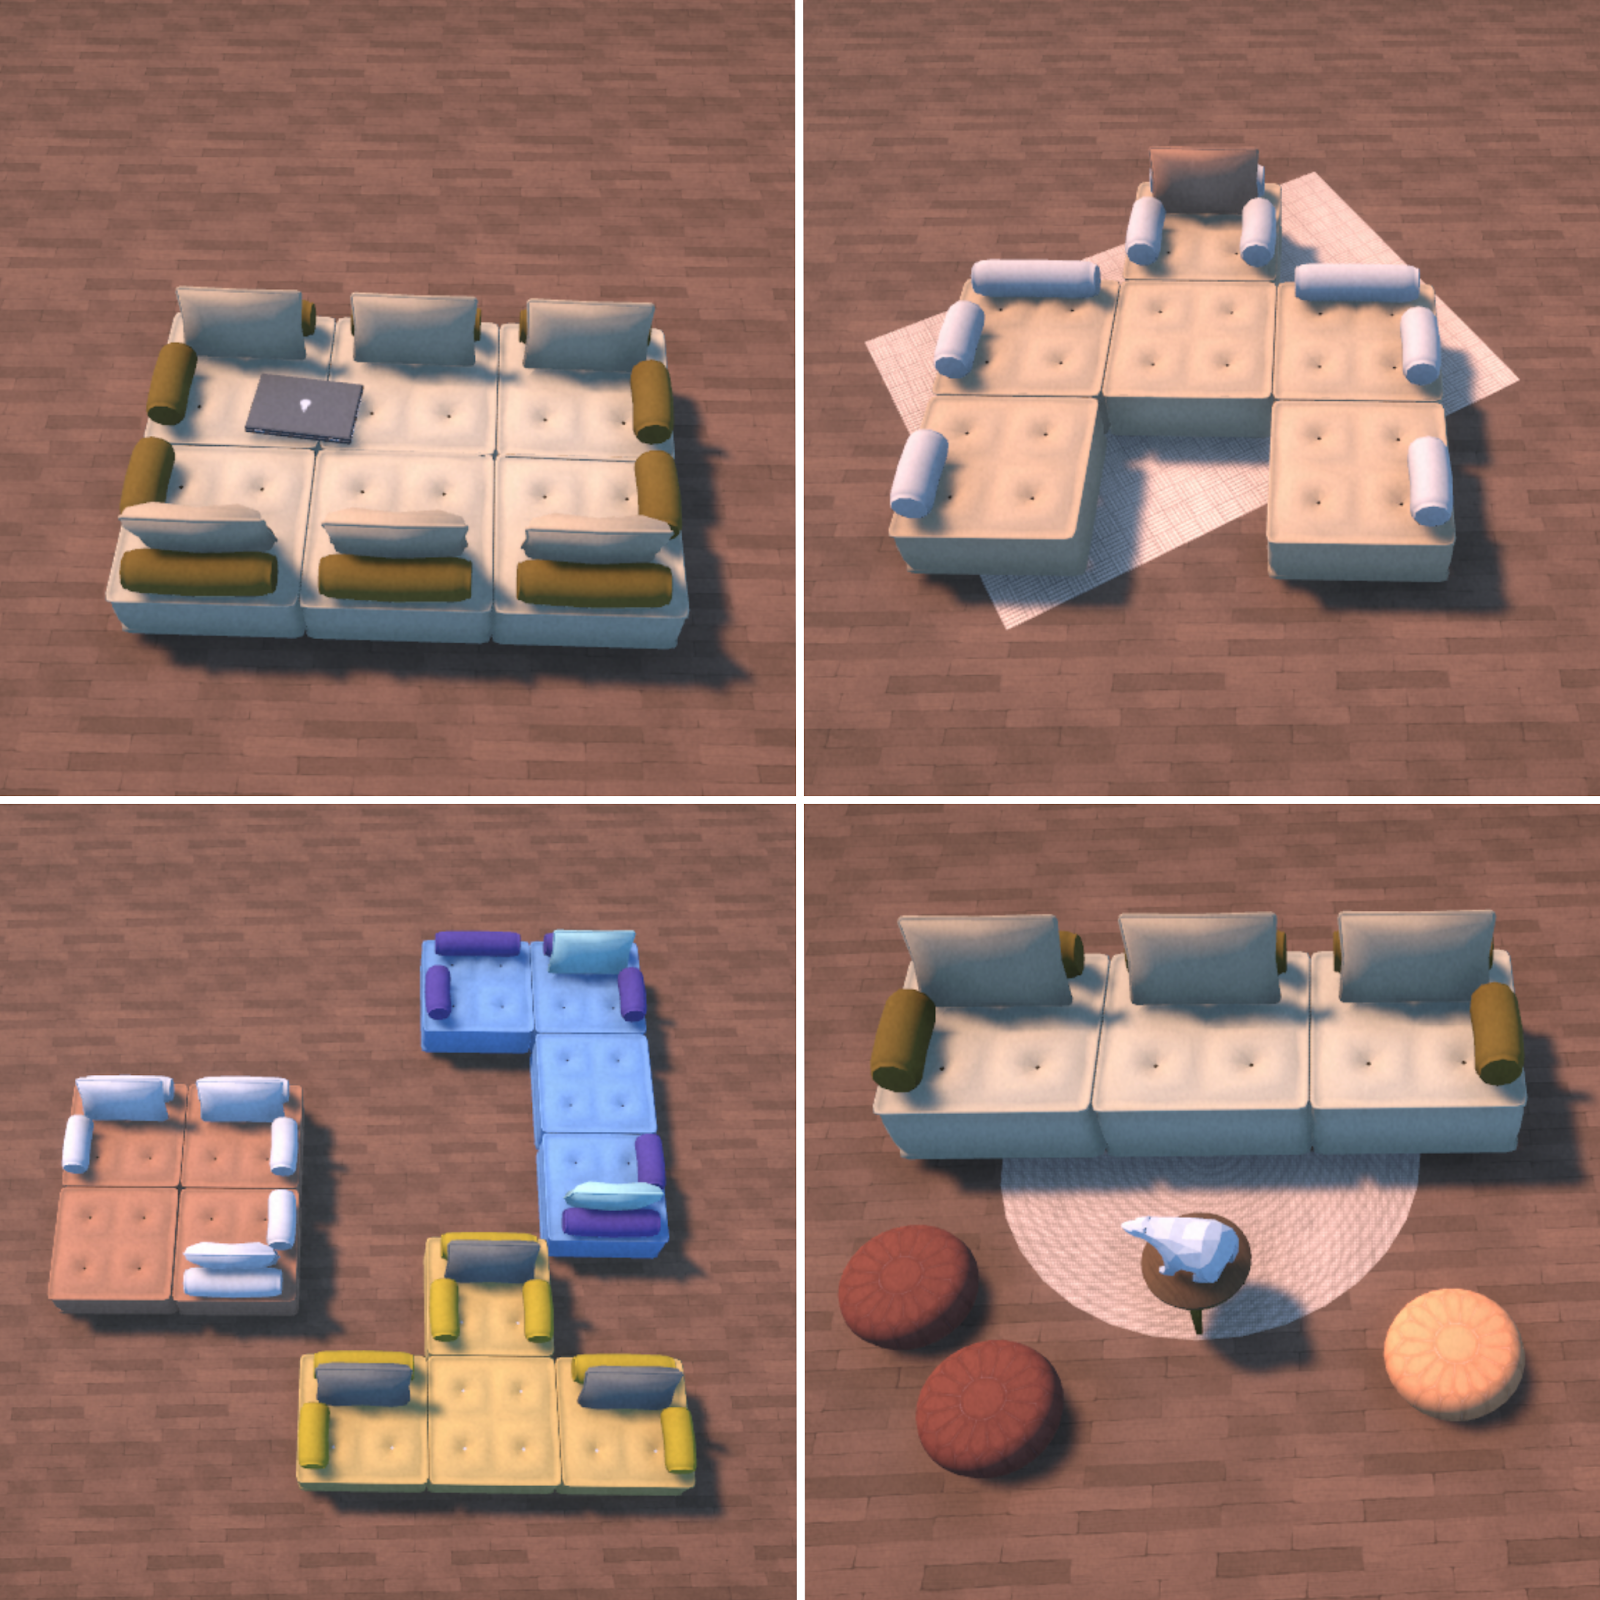
To be able to have the chair in the game and purchase it while playing and building a house, it needs to be converted into a prefab, which is what we call a ready-to-use game item in Unity. The prefab contains the model and texture we just created, but also extra settings to tie it all together and make it a playable object.
It’s here that the various elements of an object can be added: for the chair, we have the wood parts and the straps, both added as children of the empty root. On each part, it’s possible to add components with the texture needed and specify if it’s recolorable. For more complex objects, other components are available for various purposes: for resizability (IsResizable), scalability (IsScalable), if it’s an object on the wall (WallItem), or if it’s stackable (IsStackable) and many more.
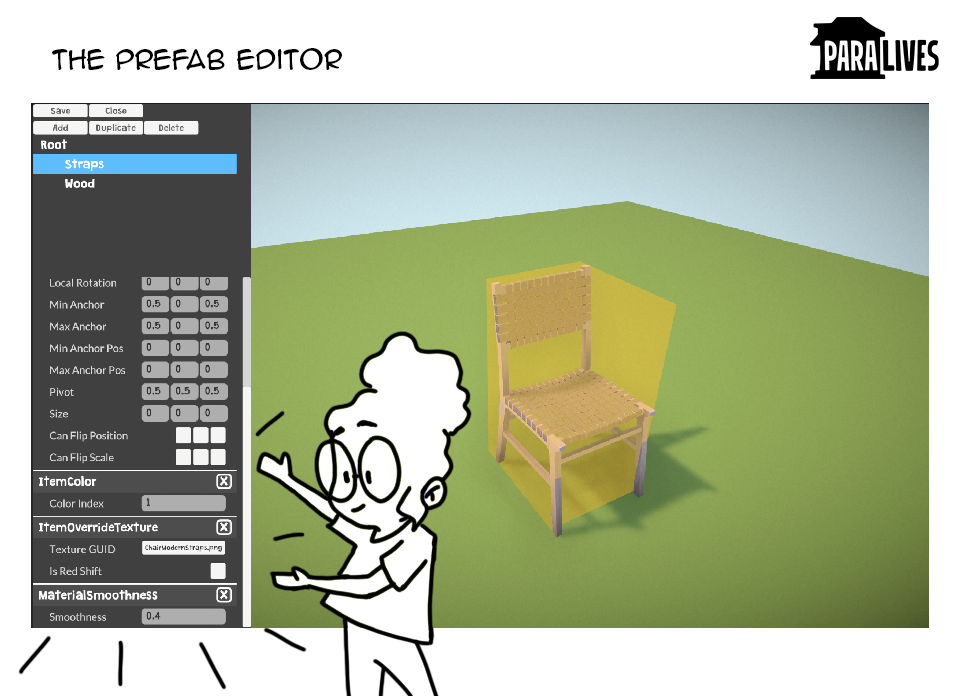
These tools and menus are still a work in progress. Our goal is to make them as easy as possible to use for developers and custom content creators.
In the future you will be able to add components linked to the playability of the object: is it just a clutter item? Can you sit on it? This is where we’re going to specify these details once the Live Mode will be ready!
After this step, we can add the chair to the in-game furniture catalog, set its price, and we are ready to go.
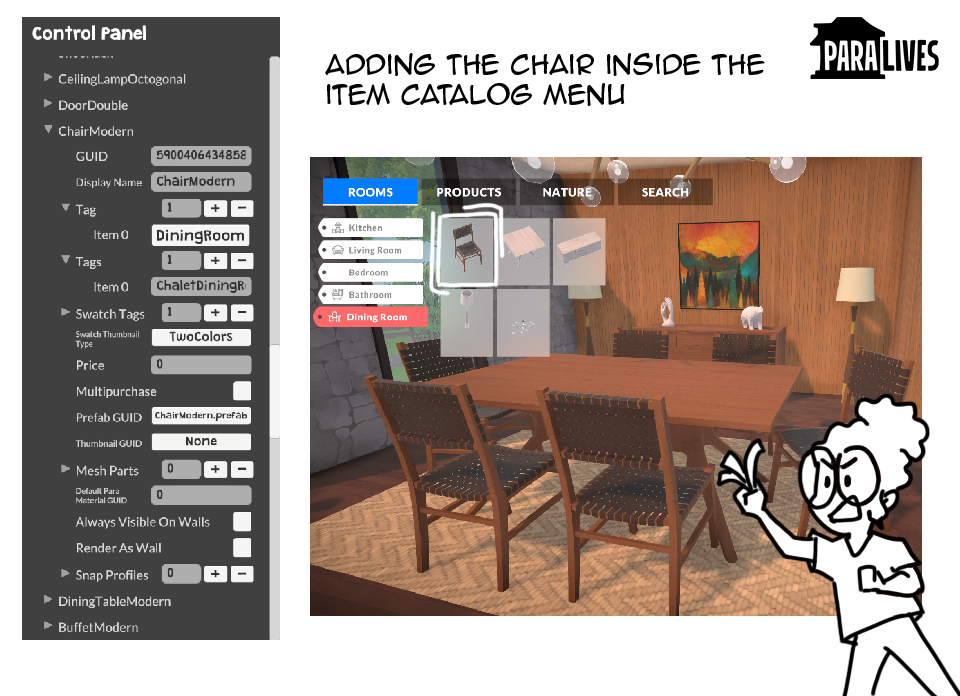
The Chair is in Paralives!
And we are done! We can now purchase the chair in the catalog, place it in the Chalet and recolor it the way we want.
Read more on this now public Patreon post!
Consider joining our Patreon if you would like to see more posts like this one.
We post every Friday! ✨

Share: