Strategic Command: World War I - SlithFox
With this entry of the Developer Diary, we highlight some of the key new features of Strategic Command World War I.
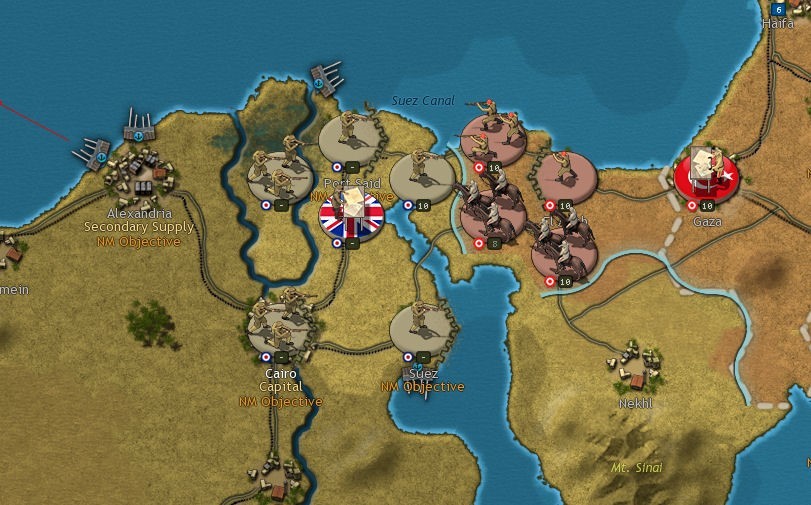
Naval Mines - New!
Naval Mines can provide a good way of damaging enemy naval units with little risk to yourself and can be laid 1 per turn by Destroyers and Torpedo Boats belonging to a Major that is fully mobilized and at war.
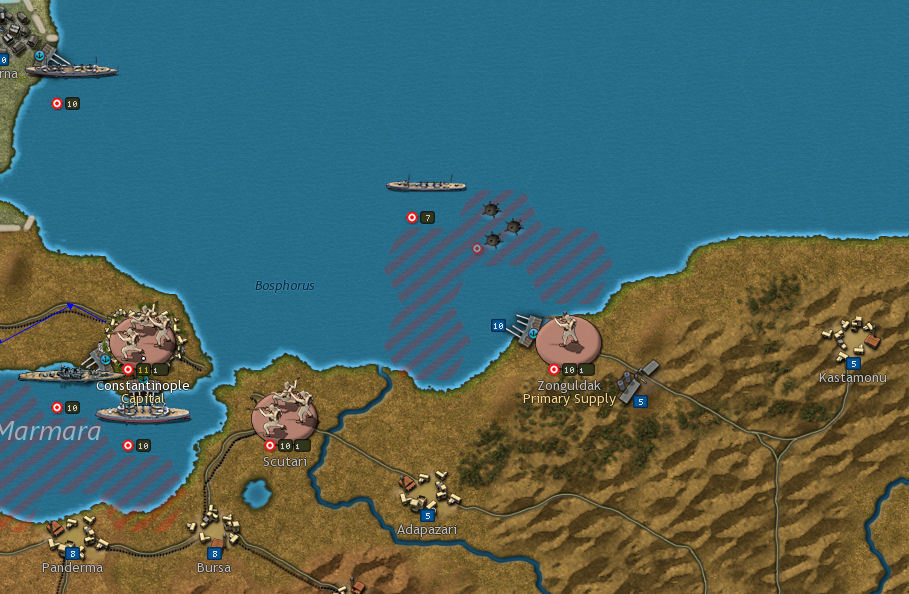
Strategically minefields can help to protect important passageways, naval bases, or to funnel enemy naval units towards preferred areas of combat.
Each Major has a starting Build Limit of 1 Naval Mine, and this number can be increased by researching Naval Warfare. The number of minefields on the map can never exceed that Major’s Build Limit, though as minefields are removed from the map when they are struck by vessels, their owning Majors will be able to relay them.
In game, minefields placed in strategic locations can also trigger events, e.g. placing one on or adjacent to the Norwegian convoy line to Germany will annoy the Norwegian government because their merchant shipping will be traveling through the minefield, and potentially suffering losses as a result.
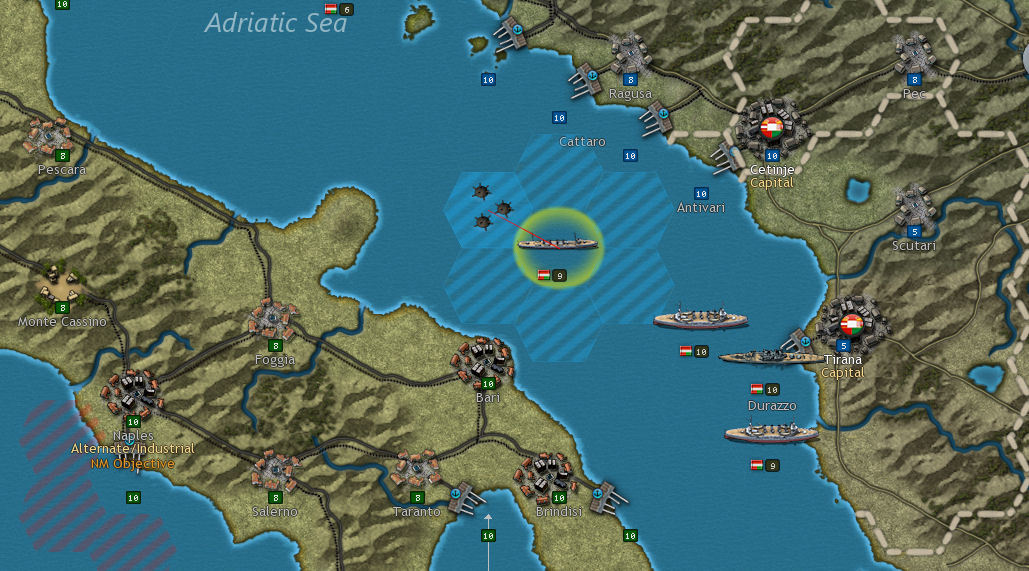
There are also several naval blockade positions that players are likely to fight over in game, and when the Entente enforce a blockade by placing naval units on the Blockade hexes, in the North Atlantic and the North Sea, it represents these merchantmen being stopped and searched, with the ships and cargoes being confiscated if they are considered to be destined for Germany’s use.

Because the blockade is enforced against merchant shipping sailing under neutral flags, it is not only the presence of Entente warships that will impede the flow of goods that will ultimately end up in Germany. For the presence of warships belonging to either side on the Blockade, hexes will interrupt their voyages, making them attempt to sail away, and this will slow down the flow of merchant shipping that indirectly supplies Germany with food and other goods.
Naval mines will have the same effect, so it is strongly recommended not to place them on the Blockade hexes, because sinking the merchant ships that are bringing goods to your country is doing the enemy’s work for them.
Mountain Corps - New!
A new unit to the series, representing two or more infantry divisions with a strength of between 50,000 and 100,000 men, including their supporting arms.
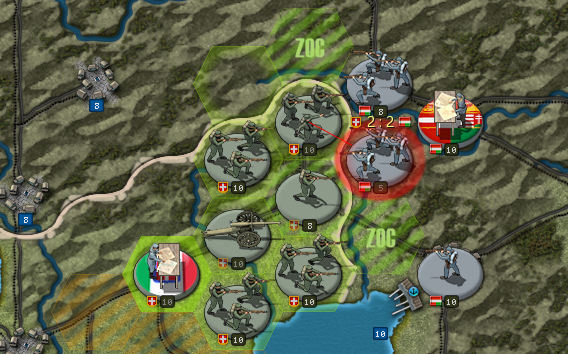
Italian Alpini Mountain Corps fighting the Austro-Hungarians along the mountainous northern Italian border.
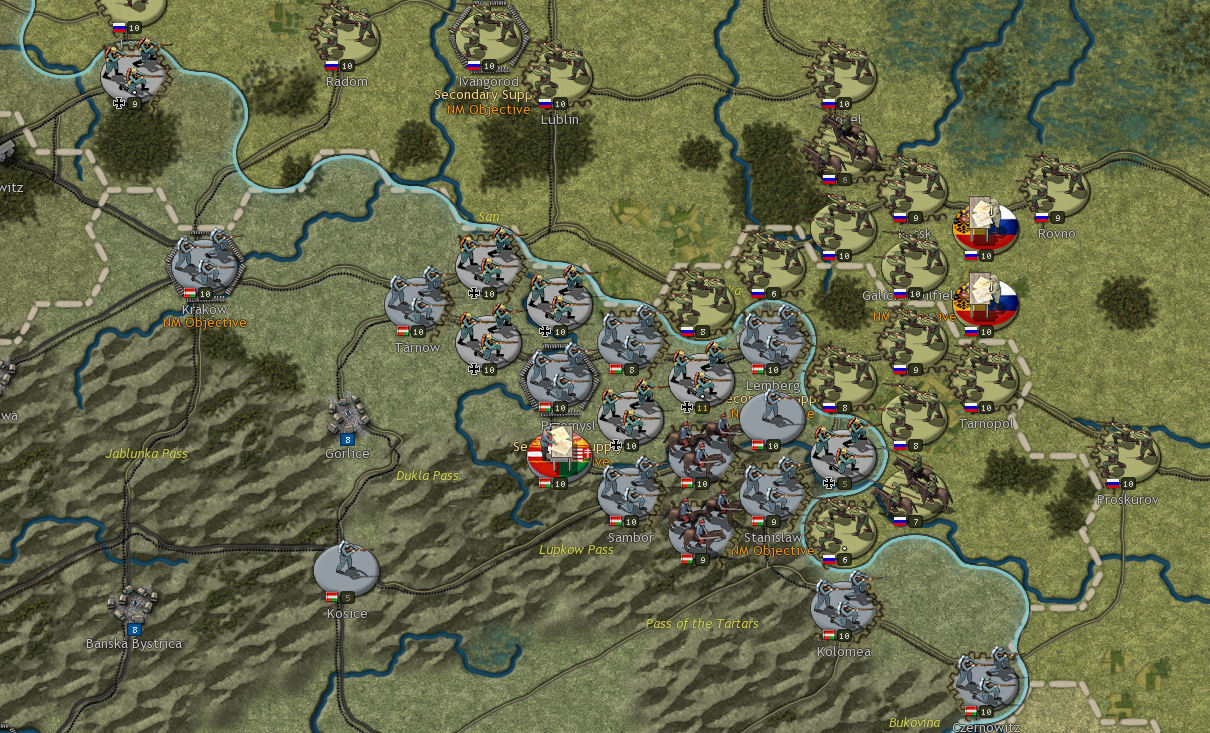
Mountain Corps benefit from bonuses when fighting from or attacking into Mountain hexes that differentiate them from other regular Corps units. This will make them especially useful in the battles in the Caucasus or on the Italian Front.
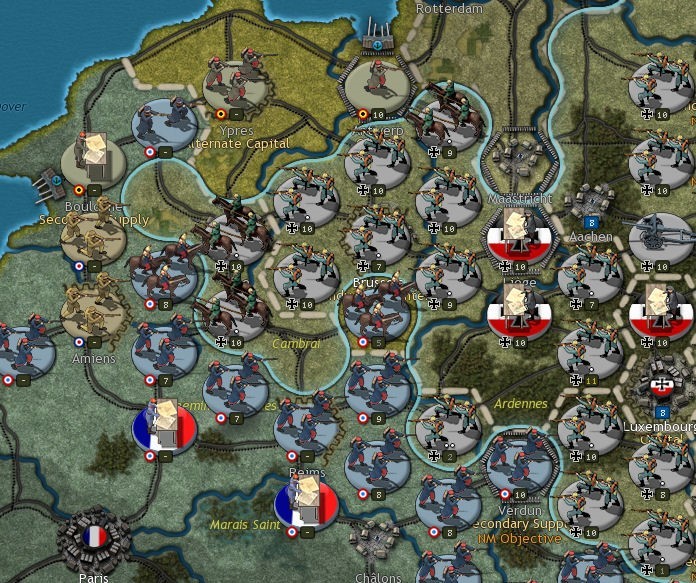
Land Convoys - New!
Players have always been able to send financial aid to their allies via Sea Convoys, but now they will also be able to send financial aid via Land Convoys.
For example, Germany can send MPPs (Military Production Points) via a Land Convoy to Austria-Hungary. This can be set within the Convoy Map screen and up to the maximum % of German income permissible.
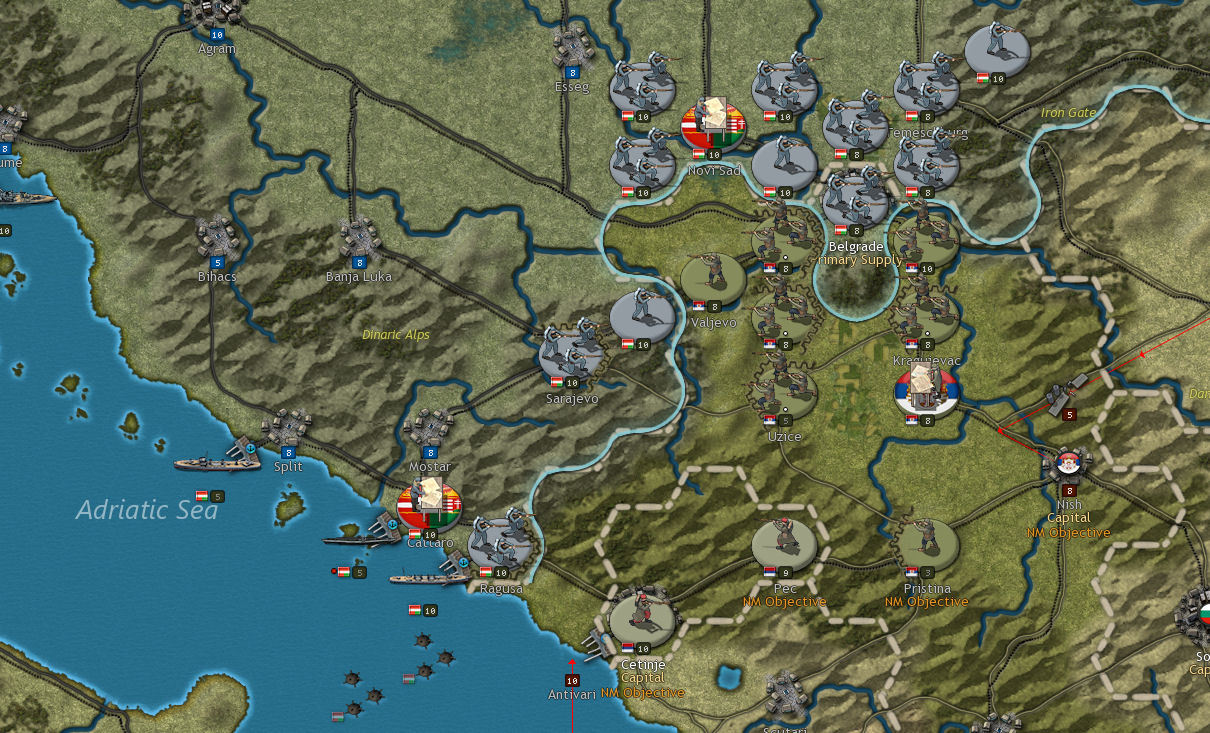
Additionally, land convoys, such as the one from Russia to Serbia via Romania, can be broken if enemy forces capture any of the hexes that the convoy passes through. This means that as the Central Powers advance into Serbia, the hexes immediately north and north west of Nish are likely to be hotly contested because without them the Serbs will not receive any Russian assistance.
The same applies to the French convoy that delivers supplies and war matériel to the Serbs via the Port of Cetinje in the Adriatic. If Austria-Hungary can capture Cetinje from the Montenegrin army then this will cut off Serbia from French aid, bringing the fall of Serbia closer.
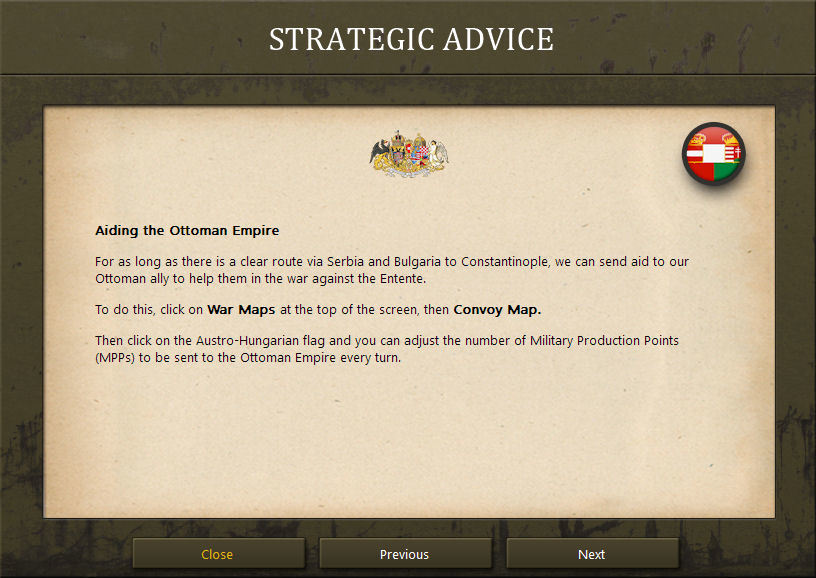
Additional land convoy option for the Austro-Hungarians to send aid to the Ottomans.
THIS CONCLUDES OUR DEVELOPER DIARIES, WE HOPE YOU ENJOY THE GAME AS MUCH AS WE DID IN DEVELOPING IT!
Strategic Command: World War I will be released on December 5th.
Naval Mines - New!
Naval Mines can provide a good way of damaging enemy naval units with little risk to yourself and can be laid 1 per turn by Destroyers and Torpedo Boats belonging to a Major that is fully mobilized and at war.
Strategically minefields can help to protect important passageways, naval bases, or to funnel enemy naval units towards preferred areas of combat.
Each Major has a starting Build Limit of 1 Naval Mine, and this number can be increased by researching Naval Warfare. The number of minefields on the map can never exceed that Major’s Build Limit, though as minefields are removed from the map when they are struck by vessels, their owning Majors will be able to relay them.
In game, minefields placed in strategic locations can also trigger events, e.g. placing one on or adjacent to the Norwegian convoy line to Germany will annoy the Norwegian government because their merchant shipping will be traveling through the minefield, and potentially suffering losses as a result.
There are also several naval blockade positions that players are likely to fight over in game, and when the Entente enforce a blockade by placing naval units on the Blockade hexes, in the North Atlantic and the North Sea, it represents these merchantmen being stopped and searched, with the ships and cargoes being confiscated if they are considered to be destined for Germany’s use.
Because the blockade is enforced against merchant shipping sailing under neutral flags, it is not only the presence of Entente warships that will impede the flow of goods that will ultimately end up in Germany. For the presence of warships belonging to either side on the Blockade, hexes will interrupt their voyages, making them attempt to sail away, and this will slow down the flow of merchant shipping that indirectly supplies Germany with food and other goods.
Naval mines will have the same effect, so it is strongly recommended not to place them on the Blockade hexes, because sinking the merchant ships that are bringing goods to your country is doing the enemy’s work for them.
Mountain Corps - New!
A new unit to the series, representing two or more infantry divisions with a strength of between 50,000 and 100,000 men, including their supporting arms.
Italian Alpini Mountain Corps fighting the Austro-Hungarians along the mountainous northern Italian border.
Mountain Corps benefit from bonuses when fighting from or attacking into Mountain hexes that differentiate them from other regular Corps units. This will make them especially useful in the battles in the Caucasus or on the Italian Front.
Land Convoys - New!
Players have always been able to send financial aid to their allies via Sea Convoys, but now they will also be able to send financial aid via Land Convoys.
For example, Germany can send MPPs (Military Production Points) via a Land Convoy to Austria-Hungary. This can be set within the Convoy Map screen and up to the maximum % of German income permissible.
Additionally, land convoys, such as the one from Russia to Serbia via Romania, can be broken if enemy forces capture any of the hexes that the convoy passes through. This means that as the Central Powers advance into Serbia, the hexes immediately north and north west of Nish are likely to be hotly contested because without them the Serbs will not receive any Russian assistance.
The same applies to the French convoy that delivers supplies and war matériel to the Serbs via the Port of Cetinje in the Adriatic. If Austria-Hungary can capture Cetinje from the Montenegrin army then this will cut off Serbia from French aid, bringing the fall of Serbia closer.
Additional land convoy option for the Austro-Hungarians to send aid to the Ottomans.
THIS CONCLUDES OUR DEVELOPER DIARIES, WE HOPE YOU ENJOY THE GAME AS MUCH AS WE DID IN DEVELOPING IT!
Strategic Command: World War I will be released on December 5th.
Share: