Gamecraft - JoshJammer
Hi Gamecrafters,

We’ve just released a hotfix for the latest update. Below is a list of the changes and fixes.


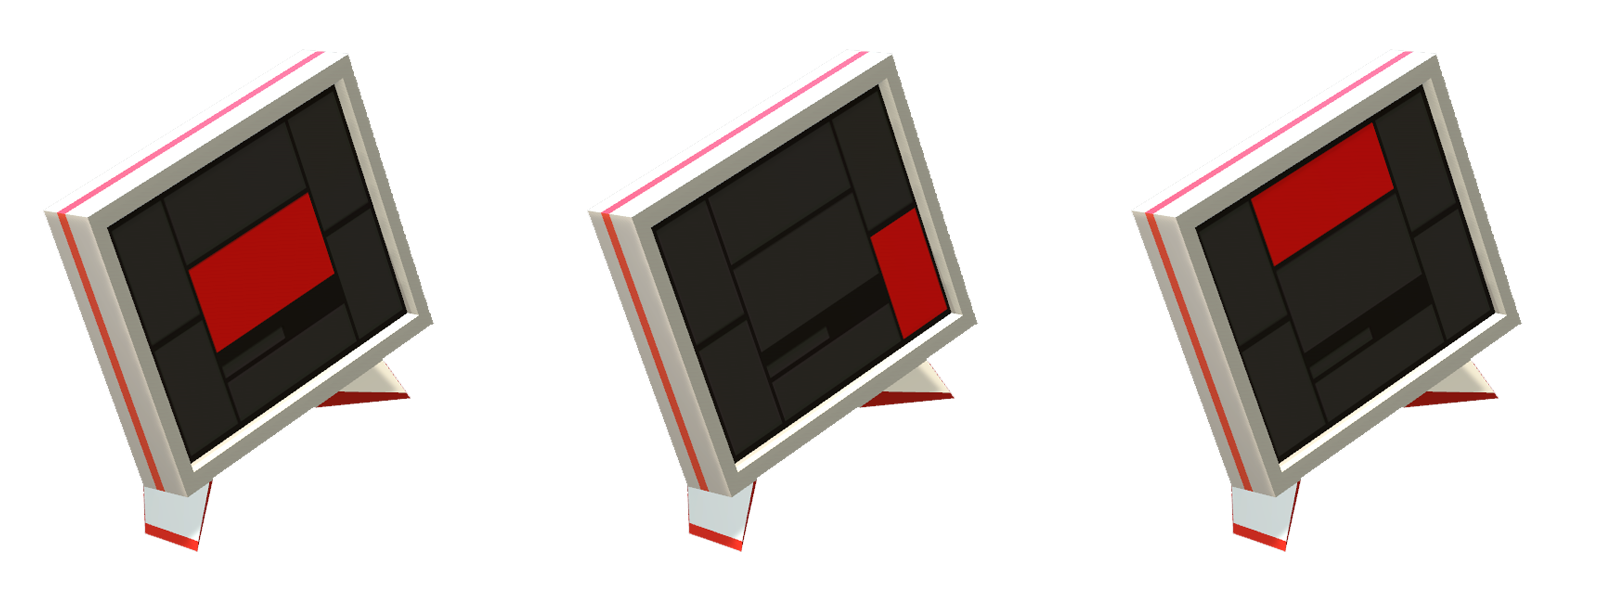
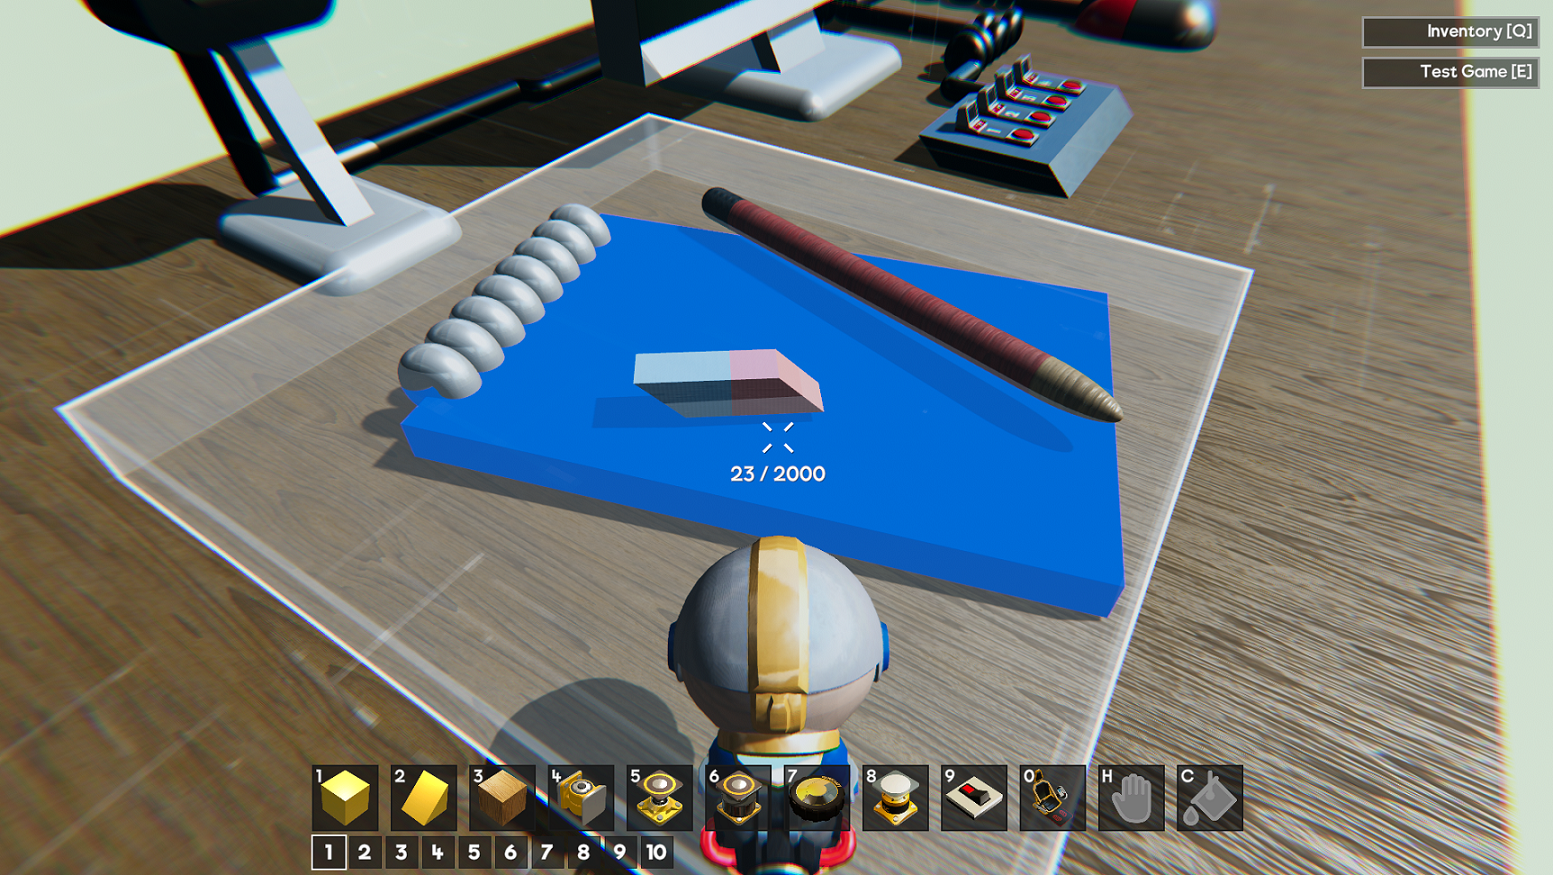
Text Input Stat Changes
With the addition of HUD blocks, we made some changes to the way we handle entering and storing text to bring it more in line with the vision of having a non-intrusive UI to handle all building aspects of Gamecraft. These changes also applied to the existing functionality of Text Blocks. A lot of you have been extremely creative when using them, really pushing them beyond their intended use and we do want to preserve as much of that as freedom as possible, but keep more in line with the original intention of Text Blocks being used to display small snippets of content, instructions and information.

With that in mind, we’ve looked at all the feedback you’ve given and we’re making a few changes to bring it closer how it used to be. These changes are:
  • The size of the Text Input field has been increased to 6 lines - This gives you more space to fill out in general.
  • As soon as you go over these defaults, the text will gradually decrease in size up to a fixed point, much like how it used to, although it will be almost impossible to read after a certain point.
  • We’ve increased the character limit to 5000 - We think this should be more than enough to let you put what you want without risking memory usage or other performance issues.

We’d like you to try out these changes and let us know what you think. If you’re still unable to achieve something you’ve set out to do with these Text Blocks, tell us and we’ll work together to figure out some more changes, new features or blocks that can give you that functionality.

Bug Fixes
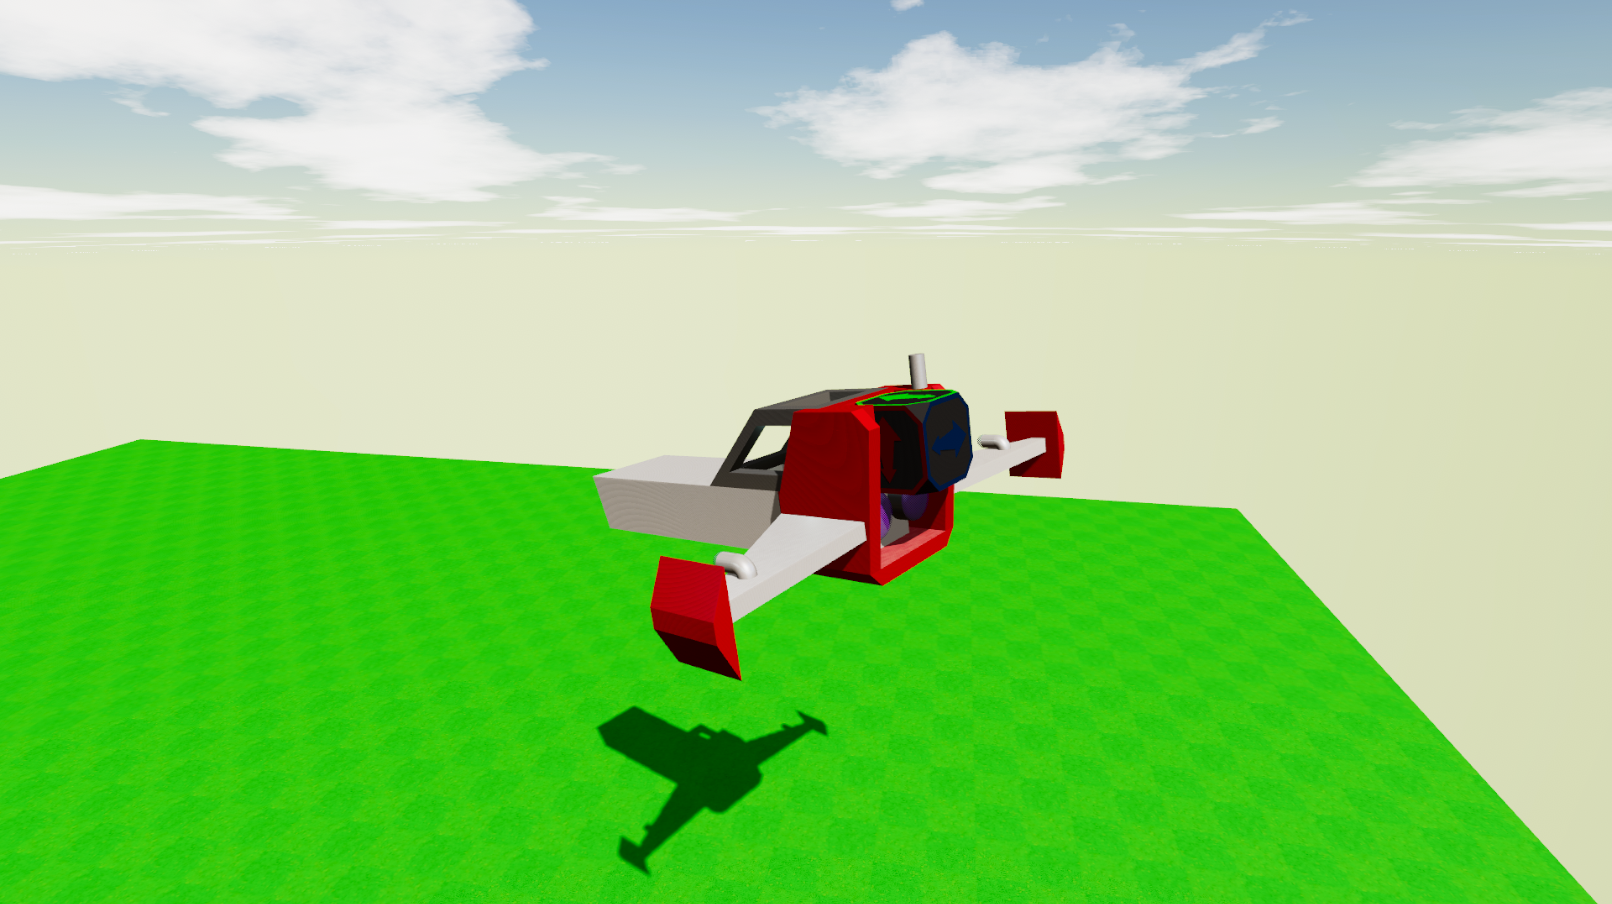
  • Fixed a crash that could occur in certain situations where joints were being stretched much further than intended
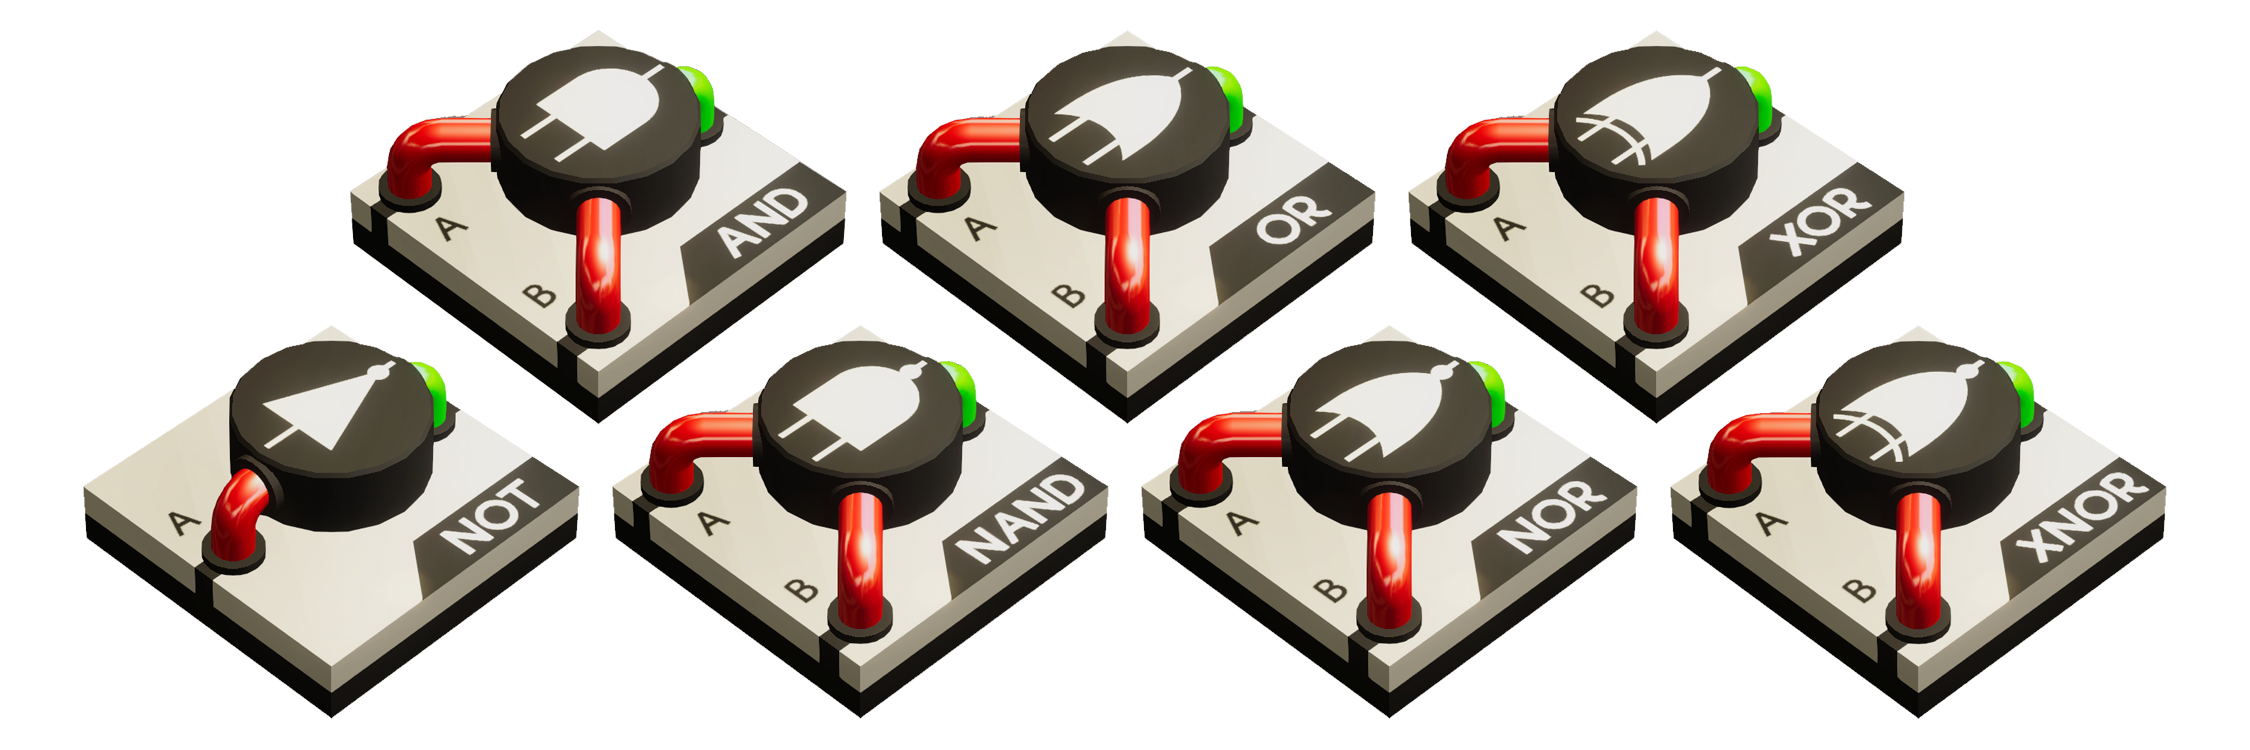
  • Fixed a bug where Logic/Gate blocks that are wired to Timers were not being processed correctly
  • Fixed a bug where copying a part that contained a loop to itself with MMB would place it with an incorrect wire attached to the previous block
  • Fixed a bug that caused the Stat slider handles to disappear when the panel is closed and reopened
  • Fixed a bug that caused the fog to transition incorrectly and vanish
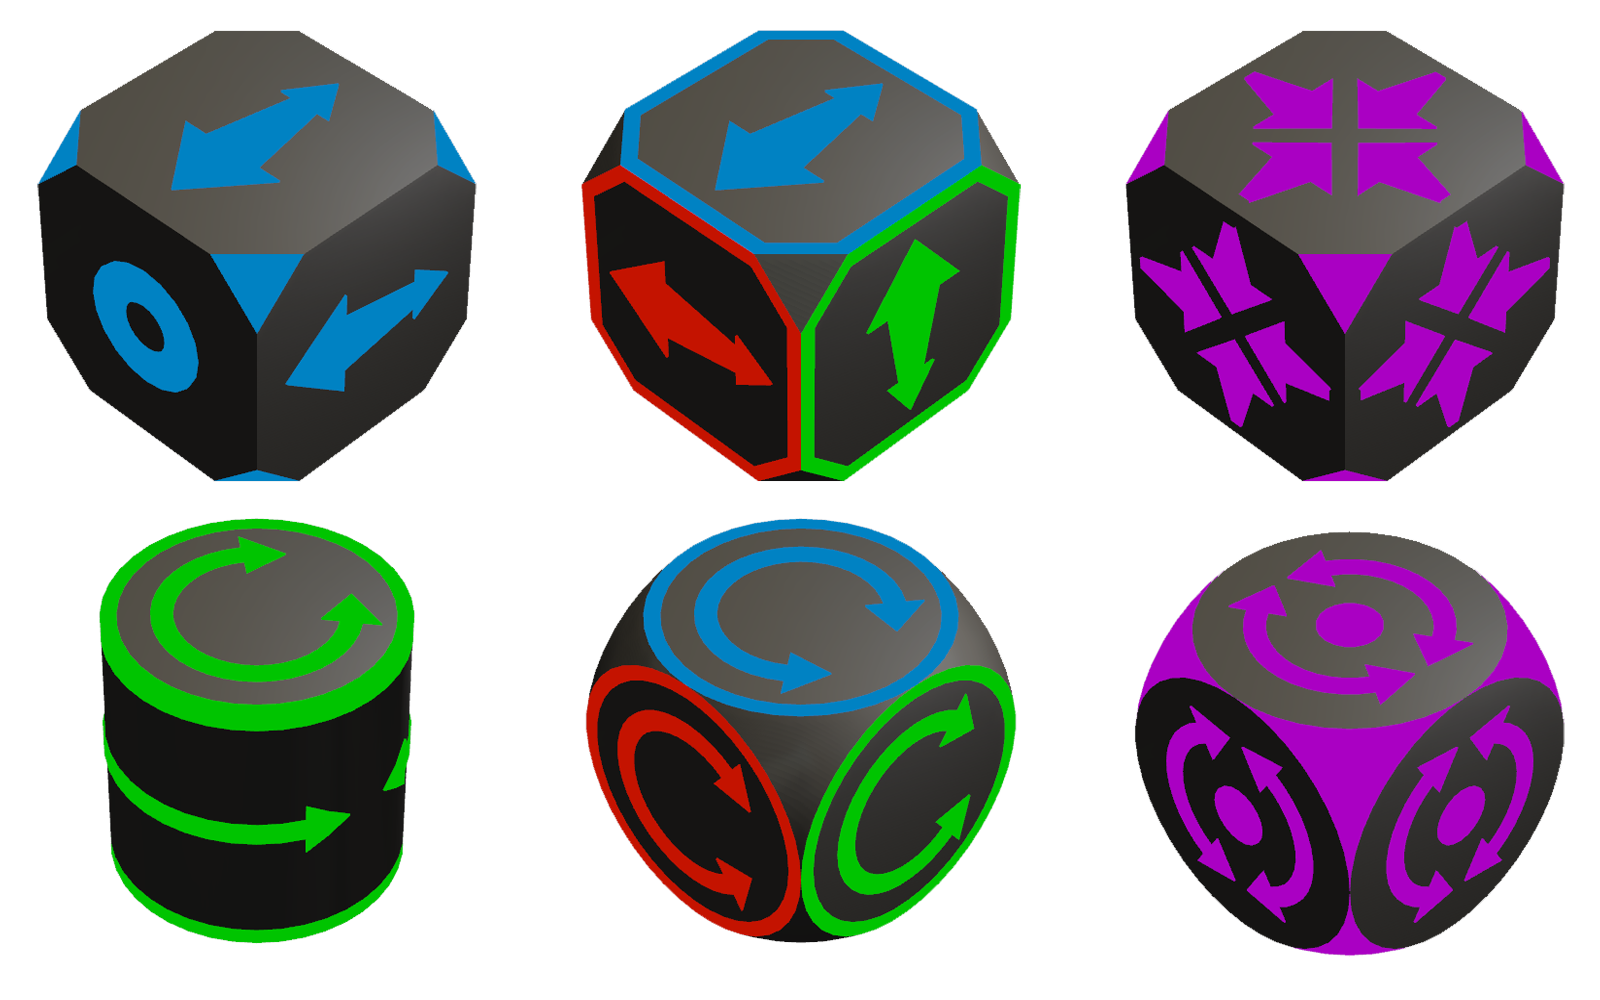
  • Fixed a bug that caused motorised Axles to snag on blocks that should be out of range - This is the same fix we applied to Motors to change their colliders into spheres during simulation as a temporary solution
  • The Physics Rotator now has the correct cylinder collision

We’re still investigating some issues that have been reported over the last couple of days and we’ll keep an eye on things over the rest of the week while we begin work on the next update.

The Gamecraft Team
Gamecraft - JoshJammer
Hello Gamecrafters!


We have another jam-packed update to share with you! Continuing with the focus of providing tools for the ‘building’ side of Gamecraft we have a range of powerful new parts, from Generic Physic blocks to HUD blocks, as well as some parts that expand the capabilities of the previous Logic blocks. Check out the full patch notes below.

Generic Physics Blocks
We’ll open with the amazing Generic Physics Blocks first. These parts provide either a force or torque to the body they are attached to.


The Mover provides a force along one specific axis, namely the direction the arrow is facing. This force allows anything connected to the block to move along that axis. The force is reduced as the speed increases, up to the maximum speed set to give a consistent output. The Mover has a single input which can take a signal from -1 to +1, so a signal of -0.5 will apply a force “backwards” at half the defined value. With no input at all, the Mover will simply apply its maximum force constantly.

There is an additional stat on this part as well! “Axis Reference” gives you the default option of “local”, which simply means the force will always be applied in the direction of the arrow, no matter what position it ends up in. The other option is “Time Start” which defines a fixed axis for the entire simulation. If the Mover starts by facing upwards and somehow tips over, the force will continue to be applied upwards instead! Fantastic if you want to create an elevator that always moves up, but can also rotate to keep the player on their toes.

The Advanced Mover behaves the same way, but allows all three axes to be controlled from a single block! This part has three separate inputs; Green, Red and Blue axes. If you wanted to set up a flying vehicle you can use a single Advanced Mover to control the elevation on one axis, the forward/backwards movement on the second and left/right on the third.


Next, we have the Rotator and Advanced Rotator. These parts apply torque around an axis. Wildly different from Motors, these parts apply torque on the body as a whole, rather than on each connection point. Placing a Rotator on top of the flying vehicle example and connecting that to the left/right input of a Pilot Seat would allow you to spin the entire build, around its center. Using an Advanced Rotator you can even add in pitch and yaw to make a crude airplane!

Pro Tip: While these blocks apply their force on the center of the body they are attached to, it is possible to ‘split’ bodies with joints, allowing you to apply the force at a specific point.

That’s not all either. We have Movement and Rotation Dampeners as well. These parts can be used independently of the Mover and Rotator. Dampeners reduce the velocity and angular velocity of the body they are attached to. This means that a Movement Dampener attached to a car would slow it down by a fixed percentage each frame. Rotation Dampeners could be attached to the outside of wheels to drastically reduce the speed at which they rotate, providing make shift breaks!

HUD Blocks
Next up are the HUD blocks. These provide a way of displaying text, objectives, values and other game details on screen. The first three HUD blocks we have for you are the Centre HUD, Objectives HUD and Game Stats HUD.


The Centre HUD block displays a piece of text right in the middle of the screen. This is great for making announcements to the user such as the start of a race or a quick call to action. Simply place one of these parts, enter some text in the text field stat and choose how long you want the text to appear for. When the Center HUD block is triggered, the text will appear on screen and fade away after a few seconds.

The Objective HUD block can be used to set up goals or guidance for your game. Objectives appear in the bottom right corner and up to 6 at time can be shown. Objectives will appear when the “on” input is triggered, which can be at the start of your game or as the player progresses through it.

Objectives can be marked as “complete” with the second input. Setting a simple objective like “Reach the end of the level!” is as easy as placing a Character OnStay Trigger at the goal and wiring it to the Objective HUD.

Last but not least we have the Game Stat HUD block. This block will display a small piece of information at the top of the screen, such as a Timer or the number of attempts the player has left (created through logic). Up to 6 of these can appear at any time.

The biggest difference with this block is the way it handles that information. The text stat of this block defines the label, shown at the bottom of the HUD. To display the stat, you’ll need to wire a Text Port. To go into a bit more detail on how that works, you can wire the Text Output of a Timer (which we’ll cover soon) to this HUD block to display the time on-screen!


The Game Stats HUD block will always appear for all players, but the Center and Objectives HUD blocks can be toggled to a special Player or Team channel. These channels can be used to give specific players different information or objectives! A Center HUD block on the ‘Player’ will only appear for the player that triggered it. A short example of this can be a race track where each player will see their own popup every time they complete a lap.

Pro Tip: Those of you that are familiar with the Rich Text support we have for Text Blocks will find you can use the same tags in these blocks too, with one small exception. Vertical offset is disabled to make sure the HUD stays consistently in the same place. Other tags can be used to move text around within the boundaries though.

State Blocks
Next, we’re going to cover the new State Blocks. These parts complement the Logic and Math blocks from the previous update extremely well and can offer a lot of gameplay potential.


First, the Bit block. The Bit block can be used as a sort of “local memory” in your logic, storing a single on/off value. The value can be set manually through the input port “one” or “Zero” input, or you can also toggle the current value with a third input.

This block also has a functional digital display built-in to show the current state, which will make debugging easier.

Next we have the Counter. The Counter block lets you set a target value, up to 999. The counter always starts at 0, but can be increased and decreased with one of two inputs. These inputs act on any signal greater than +0.5, so you could increase the Counter every time the player presses a Button and decrease it any time they enter a Trigger. The third input on thi part acts as a Reset, setting the Counter back to 0.

This part has three distinct outputs. The first is “Completed”, which will then output a signal of +1 once the target has been reached. The next is “Progress”, which provides a float value between 0 and +1 that acts as a percentage of the progress the Counter has made to the target. Finally, you’ll even be able to output the value of the Counter as “text”, straight to other blocks that support it, like the HUD blocks above!

Last but not least we have the Timer. This block lets you define a start and end time, which will then count by itself. The three inputs for this part are ‘Start’, ‘Stop’ and Reset. Start simply gets the Timer running and Stop will pause the Timer. Reset will bring the timer back to its start time. The timer can count up or down, depending on how it is set up. It can also display in either MM:SS format or MM:SS.ms. The format setting applies to the display on the Timer and the special Text Port too! The outputs for the Timer are the same as the Counter.


These parts all work on the unique player/team channels too, which means you can use the same counter for multiplayer players, with each player storing their own ‘count’ for use later!

Number 2 Text block
We’d like to quickly mention the Number 2 Text block here as it ties in nicely with the HUD and State blocks.


This block converts any numerical input, such as a Levers output signal or the result of a Math Multiplier block, into text readable by a Text Port. You’ll be able to display a huge range of information in a clean way, either for your own debugging purposes, or as game related information for players.

You can tweak the way the output is displayed by changing the maximum number of digits and how many decimal places can be shown as well. If you wanted a simple way to display the number of keys a player has collected, you can probably limit the number of digits to 1 and show 0 decimals. If you want to show the precise position of a Lever, to 4 decimal places, you can do that too!

Filter Blocks & Object ID Blocks
Last on the list for new parts are the Filters and Object ID blocks! Filters offer a means of splitting signals that come from certain objects or players and providing different behaviour, while the Object ID block can mark a unique collection of parts to check against later.


We’ll start with the Object ID block first. This part can be attached to a connectable surface of any part. Once attached this will label that part and anything on the same body with a specific ID, from A-Z. Marking a single cube with an ID of “A” means that you can combine this with a Filter block to make some logic that will only respond to that block,while ignoring any other parts that may happen to pass through.

As for the Filter blocks, we have three types. We’ll cover each of these below but we’ll start with how they work in general.

Filter Blocks can be set to a specific channel. In the case of Objects this will be A-Z, for Player this will be 1-100. If a Player Filter is set to channel “1”, any signal that enters the Filter will be checked to see who it came from. If it came from the player marked as “Player 1”, the output from this block will be +1. If any other player is found, the output is 0. This could be used to prevent Player 2 from opening a door that you only wanted Player 1 to pass through, for example.

Object Filters can be used together with Object Triggers. Each object that enters the Trigger will be checked to see if it has an ID. If it has no ID or the ID does not match, then the signal coming out of the filter is 0. If the ID of the part matches then you get an output of +1.

Let’s say you wanted to create Tic-Tac-Toe; The crosses could have an ID of “A” and the noughts could have an ID of “B”. Triggers on each space could react to each ID and know which piece is in each space. Combine that with some Bit and AND logic and you have yourself some win conditions!

Player and Team Filters work in much the same way. By default the player is on Team “A’ as Player “1” (when multiplayer later supports it you’ll be able to define what Team each player spawn in as). These filters also work with controllers like buttons and Pilot Seats, so you can create different behaviour for each player that interacts with it.

Additional Changes
Text Ports
Expanding on that HUD and State blocks new Text Ports, we’re adding a new input/output port type to certain parts. This Text Port allows you to pass text from block to block. In the case of a Timer, this will pass the time stored in the block, in whichever format chosen. If a HUD or Text block receives this, it will be added to the end of any existing text (or used as the Game Stat in that block).

Improved Stats Panel
We’re also making some much needed improvements to the tweakable stats panel. The main changes here are the improved slider, which offers much more flexibility and the ability to manually type values. Parts such as the Servo Hinge now have full 180 degree settings, rather than 10 distinct steps while other parts like the Motor can now have their Maximum Speed stat set to a degree of 0.5 precision.

All of these values can be set manually (within the boundaries and precision we’ve defined) by clicking the number under the slider. Once you’ve typed a new value you can save the change by pressing Enter or clicking outside of the input field.

Text Block Improvements
Text blocks have received a bit of an overhaul as well. Rather than bringing up a new window to enter text in, you can now change the content via a stat panel. All of the same functionality remains, we just think it is a little less intrusive this way.

Loops
Loops are here! This should be fairly straight forward so we won’t go into too much detail here. It is now possible to create loops within the wiring system.This means that you can chain a few timers together, then reset the first one as the final one finishes, or create a looping counter that adds one input to itself, while sending the result on to another part.

Each loop introduces a single frame delay (roughly 1/30th of a second) so they can also be used to create short delays. We’ll be working on other, simpler ways of doing this in future as well but it is worth keeping in mind that system using loops will run slightly differently than those without.

Wire button count increase
We’ve made a small change to the little blue dots that appear when you look near parts that can be wired in Empty Hand mode. We’ve got some bigger changes planned in future to really polish up this area of wiring but in the short term we’ve increased the maximum number visible at once. This should make it easier to get into those compact, hard to reach areas of logic that we’ve seen.

Bug Fixes
  • Fixed a bug that caused Logic gates to behave incorrectly when multiplier are present but not all inputs are used
  • Fixed a bug that caused Object OnExit Triggers to act as if they were triggered as soon as simulation starts
  • Fixed a bug that caused Game/Prefab Workshop results to overlap if the filter changed while results were still generating
  • Fixed a bug that caused Text Blocks to appear incorrectly in multiplayer
That’s everything for this epic update. We’re sure some absolutely crazy things are going to come out of these new parts and we really can’t wait to see how you all put them to use. With all of these new systems benign launched at once there’s a chance they aren’t all going to come out perfectly right away. If you run into any bugs or have any issues or feedback on these parts in general, please do let us know. Thanks again for sticking with us on this journey and helping us shape Gamecraft!

The Gamecraft Team
Gamecraft - JoshJammer
Hello Gamecrafters!


Last week we teased a few more parts coming to Gamecraft in the next update - HUD Blocks and Physics Blocks. If you haven’t read about all of those amazing new blocks, you can check out the patch notes here: https://steamcommunity.com/gid/103582791464559041/announcements/detail/2101433093282415675

Today, we’re going to give you a quick rundown of all the new features we’ll be adding in this update, which we’re going to release on Tuesday 7th April.

Physics Blocks
If you haven’t read our post about the Physics blocks already, you can find that here: https://steamcommunity.com/gid/103582791464559041/announcements/detail/2101433093282415675

A quick summary is that we’re adding 6 new blocks that can apply forces or torque to the object they’re connected to. These are the Mover, Rotator, Movement Dampener, Rotation Dampener, Advanced Mover and Advanced Rotator.

If you want to delve deeper into these blocks, you can check out our wiki page about them: https://freejamgames.atlassian.net/wiki/spaces/GCEXT/pages/729940064/Generic+Physics+Blocks

HUD Blocks
If you haven’t read our post about the HUD blocks already, you can find that here: https://steamcommunity.com/gid/103582791464559041/announcements/detail/2101433093282415675

We’re adding 3 new blocks focused on displaying game related information this update: the Centre HUD, Objective HUD and Game Stat HUD blocks. These are really powerful for bringing objective based gameplay and displaying general feedback in your games.

If you want to delve deeper into these blocks, you can check out our wiki page about them: https://freejamgames.atlassian.net/wiki/spaces/GCEXT/pages/729940073/HUD+UI+and+Text+Feedback+Blocks

State Blocks
If you haven’t read our post about the State blocks already, you can find that here: https://steamcommunity.com/gid/103582791464559041/announcements/detail/1819957482649597701

We’re adding 3 State blocks in this update: the Bit Block, Counter Block and Timer Block. These blocks are complementary to the Logic and Maths blocks from the previous update, as well as the new HUD blocks, and will open up a lot of gameplay possibilities.

If you want to delve deeper into these blocks, you can check out our wiki page about them: https://freejamgames.atlassian.net/wiki/spaces/GCEXT/pages/729940053/State+Blocks

Filter Blocks & Object ID Blocks
These blocks haven't been covered in our dev blogs yet, but we have shared a video about them on our social spaces. These are some very useful blocks that allow Gamecrafters to filter logic by Player, Team or Object ID. You can watch the video we shared about it here:


In short, filters will allow crafters to filter signals that come from controllers and Triggers to activate different behaviour based on that signal.

Number 2 Text Block
And Last, but not least, we have the Number 2 Text Block. This block allows you to process any number value from your logic and output it anywhere text can be processed such as the new HUD Blocks.

Additional Changes
Loops
We’re now happy to announce that loops will be supported in the wiring system. Each loop will introduce a single frame delay, to make sure everything is processed correctly. Infinite loops are handled smoothly so there’s no need to worry there.

If you want to delve deeper into the subject of loops, you can read about it on our wiki page here: https://freejamgames.atlassian.net/wiki/spaces/GCEXT/pages/723156993/Wiring+Loops

Text Ports
Expanding on that point above, we’re adding a new input/output port type. This “Text Port” allows you to pass text from block to block. The Text Block, along with a few of these new parts will be able to support this. Any text passed though these ports will be appended to the end of any existing text in most cases.

Improved Stats Panel
We’re also making some much needed improvements to the tweakable stats panel. The main changes here are the improved slider, which offers much more flexibility and the ability to manually type values. Parts such as the Servo Hinge now have full 180 degree settings, rather than 10 distinct steps while other parts like the Motor can now have their Maximum Speed stat set to a degree of 0.5 precision.

All of these values can be set manually (within the boundaries and precision we’ve defined) by clicking the number under the slider.

There are a few more changes on the way but we don’t want to try and cover everything today. We hope you enjoy this sneak peek into some of the great new things we’ve got planned for the next update and if you have any feedback you want to share, leave a comment on the appropriate Wiki doc.

Please follow us on our social spaces and share your creations with us:
Twitter- https://twitter.com/Gamecraft_FJ
Youtube - https://www.youtube.com/channel/UCkcRFCr9aQxszaYeXcWZjwA
Facebook- https://www.facebook.com/GamecraftGame/
Reddit - https://www.reddit.com/r/GamecraftGame/
Discord - https://discord.gg/gamecraft

Thanks for reading!

The Gamecraft Team
Gamecraft - JoshJammer
Hello Gamecrafters!


Last week we teased a few new parts coming to Gamecraft in the next update - State Blocks. If you haven’t read about all of those amazing new blocks, you can check out the patch notes here: https://steamcommunity.com/gid/103582791464559041/announcements/detail/1819957482649597701

Alongside the State blocks, we have some more, equally exciting blocks to introduce to you. We present the first set of HUD blocks. Centre HUD, Objective HUD and the Game Stat HUD blocks!


These blocks are really powerful for bringing Objective based gameplay and displaying general feedback in your games. We’re going to show you a couple of examples of how these blocks could be used in your games.

Centre HUD
The Centre HUD block displays a piece of text in the middle of the screen. This is great for making announcements to the user such as the start of a race. You can update this in real time by giving the block some extra Text input.


You can read more about the Centre HUD block by reading our wiki doc here: https://freejamgames.atlassian.net/wiki/spaces/GCEXT/pages/727842972/Centre+HUD+Block[/url] [h1]Objective HUD[/h1] The Objective HUD can be used to assign tasks or goals, and mark them as complete. This is great for giving quests for users to complete so they can be given direction and know that they are in-fact heading in the right direction in your game. [img]https://clan.cloudflare.steamstatic.com/images/35037633/99692a2afcea61c61c3d2777fe68a19cd99228bf.png[/img] You can learn more about the Objective HUD block by reading our wiki doc here: [url=https://freejamgames.atlassian.net/wiki/spaces/GCEXT/pages/727908690/Objective+HUD+Block]https://freejamgames.atlassian.net/wiki/spaces/GCEXT/pages/727908690/Objective+HUD+Block[/url] [h1]Game Stat HUD[/h1] The Game Stats HUD block can be used to display a variety of game-specific info and stats. In this example we’ve hooked up a Timer, with its special “Text Port” output, straight to the Game Stat block so you can see the timer in action! We’ve also tracked the number of attempts the player has to run through the course. [img]https://clan.cloudflare.steamstatic.com/images/35037633/37cddf2673a4fb2c9821dd1d19716998acec033c.png[/img] You can learn more about the Game Stat HUD block by reading our wiki doc here: [url=https://freejamgames.atlassian.net/wiki/spaces/GCEXT/pages/729940159/Game+Stat+HUD]https://freejamgames.atlassian.net/wiki/spaces/GCEXT/pages/729940159/Game+Stat+HUD[/url] [h1]Physics Blocks[/h1] On top of these new HUD blocks, we’d also like to show you these Generic Physics Blocks that we’re going to release with this update. [img]https://clan.cloudflare.steamstatic.com/images/35037633/de9bf1ea217002e6d9457ffebe170970bcfb103e.png[/img] These Movers, Rotators and Dampers can be used to apply forces and torques to your creations. These blocks are extremely powerful and are going to open up so many new possibilities when it comes to creating physics based gameplay. We’ve already shown how these blocks can be used on our social media, so if you haven’t seen these already you can check them out below. The first is a hovercraft and the second is a gravity defying car. [previewyoutube=TstMNT5ItxI;full]https://www.youtube.com/watch?v=TstMNT5ItxI[/previewyoutube] [previewyoutube=sP3sjAWqZOM;full]https://www.youtube.com/watch?v=sP3sjAWqZOM[/previewyoutube] If you want to learn more about these blocks, you can read about them on our Wiki here: [url=https://freejamgames.atlassian.net/wiki/spaces/GCEXT/pages/729940064/Generic+Physics+Blocks]https://freejamgames.atlassian.net/wiki/spaces/GCEXT/pages/729940064/Generic+Physics+Blocks[/url] To find out about some of our other upcoming blocks and features, you can access the main Wiki page here: [url=https://freejamgames.atlassian.net/wiki/spaces/GCEXT/overview]https://freejamgames.atlassian.net/wiki/spaces/GCEXT/overview[/url] We hope you enjoy this sneak peek into some of the great new things we’ve got planned for the next update and if you have any feedback you want to share, leave a comment on the appropriate Wiki doc. Please follow us on our social spaces and share your creations with us: Twitter- https://twitter.com/Gamecraft_FJ Youtube - https://www.youtube.com/channel/UCkcRFCr9aQxszaYeXcWZjwA Facebook- https://www.facebook.com/GamecraftGame/ Reddit - https://www.reddit.com/r/GamecraftGame/ Discord - https://discord.gg/gamecraft Thanks for reading! [i]The Gamecraft Team[/i]
Objective HUD
The Objective HUD can be used to assign tasks or goals, and mark them as complete. This is great for giving quests for users to complete so they can be given direction and know that they are in-fact heading in the right direction in your game.


You can learn more about the Objective HUD block by reading our wiki doc here: https://freejamgames.atlassian.net/wiki/spaces/GCEXT/pages/727908690/Objective+HUD+Block
Game Stat HUD
The Game Stats HUD block can be used to display a variety of game-specific info and stats. In this example we’ve hooked up a Timer, with its special “Text Port” output, straight to the Game Stat block so you can see the timer in action! We’ve also tracked the number of attempts the player has to run through the course.


You can learn more about the Game Stat HUD block by reading our wiki doc here: https://freejamgames.atlassian.net/wiki/spaces/GCEXT/pages/729940159/Game+Stat+HUD

Physics Blocks
On top of these new HUD blocks, we’d also like to show you these Generic Physics Blocks that we’re going to release with this update.


These Movers, Rotators and Dampers can be used to apply forces and torques to your creations. These blocks are extremely powerful and are going to open up so many new possibilities when it comes to creating physics based gameplay.

We’ve already shown how these blocks can be used on our social media, so if you haven’t seen these already you can check them out below. The first is a hovercraft and the second is a gravity defying car.


If you want to learn more about these blocks, you can read about them on our Wiki here: https://freejamgames.atlassian.net/wiki/spaces/GCEXT/pages/729940064/Generic+Physics+Blocks

To find out about some of our other upcoming blocks and features, you can access the main Wiki page here: https://freejamgames.atlassian.net/wiki/spaces/GCEXT/overview

We hope you enjoy this sneak peek into some of the great new things we’ve got planned for the next update and if you have any feedback you want to share, leave a comment on the appropriate Wiki doc.

Please follow us on our social spaces and share your creations with us:
Twitter- https://twitter.com/Gamecraft_FJ
Youtube - https://www.youtube.com/channel/UCkcRFCr9aQxszaYeXcWZjwA
Facebook- https://www.facebook.com/GamecraftGame/
Reddit - https://www.reddit.com/r/GamecraftGame/
Discord - https://discord.gg/gamecraft

Thanks for reading!

The Gamecraft Team


Gamecraft - JoshJammer
Hello Gamecrafters!


Last week we released a HUGE update to Gamecraft that introduced Logic, Copy & Paste and so much more! If you haven’t read about all of those amazing new things, you can check out the patch notes here: https://steamcommunity.com/gid/103582791464559041/announcements/detail/1694982051051695761

We’re working on some more epic blocks and features for our next update and we’ll be teasing some of these in each blog leading up to the release again. This week, we have some special blocks that will complement the Logic and Maths blocks added in the last update. We introduce to you, the State Blocks!


From left to right we have; The Bit Block, Counter Block and Timer Block. These powerful blocks are useful to add some extra state logic into your games. We’ll give you a brief rundown of each block in this blog, but we’d also like to start sharing some of the finer details of upcoming features with the community, to get early feedback, so you’ll find some links to our public “Confluence Wiki” which go into more depth on these blocks.

You can access the Wiki here: https://freejamgames.atlassian.net/wiki/spaces/GCEXT/overview

Bit Block


The Bit block can be used as a sort of “local memory” in your logic, storing a single on/off value. As such, this block has two possible states, 0 or 1. This value can be set manually through the associated input, or you can also toggle the current value with a separate input.

This block also has a functional digital display built-in to show the current state, which will make debugging easier.

For more info, check out this link: https://freejamgames.atlassian.net/wiki/spaces/GCEXT/pages/720535578/Bit+Block

Counter Block


The Counter block allows for the storage of an integer number that can be incremented, decremented and reset.

The Counter block lets you pre-set a target value which will then output a signal of +1 once it has been reached, as well as a float value between 0 and +1 tied to the progress the Counter has made to the target. You’ll even be able to output the value as “text” to other blocks that support it!

For more info, check out this link: https://freejamgames.atlassian.net/wiki/spaces/GCEXT/pages/720502834/Counter+Block

NB: We plan on adding support for “Text Output/Input Ports” with this update. We’ll cover the details on that a bit further on.

Timer Block


The timer block can be used to trigger an event when a specific time has passed, or even update an event as time slowly passes.

You’ll be able to start, stop and reset the timer with separate inputs. Similar to the Counter block, the Timer block can output a signal of +1 when the target time is reached, as well as the progress and “text” value.

For more info, check out this link: https://freejamgames.atlassian.net/wiki/spaces/GCEXT/pages/720109619/Timer+Block

NB: In this update we’ll also be making some improvements to the stat sliders. These changes should give you finer control and more freedom with your settings! We’ll talk more about this later in this post as well.

Text Ports
Some of these blocks would really benefit from being able to display their output in a user-friendly, fully visible way, which is exactly why we’re implementing a new “Text Port”!

These ports will fundamentally work the same way as the current input/output ports. The difference here is that these ports will only connect to a matching port i.e. you cannot connect the Text Port output of a Timer block to the input of a Motor and vice-versa.

This change is going to make text blocks even more powerful as you'll be able to show a whole lot more game related information, updated in real time!

Improved Stat Slider
A lot of these upcoming blocks reinforced the need for better precision in our stat sliders. So, we’re throwing away the current ‘10 step’ slider in favour of a smoother, more precise slider. That’s not all though, as we’re also giving you the ability to set specific values via a small label under each slider!

We hope you enjoy this sneak peek into some of the great new things we’ve got planned for the next update and if you have any feedback you want to share, leave a comment on the appropriate Wiki doc.

Please follow us on our social spaces and share your creations with us:
Twitter- https://twitter.com/Gamecraft_FJ
Youtube - https://www.youtube.com/channel/UCkcRFCr9aQxszaYeXcWZjwA
Facebook- https://www.facebook.com/GamecraftGame/
Reddit - https://www.reddit.com/r/GamecraftGame/
Discord - https://discord.gg/gamecraft

Thanks for reading!

The Gamecraft Team
Gamecraft - JoshJammer
Hi Gamecrafters,

We’ve just released a small hotfix for the latest update. Below is a list of the changes and fixes.


Bug Fixes
  • Fixed a bug with Command Computers that were copied via MMB sharing commands - Existing blocks created this way may need to be replaced to avoid this behaviour
  • Fixed a bug where joints copied from older save files, that were then copied again would incorrectly calculate their rotation/direction
  • Fixed a bug where dividing 0 by 0, then giving that output to a Motor could cause it to lock up anything it touches
  • Fixed some visual issues with larger parts flickering when viewed from certain angles
  • Fixed an error that could trigger when a player joins a server while another player is using the Box Selection tool
  • Fixed an issue where the ghost cube could always appear ‘invalid’ if the clipboard was previously left in an invalid state
  • Fixed some issues with 4:3 aspect ratio resolution on various screens (Please note: we’re dropping support for 5:4 aspect ratio at this time)
  • Fixed an issue where the ghost cube could reappear in multiplayer while creating a wire
We’re investigating a few more issues that have been reported over the last couple of days and we’ll keep an eye on things over the weekend to see if we can deliver a second hotfix next week.

The Gamecraft Team
Gamecraft - JoshJammer
Hello Gamecrafters,


We have another colossal update to share with you all! Most of the new features in this update are heavily focused on the ‘building’ aspect of Gamecraft, so you can look forward to a host of tools to make building quicker, easier and so much more powerful! We’ve also thrown in some new parts, more optimisations and other QoL changes to top it all off! Read the full patch notes below.

Box Select - Delete, Cut, Copy & Paste
The first massive feature we’re going to talk about is the “Box Select” tool. This powerful tool can be used to copy parts of games and prefabs, either your own or other members of the community, and paste them wherever you want!


To use this tool, simply select the “Empty Hand” slot on the hotbar. From there, you’ll have a handy new cursor when aiming at a surface, to show you that you’re ready to start a selection. Box Select works much like Non-Uniform Scaling, or creating a new Trigger volume. Hold LMB to start a selection, then drag in the first two perpendicular axis. Release LMB to start dragging in the final axis. When you’re finished, you can click LMB again to lock this selection in, allowing you to move around and check out the selection.

Everything that is completely within the boundaries of this box will be highlighted, up to a limit of 2000 cubes.This means that a single cube that has been scaled up to 2x2x2 will only be included if the whole block is inside. A single block of this cube will not highlight the entire thing.

Pro Tip: Clicking either mouse button, or using an action like selecting a cube will cancel the selection if you change your mind


With this selection in place, you now have three options! We’ll cover each of them now.

Copy
By pressing the default keybind of Ctrl+C, you’ll create an exact copy of the contents of the selection - everything coloured blue. Everything inside the selection will remain as it was, but you’ll now have a new “clipboard” slot to the right of the hotbar.


You can then look around and position this part as if it were any regular block!

Any existing connections, wires and stats will be copied too, so copying a car will create an exact duplicate, with its own controls, ready to go!

Pro Tip: When you’re trying to place a clipboard item, the “placement cursor” will be the center of the selection box. If you want to place something with an offset, try extending the selection box to move the center point further forward.

Cut
If you no longer want the contents of the selection box to be present, but you maybe wanted to shift them over a few blocks, you could instead choose to “cut” the selection with CTRL+X. Doing this will create a copy in the clipboard, but also completely delete everything inside the selection.

Delete
If you want to quickly clear out a mass of parts that you no longer care about, you can simply delete everything in the selection box with the default key DEL.

Once you have something saved into your clipboard it will remain there for the rest of the session (until you close the game), so you can swap back to other cubes, swap back and paste as many times as you want and even carry the clipboard over to another save! For example, you could take a car from the Prefab Workshop into your own save file, make some edits and then take that improved car into a multiplayer race with other players!

Pro Tip: If you select another Inventory part and want to switch back to the clipboard, you can do that by pressing the default keybind of CTRL+V.

Part Picker Improvements
In addition to being able to copy stats and wires with the box selection tool, we’re also adding this functionality to the “part picker”, which can be used by clicking MMB when aiming at a part. Now, picking a part this way will copy the part, scale, colour and any stats or wires! With this, you’ll be able to quickly place, tweak and wire a Motor, then copy it and paste three more copied to create a car. This also applies to Text Blocks and Command Computers, which will have their contents copied.

Logic & Math Blocks
The extremely powerful Logic & Math blocks are here! These new parts are going to open up whole new worlds of possibilities when it comes to crafting games, vehicles and loads of other contraptions.

Logic Blocks


Each Logic Block performs a standard “Logic Gate” function, such as AND, OR or XOR. For those that aren’t familiar with these, we’ll cover them below.

Most Logic Blocks have two inputs. These two inputs will take any signal between -1 and +0.5 as 0 (or false). Any signal greater than +0.5 will be treated as +1 (or true), with anything over +1 clamped down. In the case of the AND Logic Block, both inputs would need to be “true” for it’s condition to be met.

The output of these blocks is a fixed 0 (if the condition is not met) or 1 (if the condition is met). For an AND block, this means that it will output a signal of 0 if either input is false, and will output a signal of +1 if both inputs are true.

The full list of current Logic Block functions are:
  • AND - If A = 1 AND B = 1 then the output = 1. Otherwise, the Output = 0 (Both inputs must be true)
  • OR - If A = 1 AND/OR B = 1 then the output = 1. Otherwise, the output = 0 (At least one input must true)
  • NOT - If A = 1 then the output = 0. If A = 0 then the output = 1 (The output is essentially the opposite of the input)
  • NAND (Not AND) - If A = 1 AND B = 1 then the output = 0. Otherwise, the Output = 0 (Unless both inputs are true, this will output 1)
  • NOR - If A = 1 OR B = 1 then the output will be 0 (As long as either input is true, the output will be 0)
  • XOR (Exclusive OR) - If A = 1 OR B = 1 then the output will be 1 (As long as only one input is true, the output will be 1, but if both inputs are true the output will be 0)
  • XNOR (Exclusive NOR) - if A = B then the output will be 1 (As long as both inputs match, the output will be 1)

Math Blocks


Math Blocks are basic arithmetic operations, such as addition, division and making a value “absolute”. We’ll cover the current operations below.

Most of these blocks also have two inputs. One of the main differences here is that these blocks allow uncapped values! This means that you can give one of these blocks an input greater than +1. Adding two inputs of +1 together will output +2, which can then in turn be multiplied even higher. These blocks support full floating point precision, so you could even multiply/divide your inputs together to get tiny values like -0.054, for fine tuning on your joints!

The full list of current Math Block operations are:
  • Adder - Output = A + B ( i.e A = 6, B = 2, O = 8)
  • Subtractor - Output = A - B ( i.e A = 6, B = 2, O = 4)
  • Multiplier - Output = A * B ( i.e A = 6, B = 2, O = 12)
  • Divider - Output = A / B ( i.e A = 6, B = 2, O = 3)
  • Mean - Output is the Average of A and B, or Output = A + B / Input ( i.e A = 6, B = 2, O = 4)
  • Absolute - Converts any negative input into a positive output ( i.e A = -2, O = 2)
  • Sign - Flips the sign of the input ( i.e A = 6, O = -6)
  • Min - Output = The lowest value between A and B ( i.e A = 6, B = 2, O = 2)
  • Max - Output = The highest value between A and B ( i.e A = 6, B = 2, O = 6)
Currently we’re not supporting loops with these blocks. If you try to connect an output back into an previous part in the sequence, causing a loop, you’ll see a message stating that this cannot be done. We plan on supporting loops later, which will have infinite loop protection and further optimisations. We’ll share more on those as they reach development.

Simple Connector

With all of these new parts to wire, things are bound to get a bit hectic, so we’re adding in a Simple Connector to help tidy things up. This part will allow you to wire the “LMB” output of a Pilot Seat to a Simple Connector, which can then go to 4 Motors, rather than having the seat go directly to each of these.

New Landscaping Parts


Building games isn’t just about the cool logic and functionality, it’s also about the look and feel. To help with this we’re adding some new Landscaping Blocks in the form of Cliff and Grass blocks. These new parts can add some real depth and character to your worlds.


Inventory Categories & Search


With all of these new parts, we wanted to give the Inventory a much needed overhaul. The first thing we’ve done is to slip the Inventory into different categories. These categories are:
  • All Parts - The default category which includes absolutely everything
  • Shapes - All of the standard Cubes, Edges etc. in all of the current materials
  • Machines - Joints, Controllers, Wheels and other “contraption” related parts can be found here
  • Logic - Triggers, Command Computers and all of the new Logic & Math Blocks
  • Special - Parts that don’t quite fit into the other categories go here, such as Spawn Points and Text Blocks
  • Cosmetic - Trees, Rocks and other Foliage is in this category
Clicking the handy little buttons on the left of the Inventory will filter to the corresponding category, meaning you’ll only find a specific subset of parts in each one.

To make things even easier to find, we’ve added a search bar in the top right. This search can handle partial searches too! For example, if you wanted to find a certain type of Axle, while in the “All Parts” category, you can simply type “Ax” or even “le”.


This will return any parts that include these letters, so “le” would also show you the Lever, Telescopic Joint and a few other parts. If no results are found, you’ll see a message in the center explaining this.

Multichannel Wiring
As part of our ongoing multiplayer prep work, we’ve taken the opportunity to start updating the current wiring system to handle multiple players a bit better. The Multichannel Wiring System now handles input from individual players. In short, this means that it can now tell the difference between “Player 1” touching a button, or entering a trigger and “Player 2”.

Previously we had to disable teleport commands in multiplayer when fired from Command Computers as there was no way to tell who should be teleported. Now, when Player 2 enters a character trigger that is connected to a Command computer, it will know who to teleport. We’ll be adding to this over time, with support for more commands, object IDs, team IDs and much, much more. Single player games remain unchanged, as these commands can always act on “Player 1”.

Optimisations & Limit Increases
We’re still working through some of the outstanding optimization work that we started a few updates ago. This time around we’ve heavily increased the “limits” in Gamecraft (we’ll go over those shortly) as well as optimising loading and saving times.

Loading Optimisations
We’ve identified a few problem areas with the initial loading sequence. With this update, everyone should reach the main menu much faster. This change is going to be more noticeable on low-end machines.

Joint count increase
One limit we’ve been aware of is the combined total of Joints allowed before errors start cropping up. Previously we had a limit of ~500 powered joints (Servos, Pneumatics etc.). Now, we’re not even sure there is a limit! You’ll now be able to place thousands of powered joints without running into errors. Although the limit now is your hardware, as that many parts will still have a performance hit. We’ll continue to work on optimising these as we go.

Single cube instance increase
When Gamecraft first launched, we were extremely limited on how many instances of a single part could be placed (which is part of the reason we had a count in the early Inventory system. This limit has slowly increased over time, as it’s been hit. From 2000 cubes, up to 20,000. Now, we’re able to support a theoretically infinite number of instances! This means you’ll be able to place hundreds of thousands of a single Aluminium cube.

Total cube instance increase
Following on from the above change, a total of 20,000 specific cubes would be fine, but after 20,000 Cubes, Edges, Corners and Spheres, more limits would be hit. As with the single cube instance limit, we’ve completely removed the cap on total parts. Again, the only limit now is the hardware you are using, but we'll continue work on optimizing this as we go.

Ongoing Multiplayer improvements
We’ve started some work to improve the connection phase of multiplayer. Loading should now be less error prone now, as everything is synced together correctly now, although it might take a little bit longer to connect to massive saves, as will likely run into other issues with memory or ping, but it will now load “as expected”.

We’ve also slightly improved the transition from Stasis to Simulation (and back). This should be a bit quicker and less ugly.

We’ve managed to fix a bug with joints that caused a lot of unintended intersections and collisions. This should improve some of the “jittering” and twitching some of you have been experiencing, but will need further work to prevent parts shooting off in other situations.

We’re committed to planning each new feature with multiplayer in mind and making sure it works as much as possible when it launches. While we’re not actively focusing on multiplayer development right now, we’re planning on spending a bit more time getting it up to scratch so that it’s playable, and more importantly enjoyable in its current state. Over the next few updates we’ll be trying to clean up some more problem areas and optimise what we can.

Other Changes
Signal Averaging Support Ended
As we’ve mentioned over the last few weeks, we’re dropping support for the old “averaged” signal model in favour of the “summed” model. Games that relied on the “averaged” model are not guaranteed to work the same on the new model, so some tweaks might be necessary.

Damped Spring Tweakable stats
Damped Springs have been added to the list of tweakable parts now. You can now tweak the “Stiffness”, which affects how freely it moves and the “Damping”, which affects how quickly it settles. These stats should offer a lot more control over your creations.

Console Blocks now trigger when the input is greater than +0.5
Previously, Command Computers would only trigger when they received an input of +1. We intended for this to happen on signals greater than +0.5, to match the Logic Blocks so this is just a small correction.

Ghost Cube Update
The Ghost Cubes has also had a bit of an overhaul to work with the new Box Select feature. The ghost cube is a little brighter and more opaque than before. This change was necessary to allow us to handle a collection of parts (trust us, it was confusing to look at 2000 overlapping and intersecting transparent cubes).

Pilot Seat changes - Ghost, Stasis & Simulation
We’ve also taken this opportunity to rework the Pilot Seat visuals a bit. The new ghost cube didn’t play well with the current setup, so we’ve created an entirely new “ghost” version of the Seats, with a smaller outline. The Stasis version of the Seat remains unchanged but the Simulation version now correctly loses it’s grid-like effect.

Empty Hand in Colour Mode takes you back to Parts Model
With the new Box Selection tool being an “Empty Hand” tool, we felt that it didn’t make much sense keeping the Empty Hand functionality as it was for Colour Mode,as you couldn’t interact with controllers or even delete parts. Now, pressing ‘H’ in Colour Mode will place you back in Parts Mode, with the Empty Hand selected, ready to start highlighting your selection.

Spawn Point Changes - Player ID, Team ID & Spawn Limit
As part of the Multichannel Wiring System, Spawn Points have received a few updates.

Each Spawn Point now has a fixed Player ID linked to it. The first one you place will be 1, the second, 2 etc. This will be shown above the Spawn Point and will later be used to allow player specific commands.

Spawn Points now have a tweakable stat in the form of “Team ID”. For now, this isn’t used anywhere in-game, but it will come into play when we add some more multiplayer functionality.

We’re limiting the total number of Spawn Points in a single save to 100. We feel like this is more than enough for now, but we’ll see how things go.

Bug Fixes
  • Fixed a bug when teleporting the player while they are in a seat
  • Fixed a bug where closing a wire panel while holding a slider could trigger an error
  • Fixed a bug where deleting large cubes near wireable parts could lead to an error
  • Fixed a bug that stopped the list of Games/Prefabs from loading when switching to Trending/All for the first time
  • Fixed a bug that prevented the multiplayer host from interacting with a button after another player had pressed it
  • Reduced the distance at which Pistons come to rest, which makes the gap left when a Piston retracts smaller
  • Fixed a visual bug with Pistons that caused the top plate to appear in the wrong place in some cases
  • Fixed a bug that prevented detached controllers from colliding with each other
  • Fixed some visual issues with layered wire/stat panels
  • Fixed some inconsistencies with the Text Block placeholder text
  • Fixed a rare error that can appear when copying a Prefab Workshop save
  • Fixed a couple of bugs with loading and entering simulation in a completely empty save file
  • Fixed some inconsistent naming of Aluminum parts
Phew, that covers everything in this gigantic update! We hope you all enjoy these amazing new features and as always, we’re looking forward to seeing some really outstanding creations soon.

The Gamecraft Team
Mar 9, 2020
Gamecraft - JoshJammer


Starting today (9th March 2020 5:00pm GMT) until 15th March 2020 5:00pm GMT, we’re running a discount across Freejam Products.

Gamecraft will be at a 25% discount, along-side one of our biggest updates. We have a series of Dev Blogs which each mention a different feature of this update and you can read the latest one here: https://steamcommunity.com/gid/103582791464559041/announcements/detail/1694981324150246172

Cardlife will be half price, a big 50% discount. Hand-draw your own character, tools and building pieces in this innovative science-fantasy creative survival game.

Robocraft - Premium for Life will also have a 50% discount. Get extra colors for your robot, and give your account a personal flair by uploading your own Avatar, as well as doubling the amount of experience you receive from matches and quests.
Gamecraft - JoshJammer
Hello Gamecrafters!


We’re starting to finish up the work we’ve been doing on some amazing features for the next major Gamecraft update and we’ve still got a couple of features left to talk about in this Dev Blog. This week we’ll be diving into Maths Blocks, Landscape Blocks and Tweakable Stats for Springs, which we plan to add in this coming update!

Math Blocks


Last week we showed off some of the new Logic Blocks, in addition (see what we did there?), we’ve also been working on some Maths Blocks. These blocks will open up a myriad of possibilities for you to explore.

The planned Math Blocks, as seen in the image above are:
  • Adder - Output = A + B ( i.e A = 6, B = 2, O = 8)
  • Subtractor - Output = A - B ( i.e A = 6, B = 2, O = 4)
  • Multiplier - Output = A * B ( i.e A = 6, B = 2, O = 12)
  • Divider - Output = A / B ( i.e A = 6, B = 2, O = 3)
  • Mean - Output is the Average of A and B ( i.e A = 6, B = 2, O = 4)
  • Absolute - Converts any negative input into a positive output ( i.e A = -2, O = 2)
  • Sign - Flips the sign of the input ( i.e A = 6, O = -6)
  • Min - Output = The lowest value between A and B ( i.e A = 6, B = 2, O = 2)
  • Max - Output = The highest value between A and B ( i.e A = 6, B = 2, O = 6)
All of these blocks support uncapped signals and even float values too! That means you’ll be able to multiply a Dial on +0.1 by an input of +6 (gained by adding “On” Switches” together) to get an output of +0.6, which can then be used to get finer positioning on your mechanical Hinges or Pistons. Logic Blocks and functional parts will still be capped to +/-1.

Since there are so many new blocks to link wires between, it might become a little messy for some creations. To combat this we’ve also added a Simple Connector Block that can be used to keep your wires tidy.

Here’s an example of one way to use the connector to clean up your project. Instead of linking each Servo in the grabber to the seat, they are linked to the simple connector instead. This can allow you to put logic in before the simple connector and easily hook it up, instead of having to re-wire all the servos.


Landscape Blocks


Gameplay is also about level design, so we’re adding a selection of Landscape Blocks for Gamecrafters to use too. These blocks can be combined to create stunning landscapes to bring out some beauty in your level. Below you can see an example of the types of landscapes you can create.


Spring Tweakable-Stats
Springs will be getting Tweakable Stats as well. Springs can have their stiffness and damping values changed, to give you much finer control over your suspension and other contraptions.


Stiffness affects the way the Springs handle weight. A lower stiffness will make the Spring less “bouncy” while a higher value will let them react better to large weights. Damping affects how quickly the Spring will try to settle back into position, with a lower damping value making the spring settle quicker.

We hope you enjoy this sneak peek into what we’re planning on releasing in our next update. We’re aiming to release this update next week, and we really cannot wait for all the amazing content you are going to create! If you missed last weeks blog, be sure to give it a read here: Gamecraft Blog 28/02/2020

We're also giving you another reminder that we'll be dropping support for “signal averaging” as part of this update. You can read more about that here:
https://steamcommunity.com/gid/103582791464559041/announcements/detail/1693854158811546458

Please follow us on our social spaces and share your creations with us:
Twitter- https://twitter.com/Gamecraft_FJ
Youtube - https://www.youtube.com/channel/UCkcRFCr9aQxszaYeXcWZjwA
Facebook- https://www.facebook.com/GamecraftGame/
Reddit - https://www.reddit.com/r/GamecraftGame/
Discord - https://discord.gg/gamecraft

Thanks for reading!
The Gamecraft Team
Gamecraft - JoshJammer
Hello Gamecrafters!


As we’re sure you’re aware by now, we’re working on some amazing features for the next major Gamecraft update and we’re going to talk about some of these features in each Dev Blog leading up to the release. This week we’ll be diving into the mystical world of logic and talking about all the Logic Gate blocks we plan to add in this coming update.


Each logic gate has its own unique function, and each will output a signal that is either 1 or 0. Inputs can be anywhere between -1 and 1, so we decided to round them so they interact nicely with these Logic Gates. Essentially, the input signal is rounded up when it reaches the Logic Gate (e.g. +0.5 is rounded up to +1, +0.49 is rounded down) and then clamped between 0 and 1 (e.g. -0.9 is clamped to 0 instead).


Let’s dive in and take a look at how each of these Logic Gates works, so you have a better understanding of how to optimise these logic gates in your games. We’ll start with 3 basic gates - AND, OR and NOT.


First, the AND Gate. This gate outputs a signal of +1 ONLY when BOTH inputs are receiving a signal of +1. This can be seen in the example above, the output is giving an output of 0 up until both inputs are giving that signal of +1.

Next, we’ll go onto the OR gate. This gate outputs a signal of 1 when EITHER of the inputs is receiving a signal of +1. This could be one or both of the inputs, but as long as one of the inputs is +1, it will give an output of +1.

Next is the NOT gate. This is a simple gate where it provides an output of +1 as long as the input is not +1. Unlike the AND gate, if both inputs are receiving a signal of +1, this gate goes back to providing an output of 0.

Now that we have these covered, let’s take a look at the rest of the planned Logic Gates. These are slight variants on the AND, OR and NOT gates above. These gates are NAND, NOR, XOR, and XNOR.


The first of these is the NAND gate. The NAND gate is the inverse of the AND gate logic. So, in order for the NAND gate to output +1, BOTH inputs must be receiving a signal that is less than +1. If EITHER input receives a signal of +1, this gate will output 0.

Next is the NOR gate. The NOR gate combines the OR and NOT gate logic together. In order for the NOR gate to output +1, NEITHER of the inputs can be receiving a signal of +1.

The XOR gate is similar to the OR gate, however, it is exclusive. This means ONLY 1 input can be receiving an input of +1 to provide an output of +1. If BOTH inputs receive an input of +1, the output will be 0.

Finally, the XNOR. This gate is a combination of the XOR and the NOT gate. This gate provides an output of +1 as long as BOTH inputs match, as 0 or +1.

All of these Logic Gates, alone or combined, should allow you to create a myriad of logic in your games. We can’t wait to see what you create with them, alongside all the other amazing features coming in this update. These are only the first of many. There are more Math and State blocks to look forward to in upcoming updates as well!

We hope you enjoy this small sneak peek into what we’re planning on releasing in our next update. Remember, we’ll be talking about more of the features that we are currently working on in each Dev Blog leading up to the next release. If you missed last week's blog, be sure to give it a read here: Gamecraft Blog 21/02/2020

We're also giving you another reminder that we'll be dropping support for “signal averaging”. You can read more about that here:
https://steamcommunity.com/gid/103582791464559041/announcements/detail/1693854158811546458

Please follow us on our social spaces and share your creations with us:
Twitter- https://twitter.com/Gamecraft_FJ
Youtube - https://www.youtube.com/channel/UCkcRFCr9aQxszaYeXcWZjwA
Facebook- https://www.facebook.com/GamecraftGame/
Reddit - https://www.reddit.com/r/GamecraftGame/
Discord - https://discord.gg/gamecraft

Thanks for reading!
The Gamecraft Team
...